
泰山派3M-RK3576手动安装OpenClaw
本文介绍了在开发板上安装OpenClaw的完整流程。首先需下载Debian12镜像并烧录到开发板,然后通过运行官方安装脚本(需联网)自动完成Node.js环境配置和OpenClaw安装。安装完成后进入新手引导界面,通过键盘操作完成基础配置,包括同意风险声明、选择快速开始模式、跳过模型和通道配置等。安装完成后需加载环境变量,并通过修改网络配置参数使UI界面可在局域网访问。最后通过openclaw d
前言
-
使用 网盘🚀 在
系统镜像/Debian12/这个目录中下载我们提供的.img镜像文件。 -
此文档使用的
Debian12镜像为:debian12_desktop_hdmi_dp_ap6256_msata_update.img
🦞 OpenClaw安装演示版本为:2026.3.2 (85377a2)
烧录镜像到开发板
参考 成品镜像烧录 将下载好的镜像文件烧录到开发板中。
运行安装脚本
OpenClaw 官方提供了一种安装脚本的方式来安装 OpenClaw:
注意:此步骤需要开发板能够访问互联网。
curl -fsSL https://openclaw.ai/install.sh | bash效果:
lckfb@TaishanPi-3M:~$ curl -fsSL https://openclaw.ai/install.sh | bash

  🦞 OpenClaw Installer
  I speak fluent bash, mild sarcasm, and aggressive tab-completion energy.

✓ Detected: linux

Install plan
OS: linux
Install method: npm
Requested version: latest

[1/3] Preparing environment
· Node.js not found, installing it now
· Installing Node.js via NodeSource
· Installing Linux build tools (make/g++/cmake/python3)
✓ Build tools installed
✓ Node.js v22 installed
· Active Node.js: v22.22.0 (/usr/bin/node)
· Active npm: 10.9.4 (/usr/bin/npm)

[2/3] Installing OpenClaw
✓ Git already installed
· Configuring npm for user-local installs
✓ npm configured for user installs
· Installing OpenClaw v2026.3.2
✓ OpenClaw npm package installed
✓ OpenClaw installed

[3/3] Finalizing setup

! PATH missing npm global bin dir: /home/lckfb/.npm-global/bin
  This can make openclaw show as "command not found" in new terminals.
  Fix (zsh: ~/.zshrc, bash: ~/.bashrc):
    export PATH="/home/lckfb/.npm-global/bin:$PATH"

🦞 OpenClaw installed successfully (2026.3.2)!
Ahh nice, I like it here. Got any snacks?

· Starting setup
安装完成之后,就会进入新手引导界面:
基础配置
在新手引导界面种,我们需要进行一些基础的配置来让 OpenClaw 能够正常使用,其他的都可以后续再进行更改。
操作说明:
在引导页面操作主要依靠键盘的上下左右键来进行选择,空格选中,回车键来确认选择。
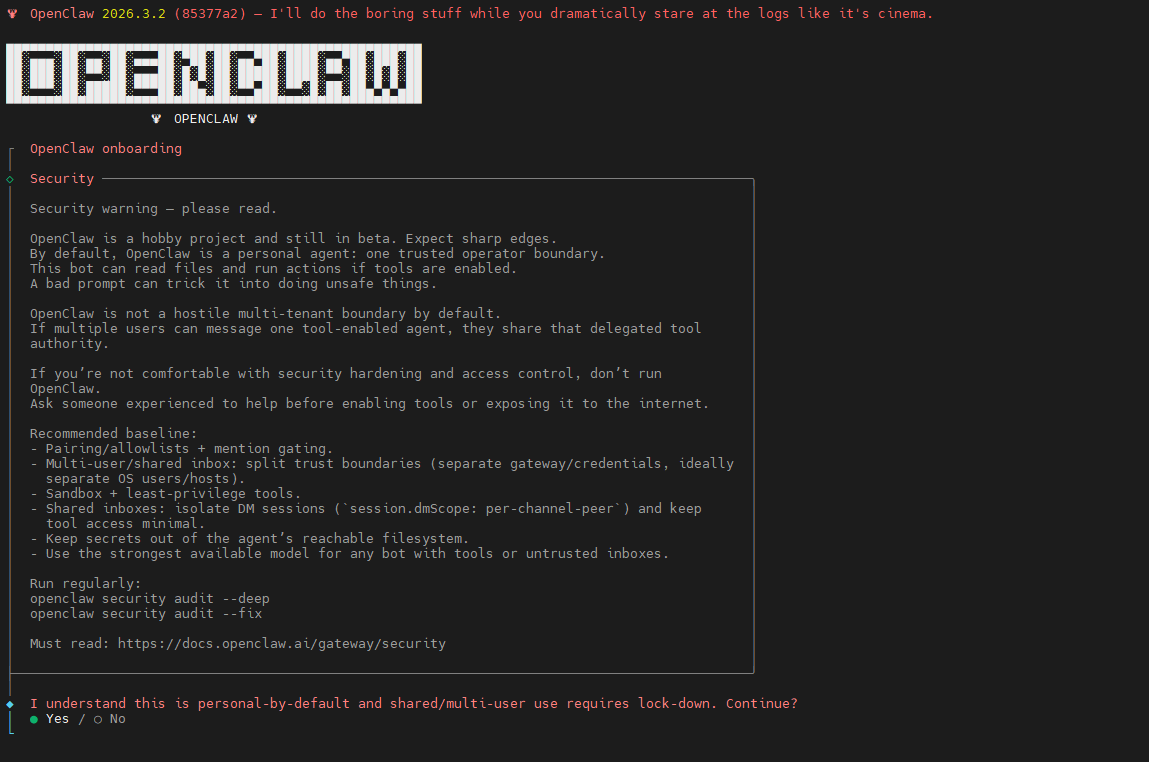
同意风险
选择 Yes,回车确认。
◆  I understand this is personal-by-default and shared/multi-user use requires lock-down. Continue?
│  ● Yes / ○ No
└
选择快速开始
选择 QuickStart,回车确认。
◆  Onboarding mode
│  ● QuickStart (Configure details later via openclaw configure.)
│  ○ Manual
└
选择模型
这里我们可以直接跳过模型的配置,后续通过 OpenClaw模型API配置 这个文档来进行配置,所以选择 Skip for now,回车确认。
◆  Model/auth provider
.....
│  ● Skip for now
└
模型供应商选择所有供应商:
◆  Filter models by provider
│  ● All providers
.....
└
默认模型,我们选择保持不动即可,后面详细配置里面会进行修改:
◆  Default model
│  ● Keep current (default: anthropic/claude-opus-4-6)
......
└
通道配置
在 OpenClaw 中通道(Channel)是连接用户与 AI 助手的桥梁,配置通道可以让用户通过熟悉的通讯平台与 OpenClaw 进行交互(发送消息)。
这里我们可以直接跳过配置,后续通过 OpenClaw飞书通道配置 这个文档来进行配置,所以选择 Skip for now,回车确认。
◆  Select channel (QuickStart)
......
│  ● Skip for now (You can add channels later via `openclaw channels add`)
└
配置Skills
选择 No 跳过配置,我们之后可以通过对话的方式,让 OpenClaw 自己配置自己的 Skills 不需要我们自己动手:
◆  Configure skills now? (recommended)
│  ○ Yes / ● No
└
hook配置
将所有的配置全部使用空格选中,然后回车确认:
◆  Enable hooks?
│  ◻ Skip for now
│  ◼ 🚀 boot-md (Run BOOT.md on gateway startup)
│  ◼ 📎 bootstrap-extra-files (Inject additional workspace bootstrap files via glob/path patterns)
│  ◼ 📝 command-logger (Log all command events to a centralized audit file)
│  ◼ 💾 session-memory (Save session context to memory when /new or /reset command is issued)
└
hatch 配置
我们选择 Do this later 来跳过此配置,我们先不打开和机器人的聊天框,后续再说。
Hatch in TUI (recommended):直接在终端里开聊Open the Web UI:打开浏览器网页版Do this later:先退出来,以后再说
◆  How do you want to hatch your bot?
│  ○ Hatch in TUI (recommended)
│  ○ Open the Web UI
│  ● Do this later
└
完成安装
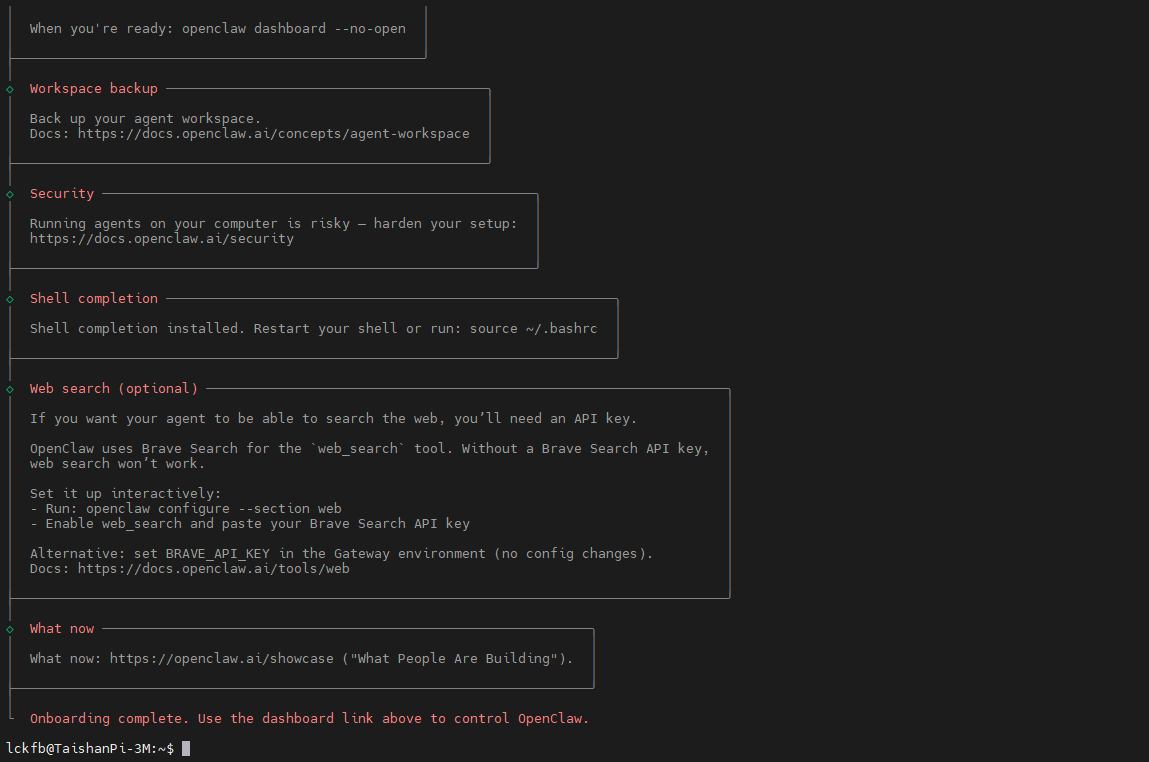
后续配置
完成安装之后我们首次需要运行 source ~/.bashrc 来加载环境变量,这样 才能使用 openclaw 这个命令:
source ~/.bashrc访问UI界面
想要访问 OpenClaw 的UI界面,我们需要设置配置参数,才能在局域网内进行访问:
可以使用 openclaw help 来查看 openclaw 命令的使用说明。
# 1. 设定网络访问模式为 LAN
openclaw config set gateway.bind lan

# 2. 设定HTTP访问降级为 true,允许不安全的HTTP访问(如果不设置这个参数,默认是禁止HTTP访问的)
openclaw config set gateway.controlUi.allowInsecureAuth true
openclaw config set gateway.controlUi.dangerouslyDisableDeviceAuth true
openclaw config set gateway.controlUi.dangerouslyAllowHostHeaderOriginFallback true

# 3. 重启 OpenClaw gateway 使配置生效
openclaw gateway restart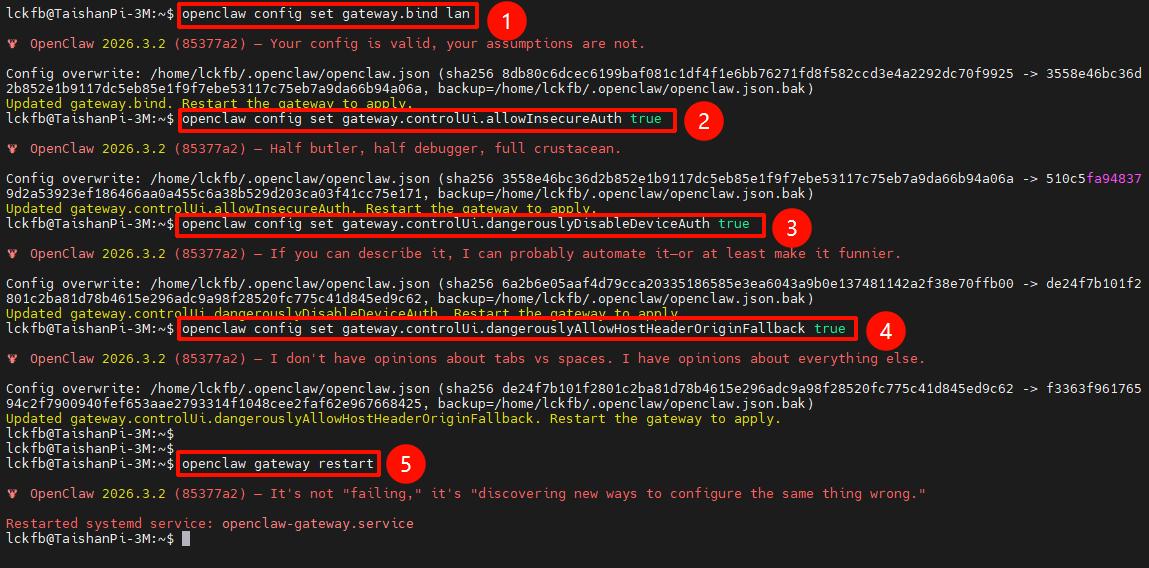
使用以下命令查看局域网内查看 OpenClaw 的 UI 访问地址 Dashboard URL:
这个命令会自动打开板子中的默认浏览器来访问 OpenClaw 的UI界面,所以我们看到相关的地址之后就可以使用 Ctrl + C 来终止这个命令了。
openclaw dashboard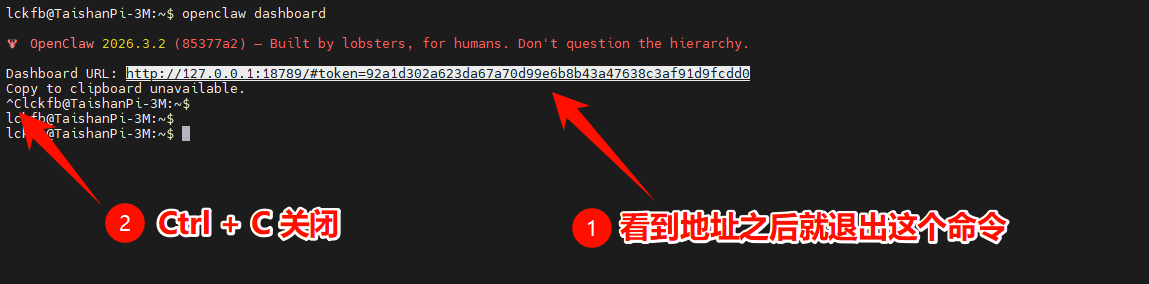
访问地址一般是 http://<开发板IP地址>:18789/#token=<token>,在浏览器中输入这个地址就可以访问 OpenClaw 的UI界面了:
-
使用
ifconfig命令可以查看<开发板IP地址>,替换掉原本的127.0.0.1就可以在局域网内访问了。 -
<token>是一个访问令牌,用于验证用户的访问权限,确保只有授权用户才能访问OpenClaw的UI界面。每次安装或者重置OpenClaw之后,这个token都会发生变化,所以需要使用最新的token来访问UI界面。我们使用openclaw dashboard命令获取的访问地址就是包含了最新token的地址,可以直接使用这个地址来访问UI界面。
http://127.0.0.1:18789/#token=92a1d302a623da67a70d99e6b8b43a47638c3af91d9fcdd0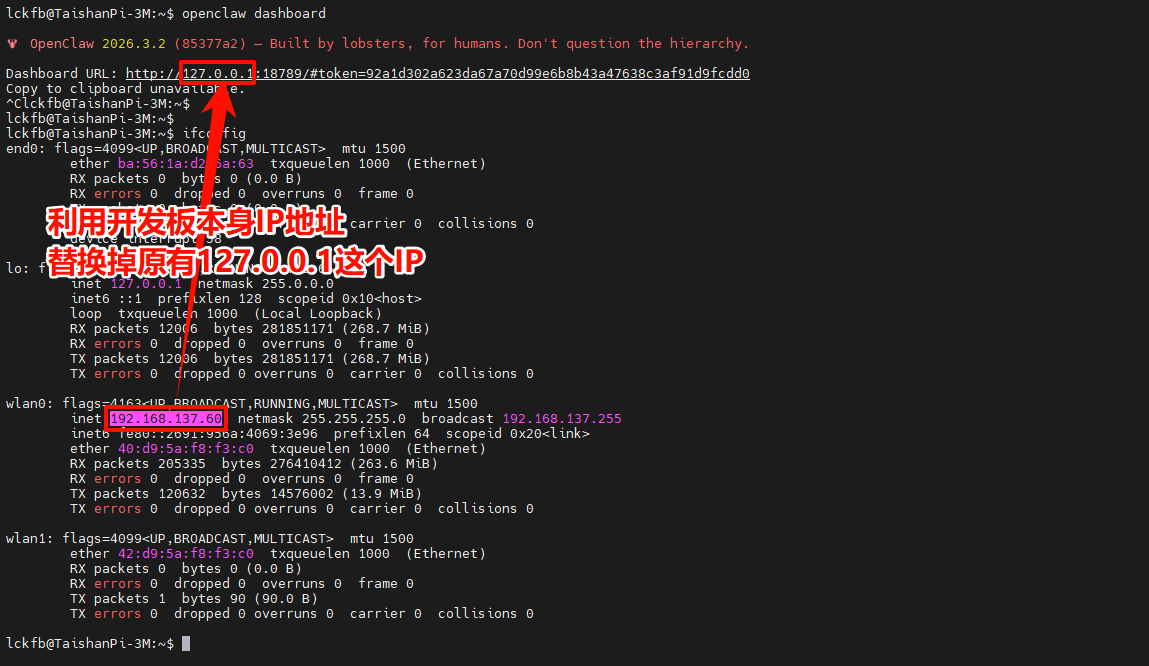
立创开发板资料
1.官网:lckfb.com
2.文档FAQ:https://wiki.lckfb.com/zh-hans/
3.视频教程:https://space.bilibili.com/3493269579237436

小龙虾开发者社区是 CSDN 旗下专注 OpenClaw 生态的官方阵地,聚焦技能开发、插件实践与部署教程,为开发者提供可直接落地的方案、工具与交流平台,助力高效构建与落地 AI 应用
更多推荐
 9
9 0
0- 0


 已为社区贡献2条内容

所有评论(0)