Spring Cloud微服务注册中心Consul入门使用(下)
Spring Cloud Consul是一个分布式系统的服务治理框架,它基于Hashicorp提供的Consul实现了服务的注册和发现、配置管理、负载均衡和健康检查等功能。
一、服务注册与发现
Spring Cloud Consul是一个分布式系统的服务治理框架,它基于Hashicorp提供的Consul实现了服务的注册和发现、配置管理、负载均衡和健康检查等功能。
在上篇文章:Spring Cloud微服务注册中心Consul入门使用(上) 中讲了Spring Cloud Consul入门服务注册与发现,运行好了Consul,仅需要添加注解@EnableDiscoveryClient并配置Consul的地址便可实现服务注册与发现
@SpringBootApplication
@EnableDiscoveryClient
public class ConsulProviderApplication {
    public static void main(String[] args) {
        SpringApplication.run(ConsulProviderApplication.class, args);
    }
}
同时,我们还需要在application.yml文件中配置Consul的地址,如下所示:
server:
  port: 8666
spring:
  application:
    name: cloud-registry-consul-provider
  cloud:
    consul:
      host: 127.0.0.1
      port: 8500
      config:
        enabled: false
      discovery:
        heartbeat:
          enabled: true
二、配置管理
在章节的服务注册与发现的配置中我们把Consul作为的配置中心的功能给关闭了。因为Consul它提供了基于Key/Value的存储,所以我们可以把Consul作为同一配置中心。这是Eureka所无法做到,它仅能使用其服务注册与发现的功能。但是Consul是可以作为注册中心,同时还能当做配置中心使用。同样的还有Nacos也是,可了解**Spring Cloud Alibaba微服务学习一:服务发现Nacos**。
添加依赖:
<dependency>
    <groupId>org.springframework.cloud</groupId>
    <artifactId>spring-cloud-starter-bootstrap</artifactId>
</dependency>
通过注解@RefreshScope实现动态刷新。当配置发生变化时,可以通过POST请求/actuator/refresh来触发配置更新。
ConsulConfigController:
@RefreshScope
@RestController
@RequestMapping
public class ConsulConfigController {

    @Value("${hello}")
    private String hello;

    @GetMapping("/hello")
    public String hello() {
        return hello;
    }
}
同时,我们还需要在配置文件中配置开启Consul的配置功能,默认是开始。还有就是键值对。spring.cloud.config.config.watch.enabled建议关闭,因为会定时去请求Consul然后刷新配置,这样会十分浪费I/O。一般生产上的配置是不会经常变动,通过API去刷新配置即可。
server:
  port: 8666
spring:
  config:
    import: optional:consul:localhost:8500
  application:
    name: cloud-registry-consul-provider
  cloud:
    consul:
      host: 127.0.0.1
      port: 8500
      config:
        enabled: true
        format: YAML   # 配置转码方式,默认 key-value,其他可选:yaml/files/properties
        default-context: application
        data-key: data
        fail-fast: true
        watch:
          enabled: false   # 是否开启配置自动刷新
          delay: 1000     # 刷新频率,这里是每秒刷新一次
        prefixes: config
      discovery:
        heartbeat:
          enabled: true
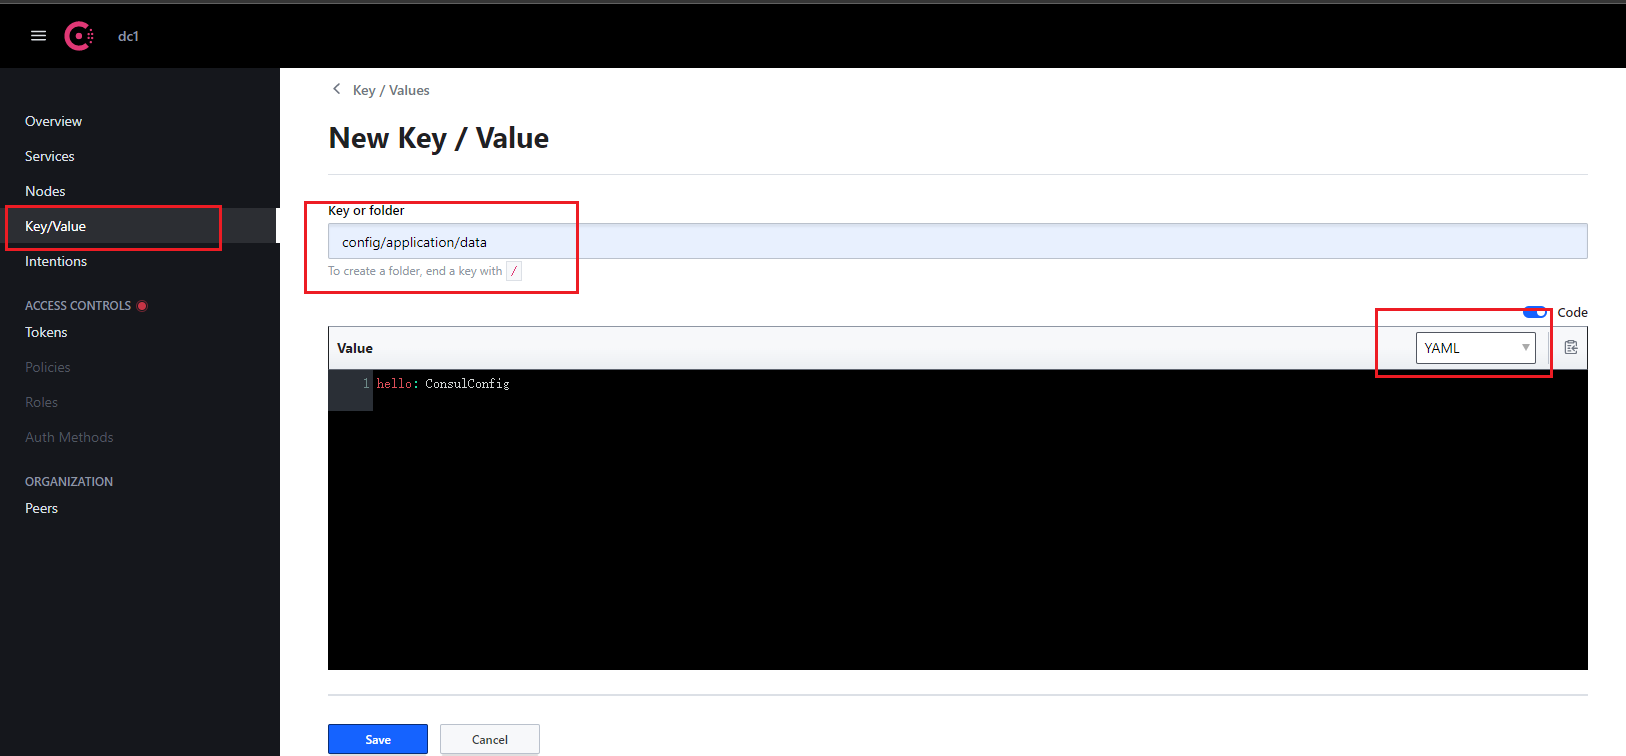
启动Consul:consul agent -dev
在Consul里面添加配置:key的值是:prefixes+default-context+data-key。如上配置的话最终是:config/application/data

启动类添加注解:@EnableConfigurationProperties
@EnableConfigurationProperties
@SpringBootApplication
@EnableDiscoveryClient
public class ConsulProviderApplication {
    public static void main(String[] args) {
        SpringApplication.run(ConsulProviderApplication.class, args);
    }
}
启动cloud-registry-consul-provider,访问
curl http://localhost:8666/hello
ConsulConfig
动态刷新
这里的动态刷新就不适用配置那样定时去刷新,而是使用API去刷新配置
首先引入配置:
<dependency>
    <groupId>org.springframework.boot</groupId>
    <artifactId>spring-boot-starter-actuator</artifactId>
</dependency>
然后在配置文件中添加:
management:
  endpoints:
    web:
      exposure:
        include: refresh
随便修改Consul中的配置保存。然后向刷新端点发送POST请求
curl -X POST http://localhost:8666/actuator/refresh
再请求接口,查看结果
http://localhost:8666/hello
在上篇文章中,引入的maven依赖是:
<dependency>
    <groupId>org.springframework.cloud</groupId>
    <artifactId>spring-cloud-starter-consul-all</artifactId>
</dependency>
这个依赖包含了Spring Cloud Consul的所有依赖:其中包括了注册中心、配置中心和事件总线。在上篇文章中,并没有使用Consul的配置功能,所以我们在配置文件把配置功能禁用了。
<dependencies>
  <dependency>
    <groupId>org.springframework.cloud</groupId>
    <artifactId>spring-cloud-starter-consul-bus</artifactId>
    <version>3.1.2</version>
    <scope>compile</scope>
  </dependency>
  <dependency>
    <groupId>org.springframework.cloud</groupId>
    <artifactId>spring-cloud-starter-consul-config</artifactId>
    <version>3.1.2</version>
    <scope>compile</scope>
  </dependency>
  <dependency>
    <groupId>org.springframework.cloud</groupId>
    <artifactId>spring-cloud-starter-consul-discovery</artifactId>
    <version>3.1.2</version>
    <scope>compile</scope>
  </dependency>
  <dependency>
    <groupId>org.springframework.boot</groupId>
    <artifactId>spring-boot-configuration-processor</artifactId>
    <version>2.6.11</version>
    <scope>compile</scope>
    <optional>true</optional>
  </dependency>
</dependencies>
三、负载均衡
Spring Cloud Consul支持通过注解@LoadBalanced显式声明负载均衡。例如可以在消费者端的RestTemplate中使用服务名来调用其他服务,如下:
@Configuration
@LoadBalancerClient(name = "cloud-registry-consul-provider", configuration = ProviderConfiguration.class)
public class ConsumerConfiguration {

    @Bean
    @LoadBalanced
    public RestTemplate restTemplate() {
        return new RestTemplate();
    }
}
其实默认是已经消费者端默认是实现了负载均衡,默认算法是轮询。按照上篇文章中搭建完消费者和生产者之后,启动多个生产者实例,通过OpenFeign调用生产者时,便可看到启动不同端口的生产者。
最后
可以关注我的微信公众号,有更多的技术干货文章


一起探索未来云端世界的核心,云原生技术专区带您领略创新、高效和可扩展的云计算解决方案,引领您在数字化时代的成功之路。
更多推荐


 23
23 0
0- 0


 已为社区贡献2条内容

所有评论(0)