
搭建Spring Cloud项目笔记
本文为Spring Cloud实际项目搭建笔记
·
项目构建
1. 创建项目
1.1 查询SpringCloud和SpringBoot 对应版本
官网地址  https://spring.io/
1.直达链接:https://spring.io/projects/spring-cloud#overview #查看版本对应关系
2.可以直接访问 https://start.spring.io/actuator/info 会返回对应版本JSON,
使用JSON在线解析就可查看

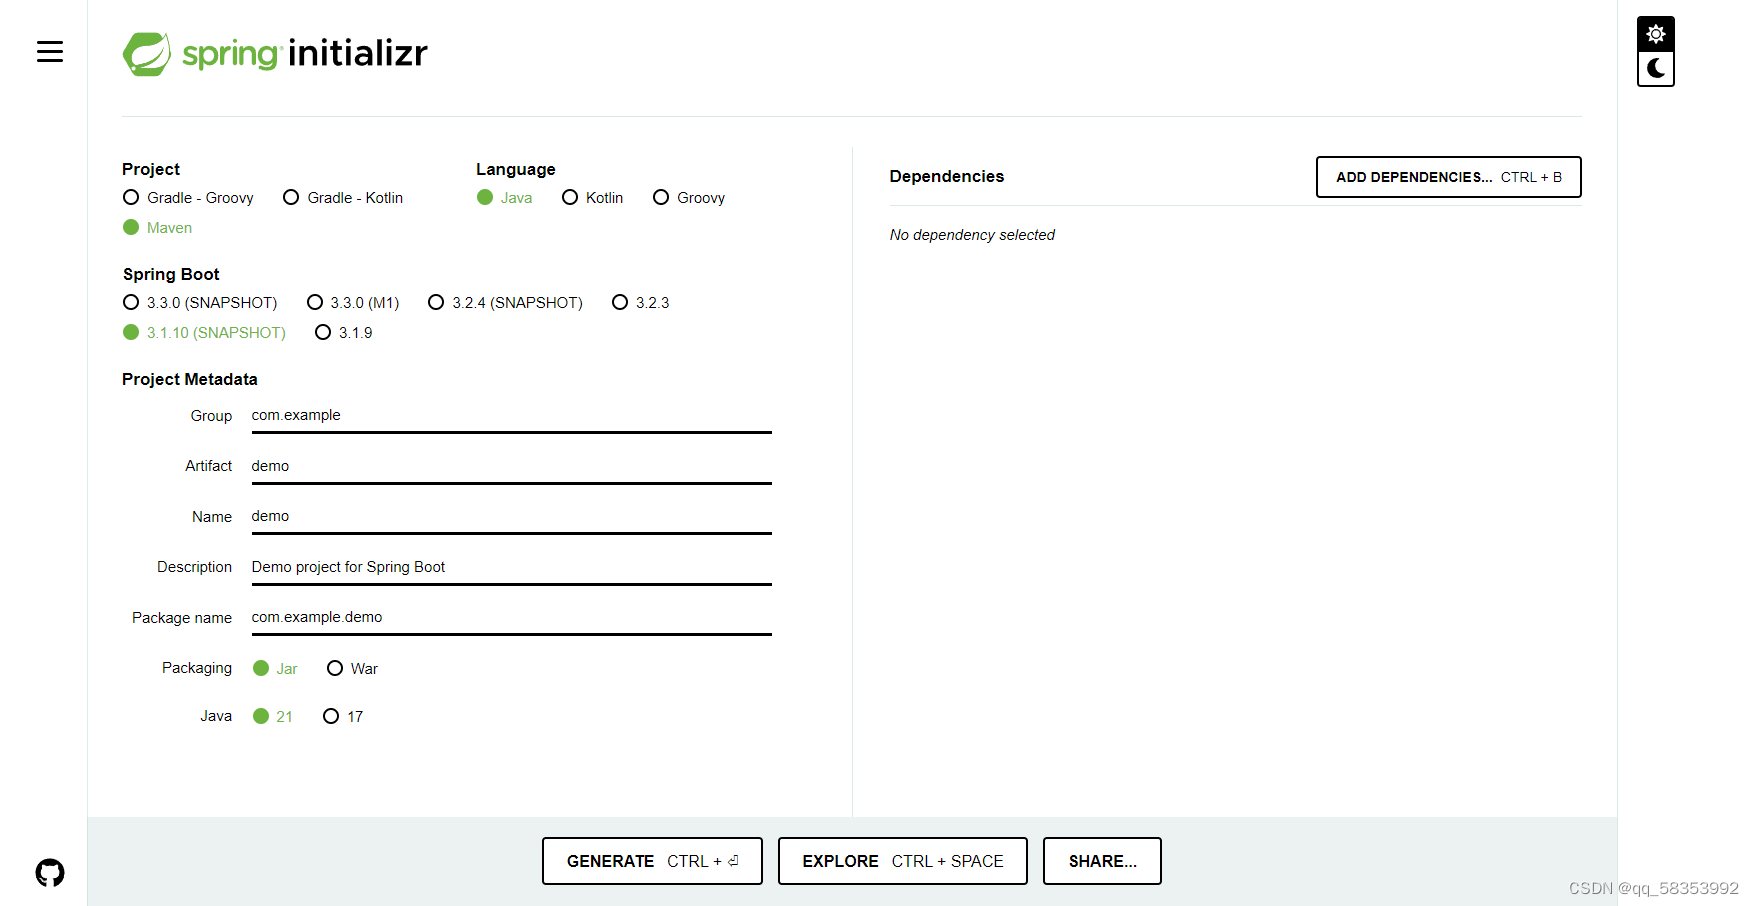
1.2 创建对应项目
https://start.spring.io/
1.3 删除SpringBoot项目无用文件夹

1).mvn 包含用于 Maven Wrapper(mvnw 和 mvnw.cmd)的配置文件,
Maven Wrapper 是一个用于封装 Maven的工具,在没有安装全局Maven的情况下运行项目
(如果本地有全局Maven,可以删除)
2).gitignore git版本控制 指定应该被 Git 版本控制系统忽略的文件和目录
(使用git务必保留)
3)HELP,md 项目帮助文档 (可以删除没有影响)
4)mvnw Maven Wrapper 的可执行脚本在Unix/Linux 系统中使用
(在没有安装全局Maven情况下运行Maven构建的脚本,可以删除)
5)mvnw.cmd Maven Wrapper 的可执行脚本在Windows 系统中使用
(在没有安装全局Maven情况下运行Maven构建的脚本,可以删除)
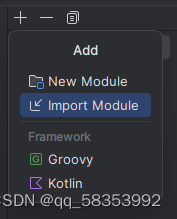
1.4 创建子工程
复制父工程到父工程文件夹下

添加Modules

将刚刚复制的父工程导入进来即可
1.5 整理pom.xml
在父工程中添加    <packaging>pom</packaging>
用来做jar包的版本控制
 <!--    引入子项目的pom-->
    <modules>
        <module>module_tesst</module>
    </modules>
 <!--       引入父项目pom-->
    <parent>
        <artifactId>springcloud_test</artifactId>
        <groupId>com.test</groupId>
        <version>0.0.1-SNAPSHOT</version>
    </parent>
2.集成SpringCloud
   <!-- spring cloud begin -->
        <dependency>
            <groupId>org.springframework.cloud</groupId>
            <artifactId>spring-cloud-starter-gateway</artifactId>
        </dependency>
        <dependency>
            <groupId>org.springframework.cloud</groupId>
            <artifactId>spring-cloud-starter-consul-discovery</artifactId>
        </dependency>
        <!-- spring cloud end -->
          <!-- 健康检查-->
        <dependency>
            <groupId>org.springframework.boot</groupId>
            <artifactId>spring-boot-starter-actuator</artifactId>
        </dependency>
        <dependency>
            <groupId>org.springframework.boot</groupId>
            <artifactId>spring-boot-starter-test</artifactId>
            <scope>test</scope>
        </dependency>
 application.yml文件
 spring:
    cloud:
        consul:
            discovery:
                prefer-ip-address: true
                instance-id: ${spring.application.name}:${spring.cloud.client.ip-address}:${server.port}
                heartbeat:
                    enabled: true
application-local.yml文件
spring:
    cloud:
        consul:
            host: 172.17.0.2
            port: 8500
3.配置Spring Boot项目必要配置
3.1 配置全局异常拦截器
/**
 * 全局异常处理
 * @author Administrator
 *
 */
@ControllerAdvice
public class GloableExceptionController extends BaseController{

    /**
     * 拦截Exception类型异常
     * 所有的异常都可以用该类来接受
     * @param request
     * @param ex
     * @return
     */
    @ExceptionHandler(value = Exception.class)
//    @OperLog(operModul="异常信息",operType="defaultExceptionHandler",operDesc="异常信息")
    public ModelAndView defaultExceptionHandler(HttpServletRequest request,Exception ex){
        ModelAndView mv = new ModelAndView();
        //获取请求路径
        mv.addObject("url",request.getRequestURL());
        //异常对象
        mv.addObject("ex",ex);
        //异常对象信息
        mv.addObject("message",ex.getMessage());
        System.err.println(mv);
        mv.setViewName("/defaultException");
        return mv;
    }

    /**
     * 自定义异常
     * @param request
     * @param ex
     * @return
     * BindingException mybatis中参数异常
     * NoHandlerFoundException 404异常
     */
    @ExceptionHandler(value = {NoHandlerFoundException.class,BindingException.class})
    public ModelAndView defaultExceptionHandler2(HttpServletRequest request,Exception ex){
        ModelAndView modelAndView = new ModelAndView("/404");
        //获取请求路径
        modelAndView.addObject("url",request.getRequestURL());
        //异常对象
        modelAndView.addObject("ex",ex);
        //异常对象信息
        modelAndView.addObject("message",ex.getMessage());
        return modelAndView;
    }

    /**
     * 权限校验异常
     * @param request
     * @param ex
     * @return
     */
    @ExceptionHandler(value = {UnauthorizedException.class})
    @ResponseBody
    public AjaxResult unauthorizedException(HttpServletRequest request,Exception ex){
        return result(HTTP_ERROR,"暂无权限",ICON_ERROR);
    }
}
3.2 跨域配置
@Component
public class CrossInterceptor extends HandlerInterceptorAdapter {

    @Override
    public boolean preHandle(HttpServletRequest request, HttpServletResponse response, Object handler) throws Exception {
        response.setHeader("Access-Control-Allow-Origin", "*");
        response.setHeader("Access-Control-Allow-Methods", "GET, POST, PUT, DELETE, OPTIONS");
        response.setHeader("Access-Control-Max-Age", "3600");
        response.setHeader("Access-Control-Allow-Headers", "*");
        response.setHeader("Access-Control-Allow-Credentials", "true");
        return true;
    }
}
或者使用过滤器
/**
 * 过滤器,需要使用@ServletComponentScan注解来扫描@WebFilter、@WebServlet、@WebListener等注解
 */
@WebFilter
public class MyCorsFilter implements Filter {

    @Override
    public void doFilter(ServletRequest req, ServletResponse res, FilterChain chain) throws IOException, ServletException {
        HttpServletResponse response = (HttpServletResponse) res;
        //设置访问源地址
        response.setHeader("Access-Control-Allow-Origin", "*");
        //设置访问源请求方法
        response.setHeader("Access-Control-Allow-Methods", "*");
        //跨域请求的有效时间, 这里是1小时
        response.setHeader("Access-Control-Max-Age", "3600");
        //设置访问源请求头
        response.setHeader("Access-Control-Allow-Headers", "*");
        response.setHeader("Access-Control-Allow-Credentials", "true");
        chain.doFilter(req, res);
    }
}
或者使用nginx
后续会有专题解释后台不必要配置跨域
3.3 配置modelMapper
    <properties>
        <modelmapper.version>3.2.0</modelmapper.version>
    </properties>
        <dependency>
            <groupId>org.modelmapper</groupId>
            <artifactId>modelmapper</artifactId>
            <version>${modelmapper.version}</version>
            <scope>compile</scope>
        </dependency>
@Configuration
public class ModelMapperConfig {
    @Bean
    public ModelMapper modelMapper() {
        ModelMapper modelMapper = new ModelMapper();

        modelMapper.getConfiguration()
            .setFullTypeMatchingRequired(true)
            .setMatchingStrategy(MatchingStrategies.STRICT)
            .setPropertyCondition(Conditions.isNotNull());

        modelMapper.addConverter(new Converter<LocalDateTime, Long>() {
            @Override
            public Long convert(MappingContext<LocalDateTime, Long> context) {
                Timestamp timestamp = Timestamp.valueOf(context.getSource());
                return timestamp.getTime();
            }
        });

        modelMapper.addConverter(new Converter<Long, LocalDateTime>() {
            @Override
            public LocalDateTime convert(MappingContext<Long, LocalDateTime> context) {
                if (context.getSource() == 0L) {
                    return null;
                }
                Timestamp timestamp = new Timestamp(context.getSource());
                return timestamp.toLocalDateTime();
            }
        });

        return modelMapper;
    }
}
3.4 MapStruct配置
   <mybatis.version>3.0.2</mybatis.version>
            <dependency>
                <groupId>org.mapstruct</groupId>
                <artifactId>mapstruct</artifactId>
                <version>${org.mapstruct.version}</version>
            </dependency>
3.5 Commons-Beanutils包
<commons-beanutils.version>1.9.4</commons-beanutils.version>
        <dependency>
            <groupId>commons-beanutils</groupId>
            <artifactId>commons-beanutils</artifactId>
            <version>${commons-beanutils.version}</version>
        </dependency>
3.6 swagger 3.0
引入Maven依赖
        <dependency>
            <groupId>org.springdoc</groupId>
            <artifactId>springdoc-openapi-starter-webmvc-ui</artifactId>
            <version>${org.springdoc.version}</version>
        </dependency>
        <dependency>
            <groupId>org.springdoc</groupId>
            <artifactId>springdoc-openapi-starter-webmvc-api</artifactId>
            <version>${org.springdoc.version}</version>
        </dependency>
配置SwaggerOpenApiConfig(注解)
可选配置类方式
import io.swagger.v3.oas.annotations.ExternalDocumentation;
import io.swagger.v3.oas.annotations.OpenAPIDefinition;
import io.swagger.v3.oas.annotations.info.Contact;
import io.swagger.v3.oas.annotations.info.Info;
import io.swagger.v3.oas.annotations.info.License;
import io.swagger.v3.oas.annotations.servers.Server;
import org.springframework.boot.SpringBootConfiguration;

@SpringBootConfiguration
@OpenAPIDefinition(
        // ## API的基本信息,包括标题、版本号、描述、联系人等
        info = @Info(
                title = "Swagger3.0 (Open API) 框架学习示例文档",       // Api接口文档标题(必填)
                description = "学习Swagger框架而用来定义测试的文档",      // Api接口文档描述
                version = "1.2.1",                                   // Api接口版本
                termsOfService = "https://example.com/",             // Api接口的服务条款地址
                contact = @Contact(
                        name = "name",                            // 作者名称
                        email = "emmail@qq.com",                  // 作者邮箱
                        url = "https://www.baidu.com"  // 介绍作者的URL地址
                ),
                license = @License(                                                // 设置联系人信息
                        name = "Apache 2.0",                                       // 授权名称
                        url = "https://www.apache.org/licenses/LICENSE-2.0.html"   // 授权信息
                )
        ),
        // ## 表示服务器地址或者URL模板列表,多个服务地址随时切换(只不过是有多台IP有当前的服务API)
        servers = {
                @Server(url = "http://192.168.100.2/demo/", description = "本地服务器一服务"),
                @Server(url = "http://192.168.100.3/demo/", description = "本地服务器二服务"),
        },
        externalDocs = @ExternalDocumentation(description = "更多内容请查看该链接", url = "xxx"))
public class SwaggerOpenApiConfig {
}
JWT验证配置类
@Configuration
@SecurityScheme(
        name = "Bearer Authentication",
        type = SecuritySchemeType.HTTP,
        bearerFormat = "JWT",
        scheme = "Bearer"
)
public class OpenAPISecurityConfig {
}
4.集成组件(中间件)
4.1 SpringBoot集成Mysql和Mybatis Plus
- mysql-connector-java是JAVA程序中真正操作mysql数据库的客户端,spring-boot-starter-jdbc中的JdbcTemplate是对JDBC的封装,底层还是调用mysql-connector-java中的方法操作mysql数据库
- 如果你想使用特定的数据库连接器,那么你应该同时引入 spring-boot-starter-jdbc 和 mysql-connector-java
        <dependency>
            <groupId>com.mysql</groupId>
            <artifactId>mysql-connector-j</artifactId>
            <scope>runtime</scope>
        </dependency>
       <!--mybatisplus组件-->
        <dependency>
            <groupId>com.baomidou</groupId>
            <artifactId>mybatis-plus-boot-starter</artifactId>
            <version>3.5.3.1</version>
        </dependency>
            <dependency>
        <groupId>com.alibaba</groupId>
        <artifactId>druid</artifactId>
        <version>1.2.9</version>
    </dependency>
yml配置
spring:
  datasource:
    driver-class-name: com.mysql.jdbc.Driver  #定义配置驱动类
    username: root #mysql登录用户名
    password: 123 #mysql登录密码
    url: jdbc:mysql://localhost:12345/shopDB?characterEncoding=utf8&allowMultiQueries=true
    type: com.alibaba.druid.pool.DruidDataSource #配置连接池
    druid:
      one:
        max-active: 100 #最大连接数
        min-idle: 20 #最小连接数
        max-wait: 2000 #超时时间(ms)
mybatis-plus:
    mapper-locations: classpath*:/mapper/*Mapper.xml
    configuration:
        log-impl: org.apache.ibatis.logging.stdout.StdOutImpl # 控制台输出日志
//配置分页插件
@Configuration
public class MyBatisPlusConfig {
    @Bean
    public MybatisPlusInterceptor mybatisPlusInterceptor() {
        MybatisPlusInterceptor interceptor = new MybatisPlusInterceptor();
        interceptor.addInnerInterceptor(new PaginationInnerInterceptor());
        return interceptor;
    }
4.2 Springboot整合redis
        <dependency>
            <groupId>org.springframework.boot</groupId>
            <artifactId>spring-boot-starter-data-redis</artifactId>
        </dependency>

yml配置
spring:
  application:
    name: redis-demo
  redis:
    host: localhost
    database: 1
    jedis:  # 配置jedis线程池,也可以配置Lettuce
      pool:
        max-active: 8 # 最大活动数量()
        max-wait: -1 # 连接池最大阻塞时间 (使用负数表示没有限制)
    port: 6379  # 6379默认端口,不配置就取默认
  # --lettuce 配置
  #  lettuce:
  #   pool:
  #     max-active:
//RedisConfig配置类
@Configuration
public class RedisConfig {
    @Bean
    public RedisTemplate<String, Object> redisTemplate(RedisConnectionFactory redisConnectionFactory) throws UnknownHostException {
        RedisTemplate<String, Object> redisTemplate = new RedisTemplate();
        redisTemplate.setConnectionFactory(redisConnectionFactory);
        Jackson2JsonRedisSerializer<Object> serializer = new Jackson2JsonRedisSerializer(Object.class);
        // 设置键(key)的序列化
        redisTemplate.setKeySerializer(new StringRedisSerializer());
        // 设置value序列化
        redisTemplate.setValueSerializer(serializer);
        // 设置HashKey序列化 为啥要hashkey
        redisTemplate.setHashKeySerializer(new StringRedisSerializer());
        // 设置HashValue序列化
        redisTemplate.setHashValueSerializer(serializer);
        // 默认序列化
        redisTemplate.setDefaultSerializer(new StringRedisSerializer());
        return redisTemplate;
    }
}
4.3 Spring Boot集成GRPC
引入依赖,开箱即用
 <dependency>
            <groupId>net.devh</groupId>
            <artifactId>grpc-server-spring-boot-starter</artifactId>
            <version>${net-devh-grpc-spring-boot.version}</version>
            <exclusions>
                <exclusion>
                    <groupId>io.grpc</groupId>
                    <artifactId>grpc-netty-shaded</artifactId>
                </exclusion>
            </exclusions>
        </dependency>
        <dependency>
            <groupId>net.devh</groupId>
            <artifactId>grpc-client-spring-boot-starter</artifactId>
            <version>${net-devh-grpc-spring-boot.version}</version>
        </dependency>
4.4 Spring Boot集成Zipkin
<dependency>
   <groupId>org.springframework.cloud</groupId>
   <artifactId>spring-cloud-starter-zipkin</artifactId>
</dependency>
spring:

  zipkin:
    #zipkin服务所在地址
    base-url: http://127.0.0.1:9411/
#    discovery-client-enabled: false
    sender:
      type: web #使用http的方式传输数据
  #配置采样百分比
  sleuth:
    sampler:
      probability: 1 # 将采样比例设置为 1.0,也就是全部都需要。默认是0.1也就是10%,一般情况下,10%就够用了
配置GRPC Tracing
@Slf4j
@AutoConfiguration(after = BraveAutoConfiguration.class)
@ConditionalOnClass({ Tracer.class, BraveTracer.class })
@EnableConfigurationProperties(TracingProperties.class)
@ConditionalOnEnabledTracing
public class GrpcZipkinConfig {

    @Bean
    public GrpcTracing grpcTracing(Tracing tracing) {
        return GrpcTracing.create(tracing);
    }

    //grpc-spring-boot-starter provides @GrpcGlobalInterceptor to allow server-side interceptors to be registered with all
    //server stubs, we are just taking advantage of that to install the server-side gRPC tracer.
    @Bean
    ServerInterceptor grpcServerSleuthInterceptor(GrpcTracing grpcTracing) {
        return grpcTracing.newServerInterceptor();
    }

    //We also create a client-side interceptor and put that in the context, this interceptor can then be injected into gRPC clien
    //then applied to the managed channel.
    @Bean
    ClientInterceptor grpcClientSleuthInterceptor(GrpcTracing grpcTracing) {
        return grpcTracing.newClientInterceptor();
    }

    @Bean
    public GlobalServerInterceptorConfigurer globalInterceptorConfigurerAdapter(ServerInterceptor grpcServerSleuthInterceptor) {
        return registry -> registry.add(grpcServerSleuthInterceptor);
    }
}
4.5 Spring Boot 集成 Micrometer
	<dependency>
		<groupId>org.springframework.boot</groupId>
		<artifactId>spring-boot-starter-web</artifactId>
	</dependency>
	<dependency>
		<groupId>org.springframework.boot</groupId>
		<artifactId>spring-boot-starter-actuator</artifactId>
	</dependency>
	<dependency>
		<groupId>io.micrometer</groupId>
		<artifactId>micrometer-registry-prometheus</artifactId>
		<micrometer-tracing.version>1.1.6</micrometer-tracing.version>
	</dependency>
4.6 Spring Boot 集成 gateway
        <dependency>
            <groupId>org.springframework.cloud</groupId>
            <artifactId>spring-cloud-starter-gateway</artifactId>
        </dependency>
spring:
    profiles:
        active: local

    application:
        name: gateway-service
        gateway:
            discovery:
                locator:
                    enabled: true
            routes:
                -   id: system-service # 路由标识必须唯一
                    uri: lb://system-service # 路由的目标服务 lb负载均衡 后面为服务名称
                    predicates: # 路由断言 判断是否符合断言规则
                        - Path=/system/** # 为system 开头则是符合
                    filters:
                        - RewritePath=/system/(?<path>.*), /$\{path} # 路径替换 /system 替换为 /
                        - PreserveHostHeader # 保留原有Host,并转发到下游服务
5.Maven 打包插件
5.1 prptobuf打包插件
   <protobuf-java.version>3.24.0</protobuf-java.version>
   <protobuf-maven-plugin.version>0.6.1</protobuf-maven-plugin.version>
<build>
        <extensions>
            <extension>
            <!-- 识别不同的操作系统 -->
                <groupId>kr.motd.maven</groupId>
                <artifactId>os-maven-plugin</artifactId>
                <version>${os.plugin.version}</version>
            </extension>
        </extensions>
        <plugins>
            <plugin>
                <groupId>org.xolstice.maven.plugins</groupId>
                <artifactId>protobuf-maven-plugin</artifactId>
                <version>${protobuf.plugin.version}</version>
                <extensions>true</extensions>
                <configuration>
                    <!-- 工具版本 -->
                   <protocArtifact>com.google.protobuf:protoc:${protobuf.version}:exe:${os.detected.classifier}</protocArtifact>
                    <!--默认值,proto源文件路径-->
                    <protoSourceRoot>${project.basedir}/src/main/proto</protoSourceRoot>
                    <!--默认值,proto目标java文件路径-->
                    <outputDirectory>${project.basedir}/src/main/java</outputDirectory>
                    <!--设置是否在生成java文件之前清空outputDirectory的文件,默认值为true,设置为false时也会覆盖同名文件-->
                    <clearOutputDirectory>false</clearOutputDirectory>

                </configuration>
                <executions>
                    <execution>
                        <!--在执行mvn compile的时候会执行以下操作-->
                        <phase>compile</phase>
                        <goals>
                            <!--生成OuterClass类-->
                            <goal>compile</goal>
                            <!--生成Grpc类-->
                            <goal>compile-custom</goal>
                        </goals>
                    </execution>
                </executions>
            </plugin>
        </plugins>
    </build>
更多参数参考官网https://www.xolstice.org/protobuf-maven-plugin/compile-mojo.html
5.2 Maven打包插件
        <maven.compiler.source>21</maven.compiler.source>
        <maven.compiler.target>21</maven.compiler.target>
<maven-compiler-plugin.verison>3.11.0</maven-compiler-plugin.verison>
    <plugin>
                <groupId>org.apache.maven.plugins</groupId>
                <artifactId>maven-compiler-plugin</artifactId>
                <version>${maven-compiler-plugin.verison}</version>
                <configuration>
                    <source>${java.version}</source>
                    <target>${java.version}</target>
                    <encoding>${project.build.sourceEncoding}</encoding>
                    <annotationProcessorPaths>
                        <path>
                            <groupId>org.projectlombok</groupId>
                            <artifactId>lombok</artifactId>
                            <version>${lombok.version}</version>
                        </path>
                        <path>
                            <groupId>io.github.linpeilie</groupId>
                            <artifactId>mapstruct-plus-processor</artifactId>
                            <version>${mapstruct-plus.version}</version>
                        </path>
                        <path>
                            <groupId>org.projectlombok</groupId>
                            <artifactId>lombok-mapstruct-binding</artifactId>
                            <version>${mapstruct-plus.lombok.version}</version>
                        </path>
                        <path>
                            <groupId>org.mapstruct</groupId>
                            <artifactId>mapstruct-processor</artifactId>
                            <version>${org.mapstruct.version}</version>
                        </path>
                    </annotationProcessorPaths>
                    <compilerArgs>
                        <arg>-parameters</arg>
                    </compilerArgs>
                </configuration>
            </plugin>
<annotationProcessorPaths>:指定了注解处理器的路径。在这个配置中,我们添加了 org.mapstruct:mapstruct-processor 的注解处理器,
${org.mapstruct.version} 是一个变量,表示从项目的属性或外部配置文件中获取的注解处理器版本。
5.3 Spring Boot 打包插件
说明:如果打包成Springboot 可执行的jar,需要添加下面的插件,如果jar用作依赖包使用直接用 maven-compiler-plugin 打包即可
           <plugin>
                <groupId>org.springframework.boot</groupId>
                <artifactId>spring-boot-maven-plugin</artifactId>
                <version>1.3.2.RELEASE</version>
                <configuration>
                    <mainClass>test.ApplicationMain</mainClass>
                </configuration>
                <executions>
                    <execution>
                        <goals>
                            <goal>repackage</goal>
                        </goals>
                    </execution>
                </executions>
            </plugin>

 <goal>repackage</goal> 这个是默认 goal,在 mvn package 执行之后,
 这个命令再次打包生成可执行的 jar,同时将 mvn package 生成的 jar 重命名为 *.origin
6.项目推送远程仓库
子级工程打包启动没有问题将项目推向远程仓库
git init # 初始化项目
git status # 检查项目更改信息
git add . # 添加所有文件
git commit -am "init" # 将新增文件提交到本地仓库
git remote add oriain "git http 地址" # 添加远程仓库
git push origin init:init  # 推送到远程分支
建议先clone到本地,再搭建项目
7.总结
本文为本人搭建项目笔记
到此Spring Cloud项目搭建完成
下一专题搭建基于Spring Security框架的用户登陆服务

一起探索未来云端世界的核心,云原生技术专区带您领略创新、高效和可扩展的云计算解决方案,引领您在数字化时代的成功之路。
更多推荐


 15
15 0
0- 0


 已为社区贡献1条内容

所有评论(0)