
如何在Linux上使用rclone备份到Google Drive
Google 谷歌 There’s still no official Linux client for Google Drive, but you can back up to your Google Drive using the rclone utility right from the command line. We show you how.Google Drive仍没有官方Lin..

There’s still no official Linux client for Google Drive, but you can back up to your Google Drive using the rclone utility right from the command line. We show you how.
Google Drive仍没有官方Linux客户端,但是您可以直接从命令行使用rclone实用程序备份到Google Drive。 我们向您展示如何。
Linux上的Google云端硬盘在哪里? (Where’s Google Drive on Linux?)
Despite promising Linux support “coming soon” back in 2012, there’s no indication that Google will ever produce a native Linux client for Google Drive. There are several unofficial third-party solutions, such as InSync, overGrive and ODrive, and some file browsers allow integration with your Google Drive, such as Files in GNOME.
尽管有望在2012年“很快”提供Linux支持 ,但没有迹象表明Google会为Google Drive生产本地Linux客户端。 有几种非官方的第三方解决方案,例如InSync , overGrive和ODrive ,一些文件浏览器允许与您的Google Drive集成,例如GNOME中的 Files 。
The third-party applications are commercial products, requiring either an outright purchase or a subscription. They work well they don’t cost much, and in fact, overGrive does have a free version, offering limited functionality for no cost.
第三方应用程序是商业产品,需要直接购买或订阅。 它们运作良好,而且价格不贵,实际上overGrive确实有一个免费版本,免费提供了有限的功能。
But what if you want to create and run backups from the command line? Or to incorporate that functionality into scripts? That’s all possible thanks to an amazing application called rclone. In fact, with rclone you can back up, download, and synchronize files to over forty different cloud solutions. It’s like rsync for clouds.
但是,如果要从命令行创建和运行备份怎么办? 还是将该功能合并到脚本中? 这一切都归功于一个名为rclone的惊人应用程序。 实际上,使用rclone可以将文件备份,下载和同步到40多种不同的云解决方案 。 就像云的rsync一样。
安装rclone (Installing rclone)
rclone almost certainly won’t be installed on your Linux computer by default. Happily, there’s an installation script that should work on all distributions. The installation process uses curl. On the computers used to research this article, Fedora 31 and Manjaro 18.1.0 already had curl installed but curl had to be installed on Ubuntu 18.04 LTS.
rclone几乎可以肯定默认情况下不会在您Linux计算机上安装。 幸运的是,有一个安装脚本可以在所有发行版上使用。 安装过程使用curl 。 在用于研究本文的计算机上,Fedora 31和Manjaro 18.1.0已经安装了curl但是必须在Ubuntu 18.04 LTS上安装curl 。
On Ubuntu, run this command to install it:
在Ubuntu上,运行以下命令进行安装:
sudo apt-get install curl

Once curl has been installed, install rclone with this command:
安装curl之后,请使用以下命令安装rclone :
curl https://rclone.org/install.sh | sudo bash

When the rclone installation has finished, you’ll see a success message.
rclone安装完成后,您将看到一条成功消息。
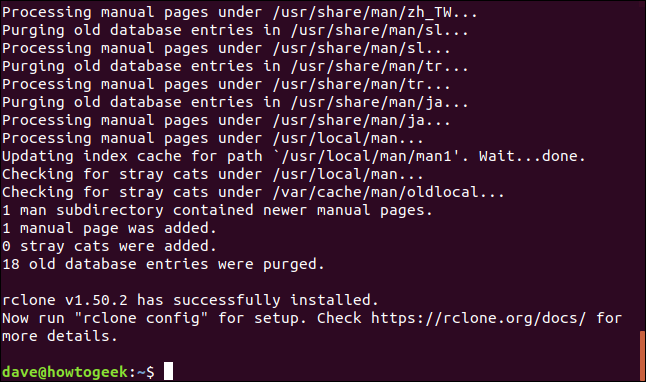
This has installed the rclone program on your Linux computer. The next step is to run through the setup process and authenticate rclone to access your Google Drive.
这已在您Linux计算机上安装了rclone程序。 下一步是完成设置过程, rclone进行身份验证以访问您的Google云端硬盘。
创建rclone远程连接 (Creating an rclone Remote Connection)
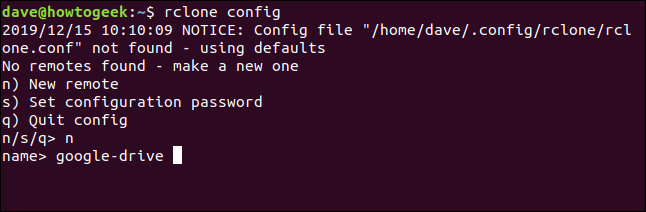
Connections to remote cloud services are called “remotes” in the rclone world. We need to create one for Google Drive. Start the rclone configuration process with this command:
在rclone世界中,与远程云服务的连接称为“远程”。 我们需要为Google云端硬盘创建一个。 使用以下命令启动rclone配置过程:
rclone config

There are a lot of questions in the configuration process. But don’t be disheartened, many of them can be left at their default values and simply accepted by pressing “Enter.”
在配置过程中有很多问题。 但不要灰心,它们中的许多可以保留为默认值,只需按“ Enter”即可接受。
rclone tells us there are no remotes configured. Press “n” and press “Enter” to create a new remote. It will prompt you for a name. We’re going to call it “google-drive.” Use whatever name you like.
rclone告诉我们没有配置的遥控器。 按“ n”并按“ Enter”创建一个新的遥控器。 它将提示您输入名称。 我们将其称为“ Google驱动器”。 使用您喜欢的任何名称。
A long menu allows you to choose the type of storage you’re creating a remote connection to.
长菜单使您可以选择要创建远程连接的存储类型。
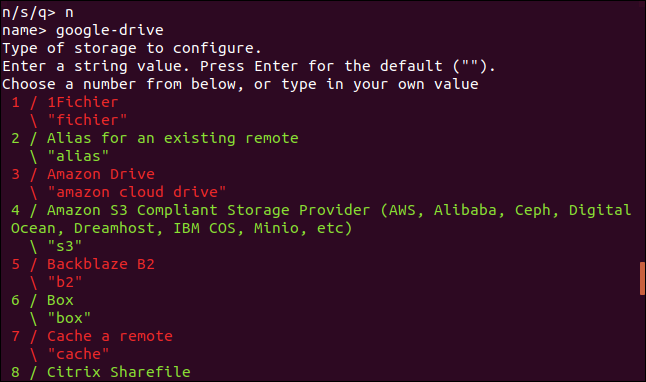
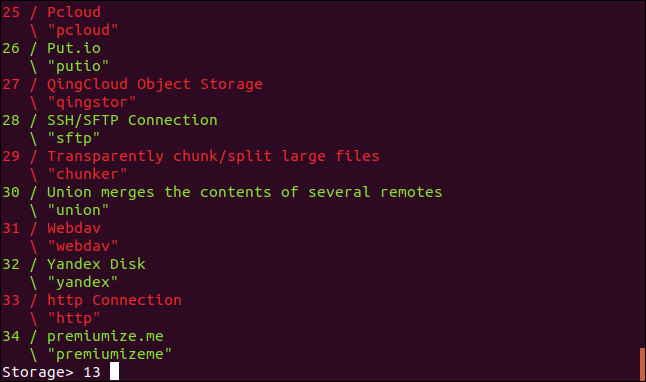
Scroll through the list until you see the entry for Google Drive, and make a note of its number.
滚动列表,直到看到Google云端硬盘条目,然后记下其编号。
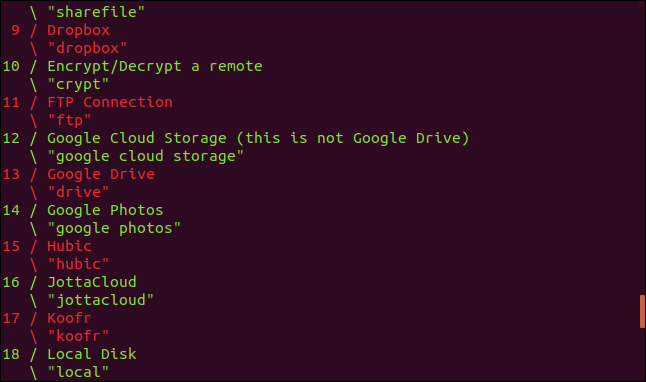
We can see that in this instance, it is number 13. Enter this as the storage type and press “Enter.”
在这种情况下,我们可以看到它是数字13。输入它作为存储类型,然后按“ Enter”。
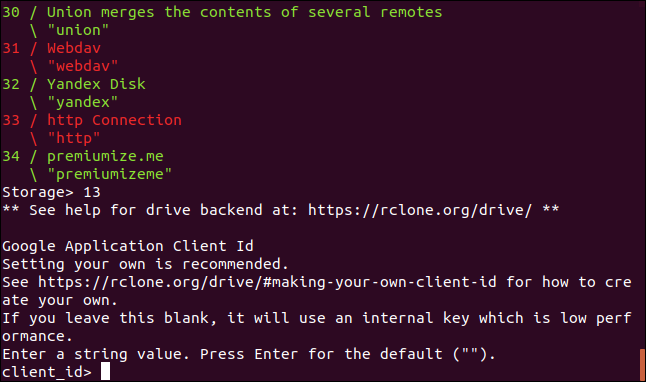
You’re prompted for a Google Application Client ID. Press “Enter” to accept the default.
系统提示您输入Google Application Client ID。 按“ Enter”接受默认设置。
You’re then prompted for a Google Application Client Secret.
然后提示您输入Google Application Client Secret。
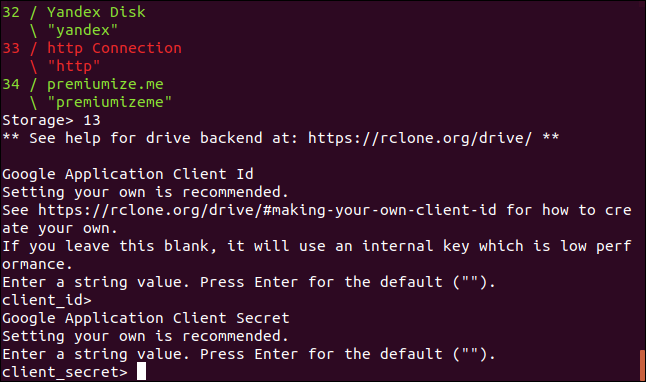
Again, just press “Enter.” You’re asked to provide the scope that rclone will have when it is operating on your Google Drive. Press “1” and then press “Enter.”
同样,只需按“ Enter”。 您需要提供rclone在您的Google云端硬盘上运行时将具有的作用域。 按“ 1”,然后按“ Enter”。

For the “ID of the root folder”, just press “Enter.”
对于“根文件夹的ID”,只需按“ Enter”。
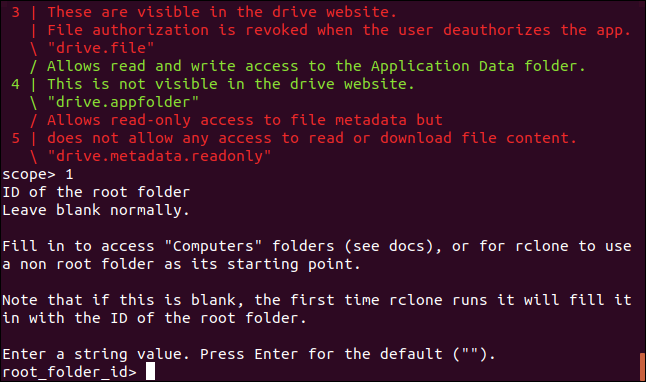
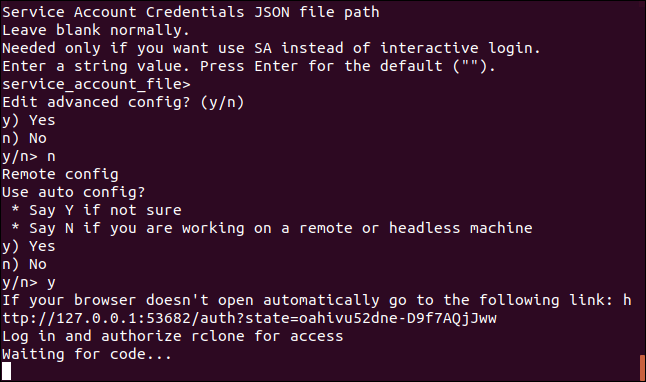
At the “Service Account Credentials” prompt, press “Enter.”
在“服务帐户凭据”提示符下,按“ Enter”。

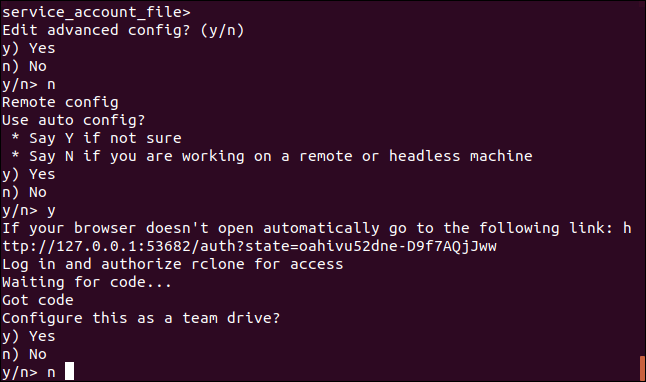
At the “Edit advanced config” prompt, just press “Enter.” At the “Use auto config” menu, press “y” and then press “Enter.”
在“编辑高级配置”提示下,只需按“ Enter”。 在“使用自动配置”菜单上,按“ y”,然后按“ Enter”。

This causes rclone to communicate to your Google Drive, and to launch your browser to allow you to give permission for rclone to interact with your Google Drive.
这将导致rclone与您的Google云端硬盘进行通信,并启动浏览器以允许您授予rclone与您的Google云端硬盘进行交互的权限。
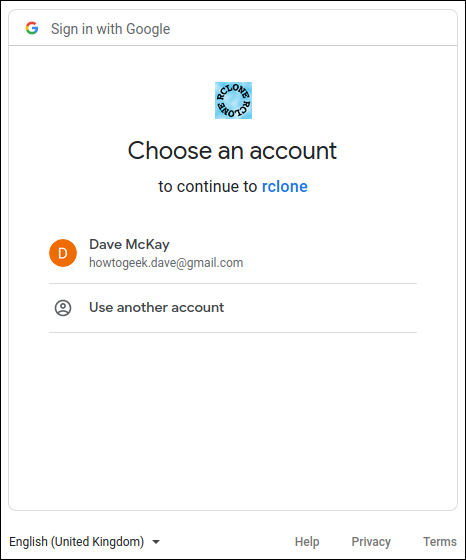
In your browser window, click on the Google account you wish to use.
在浏览器窗口中,单击要使用的Google帐户。
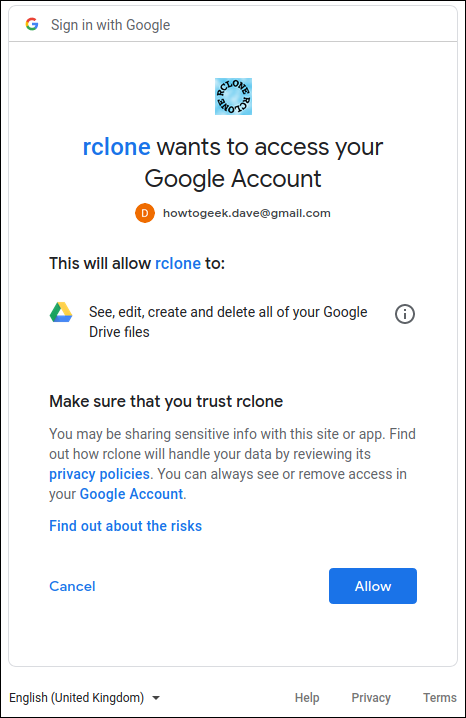
Click the “Allow” button to allow rclone to have access to your Google Drive.
点击“允许”按钮,以使rclone可以访问您的Google云端硬盘。
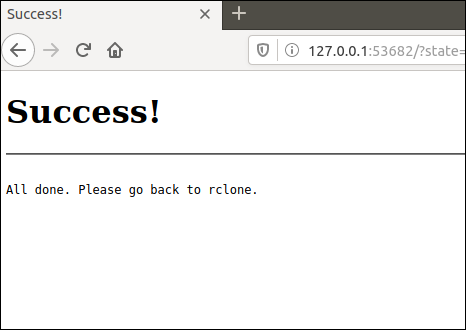
When authenticate has completed, you’ll see a “Success!” message in the browser window. You can close the browser and return to the terminal window.
身份验证完成后,您会看到“成功!” 浏览器窗口中显示消息。 您可以关闭浏览器并返回到终端窗口。
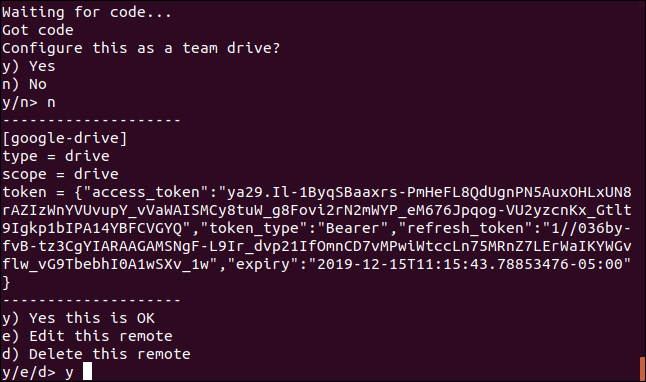
At the “Configure this as a team drive” prompt, type “n” and then press “Enter.”
在“将其配置为团队协作”提示下,键入“ n”,然后按“ Enter”。
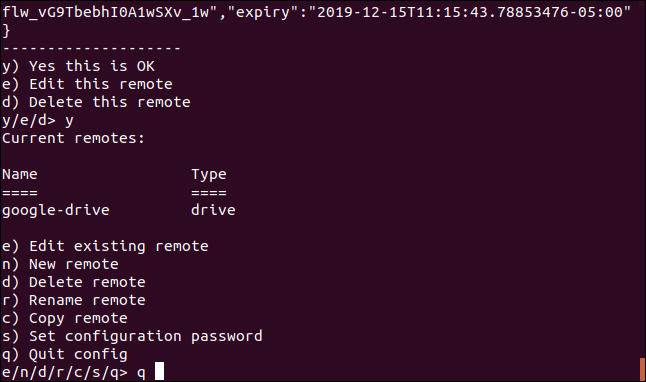
At the “Yes, Edit, Delete” menu type “y” and then press “Enter.”
在“是,编辑,删除”菜单上,键入“ y”,然后按“ Enter”。
At the final menu, type “q” and press “Enter.”
在最终菜单中,键入“ q”,然后按“ Enter”。
rclone备份脚本 (The rclone Back Up Script)
The rclone application is very feature-rich. That’s great, but it does mean there are a lot of options. The command we’re going to look at below copies files from your local computer to your Google Drive. This is a one-way copy to the cloud; it isn’t a two-way synchronization between your Google Drive and your local computer—although rclone can do that. We’re using this as a basic form of off-site backup.
rclone应用程序功能非常丰富。 很好,但这确实意味着有很多选择 。 我们将在下面查看的命令将文件从本地计算机复制到Google云端硬盘。 这是单向复制到云; 尽管rclone可以做到,但您的Google云端硬盘和本地计算机之间并不是双向同步。 我们将其用作异地备份的基本形式。
Type (or copy and paste) this into a text editor and save it to your computer. We called it gbk.sh. You can call it whatever makes sense to you.
将其键入(或复制并粘贴)到文本编辑器中,然后将其保存到计算机中。 我们称它为gbk.sh 您可以说它对您有意义。
#!/bin/bash

/usr/bin/rclone copy --update --verbose --transfers 30 --checkers 8 --contimeout 60s --timeout 300s --retries 3 --low-level-retries 10 --stats 1s "/home/dave/Documents" "google-drive:LinuxDocs"
Here’s what the parameters mean:
参数的含义如下:
copy: Copy the files from the local computer to the remote storage, skipping over files that are already present on the remote storage.
复制 :将文件从本地计算机复制到远程存储,跳过远程存储中已经存在的文件。
–update: Skip any files that are on the remote storage that have a modified time that is newer than the file on the local computer.
–update :跳过远程存储上修改时间比本地计算机上新的任何文件。
–verbose: Gives information about every file that is transferred.
–verbose :提供有关每个传输文件的信息。
–transfers 30: This sets the number of files to copy in parallel.
–transfers 30 :设置并行复制的文件数。
–checkers 8: How many “checkers” to run in parallel. Checkers monitor the transfers that are in progress.,
–checkers 8 :并行运行多少个“ checkers”。 检查器监视正在进行的传输。,
–contimeout 60s: The connection timeout. It sets the time that
rclonewill try to make a connection to the remote storage.–contimeout 60s :连接超时。 它设置
rclone尝试连接到远程存储的时间。–timeout 300s: If a transfer becomes idle for this amount of time, it is considered broken and is disconnected.
–timeout 300s :如果传输闲置了这段时间,则认为该传输已断开并且已断开连接。
–retries 3: If there are this many errors, the entire copy action will be restarted.
–retries 3 :如果有这么多错误,将重新启动整个复制操作。
–low-level-retries 10: A low-level retry tries to repeat one failing operation, such as a single HTTP request. This value sets the limit for the number of retries.
–low-level-retries 10 :低级重试尝试重复一个失败的操作,例如单个HTTP请求。 此值设置重试次数的限制。
–stats 1s:
rclonecan provide statistics on the transferred files. This sets the frequency of update of the statistics to one second.–stats 1s :
rclone可以提供有关已传输文件的统计信息。 这会将统计信息的更新频率设置为一秒。“/home/dave/Documents”: The local directory to we’re going to copy to the remote storage.
“ / home / dave / Documents” :我们要复制到远程存储的本地目录。
“google-drive:LinuxDocs”: The destination directory in the remote storage. Note the use of “google-drive”, which is the name we gave to this remote connection during the the
rclone configsequence. Also note the colon “:” that is used as a separator between the remote storage name and the directory name. Subdirectories are separated by the usual “/” forward slash. If the destination directory does not exist, it will be created.“ google-drive:LinuxDocs” :远程存储中的目标目录。 注意“ google-drive”的使用,这是我们在
rclone config序列中为此远程连接指定的rclone config。 另请注意,冒号“:”用作远程存储名称和目录名称之间的分隔符。 子目录由通常的“ /”正斜杠分隔。 如果目标目录不存在,将创建该目录。
Some of these values are the defaults, but we’ve included them here so that we can discuss them. That way, if you need to change a value, you know which parameter to adjust.
其中一些值是默认值,但我们在此处包括了它们,以便我们进行讨论。 这样,如果您需要更改值,就知道要调整哪个参数。
Make the script executable with this command:
使用以下命令使脚本可执行:
chmod +x gbk.sh
运行备份脚本 (Running the Back Up Script)
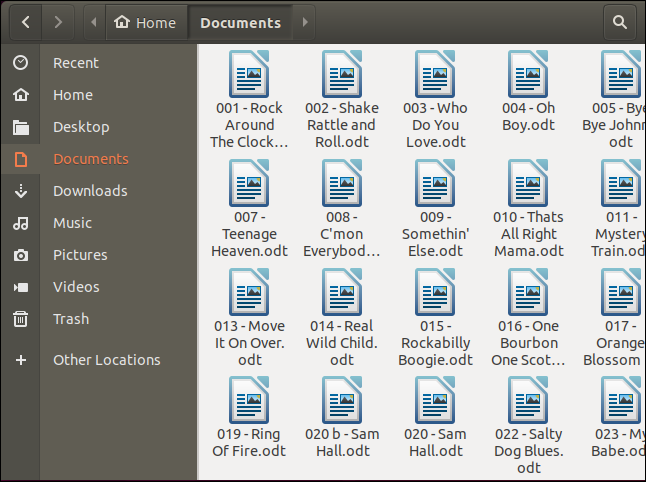
Our back up script is going to copy our Documents folder to our Google Drive. In our Documents folder, we’ve got a collection of sheet music.
我们的备份脚本将复制Documents文件夹到Google云端硬盘。 在我们的Documents文件夹中,我们有一些乐谱。
We can launch the back up script with this command:
我们可以使用以下命令启动备份脚本:
./gbk.sh

We asked for statistics updates every one second (--stats 1s), and we also asked for verbose output (--verbose). It’ll come as no surprise then that we get a lot of screen output. It’s usually a good option to turn on verbose output for new functionality so that you can spot problems. You can turn down the amount of output once you’re happy things are running smoothly.
我们要求每隔一秒钟更新一次统计信息( --stats 1s ),还要求详细输出( --verbose )。 这样我们获得了很多屏幕输出就不足为奇了。 通常,打开详细输出以获得新功能是一个不错的选择,这样您就可以发现问题。 一旦事情顺利进行,您就可以降低输出量。
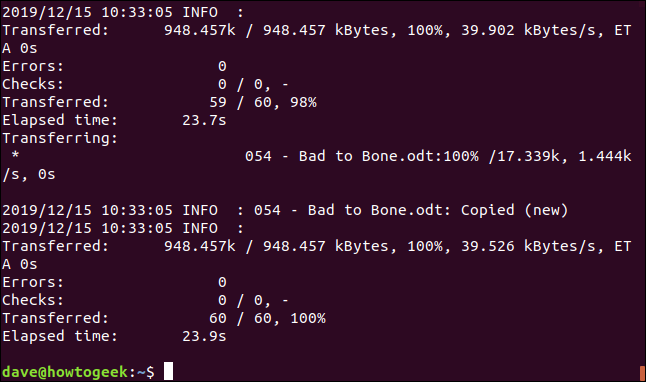
We get a final summary telling us 60 files were transferred with no errors. The transfer took roughly 24 seconds.
我们得到一个最终摘要,告诉我们60个文件已正确传输。 转移大约需要24秒。
Let’s check on our Google Drive and see what happened in our cloud storage.
让我们检查一下Google云端硬盘,看看云存储中发生了什么。
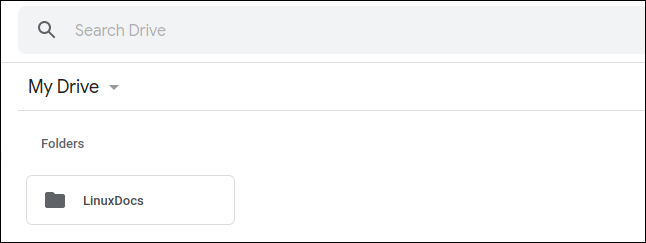
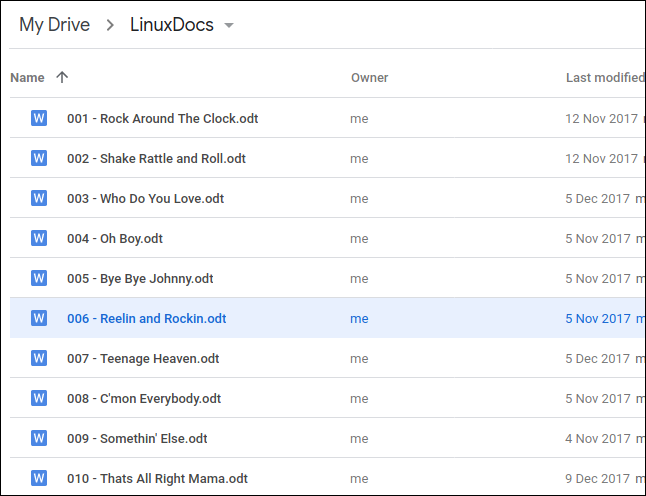
A “LinuxDocs” directory has been created, so that looks promising. If we double-click it to take a look inside, we can see that the files have all been transferred to our Google Drive.
已经创建了“ LinuxDocs”目录,因此看起来很有希望。 如果我们双击它以查看内部,我们可以看到文件已全部转移到我们的Google云端硬盘中。
使用rclone查看Google云端硬盘上的文件 (Using rclone to View Files On Google Drive)
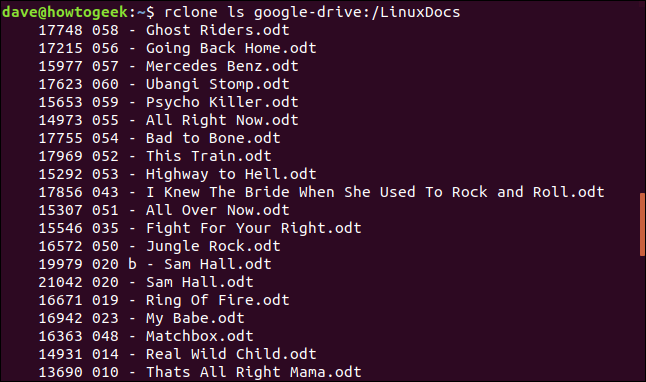
We can use rclone to peek into the folder on Google Drive, right from the terminal window:
我们可以使用rclone在终端窗口中浏览Google云端硬盘上的文件夹:
rclone ls google-drive:/LinuxDocs
冰山一角 (The Tip of the Iceberg)
That’s great that we can perform this type of copy straight from the command line. We can incorporate the use of our cloud storage into scripts, and we could schedule the execution of back up scripts using cron.
很好,我们可以直接从命令行执行这种类型的复制。 我们可以将对云存储的使用合并到脚本中,并且可以使用cron 安排执行备份脚本 。
rclone has an absolute wealth of commands, you’re encouraged to check out their documentation and excellent website. We’ve barely scratched the surface here, and a bit of reading and playing with rclone will pay back the effort many times over.
rclone具有绝对丰富的命令,建议您阅读它们的文档和出色的网站 。 我们在这里几乎还没有rclone表面,阅读和使用rclone会付出很多努力。
Strictly speaking, this isn’t a true backup. It is an off-site, remote copy of your files and data, which is definitely a good thing to have, but it is just a copy of files. It doesn’t offer versioning or other features that true backup solutions would offer.
严格来说,这不是真正的备份。 它是文件和数据的异地远程复制,这绝对是一件好事,但它只是文件的副本。 它不提供真正的备份解决方案可以提供的版本控制或其他功能。
So use rclone in conjunction with other backup techniques. As another layer to an existing backup regime rclone is an easy way to get your data stored in a location that is geographically removed from your home or office. And that’s got to be a good thing.
因此,请结合使用rclone和其他备份技术。 作为现有备份机制的rclone是一种将数据存储在从家中或办公室地理位置移开的位置的简便方法。 那一定是一件好事。
翻译自: https://www.howtogeek.com/451262/how-to-use-rclone-to-back-up-to-google-drive-on-linux/
更多推荐
 1
1 0
0- 0


 已为社区贡献2条内容

所有评论(0)