
Linux 系统编程 VSCode 配置: 自动补全、一键自动编译
·
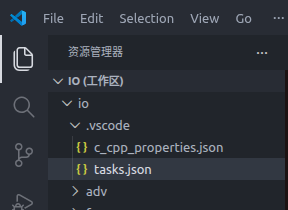
工程目录结构:
project/
├── .vscode/
│ ├── c_cpp_properties.json
│ ├── tasks.json
│
├── main.c
需要创建2个文件,这两个文件名在 VSCode 里是有“硬约定”的,文件名不可以随便改。
1. c_cpp_properties.json(补全 + 识别)
告诉 VSCode:用哪个编译器 + 去哪里找头文件 + 按什么标准解析代码, 修复自动补全
在项目目录下创建:
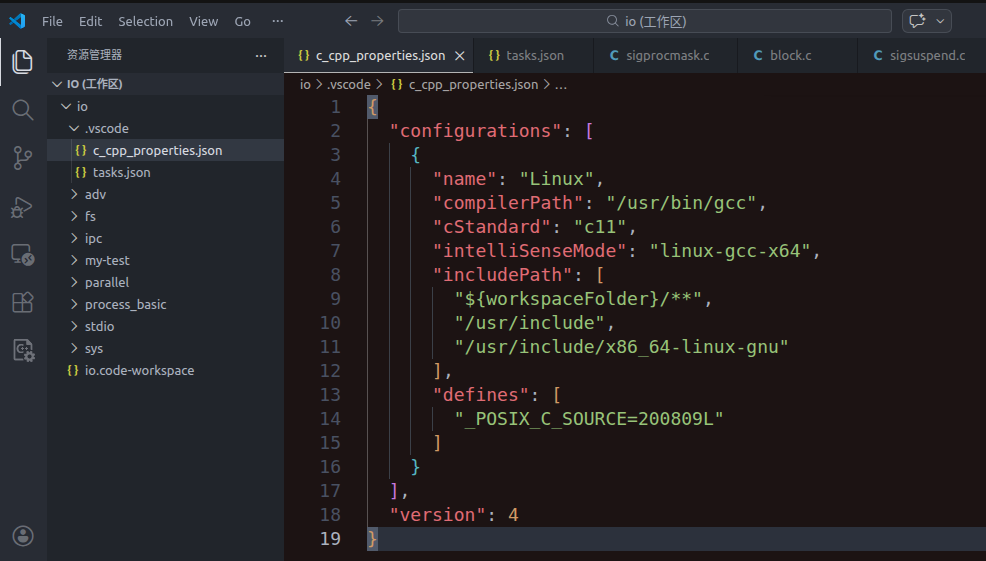
.vscode/c_cpp_properties.json 输入下面的代码
{
  "configurations": [
    {
      "name": "Linux",
      "compilerPath": "/usr/bin/gcc",
      "cStandard": "c11",
      "intelliSenseMode": "linux-gcc-x64",
      "includePath": [
        "${workspaceFolder}/**",
        "/usr/include",
        "/usr/include/x86_64-linux-gnu"
      ],
      "defines": [
        "_POSIX_C_SOURCE=200809L"
      ]
    }
  ],
  "version": 4
}
"compilerPath": "/usr/bin/gcc" 告诉 VSCode 用哪个编译器
"intelliSenseMode": "linux-gcc-x64" 用 GCC 在 Linux 上的语法规则解析代码
"includePath": [...] 告诉 VSCode 头文件在哪
"_POSIX_C_SOURCE=200809L" 告诉 VSCode启用哪些宏
2. tasks.json(一键自动编译 当前文件),
打开要编译的 .c 文件,然后按快捷键 Ctrl + Shift + B , 自动执行: gcc -g xx.c -o xx
.vscode/ 目录下 创建tasks.json文件
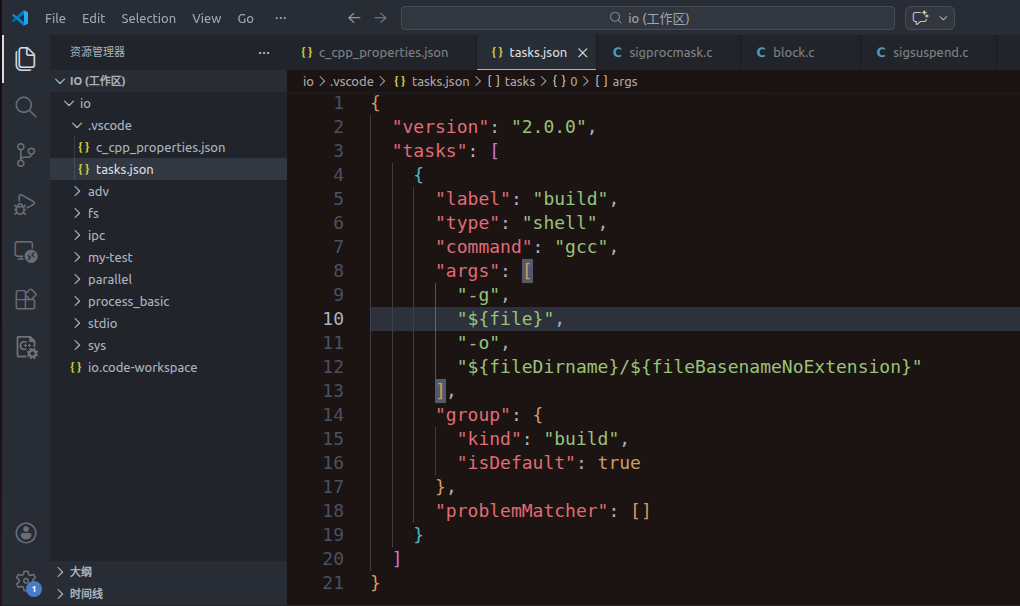
输入下面的代码。
{
  "version": "2.0.0",
  "tasks": [
    {
      "label": "build",
      "type": "shell",
      "command": "gcc",
      "args": [
        "-g",
        "${file}",
        "-o",
        "${fileDirname}/${fileBasenameNoExtension}"
      ],
      "group": {
        "kind": "build",
        "isDefault": true
      },
      "problemMatcher": []
    }
  ]
}
示例如下:
更多推荐
 0
0 0
0- 0


 已为社区贡献2条内容

所有评论(0)