
SpringBoot+Thymleaf+Python+Echarts+Neo4j实现知识图谱可视化
方案一:SpringBoot配置多数据源配置Mysql多数据库具体可以参考:https://www.w3cschool.cn/article/50807439.html配置Mysql数据库与Neo4j数据库参考:https://gitee.com/baomidou/dynamic-datasource-spring-boot-starter具体如下:1.引入dynamic-datasource-s
方案一:SpringBoot配置多数据源
配置Mysql多数据库
具体可以参考:https://www.w3cschool.cn/article/50807439.html
配置Mysql数据库与Neo4j数据库
参考:https://gitee.com/baomidou/dynamic-datasource-spring-boot-starter
具体如下:
1.引入dynamic-datasource-spring-boot-starter。
<dependency>
  <groupId>com.baomidou</groupId>
  <artifactId>dynamic-datasource-spring-boot-starter</artifactId>
  <version>3.5.1</version>
</dependency>
2.配置数据源。
spring:
  datasource:
    dynamic:
      primary: master #设置默认的数据源或者数据源组,默认值即为master
      strict: false #严格匹配数据源,默认false. true未匹配到指定数据源时抛异常,false使用默认数据源
      datasource:
        master:
          url: jdbc:mysql://xx.xx.xx.xx:3306/dynamic
          username: root
          password: 123456
          driver-class-name: com.mysql.jdbc.Driver # 3.2.0开始支持SPI可省略此配置
        slave_1:
          url: jdbc:neo4j:bolt://192.168.88.1:7687
          username: neo4j
          password: 123
          driver-class-name: org.neo4j.jdbc.bolt.BoltDriver
        slave_2:
          url: ENC(xxxxx) # 内置加密,使用请查看详细文档
          username: ENC(xxxxx)
          password: ENC(xxxxx)
          driver-class-name: com.mysql.jdbc.Driver

       #......省略
       #以上会配置一个默认库master,一个组slave下有两个子库slave_1,slave_2
3.使用 @DS 切换数据源。
@DS 可以注解在方法上或类上,同时存在就近原则 方法上注解 优先于 类上注解。
| 注解 | 结果 |
|---|---|
| 没有@DS | 默认数据源 |
| @DS(“dsName”) | dsName可以为组名也可以为具体某个库的名称 |
@Service
@DS("slave")
public class UserServiceImpl implements UserService {

  @Autowired
  private JdbcTemplate jdbcTemplate;

  public List selectAll() {
    return  jdbcTemplate.queryForList("select * from user");
  }

  @Override
  @DS("slave_1")
  public List selectByCondition() {
    return  jdbcTemplate.queryForList("select * from user where age >10");
  }
}
方案二:采用python作为neo4j数据源
思路:通过python获取neo4j数据库数据,将数据写入json文件供SpringBoot访问使用
1、Neo4j数据库数据获取
CyPher语句如下:
MATCH p=(m:Disease)-[r]->(n) return id(m) as start,labels(m) as mcats,collect(m.name) as m_name,collect(n.name) as n_name,id(n) as end,labels(n) as ncats,r.name as link limit 20
名称释义:
MATCH p=(m:Disease)-[r]->(n)
提取所有Disease的节点实体有关的关系,节点数据传入p
return id(m) as start
返回m:Disease类型节点的id值,同时赋值别名为start
collect(m.name) as m_name
由于m节点的name属性是多个字符组成的字符串,所以返回时要进行collect组合操作,避免在遍历时赋值不全。
r.name as link
将关系r的name属性赋别名作为link
2、寻找Echarts中关系图Html模板
这里我选择的是:
链接:知识图谱关系图

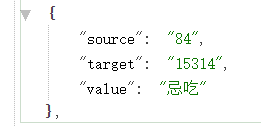
分析数据结构后,设计的json结构如下
[
	data:{
		node1.name,
		node1.tooltip,
		node1.category
	},
	{
		node2.name,
		node2.tooltip,
		node2.category
	}
],
[
	link:{
		source:
		target:
		value:
	},
	{
		source:
		target:
		value:
	}
]
3、python将查询cypher语句获得的数据写入json文件
具体参考:
https://blog.csdn.net/luanpeng825485697/article/details/93630060?ops_request_misc=&request_id=&biz_id=102&utm_term=neo4j%E6%9F%A5%E8%AF%A2%E6%9F%90%E4%B8%AA%E5%B1%9E%E6%80%A7cypher&utm_medium=distribute.pc_search_result.none-task-blog-2blogsobaiduweb~default-8-93630060.nonecase&spm=1018.2226.3001.4450
此处以Neo4j中默认的Movie-Actor数据库为例子说明,用bottle库运行
from py2neo import Graph, Node, Relationship, NodeMatcher

# 连接图库                            初始化账号密码都是neo4j
# graph = Graph('http://localhost:7474', auth=('neo4j', '123'))

# { category: '积极', name: 'cool_polaris', value: 2, symbolSize: 10 }
# { source: '我买不到口罩', target: '野萌君的好朋友', value: 1 },
# 提取实体名称catagory,提取名字name,提取 source-target

import json

from bottle import get, run, request, response, static_file
from py2neo import Graph


#password = {Your neo4j password}
graph = Graph(password = "123")


@get("/")
def get_index():
    return static_file("index.html", root="static")


@get("/graph")
def get_graph():
    results = graph.run(
        "MATCH (m:Movie)<-[:ACTED_IN]-(a:Person) "
        "RETURN m.title as movie, collect(a.name) as cast "
        "LIMIT {limit}", {"limit": 100})
    nodes = []
    rels = []
    i = 0
    print(results)
    for movie, cast in results:
        nodes.append({"title": movie, "label": "movie"})
        target = i
        i += 1
        for name in cast:
            actor = {"name": name, "label": "actor"}
            try:
                source = nodes.index(actor)
            except ValueError:
                nodes.append(actor)
                source = i
                i += 1
            rels.append({"source": source, "target": target,"value":'ACTED_IN'})
    return {"nodes": nodes, "links": rels}


@get("/search")
def get_search():
    try:
        q = request.query["q"]
    except KeyError:
        return []
    else:
        results = graph.run(
            "MATCH (movie:Movie) "
            "WHERE movie.title =~ {title} "
            "RETURN movie", {"title": "(?i).*" + q + ".*"})
        response.content_type = "application/json"
        return json.dumps([{"movie": dict(row["movie"])} for row in results])


@get("/movie/<title>")
def get_movie(title):
    results = graph.run(
        "MATCH (movie:Movie {title:{title}}) "
        "OPTIONAL MATCH (movie)<-[r]-(person:Person) "
        "RETURN movie.title as title,"
        "collect([person.name, head(split(lower(type(r)),'_')), r.roles]) as cast "
        "LIMIT 1", {"title": title})
    row = results.next()
    return {"title": row["title"],
            "cast": [dict(zip(("name", "job", "role"), member)) for member in row["cast"]]}


if __name__ == "__main__":
    run(port=8095)
之后运行http://127.0.0.1:8095/graph即可获得Neo4j查询到的数据,接着将数据写入json文件。
    with open(r"D:\你的Springboot项目文件\python\neoData1.json", "w",encoding='utf-8') as f2:
        #jsontext是neo4j返回的数据
        js = json.dumps(jsontext)
        f2.write(js)

4、SpringBoot+Thmyleaf运行
import org.springframework.context.annotation.Configuration;
import org.springframework.web.servlet.config.annotation.ResourceHandlerRegistry;
import org.springframework.web.servlet.config.annotation.WebMvcConfigurer;

@Configuration
public class WebMvcConfig implements WebMvcConfigurer {
    @Override
    public void addResourceHandlers(ResourceHandlerRegistry registry) {
        // 将所有D:\\springboot\\pic\\   访问都  映射到 /myPic/**   路径下
        registry.addResourceHandler("/python/**").addResourceLocations("file:D:\\你的Springboot项目文件\\python\\");
    }
}
前端html文件:
<!DOCTYPE html>
<html style="height: 100%">
<head>
    <meta charset="utf-8">
</head>
<body style="height: 100%; margin: 0">
<div id="chart-panel" style="height: 100%;width: 100%"></div>
<script type="text/javascript" src="https://cdn.jsdelivr.net/npm/echarts@5.3.0/dist/echarts.min.js"></script>
<script type="text/javascript" src="https://cdn.jsdelivr.net/npm/jquery/dist/jquery.min.js"></script>

<script type="text/javascript">
    var dom = document.getElementById("chart-panel");
    var myChart = echarts.init(dom);
    var option;
    var app ={};
    var uploadedDataURL = 'python/neoData1.json';


    <!--var jsondata=-->


    $.getJSON(uploadedDataURL, function(linedata) {
        <!--    var data = linedata[0]-->
        <!--    var links = linedata[1]-->
        <!--    var categories = linedata[2]-->
        var data = linedata['data']
        var links= linedata['links']


        option = {

            title: {
                text: '疾病知识库图谱',
                padding: [20,20,100,100],
                top: 'top',
                left: 'center'
            },
            tooltip:{
                show: true, // 默认显示
                    showContent: true, // 是否显示提示框浮层
                    trigger: 'item', // 触发类型,默认数据项触发
                    triggerOn: 'mousemove', // 提示触发条件,mousemove鼠标移至触发,还有click点击触发
                    alwaysShowContent: false, // 默认离开提示框区域隐藏,true为一直显示
                    showDelay: 100, // 浮层显示的延迟,单位为 ms,默认没有延迟,也不建议设置。在 triggerOn 为 'mousemove' 时有效。
                    hideDelay: 2000, // 浮层隐藏的延迟,单位为 ms,在 alwaysShowContent 为 true 的时候无效。
                    enterable: false, // 鼠标是否可进入提示框浮层中,默认为false,如需详情内交互,如添加链接,按钮,可设置为 true。
                    position: 'right', // 提示框浮层的位置,默认不设置时位置会跟随鼠标的位置。只在 trigger 为'item'的时候有效。
                    confine: false, // 是否将 tooltip 框限制在图表的区域内。
                    // 外层的 dom 被设置为 'overflow: hidden',或者移动端窄屏,导致 tooltip 超出外界被截断时,此配置比较有用。
                    transitionDuration: 0.2, // 提示框浮层的移动动画过渡时间,单位是秒,设置为 0 的时候会紧跟着鼠标移动。
            },

            toolbox: {
                show: true,
                    feature: {
                    dataView: {
                        show: true,
                            readOnly: true
                    },
                    restore: {
                        show: true
                    },
                    saveAsImage: {
                        show: true
                    }
                }
            },
            animationDuration: 1500,
                animationEasingUpdate: 'quinticInOut',
                legend: { // 图例显示(显示在右上角),name:类别名称,icon:图例的形状(默认是roundRect圆角矩形)。
                orient: 'vertical',//'horizontal', // 'vertical'
                    x: 'left', // 'center' | 'left' | {number},
                    y: 'top', // 'center' | 'bottom' | {number}
                    show: true,
                    backgroundColor: '#fffefa',
                    padding: 50,    // [5, 10, 15, 20]
                    itemGap: 20,
                    textStyle: {color: 'black'},

                data: [
                    {
                        name: 'Disease'
                    },
                    {
                        name: 'Department'
                    },
                    {
                        name: 'Symptom'
                    },
                    {
                        name: 'Check'
                    },
                    {
                        name: 'Drug'
                    },
                    {
                        name:'Food'
                    }
                ]
            },
            series: [{
                name: '',
                type: 'graph',
                layout: 'force',
                draggable: true, //节点是否可以拖拽
                force: {
                    //initLayout:'circular'
                    <!--                edgeLength: 50,-->
                    <!--                repulsion: 50,-->
                    <!--                gravity: 0.2-->
                    // initLayout: , // 力引导的初始化布局,默认使用xy轴的标点
                    repulsion: 50,// 节点之间的斥力因子。支持数组表达斥力范围,值越大斥力越大。
                    gravity: 0.2, // 节点受到的向中心的引力因子。该值越大节点越往中心点靠拢。
                    layoutAnimation: true // 因为力引导布局会在多次迭代后才会稳定,这个参数决定是否显示布局的迭代动画
                    // 在浏览器端节点数据较多(>100)的时候不建议关闭,布局过程会造成浏览器假死。
                },
                <!--            tooltip : {-->
                <!--                trigger: 'item',-->
                <!--                formatter:function(params){-->
                <!--                    if(params.data.flow){-->
                <!--                        return params.data.source + '到' + params.data.target + '的关系为'+ params.data.value;-->
                <!--                    }-->
                <!--                    else{-->
                <!--                        return params.name;-->
                <!--                    }-->
                <!--                }-->
                <!--            },-->
                data: data,
                edges: links,
                <!--            categories: categories,-->
                focusNodeAdjacency: true,
                roam: true,
                <!--            label: {-->
                <!--                normal: {-->
                <!--                    position: 'right',-->
                <!--                    formatter: '{b}'-->
                <!--                }-->
                <!--            },-->
                lineStyle: {
                    normal: {
                        //color: 'target',
                        curveness: 0
                    }
                },
                categories: [ // name(类别名称)要同legend(图例)按次序一致
                    {
                        name: 'Disease'
                    },
                    {
                        name: 'Department'
                    },
                    {
                        name: 'Symptom'
                    },
                    {
                        name: 'Check'
                    },
                    {
                        name: 'Drug'
                    },
                    {
                        name:'Food'
                    }

                ]
            }]
        };
        myChart.setOption(option);
        if (option && typeof option === 'object') {
            var startTime = +new Date();
            myChart.setOption(option, true);
            var endTime = +new Date();
            var updateTime = endTime - startTime;
            console.log('Time used:', updateTime);
        }
    })
        if (option && typeof option === 'object') {
            myChart.setOption(option);
        }
</script>
</body>
</html>
最终结果

完成了毕业设计的一小部分,记录一下,小有收获!

旨在为数千万中国开发者提供一个无缝且高效的云端环境,以支持学习、使用和贡献开源项目。
更多推荐


 1
1 0
0- 0


 已为社区贡献1条内容

所有评论(0)