
Redis三主三从集群搭建(docker版)
在本地找不到,会到远程仓库查找镜像https://cr.console.aliyun.com/cn-beijing/instances4.重启daemon5.重启docker2.部署规划图3.从redis6.0.8中得到一份redis.conf的配置文件1.将压缩包上传到/opt目录下3.复制一份redis.conf到/app/redis目录下4.查看配置文件2.设置redis密码 require
·
文章目录
- 1.分布式存储算法
- 2.基础环境搭建
- 1.给六台机器都安装docker
- 2.部署规划图
- 3.配置一个基础的Redis容器
- 4.使用阿里云镜像仓库,将Redis容器制作为镜像发布(暂时使用不了)
- 5.配置另外五台机器(方式类似以49.232.227.185为例)
- 3.集群搭建
- 4.主从扩容和主从缩容
1.分布式存储算法
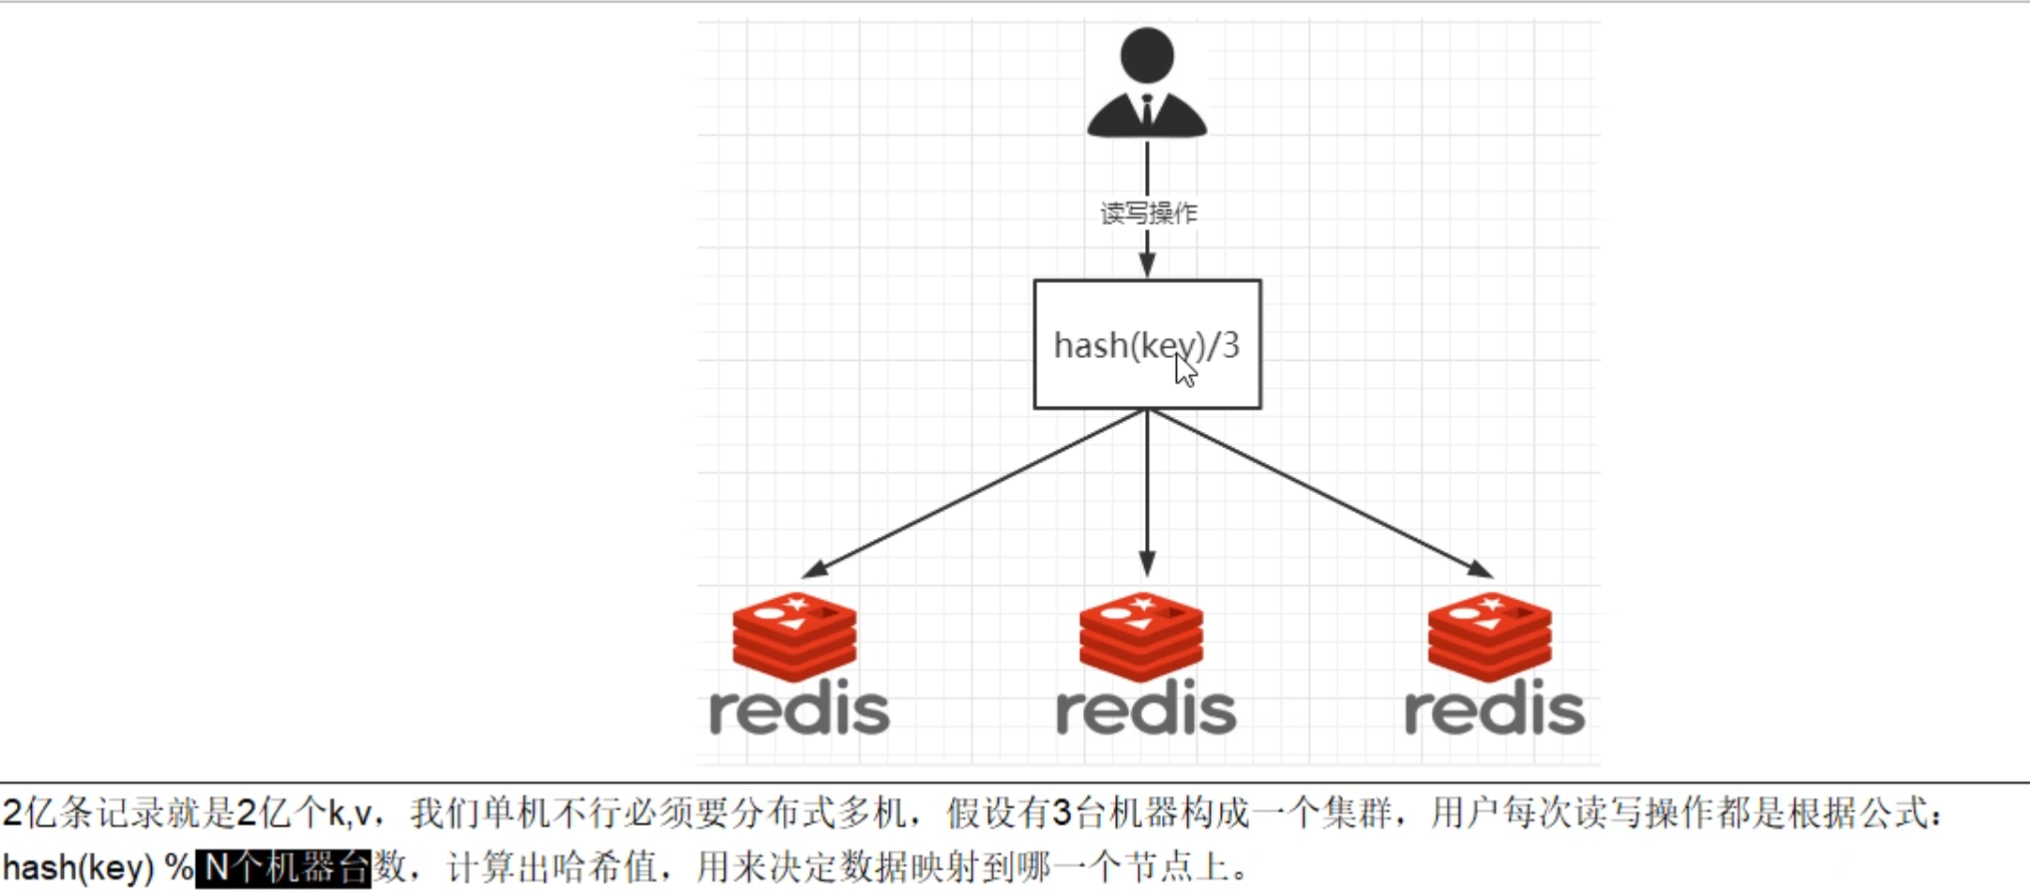
1.哈希取余算法

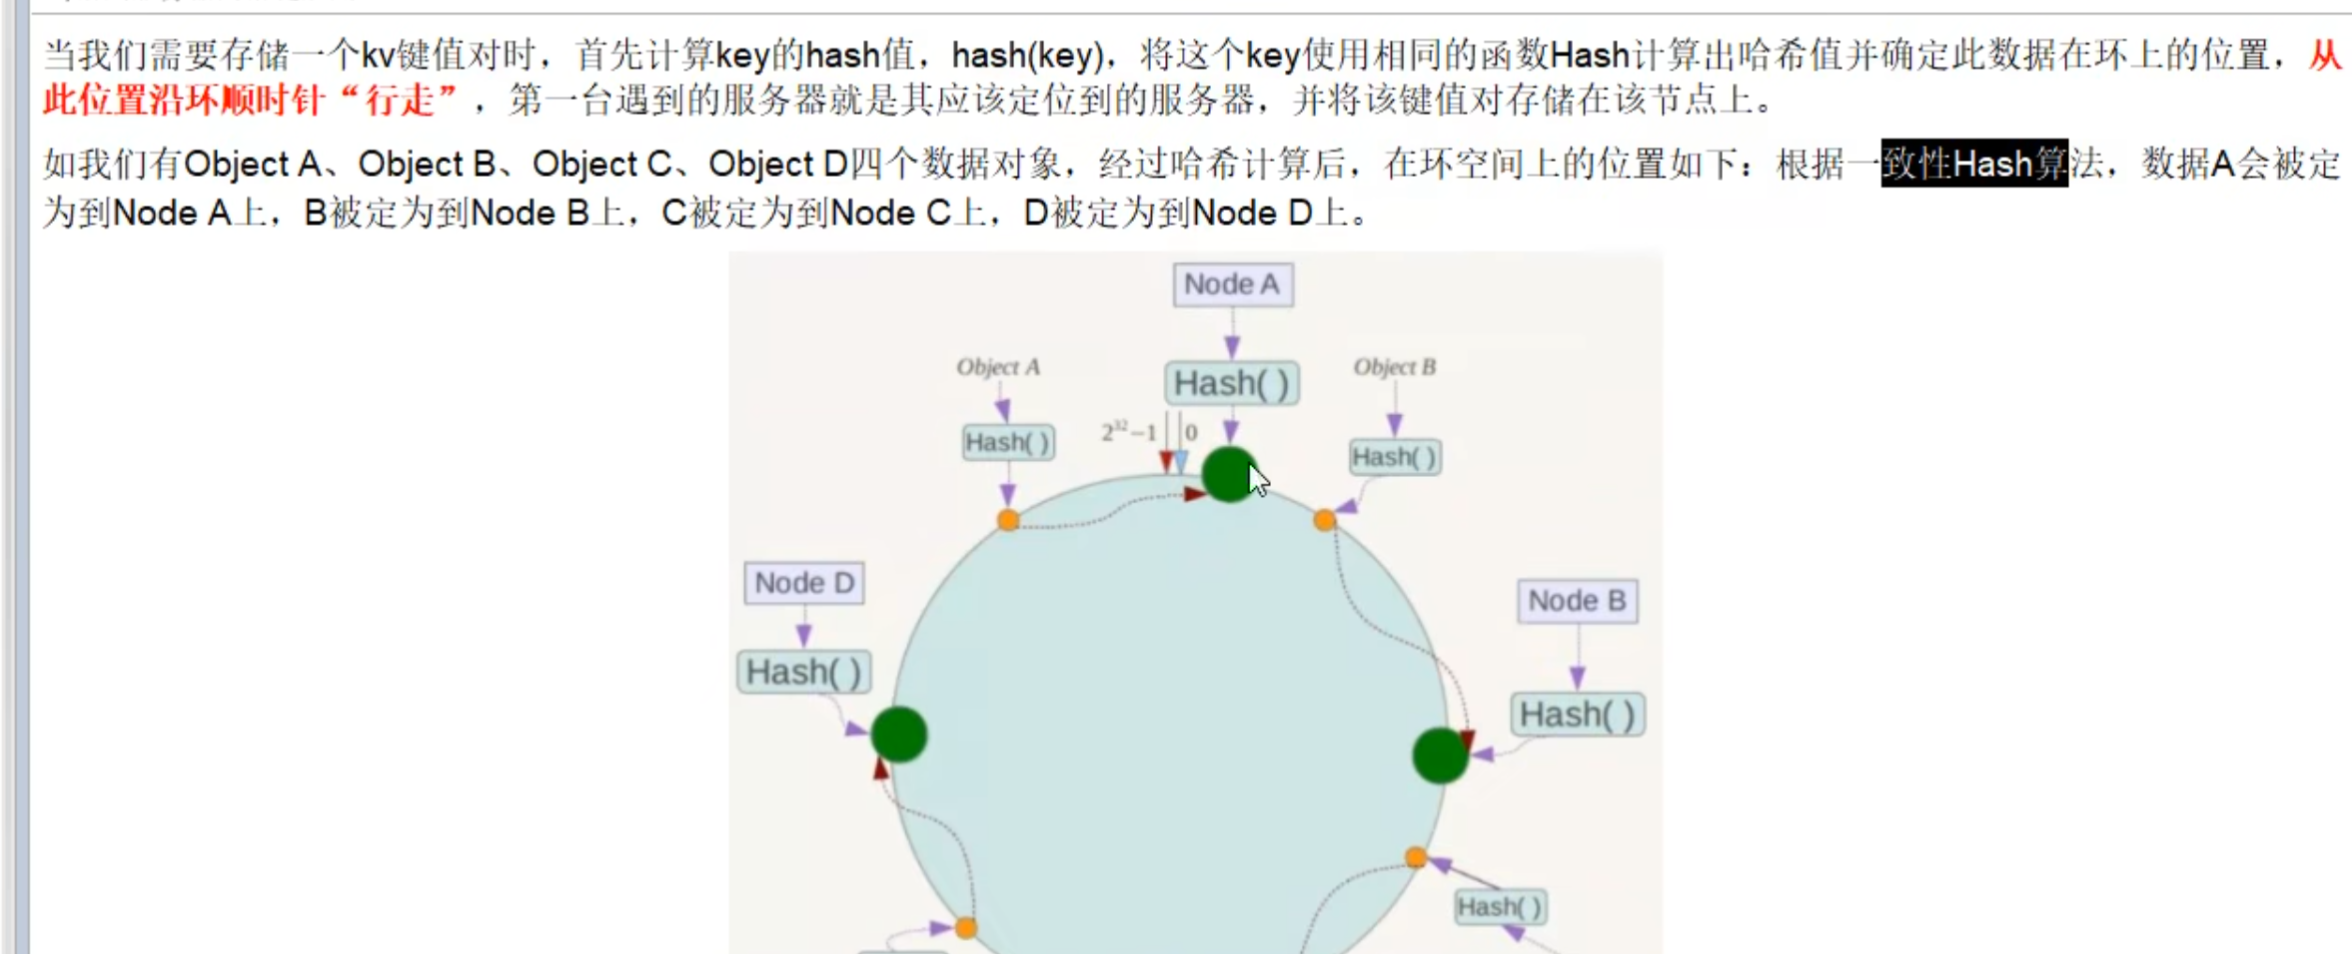
2.一致性哈希算法
1.基本介绍


2.优点
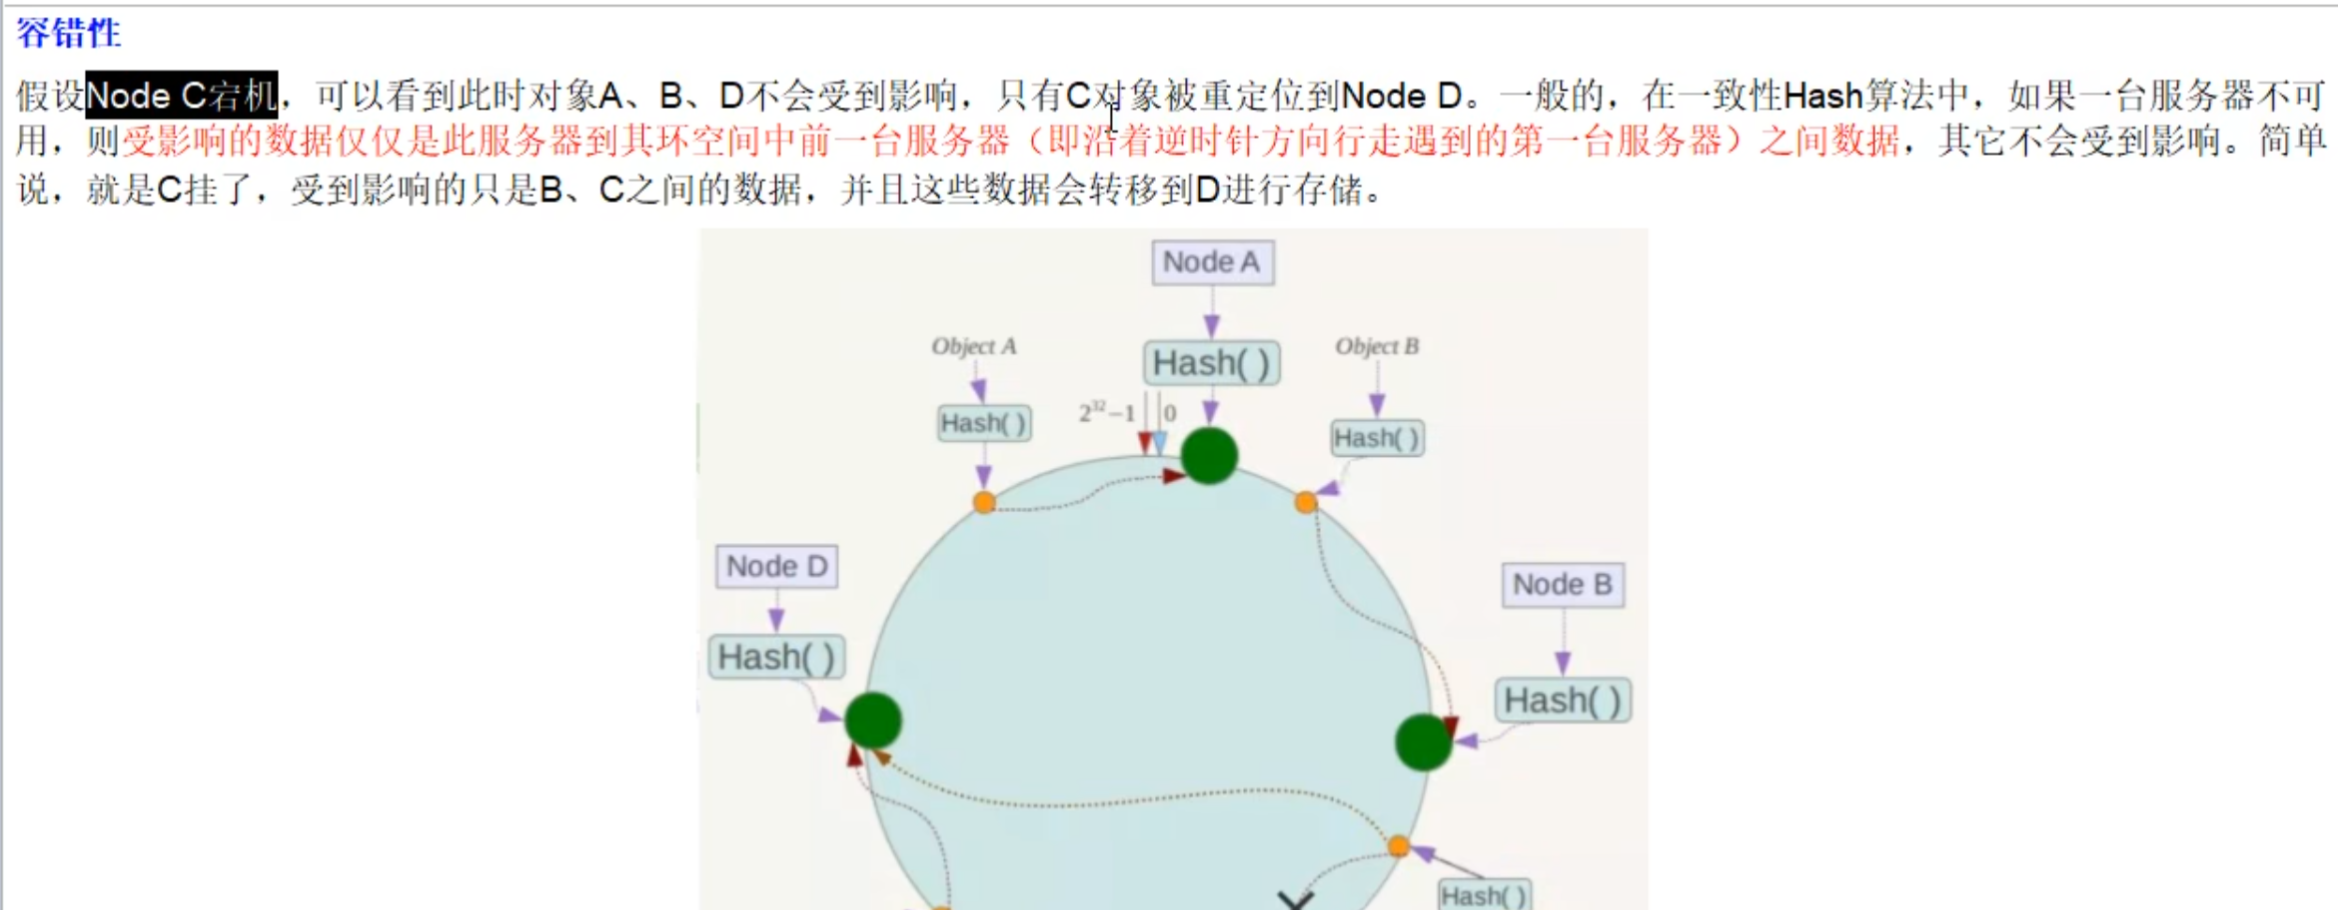
1.容错性
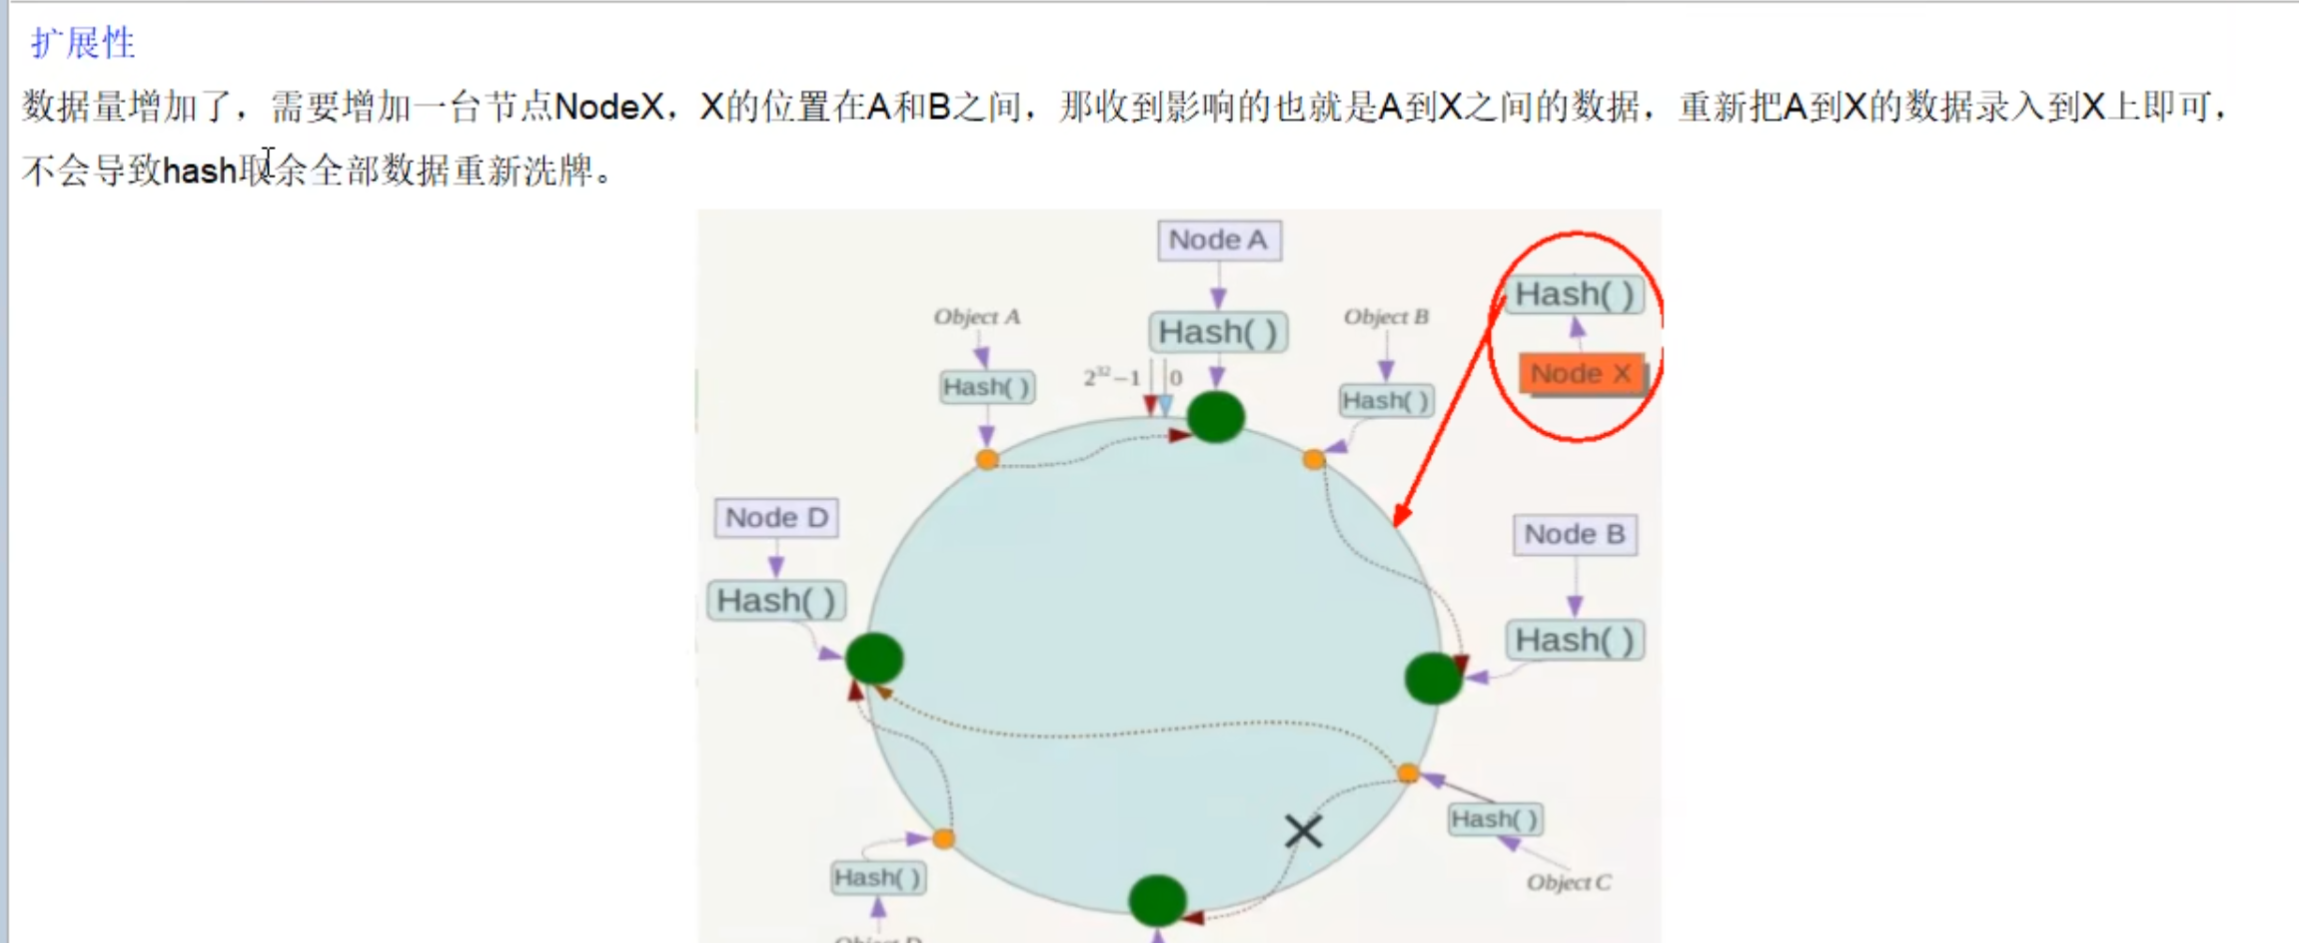
2.扩展性
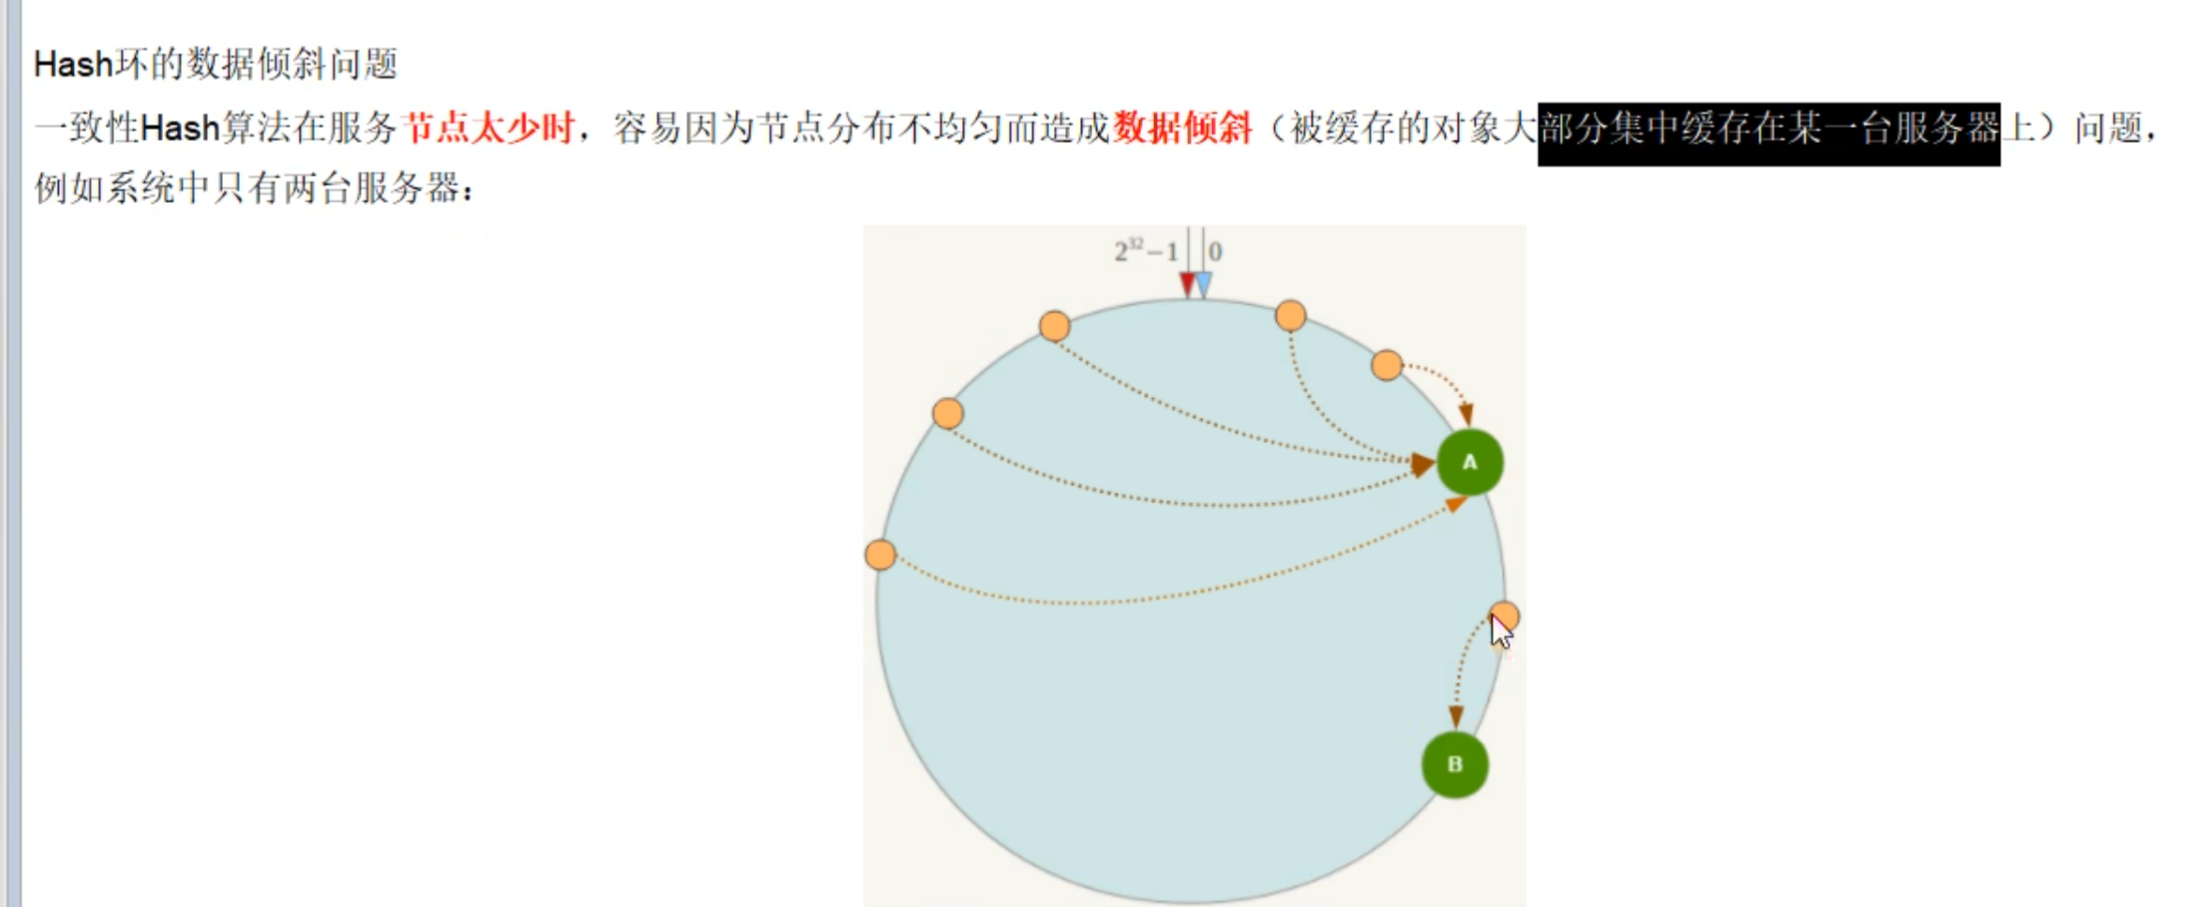
3.缺点:数据倾斜问题
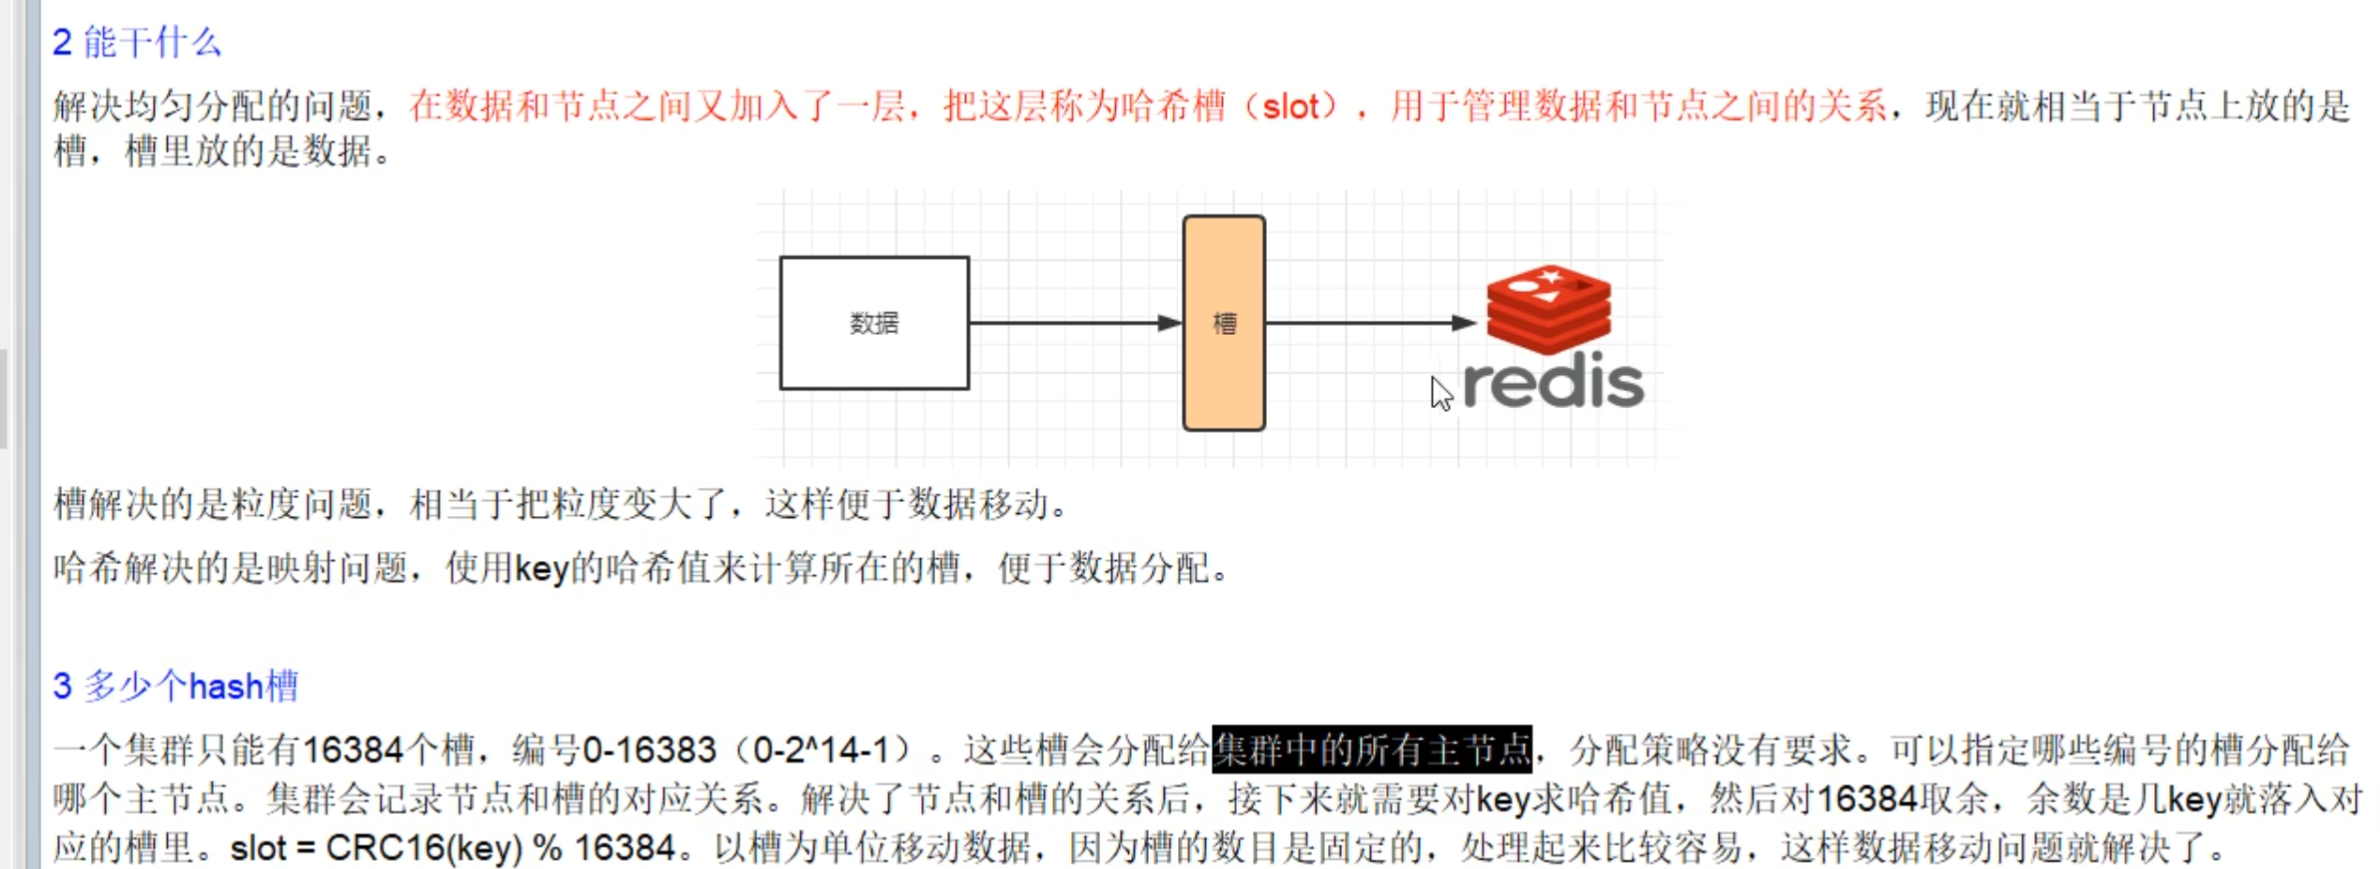
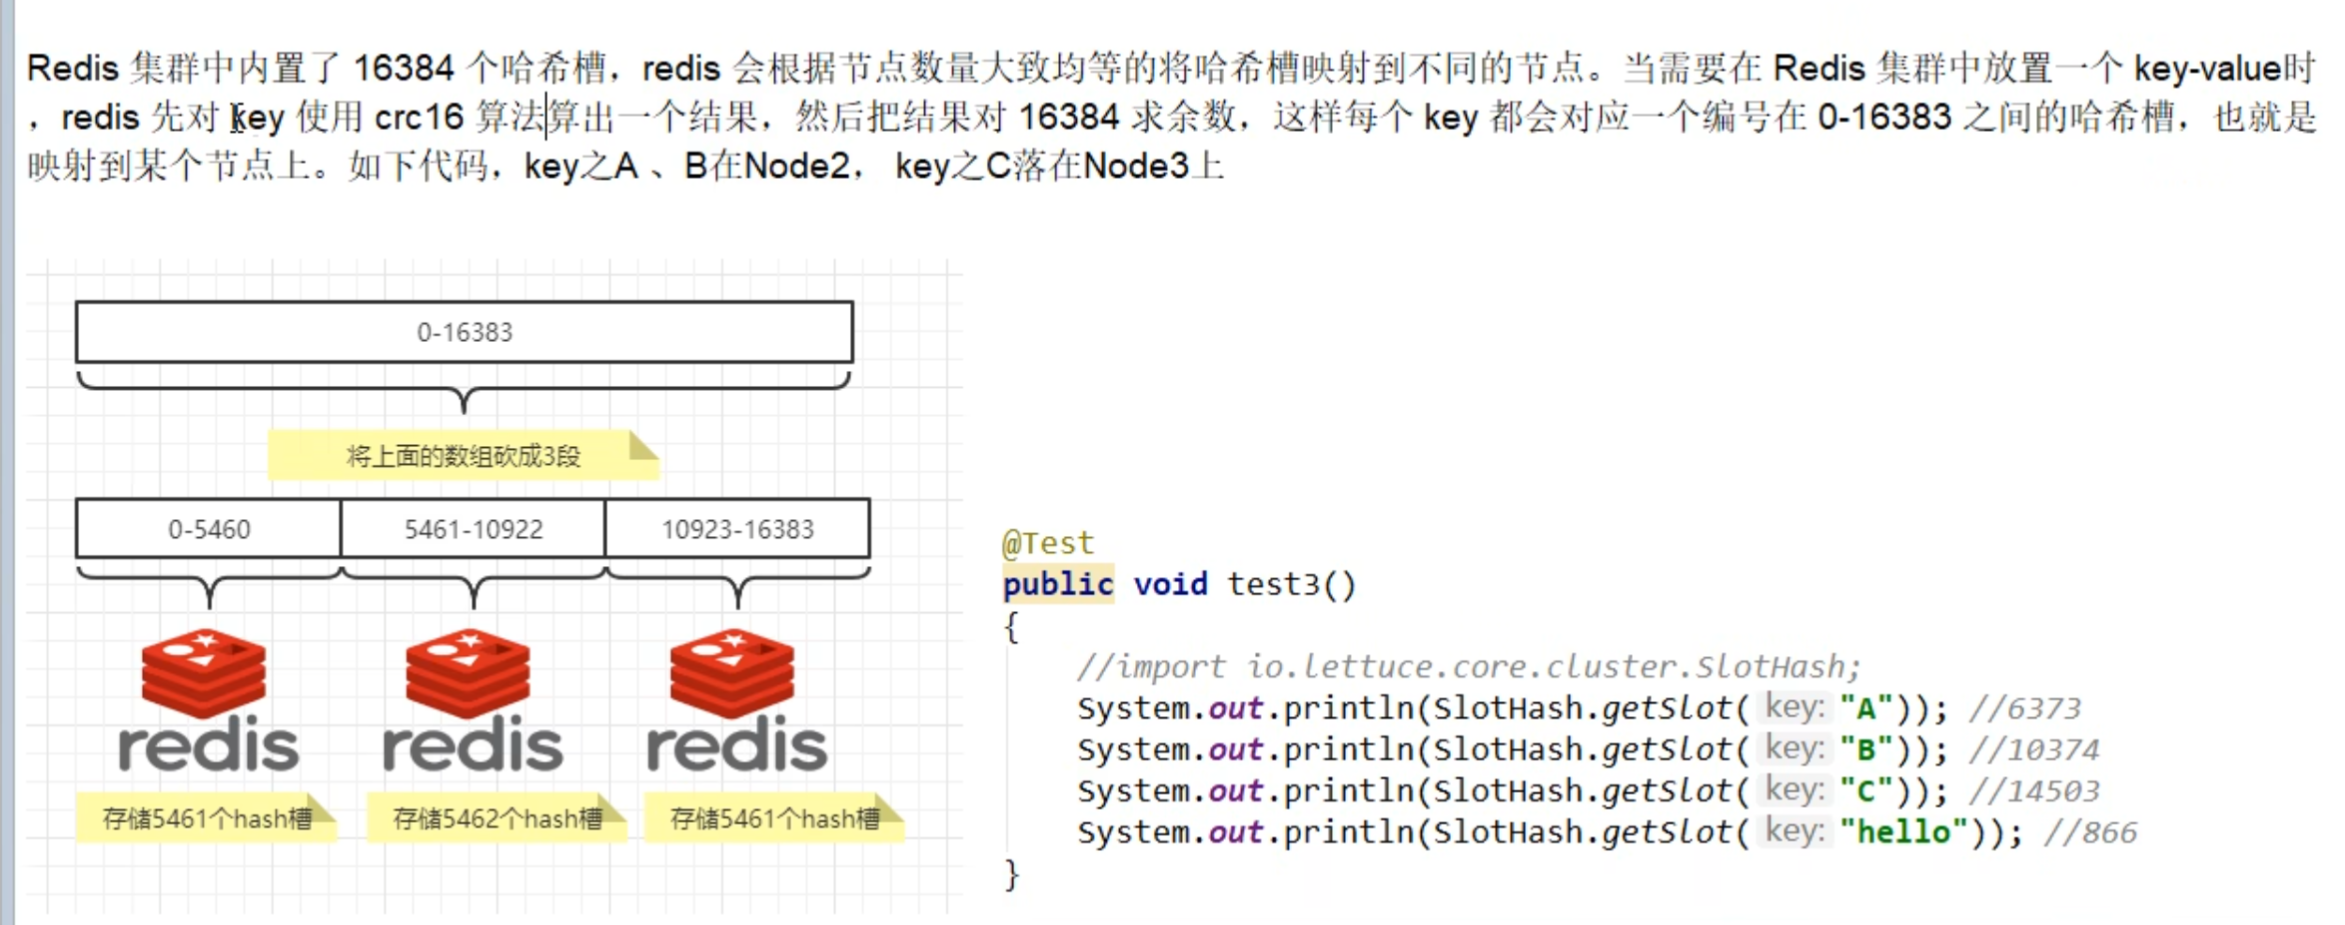
3.哈希槽分区(大厂常用)
2.基础环境搭建
1.给六台机器都安装docker
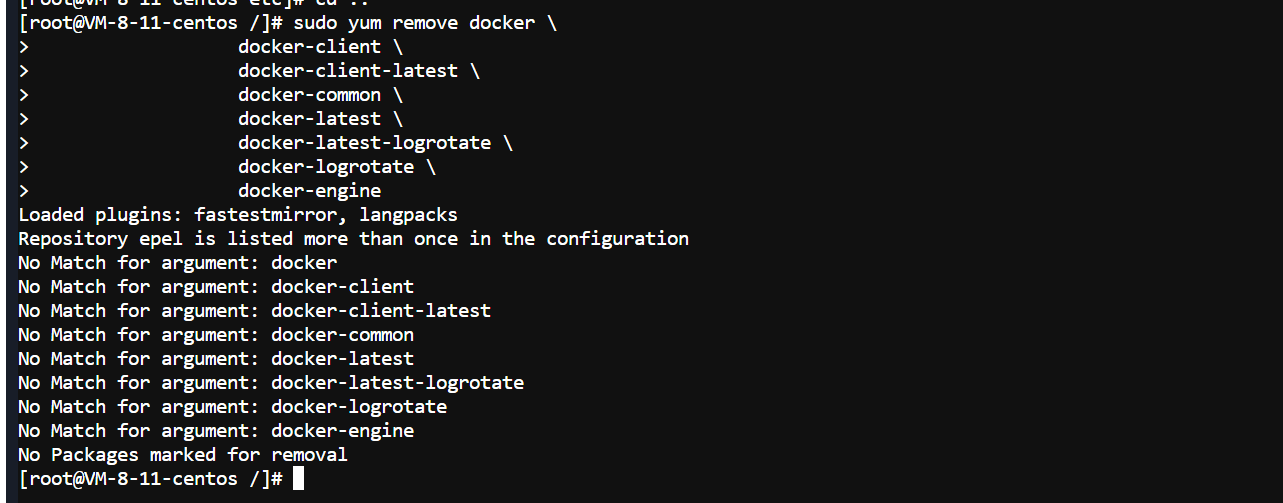
1.卸载旧版本的docker
sudo yum remove docker \
                  docker-client \
                  docker-client-latest \
                  docker-common \
                  docker-latest \
                  docker-latest-logrotate \
                  docker-logrotate \
                  docker-engine
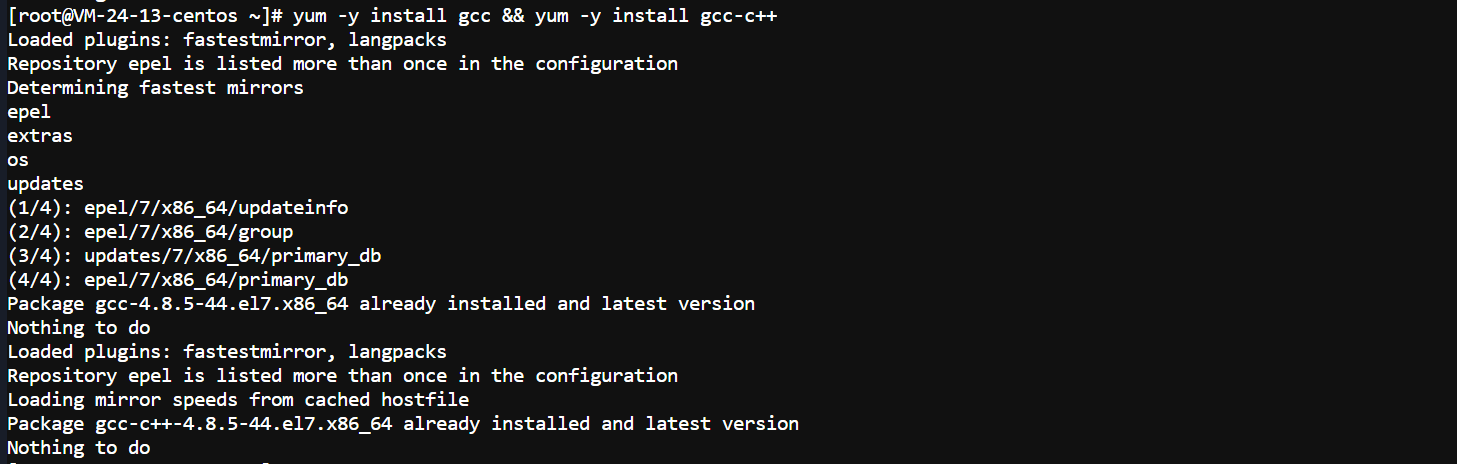
2.安装 gcc相关
yum -y install gcc && yum -y install gcc-c++
3.安装yum-utils软件包
yum install -y yum-utils

4.docker设置阿里云的镜像仓库,最好不要设置国外的

yum-config-manager --add-repo http://mirrors.aliyun.com/docker-ce/linux/centos/docker-ce.repo

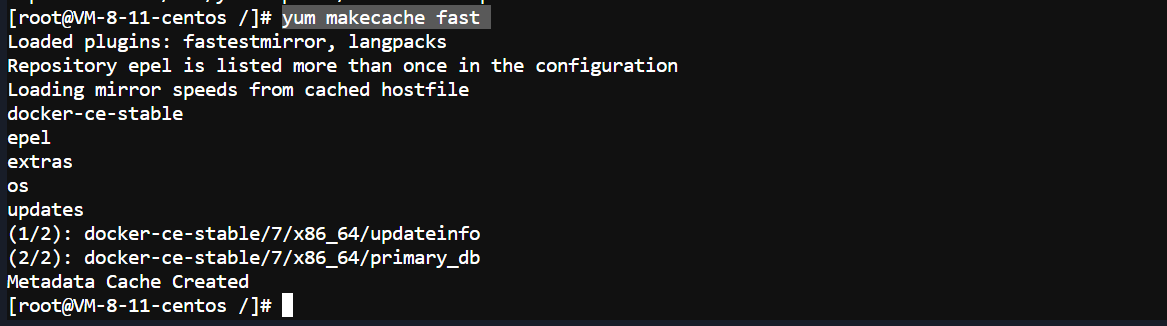
5.更新yum包的索引(linux基础,以后使用yum会快一些)
yum makecache fast
6.安装最新版的docker
yum install docker-ce docker-ce-cli containerd.io docker-buildx-plugin docker-compose-plugin

7.启动docker进程并查看docker是否成功启动
systemctl start docker && ps -aux | grep docker

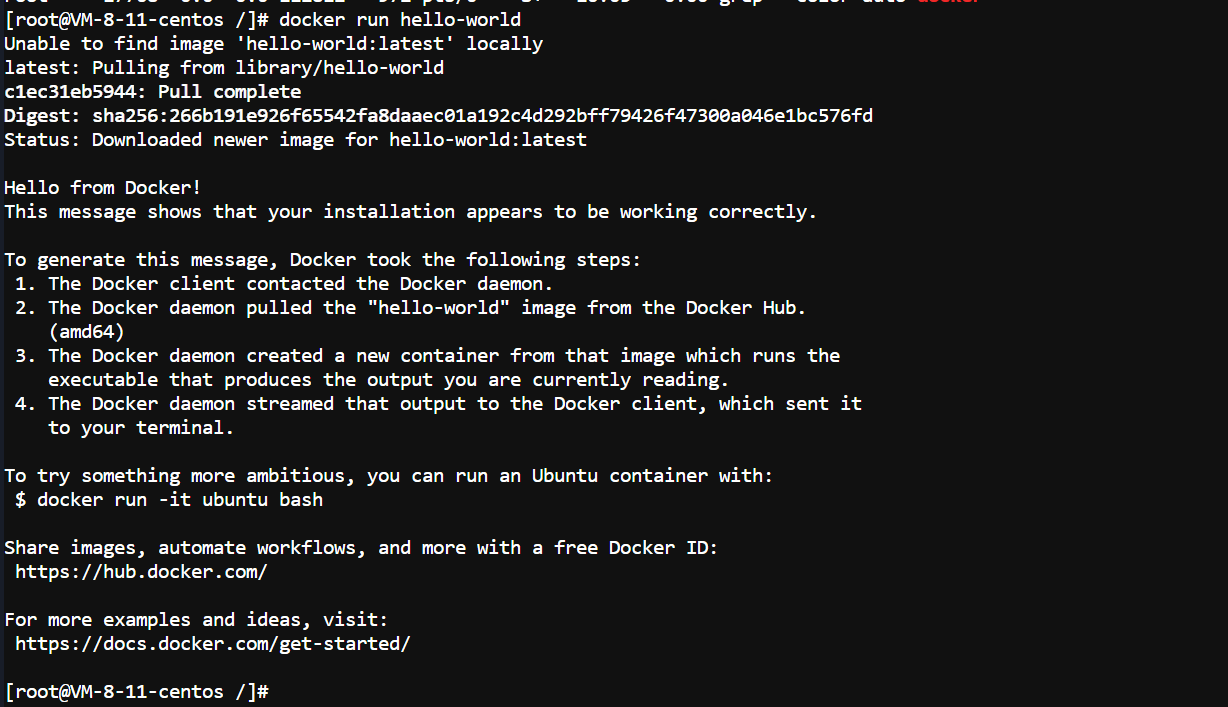
8.运行docker
在本地找不到,会到远程仓库查找镜像
docker run hello-world
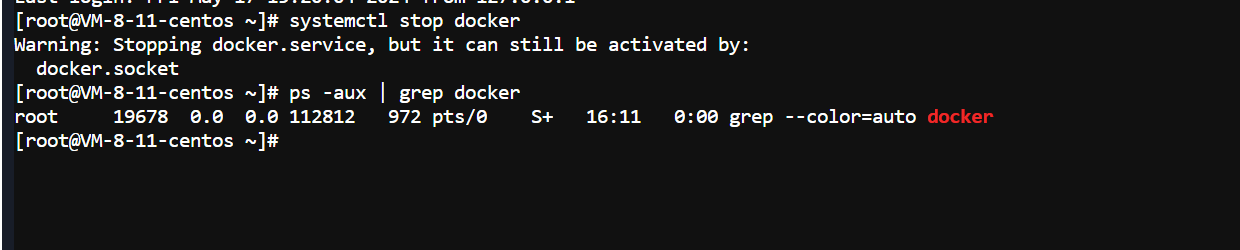
9.停止docker
systemctl stop docker && ps -aux | grep docker
10.设置docker自启动并确认是否设置成功!
systemctl enable docker && systemctl is-enabled docker

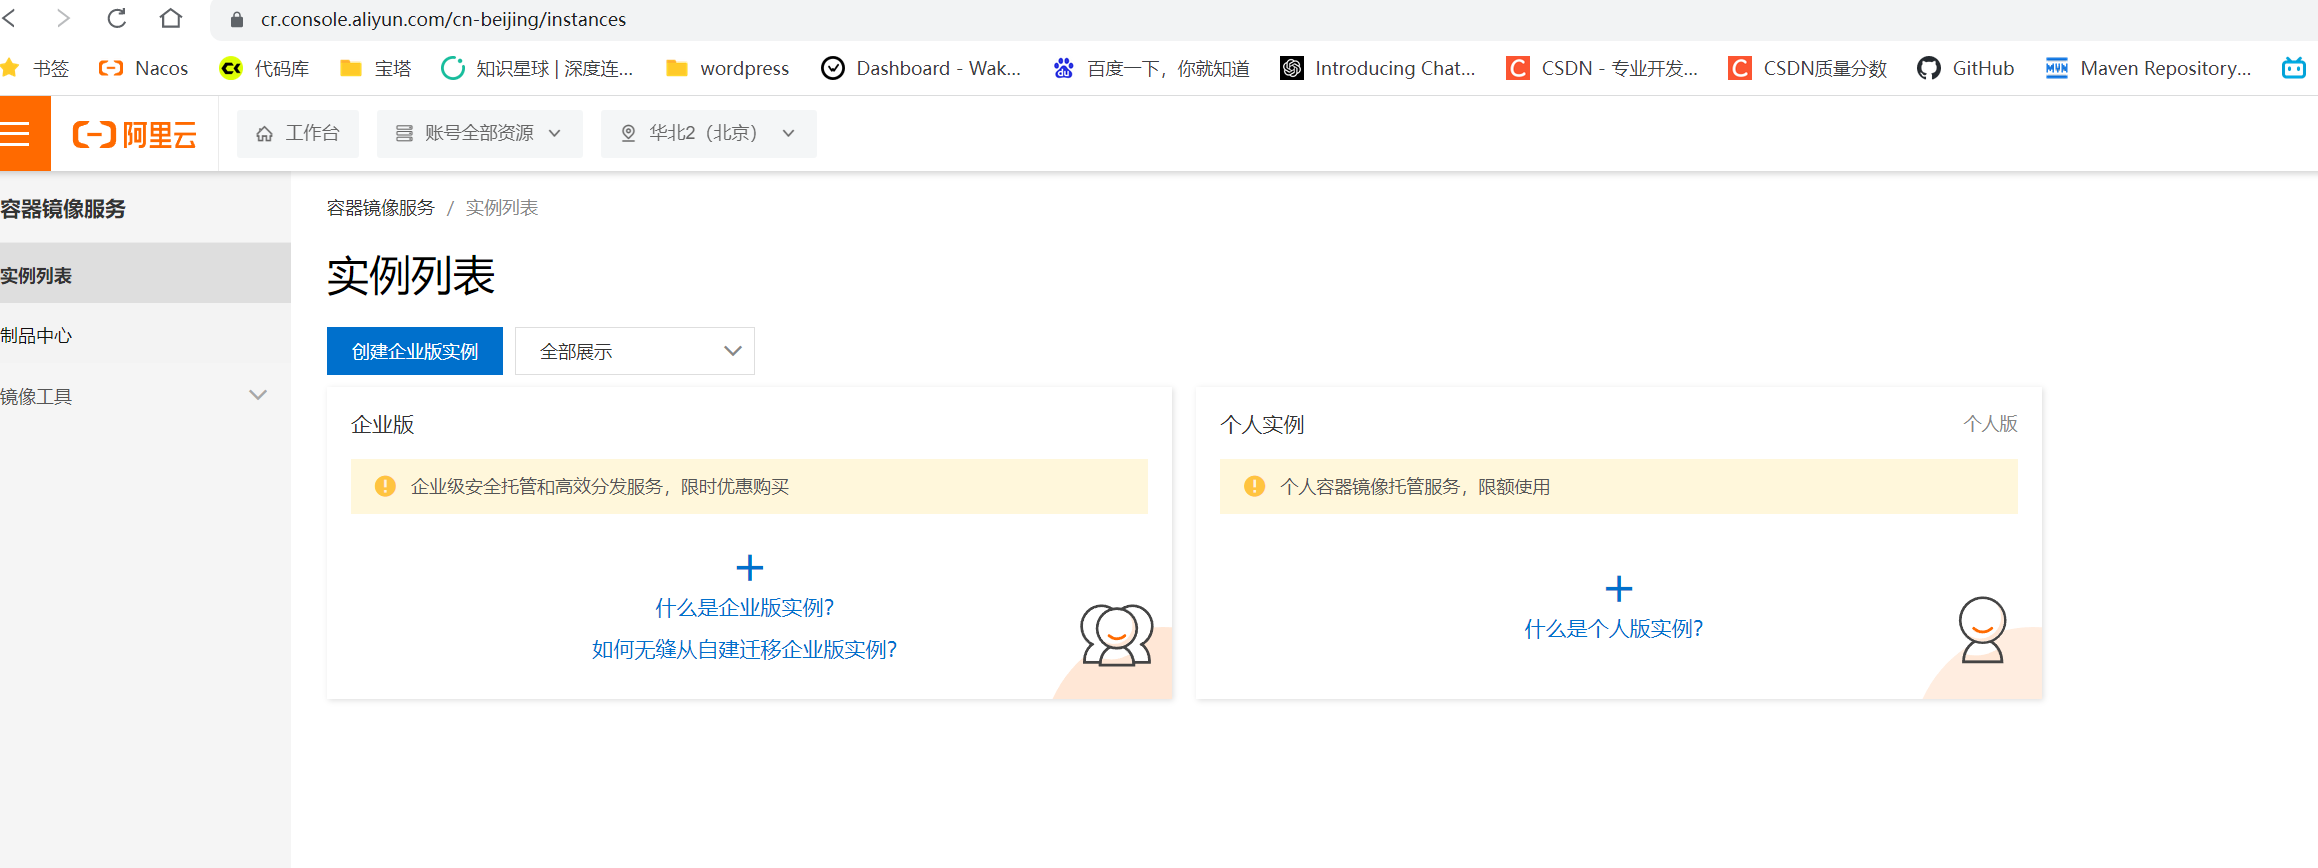
11.阿里云镜像加速器配置
1.找到容器镜像服务
https://cr.console.aliyun.com/cn-beijing/instances
2.得到镜像加速器地址
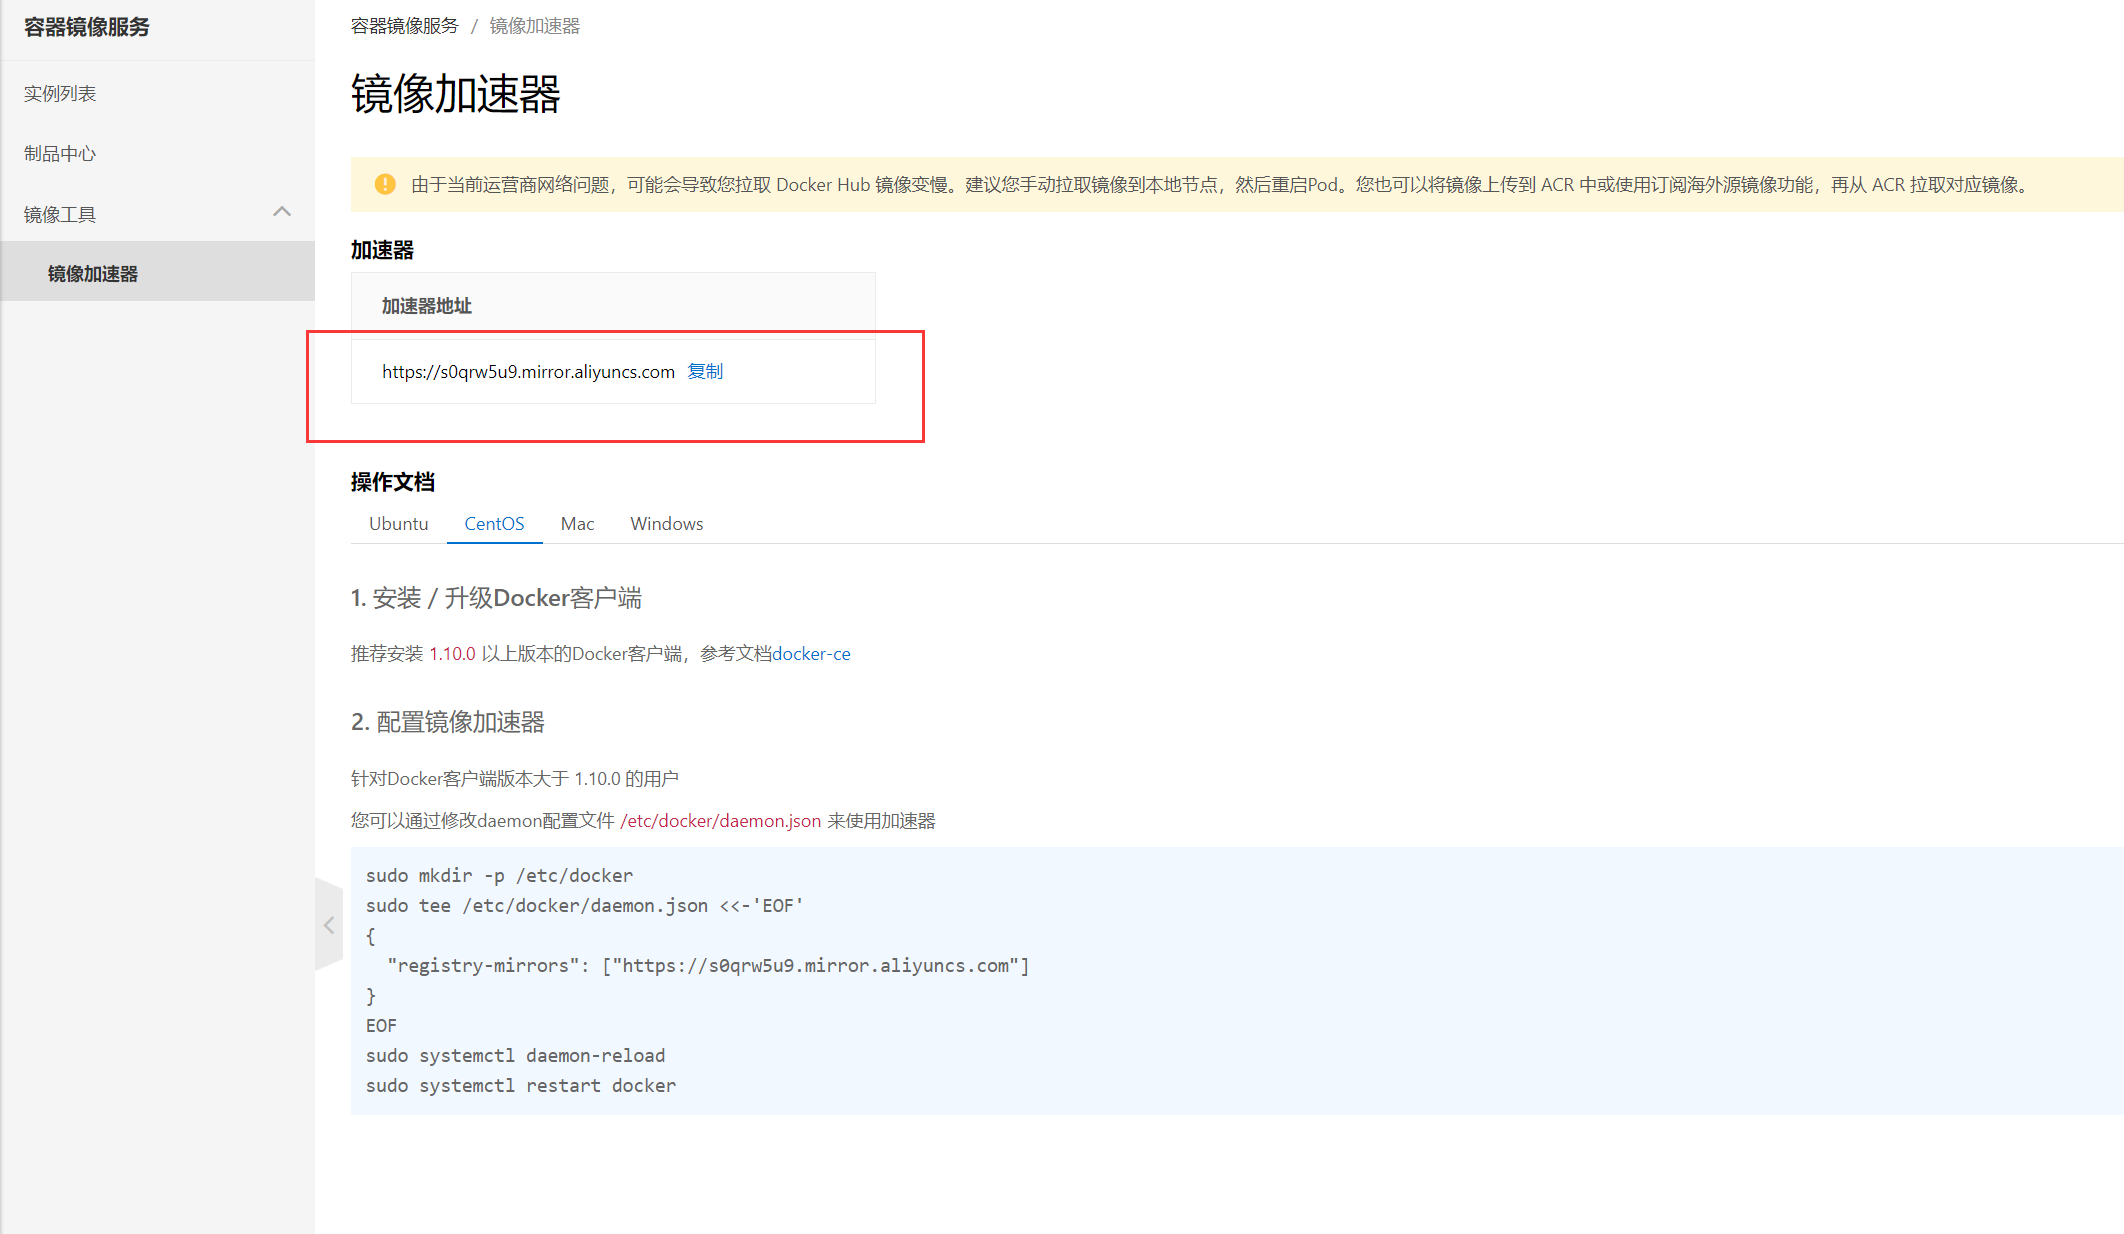
3.创建目录,并通过修改daemon配置文件/etc/docker/daemon.json来使用加速器
mkdir -p /etc/docker && tee /etc/docker/daemon.json <<-'EOF'
{
  "registry-mirrors": ["https://s0qrw5u9.mirror.aliyuncs.com"]
}
EOF
4.重启daemon
systemctl daemon-reload
5.重启docker
systemctl restart docker && ps -aux | grep docker
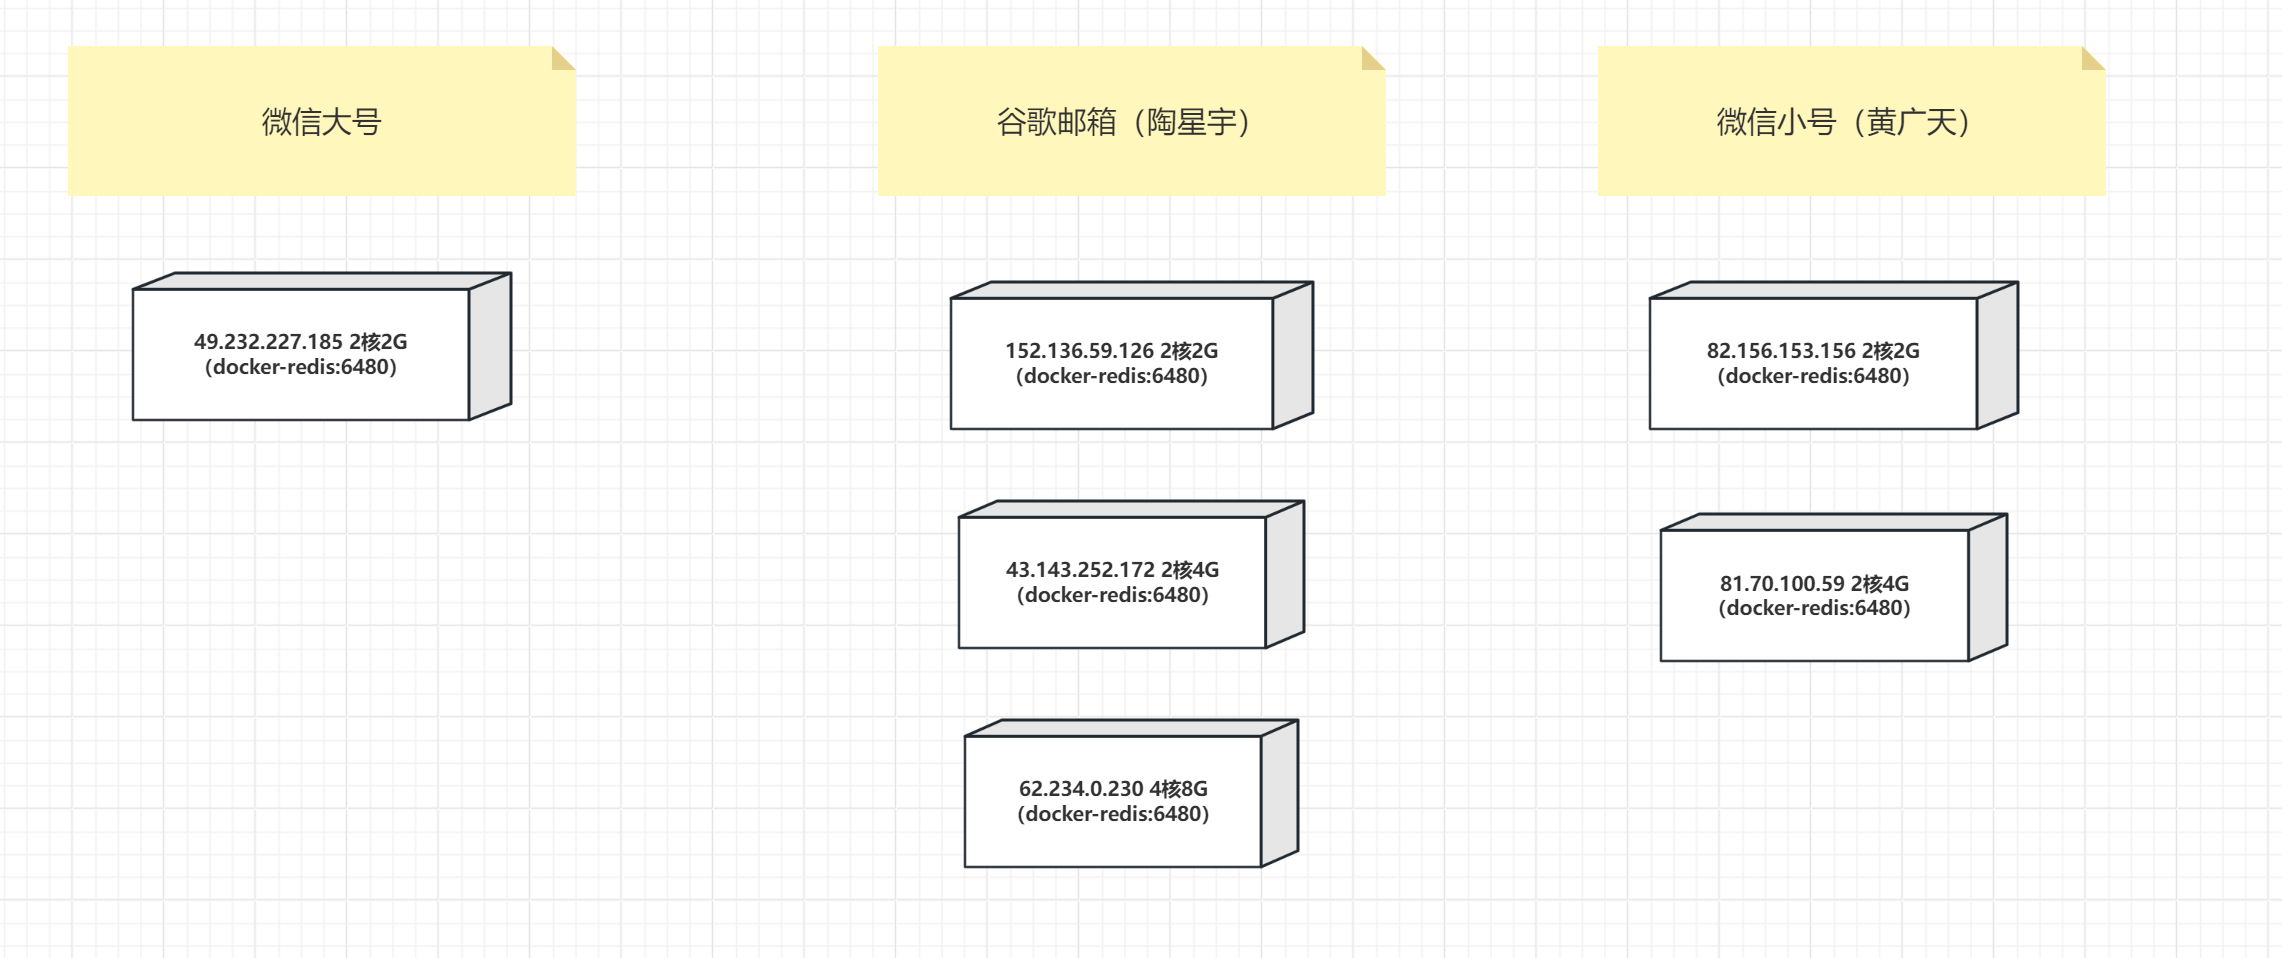
2.部署规划图
3.配置一个基础的Redis容器
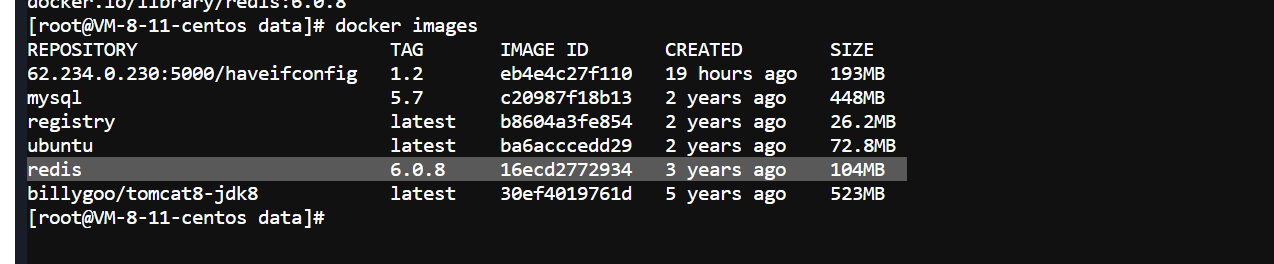
1.拉取redis:6.0.8到本地
docker pull redis:6.0.8
2.在宿主机新建目录 /app/redis,存放redis的配置文件
mkdir -p /app/redis
3.从redis6.0.8中得到一份redis.conf的配置文件
1.将压缩包上传到/opt目录下
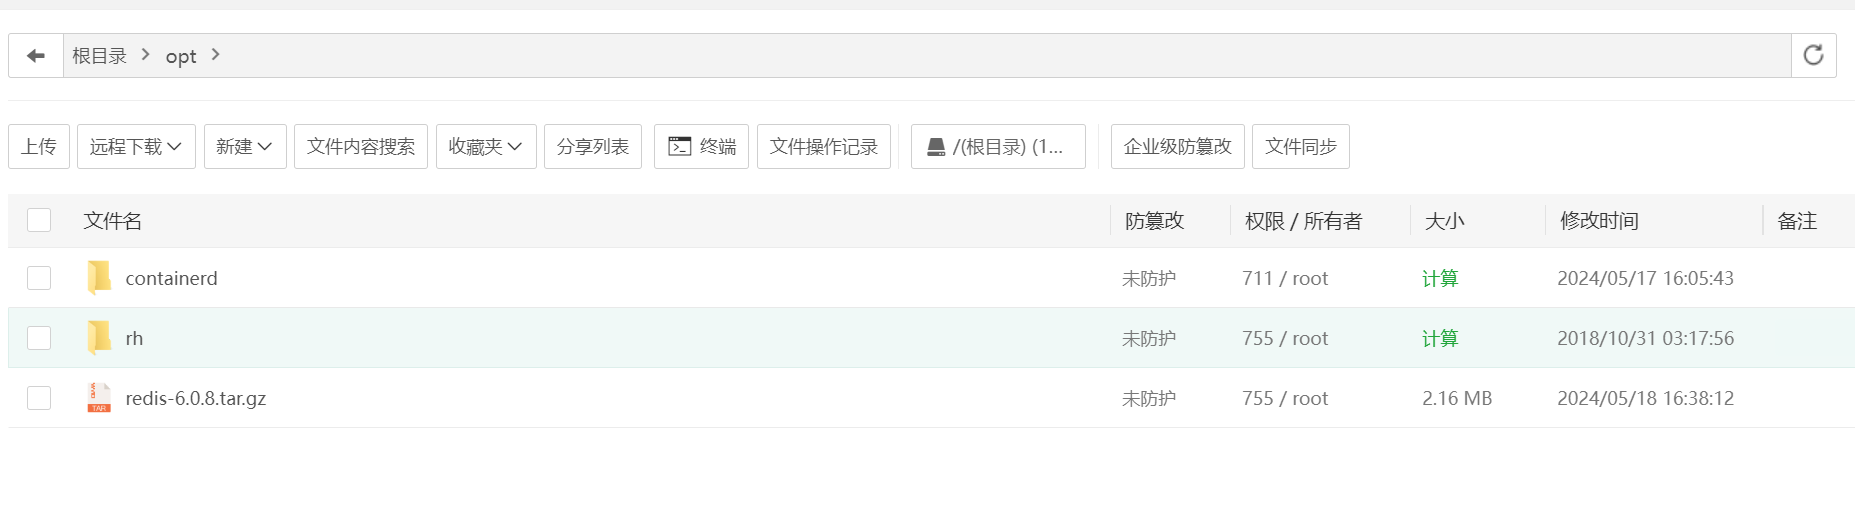
2.进入/opt目录然后解压
cd /opt && tar -zxvf redis-6.0.8.tar.gz
3.复制一份redis.conf到/app/redis目录下
cp /opt/redis-6.0.8/redis.conf /app/redis/redis.conf
4.查看配置文件
ll /app/redis

4.对配置文件进行修改
1.编辑配置文件
vim /app/redis/redis.conf
2.设置redis密码 requirepass foobared

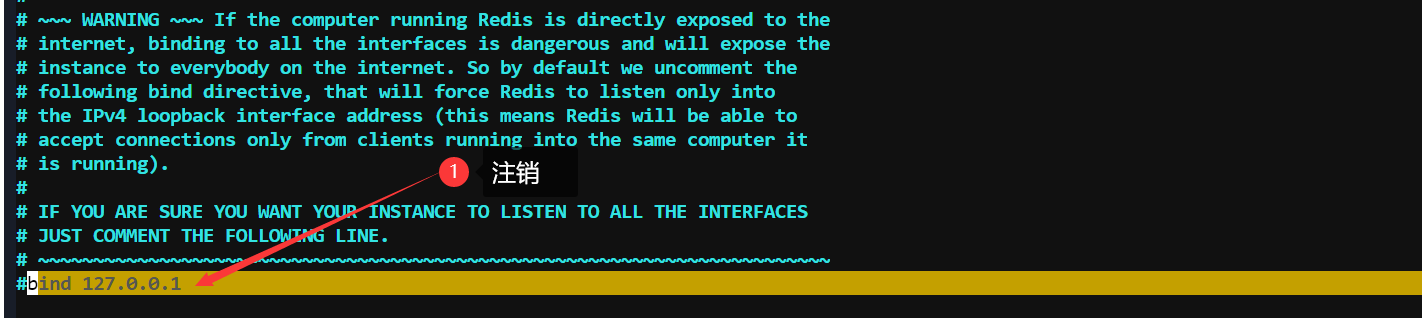
3.使redis支持远程访问 bind 127.0.0.1 和 protected-mode

4.设置daemonize no,如果是yes会与docker的-d方式冲突

5.启动Redis
- 端口映射为6480
- 名字为redis-cluster
- /app/redis/redis.conf 挂载 /etc/redis/redis.conf
- /app/redis/data:/data 挂载 /data
- -d:后台启动
- redis:6.0.8:镜像名字
- redis-server /etc/redis/redis.conf 指定容器中的配置文件来启动
docker run -p 6480:6379 --name redis-cluster --privileged=true \
-v /app/redis/redis.conf:/etc/redis/redis.conf \
-v /app/redis/data:/data -d redis:6.0.8 \
redis-server /etc/redis/redis.conf

6.连接Redis
1.使用exec命令进入redis容器
docker exec -it redis-cluster /bin/bash

2.连接redis-cli
- 这里的-p指向的是容器的redis端口默认是6379
- -a参数指定密码
redis-cli -p 6379 -a
3.进行操作测试

7.开放6480端口
1.宝塔开启
systemctl start firewalld && firewall-cmd --permanent --add-port=6480/tcp && firewall-cmd --reload && firewall-cmd --query-port=6480/tcp

2.腾讯云开启

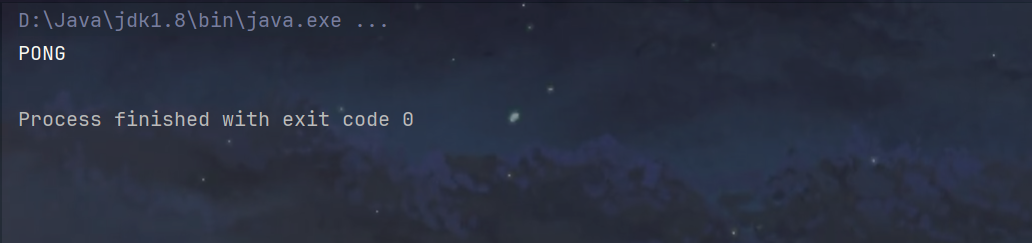
8.使用Jedis连接Redis测试
4.使用阿里云镜像仓库,将Redis容器制作为镜像发布(暂时使用不了)
1.访问阿里云的容器镜像服务
https://cr.console.aliyun.com/cn-beijing/instance/repositories
2.创建一个命名空间sunxiansheng,设置公开

3.创建镜像仓库,记得选择命名空间
1.创建仓库
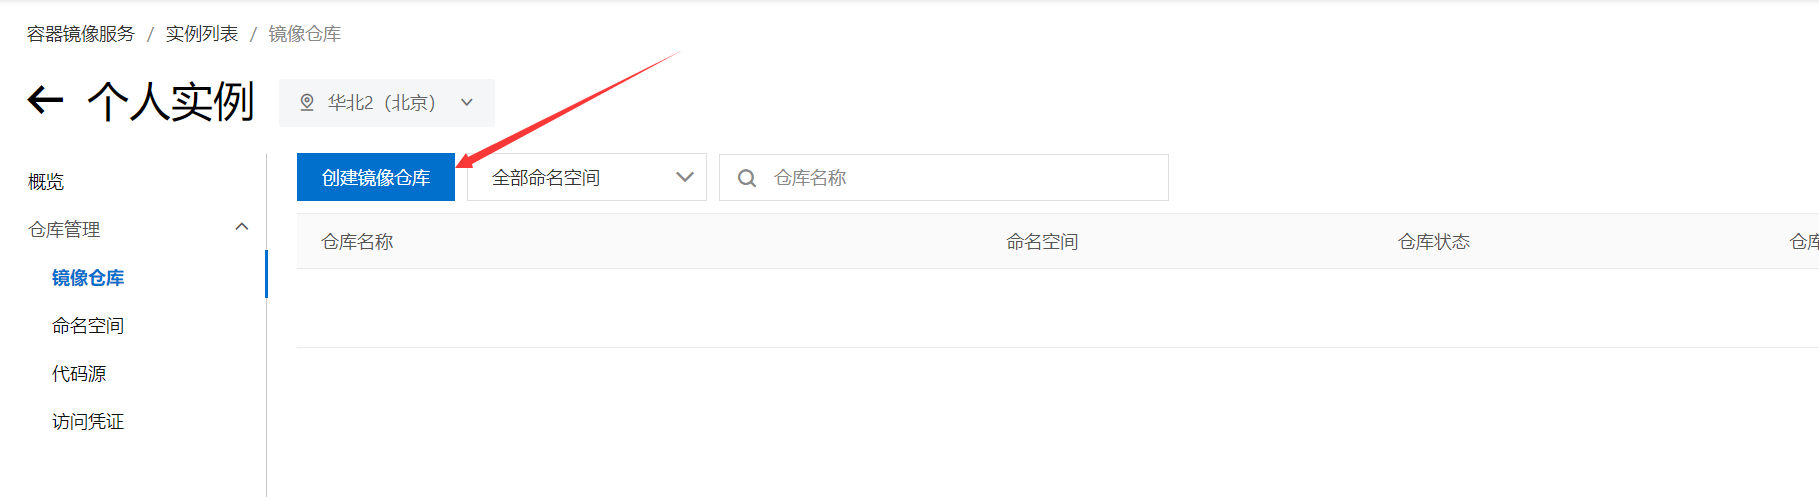
2.进行配置,选择命名空间和仓库名称
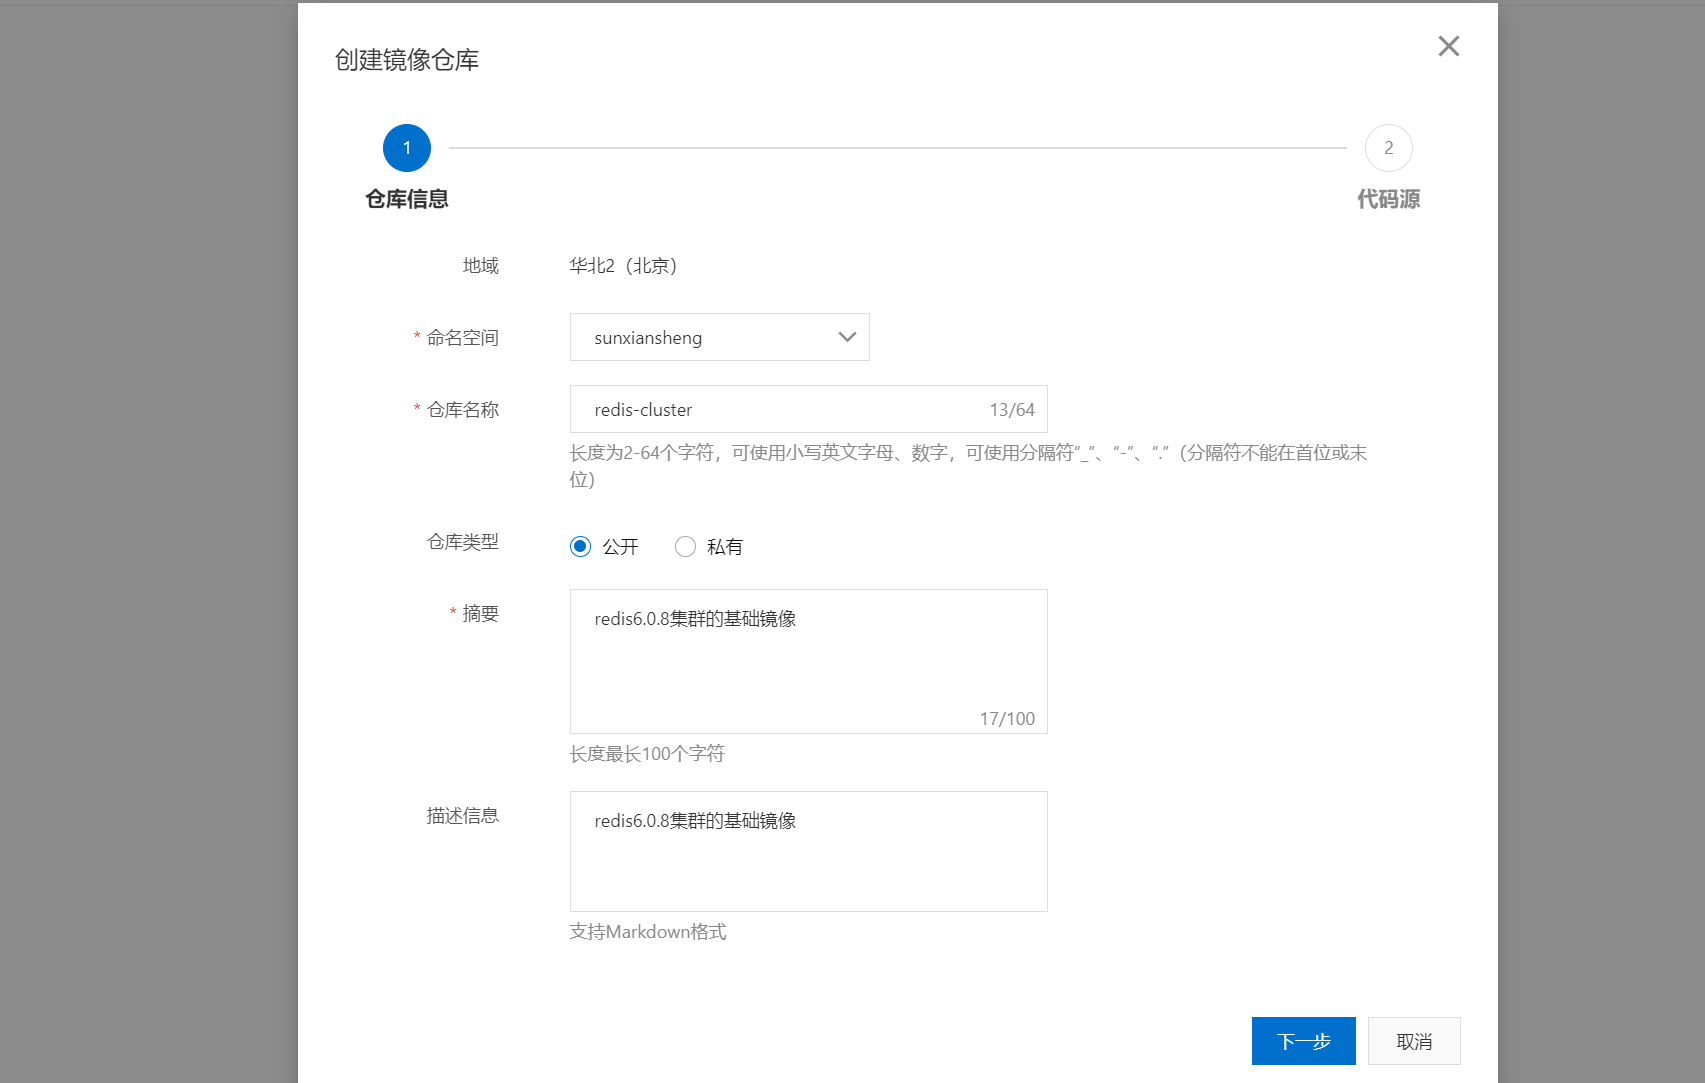
3.选择本地仓库

4.创建成功!
4.将redis容器commit到我们的新镜像(在容器外执行)
1.命令格式
docker commit -m="[提交的信息]" -a="[作者名字]" [ImageId] [名称:版本号]
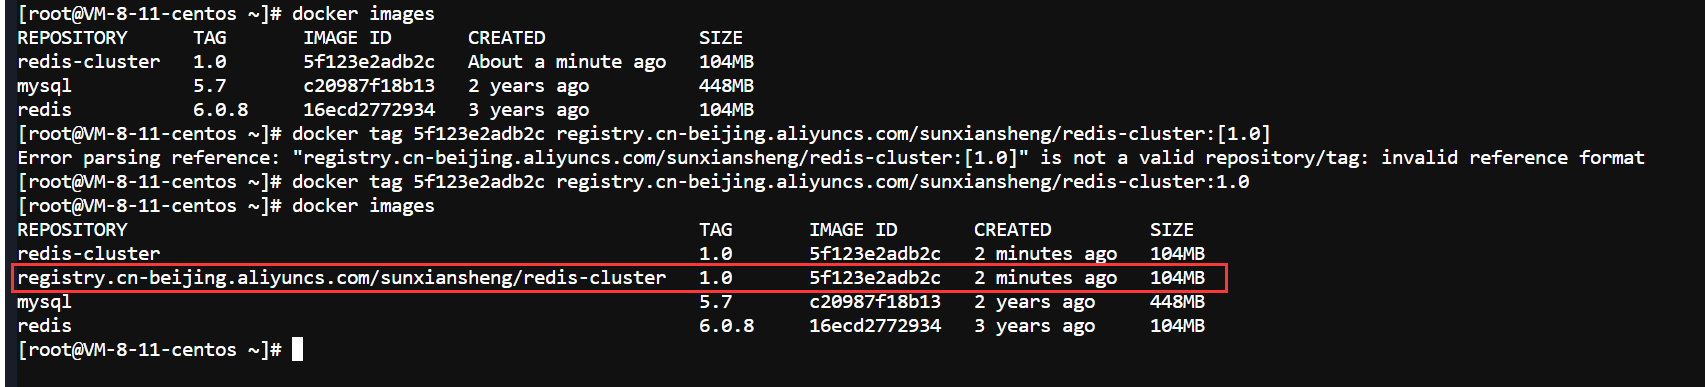
2.查看redis容器的ImageId,并执行命令,构建新镜像 redis-cluster:1.0
docker commit -m="redis集群基础镜像" -a="sun" 85e0dc53515f redis-cluster:1.0

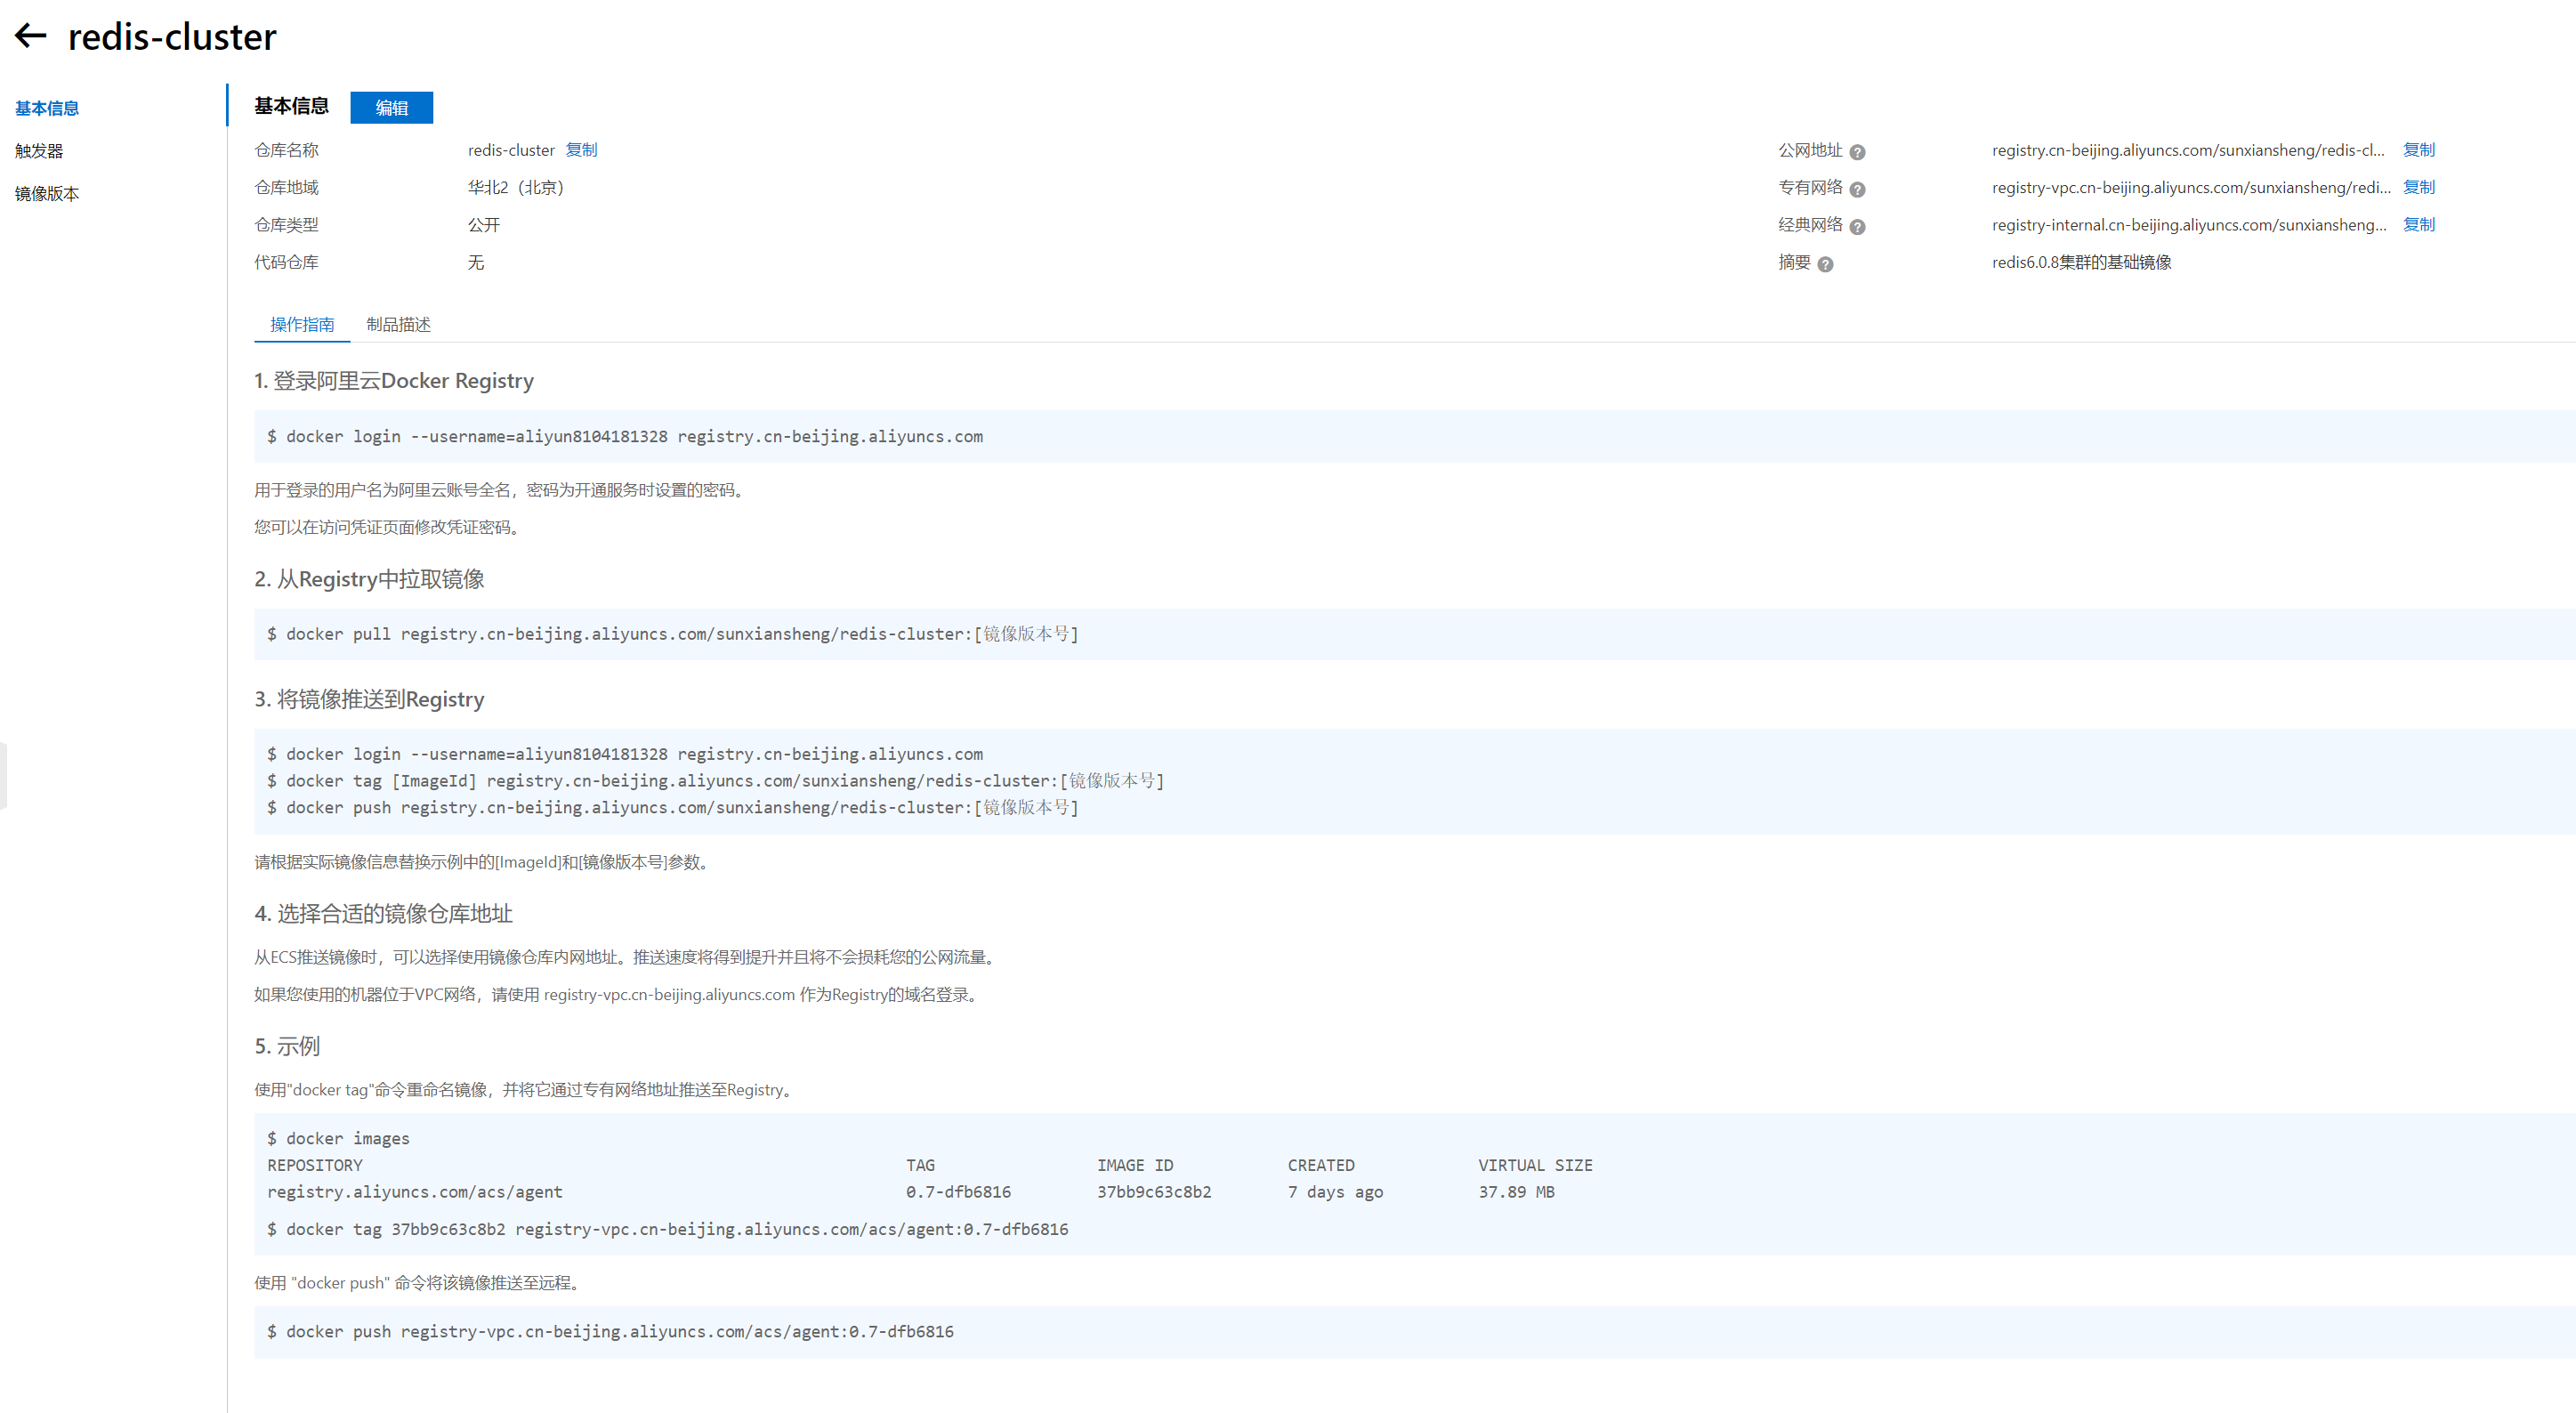
5.将本地镜像发布到阿里云镜像仓库(根据阿里云提供的指令即可)

1.首先登录阿里云镜像仓库
docker login --username=aliyun8104181328 registry.cn-beijing.aliyuncs.com


2.根据要求设置要推送的本地镜像
docker tag [ImageId] registry.cn-beijing.aliyuncs.com/sunxiansheng/redis-cluster:[镜像版本号]
docker tag 5f123e2adb2c registry.cn-beijing.aliyuncs.com/sunxiansheng/redis-cluster:1.0
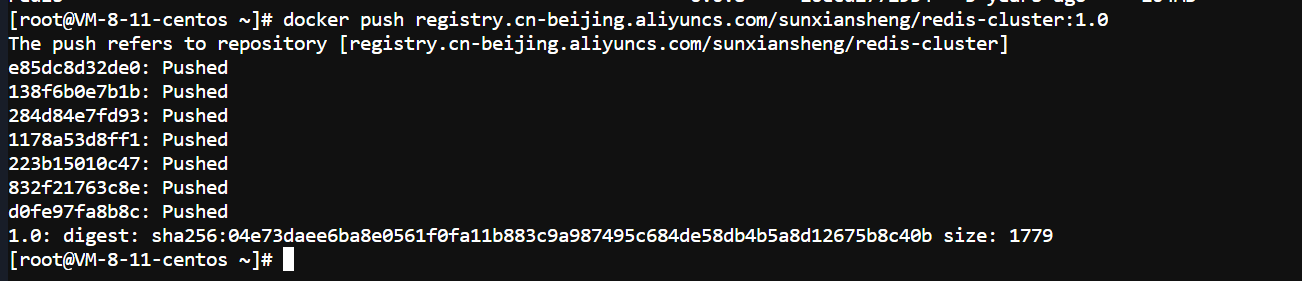
3.发布镜像到阿里云镜像仓库
docker push registry.cn-beijing.aliyuncs.com/sunxiansheng/redis-cluster:[镜像版本号]
docker push registry.cn-beijing.aliyuncs.com/sunxiansheng/redis-cluster:1.0
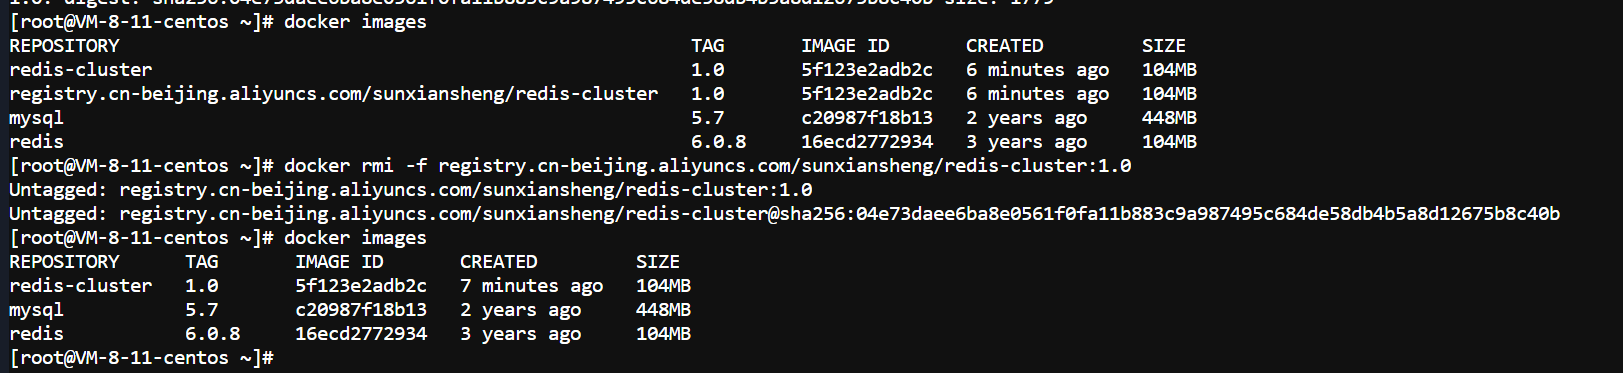
6.测试拉取镜像直接执行
1.首先删除本地的镜像
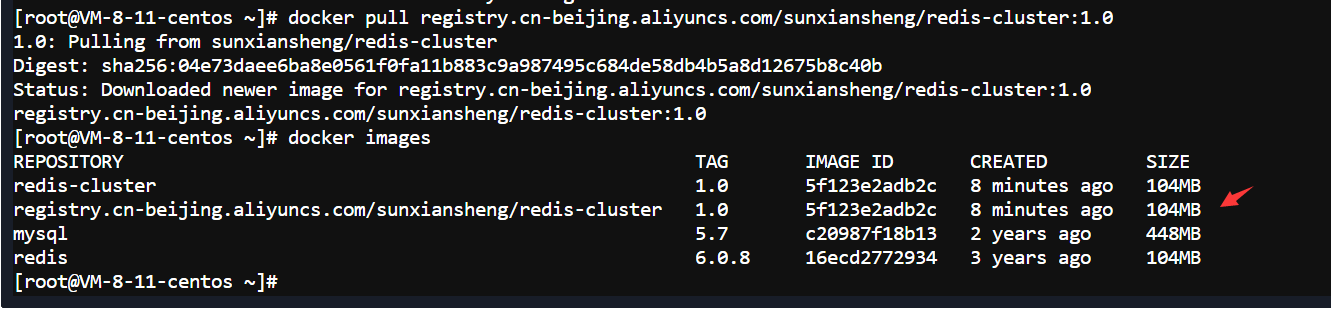
2.拉取镜像到本地

docker pull registry.cn-beijing.aliyuncs.com/sunxiansheng/redis-cluster:[镜像版本号]
docker pull registry.cn-beijing.aliyuncs.com/sunxiansheng/redis-cluster:1.0
3.删除之前进行目录挂载的/app/redis目录,为了测试启动镜像时会不会保留之前的配置
rm -rf /app/redis
4.还要删除本地的redis-cluster容器(保持环境干净)
docker rm -f redis-cluster

5.由于挂载的时候挂载了一个宿主机的/app/redis/redis.conf文件,所以需要手动创建,否则启动会失败
mkdir -p /app/redis && touch /app/redis/redis.conf
6.启动Redis
- 端口映射为6480
- 容器名字为redis-cluster
- /app/redis/redis.conf 挂载 /etc/redis/redis.conf
- /app/redis/data:/data 挂载 /data
- -d:后台启动
- registry.cn-beijing.aliyuncs.com/sunxiansheng/redis-cluster:1.0:镜像名字注意要带标签!
- redis-server /etc/redis/redis.conf 指定容器中的配置文件来启动
docker run -p 6480:6379 --name redis-cluster --privileged=true \
-v /app/redis/redis.conf:/etc/redis/redis.conf \
-v /app/redis/data:/data -d registry.cn-beijing.aliyuncs.com/sunxiansheng/redis-cluster:1.0 \
redis-server /etc/redis/redis.conf
7.自定义镜像需要Dockerfile,等学了之后再来补充
5.配置另外五台机器(方式类似以49.232.227.185为例)
1.拉取redis:6.0.8到本地
docker pull redis:6.0.8

2.在宿主机新建目录 /app/redis,存放redis的配置文件
mkdir -p /app/redis
3.从最初的机器上得到配置好的redis.conf
1.源服务器使用scp发送文件redis.conf到本服务器的/app/redis下
scp 源用户@源ip:源文件 目标用户@目标ip:目标文件夹
3.启动Redis
- 端口映射为6480
- 名字为redis-cluster
- /app/redis/redis.conf 挂载 /etc/redis/redis.conf
- /app/redis/data:/data 挂载 /data
- -d:后台启动
- redis:6.0.8:镜像名字
- redis-server /etc/redis/redis.conf 指定容器中的配置文件来启动
docker run -p 6480:6379 --name redis-cluster --privileged=true \
-v /app/redis/redis.conf:/etc/redis/redis.conf \
-v /app/redis/data:/data -d redis:6.0.8 \
redis-server /etc/redis/redis.conf

6.连接Redis
1.使用exec命令进入redis容器
docker exec -it redis-cluster /bin/bash
2.连接redis-cli
- 这里的-p指向的是容器的redis端口默认是6379
- -a参数指定密码
redis-cli -p 6379 -a
3.进行操作测试

7.开放6480端口
1.宝塔开启
systemctl start firewalld && firewall-cmd --permanent --add-port=6480/tcp && firewall-cmd --reload && firewall-cmd --query-port=6480/tcp
2.腾讯云开启

8.使用Jedis连接Redis测试
3.集群搭建
1.六台服务器都要配置
1.修改redis.conf配置文件
1.编辑配置文件
vim /app/redis/redis.conf
2.设置redis节点连接其他redis的密码 masterauth(与requirepass 一致即可)

3.重启redis容器
docker restart redis-cluster

2.开启总线端口10000 + port
1.宝塔开启16480端口
systemctl start firewalld && firewall-cmd --permanent --add-port=16480/tcp && firewall-cmd --reload && firewall-cmd --query-port=16480/tcp
2.腾讯云开启16480端口
3.删除容器,更换为集群模式的启动命令
1.删除原来的容器
docker rm -f redis-cluster

2.以集群模式启动的docker命令
- -d:后台启动
- –name:容器名字为redis-node-1,后面依次增加序号
- –net:host表示使用主机的ip和端口,会根据指定配置文件中的端口直接在主机使用不需要映射
- –privileged=true:使用数据卷的标配
- /app/redis/redis.conf 挂载 /etc/redis/redis.conf
- /app/redis/data:/data 挂载 /data
- redis:6.0.8:镜像名字
- redis-server:指定配置文件启动
- –cluster-enabled yes:以集群模式启动
- –appendonly yes:使用aof持久化策略
- –dir /data:设置数据(包括 AOF 文件)存储目录在容器内的/data下,会自动同步到主机,因为前面做了挂载
- –port 6480:指定启动端口为6480
- –cluster-config-file /data/nodes.conf:节点配置文件位置在容器内的/data/nodes.conf,会自动同步到主机
- –cluster-node-timeout:设置节点超时时间为5秒
docker run -d --name redis-node-1 --net=host --privileged=true \
  -v /app/redis/data:/data \
  -v /app/redis/redis.conf:/etc/redis/redis.conf \
  redis:6.0.8 \
  redis-server /etc/redis/redis.conf \
  --cluster-enabled yes \
  --appendonly yes \
  --dir /data \
  --port 6480 \
  --cluster-config-file /data/nodes.conf \
  --cluster-node-timeout 5000
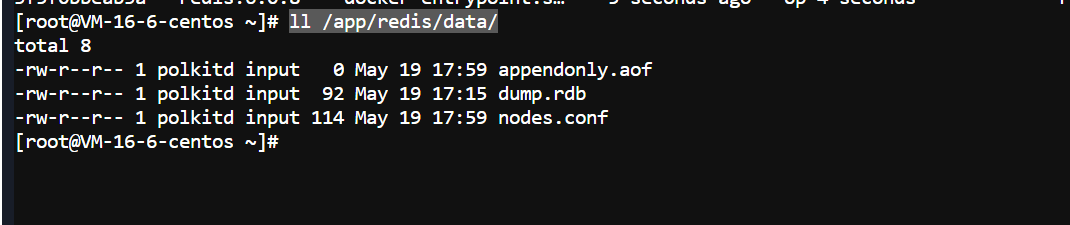
3.查看目录/app/redis/data,持久化文件以及节点文件都同步过来了!
ll /app/redis/data/
2.构建主从关系
1.进入一台机器
docker exec -it redis-node-5 /bin/bash
2.测试连接redis-cli(注意此时的ip已经在启动时指定了6480)
- –askpass:询问密码的意思
redis-cli -p 6480 --askpass

3.退出redis-cli进行集群构建
redis-cli --cluster create --cluster-replicas 1 --askpass
4.构建成功!
5.如果发现一直在构建,原因是需要开启总线的端口也就是10000 + 6480
3.常用命令
1.首先进入redis容器的redis-cli
redis-cli -c -p 6480 --askpass
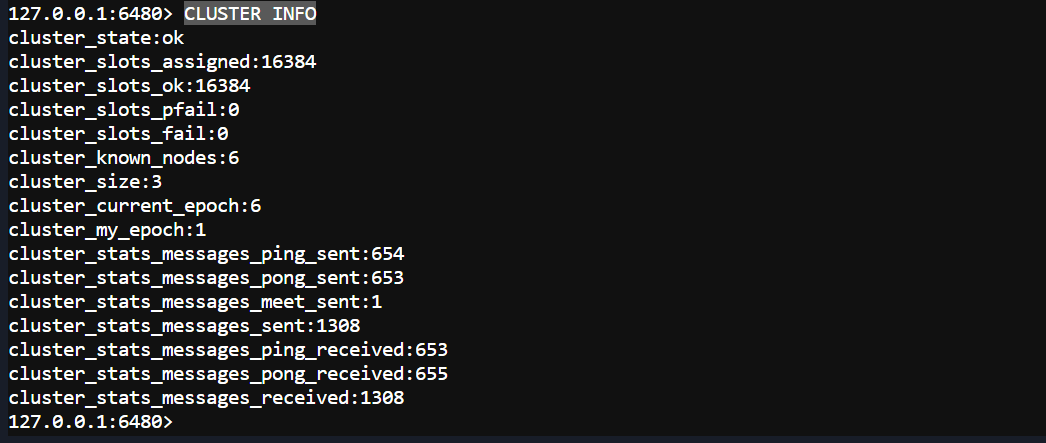
2.查看集群信息
CLUSTER INFO
3.查看集群节点
CLUSTER NODES
4.SpringBoot测试连接
1.pom.xml
<project xmlns="http://maven.apache.org/POM/4.0.0" xmlns:xsi="http://www.w3.org/2001/XMLSchema-instance"
         xsi:schemaLocation="http://maven.apache.org/POM/4.0.0 http://maven.apache.org/maven-v4_0_0.xsd">
    <modelVersion>4.0.0</modelVersion>
    <groupId>com.sun.redis</groupId>
    <artifactId>redis_springboot</artifactId>
    <version>1.0-SNAPSHOT</version>
    <name>Archetype - redis_springboot</name>
    <url>http://maven.apache.org</url>

    <parent>
        <groupId>org.springframework.boot</groupId>
        <artifactId>spring-boot-starter-parent</artifactId>
        <version>2.6.6</version>
        <relativePath/> <!-- lookup parent from repository -->
    </parent>

    <properties>
        <java.version>1.8</java.version>
    </properties>

    <dependencies>
        <dependency>
            <groupId>org.springframework.boot</groupId>
            <!-- 说 明 : 如 果 这 里 是 spring-boot-start 就 改 成 如 下
            spring-boot-start-web-->
            <artifactId>spring-boot-starter-web</artifactId>
        </dependency>
        <!-- redis -->
        <dependency>
            <groupId>org.springframework.boot</groupId>
            <artifactId>spring-boot-starter-data-redis</artifactId>
        </dependency>
        <!-- spring2.X 集成 redis 所需 common-pool-->
        <dependency>
            <groupId>org.apache.commons</groupId>
            <artifactId>commons-pool2</artifactId>
            <!--不要带版本号,防止冲突-->
        </dependency>
        <dependency>
            <groupId>org.springframework.boot</groupId>
            <artifactId>spring-boot-starter-test</artifactId>
            <scope>test</scope>
        </dependency>
        <dependency>
            <groupId>com.fasterxml.jackson.core</groupId>
            <artifactId>jackson-databind</artifactId>
            <version>2.13.2.2</version>
        </dependency>
    </dependencies>

    <build>
        <plugins>
            <plugin>
                <groupId>org.springframework.boot</groupId>
                <artifactId>spring-boot-maven-plugin</artifactId>
            </plugin>
        </plugins>
    </build>
</project>
2.application.yml
# redis集群配置
spring:
  redis:
    password: # Redis服务器密码
    database: 0 # 默认数据库为0号
    timeout: 10000ms # 连接超时时间是10000毫秒
    lettuce:
      pool:
        max-active: 8 # 最大活跃连接数,使用负值表示没有限制,最佳配置为核数*2
        max-wait: 10000ms # 最大等待时间,单位为毫秒,使用负值表示没有限制,这里设置为10秒
        max-idle: 200 # 最大空闲连接数
        min-idle: 5 # 最小空闲连接数
    cluster:
      nodes:
3.Redis配置类
package com.sun.redis.config;

import com.fasterxml.jackson.annotation.JsonAutoDetect;
import com.fasterxml.jackson.annotation.JsonTypeInfo;
import com.fasterxml.jackson.annotation.PropertyAccessor;
import com.fasterxml.jackson.databind.ObjectMapper;
import com.fasterxml.jackson.databind.jsontype.impl.LaissezFaireSubTypeValidator;
import org.springframework.cache.CacheManager;
import org.springframework.cache.annotation.CachingConfigurerSupport;
import org.springframework.cache.annotation.EnableCaching;
import org.springframework.context.annotation.Bean;
import org.springframework.context.annotation.Configuration;
import org.springframework.data.redis.cache.RedisCacheConfiguration;
import org.springframework.data.redis.cache.RedisCacheManager;
import org.springframework.data.redis.connection.RedisConnectionFactory;
import org.springframework.data.redis.core.RedisTemplate;
import org.springframework.data.redis.serializer.Jackson2JsonRedisSerializer;
import org.springframework.data.redis.serializer.RedisSerializationContext;
import org.springframework.data.redis.serializer.RedisSerializer;
import org.springframework.data.redis.serializer.StringRedisSerializer;

import java.time.Duration;

/**
 * Description:
 *
 * @Author sun
 * @Create 2024/4/29 21:29
 * @Version 1.0
 */
@EnableCaching
@Configuration
public class RedisConfig extends CachingConfigurerSupport {
    @Bean
    public RedisTemplate<String, Object> redisTemplate(RedisConnectionFactory factory) {
        RedisTemplate<String, Object> template =
                new RedisTemplate<>();
        System.out.println("template=>" + template);
        RedisSerializer<String> redisSerializer =
                new StringRedisSerializer();
        Jackson2JsonRedisSerializer jackson2JsonRedisSerializer =
                new Jackson2JsonRedisSerializer(Object.class);
        ObjectMapper om = new ObjectMapper();
        om.setVisibility(PropertyAccessor.ALL, JsonAutoDetect.Visibility.ANY);
        om.activateDefaultTyping(
                LaissezFaireSubTypeValidator.instance, ObjectMapper.DefaultTyping.NON_FINAL, JsonTypeInfo.As.WRAPPER_ARRAY);
        jackson2JsonRedisSerializer.setObjectMapper(om);
        template.setConnectionFactory(factory);
        // key 序列化方式
        template.setKeySerializer(redisSerializer);
        // value 序列化
        template.setValueSerializer(jackson2JsonRedisSerializer);
        // value hashmap 序列化
        template.setHashValueSerializer(jackson2JsonRedisSerializer);
        return template;
    }

    @Bean
    public CacheManager cacheManager(RedisConnectionFactory factory) {
        RedisSerializer<String> redisSerializer =
                new StringRedisSerializer();
        Jackson2JsonRedisSerializer jackson2JsonRedisSerializer = new
                Jackson2JsonRedisSerializer(Object.class);
        // 解决查询缓存转换异常的问题
        ObjectMapper om = new ObjectMapper();
        om.setVisibility(PropertyAccessor.ALL, JsonAutoDetect.Visibility.ANY);
        om.activateDefaultTyping(
                LaissezFaireSubTypeValidator.instance, ObjectMapper.DefaultTyping.NON_FINAL, JsonTypeInfo.As.WRAPPER_ARRAY);
        jackson2JsonRedisSerializer.setObjectMapper(om);
        // 配置序列化(解决乱码的问题),过期时间 600 秒
        RedisCacheConfiguration config = RedisCacheConfiguration.defaultCacheConfig()
                .entryTtl(Duration.ofSeconds(600))
                .serializeKeysWith(RedisSerializationContext.SerializationPair.fromSerializer(redisSerializer))
                .serializeValuesWith(RedisSerializationContext.SerializationPair.fromSerializer(jackson2JsonRedisSerializer))
                .disableCachingNullValues();
        RedisCacheManager cacheManager = RedisCacheManager.builder(factory)
                .cacheDefaults(config)
                .build();
        return cacheManager;
    }
}
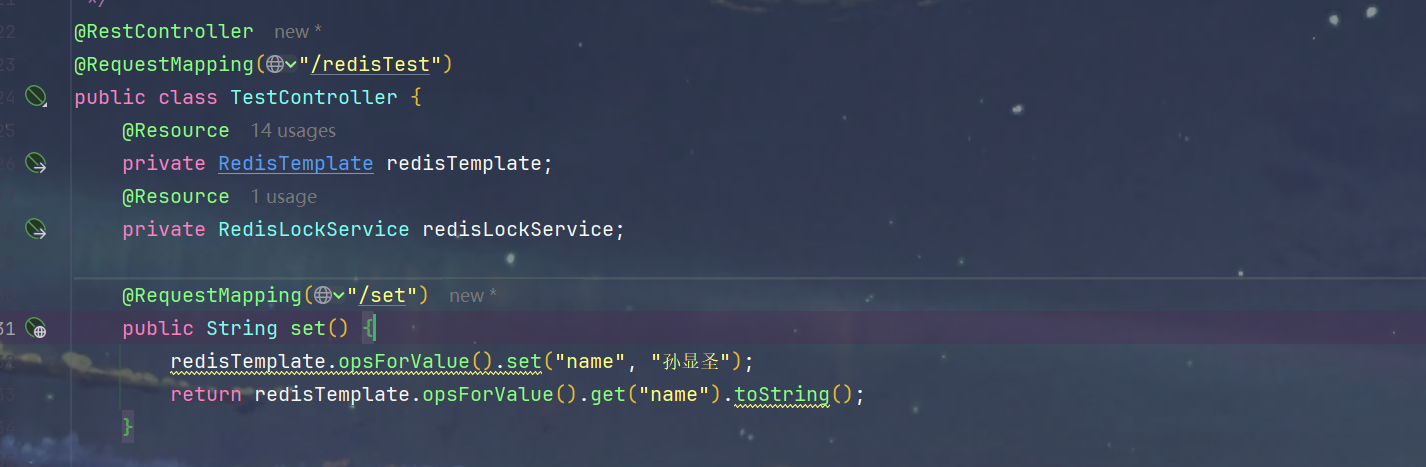
4.测试的controller
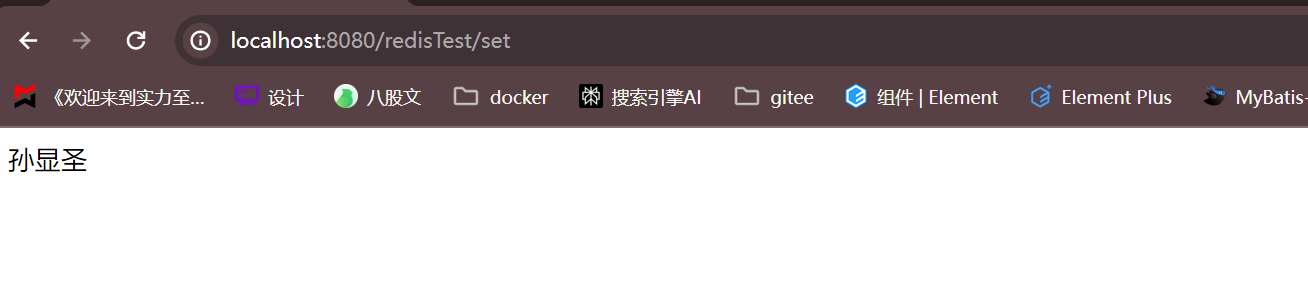
5.启动测试
5.报错 Unable to connect to [10.2.8.11:6480]: connection timed out: /10.2.8.11:6480
1.这个显示的是连接的内网地址,所以需要配置redis.conf的cluster-announce-ip来暴露服务器外网ip
2.编辑配置文件
vim /app/redis/redis.conf
3.配置 cluster-announce-ip 为每台服务器的外网ip
4.重启redis容器
docker restart 。。。
5.此时就不会再出现连接内网超时的问题了
4.主从扩容和主从缩容
1.主从扩容
1.启动一台主机
1.使用配置好的 redis.conf 启动容器
- 注意这里的cluster-announce-ip还是使用的配置文件中本服务器的ip
- 节点密码也是用的配置文件中的
- 需要修改的配置
- –name redis-node-7
- -v /app/redis/nodes7data:/data
- –cluster-config-file /data/nodes7.conf
- –port 6481
docker run -d --name redis-node-7 --net=host --privileged=true \
  -v /app/redis/nodes7data:/data \
  -v /app/redis/redis.conf:/etc/redis/redis.conf \
  redis:6.0.8 \
  redis-server /etc/redis/redis.conf \
  --cluster-enabled yes \
  --appendonly yes \
  --dir /data \
  --port 6481 \
  --cluster-config-file /data/nodes7.conf \
  --cluster-node-timeout 5000
2.查看配置data目录是否同步

3.开启端口6481和16481
systemctl start firewalld && firewall-cmd --permanent --add-port=6481/tcp && firewall-cmd --reload && firewall-cmd --query-port=6481/tcp && systemctl start firewalld && firewall-cmd --permanent --add-port=16481/tcp && firewall-cmd --reload && firewall-cmd --query-port=16481/tcp


4.jedis测试连接
2.启动一台从机
1.使用配置好的 redis.conf 启动容器
docker run -d --name redis-node-8 --net=host --privileged=true \
  -v /app/redis/nodes8data:/data \
  -v /app/redis/redis.conf:/etc/redis/redis.conf \
  redis:6.0.8 \
  redis-server /etc/redis/redis.conf \
  --cluster-enabled yes \
  --appendonly yes \
  --dir /data \
  --port 6482 \
  --cluster-config-file /data/nodes8.conf \
  --cluster-node-timeout 5000
2.开启端口6482和16482
systemctl start firewalld && firewall-cmd --permanent --add-port=6482/tcp && firewall-cmd --reload && firewall-cmd --query-port=6482/tcp && systemctl start firewalld && firewall-cmd --permanent --add-port=16482/tcp && firewall-cmd --reload && firewall-cmd --query-port=1648
2/tcp
3.jedis测试连接
3.将新增的7号节点作为master节点加入原集群
1.进入七号容器内部
docker exec -it redis-node-7 /bin/bash
2.添加七号节点到集群(选择任意一个节点即可)
redis-cli --cluster add-node --askpass
3.检查集群情况,可以看到6481已经作为一个master加入了
redis-cli --cluster check --askpass
4.重新分配槽位
1.执行指令,重新分配槽位
redis-cli --cluster reshard --askpass
2.计算平均槽位并分配给新机器

3.选择all + yes,意思就是,从其他三台机器共提取4096个槽位给新机器


4.检查集群情况,发现分配规则是前几个机器匀了槽位给新机器
redis-cli --cluster check --askpass
5.添加8号从机到7号主机下面
1.执行指令添加
- a9d42be282f99864cf95500ca909ae55dab5eb6b是主机的id
redis-cli --cluster add-node --cluster-slave --cluster-master-id a9d42be282f99864cf95500ca909ae55dab5eb6b --askpass
2.检查集群情况
redis-cli --cluster check --askpass
6.SpringBoot测试连接
1.测试是否可以设置key

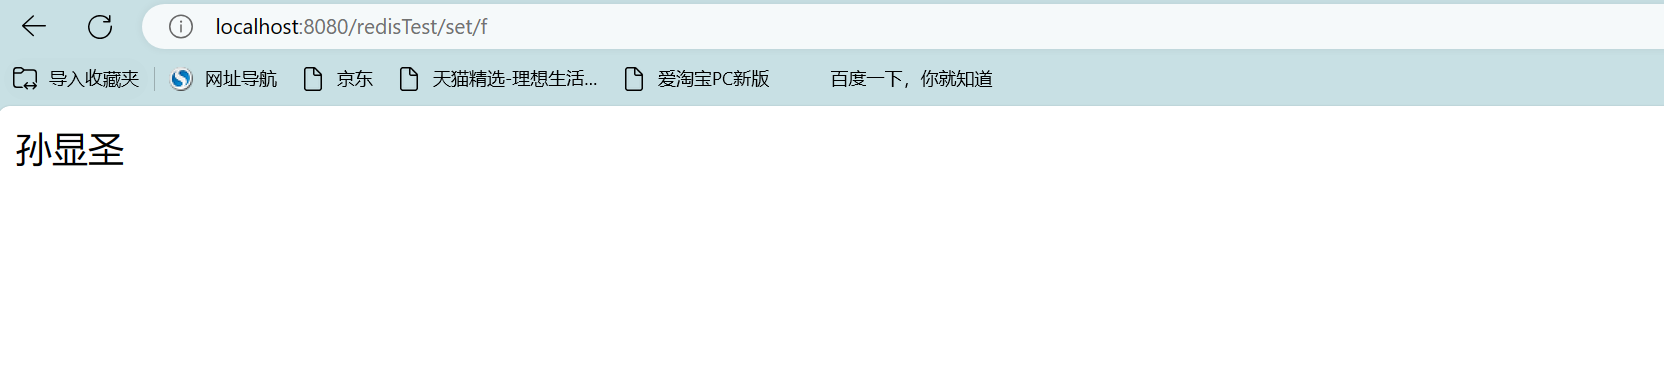
2.检查集群情况,观察是否四个机器都能插入
redis-cli --cluster check --askpass

一起探索未来云端世界的核心,云原生技术专区带您领略创新、高效和可扩展的云计算解决方案,引领您在数字化时代的成功之路。
更多推荐


 30
30 0
0- 0


 已为社区贡献4条内容

所有评论(0)