
python的FastAPI集成nacos实现服务注册
·
前情提要
最近在做一个农业视觉项目, 后端采用微服务的形式, 主要用的spring-cloud, 不过有几个业务是需要用到yolo模型的, 所以就用FastAPI搭建了个检测后把数据返回的检测接口
SECRET_TOKEN = "test_token_2026"
TEMP_IMG = "../model_results_img"

@app.post("/detect")
async def detect(
        token: str = Form(...),
        file: UploadFile = File(...),
        conf: float = Form(
            default=0.25,
            description="检测置信度阈值,范围(0, 1]"
        ),
        model_path: str = Form(
            default="yolo11n.pt",
            description="模型绝对路径"
        )
):
    # 1. Token 验证
    if token != SECRET_TOKEN:
        raise HTTPException(status_code=401, detail="无效 Token")

    if conf > 1 or conf <= 0:
        raise HTTPException(
            status_code=400,
            detail="置信度阈值范围是(0, 1]"
        )

    # 读取上传图片
    image_bytes = await file.read()
    nparr = np.frombuffer(image_bytes, np.uint8)
    img = cv2.imdecode(nparr, cv2.IMREAD_COLOR)

    # 3. YOLO 推理
    current_model = YOLO(model_path)
    print(model_path)
    start_time = time.time()
    results = current_model(img, conf=conf)
    detect_time = round(time.time() - start_time, 4)

    # 4. 封装返回结果
    detections = []
    for result in results:
        for box in result.boxes:
            class_name = current_model.names[int(box.cls)]
            detections.append({
                "class": class_name,
                "conf": round(float(box.conf), 4),
                "bbox": {
                    "x1": round(float(box.xyxy[0][0]), 2),
                    "y1": round(float(box.xyxy[0][1]), 2),
                    "x2": round(float(box.xyxy[0][2]), 2),
                    "y2": round(float(box.xyxy[0][3]), 2)
                }
            })

    try:
        now = datetime.now()
        date_path = f"{now.year}/{now.month:02d}/{now.day:02d}"
        full_dir = os.path.join(TEMP_IMG, date_path)

        # 创建目录(如果不存在)
        os.makedirs(full_dir, exist_ok=True)

        # 生成唯一的文件名
        file_name = f'{uuid4()}.jpg'
        out_path = f'{date_path}/{file_name}'
        results[0].save(filename=os.path.join(full_dir, file_name))
    except:
        out_path = 'no-data.jpg'

    data = {
            "code": 0,
            "msg": "success",
            "filename": file.filename,
            "result": out_path,
            "count": len(detections),
            "detections": detections,
            # 毫秒
            "time": detect_time
        }
    print(data)
    print(detect_time)
    return data
这里我也直接分享出来, 感觉有很多优化空间, 欢迎大家讨论 !
为了该服务更方便调用和管理, 当然为了比较装, 我就想到可以将其注册到nacos中, 之后可以直接用openFeign调用;
开始
我用的是 nacos-sdk-python==3.2.0 库, 参考文档: Python SDK 使用手册 | Nacos 官网
1. 创建nacos_config.py
import asyncio
from v2.nacos import NacosNamingService, ClientConfigBuilder, RegisterInstanceParam, DeregisterInstanceParam

NACOS_SERVER_ADDRESSES = "http://192.168.10.1:8848"
NACOS_GROUP = "DEFAULT_GROUP"
SERVICE_NAME = "py-service"
SERVICE_IP = "192.168.11.1"
SERVICE_PORT = 8000

''' 配置对象 '''
client_config = (ClientConfigBuilder()
                 .server_address(NACOS_SERVER_ADDRESSES)
                 .build())

async def register_service():
    """ 注册服务 """
    naming_client = await NacosNamingService.create_naming_service(client_config)
    res = await naming_client.register_instance(
        request=RegisterInstanceParam(
            service_name=SERVICE_NAME,
            ip=SERVICE_IP,
            port=SERVICE_PORT,
            enable=True,
            healthy=True,
        )
    )
    return res


async def deregister_service():
    """ 注销服务 """
    naming_client = await NacosNamingService.create_naming_service(client_config)
    res = await naming_client.deregister_instance(
        request=DeregisterInstanceParam(
            service_name=SERVICE_NAME,
            ip=SERVICE_IP,
            port=SERVICE_PORT
        )
    )
    return res


if __name__ == '__main__':
    # 返回True代表成功, 失败则会抛异常
    a = asyncio.run(register_service())
    print(a)
    b = asyncio.run(deregister_service())
    print(b)
2. 引入主程序, 在服务启动时注册, 关闭时注销
这里的@asynccontextmanager注解是异步上下文生成器, 介绍起来篇幅较长, 就不介绍了, 简单的来说, 就是使用该注解的函数就是由
- yield之前, 初始化, 先执行的异步函数(注册服务)
- yield 返回, 被FastAPI用(服务)
- yield之后, 关闭服务, 往下执行异步函数(注销服务)
from contextlib import asynccontextmanager
from nacosConfig import register_service, deregister_service

@asynccontextmanager
async def lifespan(app: FastAPI):
    # 启动时执行
    try:
        await register_service()
        print("   successful register Nacos")
    except Exception as e:
        print(f"  Nacos register error: {e}")
        import traceback
        traceback.print_exc()
    yield
    # 关闭时执行
    try:
        await deregister_service()
        print("  successful deregister Nacos")
    except Exception as e:
        print(f" Nacos deregister error: {e}")
        import traceback
        traceback.print_exc()

app = FastAPI(title="YOLO server", version="1.0", lifespan=lifespan)

""" 接口... """
运行起来后, 去nacos查看, 可以看到py-service
|
服务名 |
分组名称 |
集群数目 |
实例数 |
健康实例数 |
触发保护阈值 |
操作 |
|---|---|---|---|---|---|---|
|
gateway |
DEFAULT_GROUP |
1 |
1 |
1 |
false |
详情|示例代码|订阅者|删除 |
|
device-service |
DEFAULT_GROUP |
1 |
1 |
1 |
false |
详情|示例代码|订阅者|删除 |
|
py-service |
DEFAULT_GROUP |
1 |
1 |
1 |
false |
详情|示例代码|订阅者|删除 |
3. spring-cloud调用
这里为了不让篇幅太长, 就用简单的测试接口
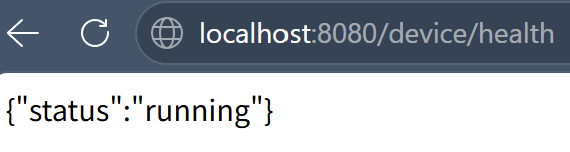
@app.get("/api/health")
async def health():
    return {"status": "running"}
网关配置
spring:
  application:
    name: gateway
  cloud:
    nacos:
      server-addr: 192.168.10.1:8848
    gateway:
      routes:
        - id: device-service
          uri: lb://device-service
          predicates:
            - Path=/device/**
OpenFeign配置
@FeignClient(name = "py-service")
public interface TestClient {

    @GetMapping("/api/health")
    String test();
}
调用接口
@RestController
@RequestMapping("/device")
public class TestController {

    @Autowired
    private TestClient testClient;

    @GetMapping("/health")
    public String healthTest(){
        return testClient.test();
    }
}
访问测试
更多推荐


 7
7 0
0- 0


 已为社区贡献1条内容

所有评论(0)