
OpenCV+Tesseract进行OCR学习(二)文字识别
OpenCV的Tesseract使用OpenCV的Tesseract使用Mac端的Tesseract使用iOS端的Tesseract使用Mac端的Tesseract使用Tesseract的安装Mac上的Tesseract安装很方便,直接利用brew来安装:brew updatebrew install tesseract或者下载源码进行编译安装:Github地址Tesseract的使用
一键AI生成摘要,助你高效阅读
问答
·
OpenCV的Tesseract使用
Mac端的Tesseract使用
Tesseract的安装
Mac上的Tesseract安装很方便,直接利用brew来安装:
brew update
brew install tesseract
或者下载源码进行编译安装:
Github地址
Tesseract的使用
#include <tesseract/baseapi.h>

tesseract::TessBaseAPI tessearct_api;
    const char  *languagePath = "/usr/local/Cellar/tesseract/3.04.01_2/share/tessdata";
    const char *languageType = "chi_sim";
    int nRet = tessearct_api.Init(languagePath, languageType,tesseract::OEM_DEFAULT);
    if (nRet != 0) {
        printf("初始化字库失败!");
        return -1;
    }
    tessearct_api.SetPageSegMode(tesseract::PSM_SINGLE_BLOCK);
    tessearct_api.SetImage(seg_image.data, seg_image.cols, seg_image.rows, 1, seg_image.cols);
    string out = string(tessearct_api.GetUTF8Text());
    cout<<"the out result :"<<out<<endl;
iOS端的Tesseract使用
Tesseract的安装
利用CocoaPods来安装,命令如下:
brew update
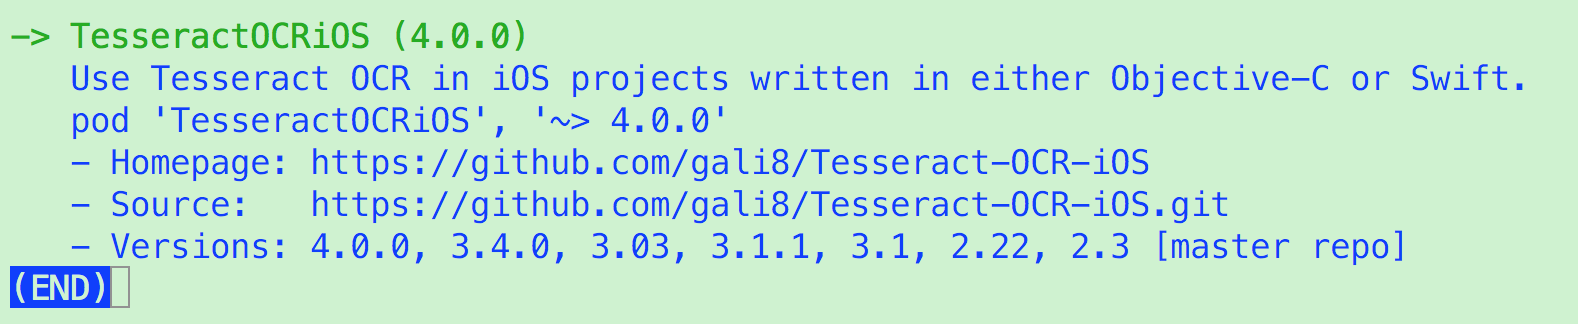
pod search tesseractocrios这时会出现如下:
继续键入命令:
touch Podfile
vi Podfile
这时,将上图中‘pod 'TesseractOCRiOS', '~> 4.0.0'’copy到Podfile中,保存退出,然后:
pod install
ok,这时打开项目目录下生成的后缀名为.xcworkspace的工程即可。
Tesseract的使用
#import "TesseractOCR/G8Tesseract.h"

//recognize image with tesseract
-(void)recognizeWithTesseract: (UIImage *)image{
    G8RecognitionOperation *operation = [[G8RecognitionOperation alloc] initWithLanguage:@"chi_sim"];
    operation.tesseract.engineMode = G8OCREngineModeTesseractOnly;
    operation.tesseract.pageSegmentationMode = G8PageSegmentationModeAutoOnly;
    operation.delegate = self;
    operation.recognitionCompleteBlock = ^(G8Tesseract *tesseract) {
        NSString *recognizedText = tesseract.recognizedText;
        NSLog(@"%@", recognizedText);
        self.text.text = recognizedText;

    };
//    self.imageView.image = operation.tesseract.thresholdedImage;
}

//print the progress infos
- (void)progressImageRecognitionForTesseract:(G8Tesseract *)tesseract {
    NSLog(@"progress: %lu", (unsigned long)tesseract.progress);
}
旨在为数千万中国开发者提供一个无缝且高效的云端环境,以支持学习、使用和贡献开源项目。
更多推荐


 1
1 0
0- 0


 已为社区贡献1条内容

所有评论(0)