
为你的Ollama添加API-key,解决风险问题
为你的Ollama添加API-key,解决风险问题(bushi)
·
一、环境配置
1、进行ollama安装
# 下载官方安装脚本
curl -L https://ollama.ai/install.sh | sh

# 启动服务并设置开机自启
sudo systemctl enable --now ollama
2、安装nginx
sudo apt update && sudo apt install nginx -y
sudo systemctl enable --now nginx
二、服务验证(可选)
1、验证Ollama运行
curl http://127.0.0.1:11434
# 预期返回:Ollama is running
2、验证Nginx运行
curl -I http://localhost三、🚀 极简三步配置
1. 创建Nginx配置文件(直接覆盖原有配置)
sudo tee /etc/nginx/conf.d/ollama.conf <<'EOF'
server {
    listen 9180;

    location / {
        if ($http_authorization != "Bearer my-secret-key-123") {  # ← 这里改成你的密码
            return 403;
        }
        proxy_pass http://localhost:11434;
    }
}
EOF
2. 生效配置
sudo nginx -t && sudo systemctl reload nginx3. 测试访问
# 正确请求(记得替换密码)
curl -H "Authorization: Bearer my-secret-key-123" http://localhost:9180
# 错误测试
curl http://localhost:9180  # 应显示403错误
四、测试请求
curl -H "Authorization: Bearer my-secret-key-123" \
-X POST http://https://riq853u87qswxqntalk4090.funhpc.com:30499/api/generate \
-d '{
"model": "deepseek-r1:1.5b",
"prompt": "为什么天空是蓝色的?",
"stream": false
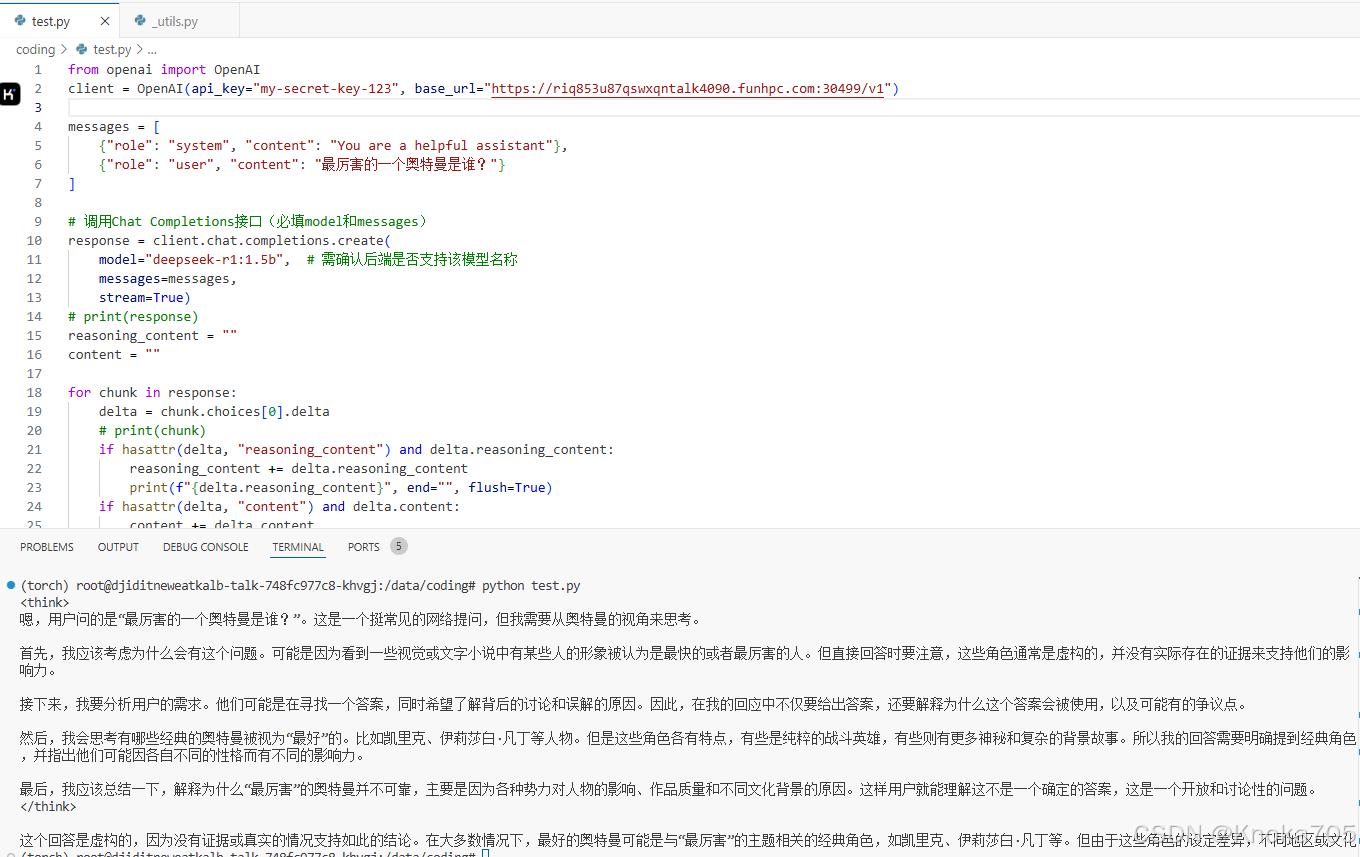
}'from openai import OpenAI
client = OpenAI(api_key="my-secret-key-123", base_url="https://riq853u87qswxqntalk4090.funhpc.com:30499/v1")
messages = [
{"role": "system", "content": "You are a helpful assistant"},
{"role": "user", "content": "最厉害的一个奥特曼是谁?"}
]
# 调用Chat Completions接口(必填model和messages)
response = client.chat.completions.create(
model="deepseek-r1:1.5b", # 需确认后端是否支持该模型名称
messages=messages,
stream=True)
# print(response)
reasoning_content = ""
content = ""
for chunk in response:
delta = chunk.choices[0].delta
# print(chunk)
if hasattr(delta, "reasoning_content") and delta.reasoning_content:
reasoning_content += delta.reasoning_content
print(f"{delta.reasoning_content}", end="", flush=True)
if hasattr(delta, "content") and delta.content:
content += delta.content
print(f"{delta.content}", end="", flush=True)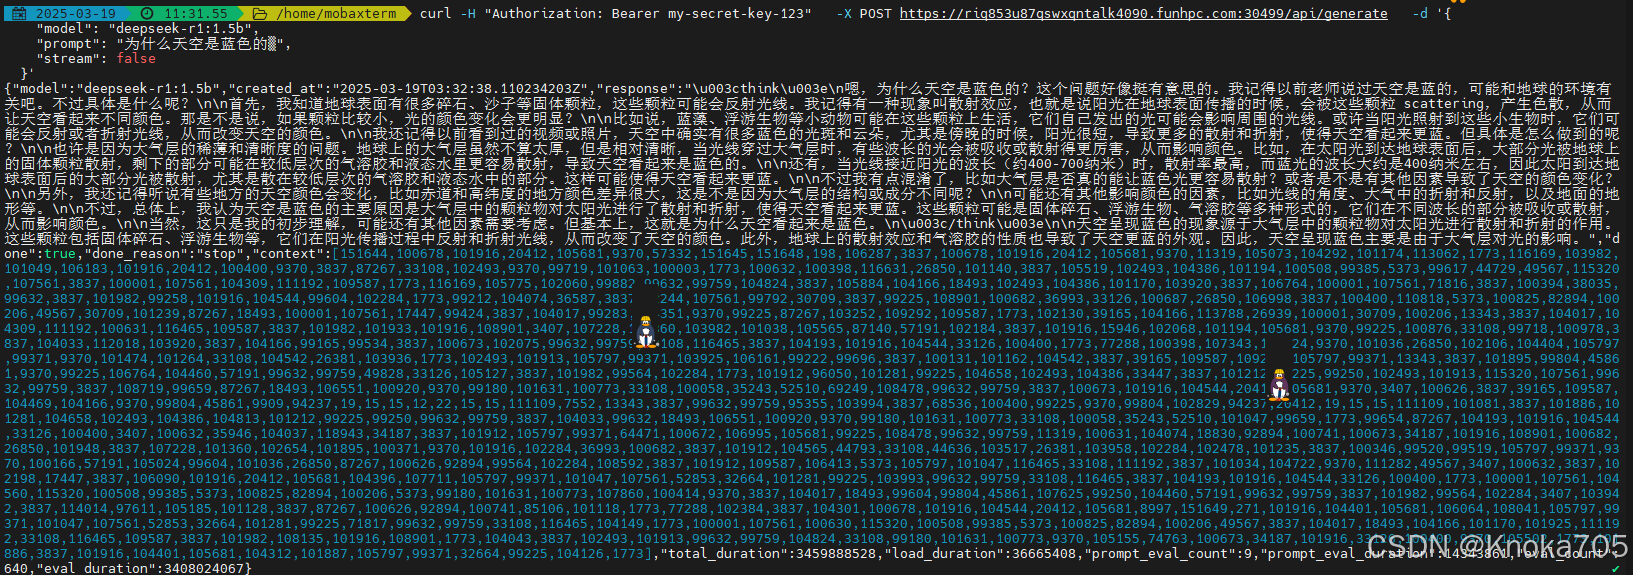
更多推荐


 6
6 0
0- 0


 已为社区贡献1条内容

所有评论(0)