

Tensorflow+cuda安装及常见的版本不兼容报错
若需要下载1.x版本的,只需将下载链接中改为自己需要的版本号即可找到相应的版本进行下载,例如需要tensorflow1.12.0版本,下载链接修改为。需要的python版本为3.6,且是linux系统,在终端运行以下命令进行 tensorflow的安装(其中,后缀whl为压缩包格式)后续cuda及cudnn的版本怎么匹配tensorflow下载安装,见下方,一般cuda及cudnn官网都显示了相应
Tensorflow、cuda安装、配置及报错问题
一、Tensorflow安装及配置
1、不使用cuda的tensorflow安装
直接在终端执行命令
pip install tensorflow
或指定版本
pip install tensorflow==版本号
2、需使用cuda提高GPU计算速度的tensorflow安装
请注意:tensorflow与cuda、cudnn的版本需匹配
例如:代码复现过程中需要配置环境要求为下图,则需要按照相应版本进行下载安装,若版本不匹配会导致安装失败或运行报错:
方法一:tensorflow可直接在终端使用命令安装
pip install tensorflow-gpu==x.x.x
例如我需要1.12.0版本
pip install tensorflow-gpu==1.12.0
方法二:如果安装不上,可以去tensorflow官网下载以后拖进文件夹,终端使用pip安装。
tensorflow下载地址
https://pypi.org/project/tensorflow-gpu/2.1.1/#files
例如,显示有各种tensorflow-gpu版本,其中cp37表示python3.7
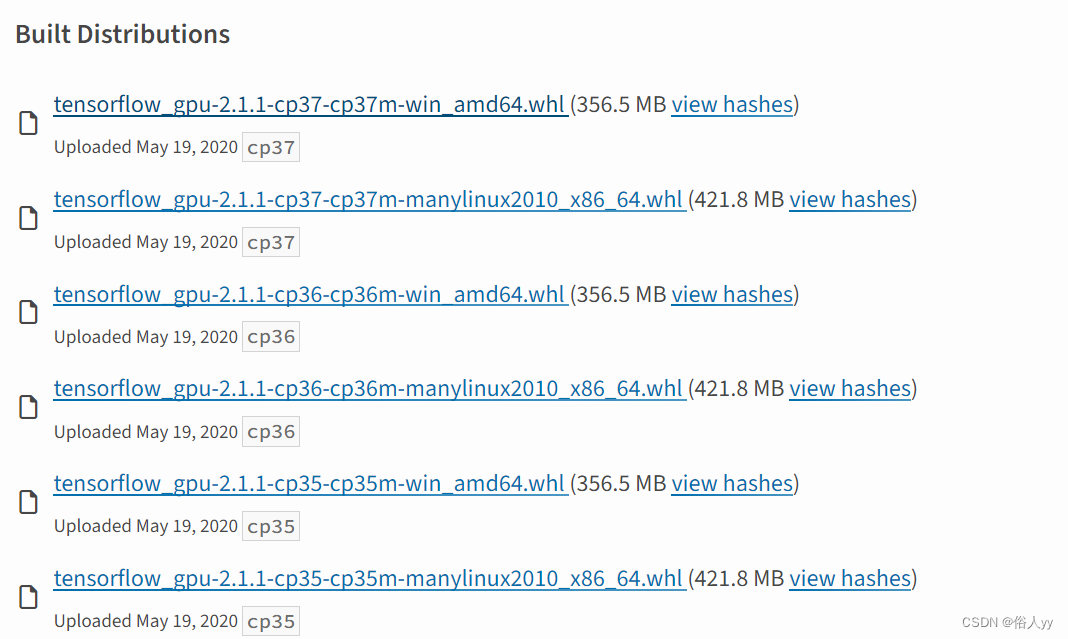
若需要下载1.x版本的,只需将下载链接中改为自己需要的版本号即可找到相应的版本进行下载,例如需要tensorflow1.12.0版本,下载链接修改为
https://pypi.org/project/tensorflow-gpu/1.12.0/#files
以上图中第四个版本为例:
需要的python版本为3.6,且是linux系统,在终端运行以下命令进行 tensorflow的安装(其中,后缀whl为压缩包格式)
pip install tensorflow_gpu-2.1.1-cp36-cp36m-manylinux2010_x86_64.whl
后续cuda及cudnn的版本怎么匹配tensorflow下载安装,见下方,一般cuda及cudnn官网都显示了相应的版本
二、cuda及cudnn匹配版本下载
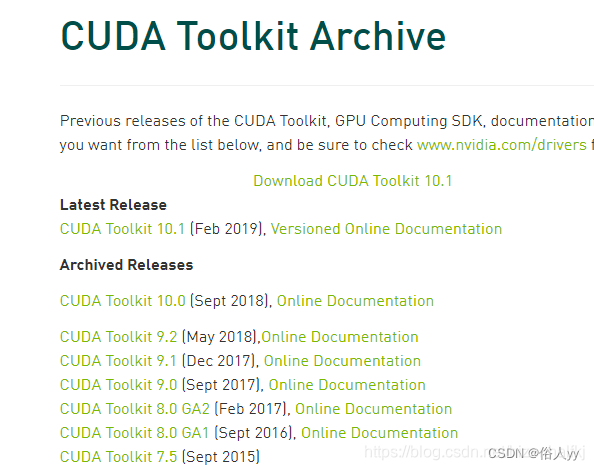
cuda下载地址:
https://developer.nvidia.com/cuda-toolkit-archive
cuDNN的下载:
https://developer.nvidia.com/rdp/cudnn-archive
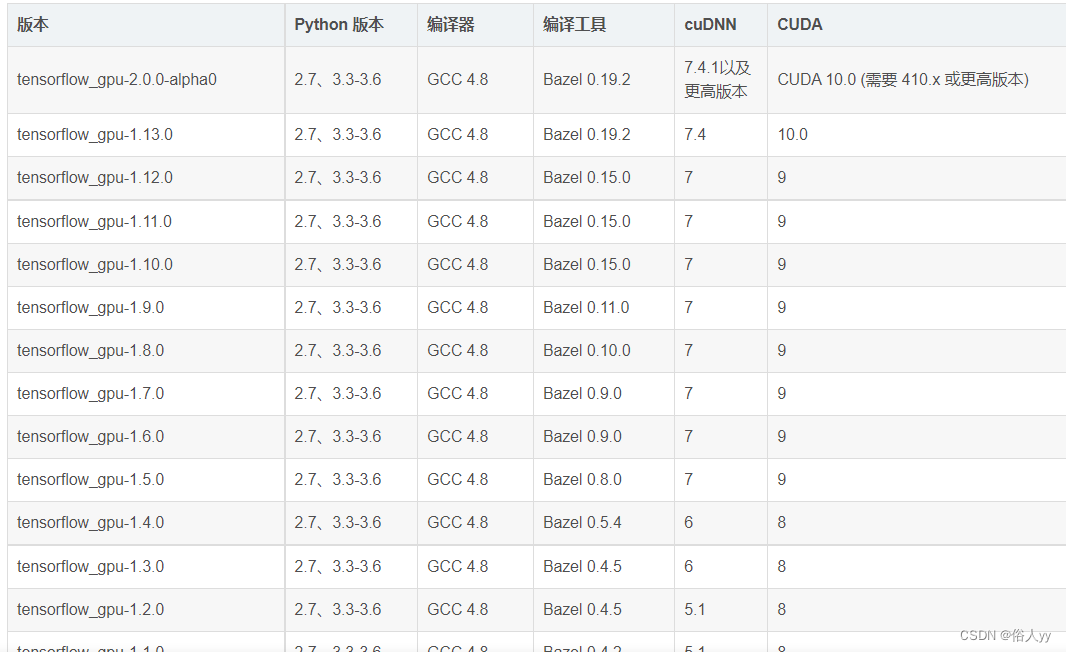
网上可以自行搜索不同tensorflow需要搭配的cuda版本,部分版本示例如下:
例如:需要的环境配置
1、下载cuda注意事项
进入下载网页可看到不同版本的cuda,选择需要的CUDA Toolkit 9.0
然后,需要知道系统各种情况,其中Distribution如下图,可在终端运行代码查看
lsb_release -a
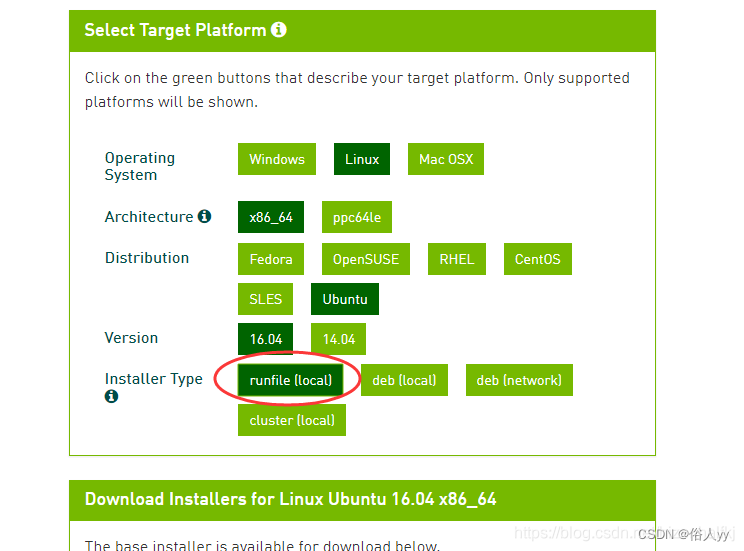
注意Installer Type这里选择runfile (local)。
然后在Download按钮上右键选择复制下载链接,直接在终端使用如下代码下载更快~~~~记得在终端中cd进入需要将cuda下载的位置执行以下命令:
wget -c 刚复制的下载cuda的链接

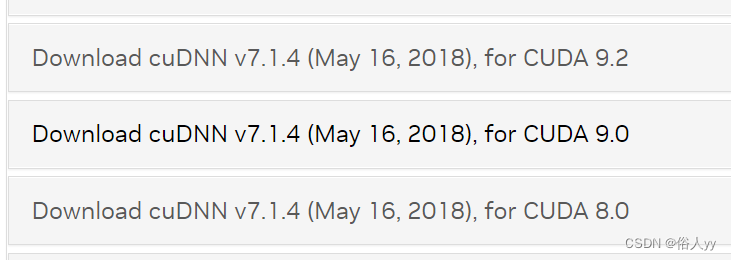
2、cudnn下载注意事项
针对cuda的版本下载所需要的对应cudnn版本
例如:已下载cuda9.0,可以匹配的cuda9.0的cudnn版本有
同时,需要cudnn7.1.4,则点击下载第二个即可。
至于cuda和cudnn的安装操作可以参考其他博客,
需要sudo权限(root权限)
windows安装比较简单!!!!
下载对应的win版本,根据博客https://blog.csdn.net/m0_73409404/article/details/132187452进行安装即可
三、Tensorflow版本不兼容报错
由于原本的服务器环境安装的tensorflow2.x版本,但是代码使用的是tensorflow1.x,这时就会出现不兼容1.x版本中的一些模块,常见报错如下:
(PS:tensorflow2.x中没用contrib模块,用compat.v1替代contrib)
1、第一种
AttributeError: module ‘tensorflow’ has no attribute ‘contrib’
这是因为在tensorflow2.x中没有了tensorflow1.x中的tensorflow.contrib模块,即版本不兼容,只需将:
import tensorflow as tf
修改为:
import tensorflow.compat.v1 as tf
tf.disable_v2_behavior()  #使TensorFlow 2.x可以向后兼容TensorFlow 1.x的代码

或者

import tensorflow.compat.v1 as tf
tf.compat.v1.disable_eager_execution()
2、第二种
AttributeError: module ‘tensorflow’ has no attribute ‘Session’
tf.Session()
修改为
tf.compat.v1.Session()
3、第三种
AttributeError: module ‘tensorflow’ has no attribute ‘slim’
报错代码 slim = tf.contrib.slim
这是因为tensorflow2.x版本中需要单独安装tf-slim库
终端执行
pip install --upgrade tf_slim
代码中导入
import tf_slim as slim
4、第四种
ImportError: cannot import name ‘rnn’ from ‘tensorflow.compat.v1’
前面已将tensorflow.contrib模块改为tensorflow.compat.v1模块
报错代码 from tensorflow.compat.v1 import rnn
修改为
import tensorflow.compat.v1.nn.rnn_cell
即contrib用compat.v1替代,rnn用nn.rnn_cell替代
5、第五种
AttributeError: module ‘tensorflow’ has no attribute ‘random_normal’
在报错的行数将
tf.random_normal
修改成
tf.random.normal
6、第六种
tensorflow2.x在网络训练过程中contrib报错
(1)报错代码 tf.contrib.layers.xavier_initializer()
修改为
tf.keras.initializers.glorot_normal()
(2)报错代码 tf.contrib.layers.layer_norm
修改为
layer_norma = tf.keras.layers.LayerNormalization(axis = -1)
layer_norma(input_tensor)
(3)报错代码 tf.contrib.data.map_and_batch
修改为
tf.data.experimental.map_and_batch

旨在为数千万中国开发者提供一个无缝且高效的云端环境,以支持学习、使用和贡献开源项目。
更多推荐


 4
4 0
0- 0


 已为社区贡献3条内容

所有评论(0)