SSM整合案例【C站讲解最详细流程的案例】
SSM整合案例 —— 用户添加和即时查询【这绝对是一个全网最详细的SSM项目讲解实战案例】
一、需求分析
接下来我们使用Maven+Spring+MyBatis+SpringMVC完成一个案例,案例需求为在页面可以进行添加学生+查询所有学生!其他小功能如果有想法的读者可以自行添加,作者有更重要的事情需要做哦。
1.1 使用到的技术
- 使用Maven创建聚合工程,并使用Maven的tomcat插件运行工程
- 使用Spring的IOC容器管理对象
- 使用MyBatis操作数据库
- 使用Spring的声明式事务进行事务管理
- 使用SpringMVC作为控制器封装Model并跳转到JSP页面展示数据
- 使用Junit测试方法
- 使用Log4j在控制台打印日志
1.2 确定项目流程
- 创建maven父工程,添加需要的依赖和插件
- 创建dao子工程,配置MyBatis操作数据库,配置Log4j在控制台打印日志。
- 创建service子工程,配置Spring声明式事务
- 创建controller子工程,配置SpringMVC作为控制器,编写JSP页面展示数据。
- 每个子工程都使用Spring进行IOC管理
1.3 准备数据库数据
SET NAMES utf8mb4;
SET FOREIGN_KEY_CHECKS = 0;

-- ----------------------------
-- Table structure for student
-- ----------------------------
DROP TABLE IF EXISTS `student`;
CREATE TABLE `student`  (
  `id` int NOT NULL AUTO_INCREMENT,
  `name` varchar(255) CHARACTER SET utf8 COLLATE utf8_general_ci NULL DEFAULT NULL,
  `sex` varchar(255) CHARACTER SET utf8 COLLATE utf8_general_ci NULL DEFAULT NULL,
  `address` varchar(255) CHARACTER SET utf8 COLLATE utf8_general_ci NULL DEFAULT NULL,
  PRIMARY KEY (`id`) USING BTREE
) ENGINE = InnoDB AUTO_INCREMENT = 10 CHARACTER SET = utf8 COLLATE = utf8_general_ci ROW_FORMAT = Dynamic;

-- ----------------------------
-- Records of student
-- ----------------------------
INSERT INTO `student` VALUES (1, '几何心凉', '男', '北京');
INSERT INTO `student` VALUES (2, '哈士奇', '女', '上海');
INSERT INTO `student` VALUES (3, 'SXT', '女', '上海');
INSERT INTO `student` VALUES (4, '利比亚', '男', '广州');

SET FOREIGN_KEY_CHECKS = 1;
二、创建父工程
创建maven父工程mvc_demo4,下面是添加需要的依赖和插件,算了直接放上pom.xml文件
<?xml version="1.0" encoding="UTF-8"?>

<project xmlns="http://maven.apache.org/POM/4.0.0" xmlns:xsi="http://www.w3.org/2001/XMLSchema-instance"
  xsi:schemaLocation="http://maven.apache.org/POM/4.0.0 http://maven.apache.org/xsd/maven-4.0.0.xsd">
  <modelVersion>4.0.0</modelVersion>

  <groupId>com.example</groupId>
  <artifactId>mvc_demo4</artifactId>
  <version>1.0-SNAPSHOT</version>
  <modules>
    <module>ssm_dao</module>
    <module>ssm_service</module>
    <module>ssm_controller</module>
  </modules>
  <packaging>pom</packaging>

  <name>mvc_demo4 Maven Webapp</name>
  <!-- FIXME change it to the project's website -->
  <url>https://www.example.com</url>

  <properties>
    <!-- Spring版本 -->
    <spring.version>5.2.12.RELEASE</spring.version>
    <project.build.sourceEncoding>UTF-8</project.build.sourceEncoding>
    <maven.compiler.source>1.7</maven.compiler.source>
    <maven.compiler.target>1.7</maven.compiler.target>
  </properties>

  <dependencies>
    <!-- mybatis -->
    <dependency>
      <groupId>org.mybatis</groupId>
      <artifactId>mybatis</artifactId>
      <version>3.5.7</version>
    </dependency>
    <!-- mysql驱动 -->
    <dependency>
      <groupId>mysql</groupId>
      <artifactId>mysql-connector-java</artifactId>
      <version>8.0.27</version>
    </dependency>
    <!-- druid连接池 -->
    <dependency>
      <groupId>com.alibaba</groupId>
      <artifactId>druid</artifactId>
      <version>1.2.8</version>
    </dependency>
    <!-- Mybatis与Spring的整合包 -->
    <dependency>
      <groupId>org.mybatis</groupId>
      <artifactId>mybatis-spring</artifactId>
      <version>2.0.6</version>
    </dependency>
    <dependency>
      <groupId>org.springframework</groupId>
      <artifactId>spring-jdbc</artifactId>
      <version>${spring.version}</version>
    </dependency>
    <!-- springmvc -->
    <dependency>
      <groupId>org.springframework</groupId>
      <artifactId>spring-context</artifactId>
      <version>${spring.version}</version>
    </dependency>
    <dependency>
      <groupId>org.springframework</groupId>
      <artifactId>spring-web</artifactId>
      <version>${spring.version}</version>
    </dependency>
    <dependency>
      <groupId>org.springframework</groupId>
      <artifactId>spring-webmvc</artifactId>
      <version>${spring.version}</version>
    </dependency>
    <!-- 事务 -->
    <dependency>
      <groupId>org.springframework</groupId>
      <artifactId>spring-tx</artifactId>
      <version>${spring.version}</version>
    </dependency>
    <dependency>
      <groupId>org.aspectj</groupId>
      <artifactId>aspectjweaver</artifactId>
      <version>1.8.7</version>
    </dependency>
    <!-- jstl -->
    <dependency>
      <groupId>org.apache.taglibs</groupId>
      <artifactId>taglibs-standard-spec</artifactId>
      <version>1.2.5</version>
    </dependency>
    <dependency>
      <groupId>org.apache.taglibs</groupId>
      <artifactId>taglibs-standard-impl</artifactId>
      <version>1.2.5</version>
    </dependency>
    <!-- servlet -->
    <dependency>
      <groupId>javax.servlet</groupId>
      <artifactId>servlet-api</artifactId>
      <version>2.5</version>
      <scope>provided</scope>
    </dependency>
    <!-- jsp -->
    <dependency>
      <groupId>javax.servlet.jsp</groupId>
      <artifactId>jsp-api</artifactId>
      <version>2.0</version>
      <scope>provided</scope>
    </dependency>
    <!-- junit -->
    <dependency>
      <groupId>junit</groupId>
      <artifactId>junit</artifactId>
      <version>4.12</version>
      <scope>test</scope>
    </dependency>
    <dependency>
      <groupId>org.springframework</groupId>
      <artifactId>spring-test</artifactId>
      <version>${spring.version}</version>
    </dependency>
    <!-- log4j -->
    <dependency>
      <groupId>log4j</groupId>
      <artifactId>log4j</artifactId>
      <version>1.2.12</version>
    </dependency>
  </dependencies>

  <build>
    <plugins>
      <!-- tomcat插件 -->
      <plugin>
        <groupId>org.apache.tomcat.maven</groupId>
        <artifactId>tomcat7-maven-plugin</artifactId>
        <version>2.1</version>
        <configuration>
          <port>8080</port>
          <path>/</path>
          <uriEncoding>UTF-8</uriEncoding>
          <server>tomcat7</server>
          <systemProperties>
            <java.util.logging.SimpleFormatter.format>%1$tH:%1$tM:%1$tS%2 $s%n%4$s: %5$s%6$s%n
            </java.util.logging.SimpleFormatter.format>
          </systemProperties>
        </configuration>
      </plugin>
    </plugins>
  </build>
</project>
三、创建dao工程
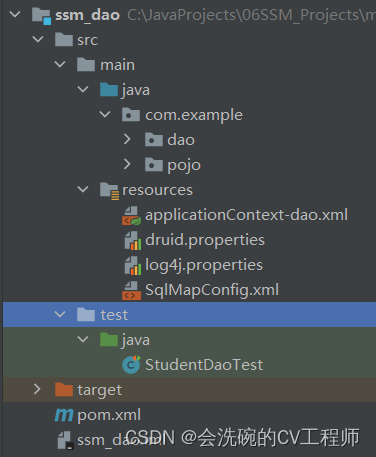
3.1 在父工程下创建maven普通java子工程ssm_dao
目录结构如下图:
3.2 实体类
Student.java
package com.example.pojo;

public class Student {
    private int id;
    private String name;
    private String sex;
    private String address;

    public Student() {
    }

    public Student(int id, String name, String sex, String address) {
        this.id = id;
        this.name = name;
        this.sex = sex;
        this.address = address;
    }

    public int getId() {
        return id;
    }

    public void setId(int id) {
        this.id = id;
    }

    public String getName() {
        return name;
    }

    public void setName(String name) {
        this.name = name;
    }

    public String getSex() {
        return sex;
    }

    public void setSex(String sex) {
        this.sex = sex;
    }

    public String getAddress() {
        return address;
    }

    public void setAddress(String address) {
        this.address = address;
    }

    @Override
    public String toString() {
        return "Student [ " +
                "id=" + id +
                ", name='" + name + '\'' +
                ", sex='" + sex + '\'' +
                ", address='" + address + '\'' +
                " ]";
    }
}
3.3 持久层接口
StudentDao.java
package com.example.dao;

import com.example.pojo.Student;
import org.apache.ibatis.annotations.Insert;
import org.apache.ibatis.annotations.Select;

import java.util.List;

public interface StudentDao {
    // 查询所有学生
    @Select("select * from student")
    List<Student> findAll();

    // 添加学生
    @Insert("insert into student values(null,#{name},#{sex},#{address})")
    void add(Student student);
}
3.4 log4j.properties配置文件
这里有这个日志文件是为了控制输出的时候可以更加直观感受到我们操作流程:
log4j.rootCategory=debug, CONSOLE, LOGFILE
log4j.logger.org.apache.axis.enterprise=FATAL, CONSOLE
log4j.appender.CONSOLE=org.apache.log4j.ConsoleAppender
log4j.appender.CONSOLE.layout=org.apache.log4j.PatternLayout
log4j.appender.CONSOLE.layout.ConversionPattern=[%d{MM/dd HH:mm:ss}] %-6r [%15.15t] %-5p %30.30c %x - %m\n
3.5 数据库配置文件druid.properties
jdbc.driverClassName=com.mysql.cj.jdbc.Driver
jdbc.url=jdbc:mysql:///student
jdbc.username=自己用户名
jdbc.password=自己密码
3.6 MyBatis配置文件SqlMapConfig.xml
因为我这里功能不多,就没有使用配置文件开发,只是用了注解,但也放了一个模板在这里
<?xml version="1.0" encoding="UTF-8" ?>
<!DOCTYPE configuration
        PUBLIC "-//mybatis.org//DTD Config 3.0//EN"
        "http://mybatis.org/dtd/mybatis-3-config.dtd">
<configuration>

</configuration>
3.7 Spring配置文件applicationContext-dao.xml
<?xml version="1.0" encoding="UTF-8" ?>
<beans
        xmlns="http://www.springframework.org/schema/beans"
        xmlns:xsi="http://www.w3.org/2001/XMLSchema-instance"
        xmlns:context="http://www.springframework.org/schema/context"
        xsi:schemaLocation="http://www.springframework.org/schema/beans
        http://www.springframework.org/schema/beans/spring-beans.xsd
        http://www.springframework.org/schema/context
        http://www.springframework.org/schema/context/spring-context.xsd">

    <!-- 读取数据库配置文件 -->
    <context:property-placeholder location="classpath:druid.properties"/>

    <!-- 配置数据源 -->
    <bean id="dataSource" class="com.alibaba.druid.pool.DruidDataSource">
        <property name="driverClassName" value="${jdbc.driverClassName}"/>
        <property name="url" value="${jdbc.url}"/>
        <property name="username" value="${jdbc.username}"/>
        <property name="password" value="${jdbc.password}"/>
    </bean>

    <!-- SqlSessionFactory -->
    <bean id="sqlSessionFactory" class="org.mybatis.spring.SqlSessionFactoryBean">
        <property name="dataSource" ref="dataSource"/>
        <property name="configLocation" value="classpath:SqlMapConfig.xml"/>
    </bean>

    <!-- 配置扫描包对象,为包下的接口创建代理对象 -->
    <bean id="mapperScanner" class="org.mybatis.spring.mapper.MapperScannerConfigurer">
        <property name="basePackage" value="com.example.dao"/>
    </bean>
</beans>
3.8 测试持久层接口方法
测试类:
import com.example.dao.StudentDao;
import com.example.pojo.Student;
import org.junit.Test;
import org.junit.runner.RunWith;
import org.springframework.beans.factory.annotation.Autowired;
import org.springframework.test.context.ContextConfiguration;
import org.springframework.test.context.junit4.SpringJUnit4ClassRunner;

import java.util.List;

@RunWith(SpringJUnit4ClassRunner.class)
@ContextConfiguration(locations = "classpath:applicationContext-dao.xml")
public class StudentDaoTest {
    @Autowired
    private StudentDao studentDao;

    @Test
    public void testFindAll(){
        List<Student> all = studentDao.findAll();
        all.forEach(System.out::println);
    }

    @Test
    public void testAdd(){
        Student student = new Student(0,"SXT","女","上海");
        studentDao.add(student);
    }
}
3.8.1 测试查询所有用户
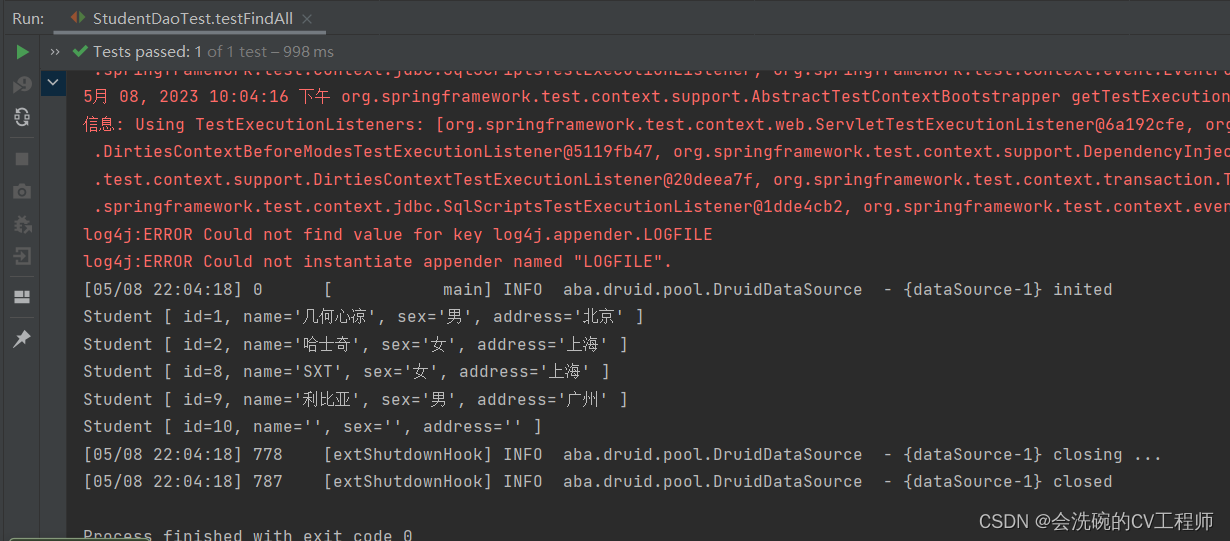
OK,测试成功,接着下一步
3.8.2 测试添加用户
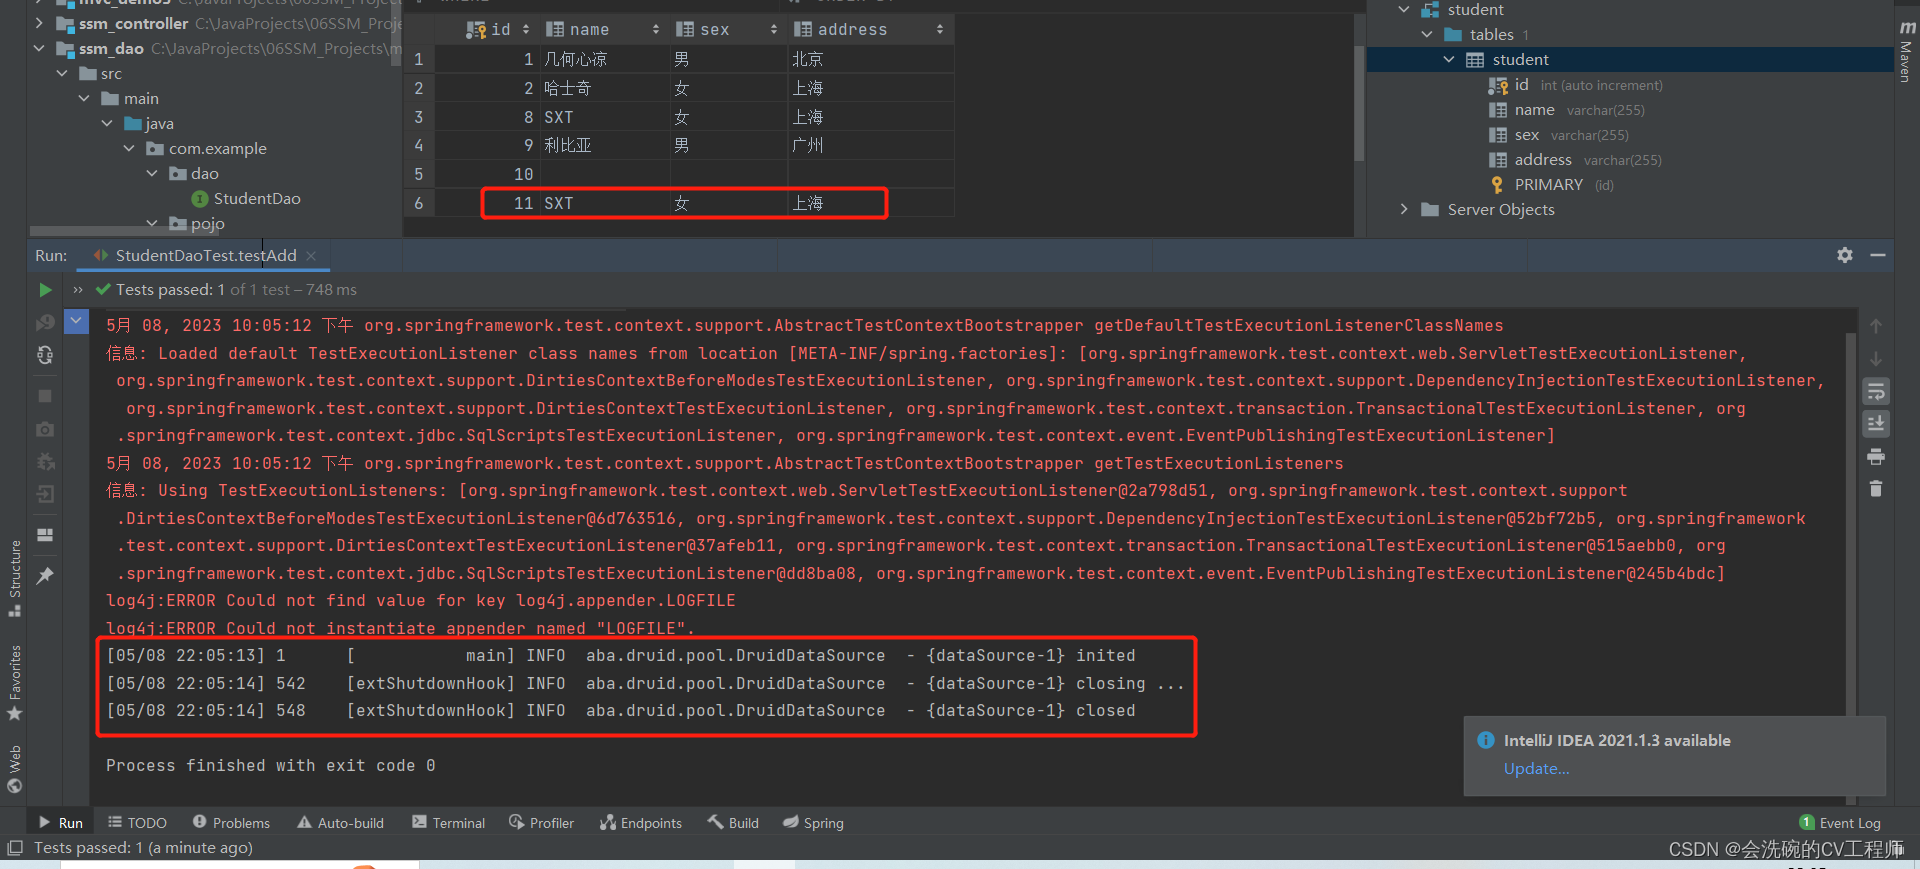
OK,测试成功,接着下一步
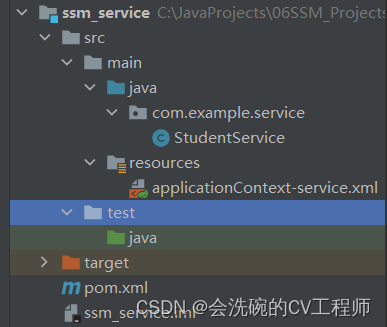
四、创建service工程
4.1 在父工程下创建maven普通java子工程ssm_service
工程目录结构图:
4.2 引入依赖
    <dependencies>
        <dependency>
            <groupId>com.example</groupId>
            <artifactId>ssm_dao</artifactId>
            <version>1.0-SNAPSHOT</version>
        </dependency>
    </dependencies>
4.3 创建服务层方法
StudentService.java
package com.example.service;

import com.example.dao.StudentDao;
import com.example.pojo.Student;
import org.springframework.beans.factory.annotation.Autowired;
import org.springframework.stereotype.Service;

import java.util.List;

@Service
public class StudentService {
    @Autowired
    private StudentDao studentDao;

    public List<Student> findAllStudent(){
        return studentDao.findAll();
    }

    public void addStudent(Student student){
        studentDao.add(student);
    }
}
4.4 创建配置文件applicationContext-service.xml
虽然说本项目需求较少,但是该有的配置我们都得整一个,巩固一下也好
<?xml version="1.0" encoding="UTF-8" ?>
<beans
xmlns="http://www.springframework.org/schema/beans"
xmlns:xsi="http://www.w3.org/2001/XMLSchema-instance"
xmlns:context="http://www.springframework.org/schema/context"
xmlns:aop="http://www.springframework.org/schema/aop"
xmlns:tx="http://www.springframework.org/schema/tx"
xsi:schemaLocation="http://www.springframework.org/schema/beans
http://www.springframework.org/schema/beans/spring-beans.xsd
http://www.springframework.org/schema/context
http://www.springframework.org/schema/context/spring-context.xsd
http://www.springframework.org/schema/aop
http://www.springframework.org/schema/aop/spring-aop.xsd
http://www.springframework.org/schema/tx
http://www.springframework.org/schema/tx/spring-tx.xsd">
<!-- 包扫描 -->
<context:component-scan base-package="com.example.service"/>
<!-- 事务管理器 -->
<bean id="transactionManger" class="org.springframework.jdbc.datasource.DataSourceTransactionManager">
<property name="dataSource" ref="dataSource"/>
</bean>
<!-- 通知 -->
<tx:advice id="txAdvice" transaction-manager="transactionManger">
<tx:attributes>
<tx:method name="*"/>
</tx:attributes>
</tx:advice>
<!-- 切面 -->
<aop:config>
<aop:advisor advice-ref="txAdvice" pointcut="execution(* com.example.service.*.*(..))"/>
</aop:config>
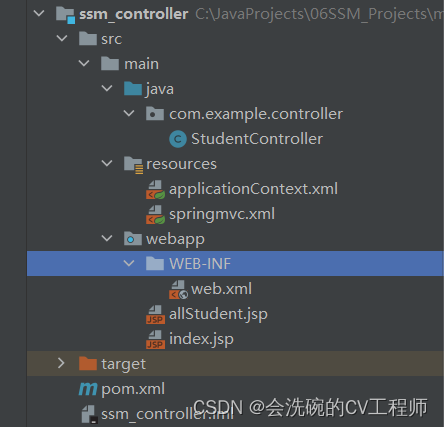
</beans>五、创建controller工程
5.1 在父工程下使用maven创建web类型子工程ssm_controller
目录结构图如下:
5.2 引入依赖
controller工程引入service子工程的依赖,并配置ssm父工程
  <parent>
    <artifactId>mvc_demo4</artifactId>
    <groupId>com.example</groupId>
    <version>1.0-SNAPSHOT</version>
  </parent>

  <dependencies>
    <dependency>
      <groupId>com.example</groupId>
      <artifactId>ssm_service</artifactId>
      <version>1.0-SNAPSHOT</version>
    </dependency>
  </dependencies>
5.3 控制器类
package com.example.controller;

import com.example.pojo.Student;
import com.example.service.StudentService;
import org.springframework.beans.factory.annotation.Autowired;
import org.springframework.stereotype.Controller;
import org.springframework.ui.Model;
import org.springframework.web.bind.annotation.RequestMapping;

import java.util.List;

@RequestMapping("/student")
@Controller
public class StudentController {
    @Autowired
    private StudentService studentService;

    @RequestMapping("/all")
    public String all(Model model){
        List<Student> allStudent = studentService.findAllStudent();
        model.addAttribute("students",allStudent);
        return "allStudent";
    }

    @RequestMapping("add")
    public String add(Student student){
        studentService.addStudent(student);
        // 重定向到查询所有学生
        return "redirect:/student/all";
    }
}
5.4 SpringMVC配置文件springmvc.xml
<?xml version="1.0" encoding="UTF-8" ?>
<beans
    xmlns="http://www.springframework.org/schema/beans"
    xmlns:mvc="http://www.springframework.org/schema/mvc"
    xmlns:context="http://www.springframework.org/schema/context"
    xmlns:xsi="http://www.w3.org/2001/XMLSchema-instance"
    xsi:schemaLocation="
    http://www.springframework.org/schema/beans
    http://www.springframework.org/schema/beans/spring-beans.xsd
    http://www.springframework.org/schema/mvc
    http://www.springframework.org/schema/mvc/spring-mvc.xsd
    http://www.springframework.org/schema/context
    http://www.springframework.org/schema/context/spring-context.xsd">

    <!-- 扫描Controller包 -->
    <context:component-scan base-package="com.example.controller"/>

    <!-- 配置视图解析器 -->
    <bean
        id="internalResolver" class="org.springframework.web.servlet.view.InternalResourceViewResolver">
        <property name="prefix" value="/"/>
        <property name="suffix" value=".jsp"/>
    </bean>

    <!-- 开启SpringMVC注解的支持 -->
    <mvc:annotation-driven/>

    <!-- 放行静态资源 -->
    <mvc:default-servlet-handler/>

</beans>
5.5 Spring的总配置文件applicationContext.xml
Spring的总配置文件applicationContext.xml,该文件引入dao和service层的Spring配置文件
<?xml version="1.0" encoding="UTF-8" ?>
<beans
    xmlns="http://www.springframework.org/schema/beans"
    xmlns:xsi="http://www.w3.org/2001/XMLSchema-instance"
    xsi:schemaLocation="http://www.springframework.org/schema/beans
    http://www.springframework.org/schema/beans/spring-beans.xsd">

    <import resource="applicationContext-dao.xml"/>
    <import resource="applicationContext-service.xml"/>

</beans>
5.6 web.xml中进行配置
在web.xml中配置Spring监听器,该监听器会监听服务器启动,并自动创建Spring的IOC容器,并配置SpringMVC的前端控制器和编码过滤器
<!DOCTYPE web-app PUBLIC
 "-//Sun Microsystems, Inc.//DTD Web Application 2.3//EN"
 "http://java.sun.com/dtd/web-app_2_3.dtd" >

<web-app
        xmlns="http://xmlns.jcp.org/xml/ns/javaee"
        xmlns:xsi="http://www.w3.org/2001/XMLSchema-instance"
        xsi:schemaLocation="http://xmlns.jcp.org/xml/ns/javaee
        http://xmlns.jcp.org/xml/ns/javaee/web-app_3_1.xsd" version="3.1">

  <display-name>Archetype Created Web Application</display-name>

  <!-- 创建Spring容器的监听器 -->
  <listener>
    <listener-class>org.springframework.web.context.ContextLoaderListener</listener-class>
  </listener>

  <context-param>
    <param-name>contextConfigLocation</param-name>
    <param-value>classpath:applicationContext.xml</param-value>
  </context-param>

  <!-- 前端控制器 -->
  <servlet>
    <servlet-name>dispatchServlet</servlet-name>
    <servlet-class>org.springframework.web.servlet.DispatcherServlet</servlet-class>
    <init-param>
      <param-name>contextConfigLocation</param-name>
      <param-value>classpath:springmvc.xml</param-value>
    </init-param>
    <load-on-startup>1</load-on-startup>
  </servlet>
  <servlet-mapping>
    <servlet-name>dispatchServlet</servlet-name>
    <url-pattern>/</url-pattern>
  </servlet-mapping>

  <!-- 编码过滤器 -->
  <filter>
    <filter-name>encFilter</filter-name>
    <filter-class>org.springframework.web.filter.CharacterEncodingFilter</filter-class>
    <init-param>
      <param-name>encoding</param-name>
      <param-value>utf-8</param-value>
    </init-param>
  </filter>
  <filter-mapping>
    <filter-name>encFilter</filter-name>
    <url-pattern>/*</url-pattern>
  </filter-mapping>
</web-app>
5.7 JSP页面allStudent.jsp
<%@ page contentType="text/html;charset=UTF-8" language="java" %>
<%@ taglib prefix="c" uri="http://java.sun.com/jsp/jstl/core" %>
<html>
<head>
    <title>所有学生</title>
</head>
<body>

    <!-- 添加学生表单 -->
    <form action="/student/add" method="post">
        <table>
            <tr>
                <th>姓名:</th>
                <td><input name="name"></td>
            </tr>
            <tr>
                <th>性别:</th>
                <td><input name="sex"></td>
            </tr>
            <tr>
                <th>地址:</th>
                <td><input name="address"></td>
            </tr>
            <tr>
                <td align="center"><input type="submit" value="提交"/></td>
            </tr>
        </table>
    </form>

    <!-- 展示学生表格 -->
    <table width="500" cellpadding="0" cellspacing="0" border="1" align="center">
        <tr>
            <th>id</th>
            <th>姓名</th>
            <th>性别</th>
            <th>地址</th>
        </tr>
        <c:forEach items="${students}" var="studnet">
            <tr>
                <td>${studnet.id}</td>
                <td>${studnet.name}</td>
                <td>${studnet.sex}</td>
                <td>${studnet.address}</td>
            </tr>
        </c:forEach>
    </table>

</body>
</html>
5.8 运行项目
我们直接访问http://localhost:8080/allStudent.jsp即可
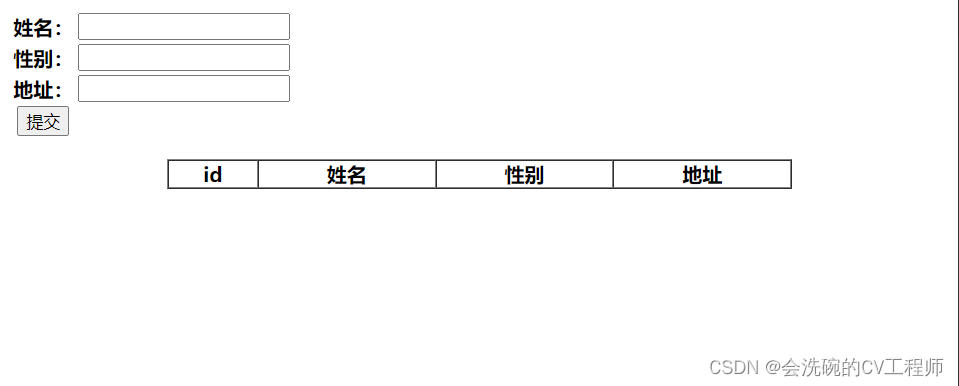
我们可以看到的页面是这样的,因为此时下方表格没有传入参数,因此就没有数据,但是只要我们对上方的输入框输入数据提交添加用户就可以刷新下方表格了。
OK,本次专栏就到此告一段落了,希望该专栏可以给各位读者有所帮助,这篇文章也是我写过最长的一篇文章,但绝对是最详细的。
往期专栏&文章相关导读
大家如果对于本期内容有什么不了解的话也可以去看看往期的内容,下面列出了博主往期精心制作的Maven,Mybatis等专栏系列文章,走过路过不要错过哎!如果对您有所帮助的话就点点赞,收藏一下啪。其中Spring专栏有些正在更,所以无法查看,但是当博主全部更完之后就可以看啦。
1. Maven系列专栏文章
| Maven系列专栏 | Maven工程开发 |
| Maven聚合开发【实例详解---5555字】 |
2. Mybatis系列专栏文章
3. Spring系列专栏文章
4. Spring MVC系列专栏文章

助力合肥开发者学习交流的技术社区,不定期举办线上线下活动,欢迎大家的加入
更多推荐


 144
144 0
0- 0


 已为社区贡献1条内容

所有评论(0)