调用腾讯API实现人像分割
岳泽昂,男,西安工程大学电子信息学院,2022级研究生研究方向:机器视觉与人工智能电子邮件:1975085289@qq.com陈梦丹,女,西安工程大学电子信息学院,2022级硕士研究生,张宏伟人工智能课题组研究方向:机器视觉与人工智能电子邮件:1169738496@qq.com二分类人像分割输入参数:自定义人像分割输入参数:二分类人像分割输出参数:自定义人像分割输出参数:搜索人像分割,点击进入。点
·
目录
1. 作者介绍
岳泽昂,男,西安工程大学电子信息学院,2022级研究生
研究方向:机器视觉与人工智能
电子邮件:1975085289@qq.com
陈梦丹,女,西安工程大学电子信息学院,2022级硕士研究生,张宏伟人工智能课题组
研究方向:机器视觉与人工智能
电子邮件:1169738496@qq.com
2.腾讯云API人像分割
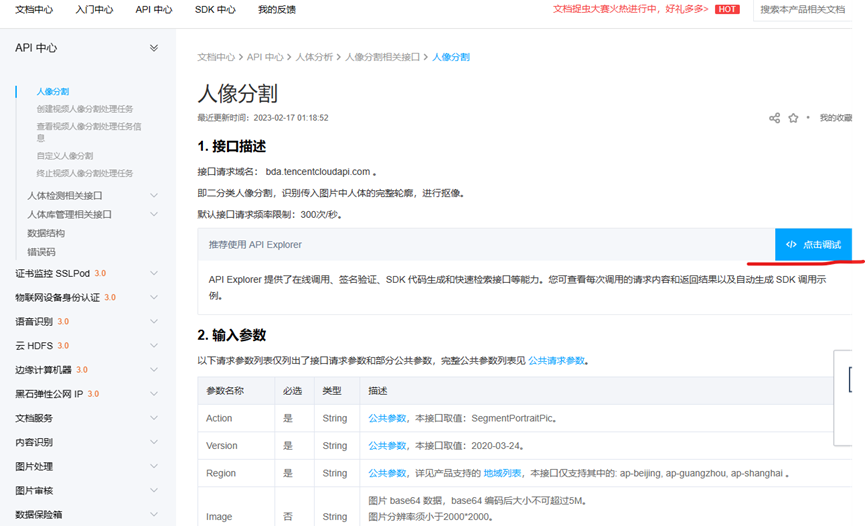
2.1 人像分割接口描述
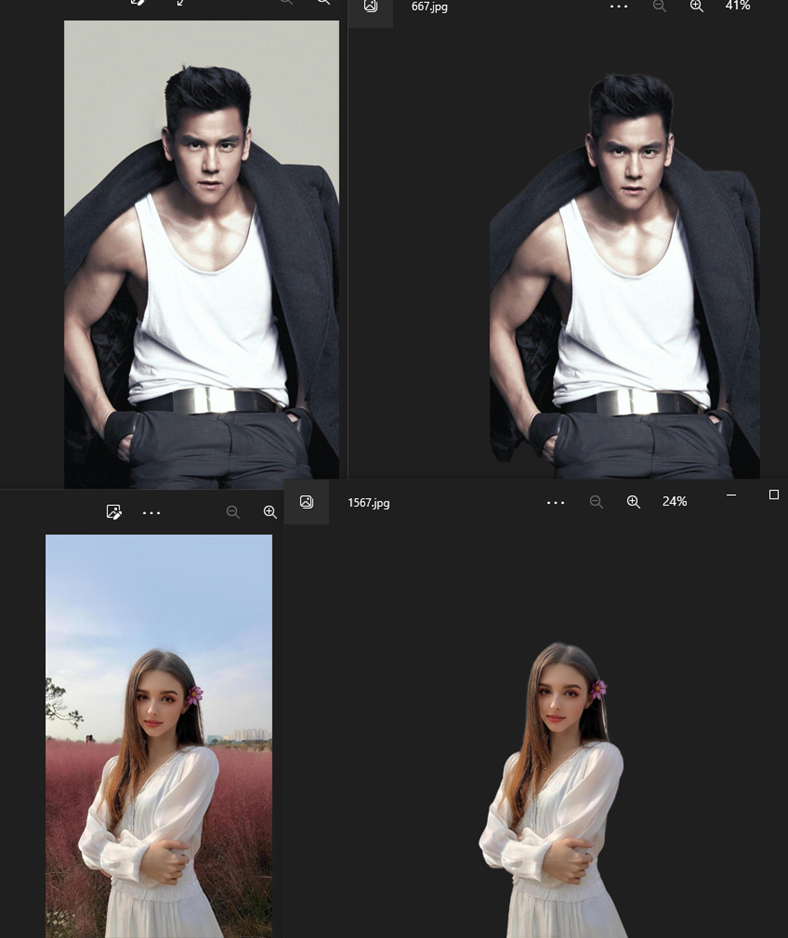
- 人像分割:即二分类人像分割,识别传入图片中人体的完整轮廓,进行抠像。
- 自定义人像分割:在前后景分割的基础上优化多分类分割,支持对头发、五官等的分割,既作为换发型、挂件等底层技术,也可用于抠人头、抠人脸等玩法。
接口请求域名: bda.tencentcloudapi.com。
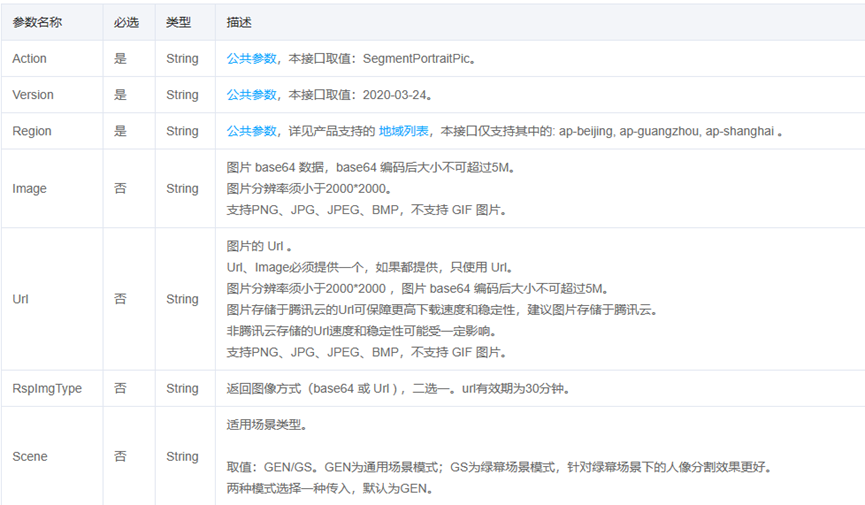
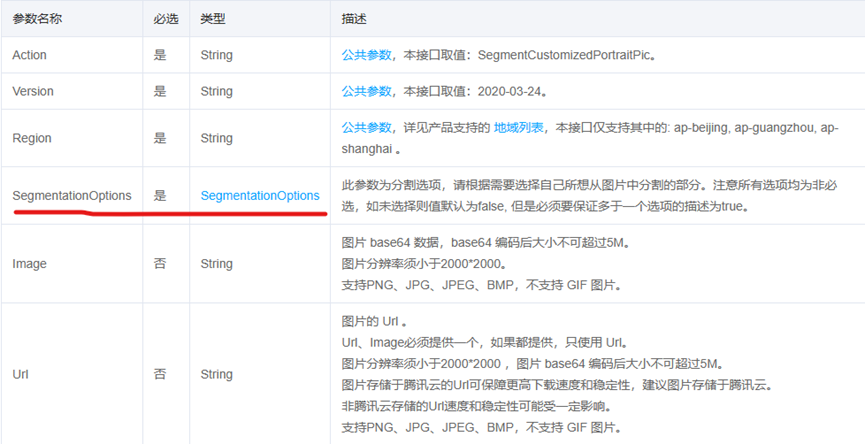
2.2 请求参数介绍
二分类人像分割输入参数:
自定义人像分割输入参数:
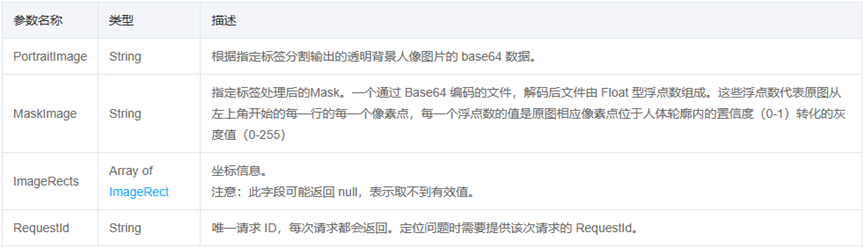
二分类人像分割输出参数:
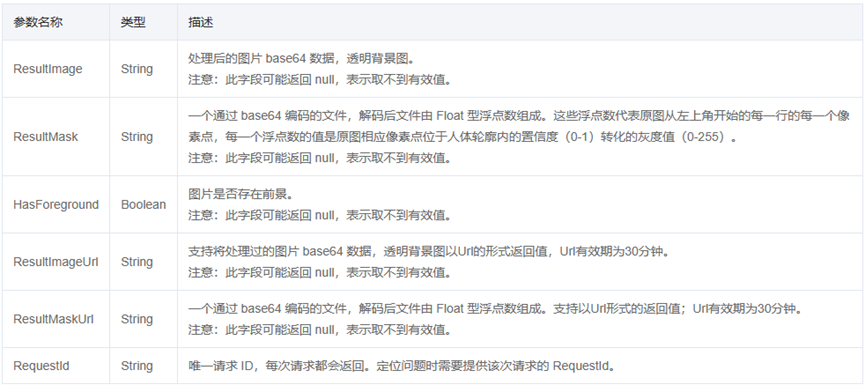
自定义人像分割输出参数:
3.代码实现
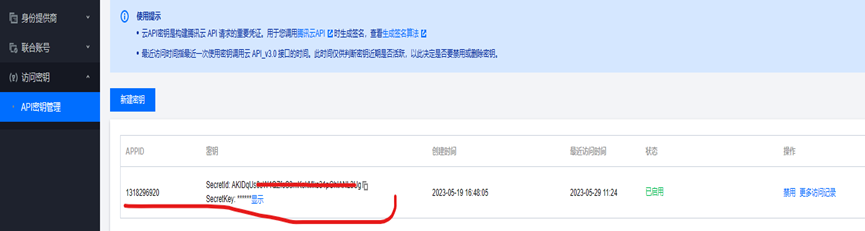
3.1 获取SecretId和SecretKey
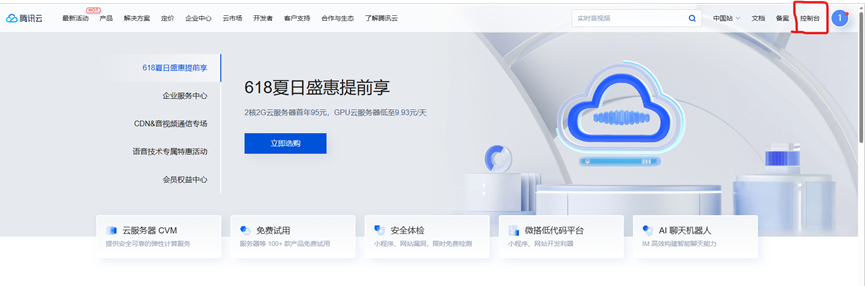
注册并登录 腾讯云账号,点击控制台,搜索访问密钥,找到之前用过的SecretId和SecretKey。
3.2 人像分割代码调试
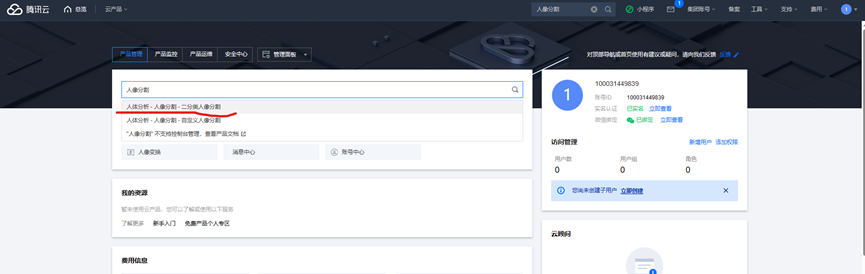
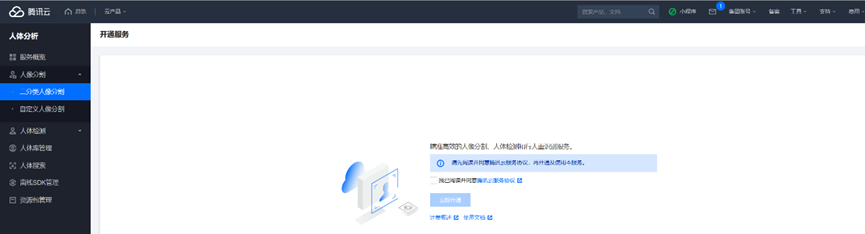
搜索人像分割,点击进入。
点击立即开通后,就会有1000次的免费资源。
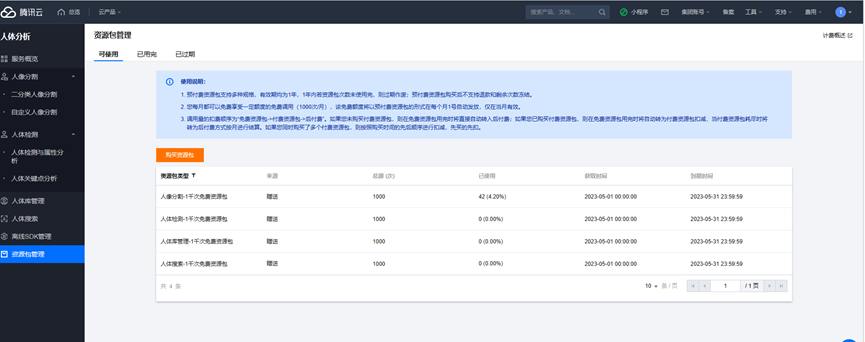
点击资源包管理就可以看到免费资源的使用情况。
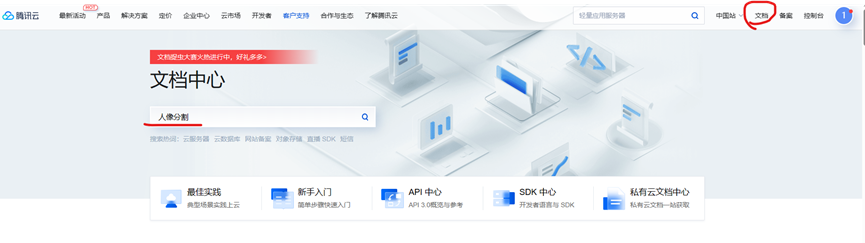
回到主页,点击文档,搜索框搜索人像分割,之后点击人体分析。
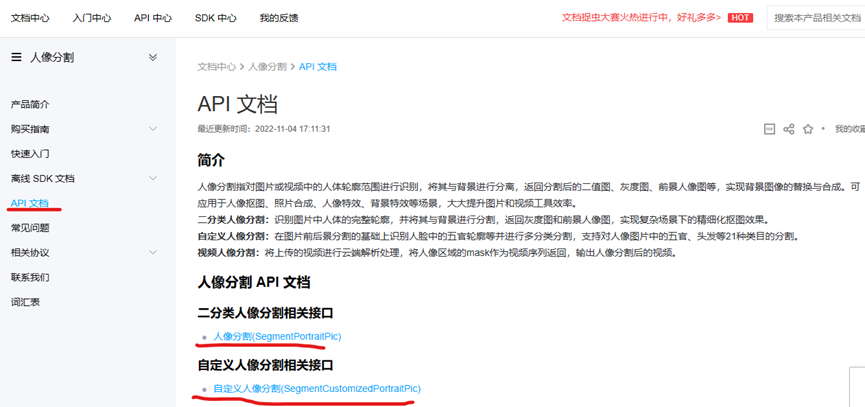
点击API文档及相应的链接,再点击调试。
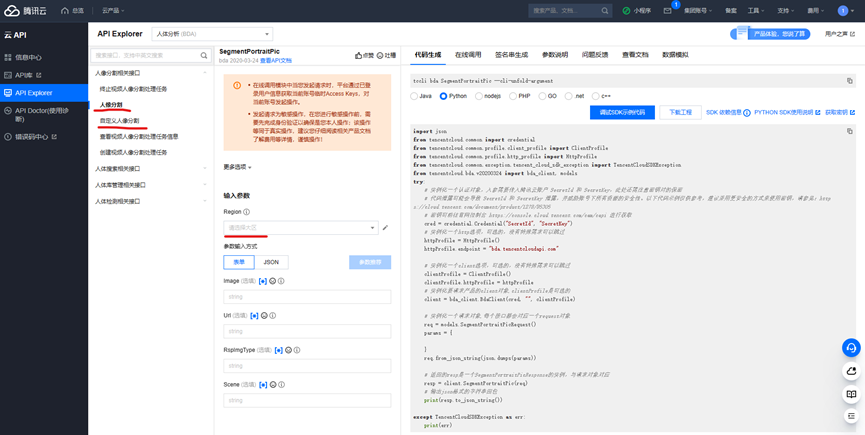
3.3 完整代码
import json
import base64
import matplotlib.pyplot as plt

from tencentcloud.common import credential
from tencentcloud.common.profile.client_profile import ClientProfile
from tencentcloud.common.profile.http_profile import HttpProfile
from tencentcloud.common.exception.tencent_cloud_sdk_exception import TencentCloudSDKException
from tencentcloud.bda.v20200324 import bda_client, models

try:
    cred = credential.Credential("***********mKekMks31pOhlANL3Ug", "vhFXbQ2QXQ4SZU9Zjd******YzEG3b")
    # 实例化一个http选项,可选的,没有特殊需求可以跳过
    httpProfile = HttpProfile()
    httpProfile.endpoint = "bda.tencentcloudapi.com"

    # 实例化一个client选项,可选的,没有特殊需求可以跳过
    clientProfile = ClientProfile()
    clientProfile.httpProfile = httpProfile
    # 实例化要请求产品的client对象,clientProfile是可选的
    client = bda_client.BdaClient(cred, "ap-beijing", clientProfile)

    # 实例化一个请求对象,每个接口都会对应一个request对象
    img_path="人像分割前的图像加载路径"
    with open(img_path,"rb") as file:
        img=base64.b64encode(file.read())

    req = models.SegmentPortraitPicRequest()                   #二分割
    # req = models.SegmentCustomizedPortraitPicRequest()     #自定义分割
    params = {
        "Image": str(img, encoding='utf-8'),
        "SegmentationOptions": {
            # "Background": True,
            # "Hair": True,
            # "LeftEyebrow": True,
            # "RightEyebrow": True,
            # "LeftEye": True,
            # "RightEye": True,
            # "Nose": True,
            # "UpperLip": True,
            # "LowerLip": True,
            # "Tooth": True,
            # "Mouth": True,
            # "LeftEar": True,
            # "RightEar": True,
            "Face": True,
            "Head": True,
            # "Body": True,
            # "Hat": True,
            # "Headdress": True,
            # "Earrings": True,
            # "Necklace": True,
            # "Belongings": True
        }
    }
    req.from_json_string(json.dumps(params))

    # 返回的resp是一个SegmentPortraitPicResponse的实例,与请求对象对应
    resp = client.SegmentPortraitPic(req)                         #二分割
    # resp = client.SegmentCustomizedPortraitPic(req)         #自定义分割
    # 输出json格式的字符串回包
    json_data = resp.to_json_string()
    resp = json.loads(json_data)
    result = str(resp).replace(", ","\n")
    print(result)
    with open("人像分割后的图像保存路径","wb") as file:
      file.write(base64.b64decode(resp["ResultImage"]))         #二分割
    # with open("自己的图像保存路径","wb") as file:
    #   file.write(base64.b64decode(resp["PortraitImage"]))     #自定义分割
except TencentCloudSDKException as err:
    print(err)
3.4 实验结果

CSDN联合极客时间,共同打造面向开发者的精品内容学习社区,助力成长!
更多推荐


 4
4 0
0- 0


 已为社区贡献31条内容

所有评论(0)