
用vue实现列表的增删改查基本功能(简单易懂)
用vue实现列表的增删改查基本功能(简单易懂)
·
文章目录
目录
四、效果图如下
前言
随着人工智能的不断发展,机器学习这门技术也越来越重要,很多人都开启了学习机器学习,本文就介绍了机器学习的基础内容。
提示:以下是本篇文章正文内容,下面案例可供参考
一、安装vue
vue开发文档参考这里可以下载 vue.js文
或者引用js连接
<script src="https://cdn.jsdelivr.net/npm/vue@2/dist/vue.js"></script>
1.打开命令窗口 输入:
npm i vue
二、使用vue
1、创建容器
2、引入
3、new Vue({
el:"#app",
data:{},
mthods:{}
})
三、相关代码
1.css代码
.modal {
				width: 100vw;
				height: 100vh;
				background-color: rgba(0, 0, 0, .6);
				position: absolute;
				left: 0;
				top: 0;
			}

			.modal .cotain {
				width: 400px;
				height: 300px;
				position: absolute;
				left: 50%;
				top: 50%;
				transform: translate(-50%, -50%);
				background-color: #fff;
			}

			.modal .title {
				width: 100%;
				height: 38px;
				background-color: #00aaff;
				line-height: 38px;
				text-align: center;
			}

			.modal .title span:nth-of-type(2) {
				float: right;
			}
2.html代码
<div id="app">
			<div class="modal" v-show='isshow'>
				<div class="cotain">
					<div class="title"><span>编辑</span><span @click='isshow=false'>x</span></div>
					<div class="content">
						<input type="text" placeholder="标题" v-model='keywords'><br>
						<input type="text" placeholder="作者" v-model='tempItem.author'><br>
						<input type="date" v-model='tempItem.createtime'><br>
						<button @click=updateItem()>确认</button>
						<button @click='isshow=false'>取消</button>
					</div>
				</div>
			</div>
			<input type="text" placeholder="标题" v-model='keywords'><br>

			<input type="text" placeholder="标题" v-model='newItem.title'>
			<input type="text" placeholder="作者" v-model='newItem.author'>
			<input type="date" v-model='newItem.createtime'>
			<button @click='addItem'>确定</button>
			<table border="1" width='600'>
				<tr bgcolor='lightblue'>
					<th>序号</th>
					<th>标题</th>
					<th>作者</th>
					<th>日期</th>
					<th>操作</th>
				</tr>
				<tr v-for="(item,index) in fillist">
					<td>{{index+1}}</td>
					<td>{{item.title}}</td>
					<td>{{item.author}}</td>
					<td>{{item.createtime}}</td>
					<td>
						<a href="javascript:void(0);" @click=deleteItem(item)>删除</a>|
						<a href="javascript:void(0);" @click=editItem(item,index)>编辑</a>

					</td>
				</tr>
			</table>
		</div>
3.Vue代码
<script src="./js/vue.js"></script>  //js代码为vue2的js代码
<!-- <script src="https://cdn.jsdelivr.net/npm/vue@2/dist/vue.js"></script> -->
		<script>
			// 初始化vue实例
			new Vue({
				el: '#app',
				data: {
					keywords:'',
					isshow: false, //是否显示模态框
					editIndex: null, //正在编辑的行号
					newItem: { //新增的对象
						title: "",
						author: '',
						createtime: ''
					},
					tempItem: { //正在编辑的对象
						title: "",
						author: '',
						createtime: ''
					}, //新增的对象
					list: [{
							title: "奇酷",
							author: 'mdy',
							createtime: '2022-09-30'
						},
						{
							title: "考研",
							author: 'dyh',
							createtime: '2022-09-28'
						}
					]
				},
				methods: {
					//添加
					addItem() {
						// 向list新增item
						this.list.unshift({
							...this.newItem
						});
						//清空数据
						this.newItem = {
							title: "",
							author: '',
							createtime: ''
						}
					},
					//删除
					deleteItem(obj) {
						var index = this.list.indexOf(obj);
						if (confirm("确认删除吗?")) {
							this.list.splice(index, 1);
						}

					},
					//编辑渲染
					editItem(item, index) {
						// 1、显示模态框
						this.isshow = true;
						// 2、渲染数据
						this.tempItem = {
							...item
						};
						this.editIndex = index; //正在编辑的行

					},
					// 确认修改
					updateItem() {
						this.list[this.editIndex] = {
							...this.tempItem
						};
						//关闭模态框
						this.isshow=false;
						//清空
						this.tempItem = { //正在编辑的对象
							title: "",
							author: '',
							createtime: ''
						}
					}
				},
				computed:{
					//过滤出的list
					fillist(){
						if(this.keywords.trim()==""){
							return this.list;
						}else{
							return this.list.filter(item=>{
								return item.title.includes(this.keywords);
							})
						}

					}
				}
			})
		</script>
四、效果图如下
1.完成的效果图
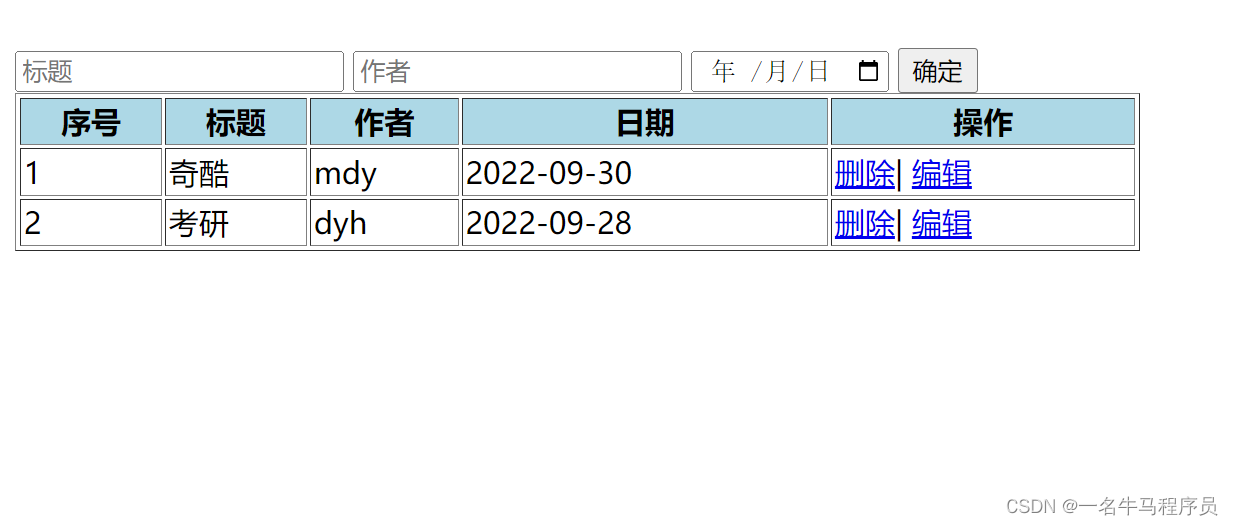
2.添加的效果图


3.删除的效果图:
点击删除序号1时:
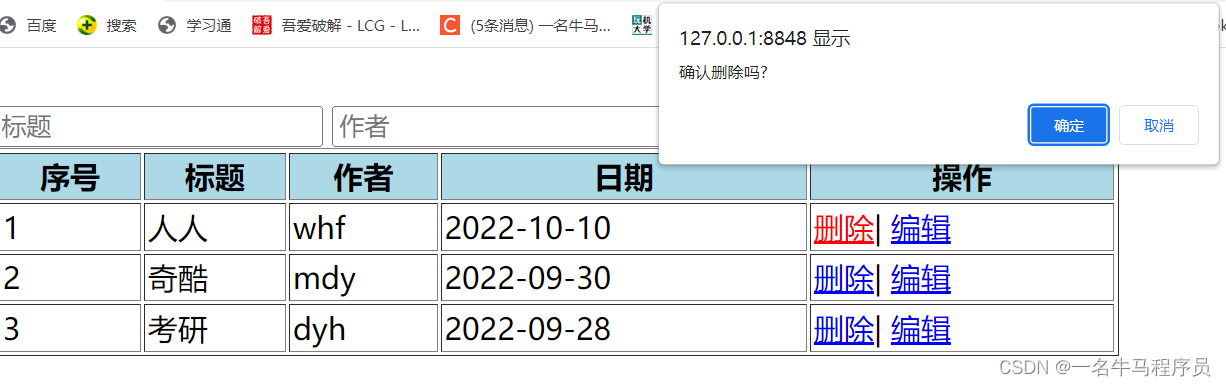
删除成功后:
4.点击修改时:
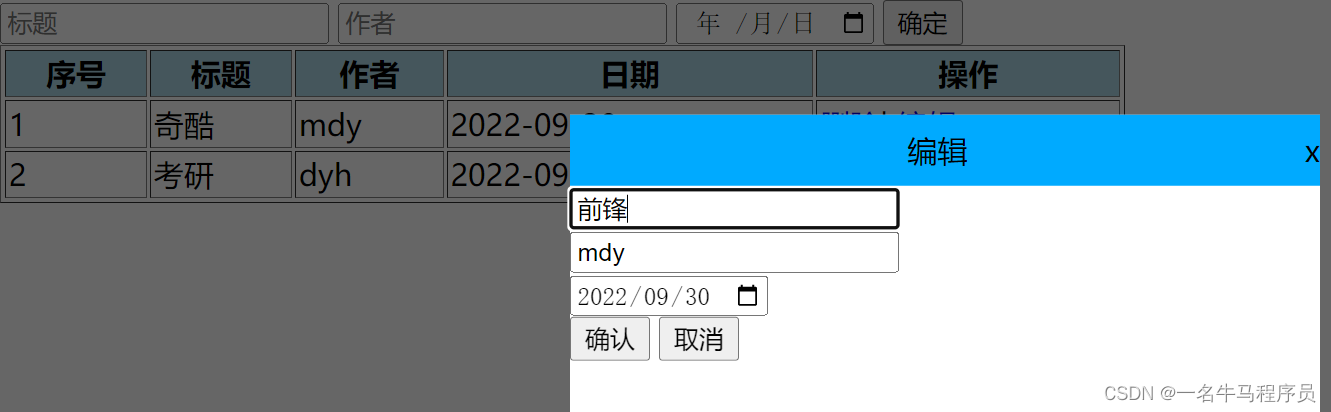
修改成功:
 4. 查询前:

查找标题为奇酷:

总结
以上就是今天要讲的内容,本文仅仅简单介绍了vue的引用以及模态框的使用,而vue提供了大量能使我们快速便捷地处理数据的函数和方法。

为开发者提供学习成长、分享交流、生态实践、资源工具等服务,帮助开发者快速成长。
更多推荐


 18
18 0
0- 0


 已为社区贡献1条内容

所有评论(0)