Flink学习(四)-- Flink常用流处理API
文章目录Flink流处理APIenvironmentcreateLocalEnvironmentcreateRemoteEnvironmentgetExecutionEnvironmentsourcefromCollection从本地集合获取readTextFile从文件获取socketTextStream 从网络套接字获取从kafka获取数据从其他自定义数据源获取transform 转换算子ma
Flink流处理API

flink的流处理API主要分为四个模块:environment,source,transform和sink,各模块的作用分别如下:
environment: 创建执行环境
source: 获取数据源
transform: 转换算子, 做主要的数据处理逻辑
sink: 将处理好的数据输出到外部系统中
1. environment 创建执行环境
创建执行环境共有三种方式:
createLocalEnvironment创建本地环境createRemoteEnvironment提交到远程集群环境执行getExecutionEnvironment根据当前执行环境创建执行环境
1.1 createLocalEnvironment
创建本地执行环境,需要在调用时指定默认的并行度,创建方式如下:
//返回本地执行环境,需要在调用时指定默认的并行度
 LocalStreamEnvironment localEnvironment = StreamExecutionEnvironment.createLocalEnvironment();
有三种创建方式,可选指定并行度,可传自定义配置,不指定并行度默认为Runtime.getRuntime().availableProcessors(),即当前运行环境的计算资源可用线程数
/**
	 * Creates a {@link LocalStreamEnvironment}. The local execution environment
	 * will run the program in a multi-threaded fashion in the same JVM as the
	 * environment was created in. The default parallelism of the local
	 * environment is the number of hardware contexts (CPU cores / threads),
	 * unless it was specified differently by {@link #setParallelism(int)}.
	 *
	 * @return A local execution environment.
	 */
	public static LocalStreamEnvironment createLocalEnvironment() {
		return createLocalEnvironment(defaultLocalParallelism);
	}

	/**
	 * Creates a {@link LocalStreamEnvironment}. The local execution environment
	 * will run the program in a multi-threaded fashion in the same JVM as the
	 * environment was created in. It will use the parallelism specified in the
	 * parameter.
	 *
	 * @param parallelism
	 * 		The parallelism for the local environment.
	 * @return A local execution environment with the specified parallelism.
	 */
	public static LocalStreamEnvironment createLocalEnvironment(int parallelism) {
		return createLocalEnvironment(parallelism, new Configuration());
	}

	/**
	 * Creates a {@link LocalStreamEnvironment}. The local execution environment
	 * will run the program in a multi-threaded fashion in the same JVM as the
	 * environment was created in. It will use the parallelism specified in the
	 * parameter.
	 *
	 * @param parallelism
	 * 		The parallelism for the local environment.
	 * 	@param configuration
	 * 		Pass a custom configuration into the cluster
	 * @return A local execution environment with the specified parallelism.
	 */
	public static LocalStreamEnvironment createLocalEnvironment(int parallelism, Configuration configuration) {
		final LocalStreamEnvironment currentEnvironment;

		currentEnvironment = new LocalStreamEnvironment(configuration);
		currentEnvironment.setParallelism(parallelism);

		return currentEnvironment;
	}

1.2 createRemoteEnvironment
创建集群执行环境,将 Jar 提交到远程服务器。需要在调用时指定 JobManager 的 IP 和端口号,并指定要在集群中运行的 Jar 包,创建方式如下:
//返回集群执行环境,将 Jar 提交到远程服务器。需要在调用时指定 JobManager 的 IP 和端口号,并指定要在集群中运行的 Jar 包。
        StreamExecutionEnvironment remoteEnvironment = StreamExecutionEnvironment.
                createRemoteEnvironment("JobManagerHost",6201,"/user/flink-demo.jar");
同样有三种创建方式,可选指定并行度,可传自定义配置,不指定并行度默认为Runtime.getRuntime().availableProcessors(),即当前运行环境的计算资源可用线程数
public static StreamExecutionEnvironment createRemoteEnvironment(
			String host, int port, String... jarFiles) {
		return new RemoteStreamEnvironment(host, port, jarFiles);
	}

	public static StreamExecutionEnvironment createRemoteEnvironment(
			String host, int port, int parallelism, String... jarFiles) {
		RemoteStreamEnvironment env = new RemoteStreamEnvironment(host, port, jarFiles);
		env.setParallelism(parallelism);
		return env;
	}

	public static StreamExecutionEnvironment createRemoteEnvironment(
			String host, int port, Configuration clientConfig, String... jarFiles) {
		return new RemoteStreamEnvironment(host, port, clientConfig, jarFiles);
	}
1.3 getExecutionEnvironment
创建一个执行环境,表示当前执行程序的上下文。 如果程序是独立调用的,则此方法返回本地执行环境; 如果从命令行客户端调用程序以提交到集群,则此方法返回此集群的执行环境,也就是说,getExecutionEnvironment 会根据查询运行的方 式决定返回什么样的运行环境,是最常用的一种创建执行环境的方式,创建方式如下:
StreamExecutionEnvironment executionEnvironment = StreamExecutionEnvironment.getExecutionEnvironment();
2. source 获取数据源
获取数据源的的方式主要有以下五种方式:
fromCollection从本地集合获取readTextFile从文件获取socketTextStream从网络套接字获取addSource(new FlinkKafkaConsumer<>("kafka-topic", new SimpleStringSchema(), properties));从kafka获取addSource(SourceFunction<OUT> function)从其他自定义数据源获取
2.1 fromCollection从本地集合获取
从集合获取示例代码如下:
 ArrayList<Integer> list = new ArrayList<>(Arrays.asList(1,2,3));
        DataStreamSource<Integer> fromCollection = executionEnvironment.fromCollection(list);
        fromCollection.print("collectionStream");
获取内容如下:

2.2 readTextFile从文件获取
从文件获取示例代码如下:
//从文件读取数据
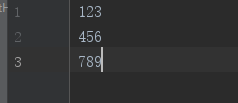
String filePath = "C:\\DATA\\projectHere\\myGitHub\\flink-demo\\src\\main\\resources\\FlinkData.txt";
DataStreamSource<String> textFile = executionEnvironment.readTextFile(filePath);
textFile.print("fileStream");
文件内容如下:
输出内容如下:

2.3 socketTextStream 从网络套接字获取
监听socket实时监听数据示例代码如下:
// socket读取数据
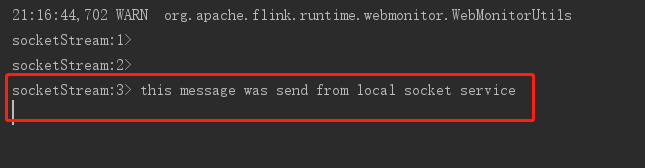
DataStreamSource<String> socketTextStream = executionEnvironment.socketTextStream("localhost", 9000);
socketTextStream.print("socketStream");
- 执行命令开放一个socket服务,端口为9000,命令如下:
nc -lk 9000
- 运行flink程序,
- 在socket窗口发送信息如下:

- flink接收信息如下:
2.4 从kafka获取数据
从kafka获取数据源需先引入以下依赖(依赖版本请根据自己实际情况调整)
<dependency>
			<groupId>org.apache.flink</groupId>
			<artifactId>flink-connector-kafka_2.11</artifactId>
			<version>1.11.2</version>
		</dependency>
从kafka读取的主要代码如下:
//kafka读取数据
Properties props = new Properties();
props.setProperty("bootstrap.servers", "kafka所在host:端口");
props.setProperty("key.deserializer","org.apache.kafka.common.serialization.StringDeserializer");
props.setProperty("value.deserializer","org.apache.kafka.common.serialization.StringDeserializer");
props.setProperty("auto.offset.reset", "latest");
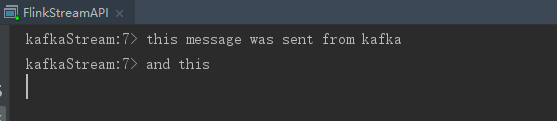
DataStreamSource<String> kafkaStream = executionEnvironment.addSource(new FlinkKafkaConsumer<>("flink-topic", new SimpleStringSchema(), props));
kafkaStream.print("kafkaStream");
从kafka获取数据步骤如下:
- 创建topic,topic名即上文代码中指定的
flink-topic,创建命令如下:
./bin/kafka-topics.sh --create --zookeeper zookeeper:2181 --replication-factor 1 --partitions 1 --topic flink-topic
- 启动生产者,生产数据,命令如下:
./bin/kafka-console-producer.sh --broker-list localhost:9092 --topic flink-topic
3 . 在生产者控制台窗口发送信息如下:

- flink接收信息如下:
2.5 从其他自定义数据源获取
source支持自定义数据源输入,可通过实现SourceFunction<T>接口中的run()和cancel()方法来自定义数据源,这里以生成随机数数据流为例,简单实现一个自定义数据源.
- 自定义数据源, 实现如下:
package spendreport;
import org.apache.flink.streaming.api.functions.source.SourceFunction;
import java.util.Random;

/**
 * Created by HE31 on 2020 /12/6 17:12
 */
public class CustomSource implements SourceFunction<Integer> {
    private  boolean isRun = true;
    @Override
    public void run(SourceContext<Integer> sourceContext) throws Exception {
        while (isRun){
            sourceContext.collect(new Random().nextInt(10));
            Thread.sleep(100);
        }
    }

    // 取消方法
    @Override
    public void cancel() {
        isRun = false;
    }
}
addSource()传入自定义数据源:
 CustomSource source = new CustomSource();
        //source.cancel();
        DataStreamSource<Integer> customSource = executionEnvironment.addSource(source);
        customSource.print("customSourceStream");
- 输出如下:

3. transform 转换算子
转换算子主要对输入的数据流做处理,是四大模块中最关键的模块,其算子主要有:
- map
- flatMap
- filter
- keyBy
- 滚动聚合算子
- sum()
- min()
- max()
- minBy()
- maxBy()
- reduce
- split & select
- connect & coMap
- union
下面分别简单介绍各算子的用法,很多例子中会用到一个WordCount自定义实体类,这里先行声明,其结构如下:
package spendreport;


/**
 * Created by HE31 on 2020/11/29 18:35
 */
public  class WordCount {
    private String word;
    private Integer count;

    public String getWord() {
        return word;
    }

    public void setWord(String word) {
        this.word = word;
    }

    public Integer getCount() {
        return count;
    }

    public void setCount(Integer count) {
        this.count = count;
    }

    public WordCount(String word, Integer count) {
        this.word = word;
        this.count = count;
    }

    public WordCount() {
    }

    @Override
    public String toString() {
        return "WordCount{" +
                "word='" + word + '\'' +
                ", count=" + count +
                '}';
    }

}
3.1 map
map 与java8中的map很类似,都是用来做转换处理
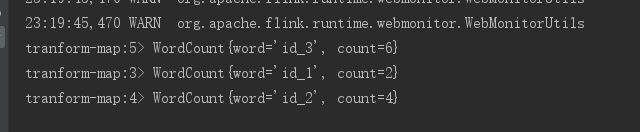
如将集合1,2,3 转换为wordCount对象 ,word为 “id_”+值,count为值*2
  ArrayList<Integer> mapList = new ArrayList<>(Arrays.asList(1,2,3));
        SingleOutputStreamOperator<WordCount> map = executionEnvironment.fromCollection(mapList).map(s -> new WordCount("id_" + s, s * 2));
        map.print("tranform-map");
输出如下:
3.2 flatMap
flatMap主要是对流中的元素做打平等操作
如:将[[1,2],[3,4],[5,6]]转换为[1,2,3,4,5,6]
  List<List<Integer>> lists = new ArrayList<>();
        lists.add(Arrays.asList(1,2));
        lists.add(Arrays.asList(3,4));
        lists.add(Arrays.asList(5,6));
        DataStreamSource<List<Integer>> listDataStreamSource = executionEnvironment.fromCollection(lists);
        listDataStreamSource.print("transform-flatMap-before");
        SingleOutputStreamOperator<Integer> flatMapStream = listDataStreamSource.flatMap((List<Integer> l, Collector<Integer> collector) -> {
            l.forEach(collector::collect);
        }).returns(Types.INT);
        flatMapStream.print("transform-flatMap-after");
输出如下:

这里需要注意的是lambda表达式需要指定返回类型,不然会报参数类型丢失的异常,具体可看另一篇文章:Flink学习(三) – Java版流处理工程运行问题记录
3.3 filter
即对流中元素做过滤操作
如筛选集合[1,2,3]中元素[1]
  ArrayList<Integer> filterList = new ArrayList<>(Arrays.asList(1,2,3));
        SingleOutputStreamOperator<Integer> filter = executionEnvironment.fromCollection(filterList).filter(s -> s == 1);
        filter.print("transform-filter");
输出如下:

3.4 keyBy
逻辑地将一个流拆分成不相交的分区,每个分 区包含具有相同 key 的元素,在内部以 hash 的形式实现的,类似sql中的group by
如:将 wordCount根据word做分区
        ArrayList<WordCount> wordCounts = new ArrayList<>(Arrays.asList(new WordCount("flink", 1)
                , new WordCount("flink", 1)
                , new WordCount("java", 1)
                , new WordCount("sql", 1)
                , new WordCount("java", 1)));
        KeyedStream<WordCount, String> wordCountStringKeyedStream = executionEnvironment.fromCollection(wordCounts).keyBy(WordCount::getWord);
        wordCountStringKeyedStream.print("transform-keyBy");
输出如下:

3.5 滚动聚合算子
通过上一步的keyBy()之后,滚动聚合算子可对分组后的组内元素做聚合操作,如:
- sum()
- min()
- max()
- minBy()
- maxBy()
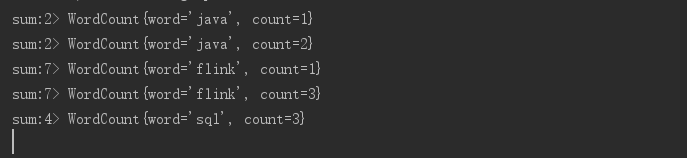
3.5.1 sum
对分区元素做求和操作
如:对wordCount中的count做求和
      ArrayList<WordCount> aggWordCounts = new ArrayList<>(Arrays.asList(new WordCount("flink", 1)
                , new WordCount("flink", 2)
                , new WordCount("java", 1)
                , new WordCount("sql", 3)
                , new WordCount("java", 1)));
        DataStreamSource<WordCount> streamSource = executionEnvironment.fromCollection(aggWordCounts);
        SingleOutputStreamOperator<WordCount> sum = streamSource.keyBy(WordCount::getWord).sum("count");
        sum.print("sum");
输出如下:
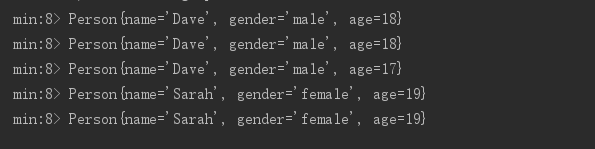
3.5.2 min & minBy
min(): 只求对应属性的最小值
minBy(): 找到对应属性最小值的那条记录
为了便于观察和区分min()与minBy(),再定义一个Person实体类,如下:
package spendreport;

/**
 * Created by HE31 on 2020/12/13 15:16
 */
public class Person {
    /**
     * 姓名
     */
    private String name;
    /**
     * 性别
     */
    private String gender;
    /**
     * 年龄
     */
    private Integer age;

    public Person(String name, String gender, Integer age) {
        this.name = name;
        this.gender = gender;
        this.age = age;
    }

    public Person() {
    }

    public String getName() {
        return name;
    }

    public void setName(String name) {
        this.name = name;
    }

    public String getGender() {
        return gender;
    }

    public void setGender(String gender) {
        this.gender = gender;
    }

    public Integer getAge() {
        return age;
    }

    public void setAge(Integer age) {
        this.age = age;
    }

    @Override
    public String toString() {
        return "Person{" +
                "name='" + name + '\'' +
                ", gender='" + gender + '\'' +
                ", age=" + age +
                '}';
    }
}
用min()求不同性别的最小年龄:
        List<Person> students = new ArrayList<>(Arrays.asList(new Person("Dave", "male", 18)
                , new Person("Tom", "male", 20)
                , new Person("John", "male", 17)
                , new Person("Sarah", "female", 19)
                , new Person("Helen", "female", 25)
        ));
        DataStreamSource<Person> personDataStreamSource = executionEnvironment.fromCollection(students);
        SingleOutputStreamOperator<Person> min = personDataStreamSource.keyBy(Person::getGender).min("age");
       min.print("min");
输出如下:
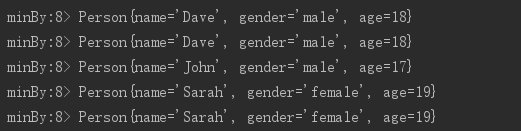
用minBy()找出不同性别的年龄最小的人
 List<Person> students = new ArrayList<>(Arrays.asList(new Person("Dave", "male", 18)
                , new Person("Tom", "male", 20)
                , new Person("John", "male", 17)
                , new Person("Sarah", "female", 19)
                , new Person("Helen", "female", 25)
        ));
        DataStreamSource<Person> personDataStreamSource = executionEnvironment.fromCollection(students);
        //SingleOutputStreamOperator<Person> min = personDataStreamSource.keyBy(Person::getGender).min("age");
      // min.print("min");
        SingleOutputStreamOperator<Person> minBy = personDataStreamSource.keyBy(Person::getGender).minBy("age");
        minBy.print("minBy");
输出如下:
比较min()与minBy()的结果:
min()

minBy()
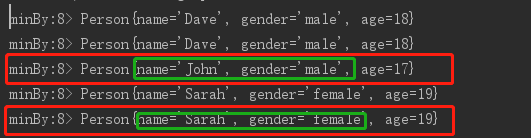
可以看出min()只是改变了结果集对象中所要求的age属性,并不会改变name和gender属性
而minBy()的结果集输出的就是即为age最小的整个对象
max()和maxBy()也同理
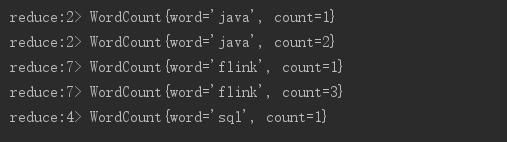
3.5.3 reduce
对流做规约操作
如:对WordCount中count做规约求和
 ArrayList<WordCount> reduceCounts = new ArrayList<>(Arrays.asList(new WordCount("flink", 1)
                , new WordCount("flink", 2)
                , new WordCount("java", 1)
                , new WordCount("sql", 1)
                , new WordCount("java", 1)));
        DataStreamSource<WordCount> personDataStreamSource = executionEnvironment.fromCollection(reduceCounts);

        SingleOutputStreamOperator<WordCount> reduce = personDataStreamSource.keyBy(WordCount::getWord)
                .reduce((curWord, nextWord) -> new WordCount(curWord.getWord(),curWord.getCount()+nextWord.getCount()));
        reduce.print("reduce");
输出如下:
3.5.4 split & select
对流做分流筛选
如:对人群按年龄做筛选,以18岁为分界线,18岁以下为青少年,18岁及以上为成年人
 //split & select
        List<Person> students = new ArrayList<>(Arrays.asList(new Person("Dave", "male", 18)
                , new Person("Tom", "male", 20)
                , new Person("John", "male", 17)
                , new Person("Sarah", "female", 19)
                , new Person("Helen", "female", 25)
        ));

        DataStreamSource<Person> personDataStreamSource1 = executionEnvironment.fromCollection(students);
        //打分流标签
        SplitStream<Person> splitStream = personDataStreamSource1.split(person -> {
            ArrayList<String> tags = new ArrayList<>();
            if (person.getAge() >= 18) {

                tags.add("adult");
            } else {
                tags.add("teen");
            }
            return tags;
        });
        //根据标签筛选
        DataStream<Person> adult = splitStream.select("adult");
        DataStream<Person> teen = splitStream.select("teen");
        DataStream<Person> all = splitStream.select("adult", "teen");
        adult.print("adult");
        teen.print("teen");
        all.print("all");
输出如下:

3.5.5 Connect & CoMap
connect可将两种不同数据类型的流合并成一个流,CoMap可对该合并流做处理
如:把以上WordCount和Person两个风马牛不相及的流合成一个,再在一个合并流中分别提取WordCount流的word,Person流的name
  List<Person> coStudent = new ArrayList<>(Arrays.asList(new Person("Dave", "male", 18)
                , new Person("Tom", "male", 20)
                , new Person("John", "male", 17)
                , new Person("Sarah", "female", 19)
                , new Person("Helen", "female", 25)
        ));

        ArrayList<WordCount> coWordCounts = new ArrayList<>(Arrays.asList(new WordCount("flink", 1)
                , new WordCount("flink", 2)
                , new WordCount("java", 1)
                , new WordCount("sql", 1)
                , new WordCount("java", 1)));

        DataStreamSource<Person> personDataStreamSource2 = executionEnvironment.fromCollection(coStudent);
        DataStreamSource<WordCount> wordCountDataStreamSource = executionEnvironment.fromCollection(coWordCounts);
        //连接两个流
        ConnectedStreams<Person, WordCount> connectedStreams = personDataStreamSource2.connect(wordCountDataStreamSource);
        //使用coMap分别提取两条流
        SingleOutputStreamOperator<Object> coMap = connectedStreams.map(new CoMapFunction<Person, WordCount, Object>() {
            @Override
            public Object map1(Person value) throws Exception {
                return value.getName();
            }

            @Override
            public Object map2(WordCount value) throws Exception {
                return value.getWord();
            }
        });
        coMap.print("coMap");
输出如下:

3.5.6 union
union同样也是合流操作,但是与connect相比,主要有两点不同:
- union用于合并相同数据类型的流,connect用于合并不同数据类型的流
- union可以合并多条流,connect只能合并两条流
如:合并三个班级的同学名单,然后列出所有人的名字:
  List<Person> class1 = new ArrayList<>(Arrays.asList(new Person("Dave", "male", 18)
                , new Person("Tom", "male", 20)
                , new Person("John", "male", 17)
                , new Person("Sarah", "female", 19)
                , new Person("Helen", "female", 25)
        ));

        List<Person> class2 = new ArrayList<>(Arrays.asList(new Person("Bob", "male", 19)
                , new Person("Ted", "male", 23)
                , new Person("Joe", "male", 27)
                , new Person("Amy", "female", 24)
                , new Person("Anne", "female", 25)
        ));

        List<Person> class3 = new ArrayList<>(Arrays.asList(new Person("Bill", "male", 23)
                , new Person("Vivian", "female", 23)
                , new Person("Ted", "male", 25)
                , new Person("Emma", "female", 24)
                , new Person("Lily", "female", 15)
        ));

        DataStreamSource<Person> class1Stream = executionEnvironment.fromCollection(class1);
        DataStreamSource<Person> class2Stream = executionEnvironment.fromCollection(class2);
        DataStreamSource<Person> class3Stream = executionEnvironment.fromCollection(class3);
        //合并三个班级
        DataStream<Person> personDataStream = class1Stream.union(class2Stream).union(class3Stream);
        SingleOutputStreamOperator<String> streamOperator = personDataStream.map(person -> person.getName());
        streamOperator.print("union");
输出如下:

4. sink 结果集下沉
sink即将处理好的数据集输出到外部系统中,flink官方已提供多种外部系统连接器,常用的如:
- Kafka
- ES
- JDBC
- Redis(由Apache Bahir提供)
- HDFS
等等,具体如下:

这里例举其中几种
4.1 sink到文件
ArrayList<WordCount> sinkCounts = new ArrayList<>(Arrays.asList(new WordCount("flink", 1)
                , new WordCount("flink", 2)
                , new WordCount("java", 1)
                , new WordCount("sql", 1)
                , new WordCount("java", 1)));

        DataStreamSource<WordCount> collection = executionEnvironment.fromCollection(sinkCounts);
        SingleOutputStreamOperator<WordCount> operator = collection.map(wordCount -> new WordCount("sink_" + wordCount.getWord(), wordCount.getCount()));
        operator.addSink(
                StreamingFileSink.forRowFormat(new Path("C:\\DATA\\projectHere\\myGitHub\\flink-demo\\src\\main\\resources\\sink")
                        , new SimpleStringEncoder<WordCount>() {
        }).build()).setParallelism(1);
输出文件如下:

4.2 sink到kafka
- 这里需要跟从kafka读取数据源一样,先引入相同的依赖:
		<dependency>
			<groupId>org.apache.flink</groupId>
			<artifactId>flink-connector-kafka_2.11</artifactId>
			<version>1.11.2</version>
		</dependency>
- flink处理代码如下:
  ArrayList<WordCount> sinkCounts = new ArrayList<>(Arrays.asList(new WordCount("flink", 1)
                , new WordCount("flink", 2)
                , new WordCount("java", 1)
                , new WordCount("sql", 1)
                , new WordCount("java", 1)));

        SingleOutputStreamOperator<String> streamOperator = executionEnvironment.fromCollection(sinkCounts)
                .map(wordCount -> new WordCount("sink_" + wordCount.getWord(), wordCount.getCount()).toString());
        //FlinkKafkaProducer()三个参数分别为:brokerList,topicId,SerializationSchema,这里为方便起见,直接将WordCount对象转为了String
        streamOperator.addSink(new FlinkKafkaProducer<>("localhost:9092", "test-topic", new SimpleStringSchema()));
- 启动Kafka消费者客户端接收数据:
./bin/kafka-console-consumer.sh --bootstrap-server localhost:9092 --topic test-topic
- kafka消费者接受数据如下:


CSDN联合极客时间,共同打造面向开发者的精品内容学习社区,助力成长!
更多推荐


 0
0 0
0- 0


 已为社区贡献1条内容

所有评论(0)