
UNet/UNet++多类别分割
本文是一个UNet/UNet++多类别分割的实操,不介绍原理。本文使用的代码: https://github.com/zonasw/unet-nested-multiple-classification下载代码:git clone https://github.com/zonasw/unet-nested-multiple-classification.git下载demo数据集(或者从百度...
本文是一个UNet/UNet++多类别分割的实操,不介绍原理。
本文使用的代码: https://github.com/zonasw/unet-nested-multiple-classification
运行demo
- 下载代码:
git clone https://github.com/zonasw/unet-nested-multiple-classification.git - 下载demo数据集(或者从百度网盘下载,提取密码: dq7j)并解压到data文件夹中,该数据集中包含
checkpoints,images,masks,test四个文件夹,其中images是图像数据集,masks是该数据集对应的标签,test是测试数据,checkpoints是在该数据集上预训练的模型。 - 训练
python train.py - 推理
python inference.py -m ./data/checkpoints/epoch_10.pth -i ./data/test/input -o ./data/test/output
该数据集包含1500张128x128的图像,图像是程序生成的,包含三种类别: 背景、圆形、矩形,如下:

该模型识别背景,圆形,矩形三种类别,使用如下图像进行推理:
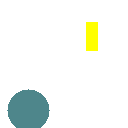
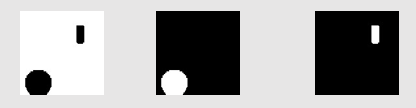
得到的推理结果为三个图像,这三个图像分别是背景、圆、矩形(白色像素为预测结果):
该数据集是由程序生成的,图像对应的标签是一个8位的单通道图像,值为相应的类别索引。
关于标签
假设有如下图像,该图像是一个10x10大小的图像,图像周围是空白背景,中心位置是一个圆形:
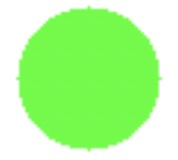
该图像包含两个类别,背景和圆,则背景位置对应的标签的像素值应该为0,圆对应的标签像素值应该为1,像下面这样:
0 0 0 0 0 0 0 0 0 0
0 0 0 0 0 0 0 0 0 0
0 0 0 1 1 1 1 0 0 0
0 0 1 1 1 1 1 1 0 0
0 0 1 1 1 1 1 1 0 0
0 0 1 1 1 1 1 1 0 0
0 0 1 1 1 1 1 1 0 0
0 0 0 1 1 1 1 0 0 0
0 0 0 0 0 0 0 0 0 0
0 0 0 0 0 0 0 0 0 0
由于该标签图像的值只包含0和1,所以它看起来整个图都是黑色的。
由于标签图像是8位的单通道图像,所以该方法支持最多256种类别。
制作标签
现在有如下图片

该数据存在三个类别,分别是 Background、Tom、Jerry,使用labelme标注结果如下

该结果保存成为了一个json文件,内容如下
{
    "version": "3.16.7",
    "flags": {},
    "shapes": [
        {
            "label": "Tom",
            "line_color": null,
            "fill_color": null,
            "points": [
                [
                    563.3793103448277,
                    120.51724137931035
                ],
                ......
                [
                    585.7931034482759,
                    104.13793103448276
                ]
            ],
            "shape_type": "polygon",
            "flags": {}
        },
        {
            "label": "Jerry",
            "line_color": null,
            "fill_color": null,
            "points": [
                [
                    328.89655172413796,
                    276.55172413793105
                ],
                ......
                [
                    319.4137931034483,
                    259.3103448275862
                ]
            ],
            "shape_type": "polygon",
            "flags": {}
        }
    ],
    "lineColor": [0,255,0,128],
    "fillColor": [255,0,0,128],
    "imagePath": "image.png",
    "imageData": "...",
    "imageHeight": 540,
    "imageWidth": 960
}
我们要制作一个只包含三个类别的标签图像,该标签图像中,Background为0,Tom为1,Jerry为2。我们首先要创建一个和原图大小一致的空白图像,该图像所有像素都是0,这表示在该图像中所有的内容都是Background。然后根据标签对应的区域使用与之对应的类别索引来填充该图像,也就是说,将Tom对应的区域用1填充,Jerry对应的区域用2填充。具体如下
import cv2
import numpy as np
import json


category_types = ["Background", "Tom", "Jerry"]

img = cv2.imread("images/image.png")
h, w = img.shape[:2]
mask = np.zeros([h, w, 1], np.uint8)    # 创建一个大小和原图相同的空白图像

with open("images/image.json", "r") as f:
    label = json.load(f)

shapes = label["shapes"]
for shape in shapes:
    category = shape["label"]
    points = shape["points"]
    # 填充
    points_array = np.array(points, dtype=np.int32)
    mask = cv2.fillPoly(mask, [points_array], category_types.index(category))

cv2.imwrite("masks/image.png", mask)
该图像只包含0、1和2,如果打开图像查看的话,应该是一个全黑的图像,因为2这个像素值太小了,无法看清。如果想查看某个类别的标注情况,可以在mask = cv2.fillPoly(mask, [points_array], category_types.index(category))中将该颜色改为一个清晰可见的颜色,例如将Tom的颜色改成255,但是最终制作标签的时候要记得将其改回对应的索引值。如下
for shape in shapes:
    category = shape["label"]
    points = shape["points"]
    points_array = np.array(points, dtype=np.int32)
    if category == "Tom":
    	# 调试时将Tom的填充颜色改为255,便于查看
        mask = cv2.fillPoly(mask, [points_array], 255)
    else:
        mask = cv2.fillPoly(mask, [points_array], category_types.index(category))

cv2.imshow("mask", mask)
cv2.waitKey(0)
这样能够清晰看到Tom的标注结果是否正确

最后,保存图像的时候要注意保存成png格式的图像,因为jpg格式会在存储时对图像进行压缩,导致mask图像不准确。
损失函数
在计算多类别任务损失时,最开始是使用了交叉熵损失函数,交叉熵损失函数容易受到类别不平衡影响,后来改用了一种基于IOU的损失函数lovaszSoftmax,效果显著提升。

旨在为数千万中国开发者提供一个无缝且高效的云端环境,以支持学习、使用和贡献开源项目。
更多推荐


 44
44 0
0- 0


 已为社区贡献1条内容

所有评论(0)