Welcome!
Perhaps you've just created your first SQLite database.
Or maybe you read my previous blog post on deploying a free tier relational database with Amazon RDS 😉

Deploying a free tier relational database with Amazon RDS
Chris Greening ・ Mar 28 ・ 9 min read
For whatever reason you've arrived here - welcome!
And now that you've got that fancy database I'm sure you just can't wait to access it from the warm embrace of Python
So let's jump into some code and learn how we can leverage SQLAlchemy's capabilities as "The Database Toolkit for Python" to connect to our database!
Table of Contents
- Understanding the SQLAlchemy Engine
- Deconstructing the database URL
- Creating the Engine
- Executing a SQL query from Python
- Conclusion
- Additional resources
❗ IMPORTANT ❗: This tutorial is strictly for practical learning purposes and NOT an exhaustive guide for setting up a secure production-ready environment.
Be sure to keep an eye out for additional ❗ IMPORTANT ❗ notes throughout this tutorial for potential security concerns, gotchas, etc.
Understanding the SQLAlchemy Engine
As we all know the engine is the heart of (most) motor vehicles.
It's a complex machine that:
- takes gasoline as an input
- burns the gasoline
- and converts the resulting heat into mechanical work as an output
And just like with motor vehicles, the Engine is the heart of SQLAlchemy.
It's the lowest level object used by SQLAlchemy and it helps drive the conversation between our Python application and database(s).
Without going into too much detail, the Engine
internally references a:
Dialectobject that handles communication and aPoolobject that handles connection.
These in turn work with the DBAPI behind the scenes to translate information to and from our app and database.
The Engine is a complex piece of software that:
- takes input from our Python app
- processes the information
- and converts it into output that our SQL database can understand
Don't sweat the details when you're first learning! 😅
The important part here is just understanding that we have to create that engine for our app to use
Deconstructing the database URL

Now back to the analogy of motor vehicles... when we turn on our engine it's often because we have a destination in mind that we want to drive to
To get there we have to know things like:
- How are we getting there?
- Where are we going?
- What additional information do we need?
And in the context of SQLAlchemy, this is where our database URL comes in
A typical database URL might look something (but not exactly) like this:dialect+driver://username:password@host:port/database
Feeding this to our instance of Engine, we're able to inform SQLAlchemy crucial information such as:
dialect+driver: Is our database MySQL, PostgreSQL, etc? what DBAPI should ourEngineconnect to?username:password: What credentials do we need to connect to our database?host:port: Where is our database?database: What is the name of our database?
So now let's take a look at a couple examples of what an actual database URL could look like:
# Connect to a local SQLite database
DATABASE_URL = "sqlite:///spam.db'
# Connect to a remote MySQL instance on Amazon RDS
DATABASE_URL = "mysql+pymysql://chris:pa$$w0rd@insert-your-database-name.abcdefgh.us-east-1.rds.amazonaws.com:3306/mydatabase"
# Connect to a remote PostgreSQL database and pass additional parameters
DATABASE_URL = "postgresql+pg8000://user:pa$$w0rd@12.34.56.789/mydatabase?charset=utf8mb4
For additional information and usecases regarding the database URL, feel free to check out some of the official SQLAlchemy documentation on the subject!
❗ IMPORTANT ❗: If you're connecting to a remote database, publicly exposing your database to the internet and/or establishing remote unencrypted connections opens up attack vectors that make your database and application vulnerable
Reminder that this tutorial is NOT an exhaustive guide for setting up a secure production environment.
Creating the Engine
So now let's go ahead and actually create the engine!
from sqlalchemy import create_engine
engine = create_engine(DATABASE_URL)
"Wait - that's it?"
Yeah! That's it!
It's worth mentioning that Engine (and more specifically the internal Pool) have a lazy initialization. They don't establish that first DBAPI connection until we explicitly connect or call an operation that uses connect internally such as execute
For additional information and usecases regarding create_engine, feel free to check out some of the official SQLAlchemy documentation on the subject!
Executing a SQL query from Python
And now that we've instantiated our Engine, we're ready to use it to query our database and parse its response into usable data in Python!
from sqlalchemy import text

# Loop through every row in table chris_greenings_blog
with engine.connect() as connection:
    query = text("SELECT * FROM chris_greenings_blog")
    blog_posts = connection.execute(query)
    for post in blog_posts:
        print(post["title"])
In the above code snippet our Engine (and its internal references) have:
- established a connection to our database
- translated our Python textual
strquery into something the DBAPI can understand - executed the query
- returned and translated the DBAPI's response into something Python can understand
- looped through each row and printed the title of every blog post
Pretty nifty, eh?
Try it yourself!
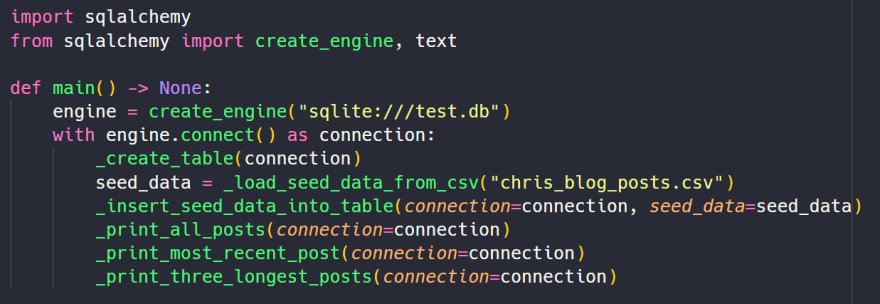
As an addition to this blog post, I've published a small project on GitHub that uses SQLAlchemy to:
- create a local SQLite database
- create a table
- seed the database with data from a CSV
- perform simple queries
Click here to check it out and be sure to tinker around with the code to get the most out of this tutorial!
Conclusion
In this tutorial we covered one of the most critical aspects of using SQLAlchemy: connecting to our database
And this only scratched the surface of what we can accomplish with SQLAlchemy - I highly recommend digging deeper and learning more about what SQLAlchemy has to offer (such as its capabilities as an Object Relational Mapper)!
Thanks so much for reading and if you liked my content, be sure to check out some of my other work or connect with me on social media or my personal website 😄
Cheers!
Back to the top ⤴️

Deploying a free tier relational database with Amazon RDS
Chris Greening ・ Mar 28 ・ 9 min read
 chris-greening / chris-greening-blog
Repo for storing content related to Chris Greening's blog posts and tutorials
Chris Greening's blog
Welcome to my blog's repository!
The purpose of this repo is to organize data, source files, and additional information relating to my blog at DEV.to.
Check out my website or email me if you want to get in touch!
Posts
- I built an interactive 3D photo display with JavaScript
- Deploying a free tier relational database with Amazon RDS
- I added a JavaScript arcade game to my portfolio's homepage
- Animating 60 years of US energy data with 10 lines of Python
- Scraping every post on an Instagram profile with less than 10 lines of Python
Additional resources
- SQLAlchemy Official Website
- Python Flask Tutorial: Full-Featured Web App Part 4 - Databaes with Flask-SQLAlchemy (Youtube)
- SQLAlchemy - Python Tutorial
- SQLAlchemy Github
- SQLAlchemy Tutorial


 已为社区贡献126445条内容

所有评论(0)