Windows Server 2019 + Certify + Let‘s Encrypt:DNSPod 自动续期并自动部署到 hMailServer 与腾讯云 COS
Windows Server 2019 + Certify + Let’s Encrypt:DNSPod 自动续期并自动部署到 hMailServer 与腾讯云 COS
文章摘要:Windows Server 2019 上使用 Certify + Let’s Encrypt + DNSPod/Tencent DNS 实现通配符证书自动续期,并自动部署到 hMailServer 和腾讯云 COS。包含 DNS-01、PEM 导出、邮件 TLS、COS API 自动换证、PowerShell 幂等处理和实战排错。
基于一次真实落地过程整理。截图中的域名、Bucket、证书 ID、邮箱账号等均已脱敏,统一使用
example.com等示例值。
1. 最终架构
Let's Encrypt 自动续期
        ↓
Tencent DNS / DNSPod DNS-01 自动验证
        ↓
Certify 获得 *.example.com + example.com
        ↓
① Export fullchain.pem
② Export privkey.pem
③ Restart hMailServer
        ↓
④ PowerShell → 腾讯云 SSL UploadCertificate
        ↓
DeployCertificateInstance
        ↓
COS:static.example.com
        ↓
轮询部署状态直到 Success
环境:Windows Server 2019、Certify Certificate Manager 7.2.1、Let’s Encrypt、DNSPod/Tencent DNS、hMailServer 5.6.8、腾讯云 COS、Foxmail、PowerShell 5.1。
2. DNS-01 与腾讯云 CAM
通配符 *.example.com 必须使用 DNS-01。Certify 7.2.1 中选择:
Challenge Type: dns-01
DNS Update Method: Tencent DNS API (using Posh-ACME)
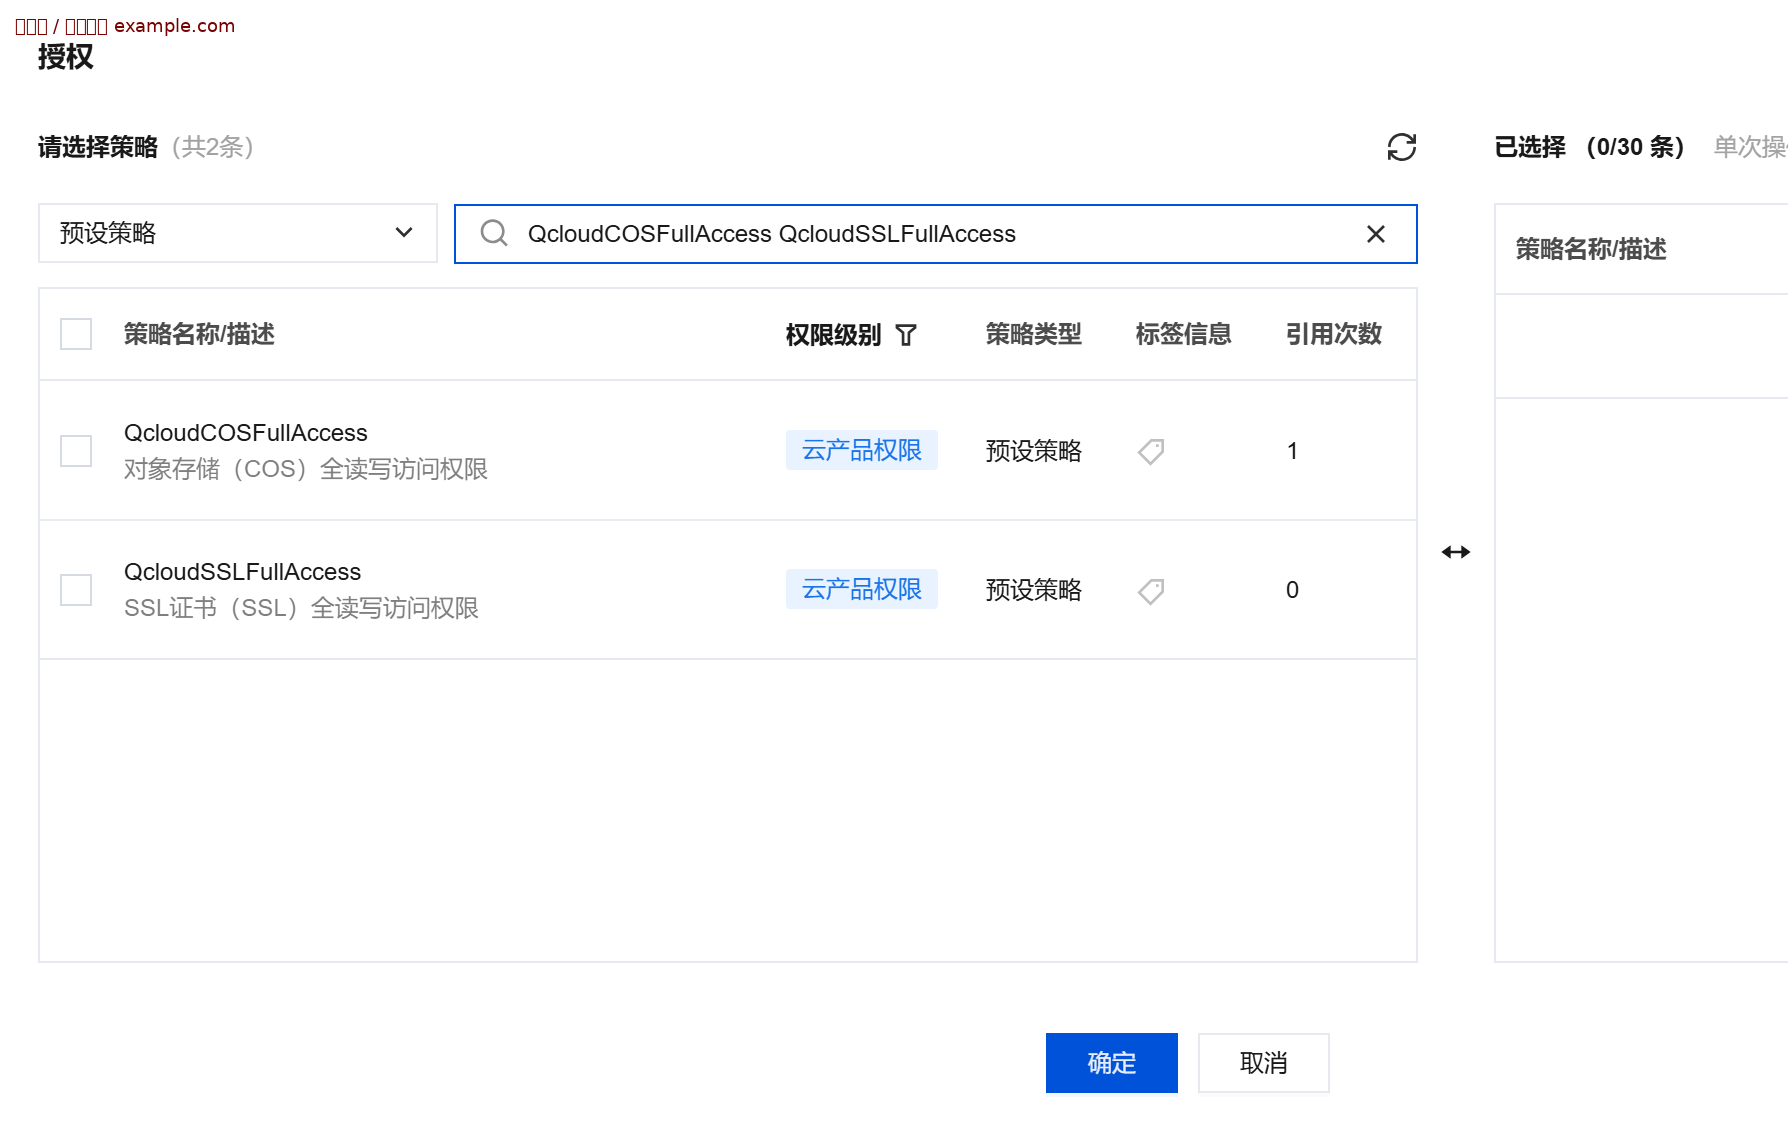
CAM 建议使用独立子用户。为了先跑通流程,可临时授予 QcloudSSLFullAccess、QcloudCOSFullAccess,并授予 DNSPod/Tencent DNS 所需权限;稳定后再收紧为最小权限。
【📷 图01|CAM 权限策略】
3. Certify 申请通配符证书
Identifiers:
*.example.com
example.com
先测试 Tencent DNS API 凭据,再申请证书。成功后应看到 Certificate Active、Auto Renewal Enabled: Yes。
4. hMailServer 自动换证
4.1 导出 PEM
Certify → Tasks → Deployment Tasks 添加两个 Export Certificate:
C:\Certs\hMailServer\fullchain.pem
C:\Certs\hMailServer\privkey.pem
hMailServer → Settings → Advanced → SSL certificates:
Name: example.com Wildcard
Certificate file: C:\Certs\hMailServer\fullchain.pem
Private key file: C:\Certs\hMailServer\privkey.pem
4.2 新增 TLS 端口
保留原有 25/587,不破坏已有收发链路;新增:
| 协议 | 端口 | 安全方式 |
|---|---|---|
| SMTP | 465 | SSL/TLS |
| IMAP | 993 | SSL/TLS |
| POP3 | 995 | SSL/TLS |
Windows 防火墙:
New-NetFirewallRule `
  -DisplayName "hMailServer TLS 465 993 995" `
  -Direction Inbound `
  -Protocol TCP `
  -LocalPort 465,993,995 `
  -Action Allow
腾讯云安全组也放行 TCP 465、993、995。
4.3 自动重启 hMailServer
Certify 再添加:
Restart a Service
Service: hMailServer
Action: Restart Service
Trigger: Run On Success
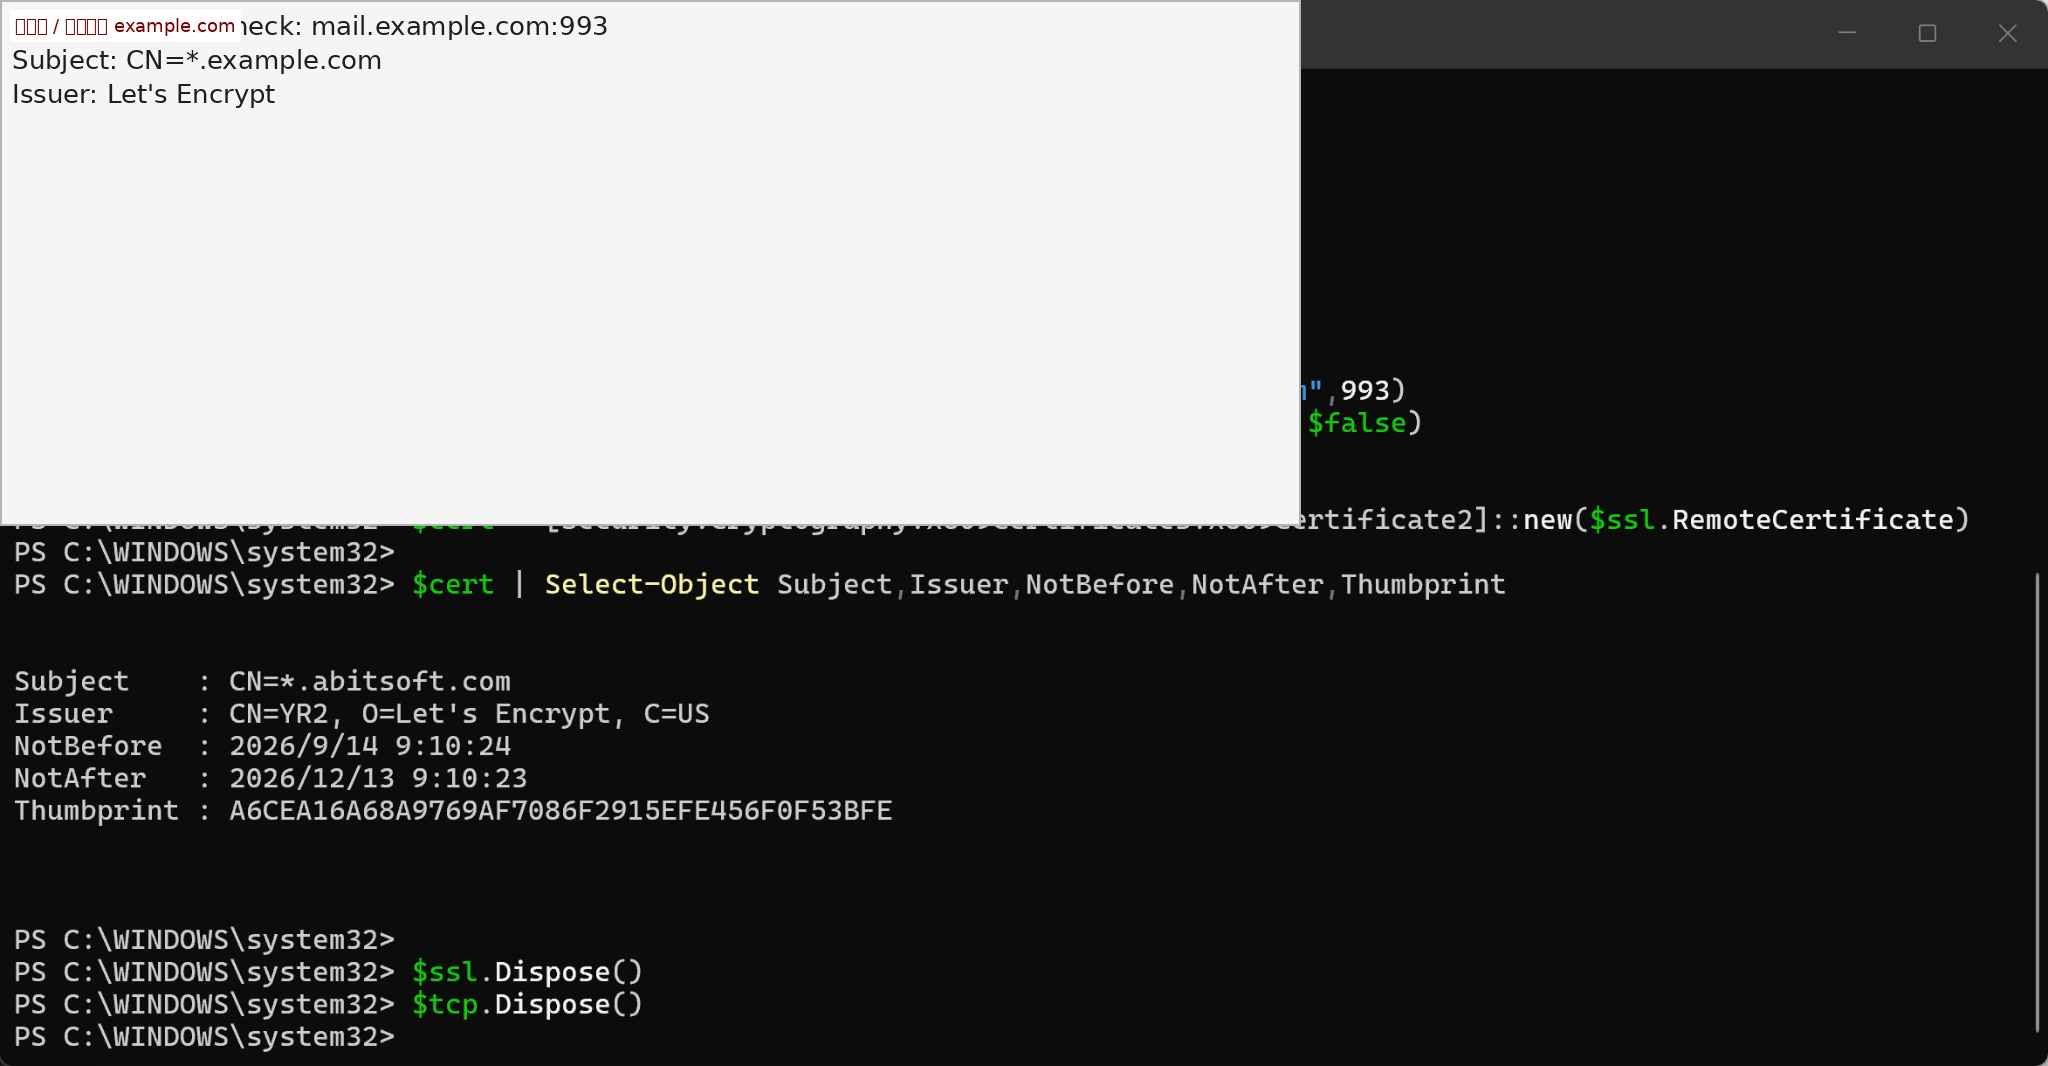
4.4 公网 TLS 验证
$tcp = [Net.Sockets.TcpClient]::new("mail.example.com",993)
$ssl = [Net.Security.SslStream]::new($tcp.GetStream(),$false)
$ssl.AuthenticateAsClient("mail.example.com")
$cert = [Security.Cryptography.X509Certificates.X509Certificate2]::new($ssl.RemoteCertificate)
$cert | Select Subject,Issuer,NotBefore,NotAfter,Thumbprint
$ssl.Dispose(); $tcp.Dispose()
【📷 图02|邮件服务器 TLS 证书验证】
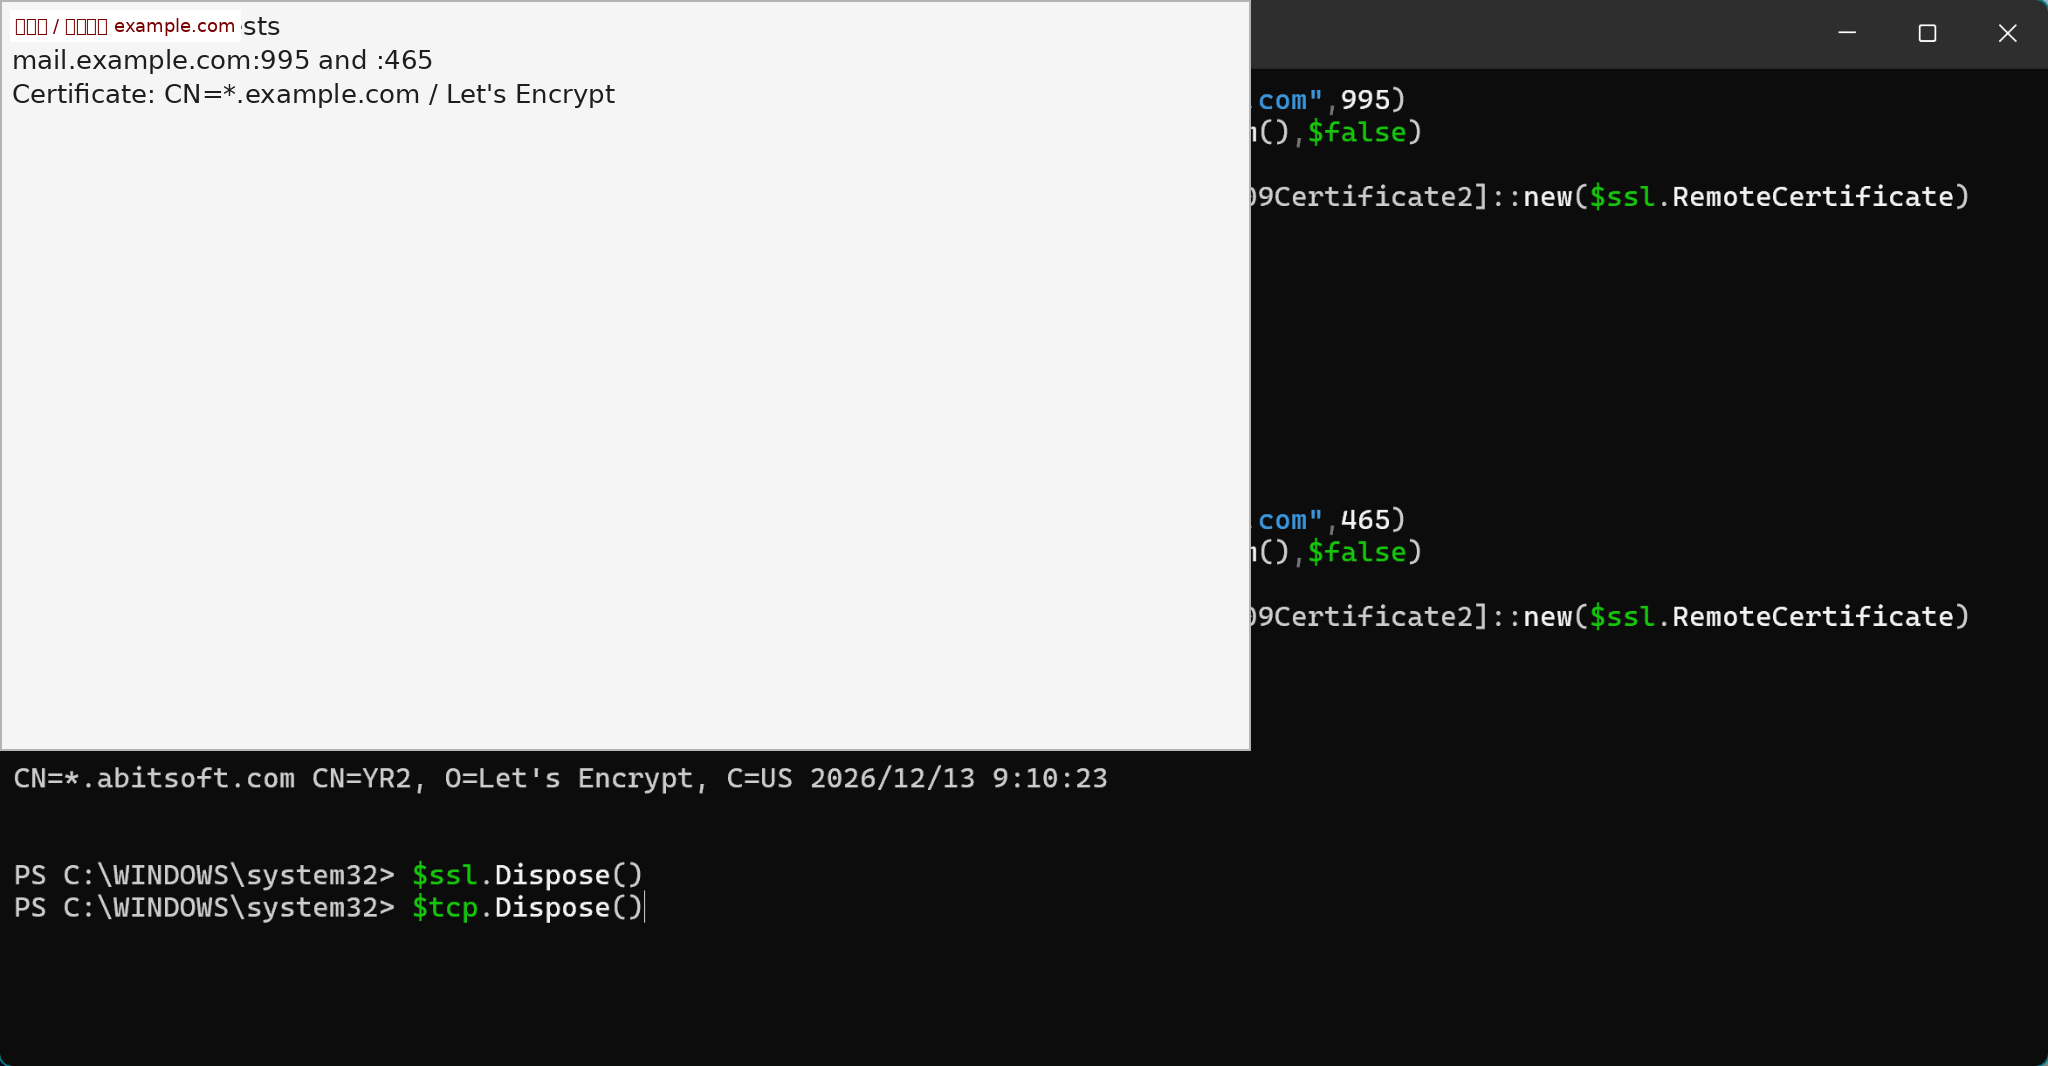
465/995 也要验证 TLS 握手,而不只是 Test-NetConnection=True:
【📷 图03|465 / 995 TLS 握手验证】
5. Foxmail 客户端
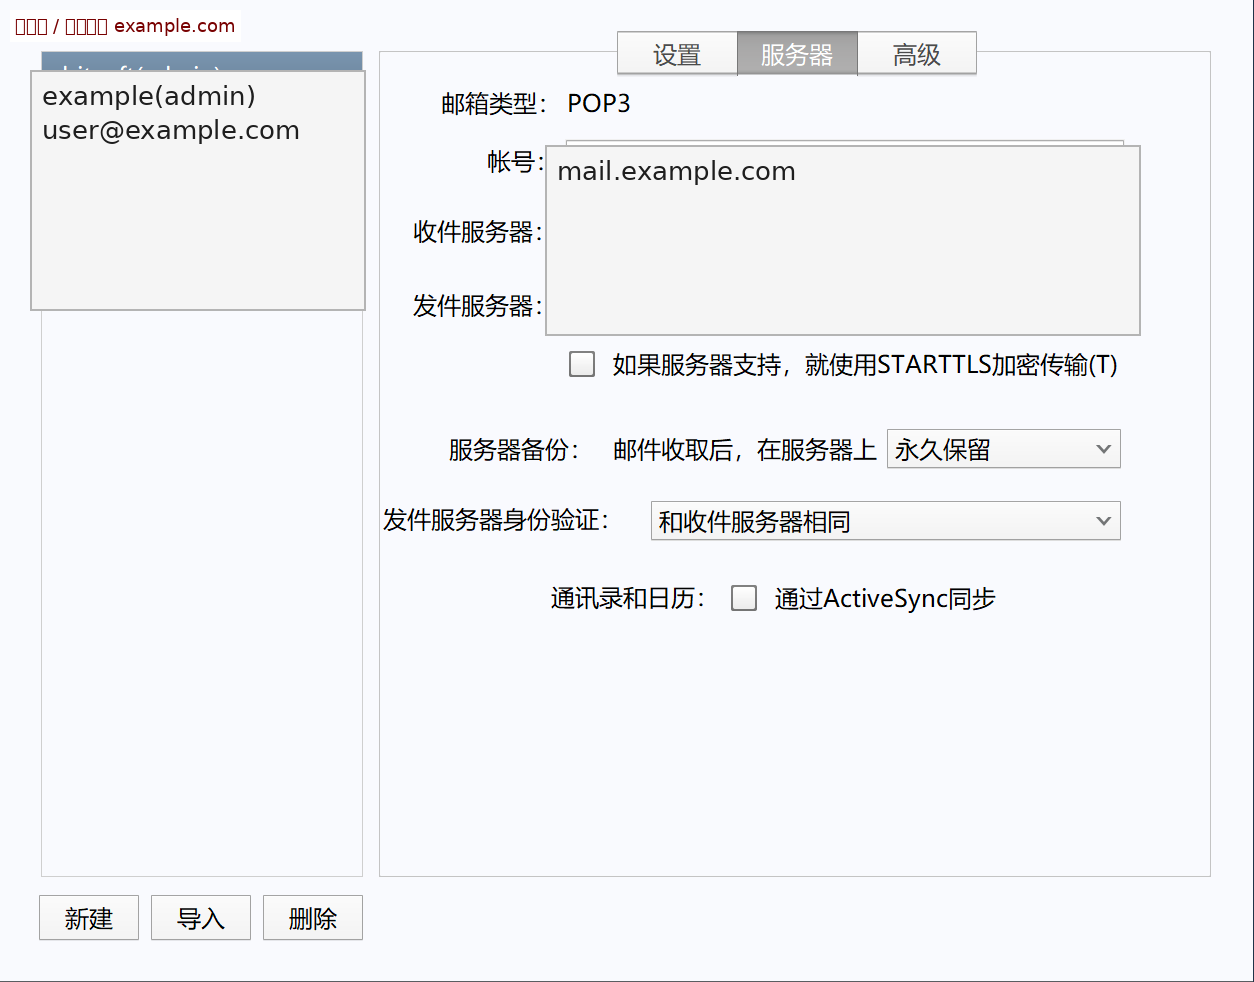
如果原账号是 POP3,不必为了证书强行改成 IMAP,可以直接升级为 TLS:
收件:mail.example.com / POP3 / 995 / SSL
发件:mail.example.com / SMTP / 465 / SSL
STARTTLS:不要勾
【📷 图04|Foxmail SSL/TLS 配置】
如果 Foxmail 超时、但 PowerShell TLS 握手正常,优先检查 Clash/TUN/系统代理;邮件域名建议走 DIRECT。
6. 腾讯云 COS 自动换证
本案例使用 COS “自定义源站域名”,不是 CDN:
static.example.com
→ example-bucket-1234567890.cos.ap-guangzhou.myqcloud.com
【📷 图05|COS 自定义源站域名】
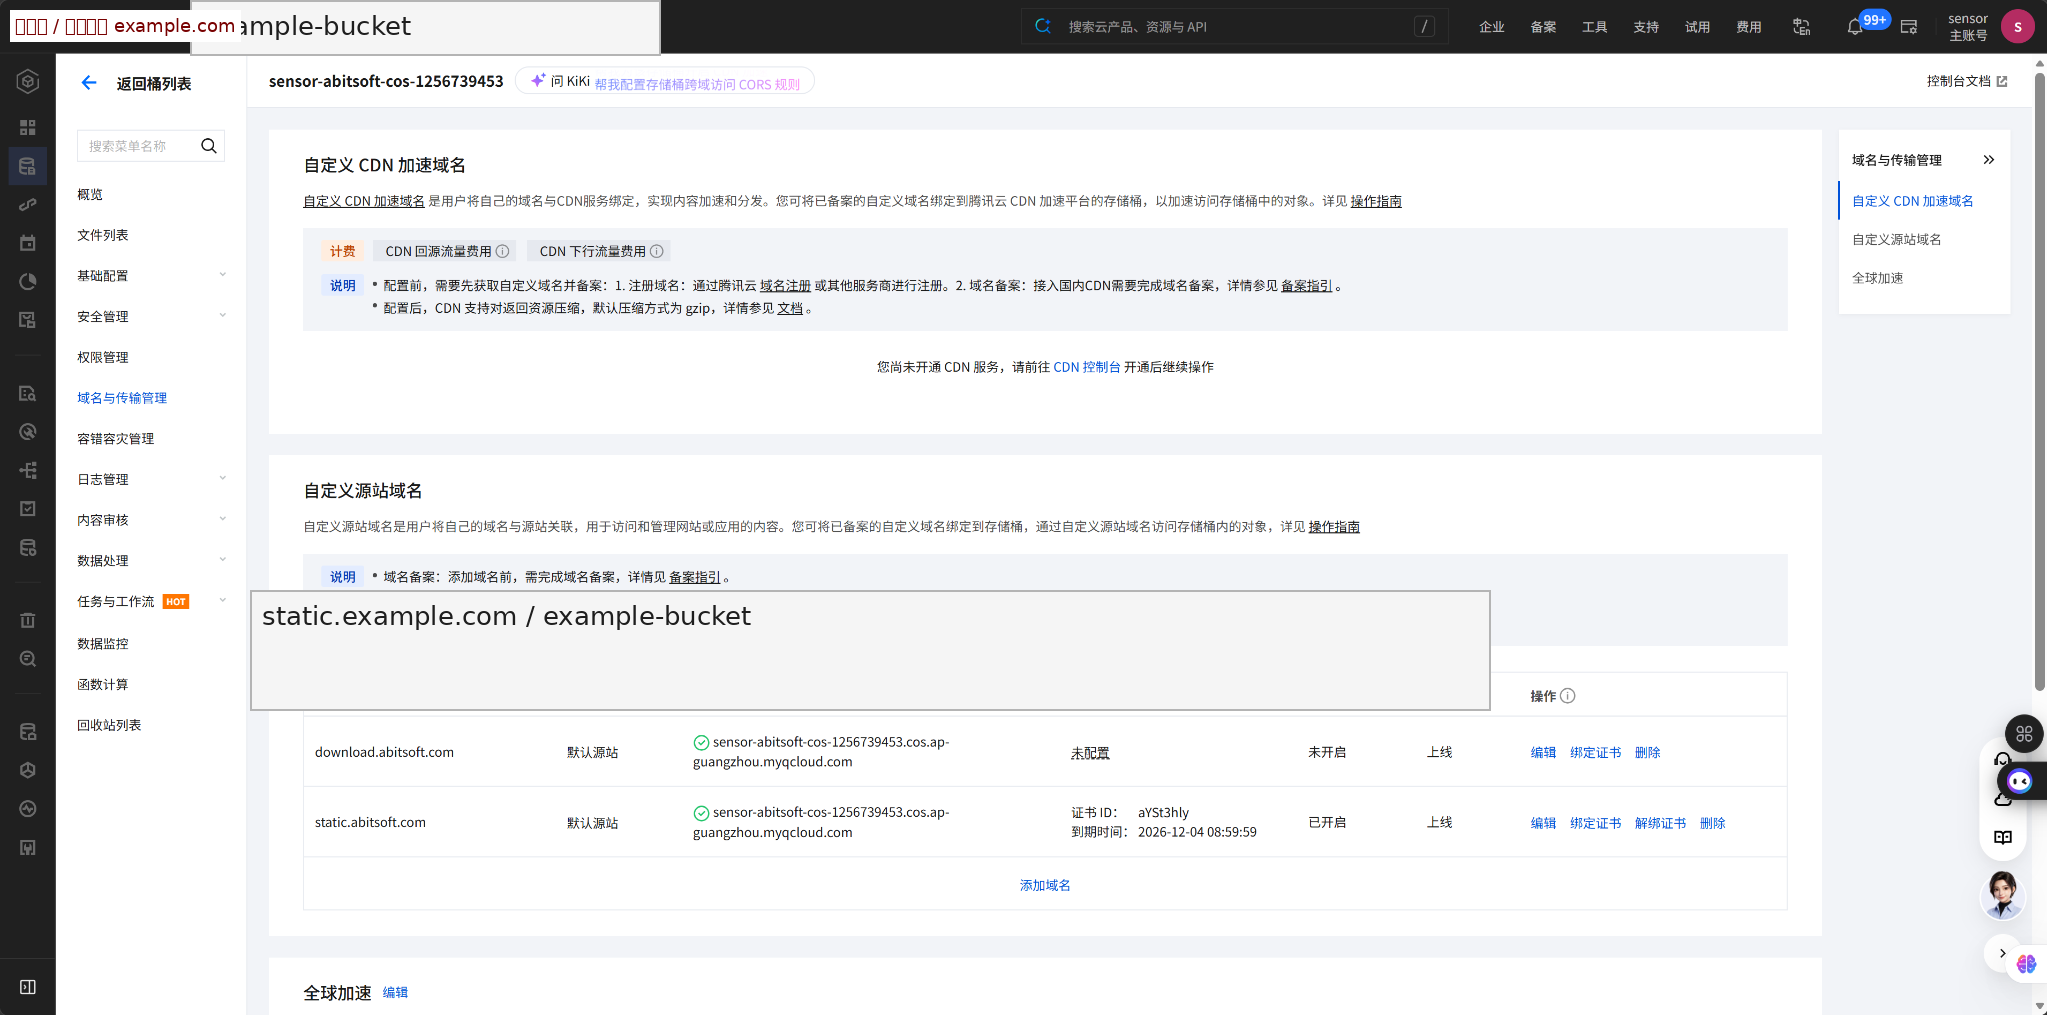
6.1 SecretId/SecretKey 不写进脚本
保存成 Machine 环境变量:
[Environment]::SetEnvironmentVariable("TENCENT_SECRET_ID","你的SecretId","Machine")
[Environment]::SetEnvironmentVariable("TENCENT_SECRET_KEY","你的SecretKey","Machine")
然后重启 Certify Management Agent,让后台服务继承环境变量。
6.2 先只测试 UploadCertificate
第一阶段只上传证书,不切换 COS。成功会返回 CertificateId:
【📷 图06|PowerShell 上传腾讯云 SSL 证书成功】
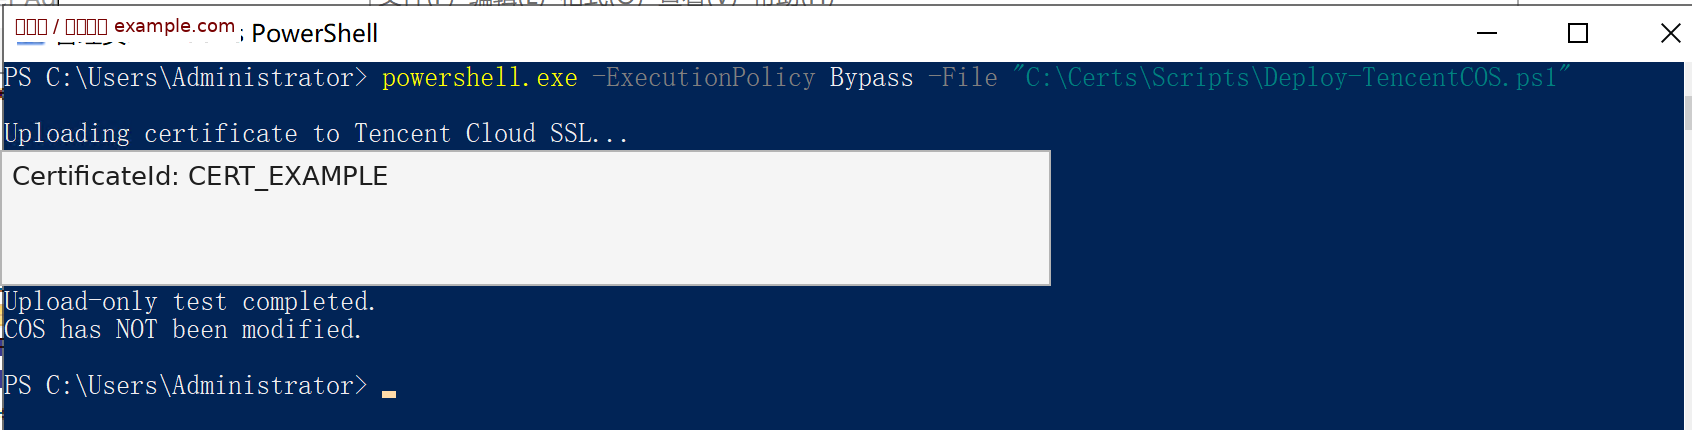
腾讯云 SSL 控制台会出现新的 *.example.com, example.com 证书:
【📷 图07|腾讯云 SSL 证书列表】
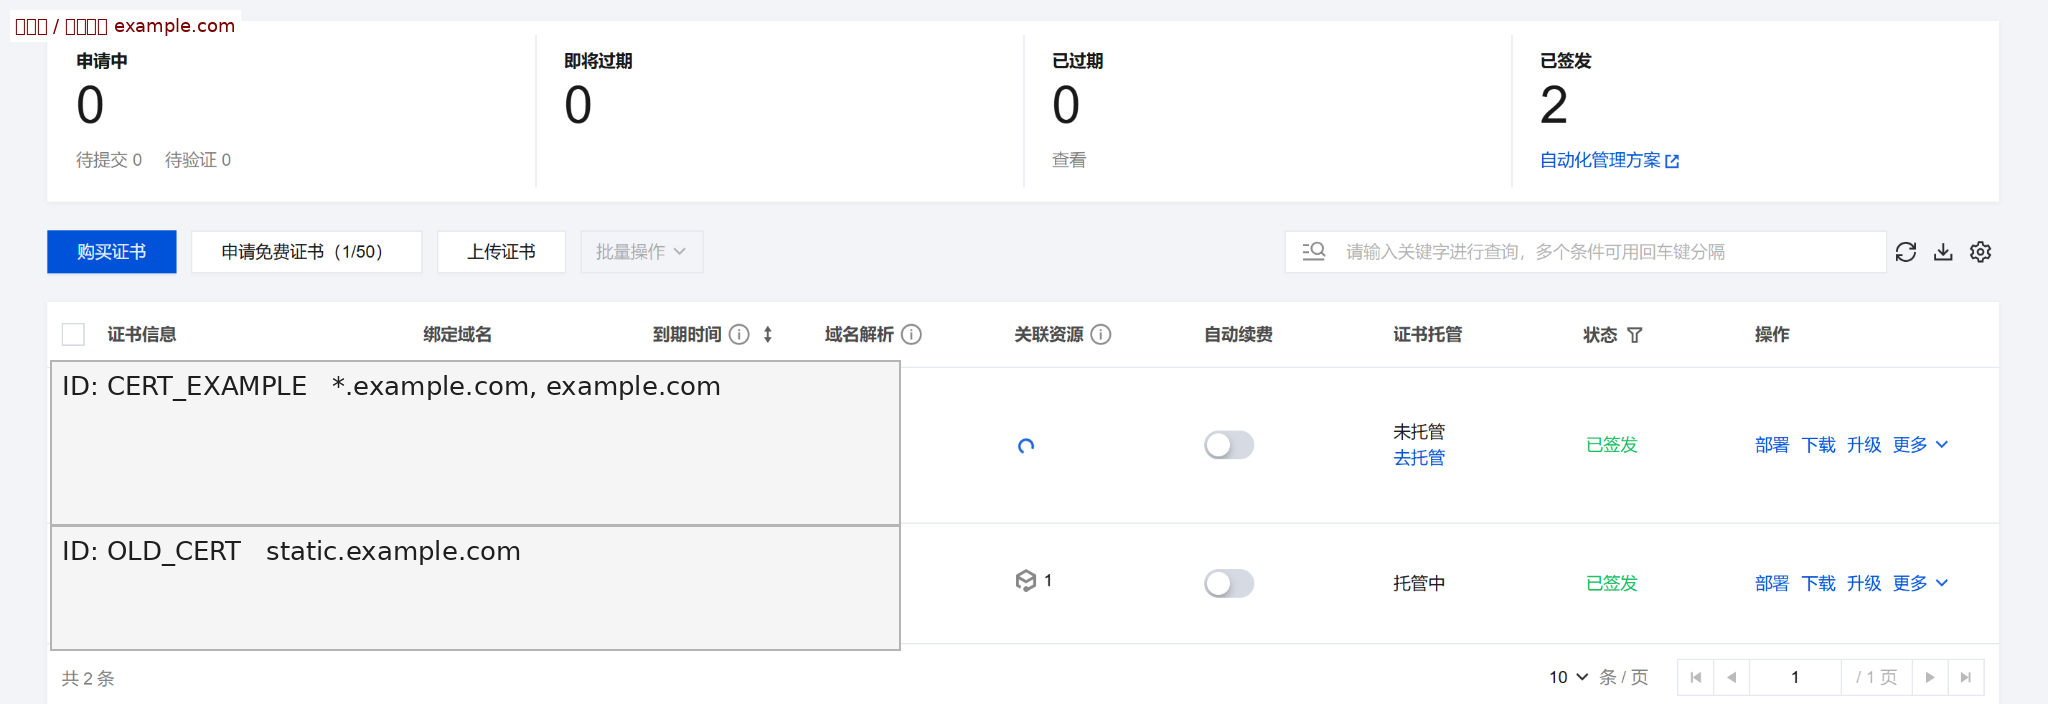
6.3 部署到 COS
COS 实例格式:
ap-guangzhou|example-bucket-1234567890|static.example.com
PowerShell 调用:
UploadCertificate
→ CertificateId
→ DeployCertificateInstance(ResourceType=cos)
→ DeployRecordId
→ DescribeHostDeployRecordDetail
最终应轮询到:
Total=1 Success=1 Failed=0 Running=0
【📷 图08|COS 证书自动部署成功】
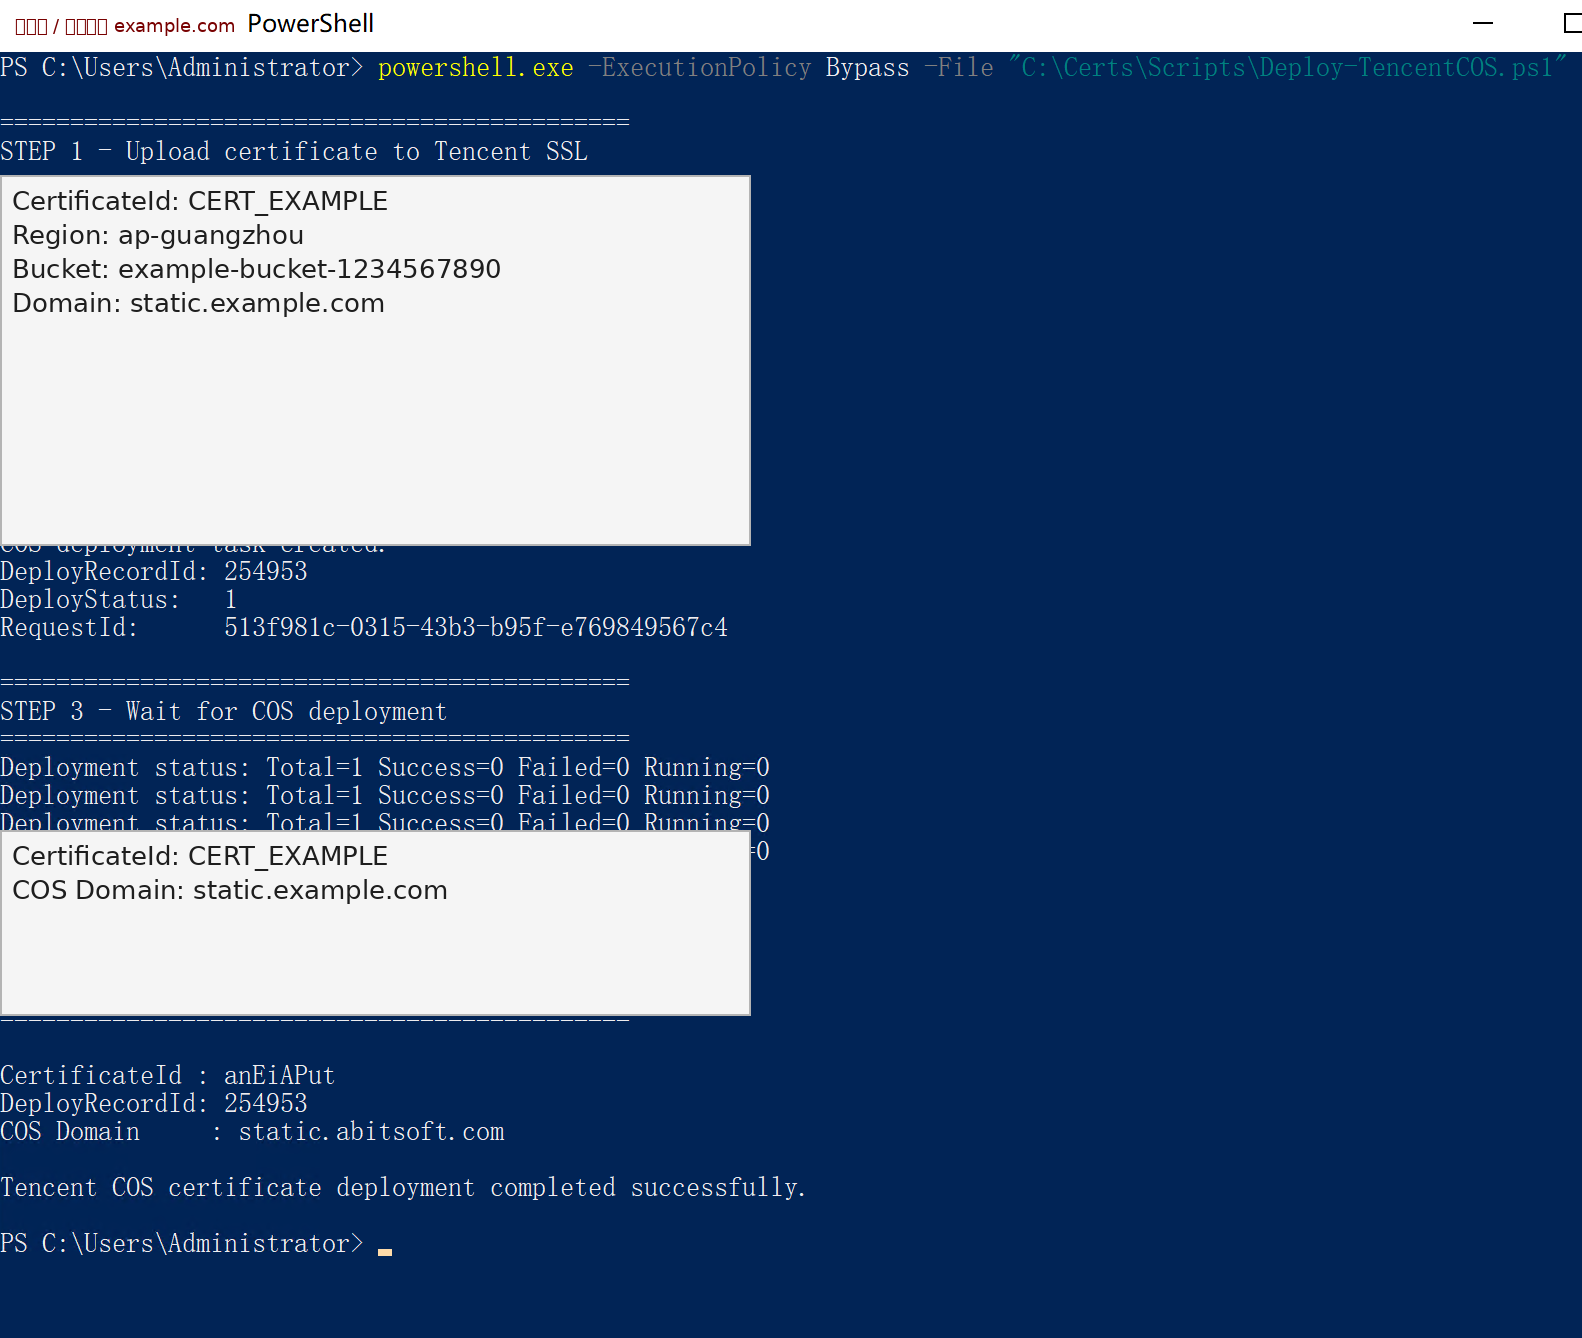
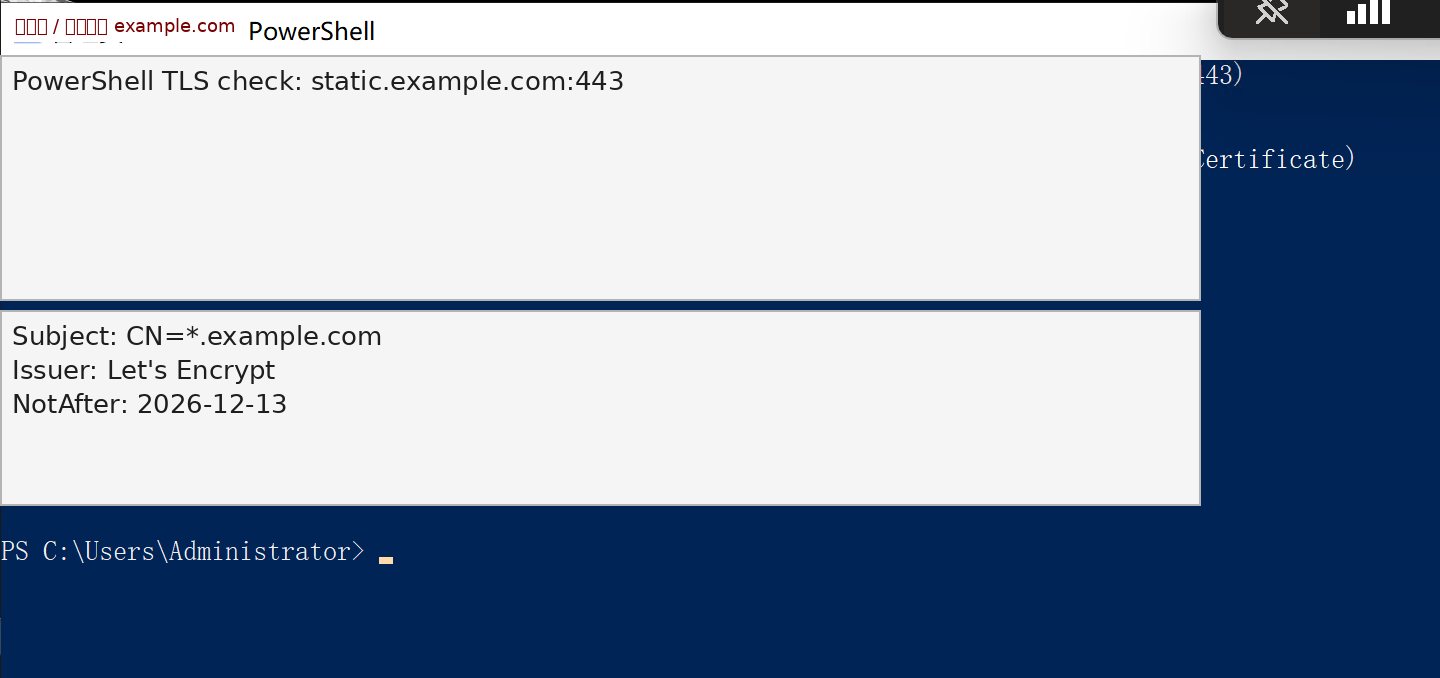
COS 控制台证书 ID 切换后,公网证书可能还有短暂下发延迟。最终必须从公网 443 再验证:
【📷 图09|COS 公网 TLS 验证】
7. PowerShell 自动部署脚本的关键逻辑
完整脚本建议保存为:
C:\Certs\Scripts\Deploy-TencentCOS.ps1
核心设计:
- 从 Machine 环境变量读取 SecretId/SecretKey;
- 读取
fullchain.pem与privkey.pem; - 使用 TC3-HMAC-SHA256 调腾讯云 SSL API;
UploadCertificate设置Repeatable=false,重复执行时复用证书;DeployCertificateInstance部署到 COS;DescribeHostDeployRecordDetail轮询结果;- 若返回
CertificateDeployInstanceEmpty,说明 COS 已经使用同一张证书,自动化应视为成功,而不是失败。
关键幂等处理:
try {
    $DeployResponse = Invoke-TencentCloudApi `
        -Action "DeployCertificateInstance" `
        -BodyObject $DeployBody `
        -Region $CosRegion
}
catch {
    if ($_.Exception.Message -match "CertificateDeployInstanceEmpty") {
        Write-Host "COS certificate is already up to date."
        exit 0
    }
    throw
}
8. 挂到 Certify
Certify → Tasks → Add → Run PowerShell Script:
Task Name: Deploy Certificate to Tencent COS
Trigger: Run On Success
Program/Script: C:\Certs\Scripts\Deploy-TencentCOS.ps1
Pass Result as First Arg: 取消勾选
Execution Mode: Automatic
Script Timeout Mins: 15
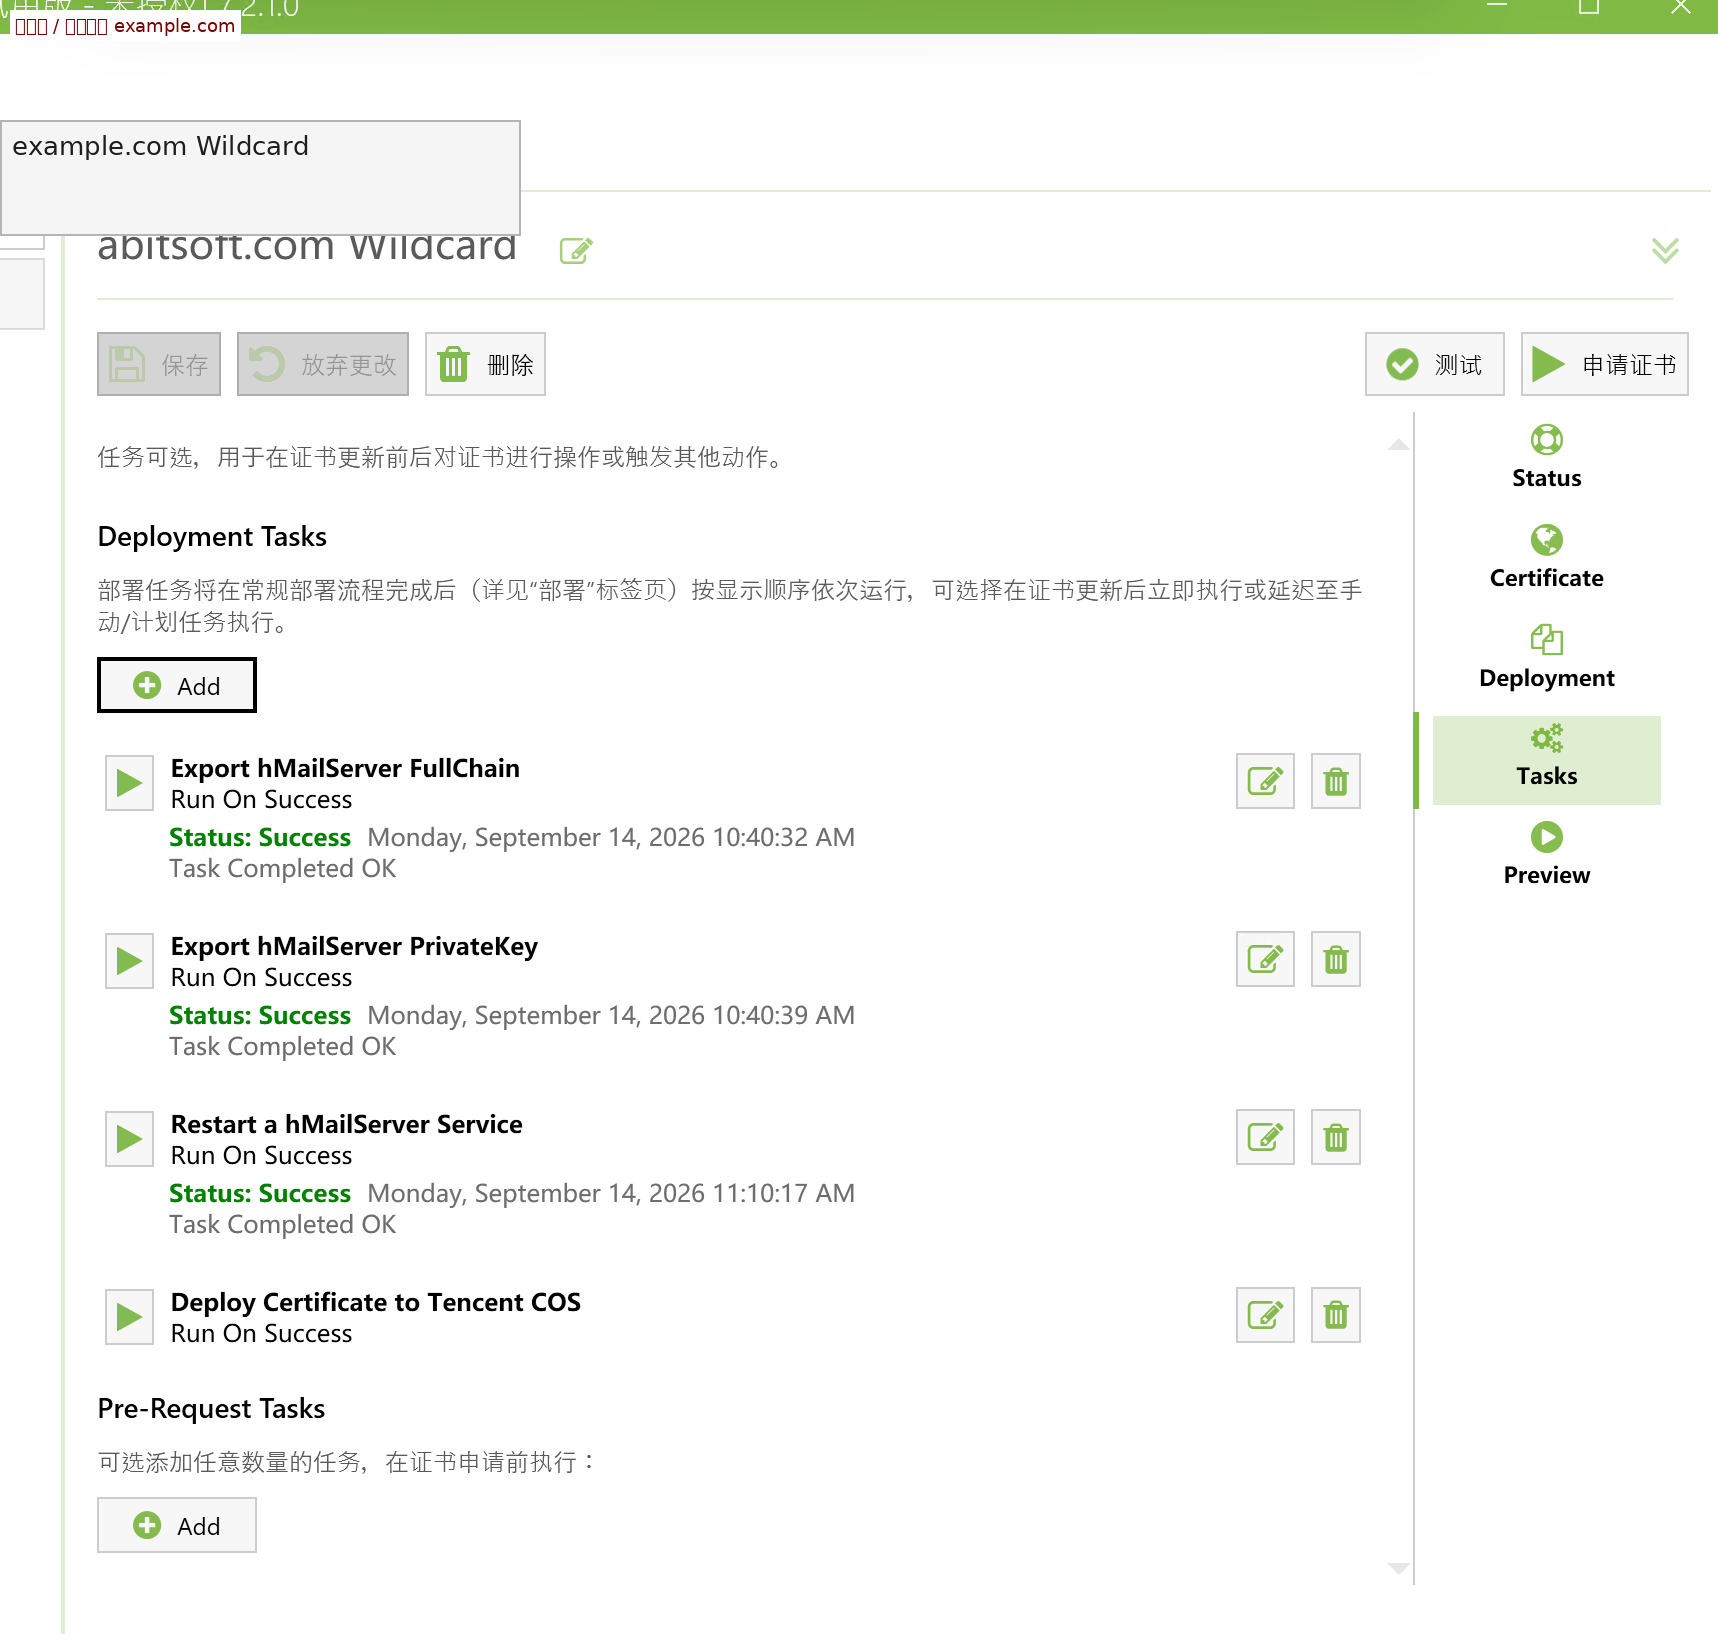
最终任务链:
1. Export hMailServer FullChain
2. Export hMailServer PrivateKey
3. Restart a hMailServer Service
4. Deploy Certificate to Tencent COS
【📷 图10|Certify 最终自动化任务链】
9. 实战中最容易踩的坑
TCP 通不等于 TLS 正常
Test-NetConnection=True 只说明端口可达,必须用 SslStream.AuthenticateAsClient() 验证实际证书。
587 有两个不同角色
本机监听 587 是客户端提交邮件;hMailServer 到第三方 SMTP Relay 的 587 是出站中继,互不冲突。
COS 部署成功后可能有短暂下发延迟
先看 COS 控制台 CertificateId 是否已切换,再从公网 443 验证。
自动化必须幂等
重复部署同一张证书时,腾讯云可能返回 CertificateDeployInstanceEmpty。脚本必须将其视为“已是最新状态”。
Machine 环境变量创建后要重启 Certify Management Agent
否则后台服务可能继承不到新变量。
10. 最终检查清单
- Certify Auto Renewal Enabled = Yes
- Tencent DNS API Test 成功
- fullchain.pem / privkey.pem 自动导出成功
- hMailServer 465/993/995 正在 Listen
- Windows 防火墙与腾讯云安全组已放行
mail.example.com:993返回 Let’s Encrypt 通配符证书- Foxmail 995/465 SSL 收发正常
- 腾讯云 SSL 中存在上传证书
- COS
static.example.com已绑定新证书 static.example.com:443公网返回 Let’s Encrypt- Certify 的 COS Task 显示
Status: Success / Task Completed OK
完成以上检查后,hMailServer 与 COS 的 90 天证书即可实现无人值守自动续期。

纵情码海钱塘涌,杭州开发者创新动! 属于杭州的开发者社区!致力于为杭州地区的开发者提供学习、合作和成长的机会;同时也为企业交流招聘提供舞台!
更多推荐

 0
0 0
0- 0


 已为社区贡献1条内容

所有评论(0)