
用 Python + PyQT6 写一款高颜值的天气查询软件(附完整源码)
·
🧭 前言
最近用 Python 写了一个小小的天气查询软件,界面简洁美观,功能实用,适合新手学习 PyQt6、API 调用、界面美化等知识点。今天就带大家一步步拆解这个项目,手把手教学,零基础也能看懂!
🧰 项目功能
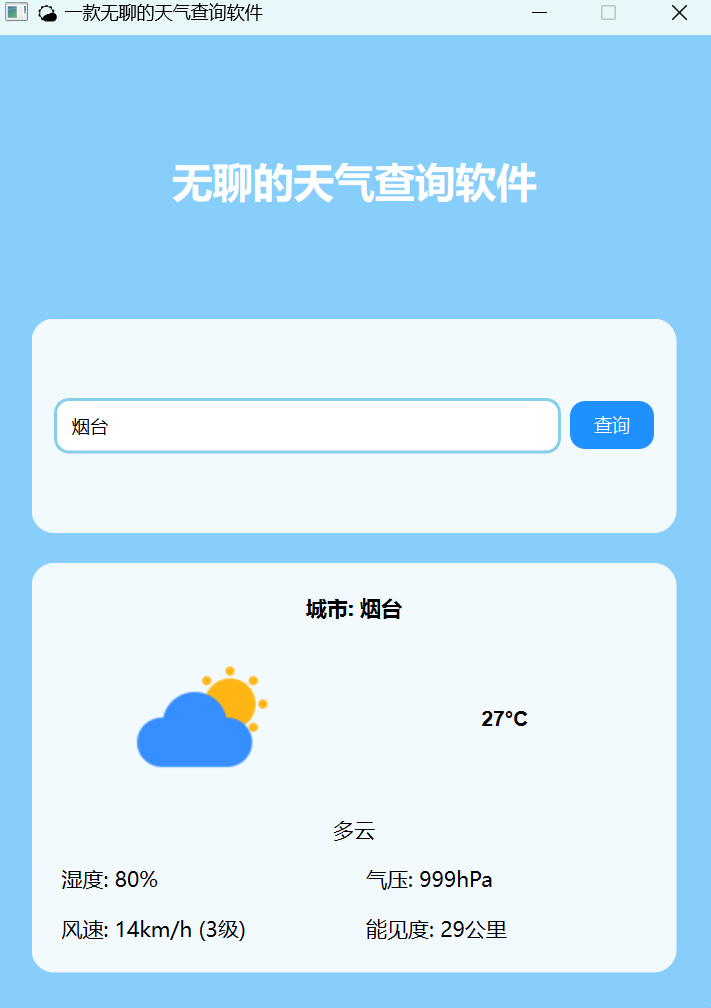
✅ 输入城市名,点击查询按钮即可获取天气信息
✅ 显示当前温度、天气状况、湿度、风速、气压、能见度
✅ 自动加载天气图标
✅ 异常处理完善(网络超时、城市不存在等)
✅ 界面美观,支持阴影、圆角、渐变背景等视觉效果
🧱 技术栈
|
表格 |
|
| 技术 | 用途 |
| PyQT6 | 图形界面开发(GUI) |
| requests | 网络请求 |
| 和风天气API | 天气数据来源 |
🧪 第一步:注册和风天气 API
-
注册账号,创建应用,获取你的
API Key -
替换代码中的
self.api_key = "你的Key"
🧑💻 第二步:安装依赖
我的python版本为3.13
pip install PySide6 requests注意:PyQt6 和 PySide6 是 Qt 的 Python 绑定,语法几乎一样,这里用的是 PySide6。
🧩 第三步:界面设计思路
我们使用 QMainWindow 作为主窗口,整体布局如下:
QVBoxLayout
├── 标题 QLabel
├── 输入框卡片 QFrame(含 QLineEdit + QPushButton)
├── 天气信息卡片 QFrame(含多个 QLabel)-
使用
QGraphicsDropShadowEffect添加阴影 -
使用
setStyleSheet设置圆角、背景色、边框等 -
使用
QPixmap加载天气图标
🌐 第四步:API 调用流程
1. 获取城市 ID
https://geoapi.qweather.com/v2/city/lookup?location=城市名&key=你的Key2. 获取实时天气
https://devapi.qweather.com/v7/weather/now?location=城市ID&key=你的Key3. 下载天气图标
https://a.hecdn.net/img/common/icon/202106d/{图标代码}.png🧪 第五步:异常处理
| 表格 | |
| 异常类型 | 提示方式 |
| 城市名称为空 | QMessageBox.warning |
| 城市不存在 | QMessageBox.critical |
| 网络超时 | requests.exceptions.Timeout |
| 网络连接错误 | requests.exceptions.ConnectionError |
| 其它异常 | try-except 捕获并弹窗提示 |
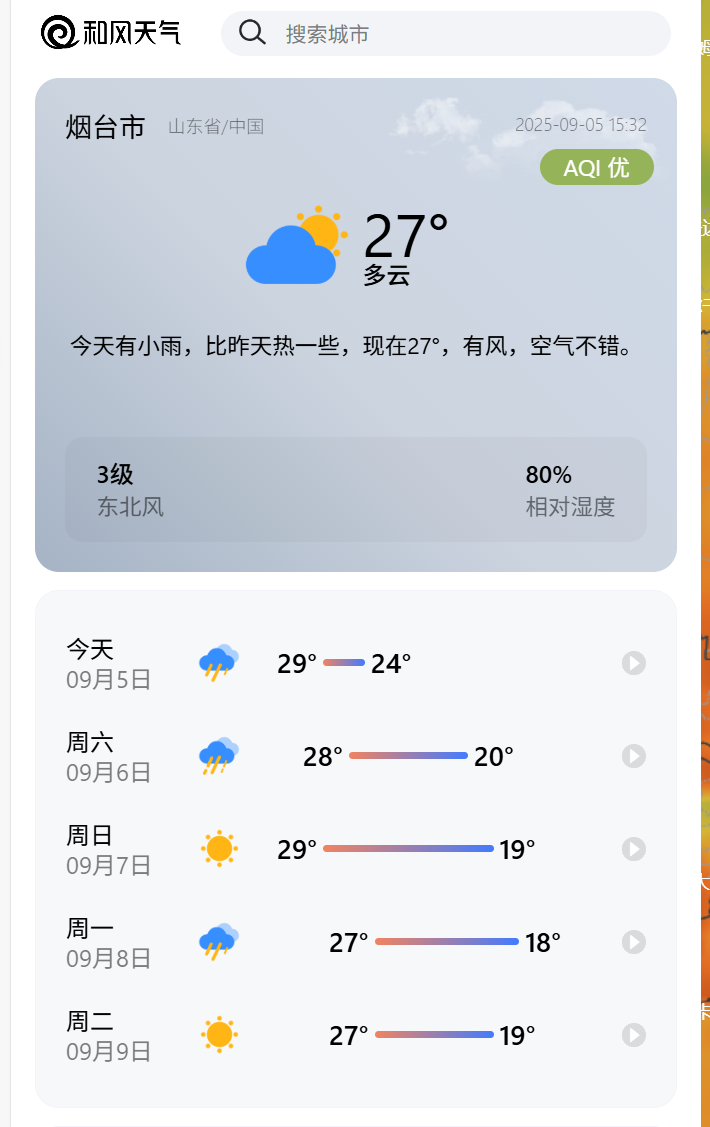
📸 界面预览
📦 完整源码(可直接运行)
import sys
import requests
from PySide6.QtWidgets import (
    QApplication, QMainWindow, QWidget, QVBoxLayout, QHBoxLayout,
    QLabel, QLineEdit, QPushButton, QMessageBox, QFrame, QGraphicsDropShadowEffect
)
from PySide6.QtCore import Qt
from PySide6.QtGui import QFont, QPixmap, QPalette, QColor


class WeatherApp(QMainWindow):
    def __init__(self):
        super().__init__()
        self.setWindowTitle("🌤️ 一款无聊的天气查询软件")
        self.setFixedSize(480, 650)

        # 背景颜色
        palette = QPalette()
        gradient = QColor(135, 206, 250)  # 天蓝色
        palette.setColor(QPalette.Window, gradient)
        self.setPalette(palette)

        # 中央部件
        central_widget = QWidget()
        self.setCentralWidget(central_widget)

        layout = QVBoxLayout(central_widget)
        layout.setSpacing(20)
        layout.setContentsMargins(25, 25, 25, 25)

        # 标题
        title_label = QLabel("无聊的天气查询软件")
        title_label.setAlignment(Qt.AlignCenter)
        title_font = QFont("Microsoft YaHei", 48, QFont.Bold)  # 放大标题字体
        title_label.setFont(title_font)
        title_label.setStyleSheet("color: white;font-size:20pt;")
        layout.addWidget(title_label)

        # 输入区域卡片
        input_frame = QFrame()
        input_frame.setObjectName("card")
        input_layout = QHBoxLayout(input_frame)
        input_layout.setContentsMargins(15, 15, 15, 15)

        self.city_input = QLineEdit()
        self.city_input.setPlaceholderText("请输入城市名称...")
        self.city_input.setStyleSheet("""
            QLineEdit {
                padding: 8px;
                border: 2px solid #87CEEB;
                border-radius: 10px;
                background: white;
            }
            QLineEdit:focus {
                border: 2px solid #1E90FF;
            }
        """)
        input_layout.addWidget(self.city_input)

        self.search_button = QPushButton("查询")
        self.search_button.setStyleSheet("""
            QPushButton {
                background-color: #1E90FF;
                color: white;
                border-radius: 10px;
                padding: 8px 16px;
            }
            QPushButton:hover {
                background-color: #4682B4;
            }
        """)
        self.search_button.clicked.connect(self.get_weather)
        input_layout.addWidget(self.search_button)
        layout.addWidget(input_frame)

        # 天气信息卡片
        info_frame = QFrame()
        info_frame.setObjectName("card")
        info_layout = QVBoxLayout(info_frame)
        info_layout.setContentsMargins(20, 20, 20, 20)
        info_layout.setSpacing(15)

        # 城市名
        self.city_label = QLabel("城市: --")
        self.city_label.setAlignment(Qt.AlignCenter)
        self.city_label.setFont(QFont("Microsoft YaHei", 16, QFont.Bold))
        info_layout.addWidget(self.city_label)

        # 天气图标 + 温度
        weather_top_layout = QHBoxLayout()
        self.weather_icon = QLabel()
        self.weather_icon.setFixedSize(100, 100)
        weather_top_layout.addWidget(self.weather_icon, alignment=Qt.AlignCenter)

        self.temperature_label = QLabel("--°C")
        self.temperature_label.setFont(QFont("Arial", 34, QFont.Bold))
        weather_top_layout.addWidget(self.temperature_label, alignment=Qt.AlignCenter)
        info_layout.addLayout(weather_top_layout)

        # 天气描述
        self.weather_label = QLabel("天气状况: --")
        self.weather_label.setAlignment(Qt.AlignCenter)
        info_layout.addWidget(self.weather_label)

        # 详细信息
        details_layout = QHBoxLayout()
        left_details = QVBoxLayout()
        self.humidity_label = QLabel("湿度: --")
        self.wind_label = QLabel("风速: --")
        left_details.addWidget(self.humidity_label)
        left_details.addWidget(self.wind_label)

        right_details = QVBoxLayout()
        self.pressure_label = QLabel("气压: --")
        self.visibility_label = QLabel("能见度: --")
        right_details.addWidget(self.pressure_label)
        right_details.addWidget(self.visibility_label)

        details_layout.addLayout(left_details)
        details_layout.addLayout(right_details)
        info_layout.addLayout(details_layout)

        layout.addWidget(info_frame)

        # 添加阴影效果
        for frame in [input_frame, info_frame]:
            shadow = QGraphicsDropShadowEffect()
            shadow.setBlurRadius(20)
            shadow.setOffset(0, 5)
            frame.setGraphicsEffect(shadow)

        # 样式表
        self.setStyleSheet("""
            #card {
                background: rgba(255, 255, 255, 0.9);
                border-radius: 15px;
            }
            QLabel {
                font-size: 14px;
            }
        """)

        # 默认城市
        self.city_input.setText("北京")
        self.weather_icon.clear()

        # 和风天气 API Key
        self.api_key = "你的key"

    def get_weather(self):
        city = self.city_input.text().strip()
        if not city:
            QMessageBox.warning(self, "警告", "请输入城市名称!")
            return

        # 重置状态
        self.weather_icon.setText("加载中...")
        self.city_label.setText(f"城市: {city}")
        self.temperature_label.setText("--°C")
        self.weather_label.setText("天气状况: 查询中...")
        self.humidity_label.setText("湿度: --")
        self.wind_label.setText("风速: --")
        self.pressure_label.setText("气压: --")
        self.visibility_label.setText("能见度: --")

        QApplication.processEvents()

        try:
            # 获取城市ID
            location_url = f"https://geoapi.qweather.com/v2/city/lookup?location={city}&key={self.api_key}"
            location_response = requests.get(location_url, timeout=10)
            location_data = location_response.json()

            if location_data["code"] == "200" and location_data.get("location"):
                location_id = location_data["location"][0]["id"]
                city_name = location_data["location"][0]["name"]

                # 获取天气
                weather_url = f"https://devapi.qweather.com/v7/weather/now?location={location_id}&key={self.api_key}"
                weather_response = requests.get(weather_url, timeout=10)
                weather_data = weather_response.json()

                if weather_data["code"] == "200":
                    now = weather_data["now"]
                    temp = now["temp"]
                    humidity = now["humidity"]
                    weather_desc = now["text"]
                    wind_speed = now["windSpeed"]
                    wind_scale = now["windScale"]
                    pressure = now["pressure"]
                    vis = now["vis"]
                    icon_code = now["icon"]

                    self.city_label.setText(f"城市: {city_name}")
                    self.temperature_label.setText(f"{temp}°C")
                    self.weather_label.setText(f"{weather_desc}")
                    self.humidity_label.setText(f"湿度: {humidity}%")
                    self.wind_label.setText(f"风速: {wind_speed}km/h ({wind_scale}级)")
                    self.pressure_label.setText(f"气压: {pressure}hPa")
                    self.visibility_label.setText(f"能见度: {vis}公里")

                    # 加载天气图标
                    icon_url = f"https://a.hecdn.net/img/common/icon/202106d/{icon_code}.png"
                    icon_response = requests.get(icon_url, timeout=10)
                    if icon_response.status_code == 200:
                        pixmap = QPixmap()
                        pixmap.loadFromData(icon_response.content)
                        self.weather_icon.setPixmap(
                            pixmap.scaled(100, 100, Qt.KeepAspectRatio, Qt.SmoothTransformation))
                    else:
                        self.weather_icon.setText("❓")
                else:
                    QMessageBox.critical(self, "错误", f"获取天气失败: {weather_data.get('message', '未知错误')}")
                    self.weather_icon.setText("❌")
            else:
                QMessageBox.critical(self, "错误", f"找不到城市: {city}")
                self.weather_icon.setText("🏙️")

        except requests.exceptions.Timeout:
            QMessageBox.critical(self, "错误", "请求超时,请检查网络连接")
            self.weather_icon.setText("⏱️")
        except requests.exceptions.ConnectionError:
            QMessageBox.critical(self, "错误", "网络连接错误,请检查网络设置")
            self.weather_icon.setText("📡")
        except Exception as e:
            QMessageBox.critical(self, "错误", f"发生异常: {str(e)}")
            self.weather_icon.setText("❌")


if __name__ == "__main__":
    app = QApplication(sys.argv)
    app.setStyle("Fusion")
    weather_app = WeatherApp()
    weather_app.show()
    sys.exit(app.exec())
🧼 后续可扩展功能(留作业)
-
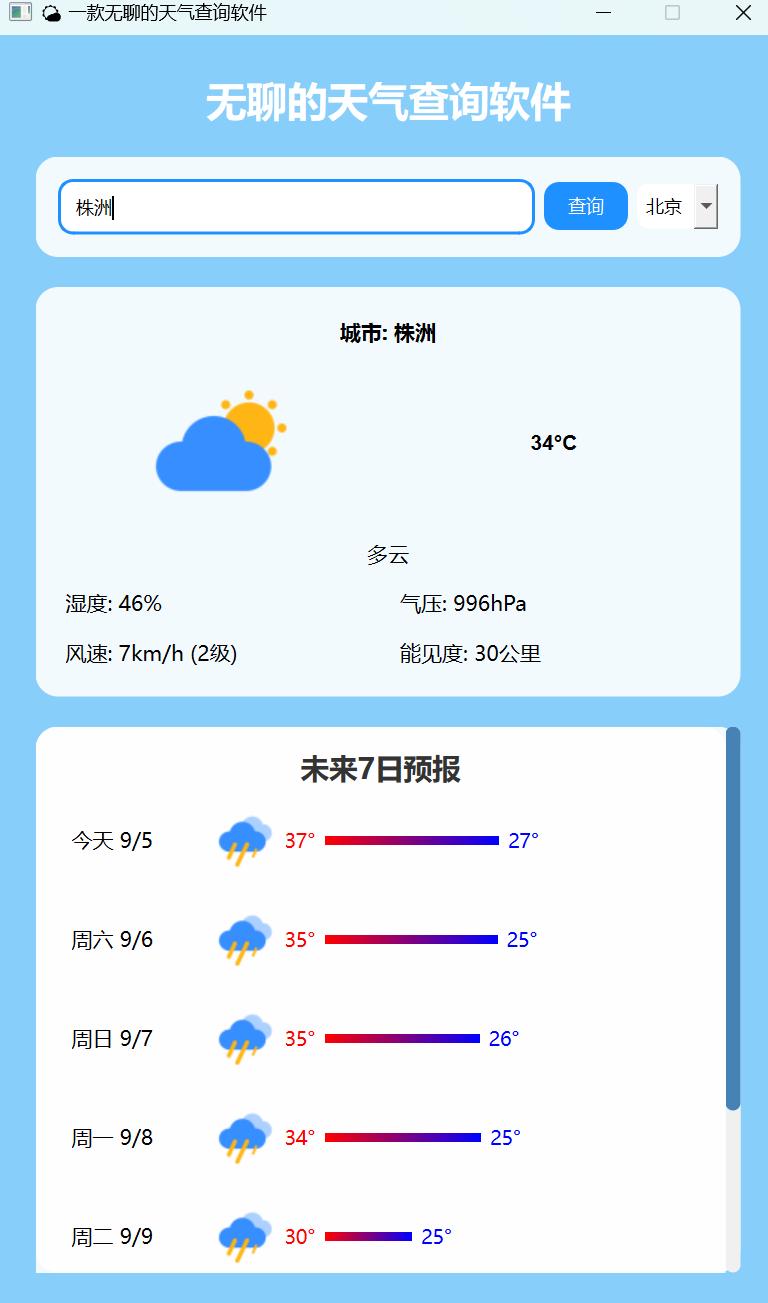
✅ 支持 7 日天气预报
-
✅ 支持切换城市历史记录
-
✅ 支持打包为
.exe文件(用pyinstaller)
效果如下:

更多推荐


 18
18 0
0- 0


 已为社区贡献1条内容

所有评论(0)