
【Java框架】知识点汇总Day4:SSM整合+项目实战(持续更新)
一、SSM整合
SSM:Spring + Spring MVC + MyBatis
Spring的作用?IOC容器自动创建各类对象
SSM框架整合本质就是把Sring MVC、MyBatis所需要的各自对象组件的创建交给Spring IOC来完成。
- Spring 起到的作用就是整合创建另外两个框架所需的对象(XML文件,手动配置)
- Spring MVC 负责Web层的交互,请求响应
- MyBatis负责持久层的交互,连接数据库。
1.1 整合步骤
1.pom.xml
 <dependencies>
    <dependency>
      <groupId>junit</groupId>
      <artifactId>junit</artifactId>
      <version>3.8.1</version>
      <scope>test</scope>
    </dependency>
    <dependency>
      <groupId>mysql</groupId>
      <artifactId>mysql-connector-java</artifactId>
      <version>8.0.33</version>
    </dependency>
    <!--MyBatis 3.4.5(2017年的版本),和 MySQL 8.0 驱动兼容性不好。升级到 3.5.x,同时可以解决JDK11反射警告问题-->
    <dependency>
      <groupId>org.mybatis</groupId>
      <artifactId>mybatis</artifactId>
      <version>3.5.13</version>
    </dependency>
    <!--MyBatis整合Spring MVC-->
    <dependency>
      <groupId>org.mybatis</groupId>
      <artifactId>mybatis-spring</artifactId>
      <version>1.3.1</version>
    </dependency>
    <!--C3P0-->
     <dependency>
       <groupId>com.mchange</groupId>
       <artifactId>c3p0</artifactId>
       <version>0.9.5.5</version>
    </dependency>
    <dependency>
      <groupId>org.springframework</groupId>
      <artifactId>spring-jdbc</artifactId>
      <version>5.3.31</version>
    </dependency>
    <dependency>
      <groupId>org.projectlombok</groupId>
      <artifactId>lombok</artifactId>
      <version>1.18.32</version>
    </dependency>
    <!--版本要对应jdk-->
    <dependency>
      <groupId>org.springframework</groupId>
      <artifactId>spring-context</artifactId>
      <version>5.3.31</version>
    </dependency>
    <dependency>
      <groupId>org.springframework</groupId>
      <artifactId>spring-aop</artifactId>
      <version>5.3.31</version>
    </dependency>
    <dependency>
      <groupId>org.springframework</groupId>
      <artifactId>spring-aspects</artifactId>
      <version>5.3.31</version>
    </dependency>
    <!--引入spring mvc的依赖-->
    <dependency>
      <groupId>org.springframework</groupId>
      <artifactId>spring-webmvc</artifactId>
      <version>5.3.31</version>
    </dependency>
  </dependencies>
2.web.xml配置spring spring-mvc
web.xml是默认的配置文件
<!DOCTYPE web-app PUBLIC
 "-//Sun Microsystems, Inc.//DTD Web Application 2.3//EN"
 "http://java.sun.com/dtd/web-app_2_3.dtd" >

<web-app>
  <display-name>Archetype Created Web Application</display-name>
  <!--Spring-->
  <context-param>
    <param-name>contextConfigLocation</param-name>
    <param-value>classpath:spring.xml</param-value>
  </context-param>
  <listener>
    <listener-class>org.springframework.web.context.ContextLoaderListener</listener-class>
  </listener>
  <!--Spring MVC的前端控制器-->
  <servlet>
    <servlet-name>springmvc</servlet-name>
    <servlet-class>org.springframework.web.servlet.DispatcherServlet</servlet-class>
  <init-param>
    <param-name>contextConfigLocation</param-name>
    <param-value>classpath:springmvc.xml</param-value>
  </init-param>
  </servlet>
  <servlet-mapping>
    <servlet-name>springmvc</servlet-name>
    <url-pattern>/</url-pattern>
  </servlet-mapping>
</web-app>
3.整合各自的配置文件
spring.xml
<?xml version="1.0" encoding="UTF-8"?>
<beans xmlns="http://www.springframework.org/schema/beans"
       xmlns:xsi="http://www.w3.org/2001/XMLSchema-instance"
       xmlns:context="http://www.springframework.org/schema/context"
       xsi:schemaLocation="http://www.springframework.org/schema/beans
                           https://www.springframework.org/schema/beans/spring-beans.xsd
                           http://www.springframework.org/schema/context
                           https://www.springframework.org/schema/context/spring-context.xsd">

    <!-- Bean 定义、组件扫描、数据源等配置放在这里 -->
    <!--相当于把config.xml中的数据源、mapper映射内容拿过来-->
    <bean id="dataSource" class="com.mchange.v2.c3p0.ComboPooledDataSource">
        <property name="user" value="root"></property>
        <property name="password" value="123456"></property>
        <property name="driverClass" value="com.mysql.cj.jdbc.Driver"></property>
        <property name="jdbcUrl" value="jdbc:mysql://localhost:3306/sys"></property>
        <property name="initialPoolSize" value="5"></property>
        <property name="maxPoolSize" value="10"></property>
    </bean>

    <bean id="sqlSessionFactory" class="org.mybatis.spring.SqlSessionFactoryBean">
        <property name="dataSource" ref="dataSource"></property>
        <property name="mapperLocations" value="classpath:com/myspring/mapper/*.xml"></property>
        <!--引入config.xml中的settings-->
        <property name="configLocation" value="classpath:config.xml"></property>
    </bean>

    <bean class="org.mybatis.spring.mapper.MapperScannerConfigurer">
        <property name="basePackage" value="com.myspring.mapper"></property>
    </bean>

</beans>
config.xml
<?xml version="1.0" encoding="UTF-8" ?>
<!DOCTYPE configuration
        PUBLIC "-//mybatis.org//DTD Config 3.0//EN"
        "http://mybatis.org/dtd/mybatis-3-config.dtd">
<configuration>
    <!-- 配置项 -->
    <settings>
        <!--打印SQL-->
        <setting name="logImpl" value="STDOUT_LOGGING"/>
        <!--懒加载-->
        <setting name="lazyLoadingEnabled" value="true"/>
        <!--开启二级缓存-->
        <setting name="cacheEnabled" value="true"/>
    </settings>
</configuration>
springmvc.xml
<?xml version="1.0" encoding="UTF-8"?>
<beans xmlns="http://www.springframework.org/schema/beans"
       xmlns:xsi="http://www.w3.org/2001/XMLSchema-instance"
       xmlns:context="http://www.springframework.org/schema/context"
       xmlns:mvc="http://www.springframework.org/schema/mvc"
       xsi:schemaLocation="http://www.springframework.org/schema/beans
                           http://www.springframework.org/schema/beans/spring-beans.xsd
                           http://www.springframework.org/schema/context
                           http://www.springframework.org/schema/context/spring-context.xsd
                           http://www.springframework.org/schema/mvc
                           http://www.springframework.org/schema/mvc/spring-mvc.xsd">

    <!-- 启用注解驱动,必须要有。Spring MVC 的 @RequestMapping 注解。
    需要 <mvc:annotation-driven/> 来启用注解驱动的处理器映射和适配器。
    没有它,Spring 根本不认识你的 @Controller 和 @RequestMapping-->
    <mvc:annotation-driven />
    <!-- 扫包 -->
    <context:component-scan base-package="com.myspring.controller"/>

    <!-- 视图解析器 -->
    <bean class="org.springframework.web.servlet.view.InternalResourceViewResolver">
        <property name="prefix" value="/" />
        <property name="suffix" value=".jsp" />
    </bean>
</beans>
4.测试
package com.myspring.controller;
import com.myspring.entity.Class;
import com.myspring.entity.User;
import com.myspring.mapper.ClassMapper;
import org.springframework.beans.factory.annotation.Autowired;
import org.springframework.stereotype.Controller;
import org.springframework.ui.Model;
import org.springframework.web.bind.annotation.RequestMapping;

@Controller
public class HelloController {

    @Autowired
    private ClassMapper classMapper;

    @RequestMapping("/index")
    public String index(){
        Class aclass =  this.classMapper.getById(1);
        System.out.println(aclass);
        return "index";
    }
}
启动Tomcat,访问localhost:8080/index
java.lang.AbstractMethodError: Method com/mchange/v2/c3p0/impl/NewProxyResultSet.isClosed()Z is abstract
原因:Java 版本与 c3p0 库不兼容
解决办法:升级 c3p0 到 0.9.5.x
<<dependency>
    <groupId>com.mchange</groupId>
    <artifactId>c3p0</artifactId>
    <version>0.9.5.5</version>
</dependency>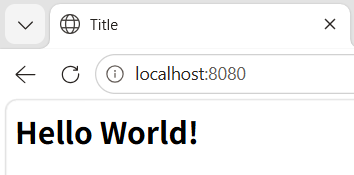
二、实战
2.1 查找
1.创建实体类
package com.ssm.entity;

import lombok.Data;

import java.util.Date;

@Data
public class News {

    private int id;
    private String title;
    private  String content;
    private Date createtime;
    private String opername;
    private String time;
}
2.创建Mapper及其.xml文件
package com.ssm.mapper;

import com.ssm.entity.News;

import java.util.List;

public interface NewsMapper {
    public List<News> list();
}
<?xml version="1.0" encoding="UTF-8" ?>
<!DOCTYPE mapper PUBLIC "-//mybatis.org//DTD Mapper 3.0//EN" "http://mybatis.org/dtd/mybatis-3-mapper.dtd">
<mapper namespace="com.ssm.mapper.NewsMapper">

 <select id="list" resultType="com.ssm.entity.News">
     select * from sys_news
 </select>

</mapper>
3.Controller中添加方法
package com.ssm.controller;

import com.ssm.entity.News;
import com.ssm.mapper.NewsMapper;
import org.springframework.beans.factory.annotation.Autowired;
import org.springframework.stereotype.Controller;
import org.springframework.ui.Model;
import org.springframework.web.bind.annotation.RequestMapping;

import java.text.SimpleDateFormat;
import java.util.List;

@Controller
public class HelloController {

    @Autowired
    private NewsMapper newsMapper;

    @RequestMapping("/list")
    public String list(Model model){
        List<News> list = this.newsMapper.list();
        model.addAttribute("list",list);
        for (News news : list){
            SimpleDateFormat simpleDateFormat = new SimpleDateFormat("yyyy-MM-dd");
           String format =  simpleDateFormat.format(news.getCreatetime());
           news.setTime(format);
        }
        return "index";
    }
}
4.pom.xml添加log4j依赖
jstl依赖很重要,不添加,访问时会报“org.apache.jasper.JasperException: /index.jsp (行.: [17], 列: [4]) 在用前缀[c]导入的标记库中未定义标记[]”
<dependency>
    <groupId>javax.servlet</groupId>
    <artifactId>jstl</artifactId>
    <version>1.2</version>
</dependency>

  <!-- Servlet API - 编译时需要,打包时不包含 -->
    <dependency>
      <groupId>javax.servlet</groupId>
      <artifactId>javax.servlet-api</artifactId>
      <version>4.0.1</version>
      <scope>provided</scope>  <!-- 必须是 provided -->
    </dependency>
5.创建index.jsp
<%@ page contentType="text/html;charset=UTF-8" language="java" %>
<%@ page isELIgnored="false"%>
<%--<%@ taglib prefix="c" uri="http://www.springframework.org/tags/form" %>--%>
<%@ taglib prefix="c" uri="http://java.sun.com/jsp/jstl/core" %>
<html>
<head>
    <title>Title</title>
</head>
<body>
<table border="1">
    <tr>
        <td>ID</td>
        <td>标题</td>
        <td>内容</td>
        <td>创建时间</td>
        <td>操作员</td>
    </tr>
    <c:forEach items="${list}"  var="news">
    <tr>
        <td>${news.id}</td>
        <td>${news.title}</td>
        <td>${news.content}</td>
        <td>${news.time}</td>
        <td>${news.opername}</td>
    </tr>
    </c:forEach>   <%-- ✅ <tr> 必须放在 <c:forEach> 和 </c:forEach> 之间 --%>

</table>

</body>
</html>
<tr>不放在<c:forEach>之间,就执行一次,只能看到表头。
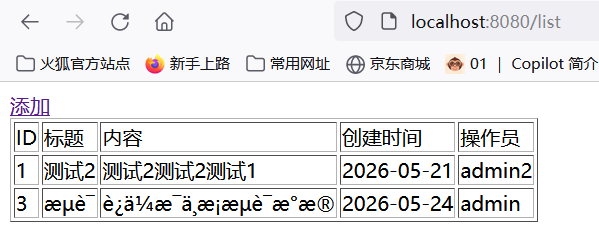
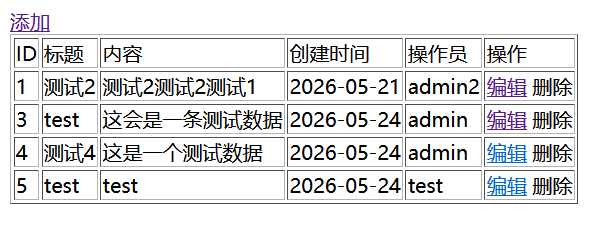
6.测试
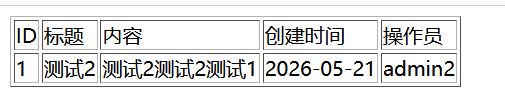
如果检查之后还是只显示表头,检查访问地址,默认跳转localhost:8080,我们需要访问localhost:8080/list,才能看到数据。
2.2 添加
1.index.jsp
<a href="add.jsp">添加</a>2.创建add.jsp
<%@ page contentType="text/html;charset=UTF-8" language="java" %>
<html>
<head>
    <title>Title</title>
</head>
<body>
<form action="/add" method="post">
    <table>
        <tr>
            <td>title: </td>
            <td>
                <input type="text" name="title">
            </td>
        </tr>
        <tr>
            <td>content: </td>
            <td>
                <input type="text" name="content">
            </td>
        </tr>
        <tr>
            <td>opername: </td>
            <td>
                <input type="text" name="opername">
            </td>
        </tr>
        <tr>
            <td>
                <input type="submit" name="提交">
            </td>
            <td>
                <input type="reset" name="重置">
            </td>
        </tr>
    </table>
</form>

</body>
</html>
3.controller中添加add方法
 @RequestMapping("/add")
    public String add(News news){
        System.out.println(news);
        news.setCreatetime(new Date());
      this.newsMapper.add(news);
        return "redirect:/list";
    }
4.mapper及.xml文件中添加add方法
package com.ssm.mapper;

import com.ssm.entity.News;

import java.util.List;

public interface NewsMapper {
    public List<News> list();
    public void add(News news);
}
<insert id="add" parameterType="com.ssm.entity.News">
insert into sys_news(title,content,createtime,opername) values (#{title},#{content},#{createtime},#{opername})
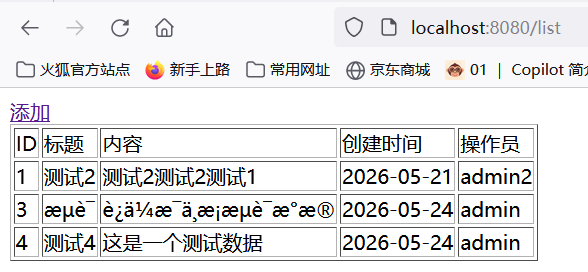
</insert>5.测试
访问localhost:8080/list
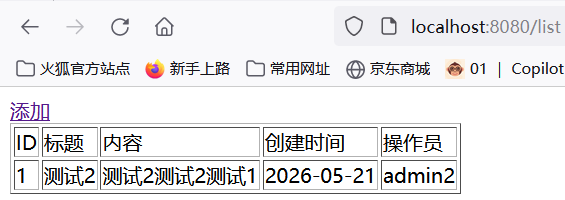
点击“添加”
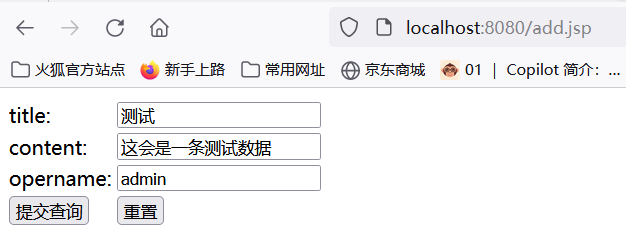
点击“提交”
出现乱码的情况。
原因:web.xml 用的是 Web Application 2.3 DTD,这个版本不支持 <filter> 放在 <servlet> 之前的规范要求,但实际上 Tomcat 会按顺序加载。
关键问题:你的 web.xml 中根本没有 CharacterEncodingFilter
web.xml中添加
<!-- 1. 编码过滤器 - 必须放在最前面 -->
    <filter>
        <filter-name>encodingFilter</filter-name>
        <filter-class>org.springframework.web.filter.CharacterEncodingFilter</filter-class>
        <init-param>
            <param-name>encoding</param-name>
            <param-value>UTF-8</param-value>
        </init-param>
        <init-param>
            <param-name>forceEncoding</param-name>
            <param-value>true</param-value>
        </init-param>
    </filter>
    <filter-mapping>
        <filter-name>encodingFilter</filter-name>
        <url-pattern>/*</url-pattern>
    </filter-mapping>
重启Tomcat测试
如果Tomcat服务器显示的数据也是乱码。
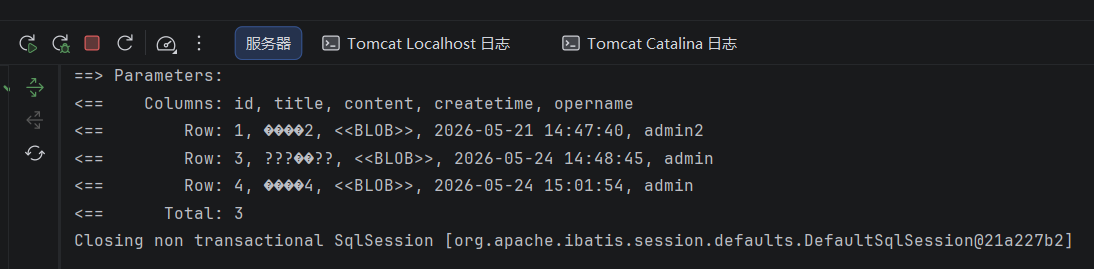
解决办法:spring.xml文件中更改为
<property name="jdbcUrl" value="jdbc:mysql://localhost:3306/car_rental_separate?useUnicode=true&characterEncoding=utf-8&serverTimezone=Asia/Shanghai"></property>2.3 编辑
1.index.jsp链接“编辑”
        <td>
            <a href="/get?id=${news.id}">编辑</a>
        </td>
2.创建edit.jsp
<%@ page contentType="text/html;charset=UTF-8" language="java" %>
<%@ page isELIgnored="false"%>
<html>
<head>
    <title>Title</title>
</head>
<body>
<form action="/update" method="post">
    <table>
        <tr>
            <td>ID: </td>
            <td>
              <!--只读或者隐藏,在数据库中是自增,强行更改会导致提交后得不到更新后的数据-->
                <input type="text" name="id" value="${news.id}" readonly>
            </td>
        </tr>
        <tr>
            <td>title: </td>
            <td>
                <input type="text" name="title" value="${news.title}">
            </td>
        </tr>
        <tr>
            <td>content: </td>
            <td>
                <input type="text" name="content" value="${news.content}">
            </td>
        </tr>
        <tr>
            <td>createtime: </td>
            <td>
                <input type="text" name="createtime" value="${news.createtime}" readonly>
            </td>
        </tr>
        <tr>
            <td>opername: </td>
            <td>
                <input type="text" name="opername" value="${news.opername}">
            </td>
        </tr>
        <tr>
            <td>
                <input type="submit" name="提交">
            </td>
            <td>
                <input type="reset" name="重置">
            </td>
        </tr>
    </table>
</form>

</body>
</html>
3.mapper及xml文件
mapper 增加方法
public News getById(Integer id);
    public void update(News news);
.xml
 <select id="update" parameterType="com.ssm.entity.News">
        update sys_news set title = #{title},content = #{content},opername = #{opername} where id = ${id}
    </select>
4.congtroller实现方法
 @RequestMapping("/get")
    public String get(Integer id,Model model){
        News news = this.newsMapper.getById(id);
        model.addAttribute("news",news);
        return "edit";
    }

    @RequestMapping("/update")
    public String update(News news){
        this.newsMapper.update(news);
        return "redirect:/list";

    }
5.测试
2.4 删除
升级 web.xml 到 Servlet 3.0+
如果 不升级,保持2.0的话,删除数据时会出现,网页闪一下,但是数据未被删除的情况。
<?xml version="1.0" encoding="UTF-8"?>
<<web-app xmlns="http://xmlns.jcp.org/xml/ns/javaee"
         xmlns:xsi="http://www.w3.org/2001/XMLSchema-instance"
         xsi:schemaLocation="http://xmlns.jcp.org/xml/ns/javaee http://xmlns.jcp.org/xml/ns/javaee/web-app_3_1.xsd"
         version="3.1">
1.index.jsp文件
        <td>
            <a href="/delete?id=${news.id}">删除</a>
        </td>
2.mapper及.xml文件
public void deleteById(Integer id); <select id="deleteById" parameterType="java.lang.Integer">
delete from sys_news where id = #{id}
</select>3.controller
@RequestMapping("/delete")
public String delete(Integer id){
this.newsMapper.deleteById(id);
return "redirect:/list";
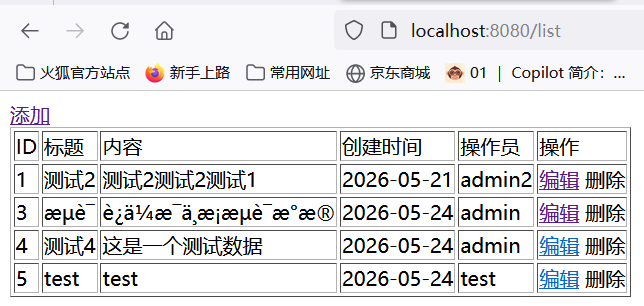
}4.测试
点击“删除”就能删除数据

更多推荐


 8
8 0
0- 0


 已为社区贡献15条内容

所有评论(0)