
CC被封号?也许你可以试试OpenCode
OpenCode 是一个开源的 AI Agent 编码工具。它可以通过终端界面、桌面应用程序或 IDE 扩展来使用。OpenCode 最大的吸引力在于它的开放性和多场景支持,不仅支持完全本地化的模型部署,还支持 75+ 种 LLM 提供商,如 Anthropic、Github Copilot、OpenAI、Google、智谱 AI 等。使用起来更加灵活。主要特性:自动启用 LSP为大模型自动加载正
目录
- OpenCode简介
- 快速开始
- 配置使用
- 源码解析
- 结语:默认已很强,源码更值得一读
OpenCode简介
OpenCode 是一个开源的 AI Agent 编码工具。它可以通过终端界面、桌面应用程序或 IDE 扩展来使用。
- 核心定位:它是一个开源、隐私优先且高度可定制的 AI 编码代理。
- 支持多种使用场景:不仅支持 TUI(终端图形界面)模式,也支持通过 CLI、桌面应用和 VS Code 扩展插件运行。
- 生态数据:目前 GitHub 上已有 50k+ Star,拥有 650k+ 月活开发者。
OpenCode 最大的吸引力在于它的开放性和多场景支持,不仅支持完全本地化的模型部署,还支持 75+ 种 LLM 提供商,如 Anthropic、Github Copilot、OpenAI、Google、智谱 AI 等。使用起来更加灵活。
主要特性:
-
自动启用 LSP
为大模型自动加载正确的语言服务器(LSP) -
多会话并行
可在同一个项目中同时启动多个 Agent -
会话分享
可将任意会话生成链接,用于参考或调试问题 -
GitHub Copilot 支持
使用 GitHub 登录,直接复用你的 Copilot 账号 -
ChatGPT Plus / Pro 支持
使用 OpenAI 登录,调用你的 ChatGPT Plus 或 Pro 账号 -
支持任意模型
通过 Models.dev 接入 75+ 个 LLM 提供方,包括本地模型 -
支持任意编辑器
提供终端界面、桌面应用以及 IDE 插件多种使用方式
快速开始
Node.js生态扫盲
最近在看各种 Agent、MCP Server、CLI 工具(OpenCode、Claude Code、Aion UI 等)时,一个非常直观的感受是:
AI 很新,但工程栈非常 JS。
pnpm、bun、node、npx、corepack、nvm、nix……
名词密度极高,而且彼此看起来又高度重叠,让很多后端工程师(包括我自己)第一反应是:
“这都是什么?为什么一个项目要用这么多工具?”
JS 生态最容易让人困惑的地方在于:
👉 它把“运行时 / 包管理 / 版本管理 / 执行方式 / 环境复现”全部拆成了独立组件。
如果从分层角度看,其实非常清晰:
┌────────────────────────────────┐
│        应用 / Agent / CLI       │
│   (OpenCode / MCP Server)       │
└───────────────▲────────────────┘
                │
┌───────────────┴────────────────┐
│       包管理 & 执行层           │
│ pnpm / npm / yarn / bun         │
│ npx                              │
└───────────────▲────────────────┘
                │
┌───────────────┴────────────────┐
│          Runtime 层             │
│ node / bun                      │
└───────────────▲────────────────┘
                │
┌───────────────┴────────────────┐
│      Runtime 版本管理           │
│ nvm                             │
└───────────────▲────────────────┘
                │
┌───────────────┴────────────────┐
│      工具链版本管理             │
│ corepack                        │
└───────────────▲────────────────┘
                │
┌───────────────┴────────────────┐
│      系统 / 声明式环境           │
│ nix                             │
└────────────────────────────────┘
你之所以觉得“东西多”,不是因为 JS 特别复杂,而是因为:它把工程问题拆得非常显性。
Node.js:一切的起点(但不是一切)
Node 是什么?
一句话定义:
Node.js 是 JavaScript 的后端运行时。
它的地位相当于:
| 语言 | 运行时 |
|---|---|
| Java | JVM |
| Python | CPython |
| Go | Go Runtime |
| JS | Node |
node index.js
Node 做了什么?
- 提供 JS 运行环境
- 提供文件系统、网络、进程等 API
- 自带 npm(包管理器)
⚠️ 一个非常常见的误解是:Node == npm ,其实不然!npm 只是 Node 自带的一个工具。
npm / yarn / pnpm:包管理器的进化史
1️⃣ npm:原生但历史包袱最重
npm 是 Node 官方包管理器,功能类似:
- pip
- Maven / Gradle
npm install
npm run build
但它的问题也非常明显:
node_modules巨大- 依赖解析不严格(历史原因)
- 性能一般
2️⃣ yarn:第一次工程化反击
yarn 出现的背景是:早期 npm 又慢又不稳定。
yarn 带来了:
- lock 文件
- 并行下载
- 更确定的依赖解析
但 yarn 2/3(berry)走得太激进,很多后端工程师第一次接触会非常不适应。
3️⃣ pnpm:后端工程师最容易接受的方案
pnpm 的核心理念是:
所有依赖只存一份,通过硬链接/内容寻址复用。
带来的结果是:
- 磁盘占用小
- 安装速度快
- 依赖关系更严格(不会“误用”未声明依赖)
👉 这也是为什么 Agent / MCP 项目里 pnpm 出现频率极高。
bun:试图“一统江湖”的新一代工具
bun 的野心非常明确:
bun = runtime + 包管理器 + 构建工具
bun install
bun run index.ts
它的优势:
- 极快(Zig 实现)
- 原生支持 TypeScript
- 写 CLI 和 Agent 非常顺手
但代价是:
- 生态还在追赶 Node
- 某些边角行为不完全兼容
👉 新项目很爱 bun,老项目依然偏 Node。
npx:一次性执行工具(不是包管理器)
npx 常被误解,但它的定位其实很简单:
临时下载并执行一个 npm 包
npx create-react-app
npx opencode init
后端可以类比:
go run github.com/xxxpipx run
Agent 项目里,npx 常用于:
- 初始化
- 脚手架
- codegen
nvm:Node 的版本管理器(非常关键)
nvm 的存在,是因为一个现实问题:
不同项目需要不同 Node 版本。
nvm 是什么?
Node.js 的版本管理器
后端类比:
| 语言 | 工具 |
|---|---|
| Python | pyenv |
| Java | sdkman |
| Go | gvm |
| Node | nvm |
nvm install 20
nvm use 20
支持项目级约束:
.nvmrc
.node-version
👉 进入目录即切换 Node 版本
corepack:管理“包管理器”的工具
这是 JS 世界最容易让人觉得“套娃”的地方。
corepack 是 Node 官方提供的:包管理器版本管理器
它解决的问题是:
"packageManager": "pnpm@9.1.0"
不同项目要求不同 pnpm / yarn 版本。
corepack enable
之后:
- 自动使用项目声明的包管理器版本
- 避免“我本地能跑,你那不行”
nix:直接从根上解决“环境不一致”
nix 的定位已经不只是 JS:
声明式、可复现的系统级包管理器
它可以固定:
- Node 版本
- pnpm 版本
- 系统依赖
- 构建环境
在 Agent / MCP 圈子里,nix 常被用在:
- CI
- infra
- 高可复现环境
一句话总结:
nvm 是开发者体验,nix 是平台级确定性。
小结
如果你只想在脑子里留下一个模型:
nvm 管 Node,Node 跑 JS,corepack 管包管理器,pnpm 管依赖,npx 负责一次性执行,nix 管一切。
如果你只是想看懂 / 跑起来 Agent 项目,不想被 JS 生态折磨:
nvm + node + corepack + pnpm
命令级别只需要记住:
nvm use
pnpm install
pnpm run dev
先别碰 bun、yarn、nix,把世界稳定下来最重要。
这里给出个对照表:
| 分类 | 组件 | 作用说明 |
|---|---|---|
| JS Runtime | node, bun |
提供 JavaScript 后端运行环境 |
| 包管理器 | npm, yarn, pnpm, bun |
下载、解析、管理项目依赖 |
| 一次性执行工具 | npx |
临时下载并执行 CLI / 脚手架 |
| 包管理器版本管理 | corepack |
按项目锁定 pnpm / yarn 版本 |
| 系统级环境管理 | nix |
声明式、可复现的完整开发环境 |
日常最常用(几乎每天都会碰)的一些命令:
Node / nvm(环境层)
node -v          # 看当前 Node 版本
nvm ls           # 已安装的 Node 版本
nvm use          # 按 .nvmrc / .node-version 切换
nvm install 20   # 安装指定 Node 版本
👉 实际使用中:nvm use + node -v 就够了
pnpm / npm(依赖 & 项目层)
pnpm install     # 安装依赖(= npm install)
pnpm add lodash  # 添加依赖
pnpm remove xxx  # 移除依赖
pnpm run dev     # 运行脚本
pnpm run build
你会发现:
pnpm installpnpm run dev
👉 占了 90% 使用频率
初始化 / 脚手架(偶尔,但必不可少)
npx(一次性执行)
npx create-react-app my-app
npx opencode init
npx degit user/repo
特点:
- 不装
- 用完即走
- 非常适合 CLI / Agent 初始化
👉 npx = “跑一次就算”
包管理器版本相关(通常一次配置)
corepack
corepack enable          # 开启(基本只需一次)
corepack prepare pnpm@9.1.0 --activate
日常你几乎不会再主动碰它,但它在背后默默救你命 😄
bun(如果项目用了才会用)
bun install
bun run dev
bun run index.ts
bun test
👉 bun 的命令非常少,也非常直观
👉 不用 bun 的项目可以完全忽略
nix(偏进阶 / infra)
如果只是“跑 agent 项目”,你可能只会见到:
nix develop
nix-shell
或者在 README 里看到一句:
nix develop
👉 能跑就行,不需要深究
👉 很多团队用 nix 是为了 CI / 可复现性
| 层级 | 常用命令 | 使用频率 |
|---|---|---|
| Node 版本 | nvm use、node -v |
⭐⭐⭐⭐⭐ |
| 依赖安装 | pnpm install |
⭐⭐⭐⭐⭐ |
| 运行项目 | pnpm run dev |
⭐⭐⭐⭐⭐ |
| 构建 | pnpm run build |
⭐⭐⭐⭐ |
| 初始化 | npx xxx |
⭐⭐⭐ |
| 包管理器 | corepack enable |
⭐(一次性) |
| 新 runtime | bun run |
⭐⭐(视项目) |
| 环境 | nix develop |
⭐⭐(少数项目) |
你只需要在脑子里记住这 5 条命令:
nvm use
pnpm install
pnpm run dev
pnpm run build
npx xxx
其他的:
- 要么是 一次性配置
- 要么是 项目特有
安装下载
虽然OpenCode最近新增桌面版,但为了和我们的白月光——CC靠近,我们就下载TUI界面。
OpenCode依赖运行时Node,我们可以提前去Node官网下载:https://nodejs.org/zh-cn
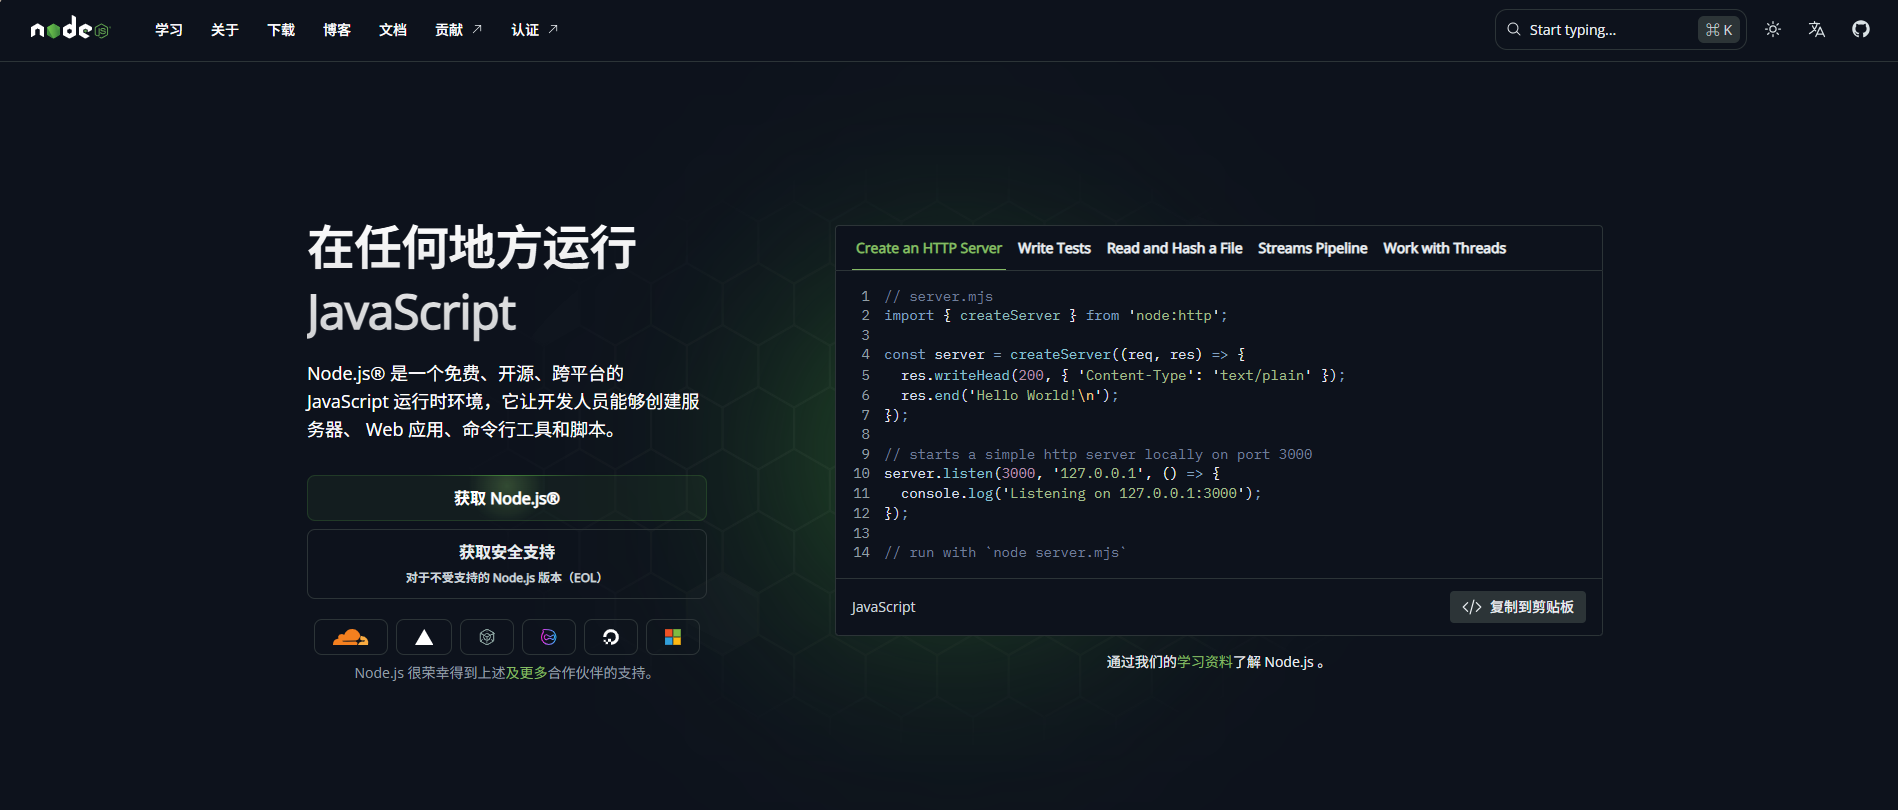
安装好Node后,会自带npm,npx和corepack,这里我们用npm快速下载:
npm i -g opencode-ai
这里简单说一句:npm 默认把包下载到你的项目目录里的 node_modules/,但这里面其实分几种情况:
最常见情况(项目内安装)
npm install lodash
👉 包会被放在:
当前项目目录/
├─ node_modules/
│  └─ lodash/
├─ package.json
这是 99% 的使用场景。
全局安装的包在哪?
npm install -g pm2
全局包的位置跟 操作系统 + Node 安装方式有关。
🔹 Linux / macOS(官方 Node / nvm)
/usr/local/lib/node_modules/
如果你用的是 nvm:
~/.nvm/versions/node/<version>/lib/node_modules/
🔹 Windows
通常是:
C:\Users\<你的用户名>\AppData\Roaming\npm\node_modules\
你也可以直接用命令看👇
npm root -g
npm 其实还有一个「缓存目录」
⚠️ 很多人会把它和 node_modules 搞混
npm 下载包时 会先缓存一份,缓存目录一般在:
🔹 macOS / Linux
~/.npm/
🔹 Windows
C:\Users\<你的用户名>\AppData\Local\npm-cache\
查看命令:
npm config get cache
这个目录不是你项目真正用的包,只是 npm 的下载缓存
快速自查命令:
npm root        # 当前项目 node_modules 路径
npm root -g     # 全局 node_modules 路径
npm config list # 看所有 npm 配置(含 prefix、cache)
核心功能
Plan / Build 双模式工作流
OpenCode 最有代表性的设计是 Plan / Build 双模式工作流:
Plan 模式:只读分析,不乱动代码
- 只读模式,专注于分析和规划
- 默认不会直接修改代码,执行 Bash 命令前会请求权限
- 适合场景:理解陌生代码库、设计重构方案、评估修改影响
Build 模式:真正执行修改
- 完全读写权限,可以直接编辑文件和执行命令
- 适合场景:实现功能、重构代码、修复 Bug、跑测试
实战推荐用法:
先在 Plan 模式想清楚,再切换 Build 模式动手执行。这种「先规划、再执行」的流程,能显著降低翻车风险。
多模型 + 一键接入 + 免费旗舰模型
在模型管理方面,OpenCode 的定位可以概括为:
“模型中立平台”:支持多家模型提供商、本地模型、自带 Key,开箱即用。
OpenCode 支持 75+ 模型提供商,包括:
- 国际厂商:Anthropic Claude、OpenAI GPT、Google Gemini、GitHub Copilot、AWS Bedrock、Groq、Azure 等
- 国产与本地模型:GLM-4.7、DeepSeek、MiniMax 等
- 本地部署:Ollama、Llama.cpp、vLLM、TGI、LocalAI 等
你可以在同一套工作流中自由切换、对比不同模型,不被任何厂商锁死。
多模型的最大挑战通常是配置复杂:不同厂商的 Base URL、认证方式、模型名称各不相同。
OpenCode 的做法非常实用:
-
只需选择提供商 → 粘贴 API Key
-
自动处理:
- 接口地址
- 鉴权方式
- 模型名称映射
- 请求格式细节
无需手写复杂配置文件,也不必自己调试 HTTP 请求,大幅降低多模型接入复杂度。
OpenCode 还提供官方渠道的 免费高质量模型,例如:
- Kimi K2.5 免费版(
kimi-k2.5-free) - GLM‑4.7 免费版(
glm-4.7-free)

这些模型在:
- 代码生成
- 复杂逻辑推理
- 大项目重构
- 多轮对话与 Agent 场景
都有非常亮眼的表现,可对标很多闭源旗舰模型。
使用方式:
- 无需单独注册或申请 Key
- 在模型列表中直接选择
kimi-k2.5-free或glm-4.7-free
新手可以零成本上手 AI 编程,老手则可以用它来对比不同模型的效果和成本。
总结:多模型 + 一键配置 + 免费模型,让 OpenCode 在模型层兼顾了:
- 灵活性:想用谁就用谁
- 易用性:配置简单
- 成本:有免费方案可用
终端优先的 TUI 体验
对很多开发者来说,终端就是主战场。
OpenCode 的 TUI 界面基于终端 UI 框架,整体风格偏 Neovim:
- 支持会话列表与快速切换
- 支持流式输出,实时查看 AI 思路
- 支持代码 diff 预览、补丁确认
- 内置简易编辑器,可直接查看或修改代码
对习惯 Vim/Neovim 的同学来说,上手非常自然。
多会话 & 客户端 / 服务器架构
OpenCode 并不是一个「单机小工具」,而是一个可作为 服务使用的智能体平台:
-
多会话并行:
同一项目下可开启多个会话,例如一个会话做重构,另一个专门调试测试用例 -
客户端 / 服务器架构:
Server 可部署在本地、远程服务器或企业内网
Client 可包括:- 终端 TUI
- 桌面 App
- IDE 插件(VS Code、JetBrains)
- Web UI / 手机 / 机器人(社区拓展)
这让 OpenCode 可以作为「编程服务」,统一管理权限、模型和工具,用多种 UI 驱动它。
OpenCode 内置了 LSP(Language Server Protocol)集成:
- 自动加载对应语言服务器(如 gopls、pylsp、clangd 等)
- 提供代码跳转、重命名、诊断等能力
同时,OpenCode 还提供一批内置工具:
glob、grep、view、patch、diagnostics等
这些工具供 AI 智能体内部调用,实现更复杂的代码编辑与分析操作。
基础使用
配置LLM 提供方
通过 OpenCode,你可以 配置任意 LLM 提供方的 API Key,从而使用对应的大模型服务。
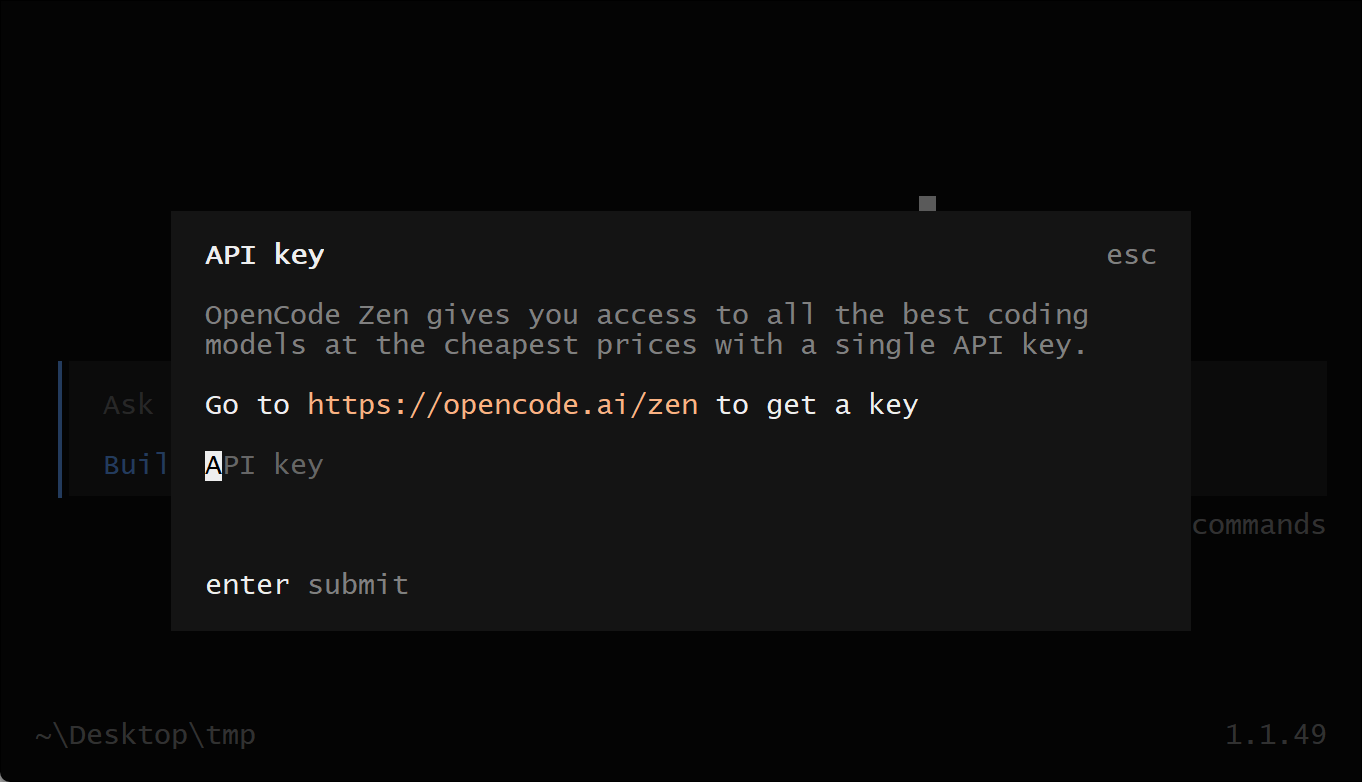
如果你是第一次接触 LLM 提供方,推荐使用 OpenCode Zen。这是由 OpenCode 团队 筛选、测试并验证过的一组模型列表,可以直接放心使用。
在 TUI(终端界面) 中运行 /connect 命令,选择 opencode,然后访问:opencode.ai/auth.
/connect
登录账号,填写你的 计费信息,并复制生成的 API Key。
将 API Key 粘贴到输入框中:
┌ API key
│
│
└ enter
初始化 OpenCode
现在你已经配置好了一个 LLM 提供方,可以进入你想要操作的项目。
# 进入项目目录
cd /path/to/project
然后运行 OpenCode:
opencode
接下来,通过运行以下命令 初始化 OpenCode 以在该项目中使用:
/init
这会让 OpenCode 分析你的项目,并在项目根目录下创建一个 AGENTS.md 文件。
提示:建议将项目中的 AGENTS.md 文件提交到 Git,这样有助于 OpenCode 理解项目结构和编码模式。
提问或操作
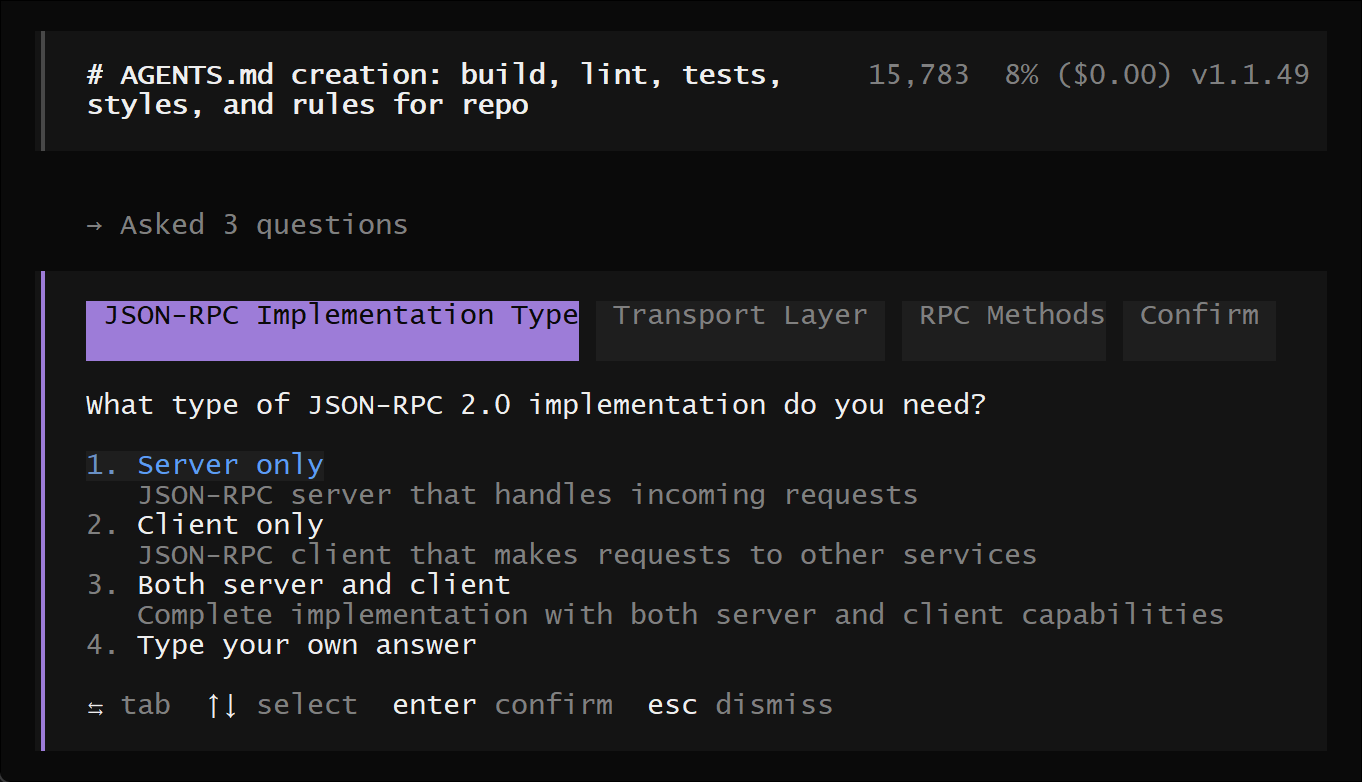
现在你已经可以使用 OpenCode 来协助开发项目了,可以随意提问或操作。(比如我这里要求他给我规划一个jsonrpc2.0的服务)
如果你是第一次使用 AI 编程智能体,这里有一些示例可以参考:
你可以让 OpenCode 解释代码库。
提示 使用 @ 键在项目中进行模糊搜索:
How is authentication handled in @packages/functions/src/api/index.ts
这对于你没有直接参与的代码模块特别有用。
你可以让 OpenCode 为项目添加新功能,但建议先让它制定计划。
创建计划(Create a plan)
OpenCode 有一个 Plan 模式,此模式下它不会直接修改代码,而是提出实现方案。
切换到 Plan 模式使用 Tab 键,右下角会显示指示器:
<TAB>
然后描述你想要它做的事情:
When a user deletes a note, we'd like to flag it as deleted in the database.
Then create a screen that shows all the recently deleted notes.
From this screen, the user can undelete a note or permanently delete it.
你需要给 OpenCode 足够的细节,就像在向团队里的初级开发者讲解一样。
提示:提供充足的上下文和示例有助于 OpenCode 理解你的需求。
迭代计划(Iterate on the plan)
当 OpenCode 给出计划后,你可以:
- 提供反馈
- 添加更多细节
例如:
We'd like to design this new screen using a design I've used before.
[Image #1] Take a look at this image and use it as a reference.
提示:可以直接将图片拖入终端,OpenCode 会扫描并将其加入提示信息中。
构建功能(Build the feature)
确认计划后,按 Tab 键切换回 Build 模式,让 OpenCode 开始修改代码:
<TAB>
然后命令它执行修改:
Sounds good! Go ahead and make the changes.
对于简单的修改,你可以直接让 OpenCode 构建功能而无需先制定计划:
We need to add authentication to the /settings route.
Take a look at how this is handled in the /notes route in @packages/functions/src/notes.ts
and implement the same logic in @packages/functions/src/settings.ts
提示 提供足够详细的描述,让 OpenCode 做出正确修改。
撤销修改(Undo changes)
如果修改结果不符合预期,可以使用 /undo 撤销:
/undo
OpenCode 会恢复到原来的代码,并显示你之前的消息。
你可以修改提示再尝试,或者多次运行 /undo 撤销多步修改。
重做修改可使用:
/redo
分享(Share)
你可以将与 OpenCode 的对话 分享给团队:
/share
这会生成当前对话的链接并复制到剪贴板。注意:对话默认不会自动分享。
完成以上步骤后,你已经熟练掌握了 OpenCode。
为了让它更适合你的习惯,可以:
- 选择主题
- 自定义快捷键
- 配置代码格式化工具
- 创建自定义命令
- 调整 OpenCode 配置文件
这样你就可以完全“把 OpenCode 变成自己的开发助手”。
与主流 AI 编程工具对比
与 Claude Code 对比
| 维度 | OpenCode | Claude Code |
|---|---|---|
| 授权与开源 | MIT 开源,可自托管 | 闭源,SaaS 服务 |
| 模型支持 | 75+ 提供商 + 本地模型(Ollama 等) | 仅 Claude 系列模型 |
| 工具本身定价 | 工具免费,按模型供应商付费 | 订阅费 + API 费用(约 $20–$200/月) |
| 界面形态 | 终端 TUI + 桌面 App + IDE 插件 | CLI + 桌面 App + VS Code 扩展 |
| 工作流 | Plan / Build 双模式,先规划再执行 | Plan 模式 + 高度自动化编程代理 |
| 数据与隐私 | 完全可控,可内网部署 | 依赖云端服务 |
| Skills 生态 | 兼容 Claude Skills,并可通过插件扩展 | 原生 Claude Skills 生态 |
| 响应速度 | 略慢于官方(通常 2.1–2.5 秒) | 更快(约 1.6–2.0 秒) |
| 灵活性 | 极高,可任意更换或混合模型 | 中等,受限于 Anthropic 生态 |
简要结论:
- 如果不差钱、只追求极致体验 → 直接用 Claude Code
- 如果在意开源、可控、可折腾,怕被封号或“断粮” → 必须掌握 OpenCode,很多人甚至把它当主力工具。
与 Cursor(AI IDE)对比
| 维度 | OpenCode | Cursor(基于 VS Code 的 AI IDE) |
|---|---|---|
| 使用场景 | 更像「智能体层」,偏自动化工作流 | 更像「IDE 增强」,偏代码补全与局部修改 |
| 界面 | 终端 + 桌面 + IDE 集成 | 完整 IDE(VS Code 改造版) |
| 学习曲线 | 需要理解 Agent / Plan/Build 思路 | VS Code 用户几乎零成本 |
| 模型灵活性 | 极高,多模型 + 本地模型 | 多模型但集中在云端 |
| 自主性 | 强调自动完成多步复杂任务 | 强调「人机协同」+ 实时补全 |
一句话概括:
Cursor 像是“聪明的 VS Code”,而 OpenCode 更像“可编排的编程智能体平台”。
配置使用
上面我们已经介绍了如何在 TUI 中通过 /connect 命令选择 opencode 并完成登录授权,包括获取并粘贴 API Key 以完成提供商配置。配置完成后,进入目标项目目录并运行 opencode,随后通过 /init 命令对项目进行初始化。该过程会自动分析项目结构,并在项目根目录生成 AGENTS.md 文件。(建议将该文件提交到 Git 仓库,以便 opencode 更好地理解项目结构和编码规范,从而提升后续协作与自动化能力。)
opencode 使用 JSON / JSONC(支持注释的 JSON) 作为配置格式。
示例(opencode.jsonc):
{
  "$schema": "https://opencode.ai/config.json",
  // 主题设置
  "theme": "opencode",
  "model": "anthropic/claude-sonnet-4-5",
  "autoupdate": true
}
配置加载机制:
1️⃣ 合并规则
配置文件不会相互替换,而是进行合并:
- 所有来源的配置会叠加
- 仅当键冲突时,优先级更高的配置覆盖较低的
- 不冲突的键会全部保留
例如:
-
全局配置:
{ "theme": "opencode", "autoupdate": true } -
项目配置:
{ "model": "anthropic/claude-sonnet-4-5" }
最终生效配置为:
{
  "theme": "opencode",
  "autoupdate": true,
  "model": "anthropic/claude-sonnet-4-5"
}
2️⃣ 配置优先级(从低到高)
配置按以下顺序加载,后面的覆盖前面的:
-
Remote config(
.well-known/opencode)
组织级默认配置 -
Global config(
~/.config/opencode/opencode.json)
用户级配置 -
Custom config(
OPENCODE_CONFIG环境变量)
指定的自定义配置文件 -
Project config(项目根目录
opencode.json)
项目级配置(标准配置中优先级最高) -
.opencode 目录
agents / commands / modes / plugins / skills / tools / themes -
Inline config(
OPENCODE_CONFIG_CONTENT)
运行时动态覆盖(最高优先级)
也就是说:
项目配置可以覆盖全局配置,全局配置可以覆盖远程组织默认配置。
远程配置(Remote Config)
组织可以通过 .well-known/opencode 提供默认配置。
- 在身份验证时自动拉取
- 作为基础配置层
- 可被本地配置覆盖
例如,如果您的组织提供默认禁用的 MCP 服务器:
{
  "mcp": {
    "jira": {
      "type": "remote",
      "url": "https://jira.example.com/mcp",
      "enabled": false
    }
  }
}
可以在本地配置中启用特定服务器:
{
  "mcp": {
    "jira": {
      "type": "remote",
      "url": "https://jira.example.com/mcp",
      "enabled": true
    }
  }
}
全局配置(Global)
路径:
~/.config/opencode/opencode.json
适合放:
- 主题
- 默认模型
- 按键绑定
- 用户级偏好设置
全局配置覆盖远程默认配置。
项目级配置(Project)
在项目根目录创建:
opencode.json
特点:
- 标准配置中优先级最高
- 会覆盖全局配置
- 支持提交到 Git
- 启动时会向上查找最近的 Git 根目录
推荐做法:
将项目特定配置放在项目根目录并提交到版本控制。
自定义路径加载配置文件
使用 OPENCODE_CONFIG 环境变量指定自定义配置文件路径。
export OPENCODE_CONFIG=/path/to/custom-config.json
opencode run "Hello world"
加载顺序:
在全局配置之后、项目配置之前
可用于临时覆盖用户级设置。
自定义配置目录
使用 OPENCODE_CONFIG_DIR 环境变量指定自定义配置目录。将在该目录中搜索代理、命令、模式和插件,就像标准 .opencode 目录一样,并且应该遵循相同的结构。
export OPENCODE_CONFIG_DIR=/path/to/config-directory
opencode run "Hello world"
TUI 配置
通过 tui 选项配置 TUI 专属设置:
{
  "tui": {
    "scroll_speed": 3,
    "scroll_acceleration": {
      "enabled": true
    },
    "diff_style": "auto"
  }
}
可用选项:
-
scroll_acceleration.enabled
启用 macOS 风格滚动加速。优先于scroll_speed。 -
scroll_speed
自定义滚动速度倍数(默认:3,最小:1)。
如果scroll_acceleration.enabled为true,则忽略。 -
diff_style
控制差异渲染方式:"auto":根据终端宽度自适应"stacked":始终单列显示
TUI命令行
文件引用
在消息中使用 @ 引用文件,会在当前工作目录中进行模糊搜索。
示例:
How is auth handled in @packages/functions/src/api/index.ts?
被引用文件的内容会自动加入对话上下文。
提示:
- 可以在消息中多次使用
@引用文件
Bash 命令
以 ! 开头可执行 shell 命令:
!ls -la
命令输出会作为工具结果加入对话。
斜杠命令(Slash Commands)
在 TUI 中输入 / + 命令名可快速执行操作,例如:
/help
大多数命令也绑定了快捷键,默认主键为:
ctrl + x
/connect
添加提供商并配置 API Key。
/compact
压缩当前会话
别名:/summarize
快捷键:ctrl+x c
/details
切换工具执行详细信息显示
快捷键:ctrl+x d
/editor
打开外部编辑器编写消息(使用 EDITOR 环境变量)
快捷键:ctrl+x e
/exit
退出 opencode
别名:/quit、/q
快捷键:ctrl+x q
/export
将当前对话导出为 Markdown,并在默认编辑器中打开
快捷键:ctrl+x x=
/help
显示帮助对话框
快捷键:ctrl+x h
/init
创建或更新 AGENTS.md 文件
快捷键:ctrl+x i
/models
列出可用模型
快捷键:ctrl+x m
/new
开始新的会话
别名:/clear
快捷键:ctrl+x n
/redo
恢复之前通过 /undo 撤销的消息
快捷键:ctrl+x r
提示:
- 文件更改也会被恢复
- 内部使用 Git 管理文件更改
- 项目必须是 Git 仓库
/sessions
列出并切换会话
别名:/resume、/continue
快捷键:ctrl+x l
/share
共享当前会话
快捷键:ctrl+x s
/theme
列出可用主题
快捷键:ctrl+x t
/thinking
切换是否显示模型的 thinking / reasoning 块
注意:
- 仅控制显示,不影响模型是否实际进行推理
- 切换模型推理变体需使用
ctrl+t
/undo
撤销最后一条消息
删除最近用户消息、后续响应及文件更改
快捷键:ctrl+x u
提示:
- 文件更改也会被恢复
- 内部基于 Git 管理,因此项目必须是 Git 仓库
/unshare
取消共享当前会话
编辑器设置
/editor 与 /export 使用 EDITOR 环境变量指定的编辑器。
示例(Linux/macOS):
export EDITOR=nano
export EDITOR=vim
export EDITOR="code --wait"
说明:
- GUI 编辑器需包含
--wait - 某些编辑器必须使用阻塞模式
- 可将设置写入
~/.bashrc或~/.zshrc以永久生效
常见编辑器:
- code(VS Code)
- cursor
- windsurf
- nvim
- vim
- nano
- notepad
- subl
服务器配置
用于 opencode serve、Web 和 Server 命令:
{
  "server": {
    "port": 4096,
    "hostname": "0.0.0.0",
    "mdns": true,
    "mdnsDomain": "myproject.local",
    "cors": ["http://localhost:5173"]
  }
}
可用选项:
port:监听端口hostname:监听主机名
若启用mdns且未设置 hostname,默认0.0.0.0mdns:启用 mDNS 服务发现mdnsDomain:自定义 mDNS 域名(默认opencode.local)cors:允许的 CORS 来源(必须是完整来源,如https://app.example.com)
工具控制
通过 tools 管理 LLM 可使用的工具:
{
  "tools": {
    "write": false,
    "bash": false
  }
}
opencode 内置了一组工具,同时支持通过自定义工具或 MCP 服务器进行扩展。
默认情况下:
-
所有工具均启用
-
不需要执行批准
-
可通过
permission配置控制工具行为"allow":允许执行"deny":禁止执行"ask":执行前请求用户批准
示例:
{
  "permission": {
    "edit": "deny",
    "bash": "ask",
    "webfetch": "allow"
  }
}
支持通配符匹配多个工具:
{
  "permission": {
    "mymcp_*": "ask"
  }
}
以下为 opencode 提供的内置工具。
内置工具
bash
在项目环境中执行 shell 命令。
{
  "permission": {
    "bash": "allow"
  }
}
可执行如:
- npm install
- git status
- 任意终端命令
edit
通过精确字符串替换修改现有文件。
{
  "permission": {
    "edit": "allow"
  }
}
这是 LLM 修改代码的主要方式。
write
创建新文件或覆盖现有文件。
{
  "permission": {
    "edit": "allow"
  }
}
注意:
-
write由edit权限统一控制 -
edit控制所有文件修改类工具:- edit
- write
- patch
- multiedit
read
读取代码库中的文件内容。
{
  "permission": {
    "read": "allow"
  }
}
支持读取大文件的指定行范围。
grep
使用正则表达式搜索文件内容。
{
  "permission": {
    "grep": "allow"
  }
}
支持:
- 完整正则语法
- 文件模式过滤
glob
基于 glob 模式匹配文件。
{
  "permission": {
    "glob": "allow"
  }
}
例如:
**/*.jssrc/**/*.ts
返回按修改时间排序的匹配文件路径。
list
列出指定路径中的文件与目录。
{
  "permission": {
    "list": "allow"
  }
}
支持 glob 过滤。
lsp(实验性)
与配置的 LSP 服务器交互,用于代码智能功能。
启用条件:
OPENCODE_EXPERIMENTAL_LSP_TOOL=true
或
OPENCODE_EXPERIMENTAL=true
配置:
{
  "permission": {
    "lsp": "allow"
  }
}
支持操作:
- goToDefinition
- findReferences
- hover
- documentSymbol
- workspaceSymbol
- goToImplementation
- prepareCallHierarchy
- incomingCalls
- outgoingCalls
patch
对文件应用补丁。
{
  "permission": {
    "edit": "allow"
  }
}
注意:
- 由
edit权限控制
skill
加载 SKILL.md 并返回内容。
{
  "permission": {
    "skill": "allow"
  }
}
todowrite
在编码会话期间管理待办事项列表。
{
  "permission": {
    "todowrite": "allow"
  }
}
用于组织多步骤任务。
注意:
- 默认子代理禁用
- 可手动启用
todoread
读取当前待办事项列表状态。
{
  "permission": {
    "todoread": "allow"
  }
}
注意:
- 默认子代理禁用
- 可手动启用
webfetch
获取指定网页内容。
{
  "permission": {
    "webfetch": "allow"
  }
}
适用于:
- 读取指定 URL
- 获取在线文件内容
websearch
执行网络搜索(基于 Exa AI)。
可用条件:
- 使用 opencode 提供
- 或设置环境变量:
OPENCODE_ENABLE_EXA=1 opencode
配置:
{
  "permission": {
    "websearch": "allow"
  }
}
说明:
- 无需 API Key
- 自动连接 Exa AI 托管 MCP 服务
提示:
- 发现信息 → 使用 websearch
- 获取特定 URL → 使用 webfetch
question
在执行过程中向用户提问。
{
  "permission": {
    "question": "allow"
  }
}
适用于:
- 收集用户偏好
- 澄清不明确指令
- 决策实施方案
- 提供选择方向
每个问题包含:
- 标题
- 问题文本
- 选项列表
支持多个问题导航后统一提交。
自定义工具
可在配置文件中定义自定义函数供 LLM 调用。
自定义工具允许你创建 LLM 在 opencode 中可以调用的函数。
它们与内置工具(如 read、write、bash 等)协同工作,在对话期间由 LLM 调用执行。
- 工具定义文件必须是 TypeScript 或 JavaScript
- 但工具实际调用的脚本可以用 任意语言编写
- TS/JS 仅用于定义工具接口
工具可以定义在:
-
📁 项目本地
.opencode/tools/ -
🌍 全局范围
~/.config/opencode/tools/
推荐使用 tool() 帮助函数(提供类型安全和参数校验)。
示例:创建一个数据库工具
import { tool } from "@opencode-ai/plugin"

export default tool({
  description: "Query the project database",
  args: {
    query: tool.schema.string().describe("SQL query to execute"),
  },
  async execute(args) {
    return `Executed query: ${args.query}`
  },
})
- 文件名 = 工具名
- 上例创建了一个名为
database的工具
可以从同一个文件导出多个工具:
export const add = tool({...})
export const multiply = tool({...})
生成的工具名称为:
math_add
math_multiply
命名规则:
<文件名>_<导出名>
参数定义:使用内置 schema(基于 Zod)
args: {
  query: tool.schema.string().describe("SQL query")
}
或直接使用 Zod:
import { z } from "zod"

export default {
  description: "Tool description",
  args: {
    param: z.string().describe("Parameter description"),
  },
  async execute(args, context) {
    // Tool implementation
    return "result"
  },
}
工具上下文(context),每个工具都会收到当前会话的上下文信息:
import { tool } from "@opencode-ai/plugin"

export default tool({
  description: "Get project information",
  args: {},
  async execute(args, context) {
    // Access context information
    const { agent, sessionID, messageID, directory, worktree } = context
    return `Agent: ${agent}, Session: ${sessionID}, Message: ${messageID}, Directory: ${directory}, Worktree: ${worktree}`
  },
})
可用字段包括:
| 字段 | 说明 |
|---|---|
| agent | 当前代理 |
| sessionID | 会话 ID |
| messageID | 消息 ID |
| directory | 当前工作目录 |
| worktree | Git 工作树根目录 |
常用:
context.directory→ 当前会话目录context.worktree→ Git 根目录
使用其他语言实现工具(示例:Python)
第一步:创建 Python 脚本
# .opencode/tools/add.py
import sys

a = int(sys.argv[1])
b = int(sys.argv[2])
print(a + b)
第二步:创建工具定义文件
import { tool } from "@opencode-ai/plugin"
import path from "path"

export default tool({
  description: "Add two numbers using Python",
  args: {
    a: tool.schema.number().describe("First number"),
    b: tool.schema.number().describe("Second number"),
  },
  async execute(args, context) {
    const script = path.join(context.worktree, ".opencode/tools/add.py")
    const result = await Bun.$`python3 ${script} ${args.a} ${args.b}`.text()
    return result.trim()
  },
})
说明:
- 使用
Bun.$执行 Python 脚本 - 工具本身是 TS 定义
- 实际逻辑由 Python 完成
MCP 服务器
MCP(Model Context Protocol)用于集成外部服务:
- 数据库访问
- API 集成
- 第三方服务
⚠️ MCP 工具会被加入模型上下文。
如果启用过多服务器:
- 会显著增加 token 消耗
- 容易超出上下文限制
- 某些服务器(如 GitHub MCP)特别消耗 token
✅ 建议:只启用真正需要的 MCP 服务器。
您可以在mcp下的opencode配置中定义MCP服务器。为每个MCP添加唯一的名称。当提示LLM时,您可以通过名称引用该MCP。
{
  "$schema": "https://opencode.ai/config.json",
  "mcp": {
    "name-of-mcp-server": {
      // ...
      "enabled": true,
    },
    "name-of-other-mcp-server": {
      // ...
    },
  },
}
说明:
- 每个 MCP 必须有唯一名称
- 可以通过
"enabled": false临时禁用
您还可以通过将enabled设置为false来取消服务器。如果您想暂时取消服务器而不将其从配置中删除,这非常有用。
组织可以通过 .well-known/opencode 提供默认 MCP,这些服务器可能默认被禁用,允许用户选择他们需要的服务器。
要从组织的远程特定启用服务器,请使用配置 enabled: true 将其添加到本地配置:
例如启用远程 Jira:
{
  "mcp": {
    "jira": {
      "type": "remote",
      "url": "https://jira.example.com/mcp",
      "enabled": true
    }
  }
}
本地 MCP 服务器
使用type将本地MCP服务器添加到MCP对像中的"local"。
{
  "mcp": {
    "my-local-mcp": {
      "type": "local",
      // Or ["bun", "x", "my-mcp-command"]
      "command": ["npx", "-y", "my-mcp-command"],
      "enabled": true,
      "environment": {
        "MY_ENV_VAR": "value"
      }
    }
  }
}
该命令是本地MCP服务器的启动方式。您还可以确定环境变量列表。
例如,以下是添加测试 @modelcontextprotocol/server-everything MCP 服务器的方法。
{
  "$schema": "https://opencode.ai/config.json",
  "mcp": {
    "mcp_everything": {
      "type": "local",
      "command": ["npx", "-y", "@modelcontextprotocol/server-everything"],
    },
  },
}
要使用它,我可以将 use the mcp_everything tool 添加到我的提示中。
use the mcp_everything tool to add the number 3 and 4
关键字段
| 字段 | 必填 | 说明 |
|---|---|---|
| type | 是 | 必须为 "local" |
| command | 是 | 启动 MCP 的命令 |
| environment | 否 | 环境变量 |
| enabled | 否 | 是否启用 |
| timeout | 否 | 获取工具超时(默认 5000ms) |
远程 MCP 服务器
通过将type设置为ZZPH1Z添加远程MCP服务器。
{
  "$schema": "https://opencode.ai/config.json",
  "mcp": {
    "my-remote-mcp": {
      "type": "remote",
      "url": "https://my-mcp-server.com",
      "enabled": true,
      "headers": {
        "Authorization": "Bearer MY_API_KEY"
      }
    }
  }
}
“remote” 是远程MCP服务器的URL,使用url选项您可以创建标头列表。
远程字段说明:
| 字段 | 必填 | 说明 |
|---|---|---|
| type | 是 | 必须为 "remote" |
| url | 是 | MCP 服务器 URL |
| enabled | 否 | 是否启用 |
| headers | 否 | 请求头 |
| oauth | 否 | OAuth 配置 |
| timeout | 否 | 超时时间 |
OAuth 支持
opencode 会自动处理远程 MCP 的 OAuth。
当服务器返回 401 时:
- 自动触发 OAuth 流程
- 支持动态客户端注册(RFC 7591)
- 自动安全存储 token
对于大多数支持 OAuth 的 MCP 配置服务器,不需要特殊配置。只需远程服务器:
{
  "$schema": "https://opencode.ai/config.json",
  "mcp": {
    "my-oauth-server": {
      "type": "remote",
      "url": "https://mcp.example.com/mcp"
    }
  }
}
如果服务器需要身份验证,opencode 将在您第一次尝试使用它时提示您进行身份验证。
如果您有来自MCP服务器强大的客户端,则可以配置它们:
{
  "mcp": {
    "my-oauth-server": {
      "type": "remote",
      "url": "https://mcp.example.com/mcp",
      "oauth": {
        "clientId": "{env:MY_CLIENT_ID}",
        "clientSecret": "{env:MY_CLIENT_SECRET}",
        "scope": "tools:read tools:execute"
      }
    }
  }
}
如果要禁用服务器的自动OAuth(例如,对于使用API密钥的服务器),则~/.local/share/opencode/mcp-auth.json设置为oauth:
{
  "$schema": "https://opencode.ai/config.json",
  "mcp": {
    "my-api-key-server": {
      "type": "remote",
      "url": "https://mcp.example.com/mcp",
      "oauth": false,
      "headers": {
        "Authorization": "Bearer {env:MY_API_KEY}"
      }
    }
  }
}
认证管理命令
使用特定MCP服务器进行身份验证:
opencode mcp auth <server>

列出所有MCP服务器及其身份验证状态:
opencode mcp list

删除凭据
opencode mcp logout <server>

调试连接和 OAuth
opencode mcp debug <server>
opencode mcp auth 命令将打开您的浏览器进行授权。授权后,opencode Tokens安全地存储在 mcp auth 中。
工具管理(全局控制)
MCP 工具可像普通工具一样管理。
全局禁用某个 MCP
{
  "$schema": "https://opencode.ai/config.json",
  "mcp": {
    "my-mcp-foo": {
      "type": "local",
      "command": ["bun", "x", "my-mcp-command-foo"]
    },
    "my-mcp-bar": {
      "type": "local",
      "command": ["bun", "x", "my-mcp-command-bar"]
    }
  },
  "tools": {
    "my-mcp-foo": false
  }
}
我们还可以使用 glob 模式来取消所有匹配的 MCP。
{
  "$schema": "https://opencode.ai/config.json",
  "mcp": {
    "my-mcp-foo": {
      "type": "local",
      "command": ["bun", "x", "my-mcp-command-foo"]
    },
    "my-mcp-bar": {
      "type": "local",
      "command": ["bun", "x", "my-mcp-command-bar"]
    }
  },
  "tools": {
    "my-mcp*": false
  }
}
如果您有大量 MCP 服务器,您可以选择为每个代理启用它们并全局取消它们。因此:
{
  "$schema": "https://opencode.ai/config.json",
  "mcp": {
    "my-mcp": {
      "type": "local",
      "command": ["bun", "x", "my-mcp-command"],
      "enabled": true
    }
  },
  "tools": {
    "my-mcp*": false
  },
  "agent": {
    "my-agent": {
      "tools": {
        "my-mcp*": true
      }
    }
  }
}
Glob 规则
glob 模式使用简单的正则表达式 globbing 模式:
- 匹配零个或多个任意字符(例如,“my-mcp*” 匹配 my-mcp_search、my-mcp_list 等)
? 恰好匹配一个字符
所有其他字符均按字面意思匹配
常见 MCP 示例
1️⃣ Sentry
{
  "mcp": {
    "sentry": {
      "type": "remote",
      "url": "https://mcp.sentry.dev/mcp",
      "oauth": {}
    }
  }
}
授权:
opencode mcp auth sentry
这将打开一个浏览器窗口以完成 OAuth 流程并将 opencode 连接到您的 Sentry 账户,通过身份验证后,您可以在提示中使用Sentry工具来查询问题、项目和错误数据。
2️⃣ Context7(文档搜索)
{
  "mcp": {
    "context7": {
      "type": "remote",
      "url": "https://mcp.context7.com/mcp"
    }
  }
}
如果您注册了免费帐户,则可以使用 API 并获得更高的速率限制。
{
  "$schema": "https://opencode.ai/config.json",
  "mcp": {
    "context7": {
      "type": "remote",
      "url": "https://mcp.context7.com/mcp",
      "headers": {
        "CONTEXT7_API_KEY": "{env:CONTEXT7_API_KEY}"
      }
    }
  }
}
这里我们假设您设置了 CONTEXT7_API_KEY 环境变量。
将 use context7 添加到提示中以使用 Context7 MCP 服务器。
Configure a Cloudflare Worker script to cache JSON API responses for five minutes. use context7
或者,您可以将类似的内容添加到您的agent.md。
When you need to search docs, use context7 tools.
3️⃣ Vercel 的 Grep
添加 Vercel 的 Grep MCP 服务器,用于搜索 GitHub 上的代码片段。
配置示例
opencode.json
{
  "$schema": "https://opencode.ai/config.json",
  "mcp": {
    "gh_grep": {
      "type": "remote",
      "url": "https://mcp.grep.app"
    }
  }
}
由于我们将 MCP 服务器命名为 gh_grep,因此可以在提示中添加:
use the gh_grep tool
示例:
What's the right way to set a custom domain in an SST Astro component? use the gh_grep tool
或者,你也可以将类似内容写入 AGENTS.md:
AGENTS.md
If you are unsure how to do something, use `gh_grep` to search code examples from GitHub.
内部实现说明
grep、glob、list 底层使用 ripgrep。
默认行为:
- 遵循
.gitignore - 被忽略文件不会被搜索或列出
若希望包含被 .gitignore 忽略的文件,可在项目根目录创建 .ignore 文件:
!node_modules/
!dist/
!build/
该文件用于显式允许某些路径被搜索。
模型
您可以通过 provider、model 和 small_model 选项,在 opencode 配置中指定要使用的提供商和模型。
opencode.json
{
  "$schema": "https://opencode.ai/config.json",
  "provider": {},
  "model": "anthropic/claude-sonnet-4-5",
  "small_model": "anthropic/claude-haiku-4-5"
}
small_model 选项用于为标题生成等轻量级任务配置单独的模型。
默认情况下,如果提供商支持更便宜的模型,opencode 会优先使用更便宜的模型;否则将回退到主模型。
provider 可包含 timeout 和 setCacheKey:
{
  "$schema": "https://opencode.ai/config.json",
  "provider": {
    "anthropic": {
      "options": {
        "timeout": 600000,
        "setCacheKey": true
      }
    }
  }
}
timeout:请求超时时间(毫秒),默认 300000。设置为false可禁用。setCacheKey:确保始终为指定提供商设置缓存键。
您还可以配置本地模型。
某些提供商支持除 timeout 和 apiKey 之外的额外选项,Amazon Bedrock:
{
  "$schema": "https://opencode.ai/config.json",
  "provider": {
    "amazon-bedrock": {
      "options": {
        "region": "us-east-1",
        "profile": "my-aws-profile",
        "endpoint": "https://bedrock-runtime.us-east-1.vpce-xxxxx.amazonaws.com"
      }
    }
  }
}
region:AWS 区域(默认 AWS_REGION 或 us-east-1)profile:AWS 凭证文件中的命名配置(默认 AWS_PROFILE)endpoint:VPC 终端节点 URL(优先于 baseURL)
注意:
Bearer Token(AWS_BEARER_TOKEN_BEDROCK 或 /connect)优先于基于配置文件的身份验证。
主题
您可以通过 opencode 配置中的 theme 选项配置要使用的主题。
{
  "$schema": "https://opencode.ai/config.json",
  "theme": ""
}
agent
可以通过 agent 选项配置专用agent。
{
  "$schema": "https://opencode.ai/config.json",
  "agent": {
    "code-reviewer": {
      "description": "Reviews code for best practices and potential issues",
      "model": "anthropic/claude-sonnet-4-5",
      "prompt": "You are a code reviewer. Focus on security, performance, and maintainability.",
      "tools": {
        // Disable file modification tools for review-only agent
        "write": false,
        "edit": false,
      },
    },
  },
}
也可以在:
~/.config/opencode/agents/.opencode/agents/
中使用 Markdown 文件定义agent。
您可以使用 default_agent 选项设置默认agent。当没有明确指定时,这将确定使用哪个agent。
{
  "$schema": "https://opencode.ai/config.json",
  "default_agent": "plan"
}
默认代理必须是 Primary agent(不是 Subagent)。这可以是内置agent(如 “build” 或 “plan”),也可以是您定义的 Custom Agent。如果指定的agent不存在或者是子agent,opencode 将回退到 “build” 并发出警告。
此设置适用于所有界面:TUI、CLI (opencode run)、桌面应用程序和 GitHub Action。
分享
您可以通过 share 选项配置 分享 功能。
{
  "$schema": "https://opencode.ai/config.json",
  "share": "manual"
}
可选值:
"manual"(默认)"auto""disabled"
默认情况下,共享设置为手动模式,您需要使用 /share 命令显式共享对话。
命令
您可以通过 command 选项为重复任务配置自定义命令。
{
  "$schema": "https://opencode.ai/config.json",
  "command": {
    "test": {
      "template": "Run the full test suite with coverage report and show any failures.\nFocus on the failing tests and suggest fixes.",
      "description": "Run tests with coverage",
      "agent": "build",
      "model": "anthropic/claude-haiku-4-5",
    },
    "component": {
      "template": "Create a new React component named $ARGUMENTS with TypeScript support.\nInclude proper typing and basic structure.",
      "description": "Create a new component",
    },
  },
}
您还可以使用 ~/.config/opencode/commands/ 或 .opencode/commands/ 中的 Markdown 文件定义命令。
快捷键
您可以通过 keybinds 选项自定义您的按键绑定。
{
  "$schema": "https://opencode.ai/config.json",
  "keybinds": {}
}
自动更新
opencode 将在启动时自动下载任何新的更新。您可以使用 autoupdate 选项禁用此功能。
{
  "$schema": "https://opencode.ai/config.json",
  "autoupdate": false
}
如果您不想更新但希望在新版本可用时收到通知,则需将 autoupdate 设置为 “notify”。 请注意,这仅在未使用 Homebrew 等包管理器安装时才有效。
格式化程序
您可以通过 formatter 选项配置代码格式化程序。
{
  "$schema": "https://opencode.ai/config.json",
  "formatter": {
    "prettier": {
      "disabled": true
    },
    "custom-prettier": {
      "command": ["npx", "prettier", "--write", "$FILE"],
      "environment": {
        "NODE_ENV": "development"
      },
      "extensions": [".js", ".ts", ".jsx", ".tsx"]
    }
  }
}
权限
默认情况下,opencode 允许所有操作,无需明确批准。您可以使用 permission 选项更改此设置。
例如,要确保 edit 和 bash 工具需要用户批准:
{
  "$schema": "https://opencode.ai/config.json",
  "permission": {
    "edit": "ask",
    "bash": "ask"
  }
}
压缩
您可以通过 compaction 选项控制上下文压缩行为。
{
  "$schema": "https://opencode.ai/config.json",
  "compaction": {
    "auto": true,
    "prune": true
  }
}
auto:自动压缩(默认 true)prune:删除旧工具输出(默认 true)
观察器
您可以通过 watcher 选项配置文件观察器忽略模式。
{
  "$schema": "https://opencode.ai/config.json",
  "watcher": {
    "ignore": ["node_modules/**", "dist/**", ".git/**"]
  }
}
模式遵循 glob 语法。使用它可以从文件监视中排除嘈杂的目录。
MCP 服务器
您可以通过 mcp 选项配置要使用的 MCP 服务器。
{
  "$schema": "https://opencode.ai/config.json",
  "mcp": {}
}
插件
Plugins 使用自定义工具、挂钩和集成扩展 opencode。
将插件文件放置在 .opencode/plugins/ 或 ~/.config/opencode/plugins/ 中。您还可以通过 plugin 选项从 npm 加载插件。
{
  "$schema": "https://opencode.ai/config.json",
  "plugin": ["opencode-helicone-session"]
}
指令
您可以通过 instructions 选项配置您正在使用的模型的说明。
{
  "$schema": "https://opencode.ai/config.json",
  "instructions": ["CONTRIBUTING.md", "docs/guidelines.md", ".cursor/rules/*.md"]
}
禁用提供商
您可以通过 disabled_providers 选项禁用自动加载的提供商。当您想要阻止加载某些提供商(即使其凭据可用)时,这非常有用。
{
  "$schema": "https://opencode.ai/config.json",
  "disabled_providers": ["openai", "gemini"]
}
disabled_providers 优先于 enabled_providers。
disabled_providers 选项接受提供商 ID 数组。当提供商被禁用时:
即使设置了环境变量也不会加载。
即使通过 /connect 命令配置 API 密钥,也不会加载它。
提供商的模型不会出现在模型选择列表中。
启用提供商
您可以通过 enabled_providers 选项指定允许的提供商列表。设置后,仅启用指定的提供商,所有其他提供商将被忽略。
{
  "$schema": "https://opencode.ai/config.json",
  "enabled_providers": ["anthropic", "openai"]
}
当您想要限制 opencode 仅使用特定的提供商而不是逐一禁用它们时,这非常有用。
注意:disabled_providers 优先于 enabled_providers。
如果提供商同时出现在 enabled_providers 和 disabled_providers 中,则 disabled_providers 优先以保持一致性。
变量
您可以在配置文件中使用变量替换来引用环境变量和文件内容。
环境变量:使用 {env:VARIABLE_NAME} 替换环境变量:
{
  "$schema": "https://opencode.ai/config.json",
  "model": "{env:OPENCODE_MODEL}",
  "provider": {
    "anthropic": {
      "models": {},
      "options": {
        "apiKey": "{env:ANTHROPIC_API_KEY}"
      }
    }
  }
}
未设置时替换为空字符串。
文件:使用 {file:path/to/file} 替换文件的内容:
{
  "$schema": "https://opencode.ai/config.json",
  "instructions": ["./custom-instructions.md"],
  "provider": {
    "openai": {
      "options": {
        "apiKey": "{file:~/.secrets/openai-key}"
      }
    }
  }
}
文件路径可以是:
-
相对于配置文件目录
-
或者以 / 或 ~ 开头的绝对路径
这些对于:
-
将 API 密钥等敏感数据保存在单独的文件中。
-
包含大型指令文件,而不会弄乱您的配置。
-
跨多个配置文件共享通用配置片段。
网络配置
opencode 支持企业网络环境的标准代理环境变量和自定义证书。
opencode 尊重标准代理环境变量。
# HTTPS proxy (recommended)
export HTTPS_PROXY=https://proxy.example.com:8080

# HTTP proxy (if HTTPS not available)
export HTTP_PROXY=http://proxy.example.com:8080

# Bypass proxy for local server (required)
export NO_PROXY=localhost,127.0.0.1
警告
TUI 与本地 HTTP 服务器通信。您必须绕过此连接的代理以防止路由循环。
您可以使用 CLI 标志配置服务器的端口和主机名。
如果您的代理需要基本身份验证,请在 URL 中包含凭据。
export HTTPS_PROXY=http://username:password@proxy.example.com:8080
警告
避免对密码进行硬编码。使用环境变量或安全凭证存储。
对于需要高级身份验证(例如 NTLM 或 Kerberos)的代理,请考虑使用支持您的身份验证方法的 LLM 网关。
如果您的企业使用自定义 CA 进行 HTTPS 连接,请配置 opencode 以信任它们。
export NODE_EXTRA_CA_CERTS=/path/to/ca-cert.pem
这适用于代理连接和直接 API 访问。
总结
以上内容涵盖了 opencode 的主要配置项,包括模型、代理、MCP 服务器、工具、自定义工具以及网络设置。通过合理配置,您可以在不同环境下灵活控制代理行为、证书信任、工具权限和模型使用,从而充分发挥 opencode 的能力。
其他更多配置选项和高级用法,请参考官方文档:opencode 配置指南。
源码解析
在本章中,我们将深入阅读 opencode 的源码,重点关注其 Agent 的构建与运行机制。通过对源码的分析,我们不仅能够理解 opencode 如何组织工具、MCP 服务器和代理的协作,还能学习企业级 Agent 架构的设计方法和实现思路。
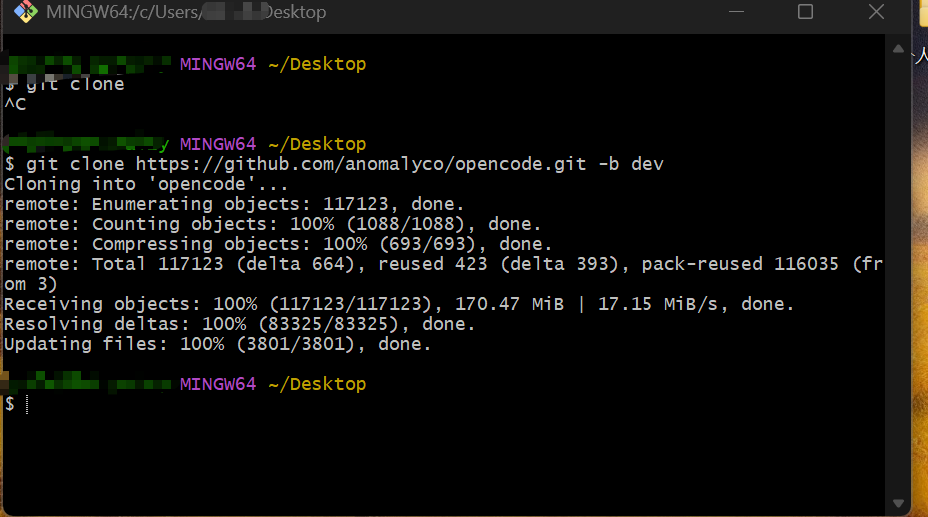
首先到github官网拉取源码:https://github.com/anomalyco/opencode
OpenCode 是一个开源的 AI 编程助手,采用 monorepo 架构,使用 Bun 作为包管理器,支持 CLI、Web 应用、桌面应用等多种形态。
目录结构图:
opencode/
├── 📁 .github/                    # GitHub 配置
│   ├── actions/                   # GitHub Actions 自定义动作
│   ├── workflows/                 # CI/CD 工作流(测试、发布、部署等)
│   └── ISSUE_TEMPLATE/            # Issue 模板
│
├── 📁 .opencode/                  # OpenCode 配置目录
│   ├── agent/                     # Agent 相关文档
│   ├── command/                   # 命令文档
│   ├── skill/                     # 技能定义
│   ├── tool/                      # 工具脚本
│   └── themes/                    # 主题配置
│
├── 📁 infra/                      # 基础设施即代码(SST)
│   ├── app.ts                     # 主应用基础设施(API、Web)
│   ├── console.ts                 # 控制台基础设施(数据库、函数)
│   ├── enterprise.ts              # 企业版基础设施
│   ├── secret.ts                  # 密钥管理
│   └── stage.ts                   # 环境阶段配置
│
├── 📁 nix/                        # Nix 包管理配置
│   ├── desktop.nix                # 桌面应用 Nix 配置
│   ├── opencode.nix               # OpenCode CLI Nix 配置
│   ├── node_modules.nix           # Node 模块 Nix 配置
│   └── scripts/                   # Nix 构建脚本
│
├── 📁 packages/                   # 核心包目录(Monorepo)
│   │
│   ├── 📦 opencode/               # 🔥 核心 CLI 包
│   │   ├── bin/                   # 可执行文件入口
│   │   ├── src/
│   │   │   ├── cli/               # CLI 命令实现
│   │   │   │   ├── cmd/           # 各种命令(run, serve, web, etc.)
│   │   │   │   └── tui/           # 终端 UI 实现
│   │   │   ├── server/            # 服务器实现(HTTP API)
│   │   │   ├── agent/             # AI Agent 核心逻辑
│   │   │   ├── session/           # 会话管理
│   │   │   ├── tool/              # 工具实现(read, write, grep, etc.)
│   │   │   ├── lsp/               # LSP 客户端集成
│   │   │   ├── mcp/               # MCP 协议支持
│   │   │   ├── acp/               # ACP 协议支持
│   │   │   ├── provider/          # LLM 提供商集成
│   │   │   └── ...
│   │   └── test/                  # 测试文件
│   │
│   ├── 📦 app/                    # Web 应用(SolidJS)
│   │   ├── src/
│   │   │   ├── app.tsx            # 应用入口
│   │   │   ├── pages/             # 页面组件
│   │   │   ├── context/           # React Context 提供者
│   │   │   └── ...
│   │   └── e2e/                   # E2E 测试
│   │
│   ├── 📦 desktop/                # 桌面应用(Tauri)
│   │   └── src/                   # Tauri + Rust 代码
│   │
│   ├── 📦 console/                # 控制台应用
│   │   ├── app/                   # 前端应用
│   │   ├── core/                  # 核心逻辑(数据库、API)
│   │   ├── function/              # 云函数
│   │   ├── mail/                  # 邮件模板
│   │   └── resource/              # 资源定义
│   │
│   ├── 📦 web/                    # 文档网站(Astro)
│   │   ├── src/
│   │   │   ├── content/docs/      # 文档内容(MDX)
│   │   │   └── ...
│   │   └── public/                # 静态资源
│   │
│   ├── 📦 ui/                     # 共享 UI 组件库
│   │   ├── src/
│   │   │   ├── components/        # React 组件
│   │   │   ├── theme/             # 主题系统
│   │   │   ├── i18n/              # 国际化
│   │   │   └── ...
│   │
│   ├── 📦 sdk/                    # SDK 包
│   │   └── js/                    # JavaScript SDK
│   │
│   ├── 📦 plugin/                 # 插件系统
│   │   └── src/                   # 插件接口和示例
│   │
│   ├── 📦 util/                   # 工具函数库
│   │   └── src/                   # 通用工具函数
│   │
│   ├── 📦 script/                 # 脚本包
│   │   └── src/                   # 脚本执行器
│   │
│   ├── 📦 containers/             # Docker 容器配置
│   │   ├── base/                  # 基础镜像
│   │   ├── bun-node/              # Bun + Node 镜像
│   │   ├── tauri-linux/           # Tauri Linux 构建镜像
│   │   └── ...
│   │
│   ├── 📦 docs/                   # 文档内容
│   │   └── ...                    # MDX 文档文件
│   │
│   ├── 📦 enterprise/             # 企业版应用
│   │   └── src/                   # 企业版前端
│   │
│   ├── 📦 extensions/             # 编辑器扩展
│   │   └── zed/                   # Zed 编辑器扩展
│   │
│   ├── 📦 slack/                  # Slack 集成
│   │   └── ...
│   │
│   └── 📦 function/               # 云函数
│       └── src/                   # API 处理函数
│
├── 📁 github/                     # GitHub Action 包
│   └── index.ts                   # GitHub Action 入口
│
├── 📁 sdks/                       # SDK 发布包
│   └── vscode/                    # VSCode 扩展
│
├── 📁 script/                     # 项目脚本
│   ├── beta.ts                    # Beta 版本发布
│   ├── publish.ts                 # 发布脚本
│   ├── generate.ts                # 代码生成脚本
│   ├── stats.ts                   # 统计脚本
│   └── ...
│
├── 📁 patches/                    # 依赖补丁
│   └── ...
│
├── 📁 specs/                      # 项目规范文档
│   └── project.md
│
├── 📄 flake.nix                   # Nix Flake 配置
├── 📄 sst.config.ts               # SST 基础设施配置
├── 📄 turbo.json                  # Turborepo 配置
├── 📄 package.json                # 根 package.json(Monorepo 配置)
├── 📄 install                      # 安装脚本
├── 📄 AGENTS.md                   # Agent 开发指南
└── 📄 README.md                   # 项目说明文档
核心模块说明:
-
packages/opencode/(核心 CLI)
- 功能:CLI 工具核心
- 关键目录:
src/cli/cmd/:命令实现(run, serve, web, mcp, acp 等)src/server/:HTTP 服务器与 API 路由src/agent/:AI Agent 逻辑src/tool/:工具(read, write, grep, bash, lsp 等)src/session/:会话管理与消息处理src/provider/:LLM 提供商集成
-
packages/app/(Web 应用)
- 功能:基于 SolidJS 的 Web 前端
- 特点:与 CLI 服务器通信,提供 Web UI
-
packages/desktop/(桌面应用)
- 功能:基于 Tauri 的桌面应用
- 特点:跨平台桌面客户端
-
packages/console/(控制台)
- 功能:管理控制台(用户、订阅等)
- 结构:
app/:前端core/:后端(数据库、API)function/:云函数
-
packages/web/(文档网站)
- 功能:基于 Astro 的文档站点
- 内容:
src/content/docs/下的 MDX 文档
-
infra/(基础设施)
- 功能:使用 SST 定义云基础设施
- 文件:
app.ts:主应用(API Worker、Web 站点)console.ts:控制台(PlanetScale 数据库、函数)enterprise.ts:企业版基础设施
-
.opencode/(配置目录)
- 功能:OpenCode 运行时配置
- 内容:Agent 文档、命令文档、技能定义、工具脚本
技术栈
- 运行时:Bun
- 前端框架:
- Web:SolidJS + SolidStart
- 文档:Astro
- 桌面:Tauri + Rust
- 基础设施:SST(部署到 Cloudflare)
- 数据库:PlanetScale(MySQL)
- 包管理:Bun workspaces + Turborepo
- 协议支持:LSP、MCP、ACP
工作流程
- 开发:
bun run dev(启动 CLI 开发服务器) - 构建:
bun turbo build(使用 Turborepo 构建所有包) - 测试:
bun turbo typecheck(类型检查) - 部署:通过 GitHub Actions 自动部署到 Cloudflare
架构特点
- Monorepo:使用 Bun workspaces 和 Turborepo
- 客户端/服务器:CLI 作为服务器,Web/Desktop 作为客户端
- 多协议支持:LSP、MCP、ACP
- 插件系统:支持自定义插件和工具
- 主题系统:支持多种主题
OpenCode 会话管理与消息处理机制深度解析
整体架构设计
OpenCode 的会话系统采用分层架构:
┌─────────────────────────────────────────┐
│         Session (会话管理层)              │
│  - 会话创建/删除/更新                    │
│  - 会话状态管理                          │
│  - 父子会话关系                          │
└─────────────────────────────────────────┘
           ↓
┌─────────────────────────────────────────┐
│      MessageV2 (消息数据模型)            │
│  - User/Assistant 消息                   │
│  - Part (文本/工具/推理等)                │
│  - 消息流式存储                          │
└─────────────────────────────────────────┘
           ↓
┌─────────────────────────────────────────┐
│    SessionProcessor (消息处理器)          │
│  - 流式事件处理                          │
│  - 工具调用管理                          │
│  - 错误处理与重试                        │
└─────────────────────────────────────────┘
           ↓
┌─────────────────────────────────────────┐
│         LLM (大模型交互层)                │
│  - 流式文本生成                          │
│  - 工具调用解析                          │
│  - 多提供商适配                          │
└─────────────────────────────────────────┘
核心模块详解
Session(会话管理)- index.ts
职责:会话生命周期管理
关键设计:
// 会话信息结构
export const Info = z.object({
  id: Identifier.schema("session"),
  slug: z.string(),                    // URL友好的标识符
  projectID: z.string(),              // 所属项目
  directory: z.string(),               // 工作目录
  parentID: z.string().optional(),     // 父会话(支持会话树)
  title: z.string(),                   // 会话标题
  summary: z.object({                  // 变更摘要
    additions: z.number(),
    deletions: z.number(),
    files: z.number(),
    diffs: Snapshot.FileDiff.array().optional(),
  }).optional(),
  time: z.object({
    created: z.number(),
    updated: z.number(),
    compacting: z.number().optional(),   // 压缩时间
  }),
  permission: PermissionNext.Ruleset.optional(), // 权限规则
})
亮点:
- 父子会话:支持
fork,可基于历史消息创建分支 - 事件驱动:通过
Bus发布Created/Updated/Deleted事件 - 自动分享:支持自动生成分享链接
- 存储抽象:使用
Storage统一存储接口
// 会话分叉(Fork)实现
export const fork = fn(
  z.object({
    sessionID: Identifier.schema("session"),
    messageID: Identifier.schema("message").optional(),
  }),
  async (input) => {
    const original = await get(input.sessionID)
    const session = await createNext({...})

    // 复制消息历史(支持部分复制)
    const msgs = await messages({ sessionID: input.sessionID })
    const idMap = new Map<string, string>()

    for (const msg of msgs) {
      if (input.messageID && msg.info.id >= input.messageID) break
      // 重新分配ID并复制消息和部分
      ...
    }
    return session
  }
)
MessageV2(消息数据模型)- message-v2.ts
职责:定义消息和 Part 的结构
核心设计:
// 用户消息
export const User = Base.extend({
  role: z.literal("user"),
  time: z.object({ created: z.number() }),
  format: Format.optional(),           // 输出格式(text/json_schema)
  summary: z.object({...}).optional(), // 摘要信息
  agent: z.string(),                   // 使用的Agent
  model: z.object({                    // 模型信息
    providerID: z.string(),
    modelID: z.string(),
  }),
  system: z.string().optional(),      // 自定义系统提示
  tools: z.record(z.string(), z.boolean()).optional(), // 工具启用状态
})

// 助手消息
export const Assistant = Base.extend({
  role: z.literal("assistant"),
  time: z.object({
    created: z.number(),
    completed: z.number().optional(),
  }),
  error: z.discriminatedUnion("name", [...]).optional(), // 错误信息
  parentID: z.string(),                // 父消息ID
  modelID: z.string(),
  providerID: z.string(),
  agent: z.string(),
  path: z.object({                     // 工作路径
    cwd: z.string(),
    root: z.string(),
  }),
  cost: z.number(),                    // 成本
  tokens: z.object({                   // Token使用统计
    total: z.number().optional(),
    input: z.number(),
    output: z.number(),
    reasoning: z.number(),
    cache: z.object({
      read: z.number(),
      write: z.number(),
    }),
  }),
})
Part 类型系统:
// Part 类型(消息的组成部分)
export const Part = z.discriminatedUnion("type", [
  TextPart,           // 文本内容
  ReasoningPart,      // 推理过程(Claude的思考链)
  FilePart,           // 文件附件
  ToolPart,           // 工具调用
  StepStartPart,      // 步骤开始
  StepFinishPart,     // 步骤结束
  SnapshotPart,       // 快照
  PatchPart,          // 补丁
  AgentPart,          // Agent切换
  RetryPart,          // 重试记录
  CompactionPart,     // 压缩标记
  SubtaskPart,        // 子任务
])
工具状态机:
// 工具调用的状态流转
ToolStatePending → ToolStateRunning → ToolStateCompleted
                                      ↓
                                 ToolStateError

export const ToolState = z.discriminatedUnion("status", [
  ToolStatePending,    // 待执行
  ToolStateRunning,    // 执行中
  ToolStateCompleted,  // 已完成
  ToolStateError,      // 执行错误
])
亮点:
- 分离存储:消息元数据与 Part 分开存储,便于增量更新
- 流式更新:支持
delta增量更新文本内容 - 多模态:支持文件、图片等附件
- 错误分类:使用
discriminatedUnion进行类型安全的错误处理
SessionProcessor(消息处理器)- processor.ts
职责:处理 LLM 流式输出,管理工具调用生命周期
核心流程:
export function create(input: {
  assistantMessage: MessageV2.Assistant
  sessionID: string
  model: Provider.Model
  abort: AbortSignal
}) {
  const toolcalls: Record<string, MessageV2.ToolPart> = {}
  let snapshot: string | undefined
  let blocked = false
  let attempt = 0
  let needsCompaction = false

  return {
    async process(streamInput: LLM.StreamInput) {
      while (true) {
        try {
          const stream = await LLM.stream(streamInput)

          // 处理流式事件
          for await (const value of stream.fullStream) {
            switch (value.type) {
              case "reasoning-start":    // 推理开始
              case "reasoning-delta":     // 推理增量
              case "reasoning-end":       // 推理结束
              case "tool-call":           // 工具调用
              case "tool-result":         // 工具结果
              case "tool-error":          // 工具错误
              case "text-delta":          // 文本增量
              case "start-step":          // 步骤开始
              case "finish-step":         // 步骤结束
              ...
            }
          }
        } catch (e) {
          // 错误处理与重试逻辑
          const error = MessageV2.fromError(e, {...})
          const retry = SessionRetry.retryable(error)
          if (retry !== undefined) {
            attempt++
            await SessionRetry.sleep(delay, input.abort)
            continue  // 重试
          }
          // 标记错误并停止
          input.assistantMessage.error = error
          return "stop"
        }
      }
    }
  }
}
关键特性:
-
死循环检测(Doom Loop Detection):
const DOOM_LOOP_THRESHOLD = 3 const lastThree = parts.slice(-DOOM_LOOP_THRESHOLD) if (lastThree.length === DOOM_LOOP_THRESHOLD && lastThree.every(p => p.type === "tool" && p.tool === value.toolName && JSON.stringify(p.state.input) === JSON.stringify(value.input) )) { // 检测到重复调用,请求权限 await PermissionNext.ask({ permission: "doom_loop", ... }) } -
快照管理:
case "start-step": snapshot = await Snapshot.track() // 记录文件系统快照 await Session.updatePart({ type: "step-start", snapshot, }) break case "finish-step": if (snapshot) { const patch = await Snapshot.patch(snapshot) // 计算差异 if (patch.files.length) { await Session.updatePart({ type: "patch", hash: patch.hash, files: patch.files, }) } } break -
自动压缩检测:
if (await SessionCompaction.isOverflow({ tokens: usage.tokens, model })) {
  needsCompaction = true
  return "compact"  // 触发压缩流程
}
LLM(大模型交互层)- llm.ts
职责:封装与 LLM 的交互,处理流式响应
核心实现:
export async function stream(input: StreamInput) {
  // 1. 构建系统提示
  const system = [
    input.agent.prompt ?? SystemPrompt.provider(input.model),
    ...input.system,
    ...(input.user.system ? [input.user.system] : []),
  ]

  // 2. 解析工具
  const tools = await resolveTools(input)

  // 3. 流式调用
  return streamText({
    model: wrapLanguageModel({...}),
    messages: [
      ...system.map(x => ({ role: "system", content: x })),
      ...input.messages,
    ],
    tools,
    temperature: params.temperature,
    maxOutputTokens,
    abortSignal: input.abort,
    experimental_repairToolCall(failed) {
      // 工具调用修复(大小写不匹配等)
      ...
    },
  })
}
亮点:
- 工具调用修复:自动修复大小写不匹配的工具名
- 多提供商适配:通过
ProviderTransform统一不同提供商的差异 - LiteLLM 兼容:为 LiteLLM 代理添加占位工具
- 插件系统:支持插件修改参数和头部
SessionCompaction(会话压缩)- compaction.ts
职责:当上下文过长时压缩历史消息
压缩策略:
// 1. 检测是否溢出
export async function isOverflow(input: {
  tokens: MessageV2.Assistant["tokens"]
  model: Provider.Model
}) {
  const context = input.model.limit.context
  const count = input.tokens.total ||
    input.tokens.input + input.tokens.output + ...

  const reserved = config.compaction?.reserved ?? 20_000
  const usable = context - reserved

  return count >= usable  // 超过可用上下文
}

// 2. 压缩处理
export async function process(input: {...}) {
  // 使用 LLM 总结旧消息
  const summary = await LLM.stream({...})

  // 创建压缩标记
  await Session.updatePart({
    type: "compaction",
    auto: true,
  })

  // 更新消息摘要
  await SessionSummary.summarize({...})
}

// 3. 修剪工具调用输出
export async function prune(input: { sessionID: string }) {
  // 保留最近40k tokens的工具调用
  // 清除更早的工具调用输出(保留输入)
  ...
}
SessionSummary(会话摘要)- summary.ts
职责:生成会话摘要,用于压缩和展示
实现思路:
export const summarize = fn(
  z.object({
    sessionID: z.string(),
    messageID: z.string(),
  }),
  async (input) => {
    const messages = await Session.messages({ sessionID: input.sessionID })

    // 计算文件变更差异
    const diffs = await computeDiff({ messages })

    // 使用 LLM 生成摘要
    const summary = await LLM.stream({
      model: smallModel,  // 使用小模型
      messages: [...],
      tools: { summarize: ... },
    })

    // 更新用户消息的摘要字段
    await Session.updateMessage({
      ...userMessage,
      summary: {
        title: summary.title,
        body: summary.body,
        diffs,
      },
    })
  }
)
设计模式与最佳实践
-
事件驱动架构
// 使用 Bus 系统进行解耦 Bus.publish(Session.Event.Created, { info: session }) Bus.publish(MessageV2.Event.PartUpdated, { part, delta }) -
流式处理
// 支持增量更新 await Session.updatePart({ part: currentText, delta: value.text, // 只发送增量 }) // 流式读取消息 export async function* stream(sessionID: string) { const list = await Storage.list(["message", sessionID]) for (let i = list.length - 1; i >= 0; i--) { yield await get({ sessionID, messageID: list[i][2] }) } } -
类型安全
// 使用 Zod 进行运行时类型验证 export const Info = z.object({...}).meta({ ref: "Session" }) // 使用 discriminatedUnion 实现类型安全的联合类型 export const Part = z.discriminatedUnion("type", [ TextPart, ToolPart, ... ]) -
错误处理与重试
// 错误分类
export function fromError(e: unknown, ctx: { providerID: string }) {
  switch (true) {
    case e instanceof DOMException && e.name === "AbortError":
      return new MessageV2.AbortedError(...)
    case LoadAPIKeyError.isInstance(e):
      return new MessageV2.AuthError(...)
    case APICallError.isInstance(e):
      return new MessageV2.APIError(...)
    ...
  }
}

// 重试逻辑
const retry = SessionRetry.retryable(error)
if (retry !== undefined) {
  const delay = SessionRetry.delay(attempt, error)
  await SessionRetry.sleep(delay, abort)
  continue  // 重试
}
关键设计亮点总结:
- 分离式存储:消息元数据与 Part 分开,便于增量更新
- 流式处理:支持实时增量更新,提升响应速度
- 状态机管理:工具调用使用状态机,状态清晰
- 自动压缩:上下文溢出时自动压缩历史
- 错误恢复:完善的错误分类与重试机制
- 事件驱动:通过事件总线解耦组件
- 类型安全:使用 Zod 进行运行时验证
- 插件系统:支持扩展和自定义
OpenCode AI Agent 系统深度解析
┌─────────────────────────────────────────┐
│      Agent 定义层                       │
│  - Agent.Info (类型定义)                │
│  - 内置 Agent (build, plan, etc.)       │
│  - 自定义 Agent (用户配置)                │
└─────────────────────────────────────────┘
           ↓
┌─────────────────────────────────────────┐
│      权限系统 (PermissionNext)           │
│  - 规则评估                              │
│  - 权限请求/批准                          │
│  - 规则合并                               │
└─────────────────────────────────────────┘
           ↓
┌─────────────────────────────────────────┐
│      工具执行层                          │
│  - 工具调用权限检查                       │
│  - Task 工具(子 Agent 调用)             │
│  - 工具上下文传递                         │
└─────────────────────────────────────────┘
Agent 核心结构
export const Info = z.object({
  name: z.string(),                    // Agent 名称
  description: z.string().optional(), // 描述
  mode: z.enum(["subagent", "primary", "all"]), // 模式
  native: z.boolean().optional(),      // 是否为内置 Agent
  hidden: z.boolean().optional(),     // 是否隐藏
  topP: z.number().optional(),        // Top-P 采样参数
  temperature: z.number().optional(), // 温度参数
  color: z.string().optional(),       // UI 颜色
  permission: PermissionNext.Ruleset, // 权限规则集
  model: z.object({                   // 指定模型
    modelID: z.string(),
    providerID: z.string(),
  }).optional(),
  variant: z.string().optional(),     // 模型变体
  prompt: z.string().optional(),      // 自定义系统提示
  options: z.record(z.string(), z.any()), // 额外选项
  steps: z.number().int().positive().optional(), // 最大步骤数
})
Agent 模式说明:
primary:主 Agent,可作为默认 Agentsubagent:子 Agent,只能通过 Task 工具调用all:两者皆可
内置 Agent
Build Agent(默认 Agent)
build: {
  name: "build",
  description: "The default agent. Executes tools based on configured permissions.",
  mode: "primary",
  native: true,
  permission: PermissionNext.merge(
    defaults,
    PermissionNext.fromConfig({
      question: "allow",      // 允许提问
      plan_enter: "allow",    // 允许进入计划模式
    }),
    user,                     // 用户配置覆盖
  ),
}
特点:
- 默认 Agent,功能最全
- 允许所有工具(基于权限)
- 支持提问和计划模式
Plan Agent(计划模式)
plan: {
  name: "plan",
  description: "Plan mode. Disallows all edit tools.",
  mode: "primary",
  native: true,
  permission: PermissionNext.merge(
    defaults,
    PermissionNext.fromConfig({
      question: "allow",
      plan_exit: "allow",
      external_directory: {
        [path.join(Global.Path.data, "plans", "*")]: "allow", // 允许访问计划目录
      },
      edit: {
        "*": "deny",  // 禁止所有编辑操作
        [path.join(".opencode", "plans", "*.md")]: "allow", // 只允许编辑计划文件
      },
    }),
    user,
  ),
}
特点:
- 只读模式,禁止编辑代码
- 允许创建/编辑计划文件
- 适合代码审查和规划
General Agent(通用子 Agent)
general: {
  name: "general",
  description: `General-purpose agent for researching complex questions
                and executing multi-step tasks. Use this agent to execute
                multiple units of work in parallel.`,
  mode: "subagent",
  native: true,
  permission: PermissionNext.merge(
    defaults,
    PermissionNext.fromConfig({
      todoread: "deny",   // 禁止读取待办
      todowrite: "deny",  // 禁止写入待办
    }),
    user,
  ),
}
特点:
- 子 Agent,用于并行任务
- 禁止待办操作(避免循环)
- 适合复杂研究和多步骤任务
Explore Agent(代码探索专家)
explore: {
  name: "explore",
  mode: "subagent",
  native: true,
  prompt: PROMPT_EXPLORE,  // 专门的探索提示
  permission: PermissionNext.merge(
    defaults,
    PermissionNext.fromConfig({
      "*": "deny",          // 默认禁止所有
      grep: "allow",        // 允许搜索
      glob: "allow",        // 允许文件匹配
      list: "allow",        // 允许列出目录
      bash: "allow",        // 允许 bash(只读操作)
      webfetch: "allow",    // 允许网页获取
      websearch: "allow",   // 允许网页搜索
      codesearch: "allow",  // 允许代码搜索
      read: "allow",        // 允许读取文件
      external_directory: {
        [Truncate.GLOB]: "allow", // 允许访问外部目录(用于搜索结果)
      },
    }),
    user,
  ),
}
探索提示(explore.txt):
You are a file search specialist. You excel at thoroughly navigating
and exploring codebases.

Your strengths:
- Rapidly finding files using glob patterns
- Searching code and text with powerful regex patterns
- Reading and analyzing file contents

Guidelines:
- Use Glob for broad file pattern matching
- Use Grep for searching file contents with regex
- Use Read when you know the specific file path you need to read
- Use Bash for file operations like copying, moving, or listing directory contents
- Adapt your search approach based on the thoroughness level specified by the caller
- Return file paths as absolute paths in your final response
- Do not create any files, or run bash commands that modify the user's system state
特点:
- 专用于代码库探索
- 只读操作,不修改文件
- 支持多种搜索方式
隐藏 Agent(系统内部使用)
// Compaction Agent - 用于会话压缩
compaction: {
  name: "compaction",
  mode: "primary",
  native: true,
  hidden: true,  // 隐藏,用户不可见
  prompt: PROMPT_COMPACTION,
  permission: PermissionNext.merge(
    defaults,
    PermissionNext.fromConfig({
      "*": "deny",  // 禁止所有工具
    }),
  ),
}

// Title Agent - 用于生成会话标题
title: {
  name: "title",
  mode: "primary",
  native: true,
  hidden: true,
  temperature: 0.5,  // 较低温度,确保一致性
  prompt: PROMPT_TITLE,
  permission: PermissionNext.merge(
    defaults,
    PermissionNext.fromConfig({
      "*": "deny",
    }),
  ),
}

// Summary Agent - 用于生成会话摘要
summary: {
  name: "summary",
  mode: "primary",
  native: true,
  hidden: true,
  prompt: PROMPT_SUMMARY,
  permission: PermissionNext.merge(
    defaults,
    PermissionNext.fromConfig({
      "*": "deny",
    }),
  ),
}
权限系统(PermissionNext)
权限规则结构
export const Rule = z.object({
  permission: z.string(),  // 权限类型(如 "read", "write", "bash")
  pattern: z.string(),      // 匹配模式(支持通配符)
  action: z.enum(["allow", "deny", "ask"]), // 动作
})

export const Ruleset = Rule.array()  // 规则集
默认权限规则
const defaults = PermissionNext.fromConfig({
  "*": "allow",              // 默认允许所有
  doom_loop: "ask",         // 死循环检测:询问
  external_directory: {
    "*": "ask",              // 外部目录:询问
    [Truncate.GLOB]: "allow", // 搜索结果目录:允许
    ...skillDirs.map(dir => [path.join(dir, "*"), "allow"]), // 技能目录:允许
  },
  question: "deny",          // 提问:默认禁止
  plan_enter: "deny",       // 进入计划:默认禁止
  plan_exit: "deny",        // 退出计划:默认禁止
  read: {
    "*": "allow",            // 读取:默认允许
    "*.env": "ask",          // .env 文件:询问
    "*.env.*": "ask",        // .env.* 文件:询问
    "*.env.example": "allow", // .env.example:允许
  },
})
权限评估流程
export function evaluate(
  permission: string,
  pattern: string,
  ruleset: Ruleset,
  approved?: Ruleset
): Rule {
  // 1. 检查已批准的规则
  if (approved) {
    for (const rule of approved) {
      if (rule.permission === permission &&
          Wildcard.match(pattern, rule.pattern)) {
        return rule  // 使用已批准的规则
      }
    }
  }

  // 2. 检查规则集(从后往前,后定义的优先级高)
  for (let i = ruleset.length - 1; i >= 0; i--) {
    const rule = ruleset[i]
    if (Wildcard.match(permission, rule.permission) &&
        Wildcard.match(pattern, rule.pattern)) {
      return rule
    }
  }

  // 3. 默认拒绝
  return { permission, pattern, action: "deny" }
}
权限请求机制
export async function ask(input: {
  permission: string
  patterns: string[]
  ruleset: Ruleset
  metadata?: Record<string, any>
  always?: string[]  // 总是允许的模式
}) {
  const s = await state()

  // 评估每个模式
  for (const pattern of input.patterns) {
    const rule = evaluate(input.permission, pattern, input.ruleset, s.approved)

    if (rule.action === "deny") {
      throw new DeniedError(...)  // 直接拒绝
    }

    if (rule.action === "ask") {
      // 创建权限请求
      const id = Identifier.ascending("permission")
      return new Promise<void>((resolve, reject) => {
        const info: Request = {
          id,
          sessionID: input.sessionID,
          permission: input.permission,
          patterns: input.patterns,
          metadata: input.metadata,
          always: input.always,
        }

        s.pending[id] = { info, resolve, reject }

        // 发布权限请求事件
        Bus.publish(Event.Asked, info)
      })
    }
  }

  // 所有模式都允许
  return Promise.resolve()
}
Agent 生成机制
生成流程
export async function generate(input: {
  description: string
  model?: { providerID: string; modelID: string }
}) {
  const cfg = await Config.get()
  const defaultModel = input.model ?? (await Provider.defaultModel())
  const model = await Provider.getModel(defaultModel.providerID, defaultModel.modelID)
  const language = await Provider.getLanguage(model)

  // 1. 构建系统提示
  const system = [PROMPT_GENERATE]
  await Plugin.trigger("experimental.chat.system.transform", { model }, { system })

  // 2. 获取现有 Agent 列表(避免重复)
  const existing = await list()

  // 3. 使用 LLM 生成 Agent 配置
  const result = await generateObject({
    temperature: 0.3,
    messages: [
      ...system.map(item => ({ role: "system", content: item })),
      {
        role: "user",
        content: `Create an agent configuration based on this request:
                  "${input.description}".

                  IMPORTANT: The following identifiers already exist and must NOT be used:
                  ${existing.map(i => i.name).join(", ")}

                  Return ONLY the JSON object, no other text, do not wrap in backticks`,
      },
    ],
    model: language,
    schema: z.object({
      identifier: z.string(),      // Agent 标识符
      whenToUse: z.string(),        // 使用场景描述
      systemPrompt: z.string(),    // 系统提示
    }),
  })

  return result.object
}
生成提示(generate.txt)
You are an elite AI agent architect specializing in crafting high-performance
agent configurations.

When a user describes what they want an agent to do, you will:

1. **Extract Core Intent**: Identify the fundamental purpose, key responsibilities,
   and success criteria for the agent.

2. **Design Expert Persona**: Create a compelling expert identity that embodies
   deep domain knowledge relevant to the task.

3. **Architect Comprehensive Instructions**: Develop a system prompt that:
   - Establishes clear behavioral boundaries and operational parameters
   - Provides specific methodologies and best practices for task execution
   - Anticipates edge cases and provides guidance for handling them
   - Defines output format expectations when relevant

4. **Optimize for Performance**: Include:
   - Decision-making frameworks appropriate to the domain
   - Quality control mechanisms and self-verification steps
   - Efficient workflow patterns
   - Clear escalation or fallback strategies

5. **Create Identifier**: Design a concise, descriptive identifier that:
   - Uses lowercase letters, numbers, and hyphens only
   - Is typically 2-4 words joined by hyphens
   - Clearly indicates the agent's primary function
Agent 与工具调用的关系
工具执行时的权限检查
// 在工具执行前检查权限
async execute(params, ctx: Tool.Context) {
  // 获取 Agent 配置
  const agent = await Agent.get(ctx.agent)

  // 检查权限
  await ctx.ask({
    permission: "read",  // 权限类型
    patterns: [params.filePath],  // 匹配模式
    ruleset: agent.permission,  // Agent 的权限规则
    metadata: { filePath: params.filePath },
  })

  // 执行工具逻辑
  ...
}
Task 工具(子 Agent 调用)
export const TaskTool = Tool.define("task", async (ctx) => {
  // 1. 获取可用的子 Agent
  const agents = await Agent.list()
    .then(x => x.filter(a => a.mode !== "primary"))

  // 2. 根据调用者权限过滤
  const caller = ctx?.agent
  const accessibleAgents = caller
    ? agents.filter(a =>
        PermissionNext.evaluate("task", a.name, caller.permission).action !== "deny"
      )
    : agents

  return {
    description: `Execute a task using a subagent...`,
    parameters: z.object({
      subagent_type: z.enum(accessibleAgents.map(a => a.name)),
      description: z.string(),
      prompt: z.string(),
      task_id: z.string().optional(),
    }),
    async execute(params, ctx) {
      // 3. 检查权限(除非用户显式调用)
      if (!ctx.extra?.bypassAgentCheck) {
        await ctx.ask({
          permission: "task",
          patterns: [params.subagent_type],
          always: ["*"],
          metadata: {
            description: params.description,
            subagent_type: params.subagent_type,
          },
        })
      }

      // 4. 获取子 Agent
      const agent = await Agent.get(params.subagent_type)

      // 5. 创建子会话
      const session = await Session.create({
        parentID: ctx.sessionID,
        title: params.description + ` (@${agent.name} subagent)`,
        permission: [
          // 子会话的权限配置
          { permission: "todowrite", pattern: "*", action: "deny" },
          { permission: "todoread", pattern: "*", action: "deny" },
          // 如果子 Agent 没有 task 权限,禁止它调用其他子 Agent
          ...(hasTaskPermission ? [] : [{
            permission: "task",
            pattern: "*",
            action: "deny",
          }]),
        ],
      })

      // 6. 在子会话中执行任务
      const result = await SessionPrompt.prompt({
        sessionID: session.id,
        model: agent.model ?? {
          modelID: ctx.modelID,
          providerID: ctx.providerID,
        },
        agent: agent.name,
        parts: await SessionPrompt.resolvePromptParts(params.prompt),
      })

      return {
        output: result.output,
        title: params.description,
        metadata: { sessionId: session.id },
      }
    },
  }
})
设计亮点:
-
灵活的权限系统
- 支持通配符模式匹配
- 规则优先级明确
- 支持 ask/allow/deny 三种动作
-
分层 Agent 架构
- 主 Agent 和子 Agent 分离
- 子 Agent 通过 Task 工具调用
- 支持 Agent 继承和权限合并
-
智能 Agent 生成
- 使用 LLM 自动生成 Agent 配置
- 避免标识符冲突
- 生成高质量的系统提示
-
内置专业 Agent
- Build:全功能开发 Agent
- Plan:只读规划 Agent
- Explore:代码探索专家
- General:通用并行任务 Agent
-
权限请求机制
- 异步权限请求
- 支持"总是允许"模式
- 事件驱动的权限响应
-
配置灵活性
- 支持项目级和全局配置
- 用户配置可覆盖默认规则
- 支持动态加载自定义 Agent
这套 Agent 系统在灵活性、安全性和易用性之间取得了平衡,值得学习。
OpenCode 工具系统深度解析
OpenCode 的工具系统采用统一的接口和注册机制:
┌─────────────────────────────────────────┐
│      Tool.define (工具定义接口)          │
│  - 统一的工具定义方式                     │
│  - 参数验证                              │
│  - 输出截断                              │
└─────────────────────────────────────────┘
           ↓
┌─────────────────────────────────────────┐
│    ToolRegistry (工具注册表)             │
│  - 内置工具注册                           │
│  - 自定义工具加载                         │
│  - 插件工具集成                           │
└─────────────────────────────────────────┘
           ↓
┌─────────────────────────────────────────┐
│     工具执行层                            │
│  - 权限检查                              │
│  - 上下文传递                            │
│  - 错误处理                              │
└─────────────────────────────────────────┘
工具定义系统
工具接口定义
export namespace Tool {
  // 工具上下文
  export type Context<M extends Metadata = Metadata> = {
    sessionID: string        // 会话ID
    messageID: string        // 消息ID
    agent: string            // Agent名称
    abort: AbortSignal       // 取消信号
    callID?: string          // 调用ID
    extra?: { [key: string]: any }  // 额外数据
    messages: MessageV2.WithParts[]  // 消息历史
    metadata(input: { title?: string; metadata?: M }): void  // 更新元数据
    ask(input: Omit<PermissionNext.Request, "id" | "sessionID" | "tool">): Promise<void>  // 权限请求
  }

  // 工具信息
  export interface Info<Parameters extends z.ZodType = z.ZodType, M extends Metadata = Metadata> {
    id: string
    init: (ctx?: InitContext) => Promise<{
      description: string              // 工具描述
      parameters: Parameters           // 参数模式(Zod)
      execute(
        args: z.infer<Parameters>,
        ctx: Context,
      ): Promise<{
        title: string                  // 工具标题
        metadata: M                    // 元数据
        output: string                 // 输出内容
        attachments?: MessageV2.FilePart[]  // 附件
      }>
      formatValidationError?(error: z.ZodError): string  // 自定义验证错误格式
    }>
  }
}
工具定义函数
export function define<Parameters extends z.ZodType, Result extends Metadata>(
  id: string,
  init: Info<Parameters, Result>["init"] | Awaited<ReturnType<Info<Parameters, Result>["init"]>>,
): Info<Parameters, Result> {
  return {
    id,
    init: async (initCtx) => {
      const toolInfo = init instanceof Function ? await init(initCtx) : init
      const execute = toolInfo.execute

      // 包装执行函数,添加参数验证和输出截断
      toolInfo.execute = async (args, ctx) => {
        try {
          // 1. 参数验证
          toolInfo.parameters.parse(args)
        } catch (error) {
          if (error instanceof z.ZodError && toolInfo.formatValidationError) {
            throw new Error(toolInfo.formatValidationError(error), { cause: error })
          }
          throw new Error(
            `The ${id} tool was called with invalid arguments: ${error}.\nPlease rewrite the input so it satisfies the expected schema.`,
            { cause: error },
          )
        }

        // 2. 执行工具
        const result = await execute(args, ctx)

        // 3. 输出截断(如果工具没有自己处理)
        if (result.metadata.truncated !== undefined) {
          return result
        }
        const truncated = await Truncate.output(result.output, {}, initCtx?.agent)
        return {
          ...result,
          output: truncated.content,
          metadata: {
            ...result.metadata,
            truncated: truncated.truncated,
            ...(truncated.truncated && { outputPath: truncated.outputPath }),
          },
        }
      }
      return toolInfo
    },
  }
}
核心工具详解
Read Tool(读取工具)
功能:读取文件或目录内容
export const ReadTool = Tool.define("read", {
  description: DESCRIPTION,
  parameters: z.object({
    filePath: z.string().describe("The absolute path to the file or directory to read"),
    offset: z.coerce.number().describe("The line number to start reading from (1-indexed)").optional(),
    limit: z.coerce.number().describe("The maximum number of lines to read (defaults to 2000)").optional(),
  }),
  async execute(params, ctx) {
    // 1. 路径解析
    let filepath = params.filePath
    if (!path.isAbsolute(filepath)) {
      filepath = path.resolve(Instance.directory, filepath)
    }

    // 2. 外部目录检查
    await assertExternalDirectory(ctx, filepath, {
      bypass: Boolean(ctx.extra?.["bypassCwdCheck"]),
      kind: stat?.isDirectory() ? "directory" : "file",
    })

    // 3. 权限检查
    await ctx.ask({
      permission: "read",
      patterns: [filepath],
      always: ["*"],
      metadata: {},
    })

    // 4. 文件不存在处理(提供建议)
    if (!stat) {
      const dir = path.dirname(filepath)
      const base = path.basename(filepath)
      const dirEntries = fs.readdirSync(dir)
      const suggestions = dirEntries
        .filter(entry =>
          entry.toLowerCase().includes(base.toLowerCase()) ||
          base.toLowerCase().includes(entry.toLowerCase())
        )
        .map(entry => path.join(dir, entry))
        .slice(0, 3)

      if (suggestions.length > 0) {
        throw new Error(`File not found: ${filepath}\n\nDid you mean one of these?\n${suggestions.join("\n")}`)
      }
      throw new Error(`File not found: ${filepath}`)
    }

    // 5. 目录处理
    if (stat.isDirectory()) {
      const dirents = await fs.promises.readdir(filepath, { withFileTypes: true })
      const entries = await Promise.all(
        dirents.map(async (dirent) => {
          if (dirent.isDirectory()) return dirent.name + "/"
          if (dirent.isSymbolicLink()) {
            const target = await fs.promises.stat(path.join(filepath, dirent.name)).catch(() => undefined)
            if (target?.isDirectory()) return dirent.name + "/"
          }
          return dirent.name
        })
      )
      entries.sort((a, b) => a.localeCompare(b))

      // 分页处理
      const limit = params.limit ?? DEFAULT_READ_LIMIT
      const offset = params.offset ?? 1
      const start = offset - 1
      const sliced = entries.slice(start, start + limit)
      const truncated = start + sliced.length < entries.length

      return {
        title,
        output: `<path>${filepath}</path>\n<type>directory</type>\n<entries>\n${sliced.join("\n")}\n...</entries>`,
        metadata: {
          preview: sliced.slice(0, 20).join("\n"),
          truncated,
          loaded: [],
        },
      }
    }

    // 6. 图片/PDF处理
    const isImage = file.type.startsWith("image/") &&
                    file.type !== "image/svg+xml"
    const isPdf = file.type === "application/pdf"
    if (isImage || isPdf) {
      return {
        title,
        output: `${isImage ? "Image" : "PDF"} read successfully`,
        metadata: {
          preview: `${isImage ? "Image" : "PDF"} read successfully`,
          truncated: false,
          loaded: instructions.map(i => i.filepath),
        },
        attachments: [{
          id: Identifier.ascending("part"),
          sessionID: ctx.sessionID,
          messageID: ctx.messageID,
          type: "file",
          mime: file.type,
          url: `data:${file.type};base64,${Buffer.from(await file.bytes()).toString("base64")}`,
        }],
      }
    }

    // 7. 二进制文件检查
    const isBinary = await isBinaryFile(filepath, file)
    if (isBinary) throw new Error(`Cannot read binary file: ${filepath}`)

    // 8. 文本文件读取(分页)
    const limit = params.limit ?? DEFAULT_READ_LIMIT
    const offset = params.offset ?? 1
    const start = offset - 1
    const lines = await file.text().then(text => text.split("\n"))

    const raw: string[] = []
    let bytes = 0
    let truncatedByBytes = false
    for (let i = start; i < Math.min(lines.length, start + limit); i++) {
      const line = lines[i].length > MAX_LINE_LENGTH
        ? lines[i].substring(0, MAX_LINE_LENGTH) + "..."
        : lines[i]
      const size = Buffer.byteLength(line, "utf-8") + (raw.length > 0 ? 1 : 0)
      if (bytes + size > MAX_BYTES) {
        truncatedByBytes = true
        break
      }
      raw.push(line)
      bytes += size
    }

    // 9. 格式化输出(带行号)
    const content = raw.map((line, index) => {
      return `${index + offset}: ${line}`
    })

    // 10. LSP预热和文件时间记录
    LSP.touchFile(filepath, false)
    FileTime.read(ctx.sessionID, filepath)

    // 11. 系统提醒(来自指令文件)
    if (instructions.length > 0) {
      output += `\n\n<system-reminder>\n${instructions.map(i => i.content).join("\n\n")}\n</system-reminder>`
    }

    return {
      title,
      output: `<path>${filepath}</path>\n<type>file</type>\n<content>\n${content.join("\n")}\n</content>`,
      metadata: {
        preview: raw.slice(0, 20).join("\n"),
        truncated: hasMoreLines || truncatedByBytes,
        loaded: instructions.map(i => i.filepath),
      },
    }
  },
})
关键特性:
- 智能路径建议:文件不存在时提供相似文件名建议
- 分页读取:支持 offset 和 limit
- 二进制检测:自动检测并拒绝二进制文件
- 图片/PDF支持:以附件形式返回
- LSP集成:预热LSP客户端
- 系统提醒:自动加载指令文件内容
Write Tool(写入工具)
功能:写入文件内容
export const WriteTool = Tool.define("write", {
  description: DESCRIPTION,
  parameters: z.object({
    content: z.string().describe("The content to write to the file"),
    filePath: z.string().describe("The absolute path to the file to write"),
  }),
  async execute(params, ctx) {
    const filepath = path.isAbsolute(params.filePath)
      ? params.filePath
      : path.join(Instance.directory, params.filePath)

    // 1. 外部目录检查
    await assertExternalDirectory(ctx, filepath)

    // 2. 读取旧内容(用于生成diff)
    const file = Bun.file(filepath)
    const exists = await file.exists()
    const contentOld = exists ? await file.text() : ""
    if (exists) await FileTime.assert(ctx.sessionID, filepath)

    // 3. 生成diff
    const diff = trimDiff(createTwoFilesPatch(filepath, filepath, contentOld, params.content))

    // 4. 权限检查(带diff信息)
    await ctx.ask({
      permission: "edit",
      patterns: [path.relative(Instance.worktree, filepath)],
      always: ["*"],
      metadata: {
        filepath,
        diff,  // diff信息用于权限决策
      },
    })

    // 5. 写入文件
    await Bun.write(filepath, params.content)

    // 6. 发布事件
    await Bus.publish(File.Event.Edited, { file: filepath })
    await Bus.publish(FileWatcher.Event.Updated, {
      file: filepath,
      event: exists ? "change" : "add",
    })
    FileTime.read(ctx.sessionID, filepath)

    // 7. LSP诊断
    await LSP.touchFile(filepath, true)
    const diagnostics = await LSP.diagnostics()
    const normalizedFilepath = Filesystem.normalizePath(filepath)

    let output = "Wrote file successfully."
    let projectDiagnosticsCount = 0
    for (const [file, issues] of Object.entries(diagnostics)) {
      const errors = issues.filter(item => item.severity === 1)
      if (errors.length === 0) continue

      const limited = errors.slice(0, MAX_DIAGNOSTICS_PER_FILE)
      const suffix = errors.length > MAX_DIAGNOSTICS_PER_FILE
        ? `\n... and ${errors.length - MAX_DIAGNOSTICS_PER_FILE} more`
        : ""

      if (file === normalizedFilepath) {
        // 当前文件的错误
        output += `\n\nLSP errors detected in this file, please fix:\n<diagnostics file="${filepath}">\n${limited.map(LSP.Diagnostic.pretty).join("\n")}${suffix}\n</diagnostics>`
        continue
      }

      // 其他文件的错误(限制数量)
      if (projectDiagnosticsCount >= MAX_PROJECT_DIAGNOSTICS_FILES) continue
      projectDiagnosticsCount++
      output += `\n\nLSP errors detected in other files:\n<diagnostics file="${file}">\n${limited.map(LSP.Diagnostic.pretty).join("\n")}${suffix}\n</diagnostics>`
    }

    return {
      title: path.relative(Instance.worktree, filepath),
      metadata: {
        diagnostics,
        filepath,
        exists: exists,
      },
      output,
    }
  },
})
关键特性:
- Diff生成:写入前生成diff用于权限检查
- 文件时间检查:防止并发修改冲突
- LSP诊断:自动检查语法错误
- 事件发布:通知文件系统监听器
Edit Tool(编辑工具)
功能:精确编辑文件(替换指定文本)
export const EditTool = Tool.define("edit", {
  description: DESCRIPTION,
  parameters: z.object({
    filePath: z.string().describe("The absolute path to the file to modify"),
    oldString: z.string().describe("The text to replace"),
    newString: z.string().describe("The text to replace it with"),
    replaceAll: z.boolean().optional().describe("Replace all occurrences"),
  }),
  async execute(params, ctx) {
    if (params.oldString === params.newString) {
      throw new Error("No changes to apply: oldString and newString are identical.")
    }

    const filePath = path.isAbsolute(params.filePath)
      ? params.filePath
      : path.join(Instance.directory, params.filePath)

    // 使用文件锁防止并发修改
    await FileTime.withLock(filePath, async () => {
      const file = Bun.file(filePath)
      await FileTime.assert(ctx.sessionID, filePath)
      contentOld = await file.text()

      // 智能替换(多种策略)
      contentNew = replace(contentOld, params.oldString, params.newString, params.replaceAll)

      // 生成diff并请求权限
      diff = trimDiff(createTwoFilesPatch(filePath, filePath,
        normalizeLineEndings(contentOld),
        normalizeLineEndings(contentNew)))
      await ctx.ask({
        permission: "edit",
        patterns: [path.relative(Instance.worktree, filePath)],
        always: ["*"],
        metadata: { filepath: filePath, diff },
      })

      // 写入文件
      await file.write(contentNew)

      // 发布事件
      await Bus.publish(File.Event.Edited, { file: filePath })
      await Bus.publish(FileWatcher.Event.Updated, { file: filePath, event: "change" })
      FileTime.read(ctx.sessionID, filePath)
    })

    // 计算文件差异统计
    const filediff: Snapshot.FileDiff = {
      file: filePath,
      before: contentOld,
      after: contentNew,
      additions: 0,
      deletions: 0,
    }
    for (const change of diffLines(contentOld, contentNew)) {
      if (change.added) filediff.additions += change.count || 0
      if (change.removed) filediff.deletions += change.count || 0
    }

    // LSP诊断
    await LSP.touchFile(filePath, true)
    const diagnostics = await LSP.diagnostics()
    const normalizedFilePath = Filesystem.normalizePath(filePath)
    const issues = diagnostics[normalizedFilePath] ?? []
    const errors = issues.filter(item => item.severity === 1)

    let output = "Edit applied successfully."
    if (errors.length > 0) {
      const limited = errors.slice(0, MAX_DIAGNOSTICS_PER_FILE)
      const suffix = errors.length > MAX_DIAGNOSTICS_PER_FILE
        ? `\n... and ${errors.length - MAX_DIAGNOSTICS_PER_FILE} more`
        : ""
      output += `\n\nLSP errors detected in this file, please fix:\n<diagnostics file="${filePath}">\n${limited.map(LSP.Diagnostic.pretty).join("\n")}${suffix}\n</diagnostics>`
    }

    return {
      metadata: { diagnostics, diff, filediff },
      title: `${path.relative(Instance.worktree, filePath)}`,
      output,
    }
  },
})
智能替换策略(多种Replacer):
export function replace(content: string, oldString: string, newString: string, replaceAll = false): string {
  // 按优先级尝试多种替换策略
  for (const replacer of [
    SimpleReplacer,              // 1. 精确匹配
    LineTrimmedReplacer,         // 2. 行尾空白忽略
    BlockAnchorReplacer,         // 3. 块锚点匹配(首尾行匹配)
    WhitespaceNormalizedReplacer, // 4. 空白规范化
    IndentationFlexibleReplacer,  // 5. 缩进灵活匹配
    EscapeNormalizedReplacer,     // 6. 转义字符规范化
    TrimmedBoundaryReplacer,      // 7. 边界空白修剪
    ContextAwareReplacer,         // 8. 上下文感知匹配
    MultiOccurrenceReplacer,      // 9. 多出现匹配
  ]) {
    for (const search of replacer(content, oldString)) {
      const index = content.indexOf(search)
      if (index === -1) continue

      if (replaceAll) {
        return content.replaceAll(search, newString)
      }

      // 检查是否唯一
      const lastIndex = content.lastIndexOf(search)
      if (index !== lastIndex) continue  // 多个匹配,需要更多上下文

      return content.substring(0, index) + newString + content.substring(index + search.length)
    }
  }

  throw new Error("Could not find oldString in the file...")
}
关键特性:
- 多种匹配策略:从精确到模糊,提高匹配成功率
- 文件锁:防止并发修改
- 差异统计:计算增删行数
- 上下文感知:BlockAnchorReplacer 使用首尾行作为锚点
Grep Tool(搜索工具)
功能:使用正则表达式搜索文件内容
export const GrepTool = Tool.define("grep", {
  description: DESCRIPTION,
  parameters: z.object({
    pattern: z.string().describe("The regex pattern to search for"),
    path: z.string().optional().describe("The directory to search in"),
    include: z.string().optional().describe('File pattern to include (e.g. "*.js")'),
  }),
  async execute(params, ctx) {
    // 1. 权限检查
    await ctx.ask({
      permission: "grep",
      patterns: [params.pattern],
      always: ["*"],
      metadata: {
        pattern: params.pattern,
        path: params.path,
        include: params.include,
      },
    })

    // 2. 路径解析
    let searchPath = params.path ?? Instance.directory
    searchPath = path.isAbsolute(searchPath)
      ? searchPath
      : path.resolve(Instance.directory, searchPath)
    await assertExternalDirectory(ctx, searchPath, { kind: "directory" })

    // 3. 使用ripgrep搜索
    const rgPath = await Ripgrep.filepath()
    const args = [
      "-nH",                    // 显示行号和文件名
      "--hidden",               // 搜索隐藏文件
      "--no-messages",          // 抑制错误消息
      "--field-match-separator=|",  // 字段分隔符
      "--regexp", params.pattern,
    ]
    if (params.include) {
      args.push("--glob", params.include)
    }
    args.push(searchPath)

    const proc = Bun.spawn([rgPath, ...args], {
      stdout: "pipe",
      stderr: "pipe",
      signal: ctx.abort,
    })

    const output = await new Response(proc.stdout).text()
    const exitCode = await proc.exited

    // 4. 处理结果(ripgrep: 0=找到, 1=未找到, 2=错误但可能有结果)
    if (exitCode === 1 || (exitCode === 2 && !output.trim())) {
      return {
        title: params.pattern,
        metadata: { matches: 0, truncated: false },
        output: "No files found",
      }
    }

    // 5. 解析结果
    const lines = output.trim().split(/\r?\n/)
    const matches = []

    for (const line of lines) {
      if (!line) continue
      const [filePath, lineNumStr, ...lineTextParts] = line.split("|")
      if (!filePath || !lineNumStr || lineTextParts.length === 0) continue

      const lineNum = parseInt(lineNumStr, 10)
      const lineText = lineTextParts.join("|")

      const file = Bun.file(filePath)
      const stats = await file.stat().catch(() => null)
      if (!stats) continue

      matches.push({
        path: filePath,
        modTime: stats.mtime.getTime(),
        lineNum,
        lineText,
      })
    }

    // 6. 按修改时间排序(最新的在前)
    matches.sort((a, b) => b.modTime - a.modTime)

    // 7. 限制结果数量
    const limit = 100
    const truncated = matches.length > limit
    const finalMatches = truncated ? matches.slice(0, limit) : matches

    // 8. 格式化输出
    const outputLines = [`Found ${matches.length} matches${truncated ? ` (showing first ${limit})` : ""}`]

    let currentFile = ""
    for (const match of finalMatches) {
      if (currentFile !== match.path) {
        if (currentFile !== "") outputLines.push("")
        currentFile = match.path
        outputLines.push(`${match.path}:`)
      }
      const truncatedLineText = match.lineText.length > MAX_LINE_LENGTH
        ? match.lineText.substring(0, MAX_LINE_LENGTH) + "..."
        : match.lineText
      outputLines.push(`  Line ${match.lineNum}: ${truncatedLineText}`)
    }

    return {
      title: params.pattern,
      metadata: { matches: matches.length, truncated },
      output: outputLines.join("\n"),
    }
  },
})
关键特性:
- 使用ripgrep:高性能搜索
- 按修改时间排序:最新文件优先
- 结果分组:按文件分组显示
- 行号显示:便于定位
Bash Tool(命令执行工具)
功能:执行shell命令
export const BashTool = Tool.define("bash", async () => {
  const shell = Shell.acceptable()

  return {
    description: DESCRIPTION.replaceAll("${directory}", Instance.directory),
    parameters: z.object({
      command: z.string().describe("The command to execute"),
      timeout: z.number().optional().describe("Optional timeout in milliseconds"),
      workdir: z.string().optional().describe("The working directory"),
      description: z.string().describe("Clear description of what this command does"),
    }),
    async execute(params, ctx) {
      const cwd = params.workdir || Instance.directory
      const timeout = params.timeout ?? DEFAULT_TIMEOUT

      // 1. 解析命令(使用tree-sitter-bash)
      const tree = await parser().then(p => p.parse(params.command))
      if (!tree) {
        throw new Error("Failed to parse command")
      }

      // 2. 提取路径和命令模式(用于权限检查)
      const directories = new Set<string>()
      const patterns = new Set<string>()
      const always = new Set<string>()

      for (const node of tree.rootNode.descendantsOfType("command")) {
        const command = []
        for (let i = 0; i < node.childCount; i++) {
          const child = node.child(i)
          if (child.type === "command_name" || child.type === "word") {
            command.push(child.text)
          }
        }

        // 处理文件操作命令(cd, rm, cp, mv等)
        if (["cd", "rm", "cp", "mv", "mkdir", "touch"].includes(command[0])) {
          for (const arg of command.slice(1)) {
            if (arg.startsWith("-")) continue
            const resolved = await $`realpath ${arg}`.cwd(cwd).quiet().nothrow().text().then(x => x.trim())
            if (resolved && !Instance.containsPath(resolved)) {
              const dir = (await Filesystem.isDir(resolved)) ? resolved : path.dirname(resolved)
              directories.add(dir)
            }
          }
        }

        // 收集命令模式
        if (command.length && command[0] !== "cd") {
          patterns.add(commandText)
          always.add(BashArity.prefix(command).join(" ") + " *")
        }
      }

      // 3. 权限检查
      if (directories.size > 0) {
        const globs = Array.from(directories).map(dir => path.join(dir, "*"))
        await ctx.ask({
          permission: "external_directory",
          patterns: globs,
          always: globs,
          metadata: {},
        })
      }

      if (patterns.size > 0) {
        await ctx.ask({
          permission: "bash",
          patterns: Array.from(patterns),
          always: Array.from(always),
          metadata: {},
        })
      }

      // 4. 执行命令
      const shellEnv = await Plugin.trigger("shell.env", { cwd }, { env: {} })
      const proc = spawn(params.command, {
        shell,
        cwd,
        env: { ...process.env, ...shellEnv.env },
        stdio: ["ignore", "pipe", "pipe"],
        detached: process.platform !== "win32",
      })

      let output = ""

      // 5. 实时更新元数据
      ctx.metadata({
        metadata: {
          output: "",
          description: params.description,
        },
      })

      const append = (chunk: Buffer) => {
        output += chunk.toString()
        ctx.metadata({
          metadata: {
            output: output.length > MAX_METADATA_LENGTH
              ? output.slice(0, MAX_METADATA_LENGTH) + "\n\n..."
              : output,
            description: params.description,
          },
        })
      }

      proc.stdout?.on("data", append)
      proc.stderr?.on("data", append)

      // 6. 超时和取消处理
      let timedOut = false
      let aborted = false
      let exited = false

      const kill = () => Shell.killTree(proc, { exited: () => exited })

      if (ctx.abort.aborted) {
        aborted = true
        await kill()
      }

      const abortHandler = () => {
        aborted = true
        void kill()
      }

      ctx.abort.addEventListener("abort", abortHandler, { once: true })

      const timeoutTimer = setTimeout(() => {
        timedOut = true
        void kill()
      }, timeout + 100)

      // 7. 等待命令完成
      await new Promise<void>((resolve, reject) => {
        const cleanup = () => {
          clearTimeout(timeoutTimer)
          ctx.abort.removeEventListener("abort", abortHandler)
        }

        proc.once("exit", () => {
          exited = true
          cleanup()
          resolve()
        })

        proc.once("error", (error) => {
          exited = true
          cleanup()
          reject(error)
        })
      })

      // 8. 添加元数据
      const resultMetadata: string[] = []
      if (timedOut) {
        resultMetadata.push(`bash tool terminated command after exceeding timeout ${timeout} ms`)
      }
      if (aborted) {
        resultMetadata.push("User aborted the command")
      }
      if (resultMetadata.length > 0) {
        output += "\n\n<bash_metadata>\n" + resultMetadata.join("\n") + "\n</bash_metadata>"
      }

      return {
        title: params.description,
        metadata: {
          output: output.length > MAX_METADATA_LENGTH
            ? output.slice(0, MAX_METADATA_LENGTH) + "\n\n..."
            : output,
          exit: proc.exitCode,
          description: params.description,
        },
        output,
      }
    },
  }
})
关键特性:
- 命令解析:使用tree-sitter-bash解析命令
- 路径提取:自动提取文件路径用于权限检查
- 实时输出:流式输出并更新元数据
- 超时控制:可配置超时时间
- 进程树终止:正确终止子进程
LSP Tool(语言服务器工具)
功能:调用LSP功能(跳转定义、查找引用等)
export const LspTool = Tool.define("lsp", {
  description: DESCRIPTION,
  parameters: z.object({
    operation: z.enum([
      "goToDefinition",
      "findReferences",
      "hover",
      "documentSymbol",
      "workspaceSymbol",
      "goToImplementation",
      "prepareCallHierarchy",
      "incomingCalls",
      "outgoingCalls",
    ]),
    filePath: z.string().describe("The absolute or relative path to the file"),
    line: z.number().int().min(1).describe("The line number (1-based)"),
    character: z.number().int().min(1).describe("The character offset (1-based)"),
  }),
  execute: async (args, ctx) => {
    const file = path.isAbsolute(args.filePath)
      ? args.filePath
      : path.join(Instance.directory, args.filePath)

    await assertExternalDirectory(ctx, file)

    // 1. 权限检查
    await ctx.ask({
      permission: "lsp",
      patterns: ["*"],
      always: ["*"],
      metadata: {},
    })

    const uri = pathToFileURL(file).href
    const position = {
      file,
      line: args.line - 1,      // LSP使用0-based
      character: args.character - 1,
    }

    // 2. 检查文件存在性
    const exists = await Bun.file(file).exists()
    if (!exists) {
      throw new Error(`File not found: ${file}`)
    }

    // 3. 检查LSP客户端可用性
    const available = await LSP.hasClients(file)
    if (!available) {
      throw new Error("No LSP server available for this file type.")
    }

    // 4. 预热LSP
    await LSP.touchFile(file, true)

    // 5. 执行LSP操作
    const result: unknown[] = await (async () => {
      switch (args.operation) {
        case "goToDefinition":
          return LSP.definition(position)
        case "findReferences":
          return LSP.references(position)
        case "hover":
          return LSP.hover(position)
        case "documentSymbol":
          return LSP.documentSymbol(uri)
        case "workspaceSymbol":
          return LSP.workspaceSymbol("")
        case "goToImplementation":
          return LSP.implementation(position)
        case "prepareCallHierarchy":
          return LSP.prepareCallHierarchy(position)
        case "incomingCalls":
          return LSP.incomingCalls(position)
        case "outgoingCalls":
          return LSP.outgoingCalls(position)
      }
    })()

    const output = result.length === 0
      ? `No results found for ${args.operation}`
      : JSON.stringify(result, null, 2)

    return {
      title: `${args.operation} ${path.relative(Instance.worktree, file)}:${args.line}:${args.character}`,
      metadata: { result },
      output,
    }
  },
})
Glob Tool(文件匹配工具)
功能:使用glob模式匹配文件
export const GlobTool = Tool.define("glob", {
  description: DESCRIPTION,
  parameters: z.object({
    pattern: z.string().describe("The glob pattern to match files against"),
    path: z.string().optional().describe("The directory to search in"),
  }),
  async execute(params, ctx) {
    // 1. 权限检查
    await ctx.ask({
      permission: "glob",
      patterns: [params.pattern],
      always: ["*"],
      metadata: {
        pattern: params.pattern,
        path: params.path,
      },
    })

    // 2. 路径解析
    let search = params.path ?? Instance.directory
    search = path.isAbsolute(search)
      ? search
      : path.resolve(Instance.directory, search)
    await assertExternalDirectory(ctx, search, { kind: "directory" })

    // 3. 使用ripgrep查找文件
    const limit = 100
    const files = []
    let truncated = false

    for await (const file of Ripgrep.files({
      cwd: search,
      glob: [params.pattern],
      signal: ctx.abort,
    })) {
      if (files.length >= limit) {
        truncated = true
        break
      }
      const full = path.resolve(search, file)
      const stats = await Bun.file(full)
        .stat()
        .then(x => x.mtime.getTime())
        .catch(() => 0)
      files.push({
        path: full,
        mtime: stats,
      })
    }

    // 4. 按修改时间排序
    files.sort((a, b) => b.mtime - a.mtime)

    // 5. 格式化输出
    const output = []
    if (files.length === 0) {
      output.push("No files found")
    } else {
      output.push(...files.map(f => f.path))
      if (truncated) {
        output.push("")
        output.push(`(Results are truncated: showing first ${limit} results...)`)
      }
    }

    return {
      title: path.relative(Instance.worktree, search),
      metadata: {
        count: files.length,
        truncated,
      },
      output: output.join("\n"),
    }
  },
})
工具注册表(ToolRegistry)
export namespace ToolRegistry {
  // 加载自定义工具
  export const state = Instance.state(async () => {
    const custom = [] as Tool.Info[]

    // 1. 从配置文件目录加载工具
    const glob = new Bun.Glob("{tool,tools}/*.{js,ts}")
    const matches = await Config.directories().then(dirs =>
      dirs.flatMap(dir => [...glob.scanSync({ cwd: dir, absolute: true })])
    )

    for (const match of matches) {
      const namespace = path.basename(match, path.extname(match))
      const mod = await import(match)
      for (const [id, def] of Object.entries<ToolDefinition>(mod)) {
        custom.push(fromPlugin(id === "default" ? namespace : `${namespace}_${id}`, def))
      }
    }

    // 2. 从插件加载工具
    const plugins = await Plugin.list()
    for (const plugin of plugins) {
      for (const [id, def] of Object.entries(plugin.tool ?? {})) {
        custom.push(fromPlugin(id, def))
      }
    }

    return { custom }
  })

  // 获取所有工具
  async function all(): Promise<Tool.Info[]> {
    const custom = await state().then(x => x.custom)
    const config = await Config.get()

    return [
      InvalidTool,           // 无效工具调用处理
      ...(["app", "cli", "desktop"].includes(Flag.OPENCODE_CLIENT) ? [QuestionTool] : []),
      BashTool,
      ReadTool,
      GlobTool,
      GrepTool,
      EditTool,
      WriteTool,
      TaskTool,              // 子Agent调用
      WebFetchTool,
      TodoWriteTool,
      WebSearchTool,
      CodeSearchTool,
      SkillTool,
      ApplyPatchTool,
      ...(Flag.OPENCODE_EXPERIMENTAL_LSP_TOOL ? [LspTool] : []),
      ...(config.experimental?.batch_tool === true ? [BatchTool] : []),
      ...custom,             // 自定义工具
    ]
  }

  // 根据模型和Agent过滤工具
  export async function tools(
    model: { providerID: string; modelID: string },
    agent?: Agent.Info,
  ) {
    const tools = await all()
    const result = await Promise.all(
      tools
        .filter(t => {
          // 根据模型启用/禁用特定工具
          if (t.id === "codesearch" || t.id === "websearch") {
            return model.providerID === "opencode" || Flag.OPENCODE_ENABLE_EXA
          }

          // GPT模型使用apply_patch,其他使用edit/write
          const usePatch = model.modelID.includes("gpt-") &&
                          !model.modelID.includes("oss") &&
                          !model.modelID.includes("gpt-4")
          if (t.id === "apply_patch") return usePatch
          if (t.id === "edit" || t.id === "write") return !usePatch

          return true
        })
        .map(async t => {
          return {
            id: t.id,
            ...(await t.init({ agent })),
          }
        }),
    )
    return result
  }
}
硬编码供应商的内置工具
OpenCode 内置了多个工具,部分直接调用第三方服务(如 Exa AI),地址已硬编码在代码中。
WebSearchTool(网络搜索)
实现位置:packages/opencode/src/tool/websearch.ts
// ⭐ 硬编码的 API 配置
const API_CONFIG = {
  BASE_URL: "https://mcp.exa.ai",  // Exa AI 的 MCP 服务器地址
  ENDPOINTS: {
    SEARCH: "/mcp",
  },
  DEFAULT_NUM_RESULTS: 8,
} as const

export const WebSearchTool = Tool.define("websearch", async () => {
  return {
    description: DESCRIPTION.replace("{{date}}", new Date().toISOString().slice(0, 10)),
    parameters: z.object({
      query: z.string().describe("Websearch query"),
      numResults: z.number().optional().describe("Number of search results (default: 8)"),
      livecrawl: z.enum(["fallback", "preferred"]).optional(),
      type: z.enum(["auto", "fast", "deep"]).optional(),
      contextMaxCharacters: z.number().optional(),
    }),
    async execute(params, ctx) {
      // 1. 权限检查
      await ctx.ask({
        permission: "websearch",
        patterns: [params.query],
        always: ["*"],
        metadata: { ...params },
      })

      // 2. 构建 MCP JSON-RPC 请求
      const searchRequest: McpSearchRequest = {
        jsonrpc: "2.0",
        id: 1,
        method: "tools/call",
        params: {
          name: "web_search_exa",  // ⭐ 调用 Exa AI 的 web_search_exa 工具
          arguments: {
            query: params.query,
            type: params.type || "auto",
            numResults: params.numResults || API_CONFIG.DEFAULT_NUM_RESULTS,
            livecrawl: params.livecrawl || "fallback",
            contextMaxCharacters: params.contextMaxCharacters,
          },
        },
      }

      // 3. 超时控制(25秒)
      const { signal, clearTimeout } = abortAfterAny(25000, ctx.abort)

      try {
        // 4. 直接调用 Exa AI 的 MCP 服务器
        const response = await fetch(`${API_CONFIG.BASE_URL}${API_CONFIG.ENDPOINTS.SEARCH}`, {
          method: "POST",
          headers: {
            accept: "application/json, text/event-stream",
            "content-type": "application/json",
          },
          body: JSON.stringify(searchRequest),
          signal,
        })

        // 5. 解析 SSE(Server-Sent Events)响应
        const responseText = await response.text()
        const lines = responseText.split("\n")
        for (const line of lines) {
          if (line.startsWith("data: ")) {
            const data: McpSearchResponse = JSON.parse(line.substring(6))
            if (data.result?.content?.[0]) {
              return {
                output: data.result.content[0].text,
                title: `Web search: ${params.query}`,
                metadata: {},
              }
            }
          }
        }

        return {
          output: "No search results found. Please try a different query.",
          title: `Web search: ${params.query}`,
          metadata: {},
        }
      } catch (error) {
        if (error instanceof Error && error.name === "AbortError") {
          throw new Error("Search request timed out")
        }
        throw error
      }
    },
  }
})
特点:
- 直接调用
https://mcp.exa.ai/mcp - 使用 MCP JSON-RPC 协议
- 支持 SSE 流式响应
- 超时 25 秒
- 仅对 OpenCode 用户或启用标志的用户开放
CodeSearchTool(代码搜索)
实现位置:packages/opencode/src/tool/codesearch.ts
// ⭐ 硬编码的 API 配置(同样使用 Exa AI)
const API_CONFIG = {
  BASE_URL: "https://mcp.exa.ai",  // 与 websearch 使用相同的服务器
  ENDPOINTS: {
    CONTEXT: "/mcp",
  },
} as const

export const CodeSearchTool = Tool.define("codesearch", {
  description: DESCRIPTION,
  parameters: z.object({
    query: z.string().describe(
      "Search query to find relevant context for APIs, Libraries, and SDKs. " +
      "For example, 'React useState hook examples', 'Python pandas dataframe filtering'"
    ),
    tokensNum: z.number()
      .min(1000)
      .max(50000)
      .default(5000)
      .describe("Number of tokens to return (1000-50000). Default is 5000 tokens."),
  }),
  async execute(params, ctx) {
    // 1. 权限检查
    await ctx.ask({
      permission: "codesearch",
      patterns: [params.query],
      always: ["*"],
      metadata: { ...params },
    })

    // 2. 构建 MCP JSON-RPC 请求
    const codeRequest: McpCodeRequest = {
      jsonrpc: "2.0",
      id: 1,
      method: "tools/call",
      params: {
        name: "get_code_context_exa",  // ⭐ 调用 Exa AI 的 get_code_context_exa 工具
        arguments: {
          query: params.query,
          tokensNum: params.tokensNum || 5000,
        },
      },
    }

    // 3. 超时控制(30秒,比 websearch 稍长)
    const { signal, clearTimeout } = abortAfterAny(30000, ctx.abort)

    try {
      // 4. 直接调用 Exa AI 的 MCP 服务器
      const response = await fetch(`${API_CONFIG.BASE_URL}${API_CONFIG.ENDPOINTS.CONTEXT}`, {
        method: "POST",
        headers: {
          accept: "application/json, text/event-stream",
          "content-type": "application/json",
        },
        body: JSON.stringify(codeRequest),
        signal,
      })

      // 5. 解析 SSE 响应(与 websearch 相同)
      const responseText = await response.text()
      const lines = responseText.split("\n")
      for (const line of lines) {
        if (line.startsWith("data: ")) {
          const data: McpCodeResponse = JSON.parse(line.substring(6))
          if (data.result?.content?.[0]) {
            return {
              output: data.result.content[0].text,
              title: `Code search: ${params.query}`,
              metadata: {},
            }
          }
        }
      }

      return {
        output: "No code snippets or documentation found. Please try a different query...",
        title: `Code search: ${params.query}`,
        metadata: {},
      }
    } catch (error) {
      if (error instanceof Error && error.name === "AbortError") {
        throw new Error("Code search request timed out")
      }
      throw error
    }
  },
})
特点:
- 同样调用
https://mcp.exa.ai/mcp - 调用
get_code_context_exa工具 - 超时 30 秒
- 返回 1000-50000 tokens 的代码上下文
WebFetchTool(网页抓取)
实现位置:packages/opencode/src/tool/webfetch.ts
export const WebFetchTool = Tool.define("webfetch", {
  description: DESCRIPTION,
  parameters: z.object({
    url: z.string().describe("The URL to fetch content from"),
    format: z.enum(["text", "markdown", "html"]).default("markdown"),
    timeout: z.number().optional(),
  }),
  async execute(params, ctx) {
    // 1. URL 验证
    if (!params.url.startsWith("http://") && !params.url.startsWith("https://")) {
      throw new Error("URL must start with http:// or https://")
    }

    // 2. 权限检查
    await ctx.ask({
      permission: "webfetch",
      patterns: [params.url],
      always: ["*"],
      metadata: { ...params },
    })

    // 3. 超时控制(默认 30 秒,最大 120 秒)
    const timeout = Math.min((params.timeout ?? 30) * 1000, 120000)
    const { signal, clearTimeout } = abortAfterAny(timeout, ctx.abort)

    // 4. 构建请求头(模拟浏览器)
    const headers = {
      "User-Agent": "Mozilla/5.0 (Windows NT 10.0; Win64; x64) AppleWebKit/537.36...",
      Accept: acceptHeader,  // 根据 format 参数设置
      "Accept-Language": "en-US,en;q=0.9",
    }

    // 5. 直接 fetch(不依赖第三方服务)
    const initial = await fetch(params.url, { signal, headers })

    // 6. Cloudflare 反爬虫检测处理
    const response =
      initial.status === 403 && initial.headers.get("cf-mitigated") === "challenge"
        ? await fetch(params.url, {
            signal,
            headers: { ...headers, "User-Agent": "opencode" }
          })
        : initial

    // 7. 大小限制检查(5MB)
    const MAX_RESPONSE_SIZE = 5 * 1024 * 1024
    const arrayBuffer = await response.arrayBuffer()
    if (arrayBuffer.byteLength > MAX_RESPONSE_SIZE) {
      throw new Error("Response too large (exceeds 5MB limit)")
    }

    // 8. 内容转换(HTML → Markdown/Text)
    const content = new TextDecoder().decode(arrayBuffer)
    const contentType = response.headers.get("content-type") || ""

    switch (params.format) {
      case "markdown":
        if (contentType.includes("text/html")) {
          return {
            output: convertHTMLToMarkdown(content),  // 使用 TurndownService
            title: `${params.url} (${contentType})`,
            metadata: {},
          }
        }
        return { output: content, title: `${params.url} (${contentType})`, metadata: {} }

      case "text":
        if (contentType.includes("text/html")) {
          return {
            output: await extractTextFromHTML(content),  // 使用 HTMLRewriter
            title: `${params.url} (${contentType})`,
            metadata: {},
          }
        }
        return { output: content, title: `${params.url} (${contentType})`, metadata: {} }

      case "html":
        return { output: content, title: `${params.url} (${contentType})`, metadata: {} }
    }
  },
})
特点:
- 直接使用
fetch,不依赖第三方服务 - 支持 HTML → Markdown/Text 转换
- 处理 Cloudflare 反爬虫
- 限制响应大小为 5MB
内置工具 vs 配置化 MCP 工具对比
| 特性 | 内置工具(硬编码) | 配置化 MCP 工具 |
|---|---|---|
| 供应商地址 | 硬编码在代码中 | 通过配置文件指定 |
| 示例 | websearch → https://mcp.exa.ai |
context7 → 用户配置的 URL |
| 启用条件 | 代码中条件判断 | 配置文件中的 enabled 字段 |
| 认证方式 | 无需配置(可能内置) | 支持 OAuth、Headers 等 |
| 工具命名 | 固定名称(websearch) |
动态命名(serverName_toolName) |
| 代码位置 | src/tool/websearch.ts |
src/mcp/index.ts |
Skills 系统
Skills 系统允许定义可复用的领域指令和工作流,Agent 可按需加载。
Skill 是一个包含领域特定指令的 Markdown 文件(SKILL.md),用于:
- 提供特定任务的详细指导
- 定义工作流程和最佳实践
- 包含相关资源(脚本、模板、参考文档)
- 增强 Agent 在特定领域的表现
Skill 数据结构:
// packages/opencode/src/skill/skill.ts

export const Info = z.object({
  name: z.string(),           // 技能名称(唯一标识符)
  description: z.string(),   // 技能描述(用于工具描述)
  location: z.string(),      // SKILL.md 文件的绝对路径
  content: z.string(),       // Markdown 内容(去除 frontmatter)
})

export type Info = z.infer<typeof Info>
OpenCode 从多个位置自动发现 Skills,优先级从高到低:
// packages/opencode/src/skill/skill.ts

export const state = Instance.state(async () => {
  const skills: Record<string, Info> = {}
  const dirs = new Set<string>()

  // ========== 1. 外部技能目录(兼容 Claude Code)==========
  // 全局目录(~/.claude/skills/, ~/.agents/skills/)
  if (!Flag.OPENCODE_DISABLE_EXTERNAL_SKILLS) {
    for (const dir of [".claude", ".agents"]) {
      const root = path.join(Global.Path.home, dir)
      if (await Filesystem.isDir(root)) {
        await scanExternal(root, "global")  // 扫描 skills/**/SKILL.md
      }
    }

    // 项目级目录(从当前目录向上查找,直到 git worktree)
    for await (const root of Filesystem.up({
      targets: [".claude", ".agents"],
      start: Instance.directory,
      stop: Instance.worktree,
    })) {
      await scanExternal(root, "project")  // 项目级覆盖全局级
    }
  }

  // ========== 2. OpenCode 配置目录 ==========
  // .opencode/skill/ 或 .opencode/skills/
  for (const dir of await Config.directories()) {
    for await (const match of OPENCODE_SKILL_GLOB.scan({
      cwd: dir,
      absolute: true,
      onlyFiles: true,
      followSymlinks: true,
    })) {
      await addSkill(match)
    }
  }

  // ========== 3. 配置的额外路径 ==========
  const config = await Config.get()
  for (const skillPath of config.skills?.paths ?? []) {
    const expanded = skillPath.startsWith("~/")
      ? path.join(os.homedir(), skillPath.slice(2))
      : skillPath
    const resolved = path.isAbsolute(expanded)
      ? expanded
      : path.join(Instance.directory, expanded)

    if (await Filesystem.isDir(resolved)) {
      for await (const match of SKILL_GLOB.scan({
        cwd: resolved,
        absolute: true,
        onlyFiles: true,
        followSymlinks: true,
      })) {
        await addSkill(match)
      }
    }
  }

  // ========== 4. 从 URL 下载的技能 ==========
  for (const url of config.skills?.urls ?? []) {
    const list = await Discovery.pull(url)
    for (const dir of list) {
      dirs.add(dir)
      for await (const match of SKILL_GLOB.scan({
        cwd: dir,
        absolute: true,
        onlyFiles: true,
        followSymlinks: true,
      })) {
        await addSkill(match)
      }
    }
  }

  return { skills, dirs: Array.from(dirs) }
})
SkillTool 实现
工具定义
// packages/opencode/src/tool/skill.ts

export const SkillTool = Tool.define("skill", async (ctx) => {
  // 1. 获取所有可用技能
  const skills = await Skill.all()

  // 2. 根据 Agent 权限过滤技能
  const agent = ctx?.agent
  const accessibleSkills = agent
    ? skills.filter((skill) => {
        const rule = PermissionNext.evaluate("skill", skill.name, agent.permission)
        return rule.action !== "deny"  // 只排除被明确拒绝的技能
      })
    : skills

  // 3. 构建工具描述(包含可用技能列表)
  const description =
    accessibleSkills.length === 0
      ? "Load a specialized skill that provides domain-specific instructions and workflows. No skills are currently available."
      : [
          "Load a specialized skill that provides domain-specific instructions and workflows.",
          "",
          "When you recognize that a task matches one of the available skills listed below, use this tool to load the full skill instructions.",
          "",
          "The skill will inject detailed instructions, workflows, and access to bundled resources (scripts, references, templates) into the conversation context.",
          "",
          'Tool output includes a `<skill_content name="...">` block with the loaded content.',
          "",
          "The following skills provide specialized sets of instructions for particular tasks",
          "Invoke this tool to load a skill when a task matches one of the available skills listed below:",
          "",
          "<available_skills>",
          ...accessibleSkills.flatMap((skill) => [
            `  <skill>`,
            `    <name>${skill.name}</name>`,
            `    <description>${skill.description}</description>`,
            `    <location>${pathToFileURL(skill.location).href}</location>`,
            `  </skill>`,
          ]),
          "</available_skills>",
        ].join("\n")

  // 4. 参数定义
  const examples = accessibleSkills
    .map((skill) => `'${skill.name}'`)
    .slice(0, 3)
    .join(", ")
  const hint = examples.length > 0 ? ` (e.g., ${examples}, ...)` : ""

  const parameters = z.object({
    name: z.string().describe(`The name of the skill from available_skills${hint}`),
  })

  return {
    description,
    parameters,
    async execute(params, ctx) {
      // 执行逻辑见下一节
    },
  }
})
技能加载执行逻辑
async execute(params: z.infer<typeof parameters>, ctx) {
  // 1. 获取技能
  const skill = await Skill.get(params.name)

  if (!skill) {
    const available = await Skill.all().then((x) => Object.keys(x).join(", "))
    throw new Error(`Skill "${params.name}" not found. Available skills: ${available || "none"}`)
  }

  // 2. 权限检查
  await ctx.ask({
    permission: "skill",
    patterns: [params.name],
    always: [params.name],  // 默认总是允许
    metadata: {},
  })

  // 3. 获取技能目录中的文件列表(用于上下文)
  const dir = path.dirname(skill.location)
  const base = pathToFileURL(dir).href

  const limit = 10
  const files = await iife(async () => {
    const arr = []
    // 使用 ripgrep 扫描目录中的文件
    for await (const file of Ripgrep.files({
      cwd: dir,
      follow: false,
      hidden: true,
      signal: ctx.abort,
    })) {
      if (file.includes("SKILL.md")) {
        continue  // 跳过 SKILL.md 本身
      }
      arr.push(path.resolve(dir, file))
      if (arr.length >= limit) {
        break  // 限制最多 10 个文件
      }
    }
    return arr
  }).then((f) => f.map((file) => `<file>${file}</file>`).join("\n"))

  // 4. 返回技能内容(格式化输出)
  return {
    title: `Loaded skill: ${skill.name}`,
    output: [
      `<skill_content name="${skill.name}">`,
      `# Skill: ${skill.name}`,
      "",
      skill.content.trim(),  // Markdown 内容
      "",
      `Base directory for this skill: ${base}`,
      "Relative paths in this skill (e.g., scripts/, reference/) are relative to this base directory.",
      "Note: file list is sampled.",
      "",
      "<skill_files>",
      files,  // 文件列表(最多 10 个)
      "</skill_files>",
      "</skill_content>",
    ].join("\n"),
    metadata: {
      name: skill.name,
      dir,
    },
  }
}
输出格式说明
当 Agent 调用 skill 工具时,会收到以下格式的输出:
<skill_content name="bun-file-io">
# Skill: bun-file-io

## Use this when
...

## Bun file APIs
...

Base directory for this skill: file:///path/to/.opencode/skill/bun-file-io/
Relative paths in this skill (e.g., scripts/, reference/) are relative to this base directory.
Note: file list is sampled.

<skill_files>
<file>/path/to/.opencode/skill/bun-file-io/scripts/example.ts</file>
<file>/path/to/.opencode/skill/bun-file-io/templates/component.ts</file>
...
</skill_files>
</skill_content>
Skill Tool 运行机制
Skill 本质:它就是一个普通 Tool
SkillTool与read、write、bash等工具完全平级- 通过统一的 ToolRegistry 注册
- 通过统一的
resolveTools()初始化 - 通过统一的工具调用机制执行
👉 Skill 并不是特殊机制,而是被“工具化”的能力加载器。
1️⃣ 会话开始时
系统执行:
resolveTools()
流程:
- 加载所有内置工具(包括 SkillTool)
- 初始化每个工具
- 包装 execute(加入权限检查、插件钩子)
- 将完整工具列表发送给 LLM
最终效果:
LLM 在第一轮对话时,就能看到 skill 工具及其描述。
2️⃣ SkillTool 的关键特性:动态描述生成
SkillTool 会:
- 扫描当前可用技能
- 根据 Agent 权限过滤
- 动态生成工具描述
- 把
<available_skills>列表嵌入到工具说明中
LLM 看到的不是固定描述,而是:
Tool: skill
Description:
Load a specialized skill...

<available_skills>
  <skill>
    <name>bun-file-io</name>
    <description>...</description>
  </skill>
  <skill>
    <name>react-patterns</name>
    <description>...</description>
  </skill>
</available_skills>
👉 这一步非常关键:
技能列表是“提示词的一部分”。
LLM 何时会调用 Skill?
LLM 会在以下情况触发:
1️⃣ 任务语义匹配技能描述
- 用户说“读取文件”
- LLM 发现
bun-file-io描述匹配 - 触发:
skill(name="bun-file-io")
2️⃣ 需要领域知识
- 用户说“创建 React 组件”
- LLM 发现
react-patterns有帮助 - 触发调用
3️⃣ 工具描述中的引导语
描述里明确提示:
When you recognize that a task matches…
这会增强调用概率。
Skill Tool 执行后发生什么?
调用 skill(name="xxx") 后:
执行流程
- 获取技能定义
- 权限检查
- 读取
SKILL.md - 扫描技能目录文件(最多 10 个)
- 返回格式化内容
返回内容类似:
<skill_content>
  SKILL.md 内容
  基础目录说明
  文件列表
</skill_content>
关键机制:技能内容如何生效?
SkillTool 的返回值会:
- 被标记为
tool-result - 注入到对话历史
- 成为下一轮 LLM 可见上下文
对话变成:
User: 帮我读取文件
Assistant: 调用 skill
Tool: <skill_content>...</skill_content>
Assistant: 根据 bun-file-io 技能指导...
👉 技能内容不是“隐式生效”,而是显式注入上下文。
会话开始
   ↓
LLM 收到工具列表(含 skill + 技能列表)
   ↓
用户发起任务
   ↓
LLM 语义匹配技能
   ↓
调用 skill(name=xxx)
   ↓
读取 SKILL.md
   ↓
返回 skill_content
   ↓
skill_content 注入对话上下文
   ↓
LLM 在下一轮基于技能内容执行任务
SkillTool 本质是一个“可被 LLM 触发的动态 Prompt 加载器”。
它通过工具调用机制:
- 让 LLM 自主判断是否需要加载某个技能
- 将技能内容作为 Tool Result 注入上下文
- 从而实现“按需知识增强”的效果
工具启用逻辑
// packages/opencode/src/tool/registry.ts

export async function tools(model, agent?) {
  const tools = await all()
  return tools
    .filter((t) => {
      // ⭐ websearch/codesearch 的条件启用
      if (t.id === "codesearch" || t.id === "websearch") {
        // 仅对 OpenCode 用户或启用标志的用户开放
        return model.providerID === "opencode" || Flag.OPENCODE_ENABLE_EXA
      }

      // ⭐ 根据模型选择编辑工具
      const usePatch =
        model.modelID.includes("gpt-") &&
        !model.modelID.includes("oss") &&
        !model.modelID.includes("gpt-4")

      if (t.id === "apply_patch") return usePatch      // GPT 模型使用补丁模式
      if (t.id === "edit" || t.id === "write") return !usePatch  // 其他模型使用编辑模式

      return true
    })
    .map(async (t) => ({
      id: t.id,
      ...(await t.init({ agent })),
    }))
}
说明:
websearch和codesearch仅对 OpenCode 用户或启用OPENCODE_ENABLE_EXA的用户开放- GPT 模型(非 GPT-4)使用
apply_patch,其他模型使用edit/write
结语:默认已很强,源码更值得一读
写到这里,其实可以给《CC 被封号?也许你可以试试 OpenCode》做一个阶段性的收束了。
如果你的目标只是稳定使用一个可替代 Claude Code 的 AI 编程工具,那么——
- OpenCode 的官方文档已经足够完整
- 默认配置已经非常能打
- 多模型接入、权限控制、TUI 体验、工具系统都已经打磨得很成熟
绝大多数场景下,你甚至不需要折腾复杂配置,按默认流程初始化、配置好 LLM 提供方,就可以直接进入高效使用阶段。
但真正让我觉得 OpenCode 有价值的,不只是“可用”,而是——
它的源码,对我们自己构建 Agent 有极大的启发意义。
很多人都听说过 Skill 概念:
- Skill 是一种领域知识增强机制
- Skill 是一种结构化 Prompt
- Skill 可以做工作流封装
但问题是:
Skill 到底应该怎么和模型交互?
Skill 应该如何被触发?
Skill 如何避免一开始就占满上下文?
读完 OpenCode 的实现你会发现一个非常优雅的答案:
把 Skill 做成一个 Tool。
让模型:
- 自己看到可用技能列表
- 根据任务语义决定是否调用
- 通过 Tool Call 动态加载技能内容
- 再将技能内容注入上下文
这一设计极其干净:
- 没有魔法机制
- 没有隐式规则
- 完全基于标准 Tool Calling
这对我们自己做 Agent 系统是非常重要的启发。
OpenCode 还内置集成了多个 MCP 生态服务,例如:
- Smithery
- Exa 的 MCP 服务(https://exa.ai/mcp)
这意味着什么?
意味着你在构建自己的 Agent 时:
- 不必什么都从零实现
- 不必自己写一整套外部能力桥接层
- 可以直接接入成熟 MCP 服务增强能力
例如:
- 更强的搜索
- 更强的知识检索
- 外部数据整合
MCP 在 OpenCode 里并不是“实验性玩具”,而是被完整纳入工具系统与权限体系。
这对我们理解“企业级 Agent 架构”非常关键。
如果只看使用层面,它是:
一个稳定、开源、多模型、终端优先的 AI 编程工具。
但如果你站在“架构设计者”的视角去看,它是:
- 一个完整的 Agent 构建范式样本
- 一个 Tool-Driven Agent 的工程化实现
- 一个 Skill 工具化的最佳实践案例
- 一个 MCP 原生集成的落地模板
- 一个权限系统与 Agent 结合的参考架构
很多人停留在“AI 会写代码”这一层。
但 OpenCode 展示的是:
如何把 AI 编程能力做成一个可扩展、可控制、可部署、可工程化的系统。
如果你只是想找一个 Claude Code 的替代品——
OpenCode 已经够用了。
如果你想学会如何构建自己的 Agent 系统——
OpenCode 的源码,值得你认真读一遍。
或许你会像我一样,在读到 Skill 被做成 Tool 的那一刻突然明白:
原来 Agent 的能力增强,不一定是复杂框架,而可以是优雅的设计。
这,才是它最有价值的地方。

小龙虾开发者社区是 CSDN 旗下专注 OpenClaw 生态的官方阵地,聚焦技能开发、插件实践与部署教程,为开发者提供可直接落地的方案、工具与交流平台,助力高效构建与落地 AI 应用
更多推荐


 10
10 0
0- 0


 已为社区贡献5条内容

所有评论(0)