
【Python图像处理篇】opencv中的仿射变换和透视变换


仿射变换可以将矩形图片映射为平行四边形,
透视变换可以将矩形图片映射为任意四边形。
文章目录
前言
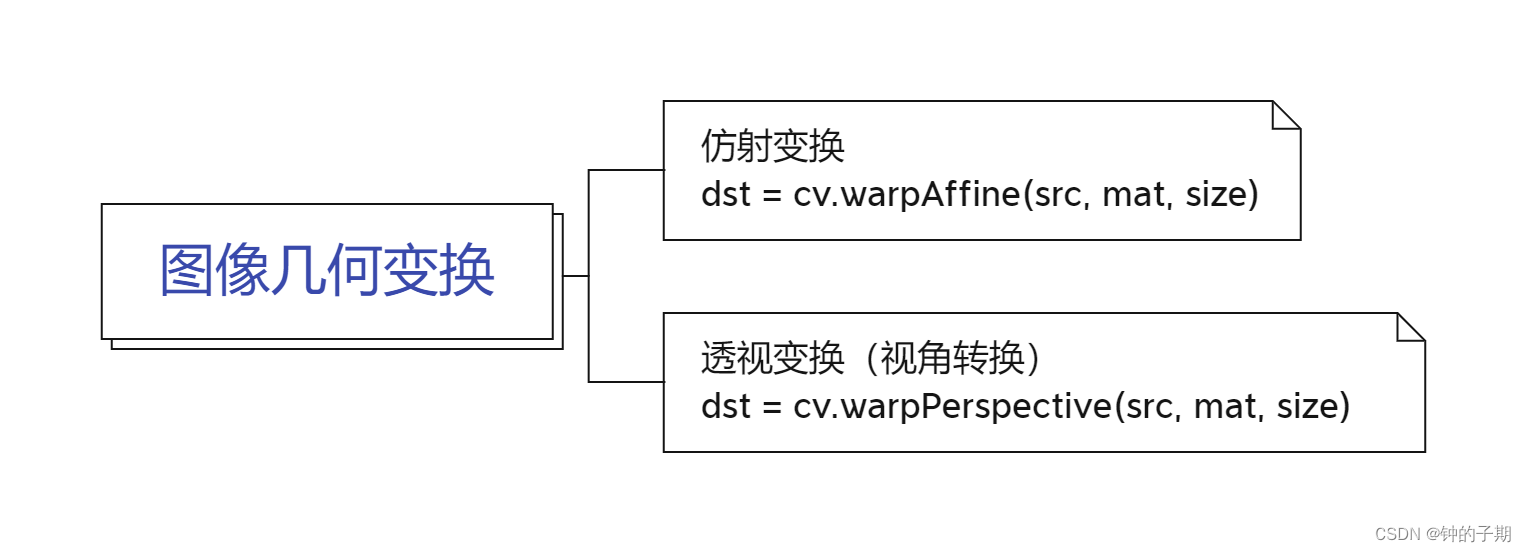
opencv提供了两个变换函数,cv2.warpAffine和cv2.warpPerspective,
使用这两个函数可以实现所有类型的变换。
cv2.warpAffine 接收的参数2x3的变换矩阵;
而cv2.warpPerspective 接收的3x3的变换矩阵。
一、仿射变换 cv2.warpAffine()
1.1 函数说明
img_out = cv.warpAffine(img, mat, size)
@desc:
img_out -- 输出图像
img -- 原始图像
mat -- 2×3的变换矩阵
size -- 变换后图像尺寸
- 仿射变换(Affine Transformation) 包括平移(transform)、旋转(rotate)、缩放(scale)、剪切(shear)。
- 本质上是另外两种简单变换的叠加:一个是线性变换,一个是平移变换。
- 该变换能保证图像的平直性和平行性,原来的直线仿射变换后还是直线,原来的平行线经过仿射变换之后还是平行线。
- 进行哪种形式的仿射变换完全取决于变换矩阵mat。
1.2 仿射变换实例
变换矩阵mat不同,变换类型不同
仿射变换矩阵mat的三种设定方式:
- 人为给定
- 使用函数 cv2.getRotationMatrix2D()
- 使用函数 cv2.getAffineTransform(src, dst)
1.2.1 平移变换
平移矩阵 mat_shift 为人为给定。
import cv2 as cv
import numpy as np
import matplotlib.pyplot as plt
# ----------------------------------------------------#
# 读取图像
# ----------------------------------------------------#
image_original = cv.imread("LenaRGB.bmp")
H, W, _ = image_original.shape
cv.imshow("image_original", image_original)
cv.waitKey(delay=0)
# ----------------------------------------------------#
# 平移变换
# mat = [[1,0,dx],
# [0,1,dy]]
# ----------------------------------------------------#
dx = 50
dy = 100
mat_shift = np.float32([[1, 0, dx],
[0, 1, dy]]) # 构造平移矩阵
image_shift = cv.warpAffine(image_original, mat_shift, (W, H))
cv.imshow("image_shift", image_shift)
cv.waitKey(delay=0)
cv.destroyAllWindows()

1.2.2 旋转变换
旋转矩阵 mat_rotate 使用函数 cv2.getRotationMatrix2D() 获得。
import cv2 as cv
import numpy as np
import matplotlib.pyplot as plt
# ----------------------------------------------------#
# 读取图像
# ----------------------------------------------------#
image_original = cv.imread("LenaRGB.bmp")
H, W, _ = image_original.shape
cv.imshow("image_original", image_original)
cv.waitKey(delay=0)
# ----------------------------------------------------#
# 旋转变换
# 对于图像的变换,OpenCV 提供了 getRotationMatrix2D() 函数来得到旋转矩阵
# 该函数包含三个参数,第一个参数是旋转中心,第二个参数是旋转角度,第三个参数是缩放比例
# mat = cv2.getRotationMatrix2D(center, angle, scale)
# ----------------------------------------------------#
center = (256, 256)
angle = 45
scale = 1
mat_rotate = cv.getRotationMatrix2D(center, angle, scale)
image_rotate = cv.warpAffine(image_original, mat_rotate, (W, H))
cv.imshow("image_rotate", image_rotate)
cv.waitKey(delay=0)
cv.destroyAllWindows()

1.2.3 一般仿射变换
仿射矩阵 mat_affine 使用函数cv2.getAffineTransform() 获得。
import cv2 as cv
import numpy as np
import matplotlib.pyplot as plt
# ----------------------------------------------------#
# 读取图像
# ----------------------------------------------------#
image_original = cv.imread("LenaRGB.bmp")
H, W, _ = image_original.shape
cv.imshow("image_original", image_original)
cv.waitKey(delay=0)
# ----------------------------------------------------#
# 仿射变换
# 变换矩阵mat可通过cv.getAffineTransfrom(points1, points2)函数获得
# 变换矩阵的获取需要至少三组变换前后对应的点坐标,设取原图上的三个点组成矩阵points1,变换后的三个点组成的矩阵points2
# mat_affine = cv.getAffineTransform(points1, points2)
# image_affine = cv.warpAffine(image_original, mat_affine, (image_original.shape[1], image_original.shape[0]))
# ----------------------------------------------------#
points1 = np.float32([[30, 30], [100, 40], [40, 100]])
points2 = np.float32([[60, 60], [200, 80], [80, 200]])
mat_affine = cv.getAffineTransform(points1, points2)
image_affine = cv.warpAffine(image_original, mat_affine, (W, H))
cv.imshow("image_affine", image_affine)
cv.waitKey(delay=0)
cv.destroyAllWindows()

1.3 仿射变换总结
- 在仿射变换中,原图中所有的平行线,在结果图像中仍然保持平行。
为了得到仿射变换矩阵,需要从原图像中找到三个点以及在输出图像中的对应点。然后cv2.getAffineTransform()函数会创建一个2x3的矩阵,即为仿射变换矩阵。
最后将矩阵传入函数cv2.warpAffine()对图像进行仿射变换。 - 仿射变换是一种二维坐标到二维坐标之间的线性变换,它保持了二维图形的平直性(直线经过变换之后依然是直线)和平行性(二维图形之间的相对位置关系保持不变,平行线依然是平行线,且直线上点的位置顺序不变)。
- 任意的仿射变换都能表示为乘一个矩阵(线性变换),再加上一个向量(平移)的形式。
二、透视变换 cv2.warpPerspective()
2.1 函数说明
img_out = cv.warpPerspective(img, mat, size)
@desc:
img_out -- 输出图像
img -- 原始图像
mat -- 3×3的变换矩阵
size -- 变换后图像尺寸
- 透视变换(Perspective Transformation) 也叫视角转换,是将图片投影到一个新的视平面,也称作投影映射。顾名思义,将图片从一个视角转换到另一个视角。
- 该变换能保证图像的平直性,不保证平行性,透视变换可保持直线不变形,但是平行线可能不再平行。
2.2 透视变换实例
透视变换矩阵 mat_perspective 使用函数 cv.getPerspectiveTransform() 获得。
import cv2 as cv
import numpy as np
import matplotlib.pyplot as plt
# ----------------------------------------------------#
# 读取图像
# ----------------------------------------------------#
image_original = cv.imread("LenaRGB.bmp")
H, W, _ = image_original.shape
cv.imshow("image_original", image_original)
cv.waitKey(delay=0)
# ----------------------------------------------------#
# 透视变换
# 变换矩阵mat可通过cv.getPerspectiveTransform()函数获得,原理和cv.getAffineTransform()相同
# 透视变换至少需要四组变换前后对应的点坐标
# 设取原图上的四个点组成矩阵points1,变换后的四个点组成的矩阵points2
# mat_perspective = cv.getPerspectiveTransform(points1, points2)
# image_perspective = cv.warpPerspective(image_original, mat_perspective, (image_original.shape[1], image_original.shape[0]))
# ----------------------------------------------------#
points1 = np.float32([[30, 30], [10, 40], [40, 10], [5, 15]])
points2 = np.float32([[0, 0], [400, 0], [0, 400], [400, 400]])
mat_perspective = cv.getPerspectiveTransform(points1, points2)
image_perspective = cv.warpPerspective(image_original, mat_perspective,
(image_original.shape[1], image_original.shape[0]))
cv.imshow("image_perspective", image_perspective)
cv.waitKey(delay=0)
cv.destroyAllWindows()

2.3 透视变换总结
- 对于视角变换,需要一个3x3的变换矩阵。
为了得到视角变换(透视变换)矩阵,需要在输入图像上找四个点,以及在输出图像上对应的位置。这四个点中的任意三个都不能共线。
然后函数cv2.getPerspectiveTransform()创建一个3x3的矩阵,即为视角变换矩阵。
最后将矩阵传入函数cv2.warpPerspective对图像进行透视变换。 - 视角变换是二维到三维,再到另一个二维视平面的映射。
- 相对于仿射变换,视角变换灵活性更高,将一个四边形矩形区域映射到另一个四边形区域(不一定是平行四边形),不只是线性变换,但也是通过矩阵乘法实现的,使用的是3x3的矩阵,矩阵前两行和仿射矩阵相同,也实现了线性变换和平移,第三行用于实现透视变换。
三、单应性变换cv2.findHomography()
参考单应性cv.findHomography 相关的:
OpenCV中的「透视变换 / 投影变换 / 单应性」—cv.warpPerspective、cv.findHomography
单应性矩阵可以当作透视变换中的透视变换矩阵mat 。
四、总结
-
仿射变换可以将矩形图片映射为平行四边形,
透视变换可以将矩形图片映射为任意四边形。 - 仿射变换是透视变换的一种特殊形式,它是把二维转到三维,变换后在映射回之前的二维空间,而不是另一个二维空间。
- 仿射变换至少需要三个对应的点坐标,透视变换至少需要四个。
参考链接:
cv2.warpAffine、cv2.warpPerspective
cv2.getPerspectiveTransform()与cv2.warpPerspective()详解
python之详细图像仿射变换讲解(图像平移、旋转、缩放、翻转)
透视变换(Perspective Transformation)★

旨在为数千万中国开发者提供一个无缝且高效的云端环境,以支持学习、使用和贡献开源项目。
更多推荐


 24
24 0
0- 0


 已为社区贡献2条内容

所有评论(0)