
【Amazon】基于AWS云实例(CentOS 7.9系统)使用kubeadm方式搭建部署Kubernetes集群1.25.4版本
本文的主要目的在于介绍如何使用kubeadm在AWS云实例上部署Kubernetes集群1.25.4版本。通过本文的阅读,读者将了解如何规划并准备CentOS 7.9系统来运行Kubernetes集群,掌握kubeadm命令的使用方法,并熟悉在AWS云实例上部署和配置Kubernetes集群的全过程。
文章目录
前言
在这个数字化快速发展的时代,云计算已经成为了企业和个人实现快速扩展和高效运营的关键手段。其中,AWS云实例由于其强大的功能和灵活性,已经成为众多用户的首选。而Kubernetes作为容器编排的领导者,能帮助用户轻松管理和部署容器化应用。本文将详细介绍如何基于AWS云实例(CentOS 7.9系统)使用kubeadm方式搭建部署Kubernetes集群1.25.4版本,帮助读者深入了解相关概念和操作方法。
Kubernetes是一个开源的容器编排平台,它能够自动化容器的部署、扩展、管理和升级。kubeadm是Kubernetes的一个核心组件,它可以帮助我们在物理机或虚拟机上快速搭建一个Kubernetes集群。而AWS云实例则是一种在云上运行虚拟机的方式,用户可以根据需求选择不同配置的实例,以满足各种工作负载的需求。
本文的主要目的在于介绍如何使用kubeadm在AWS云实例上部署Kubernetes集群1.25.4版本。通过本文的阅读,读者将了解如何规划并准备CentOS 7.9系统来运行Kubernetes集群,掌握kubeadm命令的使用方法,并熟悉在AWS云实例上部署和配置Kubernetes集群的全过程。
要成功搭建一个高效的Kubernetes集群,需要综合考虑多个方面,包括硬件资源、网络配置、存储选择、安全性等。而使用AWS云实例可以为我们提供一种快速、灵活且可靠的方式来创建和管理Kubernetes集群。在实际应用中,Kubernetes集群可以帮助企业实现应用的高可用性、可扩展性和自动化管理,从而降低运营成本并提高工作效率。
实验架构介绍
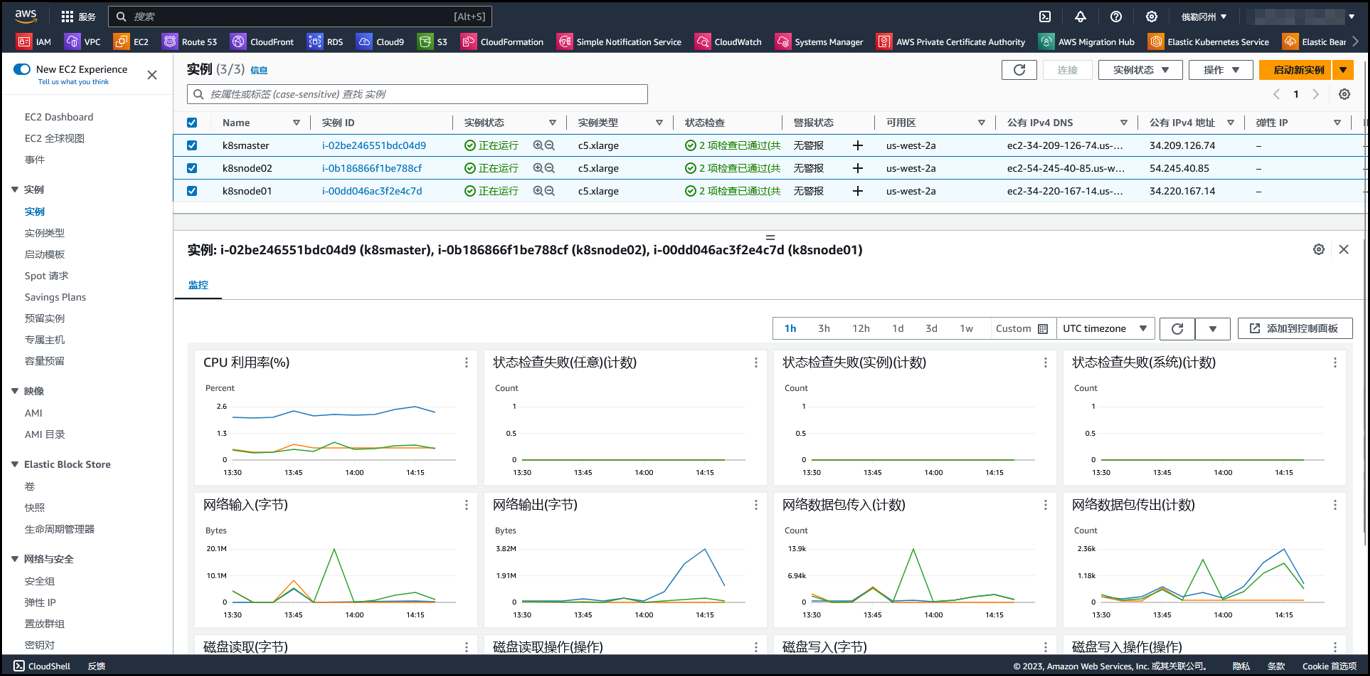
本次实验将采用三台云主机实例,其中一个作为master管理节点,另外两台作为node工作节点,来搭建部署完成kubernetes集群。
| 云主机名称 | CPU核数 | 内存大小GB | 磁盘大小GB | OS系统版本 |
|---|---|---|---|---|
| k8smaster | 4 | 8 | 200 | CentOS 7.9 |
| k8snode01 | 4 | 8 | 200 | CentOS 7.9 |
| k8snode02 | 4 | 8 | 200 | CentOS 7.9 |
K8S集群部署方式说明
本实验采用kubeadm工具搭建部署Kubernetes集群。
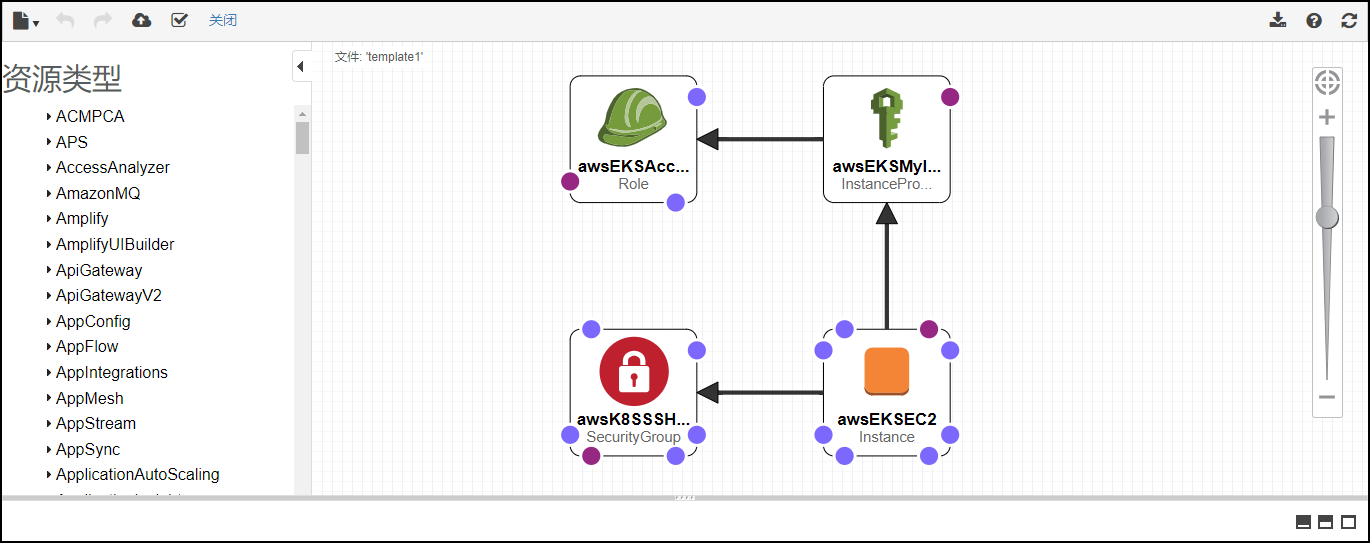
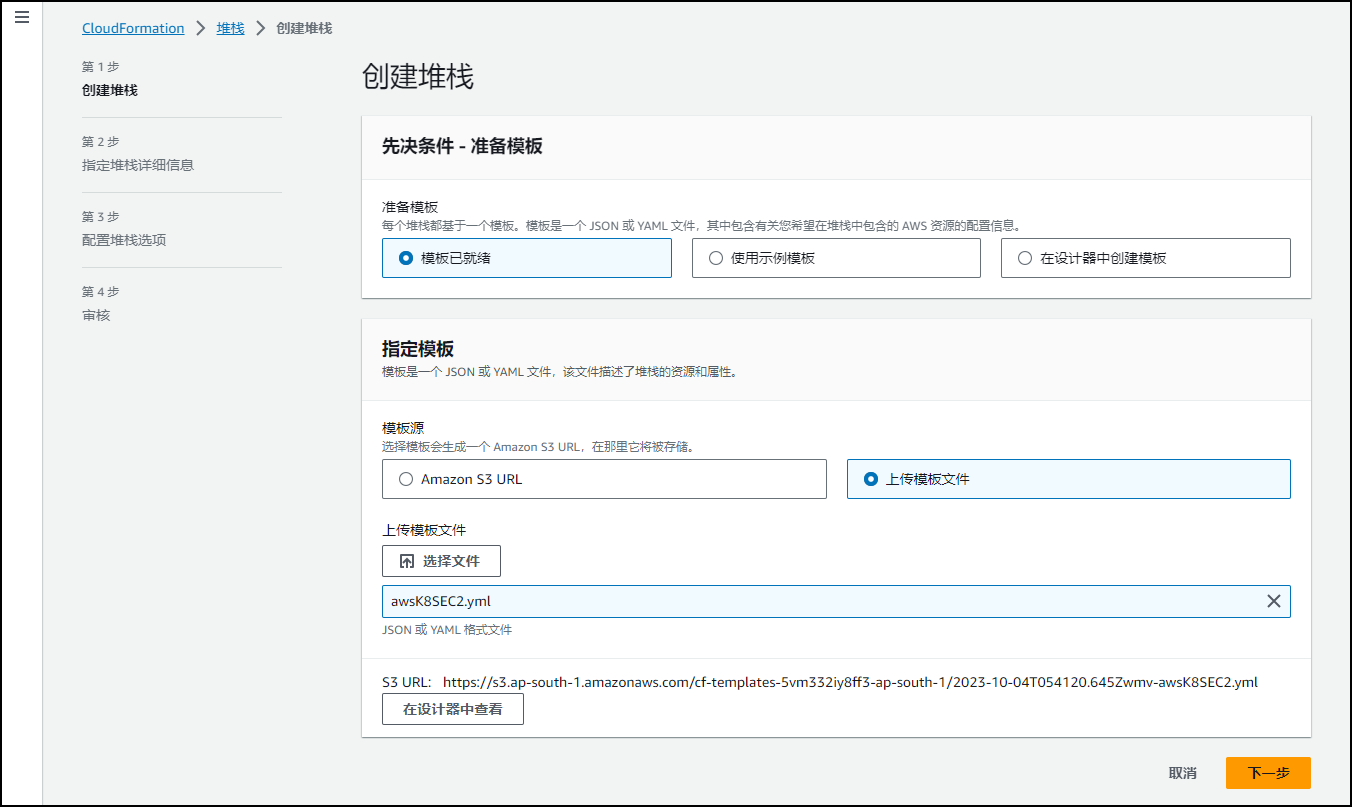
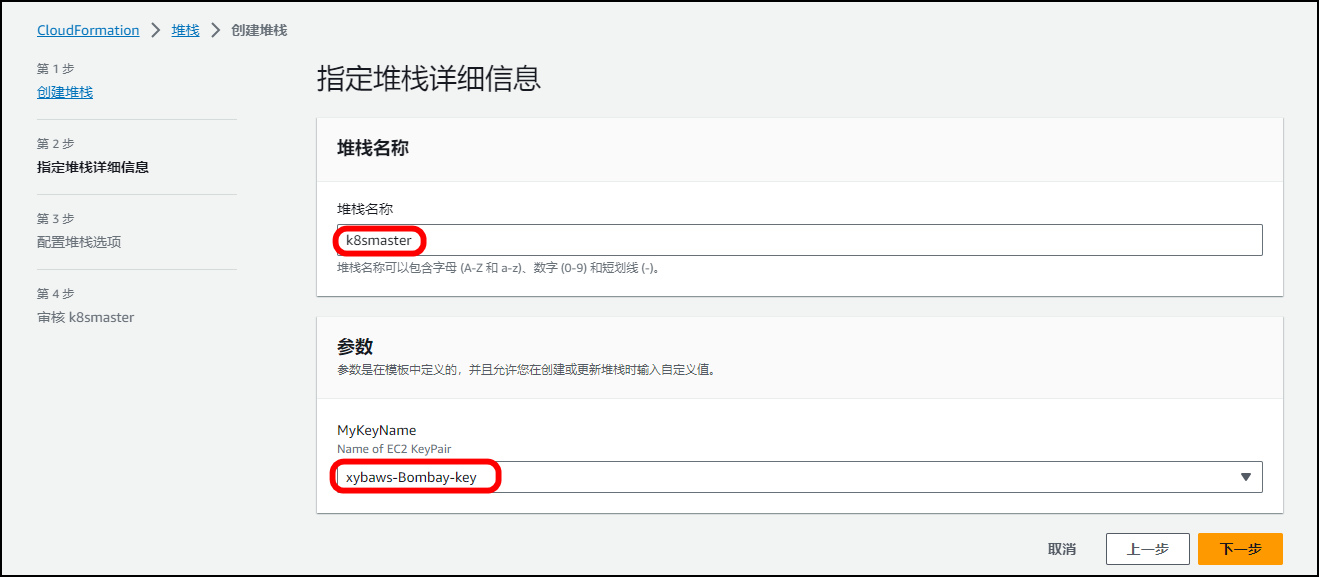
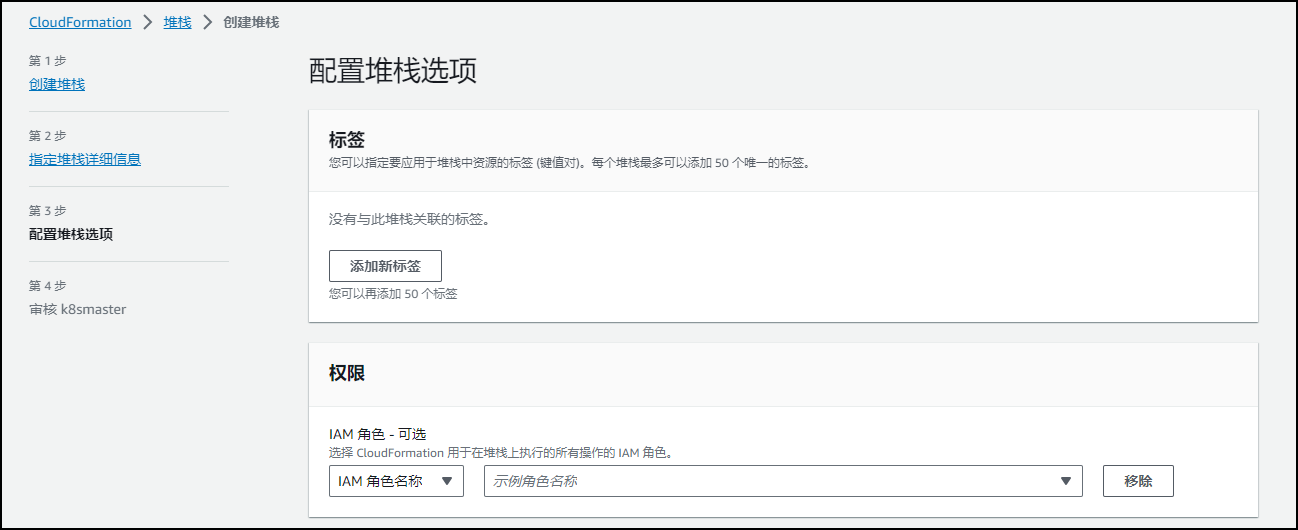
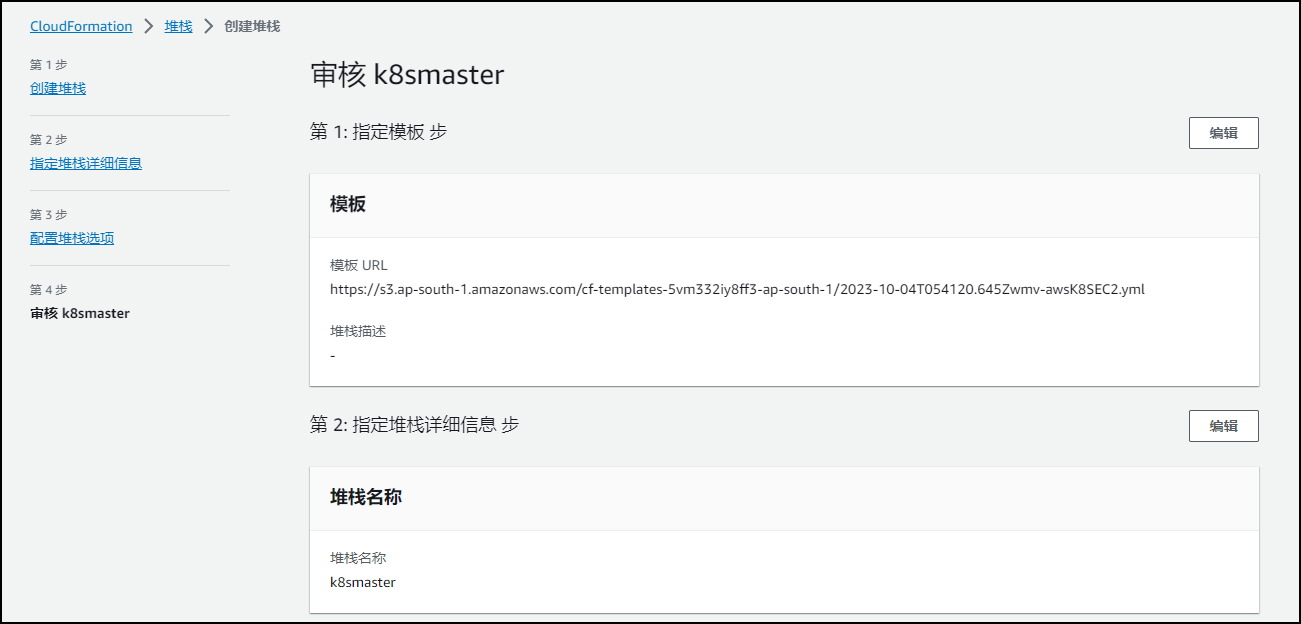
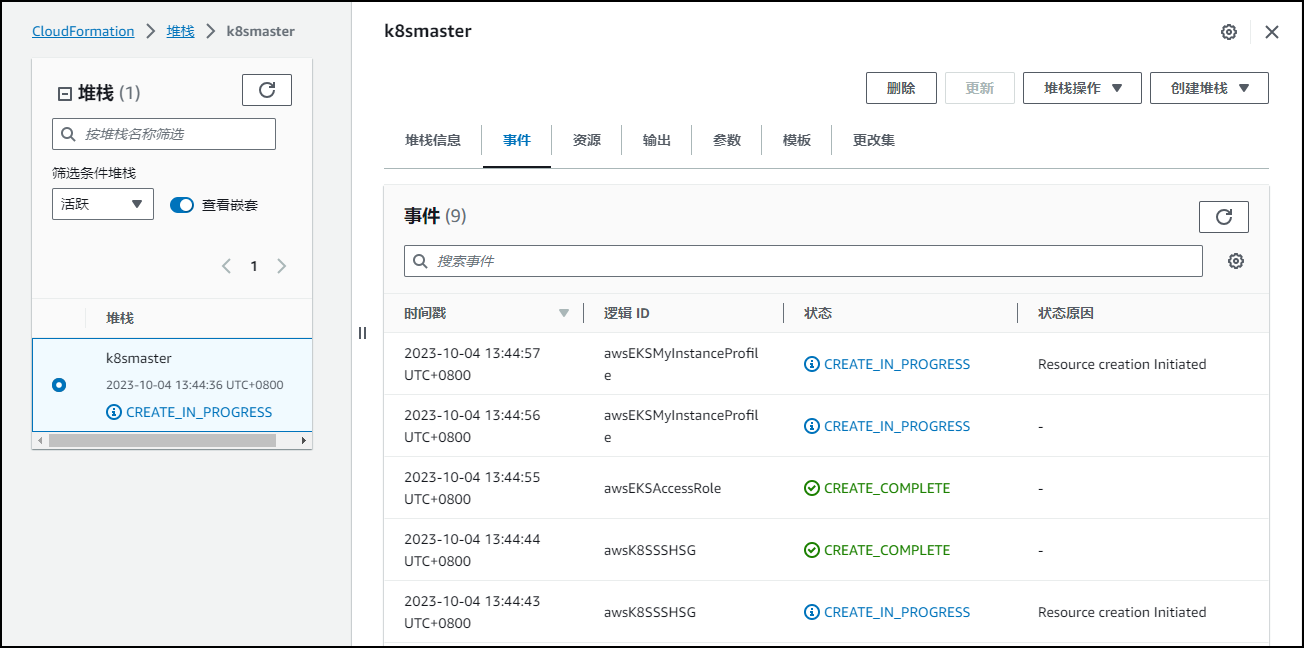
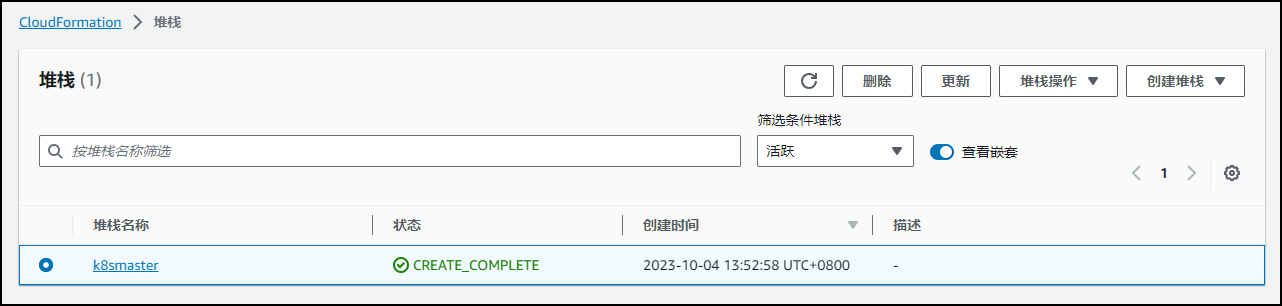
使用CloudFormation部署EC2实例

集群环境准备
修改主机名并配置域名解析(ALL节点)
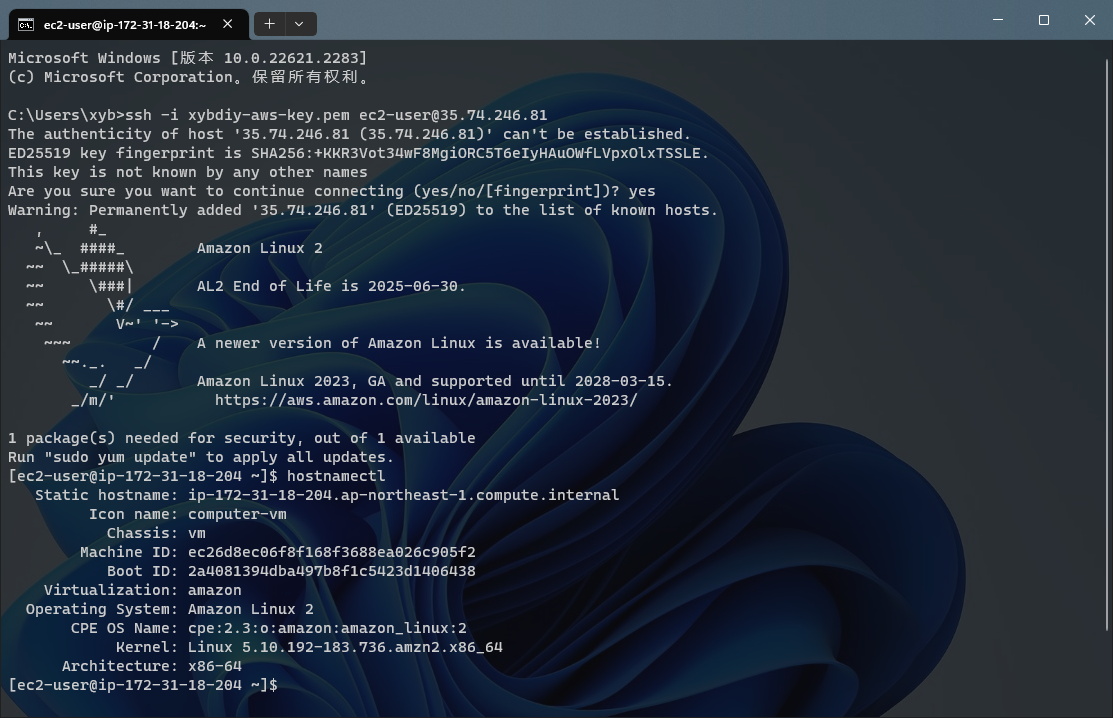
[root@ip-172-31-18-204 ~]# hostname
ip-172-31-18-204.ap-northeast-1.compute.internal
[root@ip-172-31-18-204 ~]# hostnamectl set-hostname master
[root@ip-172-31-18-204 ~]#
[root@ip-172-31-18-204 ~]# bash
[root@master ~]# hostname
master
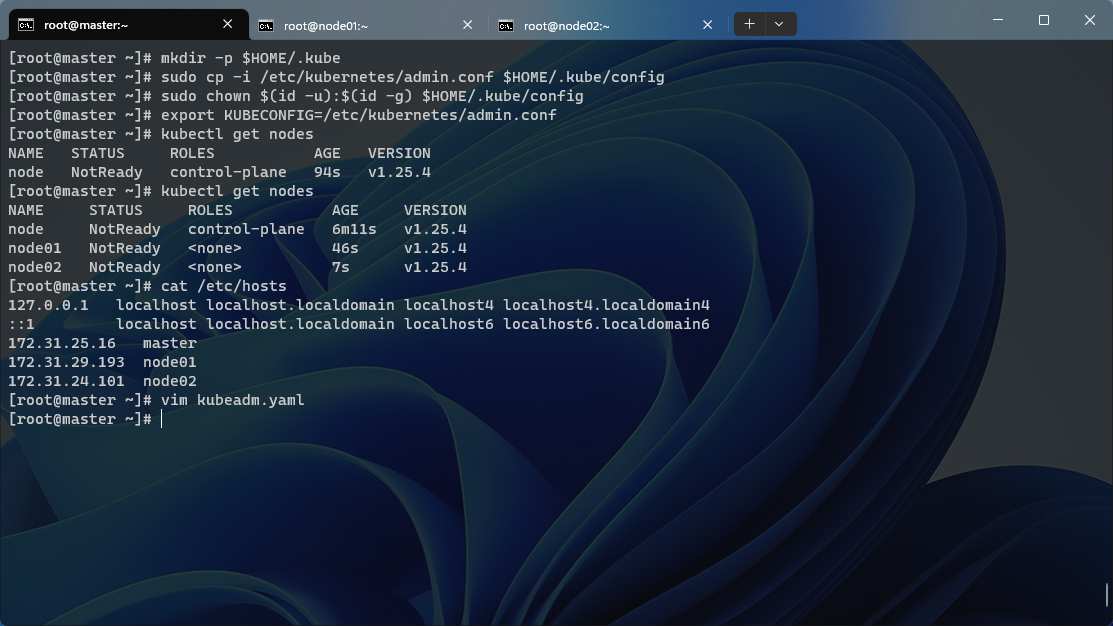
[root@master ~]# cat /etc/hosts
127.0.0.1 localhost localhost.localdomain localhost4 localhost4.localdomain4
::1 localhost6 localhost6.localdomain6
172.31.25.16 master
172.31.25.17 node01
172.31.25.18 node02
禁用防火墙
systemctl stop firewalld
systemctl disable firewalld
禁用SELinux
setenforce 0
getenforce
加载br_netfilter模块
modprobe br_netfilter
PS:最好将上面的命令设置成开机启动,因为重启后模块失效,下面是开机自动加载模块的方式,在 etc/rc.d/rc.local 文件末尾添加如下脚本内容:
for file in /etc/sysconfig/modules/*.modules ; do
[ -x $file ] && $file
done
然后在 /etc/sysconfig/modules/ 目录下新建如下文件:
mkdir -p /etc/sysconfig/modules/
vim /etc/sysconfig/modules/br_netfilter.modules
modprobe br_netfilter
增加权限
chmod 755 /etc/sysconfig/modules/br_netfilter.modules
重启后,模块就可以自动加载
[root@master ~]# lsmod | grep br_netfilter
br_netfilter           32768  0
bridge                262144  1 br_netfilter
创建 /etc/sysctl.d/k8s.conf 文件,添加如下内容:
net.bridge.bridge-nf-call-ip6tables = 1
net.bridge.bridge-nf-call-iptables = 1
net.ipv4.ip_forward = 1
# 下面的内核参数可以解决ipvs模式下长连接空闲超时的问题
net.ipv4.tcp_keepalive_intvl = 30
net.ipv4.tcp_keepalive_probes = 10
net.ipv4.tcp_keepalive_time = 600
执行此命令,使其生效
[root@master ~]# sysctl -p /etc/sysctl.d/k8s.conf
net.bridge.bridge-nf-call-ip6tables = 1
net.bridge.bridge-nf-call-iptables = 1
net.ipv4.ip_forward = 1
net.ipv4.tcp_keepalive_intvl = 30
net.ipv4.tcp_keepalive_probes = 10
net.ipv4.tcp_keepalive_time = 600
安装ipvs
cat > /etc/sysconfig/modules/ipvs.modules <<EOF
#!/bin/bash
modprobe -- ip_vs
modprobe -- ip_vs_rr
modprobe -- ip_vs_wrr
modprobe -- ip_vs_sh
modprobe -- nf_conntrack_ipv4
EOF

chmod 755 /etc/sysconfig/modules/ipvs.modules && bash
/etc/sysconfig/modules/ipvs.modules && lsmod | grep -e ip_vs -e nf_conntrack_ipv4
上面脚本创建了 /etc/sysconfig/modules/ipvs.modules 文件,保证在节点重启后能自动加载所需模块。使用lsmod | grep -e ip_vs -e nf_conntrack_ipv4 命令查看是否已经正确加载所需的内核模块。
安装 ipset 软件包
为了便于查看 ipvs 的代理规则,安装管理工具ipvsadm
yum install -y ipset
yum install -y ipvsadm
同步服务器时间
使用 chrony 来进行时间同步
yum install -y chrony
systemctl enable chronyd
systemctl start chronyd

chronyc sources

date
关闭swap分区
swappoff -a
修改 /etc/fstab 文件,注释掉 SWAP 的自动挂载,使用 free -m 确认 swap 已经关闭。swappiness 参数调整,修改 /etc/sysctl.d/k8s.conf 添加下面一行
vm.swappiness=0
执行 sysctl -p /etc/sysctl.d/k8s.conf 使修改生效。
安装Containerd
首先需要在节点上安装 seccomp 依赖
[root@master ~]# rpm -qa | grep libseccomp
libseccomp-2.4.1-1.amzn2.x86_64

[root@master ~]# wget http://rpmfind.net/linux/centos/8-stream/BaseOS/x86_64/os/Packages/libseccomp-2.5.1-1.el8.x86_64.rpm

[root@master ~]# yum remove libseccomp-2.3.1-4.el7.x86_64

[root@master ~]# rpm -ivh libseccomp-2.5.1-1.el8.x86_64.rpm

[root@master ~]# rpm -qa | grep libseccomp
libseccomp-2.5.1-1.el8.x86_64
由于 Containerd 需要依赖底层的 runc 工具,所以需要先安装 runc,不过 Containerd 提供了一个包含相关依赖的压缩包 cri-containerd-cni- V E R S I O N . {VERSION}. VERSION.{OS}-${ARCH}.tar.gz ,可以直接使用这个包来进行安装,不然可能因为 runc 版本问题导致不兼容。
注意:注意区分ARM架构和x86_64架构得包得区别,避免安装上,出现兼容报错问题。
# ARM架构
[root@master ~]# wget https://github.com/containerd/containerd/releases/download/v1.6.24/cri-containerd-1.6.24-linux-arm64.tar.gz

# x86_64架构
[root@master ~]# wget https://github.com/containerd/containerd/releases/download/v1.6.24/cri-containerd-1.6.24-linux-amd64.tar.gz
解压压缩包到系统的各个目录中
[root@master ~]# tar -C / -xzf cri-containerd-1.6.24-linux-amd64.tar.gz
将 /usr/local/bin 和 /usr/local/sbin 追加到 PATH 环境变量中
export PATH="/usr/local/bin:/usr/local/sbin:$PATH"

[root@master ~]# echo $PATH
/usr/local/bin:/usr/local/sbin:/usr/local/sbin:/sbin:/bin:/usr/sbin:/usr/bin:/root/bin
执行命令查看containerd版本信息。
[root@master ~]# containerd -v
containerd github.com/containerd/containerd v1.6.24 61f9fd88f79f081d64d6fa3bb1a0dc71ec870523
[root@master ~]# runc -h
NAME:
   runc - Open Container Initiative runtime

runc is a command line client for running applications packaged according to
the Open Container Initiative (OCI) format and is a compliant implementation of the
Open Container Initiative specification.

runc integrates well with existing process supervisors to provide a production
container runtime environment for applications. It can be used with your
existing process monitoring tools and the container will be spawned as a
direct child of the process supervisor.

Containers are configured using bundles. A bundle for a container is a directory
that includes a specification file named "config.json" and a root filesystem.
The root filesystem contains the contents of the container.

To start a new instance of a container:

    # runc run [ -b bundle ] <container-id>

Where "<container-id>" is your name for the instance of the container that you
are starting. The name you provide for the container instance must be unique on
your host. Providing the bundle directory using "-b" is optional. The default
value for "bundle" is the current directory.

USAGE:
   runc [global options] command [command options] [arguments...]

VERSION:
   1.1.9
commit: v1.1.9-0-gccaecfcb
spec: 1.0.2-dev
go: go1.20.8
libseccomp: 2.5.1

COMMANDS:
   checkpoint  checkpoint a running container
   create      create a container
   delete      delete any resources held by the container often used with detached container
   events      display container events such as OOM notifications, cpu, memory, and IO usage statistics
   exec        execute new process inside the container
   kill        kill sends the specified signal (default: SIGTERM) to the container's init process
   list        lists containers started by runc with the given root
   pause       pause suspends all processes inside the container
   ps          ps displays the processes running inside a container
   restore     restore a container from a previous checkpoint
   resume      resumes all processes that have been previously paused
   run         create and run a container
   spec        create a new specification file
   start       executes the user defined process in a created container
   state       output the state of a container
   update      update container resource constraints
   features    show the enabled features
   help, h     Shows a list of commands or help for one command

GLOBAL OPTIONS:
   --debug             enable debug logging
   --log value         set the log file to write runc logs to (default is '/dev/stderr')
   --log-format value  set the log format ('text' (default), or 'json') (default: "text")
   --root value        root directory for storage of container state (this should be located in tmpfs) (default: "/run/runc")
   --criu value        path to the criu binary used for checkpoint and restore (default: "criu")
   --systemd-cgroup    enable systemd cgroup support, expects cgroupsPath to be of form "slice:prefix:name" for e.g. "system.slice:runc:434234"
   --rootless value    ignore cgroup permission errors ('true', 'false', or 'auto') (default: "auto")
   --help, -h          show help
   --version, -v       print the version
[root@master ~]#
Containerd 的默认配置文件为 /etc/containerd/config.toml ,可以通过如下所示的命令生成一个默认的配置
[root@master ~]# containerd config default > /etc/containerd/config.toml
由于上面下载的 Containerd 压缩包中包含一个 /etc/systemd/system/containerd.service 的文件,可以通过 systemd 来配置Containerd 作为守护进程运行了,现在可以启动 Containerd,直接执行下面的命令即可。
[root@master ~]# ctr version
Client:
  Version:  v1.6.24
  Revision: 61f9fd88f79f081d64d6fa3bb1a0dc71ec870523
  Go version: go1.20.8

Server:
  Version:  v1.6.24
  Revision: 61f9fd88f79f081d64d6fa3bb1a0dc71ec870523
  UUID: 6b5ae56c-4b18-405d-9ac0-2e4de10c3596
初始化集群
上面的相关环境配置完成后,接着就可以安装 Kubeadm等软件工具,通过指定 yum 源的方式进行安装
cat <<EOF > /etc/yum.repos.d/kubernetes.repo
[kubernetes]
name=Kubernetes
baseurl=https://packages.cloud.google.com/yum/repos/kubernetes-el7-x86_64
enabled=1
gpgcheck=1
repo_gpgcheck=1
gpgkey=https://packages.cloud.google.com/yum/doc/yum-key.gpg \
https://packages.cloud.google.com/yum/doc/rpm-package-key.gpg
EOF
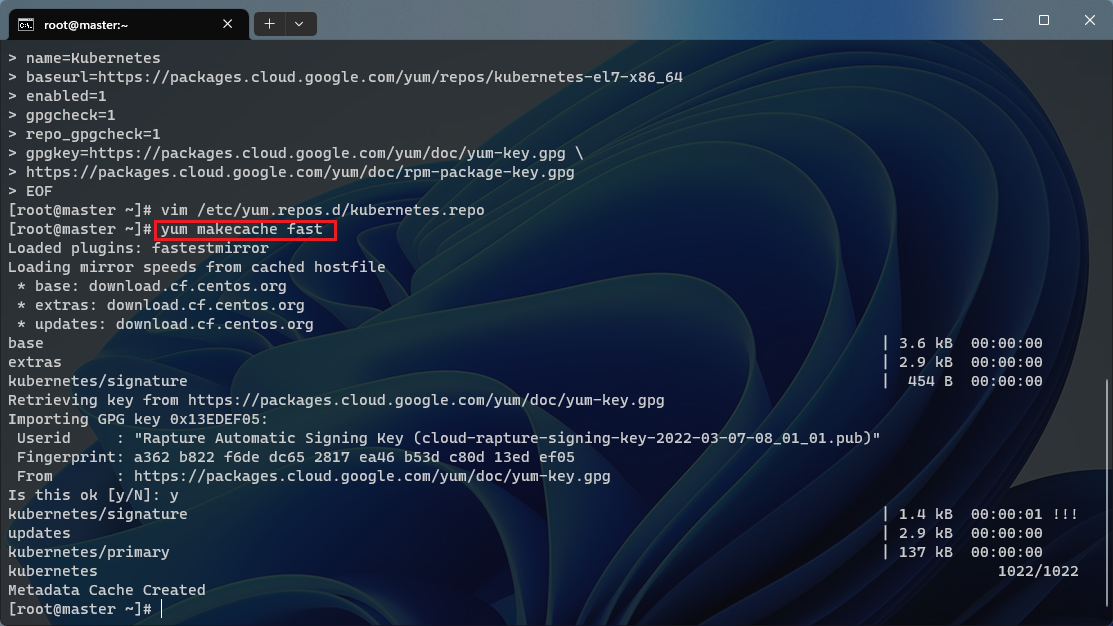
安装 kubeadm、kubelet、kubectl
## 生成本地缓存
yum makecache fast

## --disableexcludes 禁掉除了kubernetes之外的别的仓库
yum install -y kubelet-1.25.4 kubeadm-1.25.4 kubectl-1.25.4 --disableexcludes=kubernetes
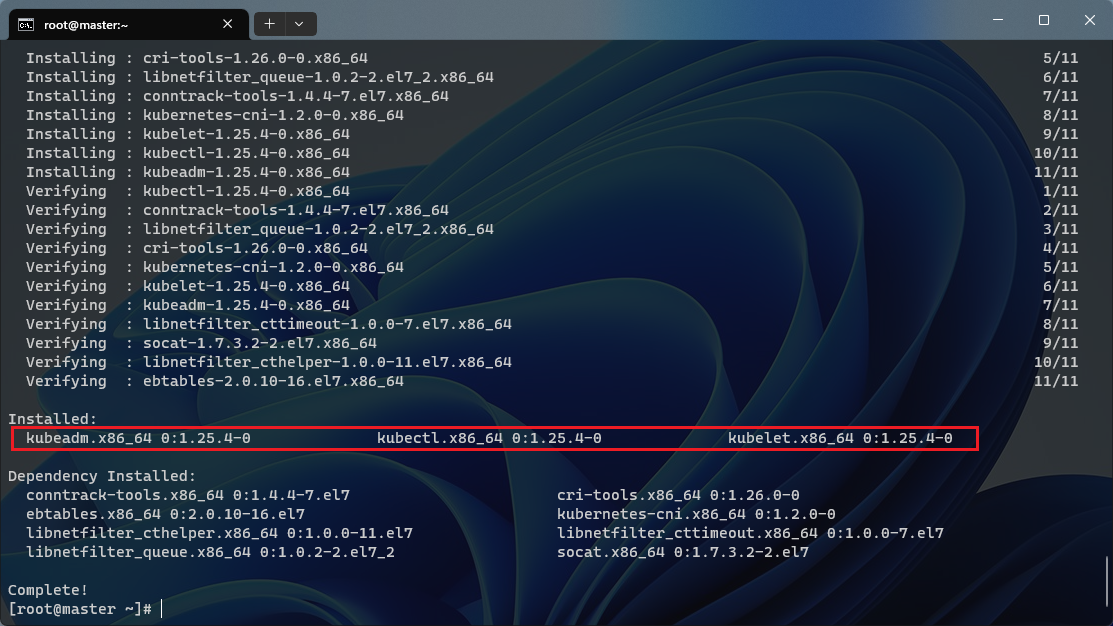
查看kubeadm版本信息。
[root@master ~]# kubeadm version
kubeadm version: &version.Info{Major:"1", Minor:"25", GitVersion:"v1.25.4", GitCommit:"872a965c6c6526caa949f0c6ac028ef7aff3fb78", GitTreeState:"clean", BuildDate:"2022-11-09T13:35:06Z", GoVersion:"go1.19.3", Compiler:"gc", Platform:"linux/amd64"}
可以看到这里安装的是 v1.25.4 版本,然后将 master 节点的 kubelet 设置成开机启动:
[root@master ~]# systemctl enable --now kubelet
Created symlink from /etc/systemd/system/multi-user.target.wants/kubelet.service to /usr/lib/systemd/system/kubelet.service.
到此为止,上面所有的操作都需要在所有节点执行配置。
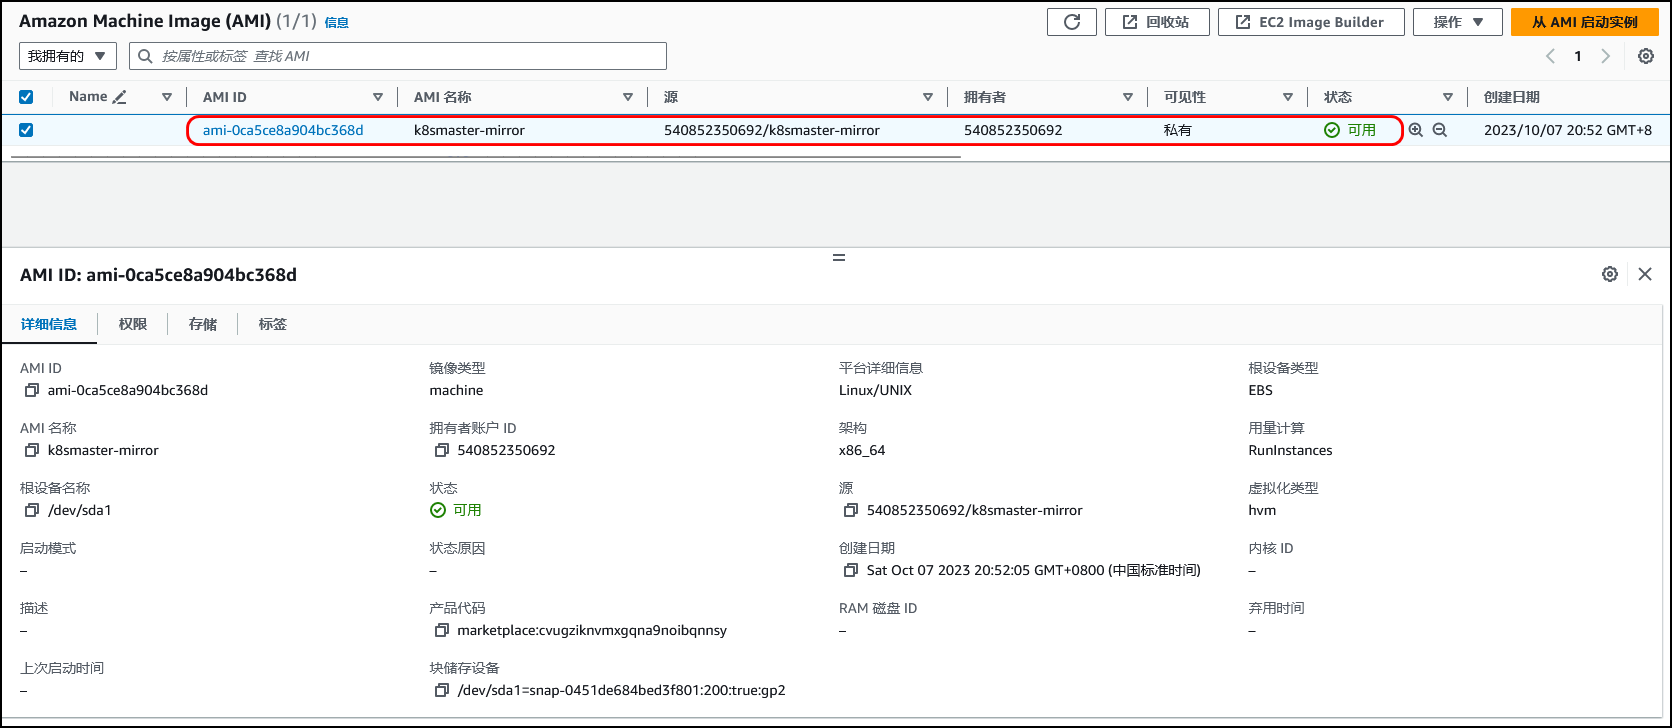
在AWS云环境中,采用云主机的方式进行集群的搭建部署,我们可以将当前环境直接做成一个镜像,然后创建新节点的时候直接使用该镜像即可,这样可以避免重复的工作。
具体创建映像操作步骤如下:
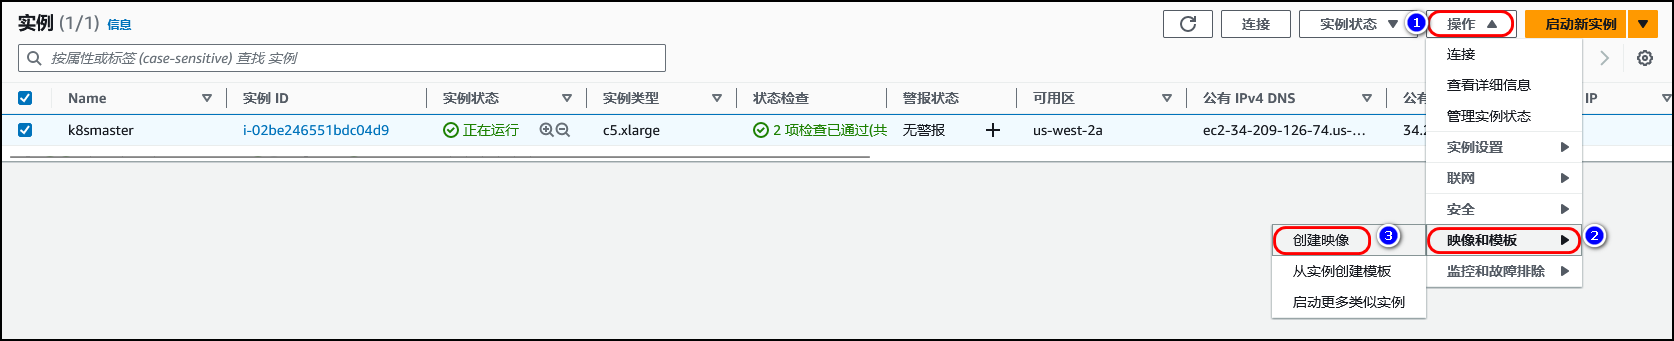
该镜像创建完成,可以直接使用该镜像文件进行其他新的节点的创建,避免重复上述重复操作。
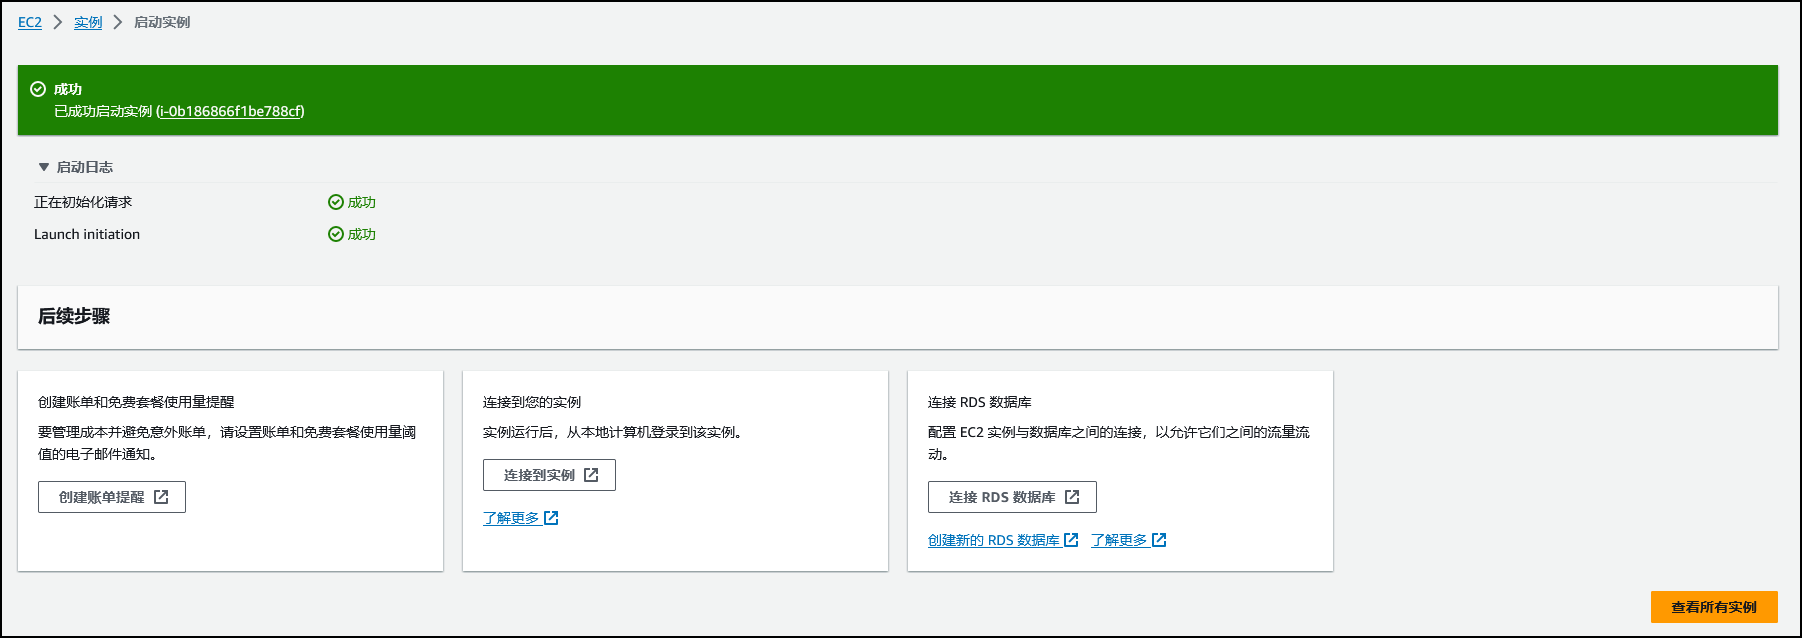
使用刚刚制作好的镜像,重新创建新的实例。
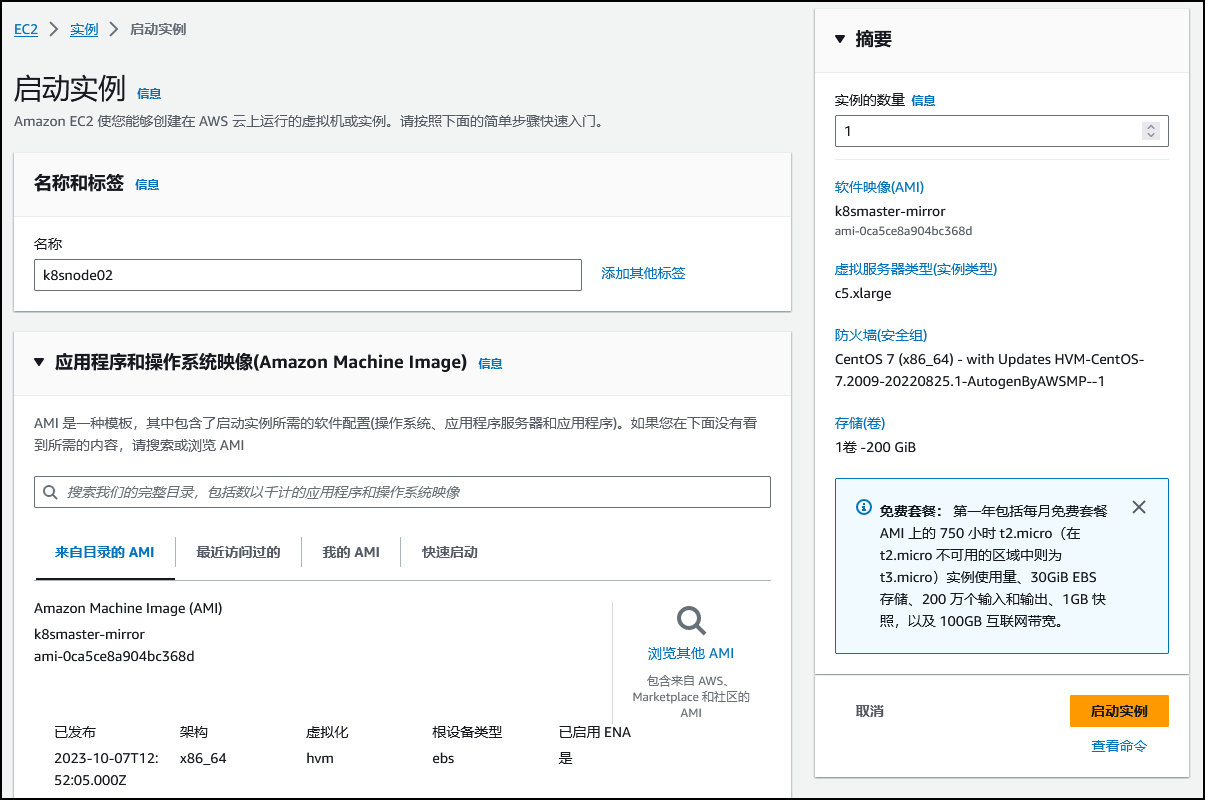
新的实例创建完成。
其他两个节点创建完成。

修改kubeadm.yaml配置文件
接下来,可以通过下面的命令在 master 节点上输出集群初始化默认使用的配置文件:
kubeadm config print init-defaults --component-configs KubeletConfiguration > kubeadm.yaml
然后根据我们自己的需求修改配置,比如修改 imageRepository 指定集群初始化时拉取 Kubernetes 所需镜像的地址,kube-proxy 的模式为 ipvs,另外需要注意的是这里准备安装 flannel 网络插件的,需要将networking.podSubnet 设置为 10.244.0.0/16
[root@master ~]# vim kubeadm.yaml
[root@master ~]# cat kubeadm.yaml
apiVersion: kubeadm.k8s.io/v1beta3
bootstrapTokens:
- groups:
  - system:bootstrappers:kubeadm:default-node-token
  token: abcdef.0123456789abcdef
  ttl: 24h0m0s
  usages:
  - signing
  - authentication
kind: InitConfiguration
localAPIEndpoint:
  advertiseAddress: 172.31.25.16
  bindPort: 6443
nodeRegistration:
  criSocket: unix:///var/run/containerd/containerd.sock
  imagePullPolicy: IfNotPresent
  name: node
  taints: null
---
apiServer:
  timeoutForControlPlane: 4m0s
apiVersion: kubeadm.k8s.io/v1beta3
certificatesDir: /etc/kubernetes/pki
clusterName: kubernetes
controllerManager: {}
dns: {}
etcd:
  local:
    dataDir: /var/lib/etcd
imageRepository: registry.k8s.io
kind: ClusterConfiguration
kubernetesVersion: 1.25.4
networking:
  dnsDomain: cluster.local
  serviceSubnet: 10.96.0.0/12
  podSubnet: 10.244.0.0/16 # 指定Pod子网
scheduler: {}
---
apiVersion: kubeproxy.config.k8s.io/v1alpha1
kind: KubeProxyConfiguration
mode: ipvs # kube-proxy 模式
---
apiVersion: kubelet.config.k8s.io/v1beta1
authentication:
  anonymous:
    enabled: false
  webhook:
    cacheTTL: 0s
    enabled: true
  x509:
    clientCAFile: /etc/kubernetes/pki/ca.crt
authorization:
  mode: Webhook
  webhook:
    cacheAuthorizedTTL: 0s
    cacheUnauthorizedTTL: 0s
cgroupDriver: systemd
clusterDNS:
- 10.96.0.10
clusterDomain: cluster.local
cpuManagerReconcilePeriod: 0s
evictionPressureTransitionPeriod: 0s
fileCheckFrequency: 0s
healthzBindAddress: 127.0.0.1
healthzPort: 10248
httpCheckFrequency: 0s
imageMinimumGCAge: 0s
kind: KubeletConfiguration
logging:
  flushFrequency: 0
  options:
    json:
      infoBufferSize: "0"
  verbosity: 0
memorySwap: {}
nodeStatusReportFrequency: 0s
nodeStatusUpdateFrequency: 0s
rotateCertificates: true
runtimeRequestTimeout: 0s
shutdownGracePeriod: 0s
shutdownGracePeriodCriticalPods: 0s
staticPodPath: /etc/kubernetes/manifests
streamingConnectionIdleTimeout: 0s
syncFrequency: 0s
volumeStatsAggPeriod: 0s
在开始初始化集群之前可以使用 kubeadm config images pull --config kubeadm.yaml 预先在各个服务器节点上拉取所 k8s 需要的容器镜像。
[root@master ~]# kubeadm config images pull --config kubeadm.yaml
[config/images] Pulled registry.k8s.io/kube-apiserver:v1.25.4
[config/images] Pulled registry.k8s.io/kube-controller-manager:v1.25.4
[config/images] Pulled registry.k8s.io/kube-scheduler:v1.25.4
[config/images] Pulled registry.k8s.io/kube-proxy:v1.25.4
[config/images] Pulled registry.k8s.io/pause:3.8
[config/images] Pulled registry.k8s.io/etcd:3.5.5-0
[config/images] Pulled registry.k8s.io/coredns/coredns:v1.9.3
然后就可以使用上面的配置文件在 master 节点上进行初始化:
[root@master ~]# kubeadm init --config kubeadm.yaml
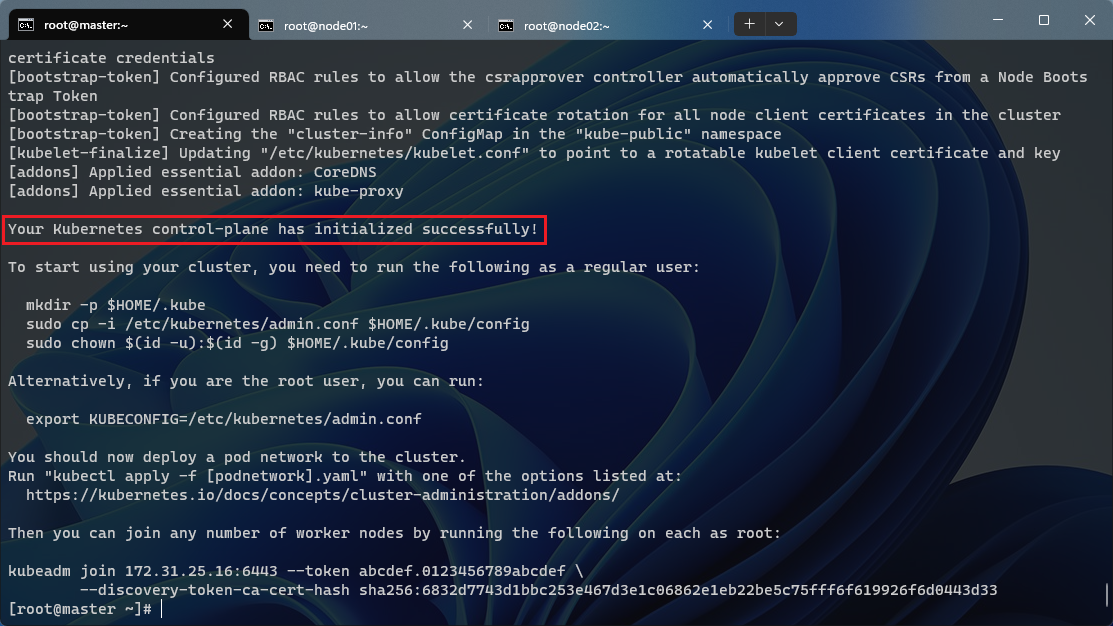
Your Kubernetes control-plane has initialized successfully!

To start using your cluster, you need to run the following as a regular user:

  mkdir -p $HOME/.kube
  sudo cp -i /etc/kubernetes/admin.conf $HOME/.kube/config
  sudo chown $(id -u):$(id -g) $HOME/.kube/config

Alternatively, if you are the root user, you can run:

  export KUBECONFIG=/etc/kubernetes/admin.conf

You should now deploy a pod network to the cluster.
Run "kubectl apply -f [podnetwork].yaml" with one of the options listed at:
  https://kubernetes.io/docs/concepts/cluster-administration/addons/

Then you can join any number of worker nodes by running the following on each as root:

kubeadm join 172.31.25.16:6443 --token abcdef.0123456789abcdef \
        --discovery-token-ca-cert-hash sha256:6832d7743d1bbc253e467d3e1c06862e1eb22be5c75fff6f619926f6d0443d33
根据安装提示拷贝 kubeconfig 文件:
[root@master ~]# mkdir -p $HOME/.kube
[root@master ~]# sudo cp -i /etc/kubernetes/admin.conf $HOME/.kube/config
[root@master ~]# sudo chown $(id -u):$(id -g) $HOME/.kube/config
[root@master ~]# export KUBECONFIG=/etc/kubernetes/admin.conf
然后可以使用 kubectl 命令查看 master 节点是否已经初始化成功
[root@master ~]# kubectl get nodes
NAME   STATUS     ROLES           AGE   VERSION
node   NotReady   control-plane   94s   v1.25.4
现在节点还处于 NotReady 状态,是因为还未安装 CNI 插件,可以先添加Node 节点后,再部署网络插件。
添加工作节点
执行上面初始化完成后提示的 join 命令即可。
kubeadm join 172.31.25.16:6443 --token abcdef.0123456789abcdef \
        --discovery-token-ca-cert-hash sha256:6832d7743d1bbc253e467d3e1c06862e1eb22be5c75fff6f619926f6d0443d33
如下图所示,该节点已经加入到该集群。
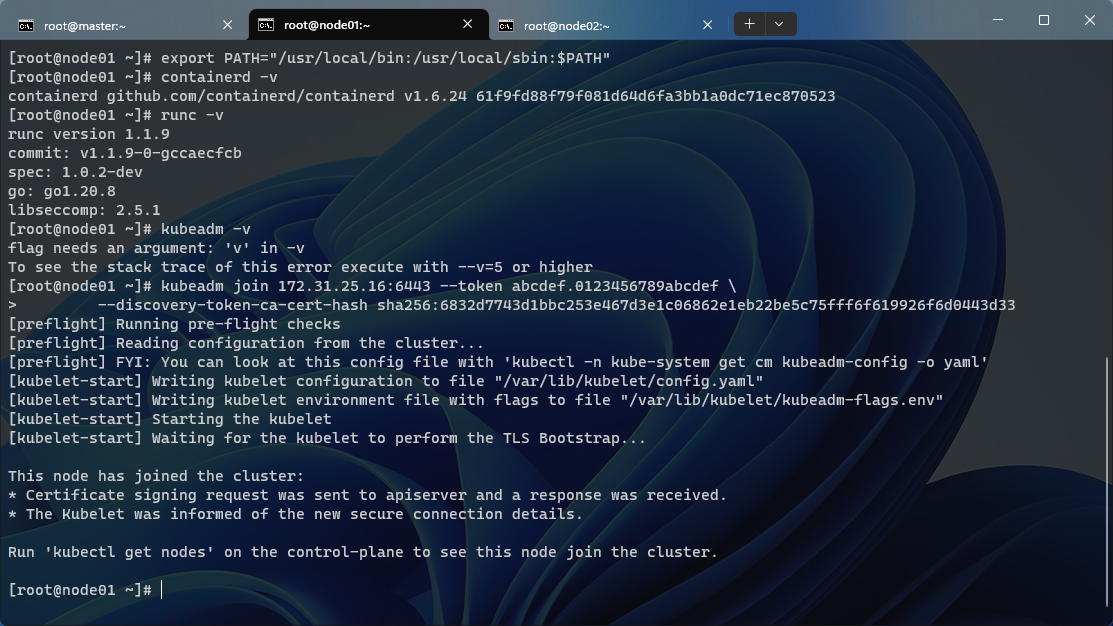
在master节点上,通过执行kubectl get nodes命令可以查看到其他两个节点已经添加进集群之中。
[root@master ~]# kubectl get nodes
NAME     STATUS     ROLES           AGE     VERSION
node     NotReady   control-plane   9m44s   v1.25.4
node01   NotReady   <none>          4m19s   v1.25.4
node02   NotReady   <none>          3m40s   v1.25.4
PS:如果忘记了上面的 join 命令,可以使用该命令
kubeadm token create --print-join-command重新获取。该token默认有效期为24小时。
[root@master ~]# kubeadm token create --print-join-command
kubeadm join 172.31.25.16:6443 --token g94xpb.jn65v6eux6p1hjpa --discovery-token-ca-cert-hash sha256:6832d7743d1bbc253e467d3e1c06862e1eb22be5c75fff6f619926f6d0443d33
安装 flannel
接下来安装网络插件,可以在文档https://kubernetes.io/docs/concepts/cluster-administration/addons 中选择我们自己的网络插件。
[root@master ~]# wget https://raw.githubusercontent.com/flannel-io/flannel/v0.20.1/Documentation/kube-flannel.yml
如果有节点是多网卡,则需要在资源清单文件中指定内网网卡。搜索到名为 kube-flannel-ds 的 DaemonSet,在kube-flannel容器下面,搜索🔍
[root@master ~]# vim kube-flannel.yml
[root@master ~]# cat kube-flannel.yml
---
kind: Namespace
apiVersion: v1
metadata:
  name: kube-flannel
  labels:
    pod-security.kubernetes.io/enforce: privileged
---
kind: ClusterRole
apiVersion: rbac.authorization.k8s.io/v1
metadata:
  name: flannel
rules:
- apiGroups:
  - ""
  resources:
  - pods
  verbs:
  - get
- apiGroups:
  - ""
  resources:
  - nodes
  verbs:
  - list
  - watch
- apiGroups:
  - ""
  resources:
  - nodes/status
  verbs:
  - patch
---
kind: ClusterRoleBinding
apiVersion: rbac.authorization.k8s.io/v1
metadata:
  name: flannel
roleRef:
  apiGroup: rbac.authorization.k8s.io
  kind: ClusterRole
  name: flannel
subjects:
- kind: ServiceAccount
  name: flannel
  namespace: kube-flannel
---
apiVersion: v1
kind: ServiceAccount
metadata:
  name: flannel
  namespace: kube-flannel
---
kind: ConfigMap
apiVersion: v1
metadata:
  name: kube-flannel-cfg
  namespace: kube-flannel
  labels:
    tier: node
    app: flannel
data:
  cni-conf.json: |
    {
      "name": "cbr0",
      "cniVersion": "0.3.1",
      "plugins": [
        {
          "type": "flannel",
          "delegate": {
            "hairpinMode": true,
            "isDefaultGateway": true
          }
        },
        {
          "type": "portmap",
          "capabilities": {
            "portMappings": true
          }
        }
      ]
    }
  net-conf.json: |
    {
      "Network": "10.244.0.0/16",
      "Backend": {
        "Type": "vxlan"
      }
    }
---
apiVersion: apps/v1
kind: DaemonSet
metadata:
  name: kube-flannel-ds
  namespace: kube-flannel
  labels:
    tier: node
    app: flannel
spec:
  selector:
    matchLabels:
      app: flannel
  template:
    metadata:
      labels:
        tier: node
        app: flannel
    spec:
      affinity:
        nodeAffinity:
          requiredDuringSchedulingIgnoredDuringExecution:
            nodeSelectorTerms:
            - matchExpressions:
              - key: kubernetes.io/os
                operator: In
                values:
                - linux
      hostNetwork: true
      priorityClassName: system-node-critical
      tolerations:
      - operator: Exists
        effect: NoSchedule
      serviceAccountName: flannel
      initContainers:
      - name: install-cni-plugin
       #image: flannelcni/flannel-cni-plugin:v1.1.0 for ppc64le and mips64le (dockerhub limitations may apply)
        image: docker.io/rancher/mirrored-flannelcni-flannel-cni-plugin:v1.1.0
        command:
        - cp
        args:
        - -f
        - /flannel
        - /opt/cni/bin/flannel
        volumeMounts:
        - name: cni-plugin
          mountPath: /opt/cni/bin
      - name: install-cni
       #image: flannelcni/flannel:v0.20.1 for ppc64le and mips64le (dockerhub limitations may apply)
        image: docker.io/rancher/mirrored-flannelcni-flannel:v0.20.1
        command:
        - cp
        args:
        - -f
        - /etc/kube-flannel/cni-conf.json
        - /etc/cni/net.d/10-flannel.conflist
        volumeMounts:
        - name: cni
          mountPath: /etc/cni/net.d
        - name: flannel-cfg
          mountPath: /etc/kube-flannel/
      containers:
      - name: kube-flannel
       #image: flannelcni/flannel:v0.20.1 for ppc64le and mips64le (dockerhub limitations may apply)
        image: docker.io/rancher/mirrored-flannelcni-flannel:v0.20.1
        command:
        - /opt/bin/flanneld
        args:
        - --ip-masq
        - --kube-subnet-mgr
        - --iface=eth0 # 如果是多网卡的话,指定内网网卡的名称
        resources:
          requests:
            cpu: "100m"
            memory: "50Mi"
          limits:
            cpu: "100m"
            memory: "50Mi"
        securityContext:
          privileged: false
          capabilities:
            add: ["NET_ADMIN", "NET_RAW"]
        env:
        - name: POD_NAME
          valueFrom:
            fieldRef:
              fieldPath: metadata.name
        - name: POD_NAMESPACE
          valueFrom:
            fieldRef:
              fieldPath: metadata.namespace
        - name: EVENT_QUEUE_DEPTH
          value: "5000"
        volumeMounts:
        - name: run
          mountPath: /run/flannel
        - name: flannel-cfg
          mountPath: /etc/kube-flannel/
        - name: xtables-lock
          mountPath: /run/xtables.lock
      volumes:
      - name: run
        hostPath:
          path: /run/flannel
      - name: cni-plugin
        hostPath:
          path: /opt/cni/bin
      - name: cni
        hostPath:
          path: /etc/cni/net.d
      - name: flannel-cfg
        configMap:
          name: kube-flannel-cfg
      - name: xtables-lock
        hostPath:
          path: /run/xtables.lock
          type: FileOrCreate
执行命令安装flannel网络插件
[root@master ~]# kubectl apply -f kube-flannel.yml
namespace/kube-flannel created
clusterrole.rbac.authorization.k8s.io/flannel created
clusterrolebinding.rbac.authorization.k8s.io/flannel created
serviceaccount/flannel created
configmap/kube-flannel-cfg created
daemonset.apps/kube-flannel-ds created
查看 Pod 运行状态
[root@master ~]# kubectl get pods -A
NAMESPACE      NAME                           READY   STATUS    RESTARTS   AGE
kube-flannel   kube-flannel-ds-f6qvb          1/1     Running   0          33s
kube-flannel   kube-flannel-ds-twjxp          1/1     Running   0          33s
kube-flannel   kube-flannel-ds-xcfb2          1/1     Running   0          33s
kube-system    coredns-565d847f94-98zx2       1/1     Running   0          19m
kube-system    coredns-565d847f94-v9pxj       1/1     Running   0          19m
kube-system    etcd-node                      1/1     Running   0          20m
kube-system    kube-apiserver-node            1/1     Running   0          20m
kube-system    kube-controller-manager-node   1/1     Running   0          20m
kube-system    kube-proxy-26wqq               1/1     Running   0          19m
kube-system    kube-proxy-bmcrs               1/1     Running   0          14m
kube-system    kube-proxy-spp5z               1/1     Running   0          14m
kube-system    kube-scheduler-node            1/1     Running   0          20m
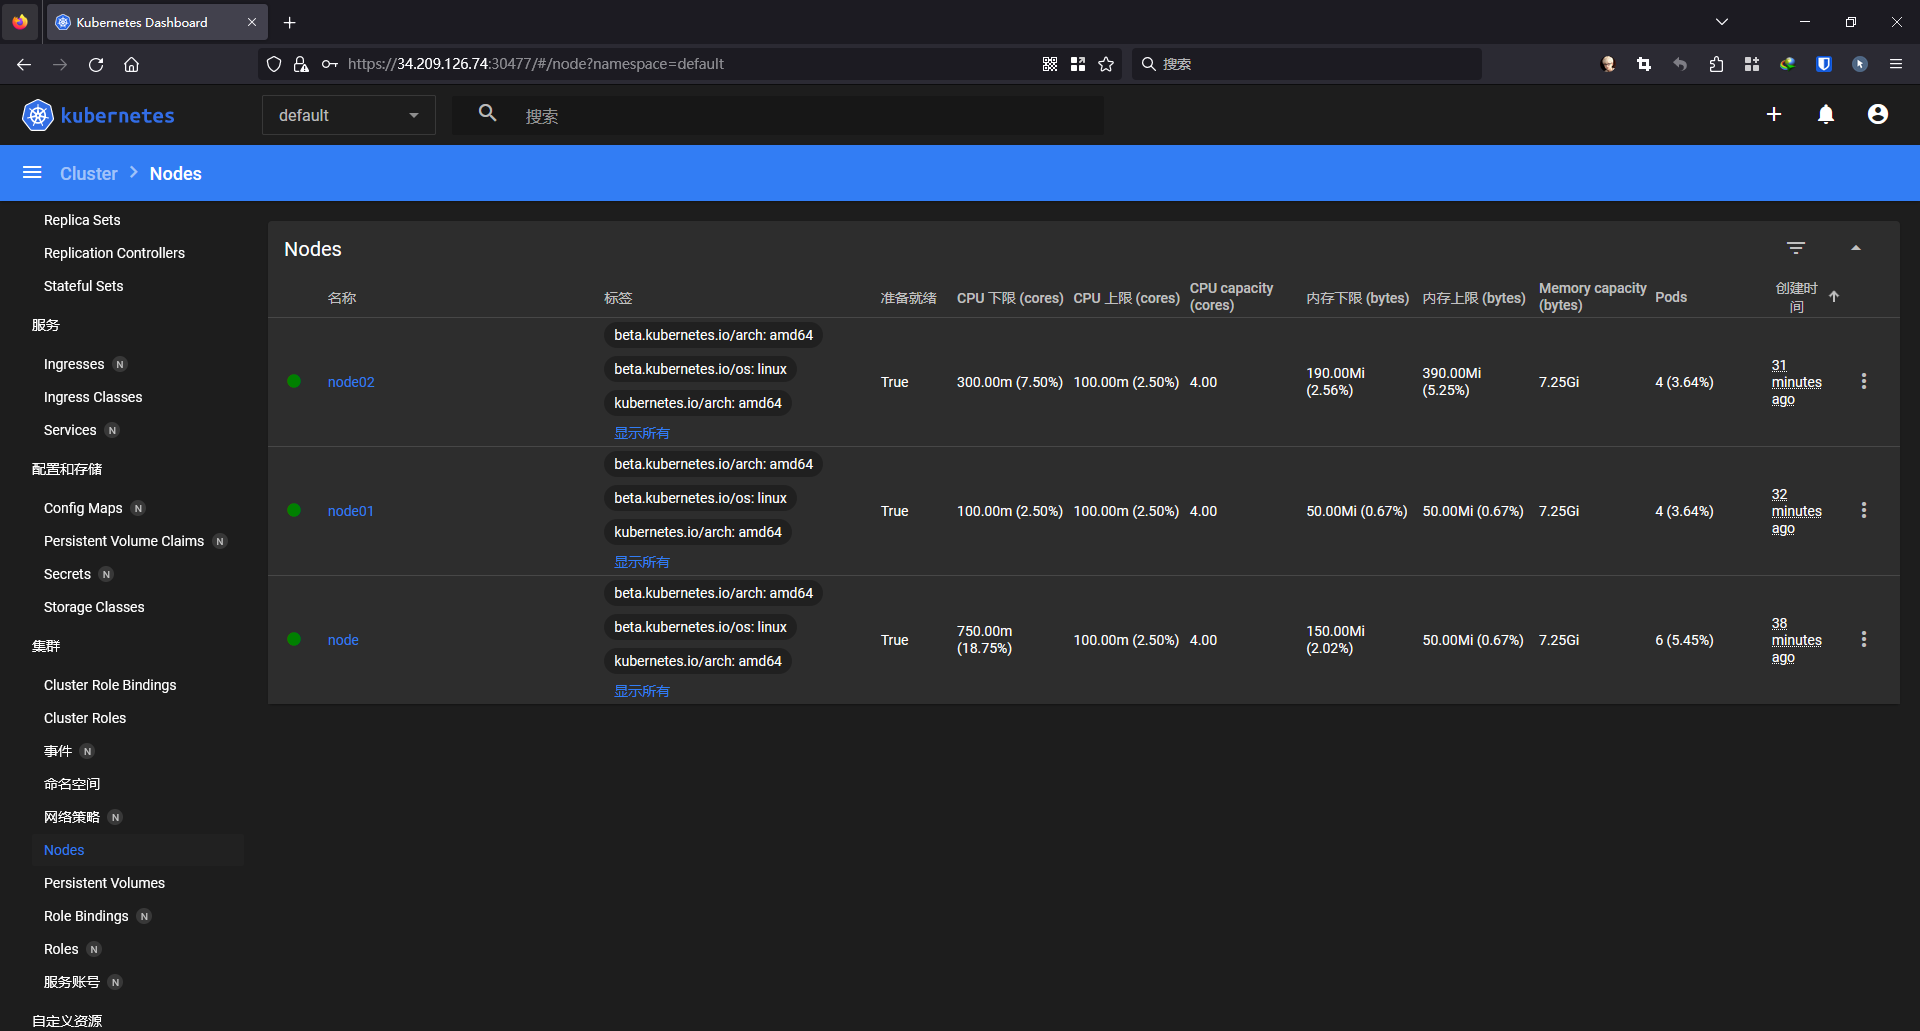
此时,所有节点都处于Ready状态。
[root@master ~]# kubectl get nodes
NAME     STATUS   ROLES           AGE   VERSION
node     Ready    control-plane   22m   v1.25.4
node01   Ready    <none>          16m   v1.25.4
node02   Ready    <none>          16m   v1.25.4
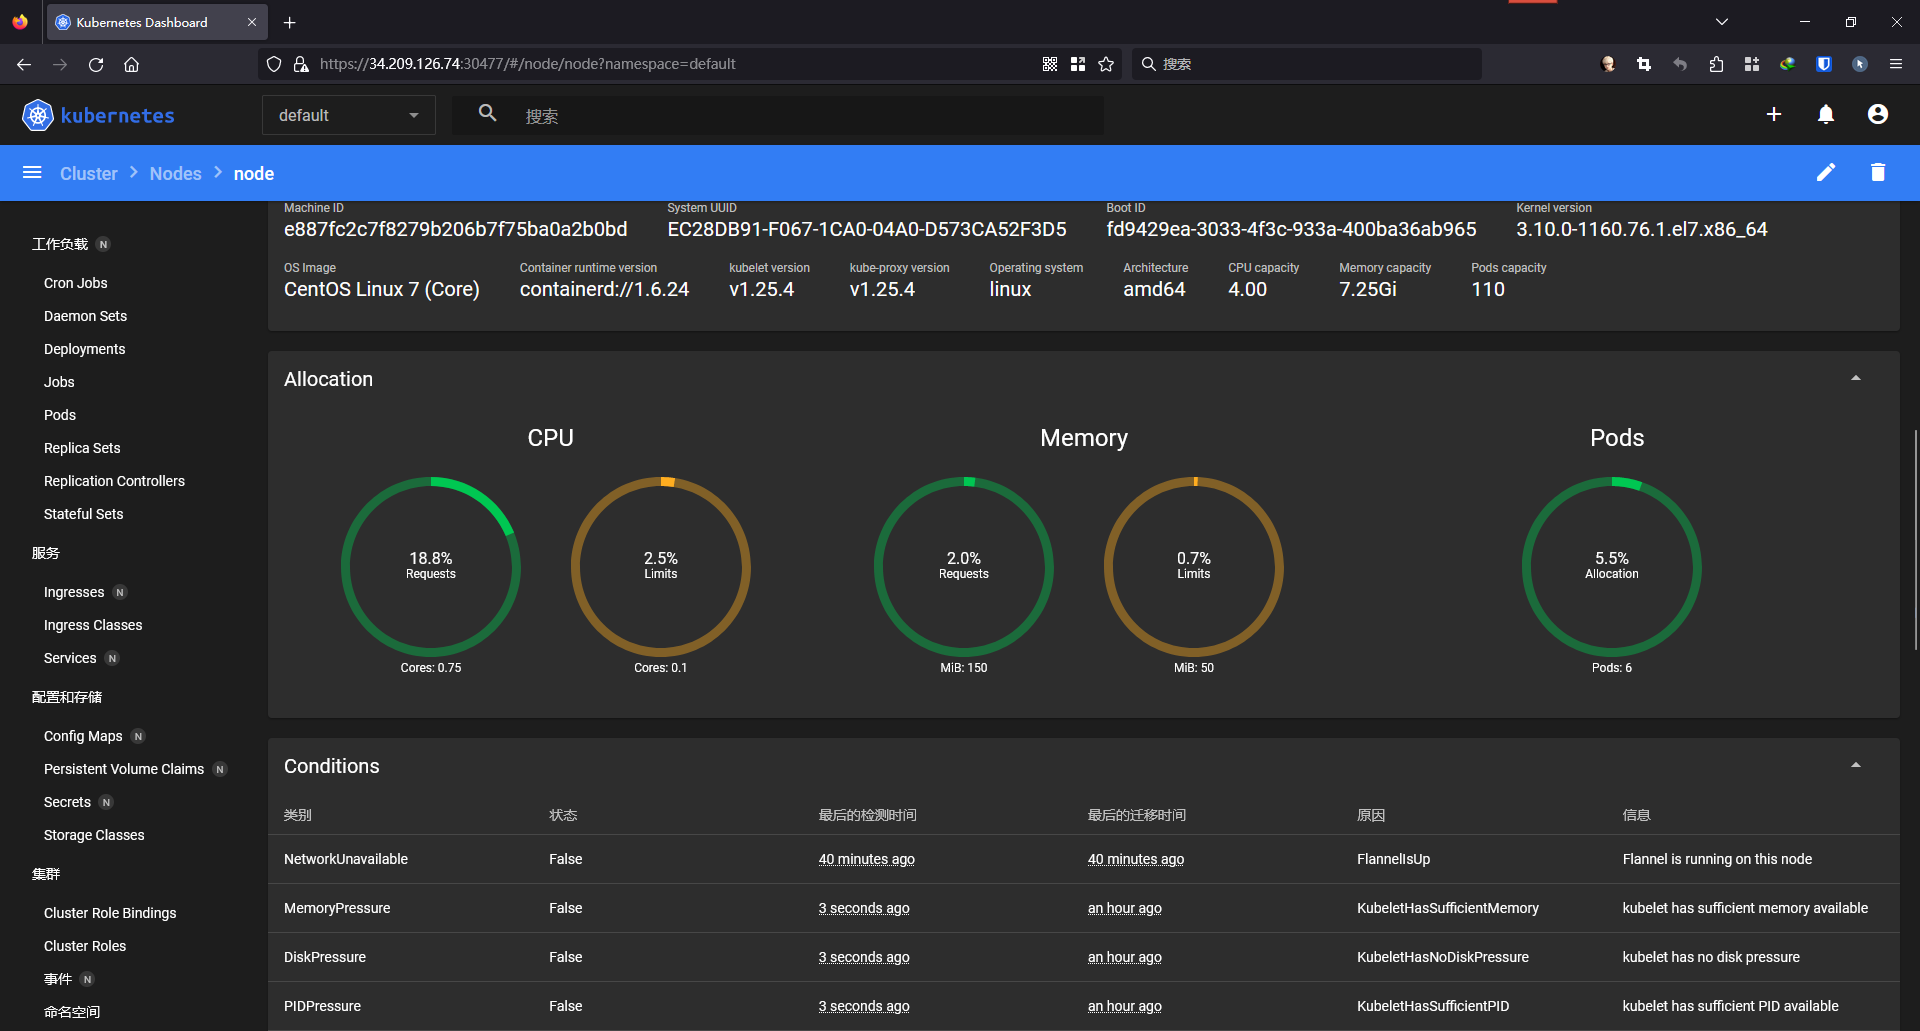
安装Dashboard
直接执行下面命令一键安装即可:
# 下载recommended.yaml配置文件
wget https://raw.githubusercontent.com/kubernetes/dashboard/v2.7.0/aio/deploy/recommended.yaml

# 编辑recommended.yaml配置文件
vim recommended.yaml
# 加上type=NodePort变成NodePort类型的服务
执行命令创建dashboard
[root@master ~]# kubectl apply -f recommended.yaml
namespace/kubernetes-dashboard created
serviceaccount/kubernetes-dashboard created
service/kubernetes-dashboard created
secret/kubernetes-dashboard-certs created
secret/kubernetes-dashboard-csrf created
secret/kubernetes-dashboard-key-holder created
configmap/kubernetes-dashboard-settings created
role.rbac.authorization.k8s.io/kubernetes-dashboard created
clusterrole.rbac.authorization.k8s.io/kubernetes-dashboard created
rolebinding.rbac.authorization.k8s.io/kubernetes-dashboard created
clusterrolebinding.rbac.authorization.k8s.io/kubernetes-dashboard created
deployment.apps/kubernetes-dashboard created
service/dashboard-metrics-scraper created
deployment.apps/dashboard-metrics-scraper created
新版本的 Dashboard 会被默认安装在 kubernetes-dashboard 这个kubernetes-dashboard命名空间
[root@master ~]# kubectl get pods -n kubernetes-dashboard
NAME                                         READY   STATUS    RESTARTS   AGE
dashboard-metrics-scraper-64bcc67c9c-6wnb6   1/1     Running   0          54s
kubernetes-dashboard-5c8bd6b59-ndbxk         1/1     Running   0          54s
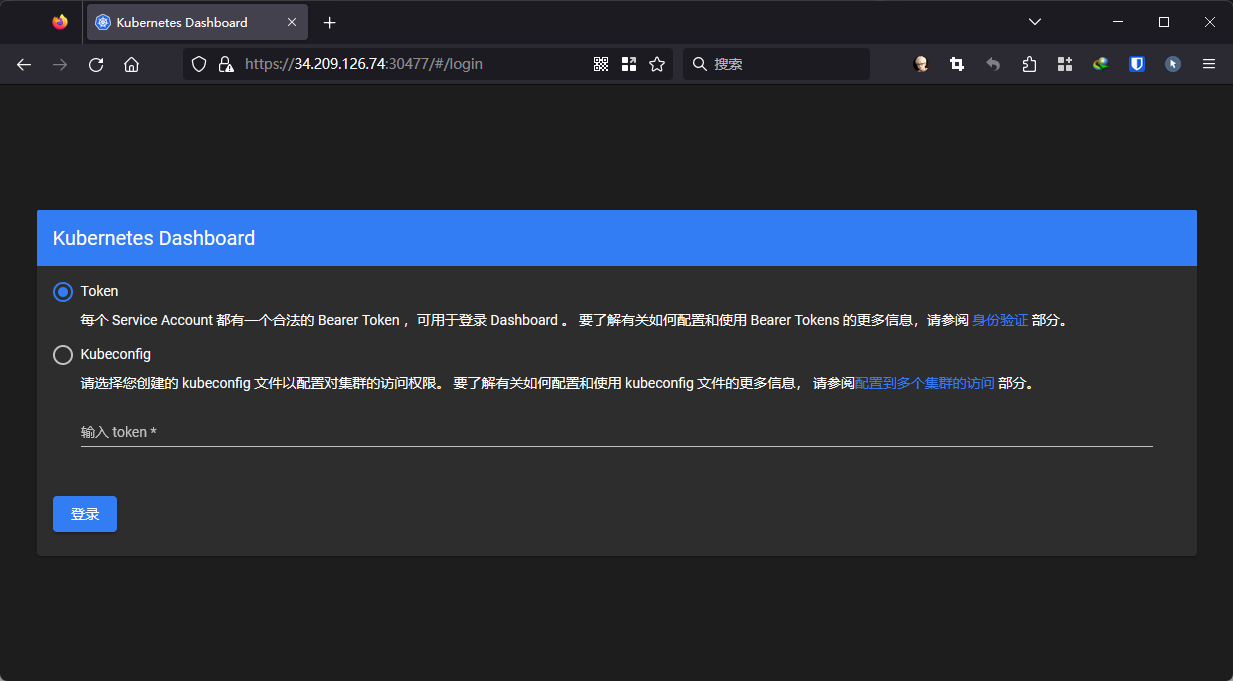
查看 Dashboard 的 NodePort 端口
[root@master ~]# kubectl get svc -n kubernetes-dashboard
NAME                        TYPE        CLUSTER-IP      EXTERNAL-IP   PORT(S)         AGE
dashboard-metrics-scraper   ClusterIP   10.105.219.37   <none>        8000/TCP        113s
kubernetes-dashboard        NodePort    10.98.61.185    <none>        443:30477/TCP   113s
通过上面的 30477端口去访问 Dashboard,使用https。
创建一个具有全局所有权限的用户来登录 Dashboard
# admin.yaml
apiVersion: v1
kind: ServiceAccount
metadata:
  name: admin-user
  namespace: kubernetes-dashboard
---
apiVersion: rbac.authorization.k8s.io/v1
kind: ClusterRoleBinding
metadata:
  name: admin-user
roleRef:
  apiGroup: rbac.authorization.k8s.io
  kind: ClusterRole
  name: cluster-admin
subjects:
- kind: ServiceAccount
  name: admin-user
  namespace: kubernetes-dashboard
执行命令创建admin-user用户
[root@master ~]# kubectl apply -f admin.yaml
serviceaccount/admin-user created
clusterrolebinding.rbac.authorization.k8s.io/admin-user created
现在需要找到可以用来登录的令牌,可以使用 kubectl create token 命令来请求一个 service account token。
# 请求创建一个 token 作为 kubernetes-dashboard 命名空间中的 admin-user 这个 sa 对 kubeapiserver 进行身份验证
kubectl create token admin-user -n kubernetes-dashboard
[root@master ~]# kubectl create token admin-user -n kubernetes-dashboard
eyJhbGciOiJSUzI1NiIsImtpZCI6InpyT0NzSG5XbkdaQXVjclljVXUxOWt0TF9fOG1XTW15X2hYVmRweTNEU1EifQ.eyJhdWQiOlsiaHR0cHM6Ly9rdWJlcm5ldGVzLmRlZmF1bHQuc3ZjLmNsdXN0ZXIubG9jYWwiXSwiZXhwIjoxNjk2NjkxMDYwLCJpYXQiOjE2OTY2ODc0NjAsImlzcyI6Imh0dHBzOi8va3ViZXJuZXRlcy5kZWZhdWx0LnN2Yy5jbHVzdGVyLmxvY2FsIiwia3ViZXJuZXRlcy5pbyI6eyJuYW1lc3BhY2UiOiJrdWJlcm5ldGVzLWRhc2hib2FyZCIsInNlcnZpY2VhY2NvdW50Ijp7Im5hbWUiOiJhZG1pbi11c2VyIiwidWlkIjoiY2Q2MjhmMmUtZmZkMy00MDdmLWI1YWUtYTVkZGYzYjIxYjQyIn19LCJuYmYiOjE2OTY2ODc0NjAsInN1YiI6InN5c3RlbTpzZXJ2aWNlYWNjb3VudDprdWJlcm5ldGVzLWRhc2hib2FyZDphZG1pbi11c2VyIn0.FwSGY3f7G3rfJozjBEGQ_u6ASv31ZFicYFFjfkBAMdkPgbI9ETPH3ciu3Ma-24bMuPpbJDxgVGAB0D12IzZKJUk_YWyTul258PEzjotUJuU3OUM_ui9Ciuex20rsUv4MrhyfT26XorJT4FhiuLsszKjgqfRfFS-4oVjAbSBoiZj5UJ1yX0wD7Trc22QF-m7CvPZekl83bhzFt6XUX6-y-To6zGfh4pBbI1Q_OVgBrLElSdowG7OI3nLL9zMVQKhKSsCKgUYMbD1DseJfEUozmzL_NXm3e54yYDMS9yyF1dqsMtntwuo6wtZv0nc7POBCAqgYGCIOMRTUpqCwa48sFQ

清理
如果集群安装过程中遇到了其他问题,可以使用下面的命令来进行重置
kubeadm reset

ifconfig cni0 down && ip link delete cni0

ifconfig flannel.1 down && ip link delete flannel.1

rm -rf /var/lib/cni/
至此,完成了基于AWS云实例采用 kubeadm 方式搭建部署 v1.25.4 版本的 kubernetes 集群的实验。🎉🎉🎉

开源、云原生的融合云平台
更多推荐
 6
6 0
0- 0


 已为社区贡献10条内容

所有评论(0)