
hadoop3编译安装
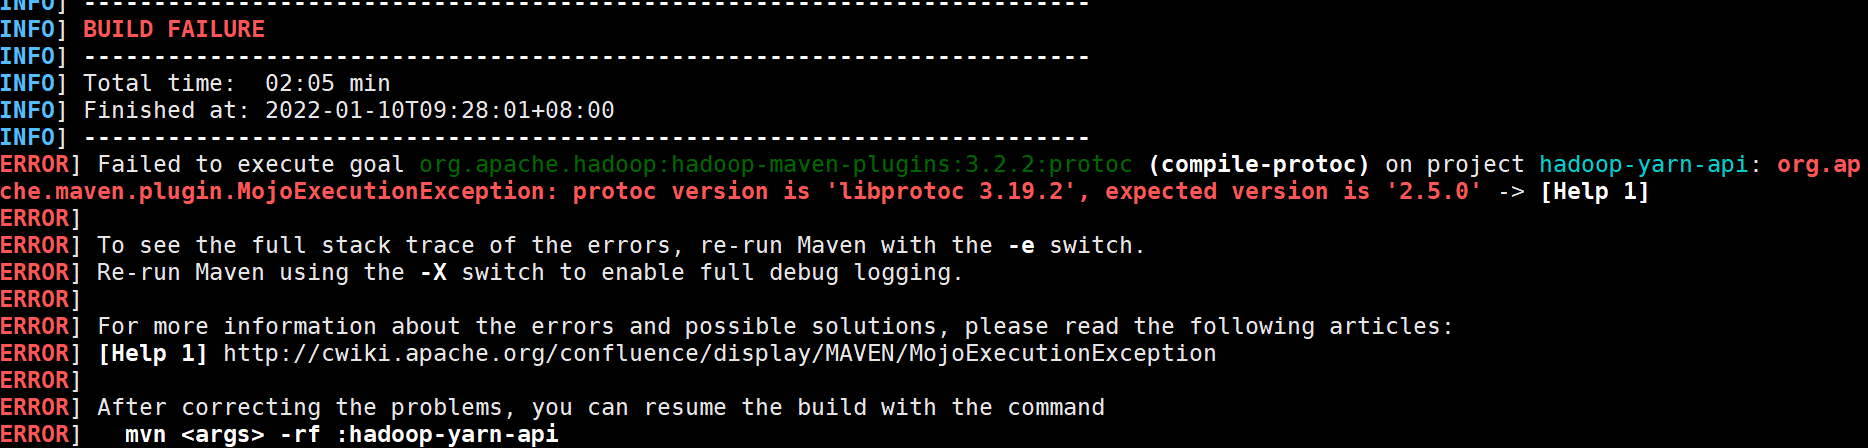
但你会发现根本没有configure,我们需要执行autogen.sh去生成configure脚本。自己安装时,以为yum没有protobufx,所以是到github上下载源码编译的。并先删除本地仓库中相应包目录下的缓存文件,再用maven安装到本地,再编译源码。执行autogen.sh,会发现无法下载gtest-1.5.0.tar.bz2。2.5.0正是所需要的,而不是官方里说的3.x,为什么呢
1.参考资料
官方的https://github.com/apache/hadoop/blob/trunk/BUILDING.txt
2.编译环境
Linux系统:Centos7.2
Jdk版本:jdk1.8
cmake版本:3.19
Hadoop版本:3.1.2
Maven版本:3.6.3
Protobuf版本:2.5
编译工具准备
a.安装依赖
| 1 |
|
b. java 和maven 环境
java 和maven 环境用到的太普遍了,这个就不重复了
c.安装protobuf
可以先查看yum上的版本

2.5.0正是所需要的,而不是官方里说的3.x,为什么呢?
直接
| 1 |
|
自己安装时,以为yum没有protobufx,所以是到github上下载源码编译的GitHub - protocolbuffers/protobuf at v2.5.0
正常解压后只要
| 1 2 3 4 |
|
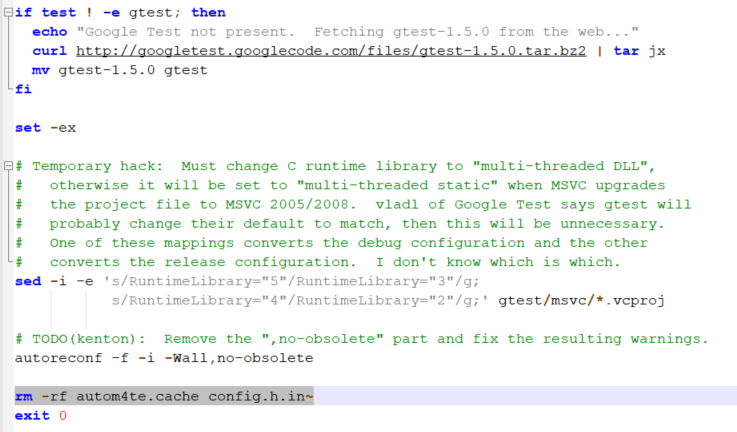
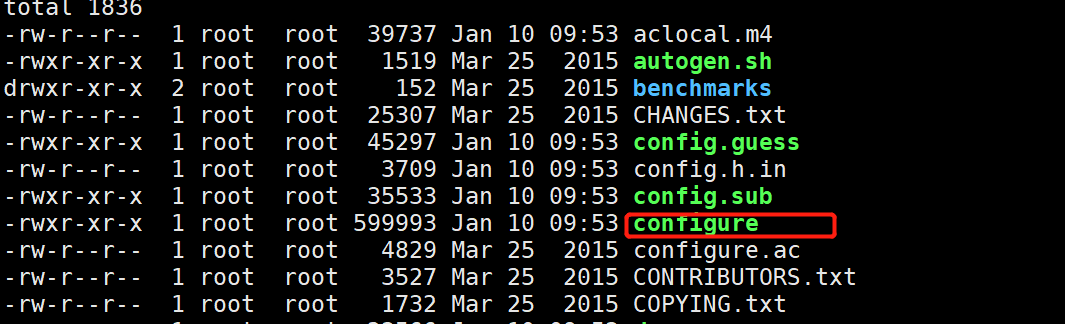
但你会发现根本没有configure,我们需要执行autogen.sh去生成configure脚本
执行autogen.sh,会发现无法下载gtest-1.5.0.tar.bz2

我们需要自行下载gtest-1.5.0.tar.bz2,
Index of /repo/pkgs/gtest/gtest-1.5.0.tar.bz2/md5/8b2c3c3f26cb53e64a3109d03a97200a
再执行autogen.sh里剩下的部分
生成configure
d.安装CMake 3.19
| 1 2 3 4 5 |
|
3.下载hadoop源码进行编译
源码下载GitHub - apache/hadoop: Apache Hadoop
注意为了更好的性能,要使用 Native Hadoop Library
Native Hadoop Library 介绍:https://hadoop.apache.org/docs/current/hadoop-project-dist/hadoop-common/NativeLibraries.html
解压后 ,cd hadoop-3.2.2-src
执行
| 1 |
|
编译中可能因为网络问题,有些包无法下载
可以自行到中央仓库Central Repository:下载相应jar包,
并先删除本地仓库中相应包目录下的缓存文件,再用maven安装到本地,再编译源码。
我遇到了2个jar无法下载,所以本地安装了下。
| 1 2 3 4 5 6 |
|
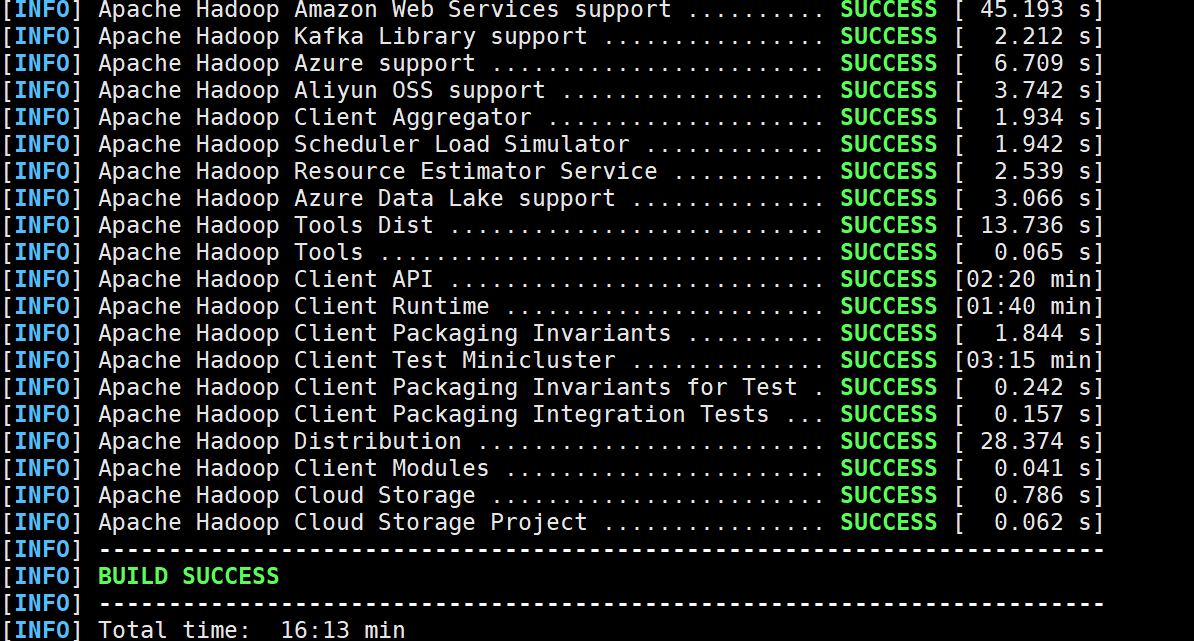
4.编译成功

旨在为数千万中国开发者提供一个无缝且高效的云端环境,以支持学习、使用和贡献开源项目。
更多推荐


 1
1 0
0- 0


 已为社区贡献2条内容

所有评论(0)