
【人脸精细分割】百度Paddle中PP-Mattingv2的部署并将之封装并调用一个C++静态库
百度开源了一个十分便捷的部署库。他对于小白十分的友好,大多数百度PaddlePaddle中的模型在fastDeploy中都有相应部署的demo,包括一些其他热门的算法模型fastDeploy中也会有相应部署的demo。
废话不多说,直接进入正题
1 部署及下载相关模型
1.1 部署fastDeploy库
百度开源了一个十分便捷的部署库fastDeploy。
他对于小白十分的友好,大多数百度PaddlePaddle中的模型在fastDeploy中都有相应部署的demo,包括一些其他热门的算法模型fastDeploy中也会有相应部署的demo。在 Windows 使用 FastDeploy C++ SDK教程。
1.2 下载相关模型
直接在fastDeploy官网选择需要的模型下载即可。我这里是下载的PP-Mattingv2。
下载解压后文件夹中会有四个文件分别是:

2 封装成静态库
2.1 使用到的工具(由于无GPU设备原因,暂时只能用cpu)
CUDA ToolKits 11.1.1(Windows10 CUDA 11.1.1下载地址,若无GPU不需要)
cudnn 8.4.1(cudnn下载地址,若无GPU不需要)
Visual Studio 2019
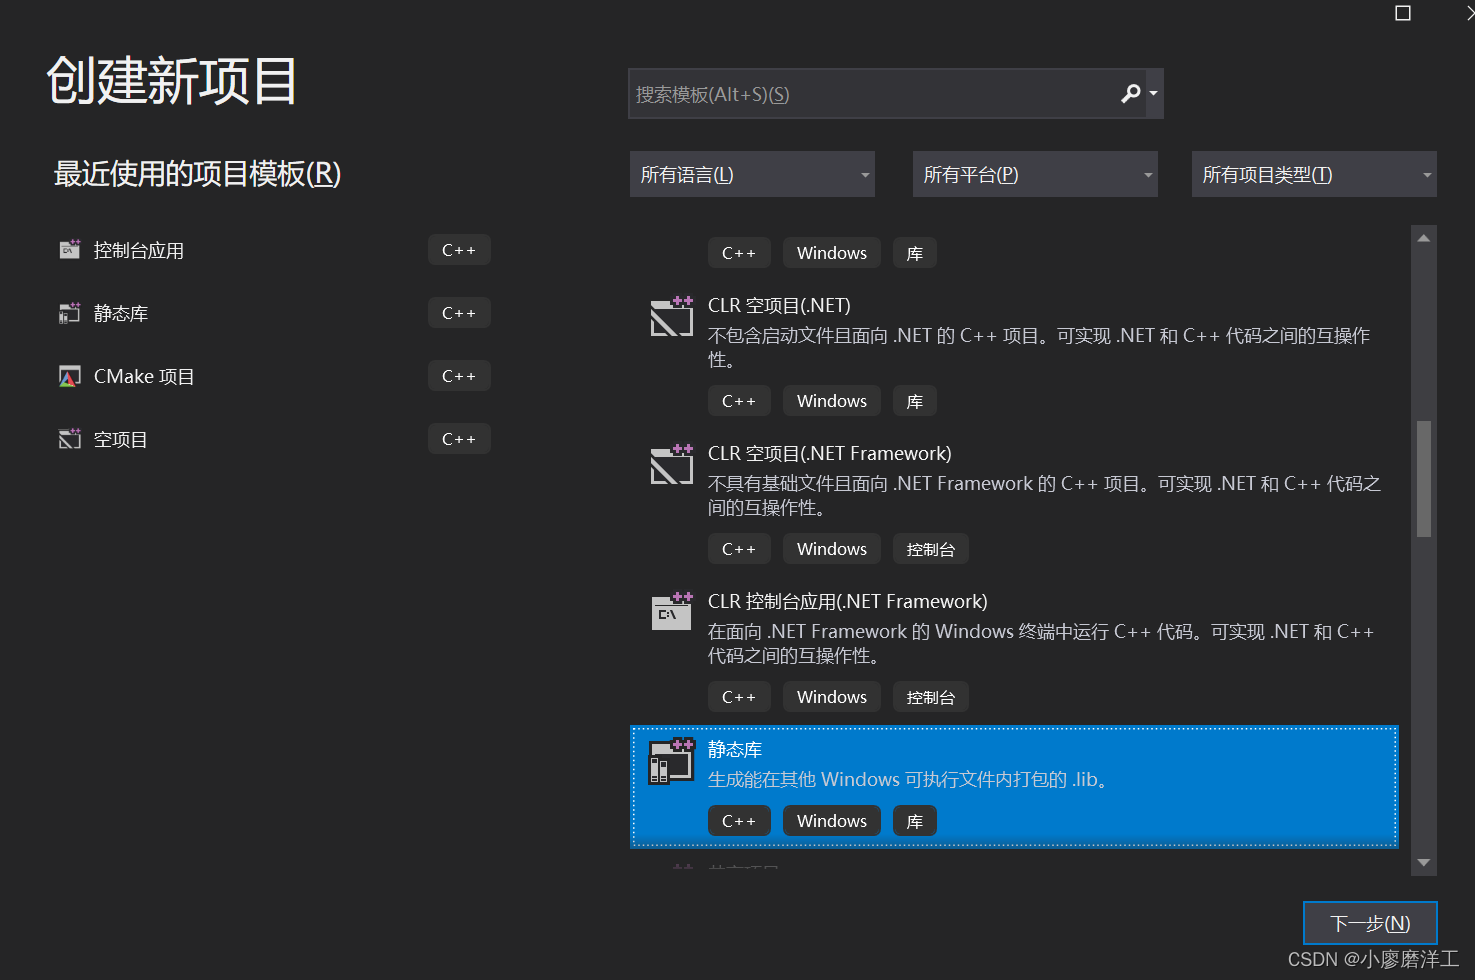
2.2 创建静态库项目
2.3 相关文件
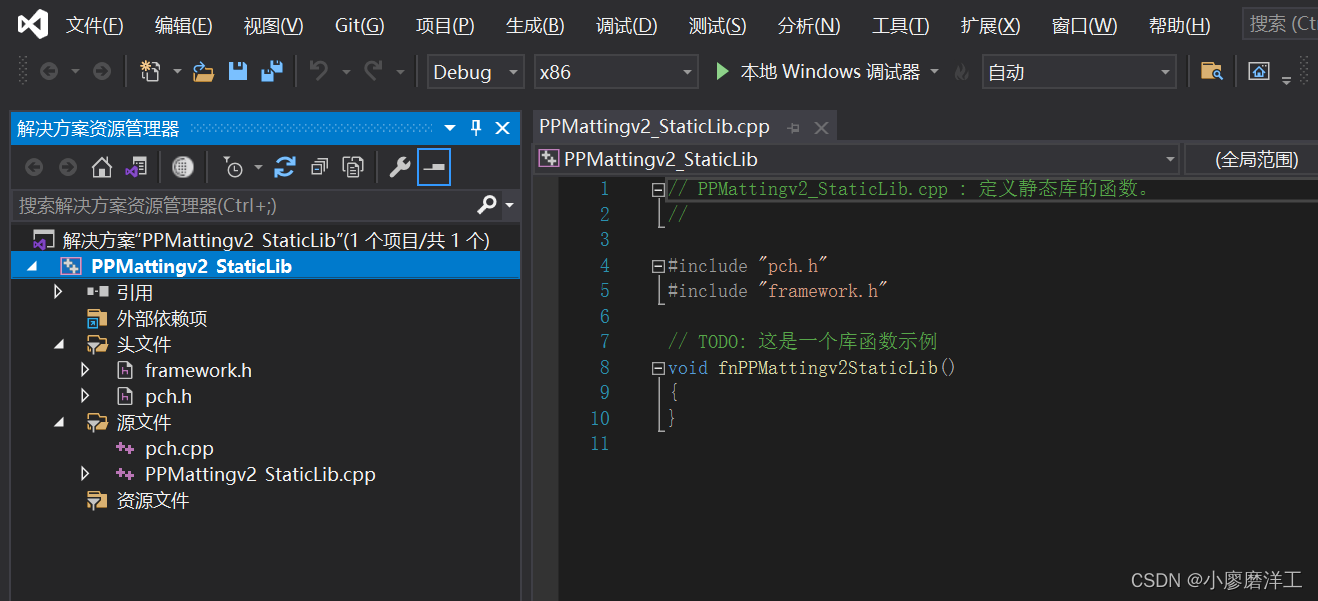
我们只需要修改framework.h和TestLib.cpp文件中的内容,其余两个文件不动。
下面我们导入相关代码:
framework.h代码:
#pragma once

#define WIN32_LEAN_AND_MEAN             // 从 Windows 头文件中排除极少使用的内容
#include "fastdeploy/vision.h"


cv::Mat GpuInfer(const std::string& model_dir, const cv::Mat& image,
    const std::string& background_file, const bool save);

cv::Mat CpuInfer(const std::string& model_dir, const cv::Mat& image,
    const std::string& background_file, const bool save);

int infer_by_camera(const std::string& device, const std::string& model_dir,
    const std::string& window_name, const std::string& background_file);
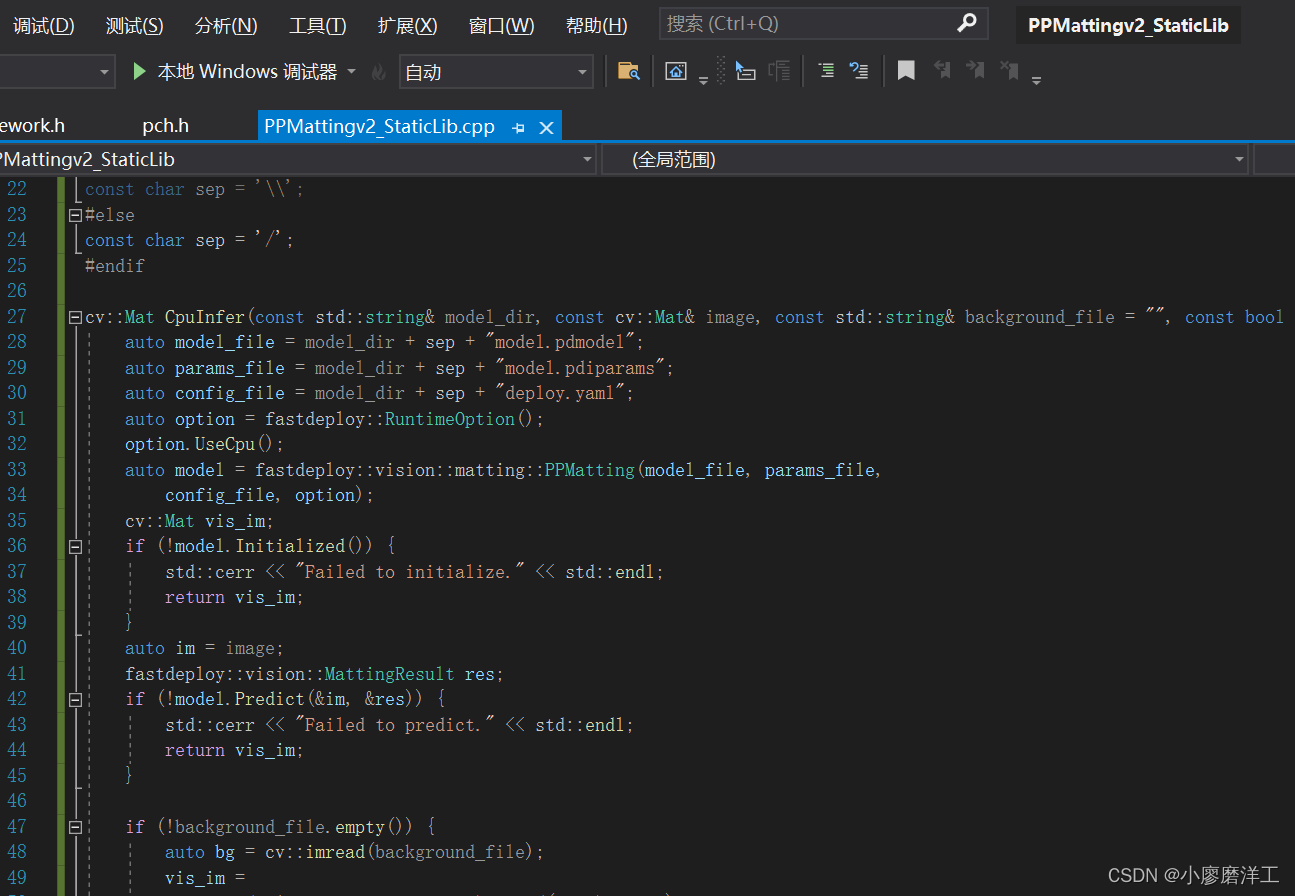
PPMattingv2_StaticLib.cpp代码:
// PPMatting_Staticlib.cpp : 定义静态库的函数。
//
// Copyright (c) 2022 PaddlePaddle Authors. All Rights Reserved.
//
// Licensed under the Apache License, Version 2.0 (the "License");
// you may not use this file except in compliance with the License.
// You may obtain a copy of the License at
//
//     http://www.apache.org/licenses/LICENSE-2.0
//
// Unless required by applicable law or agreed to in writing, software
// distributed under the License is distributed on an "AS IS" BASIS,
// WITHOUT WARRANTIES OR CONDITIONS OF ANY KIND, either express or implied.
// See the License for the specific language governing permissions and
// limitations under the License.

#include "pch.h"

#include "framework.h"

#ifdef WIN32
const char sep = '\\';
#else
const char sep = '/';
#endif

cv::Mat CpuInfer(const std::string& model_dir, const cv::Mat& image, const std::string& background_file = "", const bool save = false) {
    auto model_file = model_dir + sep + "model.pdmodel";
    auto params_file = model_dir + sep + "model.pdiparams";
    auto config_file = model_dir + sep + "deploy.yaml";
    auto option = fastdeploy::RuntimeOption();
    option.UseCpu();
    auto model = fastdeploy::vision::matting::PPMatting(model_file, params_file,
        config_file, option);
    cv::Mat vis_im;
    if (!model.Initialized()) {
        std::cerr << "Failed to initialize." << std::endl;
        return vis_im;
    }
    auto im = image;
    fastdeploy::vision::MattingResult res;
    if (!model.Predict(&im, &res)) {
        std::cerr << "Failed to predict." << std::endl;
        return vis_im;
    }

    if (!background_file.empty()) {
        auto bg = cv::imread(background_file);
        vis_im =
            fastdeploy::vision::SwapBackground(im, bg, res);
    }
    else {
        vis_im = fastdeploy::vision::VisMatting(im, res);
    }
    if (save) {
        cv::imwrite("visualized_result_fg.jpg", vis_im);
        std::cout << "visualized_result_fg.jpg" << std::endl;
    }
    return vis_im;
}

cv::Mat GpuInfer(const std::string& model_dir, const cv::Mat& image, const std::string& background_file = "", const bool save = false) {
    auto model_file = model_dir + sep + "model.pdmodel";
    auto params_file = model_dir + sep + "model.pdiparams";
    auto config_file = model_dir + sep + "deploy.yaml";

    auto option = fastdeploy::RuntimeOption();
    option.UseGpu();
    option.UsePaddleInferBackend();
    auto model = fastdeploy::vision::matting::PPMatting(model_file, params_file,
        config_file, option);
    cv::Mat vis_im;
    if (!model.Initialized()) {
        std::cerr << "Failed to initialize." << std::endl;
        return vis_im;
    }
    auto im = image;
    fastdeploy::vision::MattingResult res;
    if (!model.Predict(&im, &res)) {
        std::cerr << "Failed to predict." << std::endl;
        return vis_im;
    }

    if (!background_file.empty()) {
        auto bg = cv::imread(background_file);
        vis_im =
            fastdeploy::vision::SwapBackground(im, bg, res);
    }
    else {
        vis_im = fastdeploy::vision::VisMatting(im, res);
    }
    if (save) {
        cv::imwrite("visualized_result_fg.jpg", vis_im);
        std::cout << "visualized_result_fg.jpg" << std::endl;
    }
    return vis_im;
}

int infer_by_camera(const std::string& device, const std::string& model_dir, const std::string& window_name = "video", const std::string& background_file = "") {
    cv::VideoCapture cap;
    cap.open(0);
    if (!cap.isOpened()) {
        std::cout << "open camera failed!" << std::endl;
        return 0;
    }
    cv::namedWindow(window_name, 1);
    while (1) {
        time_t t_now = time(0);
        cv::Mat frame;
        cap >> frame;
        if (frame.empty()) {
            return 0;
        }
        if (device == "gpu" or device == "GPU")
            cv::imshow(window_name, GpuInfer(model_dir, frame, background_file));
        else
            cv::imshow(window_name, CpuInfer(model_dir, frame, background_file));
        std::cout << "Matting此帧共消耗" << (time(0) - t_now) << "秒" << std::endl;
        if (cv::waitKey(30) >= 0) break;
    }
    cap.release();
    return 1;
}
2.4 添加此项目所需库
2.4.0 注意自己生成选项(以后调用也是需要跟这个相同的选项)

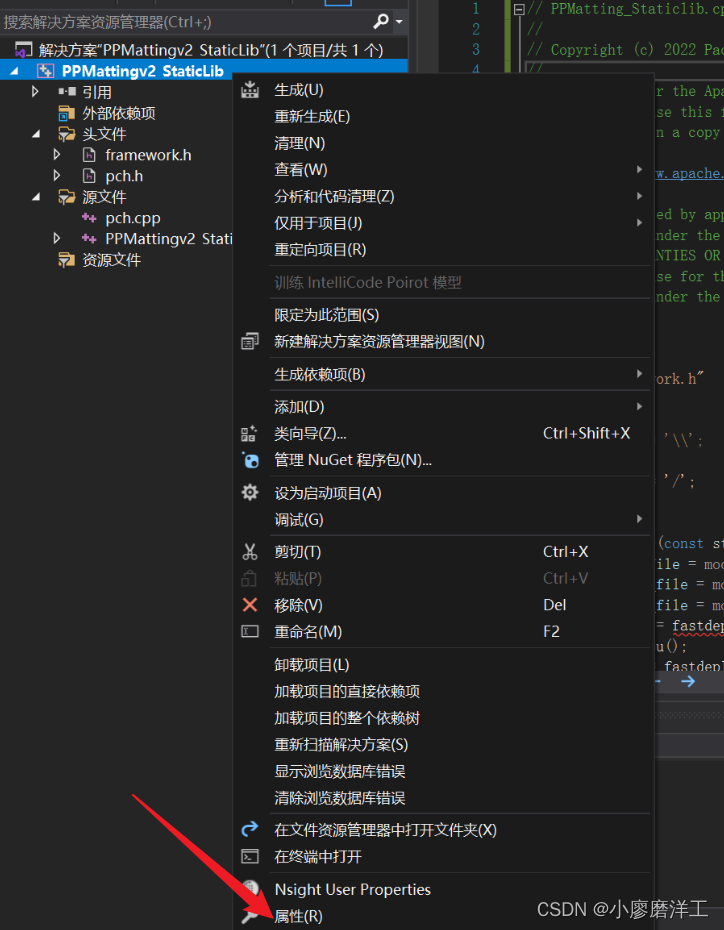
2.4.1 进入项目属性设置界面
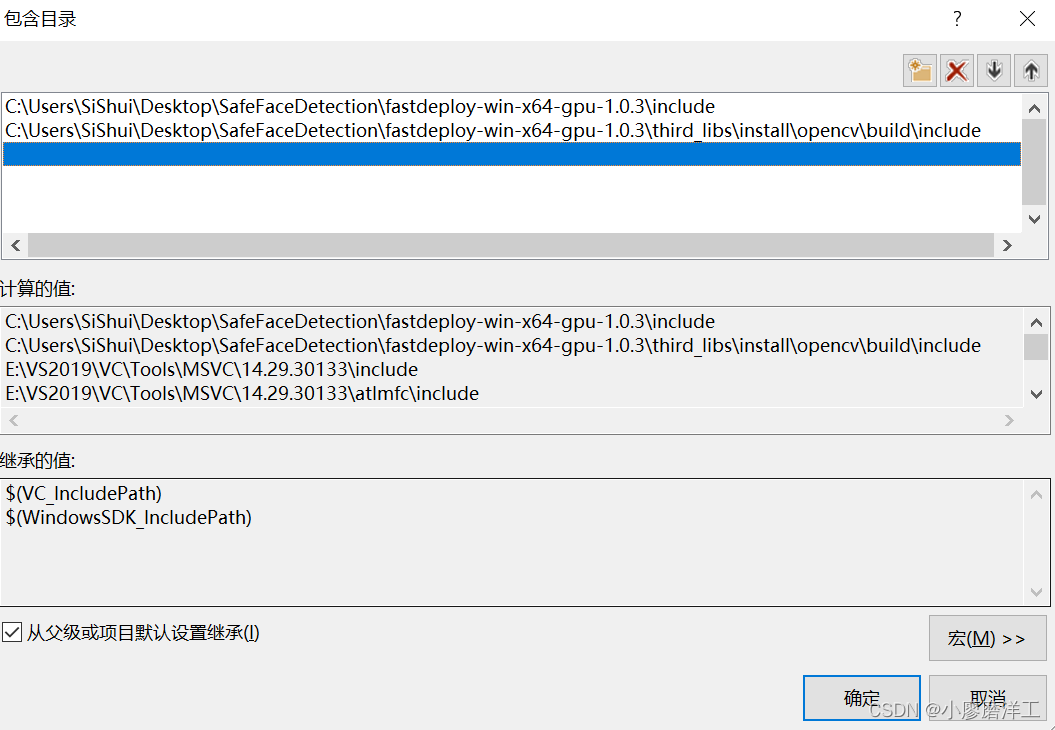
2.4.2添加包含目录
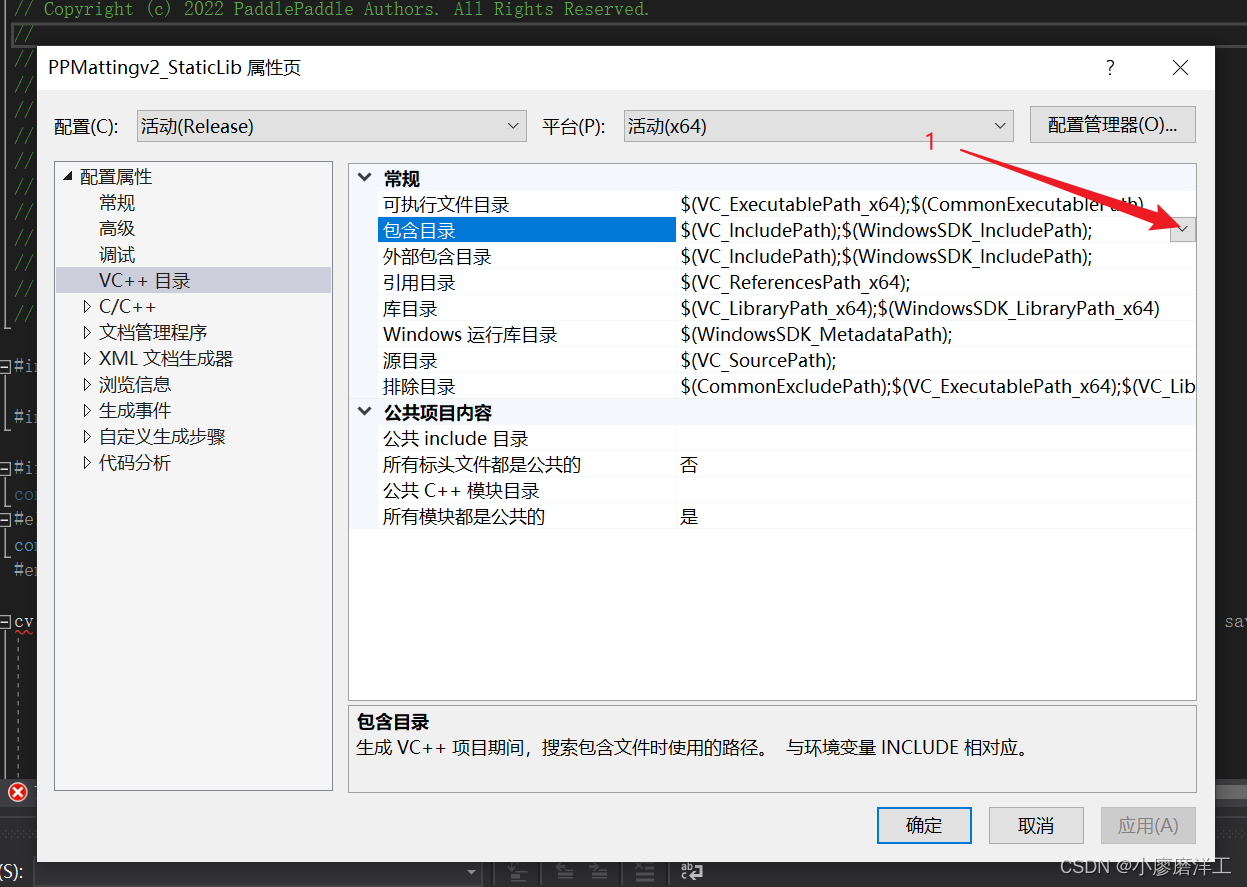
这里路径是你配置好后fastDeploy的include路径和fastDeploy中opencv的include路径。
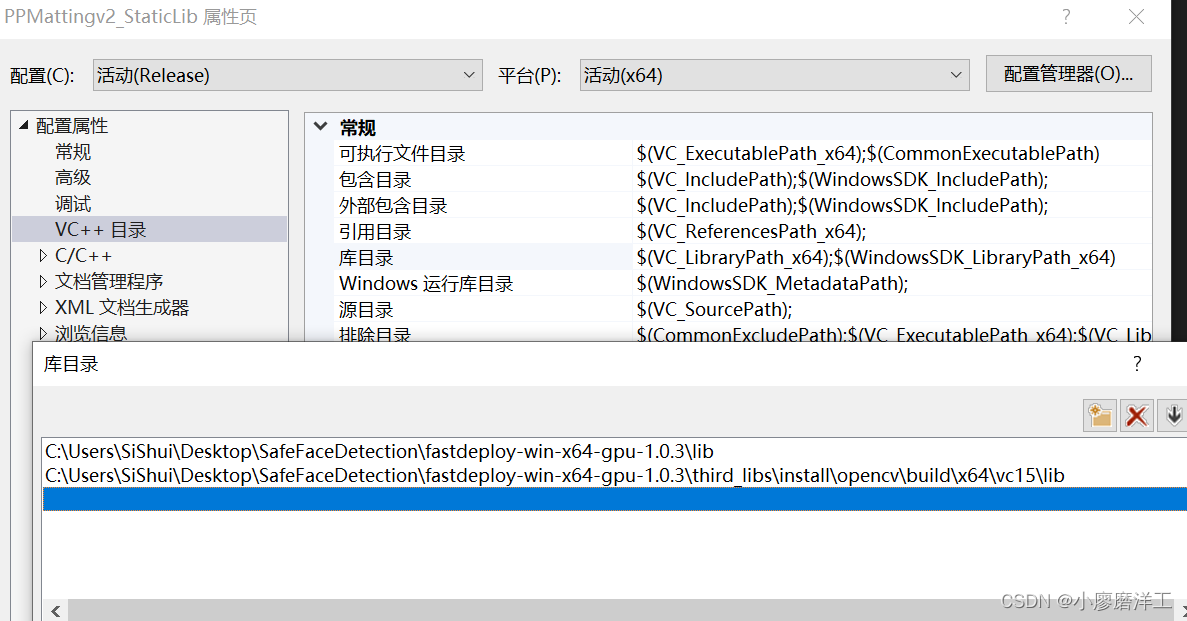
2.4.3 添加库目录
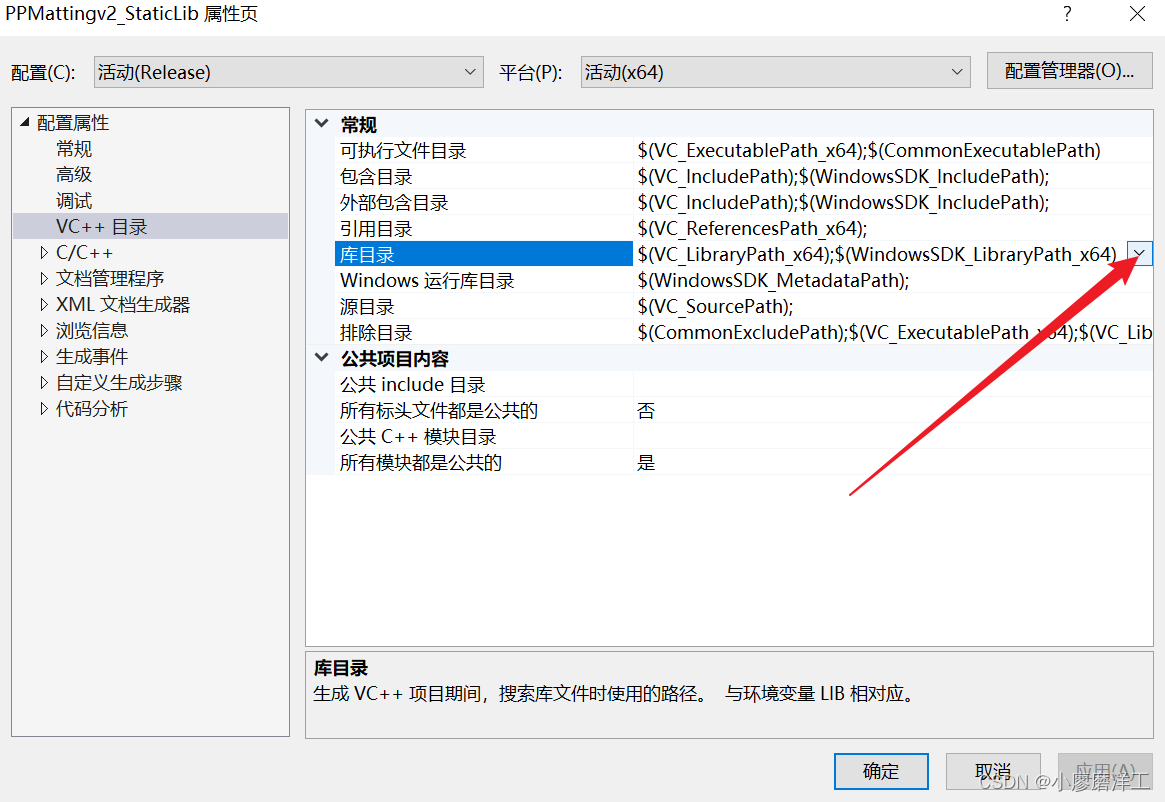
相同方法添加opencv和fastDeploy的lib路径
2.4.4 点击确定添加完毕
添加成功后,可以发现代码之前出现的大量关于无法找到fastDeploy库的报错会消失。
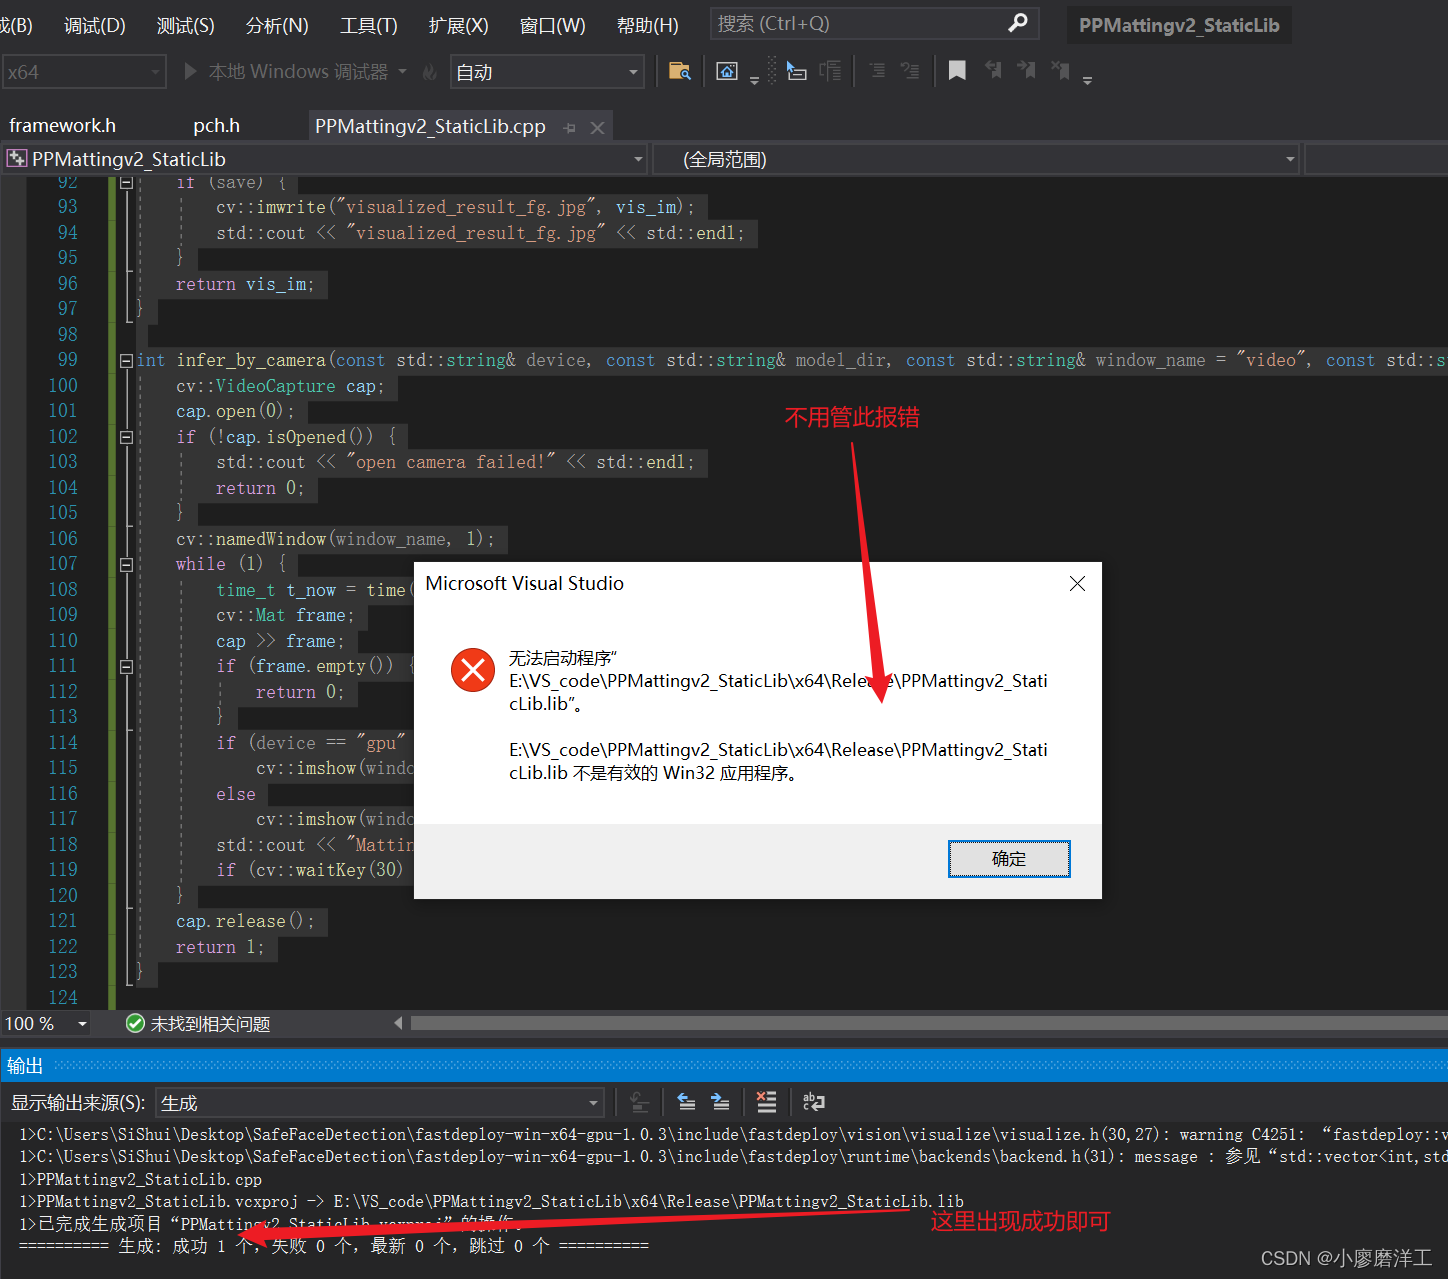
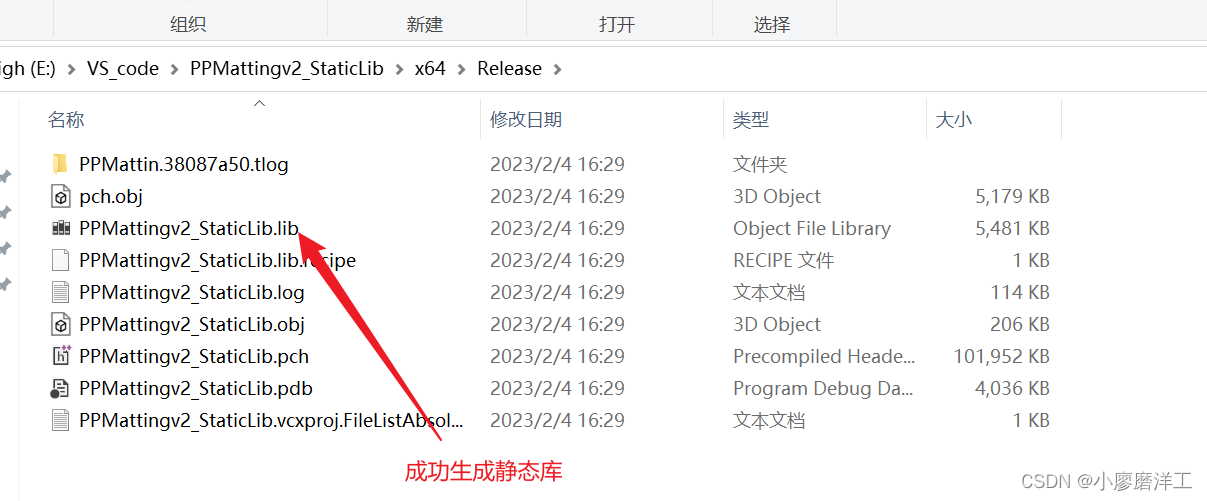
2.5 生成静态库
点击生成即可发现目录中有.lib文件。
3 调用
3.0 修改生成选项成与静态库相同

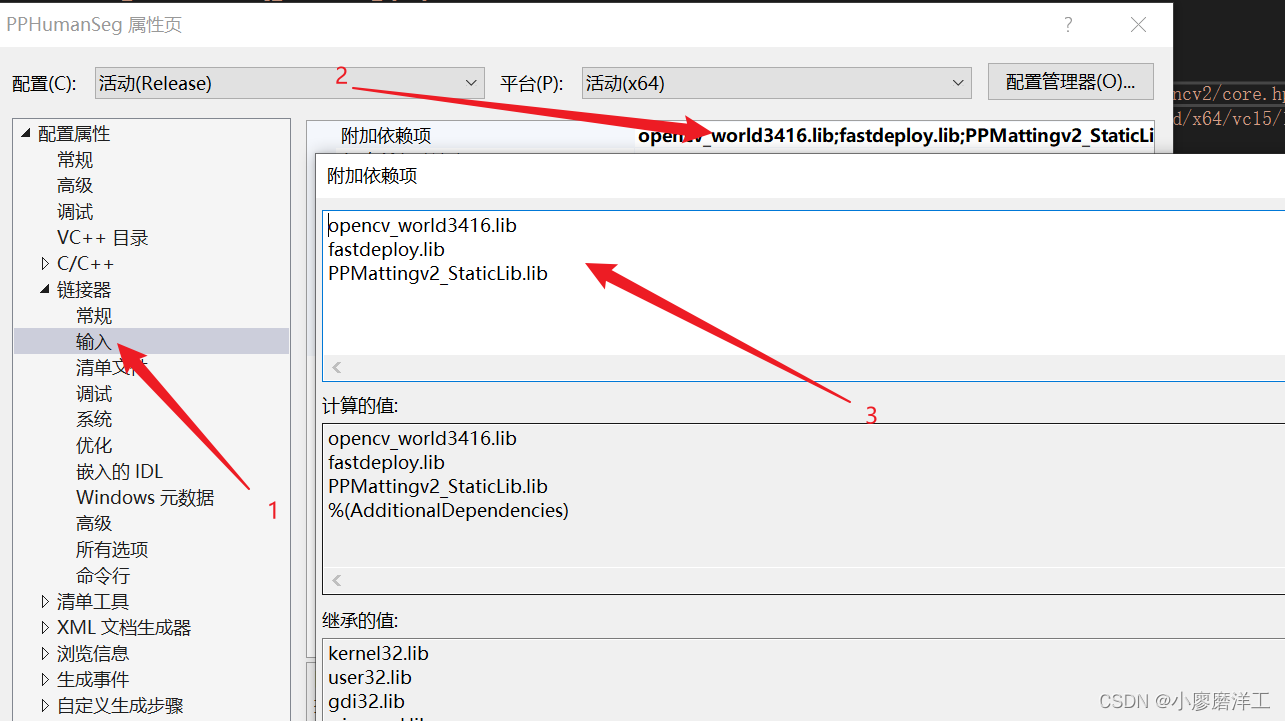
3.1 导入静态库和其他静态库中用到的库
方法同上,下面以导入库目录展示结果:

导入.lib文件
3.2 编写代码
#include <vector>
#include <iostream>
#include <string>
#include "E:/VS_code/PPMatting_Staticlib_cpu/pch.h"

int main() {
    infer_by_camera("cpu", "E:/VS_code/PPMatting_cpu/x64/Release/ppmattingv2-stdc1-human_512", "PPMattingv2", "E:/VS_code/PPMatting_cpu/x64/Release/test_bg.jpg");
    return 0;
}
4 运行
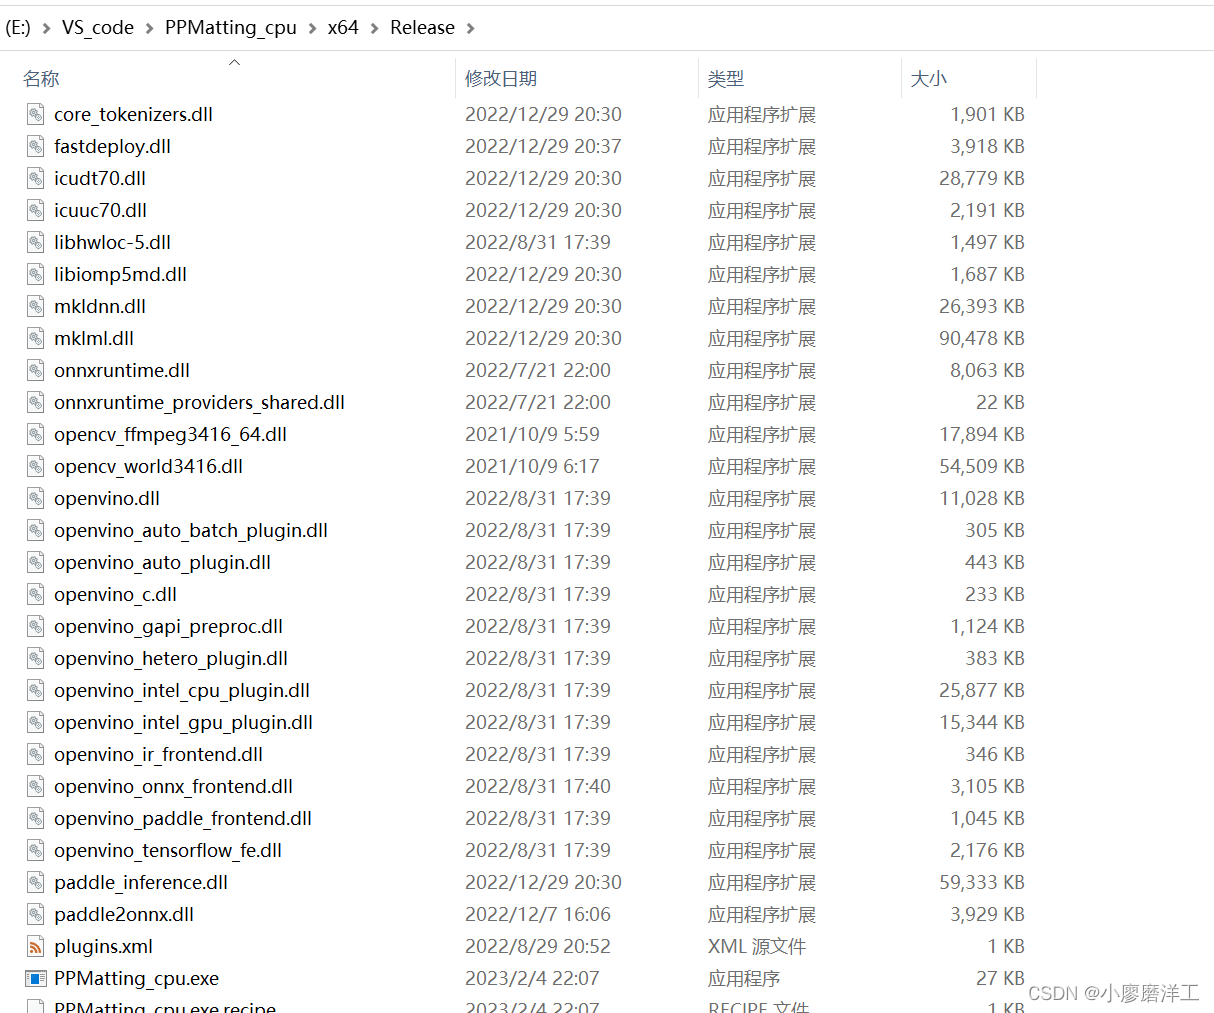
先点击运行生成一个.exe文件,我们会发现会提示缺失一系列的.dll文件。
4.1 从fastDeploy目录中导出相应.dll文件
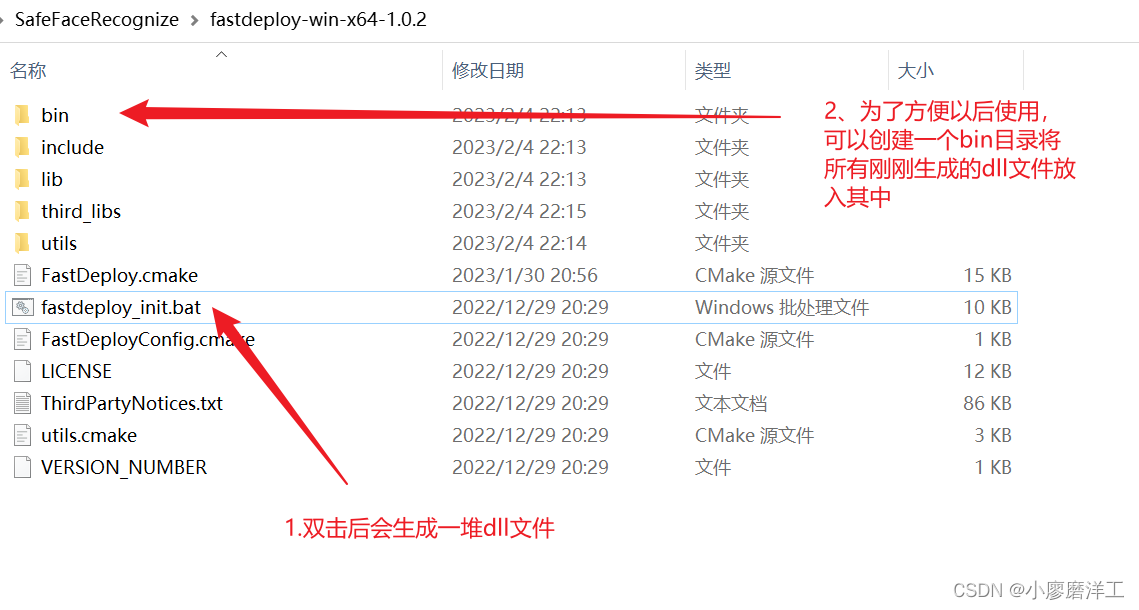
执行脚本文件后会发现生成了很多.dll文件。
4.2 将它们复制到刚刚生成的.exe文件目录下即可
4.3 运行成功


旨在为数千万中国开发者提供一个无缝且高效的云端环境,以支持学习、使用和贡献开源项目。
更多推荐


 4
4 0
0- 0


 已为社区贡献3条内容

所有评论(0)