
基于ruoyi的数据权限设置
权限
·
目录
一.代码修改
基于ruoyi实现数据权限的话,首先需要一系列代码,既单表的增删改查
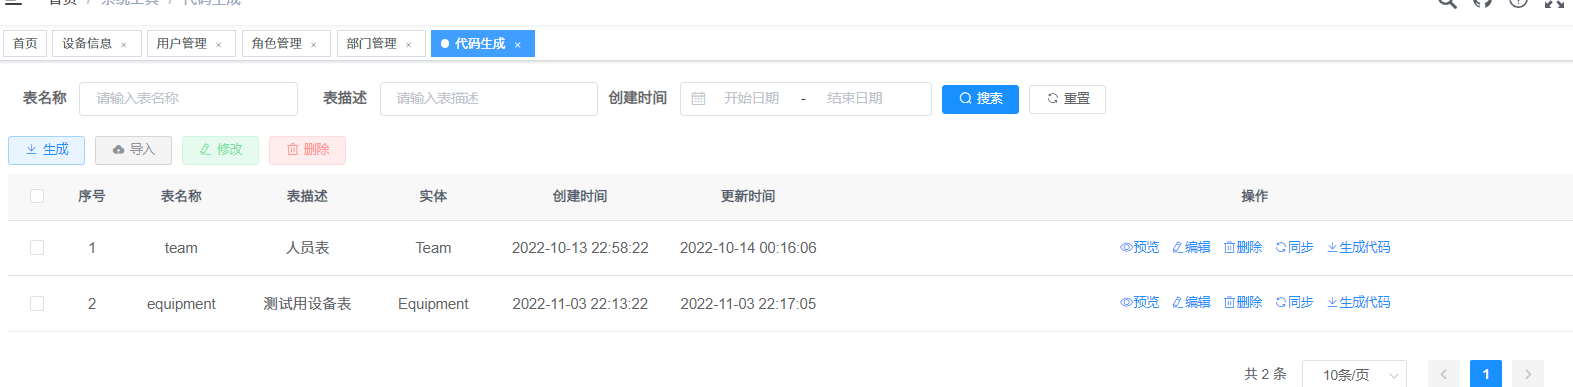
1.生成代码
用这个表来自动生成代码
然后把代码放到该放的地方,具体怎么放放到哪里放完之后怎么办,可以参考这一篇博客,ruoyi自动生成代码。
2.代码修改
此处我们选择get方法来测试,那么首先对get方法追加一个注释
 @Override
    @DataScope(deptAlias = "d", userAlias = "u")
    public List<Equipment> selectEquipmentList(Equipment equipment)
    {
        return equipmentMapper.selectEquipmentList(equipment);
    }
对xml文件做出一点修改
 <sql id="selectEquipmentVo">
        select v.id, v.machineName, v.department from equipment v left join sys_dept d on v.department = d.dept_id where v.id is not null
    </sql>

    <select id="selectEquipmentList" parameterType="Equipment" resultMap="EquipmentResult">
        <include refid="selectEquipmentVo"/>
        <where>
            <if test="machinename != null  and machinename != ''"> and machineName like concat('%', #{machinename}, '%')</if>
            <if test="department != null  and department != ''"> and department = #{department}</if>
        </where>
        ${params.dataScope}
    </select>
设置完成,剩下的工作要在页面里完成
二.权限使用和测试
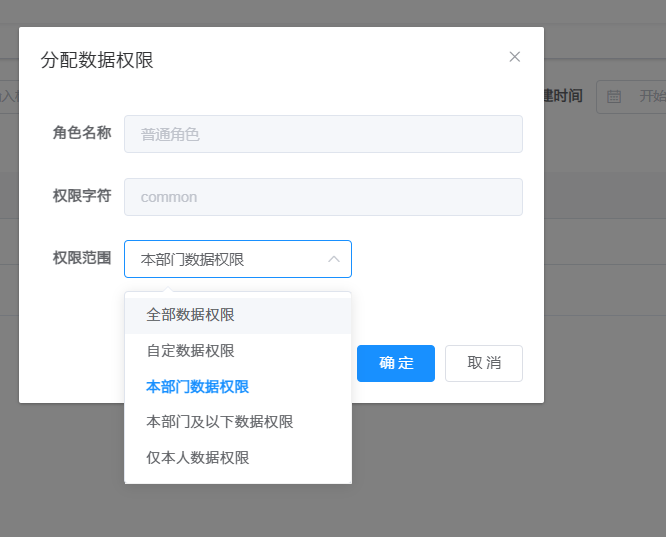
1.部门设置
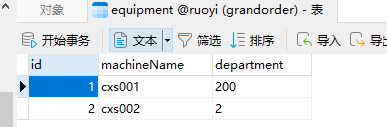
我们的数据库中虽然设置了部门的字段,但是其中的编号ruoyi并不能使用,此处首先新增一个部门,用于测试。
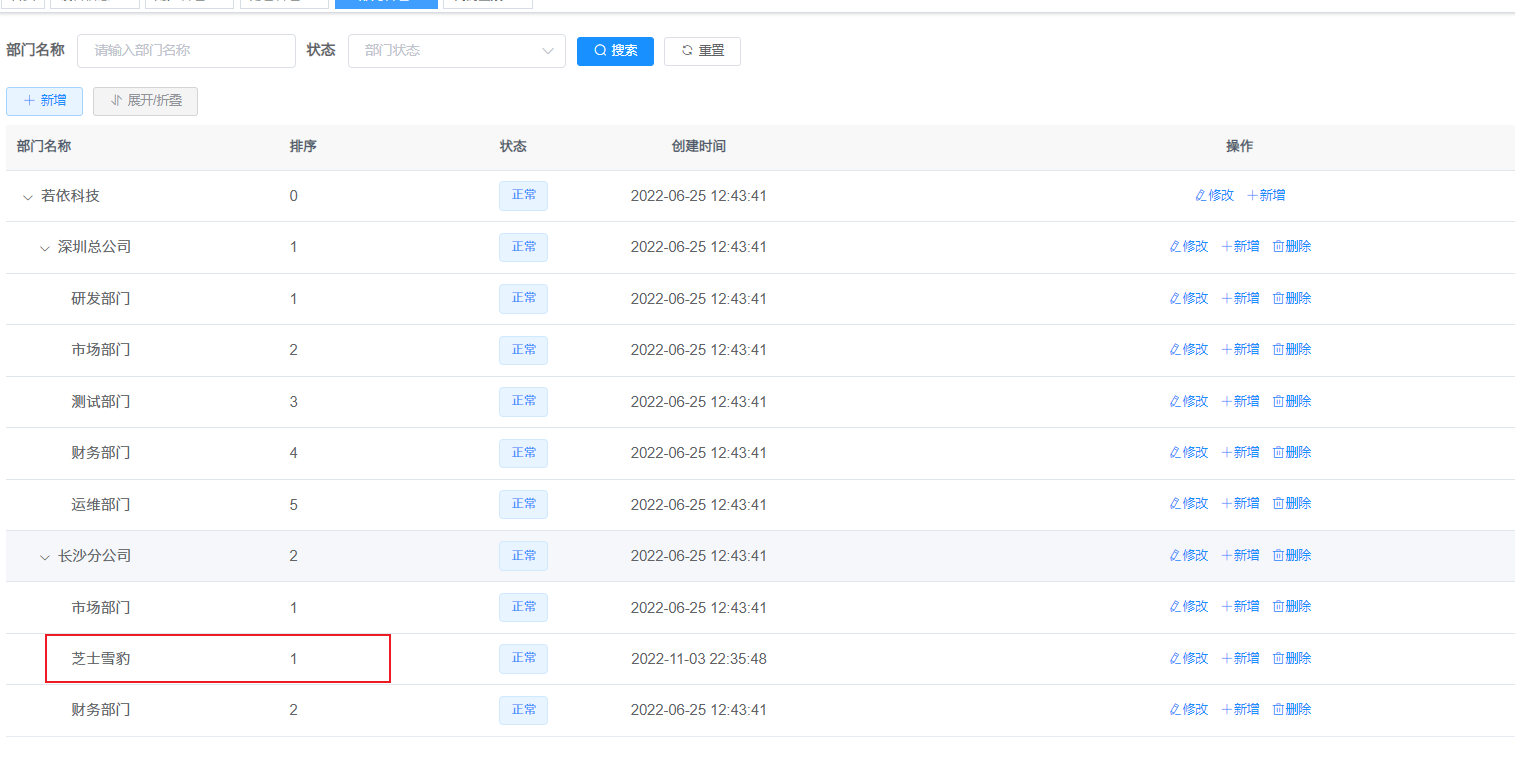
接下来给用户的部门做一下修改,改成此次测试用的芝士雪豹
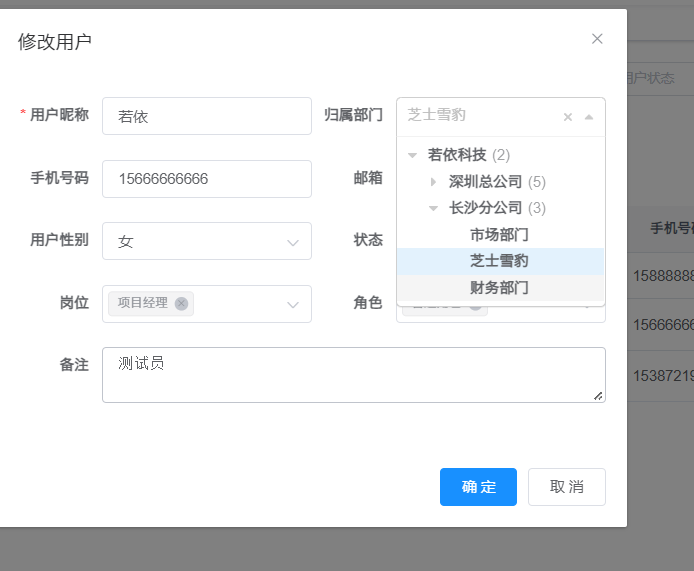
将权限范围限制在本部门数据权限
这样一来,就完成了配置,接下来小小的测试一下
三.测试
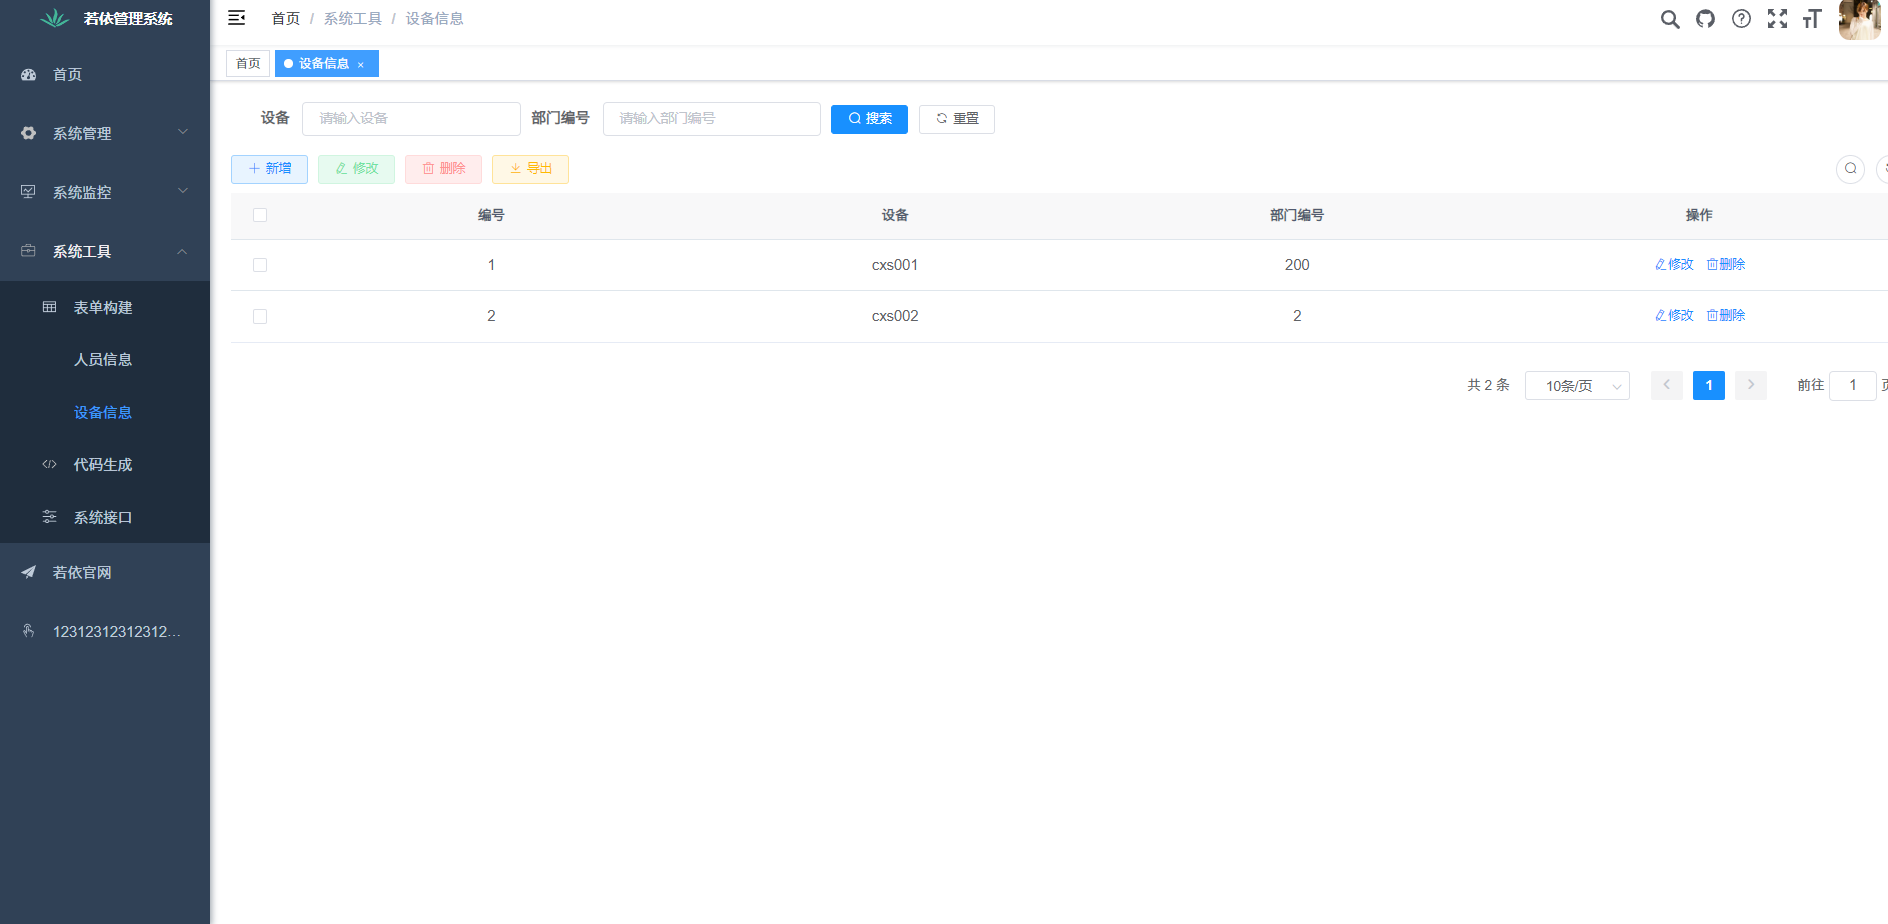
首先用超级管理员账号登录一下,可以看到当前账号展示了两个部门的信息。
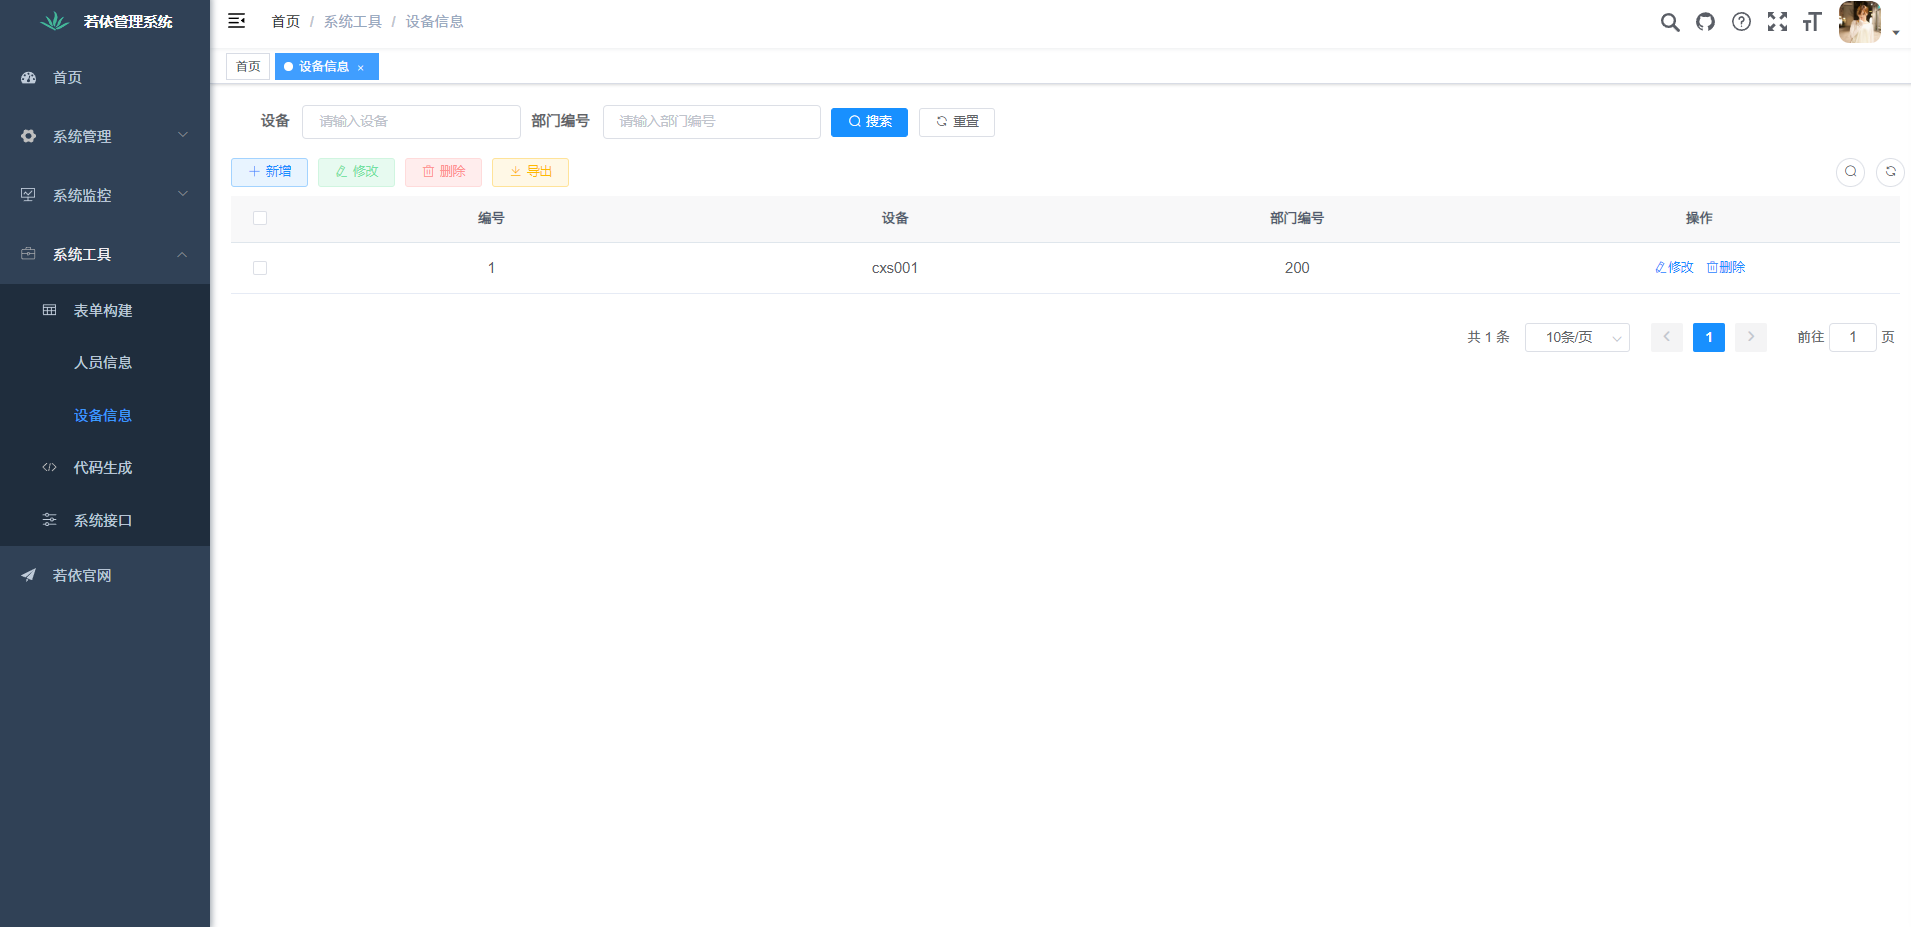
接下来登录此次测试用的账号,此账号已经被设置为芝士雪豹(部门编号200)的部门成员,这个账号所展示的信息仅仅只有部门编号为200的信息。

快速构建 Web 应用程序
更多推荐
 0
0 0
0- 0


 已为社区贡献11条内容

所有评论(0)