
通过Aidlux实现Yolov5人流跟踪统计的极简部署并发送手机提醒
AidLux智能物联网(AIoT)应用开发和部署平台-阿加犀智能科技AidLux是基于ARM架构的跨生态(Android/鸿蒙+Linux)一站式AIoT应用快速开发和部署平台APP通过共享 Linux 内核实现Android 和 Linux 生态融合,为单一设备同时提供Android和Linux运行环境集成国际主流AI框架和多种开发环境、后台服务程序、编译器及图形开发组件,无须配置开箱即用,极大
1.AidLux介绍
官网:AidLux智能物联网(AIoT)应用开发和部署平台-阿加犀智能科技
- AidLux是基于ARM架构的跨生态(Android/鸿蒙+Linux)一站式AIoT应用快速开发和部署平台APP
- 通过共享 Linux 内核实现Android 和 Linux 生态融合,为单一设备同时提供Android和Linux运行环境
- 集成国际主流AI框架和多种开发环境、后台服务程序、编译器及图形开发组件,无须配置开箱即用,极大地简化了开发步骤;自主研发的AI智能加速技术可实现CPU+GPU+NPU智能加速,大幅提高AI应用运行效率;平台广泛而深度的适配外设接口,省去大量调试工作;内置完整的跨平台桌面和命令行终端连接(SSH),一个平台完成多终端协同开发、测试、部署
- 可使用APK包安装方式快速部署在ARM架构的手机、平板、电脑和板卡等智能终端上
- AidLux能广泛应用在智能工业、AI教育、智慧人居、智慧城市、智慧物流、智慧交通、智慧零售和机器人等诸多场景中
博主觉得,AidLux最大的优势在于:常规Al应用开发需要C++、Java、Python、Linux等不同工程师相互配合,而在AidLux平台,开发者仅需使用Python一种编程语言即可进行开发,并支持将其他平台(PC、服务器)上使用Python开发的AI应用直接迁移至AidLux调试运行。
也就是说我们只需要熟悉python语言即可,再也不用学令人头疼的C++了!
2.环境搭建
2.1 手机版AidLux的安装
目前使用Aidlux主要有两种方式:
- 边缘设备的方式:阿加犀用高通芯片的S855,和S865制作了两款边缘设备,一款提供7T算力,一款提供15T算力。
- 手机设备的方式:没有边缘设备的情况下,也可以使用手机版本的Aidlux,尝试边缘设备的所有功能。
并且目前Aidlux已对基本市面上所有的芯片都进行了适配,在手机上运行算法模型,也可以体验优化的效果。当然在使用过程中,有个共同点,即手机设备和边缘设备采用的Aidlux软件,都是一样的。因此可以先尝试手机设备的方式,在后期需要更多算力的时候,使用边缘设备,就可以无缝衔接。所以我们先下载一下手机Aidlux的APP软件。打开安卓手机的应用商城,搜索Aidlux即可下载安装。

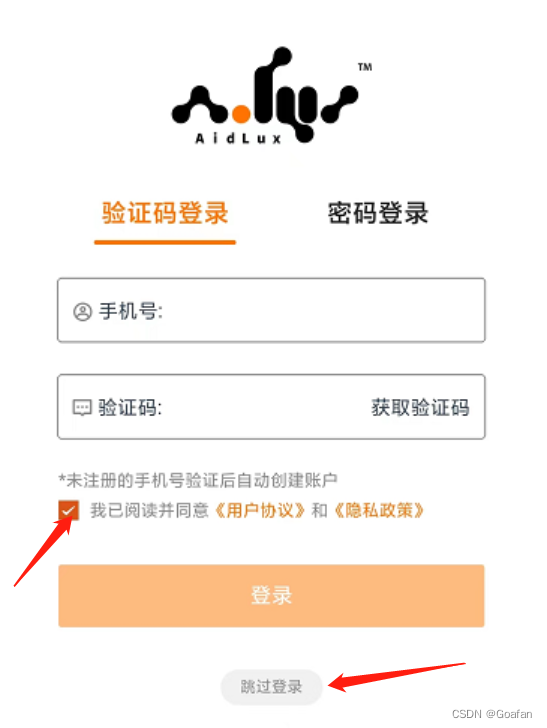
打开手机版本的Aidlux软件APP,第一次进入的时候,APP自带的系统会进行初始化。

初始化好后,进入系统登录页面,这一步最好可以用手机注册一下,当然也可以直接点击“我已阅读并同意”,然后点击跳过登录。
注意:软件获取存储权限后会有提示,如果是安卓版本12的手机,请点击确认,跟着提示完成相关步骤,以便后续开发。
进入主页面后,可以点击左上角的红色叉号,将说明页面关闭。

为了方便编程,aidlux还提供了电脑接口(需要手机和电脑连接同一网络):
点击下图中的Cloud_ip,即可显示电脑链接


在电脑中输入第一个网址即可,登陆时需要密码,默认密码为: aidlux
登录成功后可以发现,电脑的界面和手机端是同步的:

因此在开发的时候我们将写好的代码上传到文件中,就可以利用VSCode运行和调试 .
2.2 Aidlux软件设置默认后台运行
这里列举了多款手机设置的方式,大家可以参照相应的设置教程:
(1)小米手机和平板设置教程: 小米手机和平板 后台运行AidLux- AidLux开发者社区
(2)OPPO手机与平板设置教程: OPPO手机与平板 后台运行Aidlux- AidLux开发者社区
(3)vivo手机与平板设置教程: vivo手机与平板 后台运行AidLux- AidLux开发者社区
(4)华为鸿蒙/HarmonyOS 2.0设置教程: 鸿蒙/HarmonyOS 2.0 后台运行AidLux- AidLux开发者社区
(5)华为鸿蒙/HarmonyOS 3.0设置教程: 鸿蒙/HarmonyOS 3.0 后台运行AidLux- AidLux开发者社区
2.3 VSCode远程连接
新建远程连接:config如图所示,连接的密码同样是aidlux

HostName即上文提到的Cloud_ip地址,Port默认9022,连接成功后,打开我们上传到aidlux中的文件夹:注:打开文件夹的时候会再次输入密码 aidlux
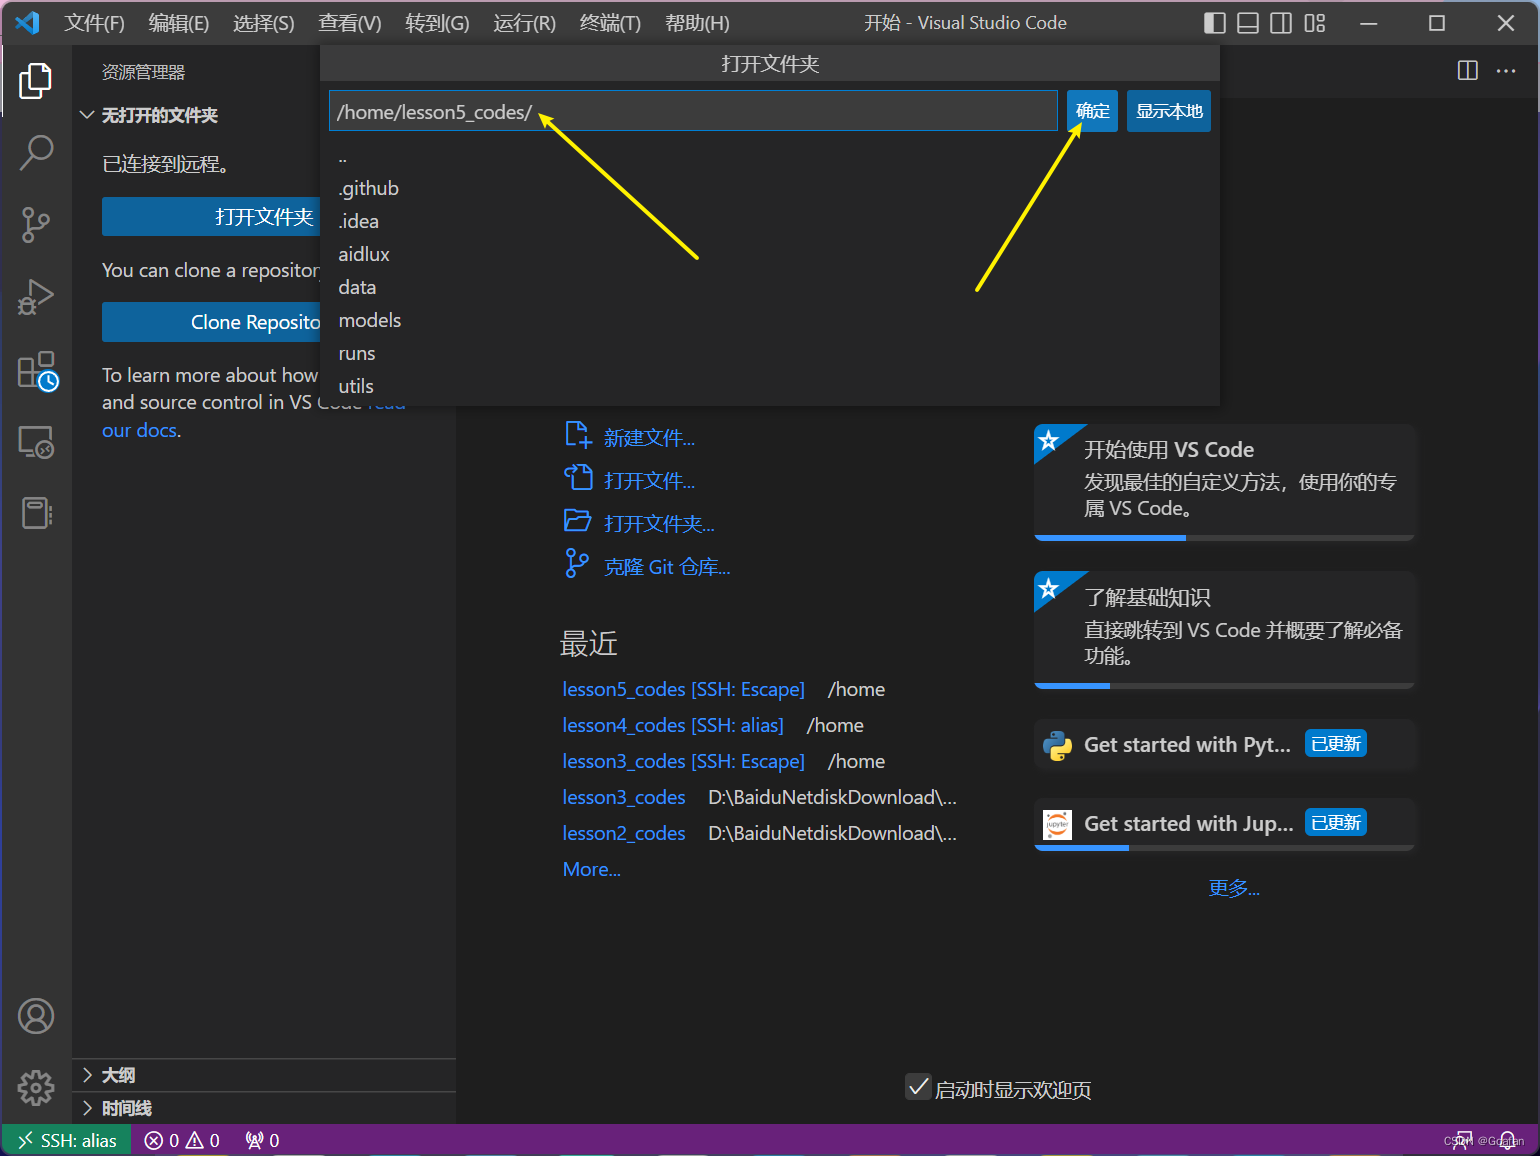

接下来就可以通过vscode进行代码调试了。
3 人流统计实战
然后我们来看一个运行YOLOv5+目标追踪bytetrack进行人流统计的案例,话不多说,先上效果:
3.1 目录结构:

其中yolov5n_best-fp16.tflite是从yolov5训练好的best.pt权重文件转换来的。
3.2 相关代码:
- yolov5_overstep.py
# aidlux相关
from cvs import *
import aidlite_gpu
from utils import detect_postprocess, preprocess_img, draw_detect_res,is_passing_line
import cv2
# bytetrack
from track.tracker.byte_tracker import BYTETracker
from track.utils.visualize import plot_tracking
import requests
import time


# 加载模型
model_path = '/home/lesson5_codes/aidlux/yolov5n_best-fp16.tflite'
in_shape = [1 * 640 * 640 * 3 * 4]
out_shape = [1 * 25200 * 6 * 4]

# 载入模型
aidlite = aidlite_gpu.aidlite()
# 载入yolov5检测模型
aidlite.ANNModel(model_path, in_shape, out_shape, 4, 0)

tracker = BYTETracker(frame_rate=30)
track_id_status = {}
cap = cvs.VideoCapture("/home/lesson5_codes/aidlux/video.mp4")
frame_id = 0
count_person = 0
while True:
    frame = cap.read()
    if frame is None:
        print('camera is over!')
        # 统计打印人数流量
        # 填写对应的喵码
        id = 'tOqH04S'
        # 填写喵提醒中,发送的消息,这里放上前面提到的图片外链
        text = "人流统计数:"+str(count_person)
        ts = str(time.time())  # 时间戳
        type = 'json'  # 返回内容格式
        request_url = "http://miaotixing.com/trigger?"
        headers = {'User-Agent': 'Mozilla/5.0 (Windows NT 10.0; Win64; x64) AppleWebKit/537.36 (KHTML, like Gecko) Chrome/87.0.4280.67 Safari/537.36 Edg/87.0.664.47'}
        result = requests.post(request_url + "id=" + id + "&text=" + text + "&ts=" + ts + "&type=" + type,headers=headers)
        break
    frame_id += 1
    if frame_id % 3 != 0:
        continue
     # 预处理
    img = preprocess_img(frame, target_shape=(640, 640), div_num=255, means=None, stds=None)
    # 数据转换:因为setTensor_Fp32()需要的是float32类型的数据,所以送入的input的数据需为float32,大多数的开发者都会忘记将图像的数据类型转换为float32
    aidlite.setInput_Float32(img, 640, 640)
    # 模型推理API
    aidlite.invoke()
    # 读取返回的结果
    pred = aidlite.getOutput_Float32(0)
    # 数据维度转换
    pred = pred.reshape(1, 25200, 6)[0]
    # 模型推理后处理
    pred = detect_postprocess(pred, frame.shape, [640, 640, 3], conf_thres=0.4, iou_thres=0.45)
    # 绘制推理结果
    res_img = draw_detect_res(frame, pred)

    # 目标追踪相关功能
    det = []
    # Process predictions
    for box in pred[0]:  # per image
        box[2] += box[0]
        box[3] += box[1]
        det.append(box)
    if len(det):
        # Rescale boxes from img_size to im0 size
        online_targets = tracker.update(det, [frame.shape[0], frame.shape[1]])
        online_tlwhs = []
        online_ids = []
        online_scores = []
        # 取出每个目标的追踪信息
        for t in online_targets:
            # 目标的检测框信息
            tlwh = t.tlwh
            # 目标的track_id信息
            tid = t.track_id
            online_tlwhs.append(tlwh)
            online_ids.append(tid)
            online_scores.append(t.score)
            # 针对目标绘制追踪相关信息
            res_img = plot_tracking(res_img, online_tlwhs, online_ids, 0,0)


            ### 人流计数识别功能实现 ###
            # 1.绘制直线
            lines = [[186,249],[1235,366]]
            cv2.line(res_img,(186,249),(1235,266),(255,255,0),3)

            # 2.计算得到人体下方中心点的位置(人体检测监测点调整)
            pt = [tlwh[0]+1/2*tlwh[2],tlwh[1]+tlwh[3]]

            # 3. 人体和违规区域的判断(人体状态追踪判断)
            track_info = is_passing_line(pt, lines)
            if tid not in track_id_status.keys():
                track_id_status.update( {tid:[track_info]})
            else:
                if track_info != track_id_status[tid][-1]:
                    track_id_status[tid].append(track_info)

            # 4. 判断是否有track_id越界,有的话保存成图片
            # 当某个track_id的状态,上一帧是-1,但是这一帧是1时,说明越界了
            if track_id_status[tid][-1] == 1 and len(track_id_status[tid]) >1:
                # 判断上一个状态是否是-1,是否的话说明越界,为了防止继续判别,随机的赋了一个3的值
                if  track_id_status[tid][-2] == -1:
                    track_id_status[tid].append(3)
                    count_person+=1
    cv2.putText(res_img,"-1 to 1 person_count:  "+str(count_person),(50,105),cv2.FONT_HERSHEY_SIMPLEX,1,(0,255,255),2)
cvs.imshow(res_img) - utils.py
import time

import cv2
import numpy as np

coco_class = ['person', 'bicycle', 'car', 'motorcycle', 'airplane', 'bus', 'train', 'truck', 'boat', 'traffic light',
        'fire hydrant', 'stop sign', 'parking meter', 'bench', 'bird', 'cat', 'dog', 'horse', 'sheep', 'cow',
        'elephant', 'bear', 'zebra', 'giraffe', 'backpack', 'umbrella', 'handbag', 'tie', 'suitcase', 'frisbee',
        'skis', 'snowboard', 'sports ball', 'kite', 'baseball bat', 'baseball glove', 'skateboard', 'surfboard',
        'tennis racket', 'bottle', 'wine glass', 'cup', 'fork', 'knife', 'spoon', 'bowl', 'banana', 'apple',
        'sandwich', 'orange', 'broccoli', 'carrot', 'hot dog', 'pizza', 'donut', 'cake', 'chair', 'couch',
        'potted plant', 'bed', 'dining table', 'toilet', 'tv', 'laptop', 'mouse', 'remote', 'keyboard', 'cell phone',
        'microwave', 'oven', 'toaster', 'sink', 'refrigerator', 'book', 'clock', 'vase', 'scissors', 'teddy bear',
        'hair drier', 'toothbrush']

def xywh2xyxy(x):
    '''
    Box (center x, center y, width, height) to (x1, y1, x2, y2)
    '''
    y = np.copy(x)
    y[:, 0] = x[:, 0] - x[:, 2] / 2  # top left x
    y[:, 1] = x[:, 1] - x[:, 3] / 2  # top left y
    y[:, 2] = x[:, 0] + x[:, 2] / 2  # bottom right x
    y[:, 3] = x[:, 1] + x[:, 3] / 2  # bottom right y
    return y

def xyxy2xywh(box):
    '''
    Box (left_top x, left_top y, right_bottom x, right_bottom y) to (left_top x, left_top y, width, height)
    '''
    box[:, 2:] = box[:, 2:] - box[:, :2]
    return box

def NMS(dets, thresh):
    '''
    单类NMS算法
    dets.shape = (N, 5), (left_top x, left_top y, right_bottom x, right_bottom y, Scores)
    '''
    x1 = dets[:,0]
    y1 = dets[:,1]
    x2 = dets[:,2]
    y2 = dets[:,3]
    areas = (y2-y1+1) * (x2-x1+1)
    scores = dets[:,4]
    keep = []
    index = scores.argsort()[::-1]
    while index.size >0:
        i = index[0]       # every time the first is the biggst, and add it directly
        keep.append(i)
        x11 = np.maximum(x1[i], x1[index[1:]])    # calculate the points of overlap
        y11 = np.maximum(y1[i], y1[index[1:]])
        x22 = np.minimum(x2[i], x2[index[1:]])
        y22 = np.minimum(y2[i], y2[index[1:]])
        w = np.maximum(0, x22-x11+1)    # the weights of overlap
        h = np.maximum(0, y22-y11+1)    # the height of overlap
        overlaps = w*h
        ious = overlaps / (areas[i]+areas[index[1:]] - overlaps)
        idx = np.where(ious<=thresh)[0]
        index = index[idx+1]   # because index start from 1

    return dets[keep]

def letterbox(img, new_shape=(640, 640), color=(114, 114, 114), auto=True, scaleFill=False, scaleup=True, stride=32):
    # Resize and pad image while meeting stride-multiple constraints
    shape = img.shape[:2]  # current shape [height, width]
    if isinstance(new_shape, int):
        new_shape = (new_shape, new_shape)

    # Scale ratio (new / old)
    r = min(new_shape[0] / shape[0], new_shape[1] / shape[1])
    if not scaleup:  # only scale down, do not scale up (for better test mAP)
        r = min(r, 1.0)

    # Compute padding
    ratio = r, r  # width, height ratios
    new_unpad = int(round(shape[1] * r)), int(round(shape[0] * r))
    dw, dh = new_shape[1] - new_unpad[0], new_shape[0] - new_unpad[1]  # wh padding
    if auto:  # minimum rectangle
        dw, dh = np.mod(dw, stride), np.mod(dh, stride)  # wh padding
    elif scaleFill:  # stretch
        dw, dh = 0.0, 0.0
        new_unpad = (new_shape[1], new_shape[0])
        ratio = new_shape[1] / shape[1], new_shape[0] / shape[0]  # width, height ratios

    dw /= 2  # divide padding into 2 sides
    dh /= 2

    if shape[::-1] != new_unpad:  # resize
        img = cv2.resize(img, new_unpad, interpolation=cv2.INTER_LINEAR)
    top, bottom = int(round(dh - 0.1)), int(round(dh + 0.1))
    left, right = int(round(dw - 0.1)), int(round(dw + 0.1))
    img = cv2.copyMakeBorder(img, top, bottom, left, right, cv2.BORDER_CONSTANT, value=color)  # add border
    return img, ratio, (dw, dh)

def preprocess_img(img, target_shape:tuple=None, div_num=255, means:list=[0.485, 0.456, 0.406], stds:list=[0.229, 0.224, 0.225]):
    '''
    图像预处理:
    target_shape: 目标shape
    div_num: 归一化除数
    means: len(means)==图像通道数,通道均值, None不进行zscore
    stds: len(stds)==图像通道数,通道方差, None不进行zscore
    '''
    img_processed = np.copy(img)
    # resize
    if target_shape:
        # img_processed = cv2.resize(img_processed, target_shape)
        img_processed = letterbox(img_processed, target_shape, stride=None, auto=False)[0]

    img_processed = img_processed.astype(np.float32)
    img_processed = img_processed/div_num

    # z-score
    if means is not None and stds is not None:
        means = np.array(means).reshape(1, 1, -1)
        stds = np.array(stds).reshape(1, 1, -1)
        img_processed = (img_processed-means)/stds

    # unsqueeze
    img_processed = img_processed[None, :]

    return img_processed.astype(np.float32)

def convert_shape(shapes:tuple or list, int8=False):
    '''
    转化为aidlite需要的格式
    '''
    if isinstance(shapes, tuple):
        shapes = [shapes]
    out = []
    for shape in shapes:
        nums = 1 if int8 else 4
        for n in shape:
            nums *= n
        out.append(nums)
    return out

def scale_coords(img1_shape, coords, img0_shape, ratio_pad=None):
    # Rescale coords (xyxy) from img1_shape to img0_shape
    if ratio_pad is None:  # calculate from img0_shape
        gain = min(img1_shape[0] / img0_shape[0], img1_shape[1] / img0_shape[1])  # gain  = old / new
        pad = (img1_shape[1] - img0_shape[1] * gain) / 2, (img1_shape[0] - img0_shape[0] * gain) / 2  # wh padding
    else:
        gain = ratio_pad[0][0]
        pad = ratio_pad[1]

    coords[:, [0, 2]] -= pad[0]  # x padding
    coords[:, [1, 3]] -= pad[1]  # y padding
    coords[:, :4] /= gain
    clip_coords(coords, img0_shape)
    return coords


def clip_coords(boxes, img_shape):
    # Clip bounding xyxy bounding boxes to image shape (height, width)
    boxes[:, 0].clip(0, img_shape[1], out=boxes[:, 0])  # x1
    boxes[:, 1].clip(0, img_shape[0], out=boxes[:, 1])  # y1
    boxes[:, 2].clip(0, img_shape[1], out=boxes[:, 2])  # x2
    boxes[:, 3].clip(0, img_shape[0], out=boxes[:, 3])  # y2

def detect_postprocess(prediction, img0shape, img1shape, conf_thres=0.25, iou_thres=0.45):
    '''
    检测输出后处理
    prediction: aidlite模型预测输出
    img0shape: 原始图片shape
    img1shape: 输入图片shape
    conf_thres: 置信度阈值
    iou_thres: IOU阈值
    return: list[np.ndarray(N, 5)], 对应类别的坐标框信息, xywh、conf
    '''
    h, w, _ = img1shape
    cls_num = prediction.shape[-1] - 5
    valid_condidates = prediction[prediction[..., 4] > conf_thres]
    valid_condidates[:, 0] *= w
    valid_condidates[:, 1] *= h
    valid_condidates[:, 2] *= w
    valid_condidates[:, 3] *= h
    valid_condidates[:, :4] = xywh2xyxy(valid_condidates[:, :4])
    valid_condidates = valid_condidates[(valid_condidates[:, 0] > 0) & (valid_condidates[:, 1] > 0) & (valid_condidates[:, 2] > 0) & (valid_condidates[:, 3] > 0)]
    box_cls = valid_condidates[:, 5:].argmax(1)
    cls_box = []
    for i in range(cls_num):
        temp_boxes = valid_condidates[box_cls == i]
        if(len(temp_boxes) == 0):
            cls_box.append([])
            continue
        temp_boxes = NMS(temp_boxes, iou_thres)
        temp_boxes[:, :4] = scale_coords([h, w], temp_boxes[:, :4] , img0shape).round()
        temp_boxes[:, :4] = xyxy2xywh(temp_boxes[:, :4])
        cls_box.append(temp_boxes[:, :5])
    return cls_box

def draw_detect_res(img, all_boxes):
    '''
    检测结果绘制
    '''
    img = img.astype(np.uint8)
    color_step = int(255/len(all_boxes))
    for bi in range(len(all_boxes)):
        if len(all_boxes[bi]) == 0:
            continue
        for box in all_boxes[bi]:
            x, y, w, h = [int(t) for t in box[:4]]
            score = str(box[4:5][0])
            cv2.putText(img, str(round(float(score),2)), (x, y-5), cv2.FONT_HERSHEY_SIMPLEX, 0.5, (255, 255, 255), 2)
            cv2.rectangle(img, (x,y), (x+w, y+h),(0, bi*color_step, 255-bi*color_step),thickness = 2)
    return img

def process_points(img,points,color_light_green):

    points = np.array([points], dtype=np.int32)
    ###绘制mask
    zeros = np.zeros((img.shape), dtype=np.uint8)
    mask = cv2.fillPoly(zeros, points, color=color_light_green)  ####填充颜色
    ##绘制轮廓
    cv2.drawContours(img, points, -1, (144, 238, 144), 5)   ###绘制轮廓
    ##叠加mask和普通图片
    mask_img = 0.01 * mask + img
    return mask_img

def is_in_poly(p, poly):
    """
    :param p: [x, y]
    :param poly: [[], [], [], [], ...]
    :return:
    """
    px, py = p
    is_in = False
    for i, corner in enumerate(poly):
        next_i = i + 1 if i + 1 < len(poly) else 0
        x1, y1 = corner
        x2, y2 = poly[next_i]
        if (x1 == px and y1 == py) or (x2 == px and y2 == py):  # if point is on vertex
            is_in = True
            break
        if min(y1, y2) < py <= max(y1, y2):  # find horizontal edges of polygon
            x = x1 + (py - y1) * (x2 - x1) / (y2 - y1)
            if x == px:  # if point is on edge
                is_in = True
                break
            elif x > px:  # if point is on left-side of line
                is_in = not is_in

    if is_in == True:
        person_status = 1
    else:
        person_status = -1

    return person_status


def is_passing_line(point, polyline):
    # 在直线下方,status =-1
    # 在直线上方,status =1
    status = 1
    # 点映射在直线的高度
    poly_y = ((polyline[1][1] - polyline[0][1]) * (point[0] - polyline[0][0])) / (polyline[1][0] - polyline[0][0]) + \
              polyline[0][1]
    if point[1] > poly_y:
        status = -1
    return status
3.3 喵提醒公众号的使用
在yolov5_overstep.py中我们可以看到,有这样一段代码:

它可以用来实现如下效果:

即:当我们预测完一段视频,或者一个时段之后,通过公众号通知我们人流量为多少。
使用方法我们已经在上面给出,大家只需要把喵码ID换成自己的,这样才会发送到自己的微信上。
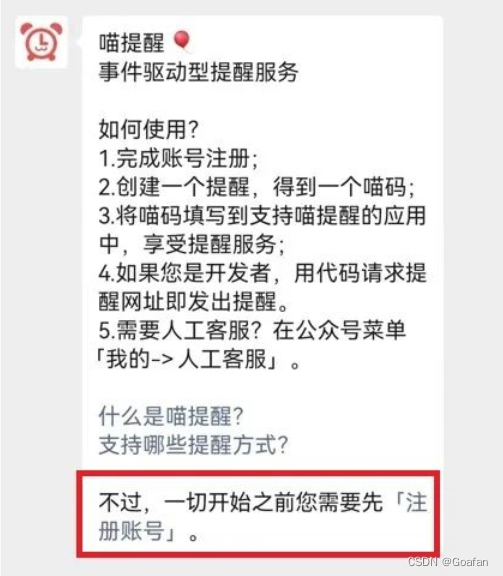
下面来介绍一下如何获取喵码id:
(1)关注“喵提醒”公众号,关注成功后,公众号会给我们发送一条消息,可以直接点击注册账号,或者给公众号发送“注册账号”。
(2)在底部菜单栏中,点击提醒--新建

(3)填写完标题和备注后,点击保存,系统会自动生成喵码id。

(4)此时,我们只需要复制喵码id,并且替换代码中原有的id即可

4 AidLux精彩案例
当然,aidlux的功能不只于此,在examples中有各种各样的AI项目案例,只需要下载运行即可体验。

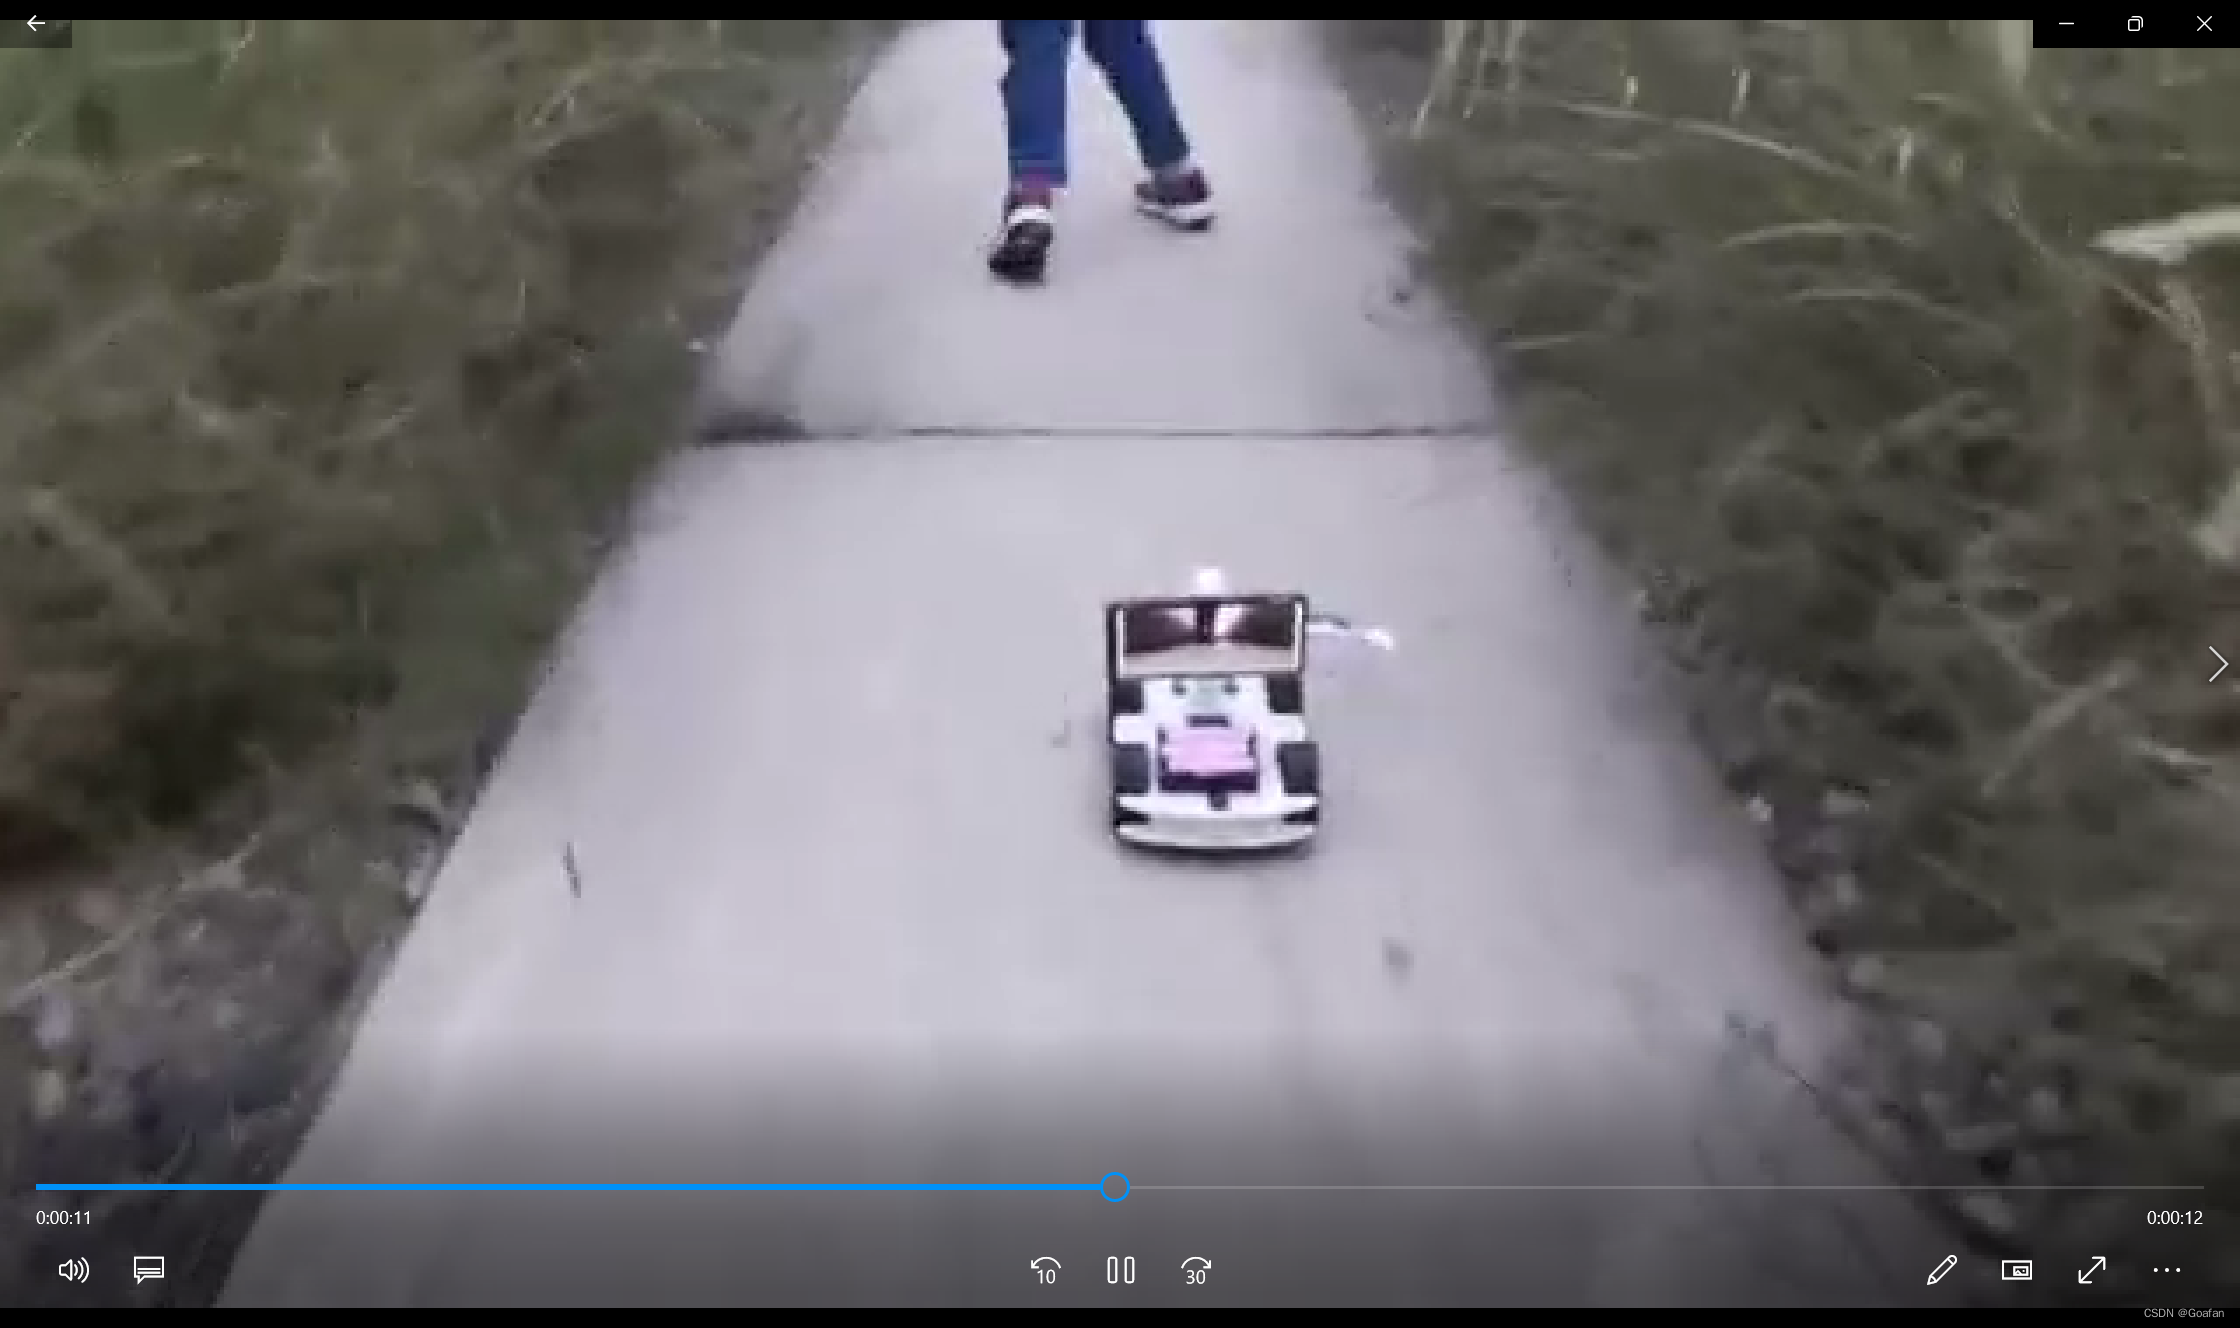
AidLux还能控制Openbot小车完成行人等跟踪任务:具体请查看官方教程
边缘设备AidBox GS865可以同时运行多路摄像头,实时处理多种算法:
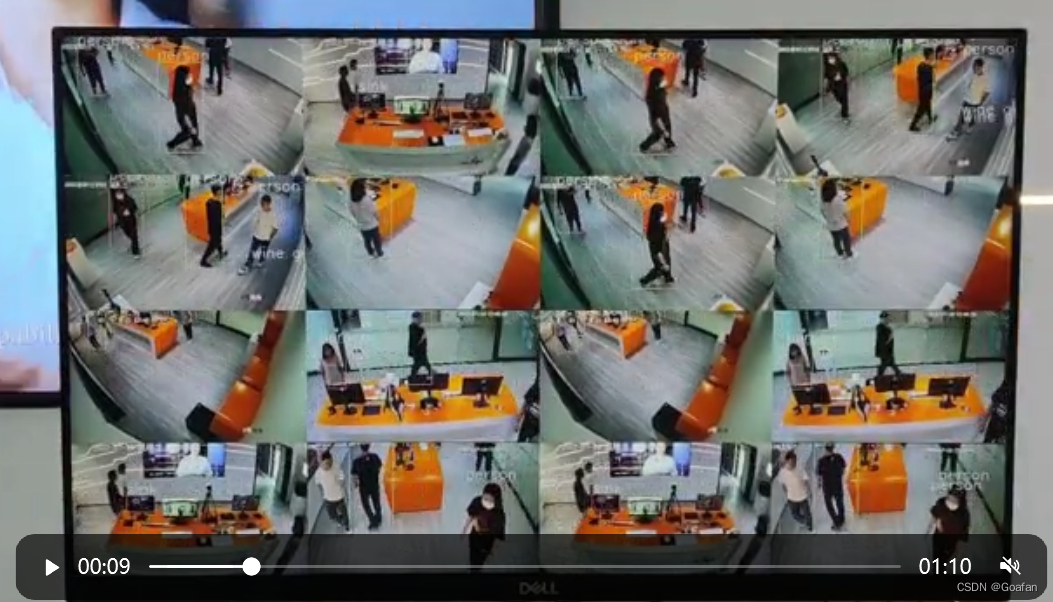
同时检测:口罩、吸烟、打电话、佩戴安全帽、人数
 |  |
 |  |
5.资料分享
由于篇幅问题,博主在文中只展示了大概的操作和部署流程,需要详细资料代码的朋友可以DD博主


为开发者提供学习成长、分享交流、生态实践、资源工具等服务,帮助开发者快速成长。
更多推荐


 3
3 0
0- 0


 已为社区贡献1条内容

所有评论(0)