

【论坛java项目】第三章 Spring Boot进阶,开发社区核心功能:过滤敏感词、发布帖子、帖子详情、事务管理、显示评论、、添加评论、私信列表、发送私信、统一处理异常
敏感词过滤器定义前缀树根据敏感词,初始化前缀树编写过滤敏感词的方法// 1、 前缀树 前缀树某一个节点 private class TrieNode {// 关键词结束标识 private boolean isKeywordEnd = false;// 子节点(key是下级字符,value是下级节点) // 当前节点的子节点 private Map < Character , TrieNode >
·
这里写自定义目录标题
一、过滤敏感词
- 不用api,用前缀树,实现敏感词过滤
前缀树
- 名称:Trie、字典树、查找树
- 特点:查找效率高,消耗内存大
- 应用:字符串检索、词频统计、字符串排序等
敏感词过滤器
- 定义前缀树
- 根据敏感词,初始化前缀树
- 编写过滤敏感词的方法
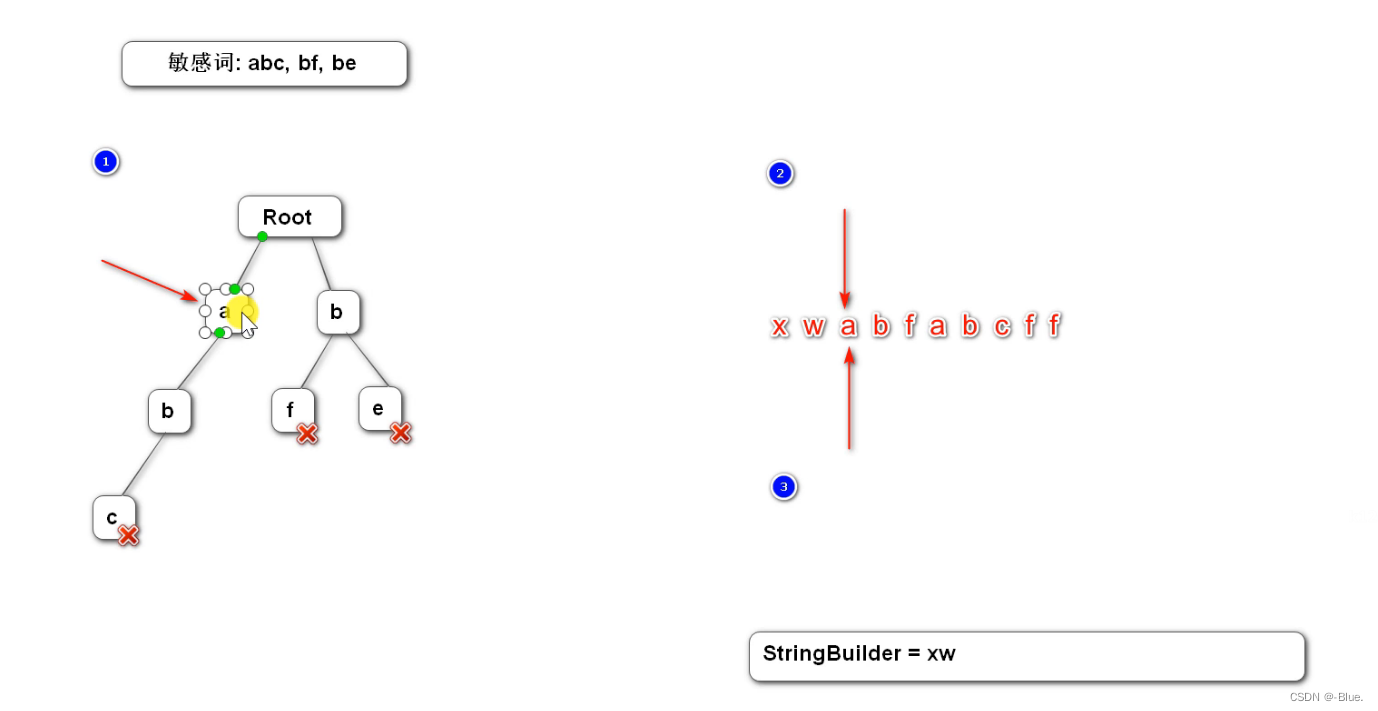
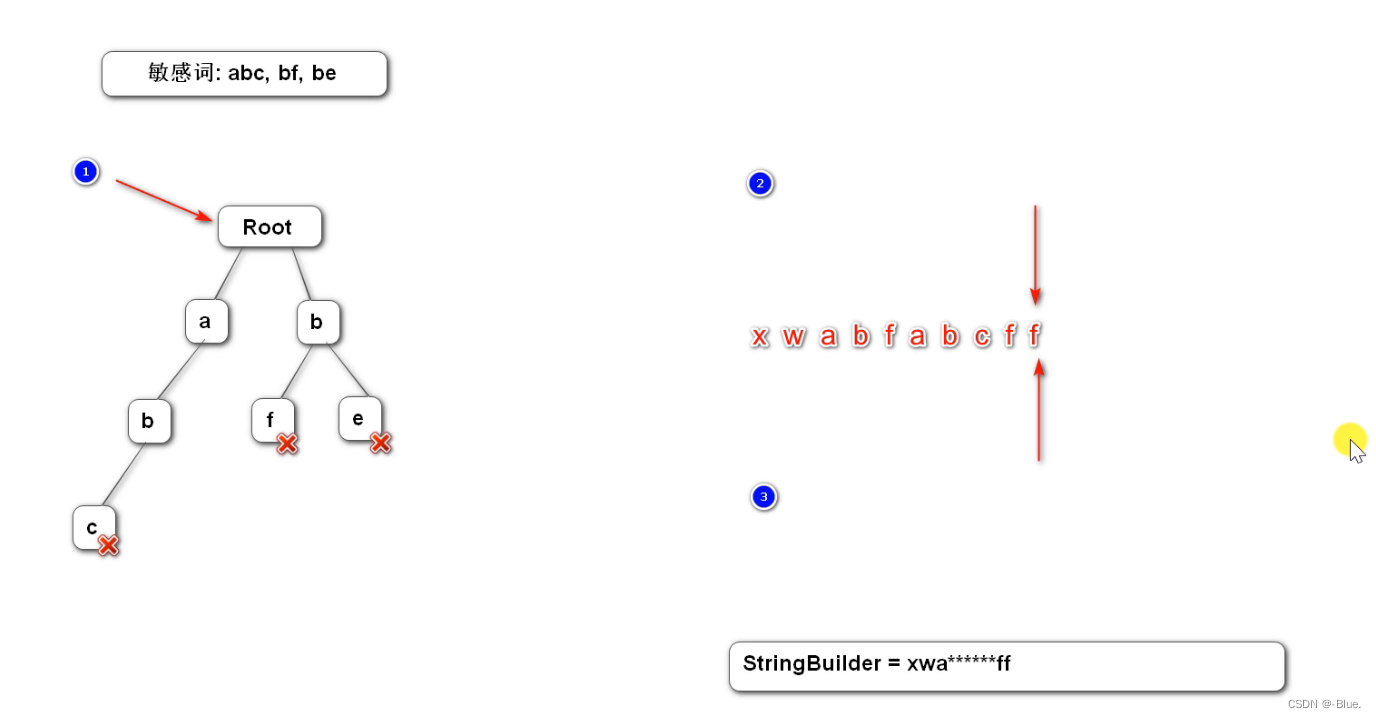
前缀树特点:
- 前缀树的根节点不包含任何字符,是空的,除了根节点的每个节点只包含一个字符
- 从根节点到某个节点,经过的路径上都有一个字符,把字符连接起来,就是当前节点对应的字符串
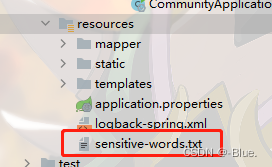
1、定义敏感词——sensitive-words.txt

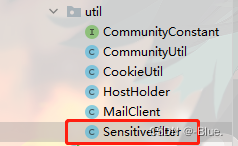
2、敏感词过滤器——SensitiveFilter
敏感词过滤器
- 定义前缀树
- 根据敏感词,初始化前缀树
- 编写过滤敏感词的方法
总代码:
package com.nowcoder.community.util;

import org.apache.commons.lang3.CharUtils;
import org.apache.commons.lang3.StringUtils;
import org.slf4j.Logger;
import org.slf4j.LoggerFactory;
import org.springframework.stereotype.Component;

import javax.annotation.PostConstruct;
import java.io.BufferedReader;
import java.io.IOException;
import java.io.InputStream;
import java.io.InputStreamReader;
import java.util.HashMap;
import java.util.Map;

@Component  //托管到容器
public class SensitiveFilter {

    private static final Logger logger = LoggerFactory.getLogger(SensitiveFilter.class);

    // 替换符
    private static final String REPLACEMENT = "***";

    // 根节点
    private TrieNode rootNode = new TrieNode();

    // 2、初始化方法,服务器启动时初始化
    @PostConstruct
    public void init() {
        try (
                // 类加载器
                InputStream is = this.getClass().getClassLoader().getResourceAsStream("sensitive-words.txt");
                BufferedReader reader = new BufferedReader(new InputStreamReader(is));
        ) {
            String keyword;
            while ((keyword = reader.readLine()) != null) {
                // 添加到前缀树
                this.addKeyword(keyword);
            }
        } catch (IOException e) {
            logger.error("加载敏感词文件失败: " + e.getMessage());
        }
    }

    // 3、将一个敏感词添加到前缀树中
    private void addKeyword(String keyword) {
        TrieNode tempNode = rootNode;
        for (int i = 0; i < keyword.length(); i++) {
            char c = keyword.charAt(i);
            TrieNode subNode = tempNode.getSubNode(c);

            if (subNode == null) {
                // 初始化子节点
                subNode = new TrieNode();
                tempNode.addSubNode(c, subNode);
            }

            // 指向子节点,进入下一轮循环
            tempNode = subNode;

            // 设置结束标识
            if (i == keyword.length() - 1) {
                tempNode.setKeywordEnd(true);
            }
        }
    }

    /**
     * 过滤敏感词
     *
     * @param text 待过滤的文本
     * @return 过滤后的文本
     */
    public String filter(String text) {
        if (StringUtils.isBlank(text)) {
            return null;
        }

        // 指针1
        TrieNode tempNode = rootNode;
        // 指针2
        int begin = 0;
        // 指针3
        int position = 0;
        // 结果
        StringBuilder sb = new StringBuilder();

        while (begin < text.length()) {
            if(position < text.length()){
                char c = text.charAt(position);

                // 跳过符号
                if (isSymbol(c)) {
                    // 若指针1处于根节点,将此符号计入结果,让指针2向下走一步
                    if (tempNode == rootNode) {
                        sb.append(c);
                        begin++;
                    }
                    // 无论符号在开头或中间,指针3都向下走一步
                    position++;
                    continue;
                }

                // 检查下级节点
                tempNode = tempNode.getSubNode(c);
                if (tempNode == null) {
                    // 以begin开头的字符串不是敏感词
                    sb.append(text.charAt(begin));
                    // 进入下一个位置
                    position = ++begin;
                    // 重新指向根节点
                    tempNode = rootNode;
                } else if (tempNode.isKeywordEnd()) {
                    // 发现敏感词,将begin~position字符串替换掉
                    sb.append(REPLACEMENT);
                    // 进入下一个位置
                    begin = ++position;
                    // 重新指向根节点
                    tempNode = rootNode;
                } else {
                    // 检查下一个字符
                    position++;
                }
            }
            // position遍历越界仍未匹配到敏感词
            else{
                sb.append(text.charAt(begin));
                position = ++begin;
                tempNode = rootNode;
            }
        }
//        // 将最后一批字符计入结果
//        sb.append(text.substring(begin));
        return sb.toString();
    }

    // 判断是否为符号 ——特殊符号
    private boolean isSymbol(Character c) {
        // 0x2E80~0x9FFF 是东亚文字范围
        return !CharUtils.isAsciiAlphanumeric(c) && (c < 0x2E80 || c > 0x9FFF);
    }

    // 1、 前缀树  前缀树某一个节点
    private class TrieNode {

        // 关键词结束标识
        private boolean isKeywordEnd = false;

        // 子节点(key是下级字符,value是下级节点)
        // 当前节点的子节点
        private Map<Character, TrieNode> subNodes = new HashMap<>();

        public boolean isKeywordEnd() {
            return isKeywordEnd;
        }

        public void setKeywordEnd(boolean keywordEnd) {
            isKeywordEnd = keywordEnd;
        }

        // 添加子节点
        public void addSubNode(Character c, TrieNode node) {
            subNodes.put(c, node);
        }

        // 获取子节点
        public TrieNode getSubNode(Character c) {
            return subNodes.get(c);
        }

    }

}
定义前缀树
 // 1、 前缀树  前缀树某一个节点
    private class TrieNode {

        // 关键词结束标识
        private boolean isKeywordEnd = false;

        // 子节点(key是下级字符,value是下级节点)
        // 当前节点的子节点
        private Map<Character, TrieNode> subNodes = new HashMap<>();

        public boolean isKeywordEnd() {
            return isKeywordEnd;
        }

        public void setKeywordEnd(boolean keywordEnd) {
            isKeywordEnd = keywordEnd;
        }

        // 添加子节点
        public void addSubNode(Character c, TrieNode node) {
            subNodes.put(c, node);
        }

        // 获取子节点
        public TrieNode getSubNode(Character c) {
            return subNodes.get(c);
        }

    }
根据敏感词,初始化前缀树
 // 2、初始化方法,服务器启动时初始化
    @PostConstruct
    public void init() {
        try (
                // 类加载器
                InputStream is = this.getClass().getClassLoader().getResourceAsStream("sensitive-words.txt");
                BufferedReader reader = new BufferedReader(new InputStreamReader(is));
        ) {
            String keyword;
            while ((keyword = reader.readLine()) != null) {
                // 添加到前缀树
                this.addKeyword(keyword);
            }
        } catch (IOException e) {
            logger.error("加载敏感词文件失败: " + e.getMessage());
        }
    }
编写过滤敏感词的方法
/**
     * 过滤敏感词
     *
     * @param text 待过滤的文本
     * @return 过滤后的文本
     */
    public String filter(String text) {
        if (StringUtils.isBlank(text)) {
            return null;
        }

        // 指针1
        TrieNode tempNode = rootNode;
        // 指针2
        int begin = 0;
        // 指针3
        int position = 0;
        // 结果
        StringBuilder sb = new StringBuilder();

        while (position < text.length()) {
            char c = text.charAt(position);

            // 跳过符号
            if (isSymbol(c)) {
                // 若指针1处于根节点,将此符号计入结果,让指针2向下走一步
                if (tempNode == rootNode) {
                    sb.append(c);
                    begin++;
                }
                // 无论符号在开头或中间,指针3都向下走一步
                position++;
                continue;
            }

            // 检查下级节点
            tempNode = tempNode.getSubNode(c);
            if (tempNode == null) {
                // 以begin开头的字符串不是敏感词
                sb.append(text.charAt(begin));
                // 进入下一个位置
                position = ++begin;
                // 重新指向根节点
                tempNode = rootNode;
            } else if (tempNode.isKeywordEnd()) {
                // 发现敏感词,将begin~position字符串替换掉
                sb.append(REPLACEMENT);
                // 进入下一个位置
                begin = ++position;
                // 重新指向根节点
                tempNode = rootNode;
            } else {
                // 检查下一个字符
                position++;
            }
        }

        // 将最后一批字符计入结果
        sb.append(text.substring(begin));

        return sb.toString();
    }

    // 判断是否为符号
    private boolean isSymbol(Character c) {
        // 0x2E80~0x9FFF 是东亚文字范围
        return !CharUtils.isAsciiAlphanumeric(c) && (c < 0x2E80 || c > 0x9FFF);
    }
3、测试
package com.nowcoder.community;
import com.nowcoder.community.util.SensitiveFilter;
import org.junit.Test;
import org.junit.runner.RunWith;
import org.springframework.beans.factory.annotation.Autowired;
import org.springframework.boot.test.context.SpringBootTest;
import org.springframework.test.context.ContextConfiguration;
import org.springframework.test.context.junit4.SpringRunner;
@RunWith(SpringRunner.class)
@SpringBootTest
@ContextConfiguration(classes = CommunityApplication.class)
public class SensitiveTests {
@Autowired
private SensitiveFilter sensitiveFilter;
@Test
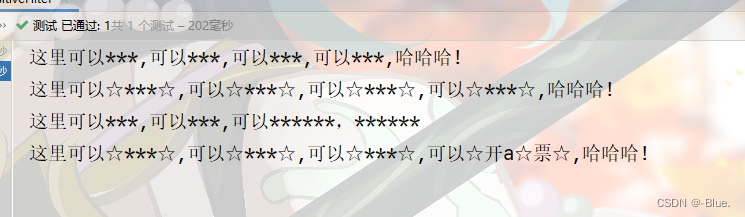
public void testSensitiveFilter() {
String text = "这里可以赌博,可以嫖娼,可以吸毒,可以开票,哈哈哈!";
text = sensitiveFilter.filter(text);
System.out.println(text);
text = "这里可以☆赌☆博☆,可以☆嫖☆娼☆,可以☆吸☆毒☆,可以☆开☆票☆,哈哈哈!";
text = sensitiveFilter.filter(text);
System.out.println(text);
text = "这里可以赌博,可以嫖娼,可以赌博嫖娼,赌博吸☆毒";
text = sensitiveFilter.filter(text);
System.out.println(text);
text = "这里可以☆赌☆☆☆博☆,可以☆嫖☆☆娼☆,可以☆吸☆☆☆☆毒☆,可以☆开a☆票☆,哈哈哈!";
text = sensitiveFilter.filter(text);
System.out.println(text);
}
}
总结
前缀树的特征
- 根节点不包含字符,除根节点以外的每个节点,只包含一个字符
- 从根节点到某一个节点,路径上经过的字符连接起来,为该节点对应的字符串
- 每个节点的所有子节点,包含的字符串不相同
前缀树的应用场景
- 字符串检索
- 词频统计
- 字符串排序
使用前缀树实现过滤敏感词算法时,需要有3个指针
- 有一个指针指向前缀树,用以遍历敏感词的每一个字符
- 有一个指针指向被过滤字符串,用以标识敏感词的开头
- 有一个指针指向被过滤字符串,用以标识敏感词的结尾
二、发布帖子
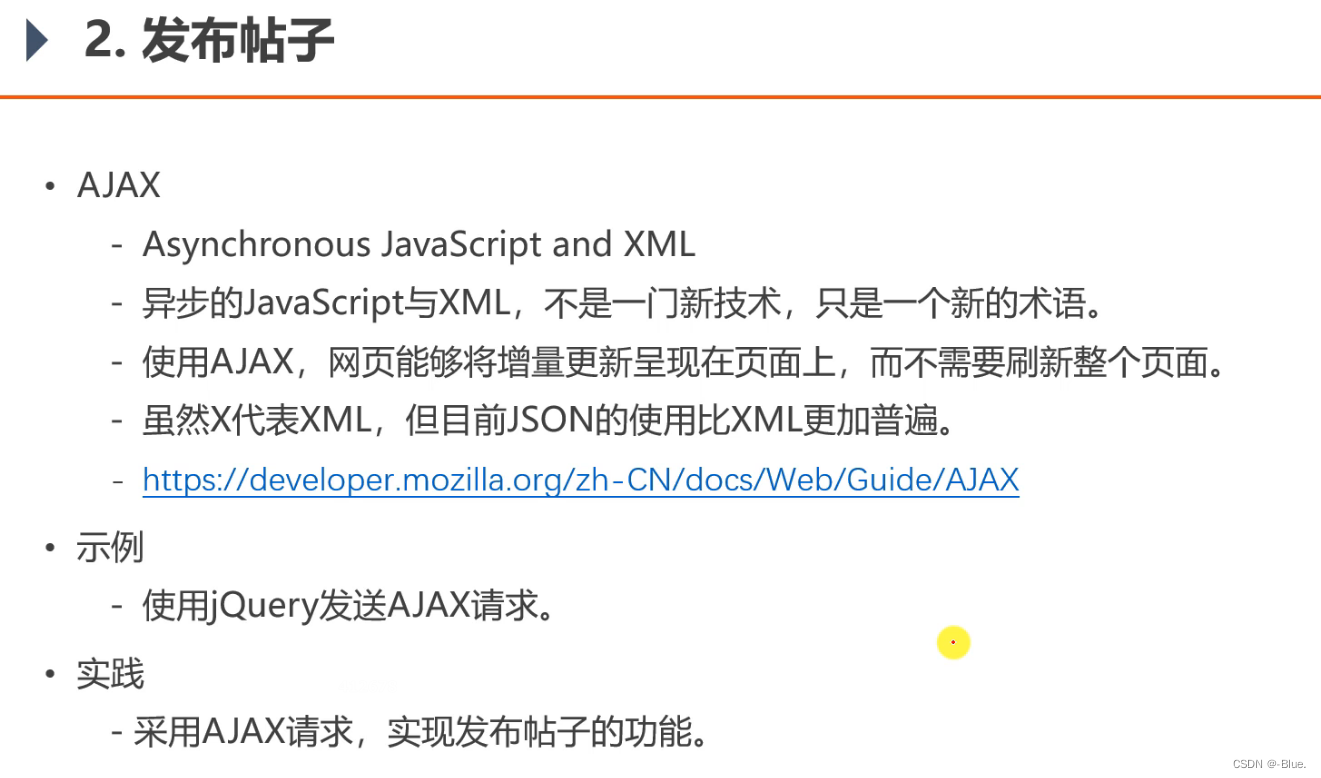
AJAX
- Asynchronous JavaScript and XML
- 异步的
JavaScript与XML,不是一门新技术,只是一个新的术语。 - 使用
AJAX,网页能够将增量更新呈现在页面上,而不需要刷新整个页面。 - 虽然X代表
XML,但目前JSON的使用比XML更加普遍。 https://developer.mozilla.org/zh-CN/docs/Web/Guide/AJAX
示例
- 使用
jQuery发送AJAX请求。
实践
- 采用AJAX请求,实现发布帖子的功能。
1、json 示例
导入依赖
- 处理json字符串的包
<dependency>
	<groupId>com.alibaba</groupId>
	<artifactId>fastjson</artifactId>
	<version>1.2.58</version>
</dependency>
编写代码——CommunityUtil
平时给服务器/浏览器返回的json数据包括以下几种内容:
- 返回编号
- 返回提示信息
- 返回业务数据
// code 编号 msg 提示 Map 业务数据
public static String getJSONString(int code, String msg, Map<String, Object> map) {
JSONObject json = new JSONObject();
json.put("code", code); // 将参数 装到 json 对象中
json.put("msg", msg);
if (map != null) {
for (String key : map.keySet()) {
json.put(key, map.get(key));
}
}
return json.toJSONString();
}
// 没有——Map 业务数据
public static String getJSONString(int code, String msg) {
return getJSONString(code, msg, null);
}
public static String getJSONString(int code) {
return getJSONString(code, null, null);
}
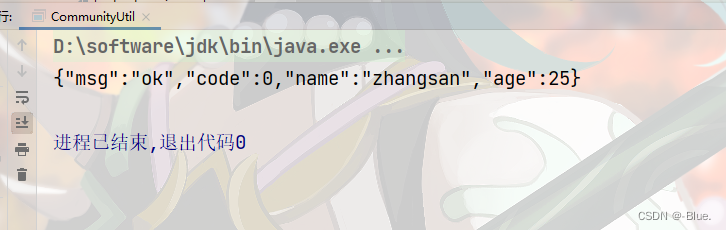
public static void main(String[] args) {
Map<String, Object> map = new HashMap<>();
map.put("name", "zhangsan");
map.put("age", 25);
System.out.println(getJSONString(0, "ok", map));
}
测试结果
传给浏览器, 浏览器转化为js对象
2、AJAX 示例
- 如何发送异步请求
编写 ajax 方法——AlphaController
需要网页返回方法
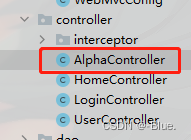
    // ajax示例  异步请求 给网页返回 json 字符串
    @RequestMapping(path = "/ajax", method = RequestMethod.POST)
    @ResponseBody
    public String testAjax(String name, int age) {
        System.out.println(name);  // 提交数据
        System.out.println(age);
        // 不需返回数据,返回编号
        return CommunityUtil.getJSONString(0, "操作成功!");
    }
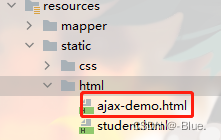
编写网页——ajax-demo.html
- 新建一个网页
- 静态网页——可以直接访问
引入jQuery
<script src="https://code.jquery.com/jquery-3.3.1.min.js" crossorigin="anonymous"></script>
- 路径
- js对象的直接量
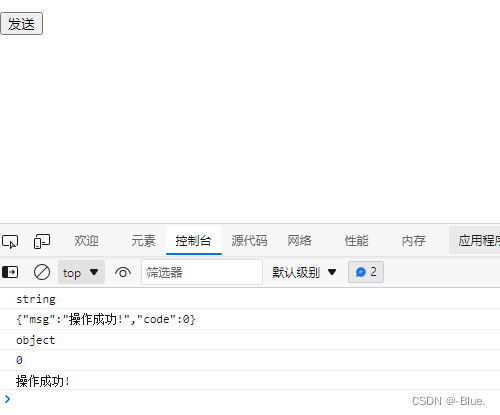
- 声明回调函数:服务器给浏览器做出响应以后,浏览器得到响应后,会调用这个函数,将数据传给
data,变成js对象
function send() {
            $.post(
                "/community/alpha/ajax",
                {"name":"张三","age":23},
                function(data) {
                    console.log(typeof(data));
                    console.log(data);

                    data = $.parseJSON(data);
                    console.log(typeof(data));
                    console.log(data.code);
                    console.log(data.msg);
                }
            );
        }
总代码
<!DOCTYPE html>
<html lang="en">
<head>
    <meta charset="UTF-8">
    <title>AJAX</title>
</head>
<body>
    <p>
        <input type="button" value="发送" onclick="send();">
    </p>

    <script src="https://code.jquery.com/jquery-3.3.1.min.js" crossorigin="anonymous"></script>
    <script>
        function send() {
            $.post(
                "/community/alpha/ajax",
                {"name":"张三","age":23},
                function(data) {
                    console.log(typeof(data));
                    console.log(data);

                    data = $.parseJSON(data);
                    console.log(typeof(data));
                    console.log(data.code);
                    console.log(data.msg);
                }
            );
        }
    </script>
</body>
</html>
测试结果
3、发布帖子功能
方法 数据访问dao层——DiscussPostMapper
 // 增加帖子方法
    int insertDiscussPost(DiscussPost discussPost);
sql语句实现方法——discusspost-mapper.xml
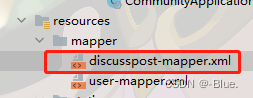
    <sql id="insertFields">
        user_id, title, content, type, status, create_time, comment_count, score
    </sql>
    <insert id="insertDiscussPost" parameterType="DiscussPost">
        insert into discuss_post(<include refid="insertFields"></include>)
        values(#{userId},#{title},#{content},#{type},#{status},#{createTime},#{commentCount},#{score})
    </insert>
service业务层——DiscussPostService
    @Autowired
    private SensitiveFilter sensitiveFilter;

    public int addDiscussPost(DiscussPost post) {
        if (post == null) {
            throw new IllegalArgumentException("参数不能为空!");
        }

        // 转义HTML标记
        post.setTitle(HtmlUtils.htmlEscape(post.getTitle()));
        post.setContent(HtmlUtils.htmlEscape(post.getContent()));
        // 过滤敏感词
        post.setTitle(sensitiveFilter.filter(post.getTitle()));
        post.setContent(sensitiveFilter.filter(post.getContent()));

        return discussPostMapper.insertDiscussPost(post);
    }
视图层——DiscussPostController
package com.nowcoder.community.controller;

import com.nowcoder.community.entity.DiscussPost;
import com.nowcoder.community.entity.User;
import com.nowcoder.community.service.DiscussPostService;
import com.nowcoder.community.util.CommunityUtil;
import com.nowcoder.community.util.HostHolder;
import org.springframework.beans.factory.annotation.Autowired;
import org.springframework.stereotype.Controller;
import org.springframework.web.bind.annotation.RequestMapping;
import org.springframework.web.bind.annotation.RequestMethod;
import org.springframework.web.bind.annotation.ResponseBody;

import java.util.Date;

// 帖子相关的业务
// 异步请求
@Controller
@RequestMapping("/discuss")
public class DiscussPostController {

    @Autowired
    private DiscussPostService discussPostService;

    //持有用户信息,用于代替session对象
    @Autowired
    private HostHolder hostHolder;

    @RequestMapping(path = "/add", method = RequestMethod.POST)
    @ResponseBody
    public String addDiscussPost(String title, String content) {
        User user = hostHolder.getUser();
        if (user == null) {  //还没登陆
            return CommunityUtil.getJSONString(403, "你还没有登录哦!");
        }

        DiscussPost post = new DiscussPost();
        post.setUserId(user.getId());
        post.setTitle(title);
        post.setContent(content);
        post.setCreateTime(new Date());
        discussPostService.addDiscussPost(post); // 存进去

        // 报错的情况,将来统一处理.
        return CommunityUtil.getJSONString(0, "发布成功!");
    }

}
页面
js
$(function(){
	$("#publishBtn").click(publish);
});

function publish() {
	$("#publishModal").modal("hide");

	// 获取标题和内容
	var title = $("#recipient-name").val();
	var content = $("#message-text").val();
	// 发送异步请求(POST)
	$.post(
		CONTEXT_PATH + "/discuss/add",
		{"title":title,"content":content},
		function(data) {
			data = $.parseJSON(data);
			// 在提示框中显示返回消息
			$("#hintBody").text(data.msg);
			// 显示提示框
			$("#hintModal").modal("show");
			// 2秒后,自动隐藏提示框
			setTimeout(function(){
				$("#hintModal").modal("hide");
				// 刷新页面
				if(data.code == 0) {
					window.location.reload();
				}
			}, 2000);
		}
	);

}
index
只有登录才显示

4、结果

5、总结
关于AJAX
- AJAX是Asynchronous JavaScript and XML的缩写
- 使用AJAX,网页能够将增量更新呈现在页面上,而不需要刷新整个页面
- 虽然X代表XML,但目前JSON的使用比XML更加普遍
- 异步的
JavaScript与XML,不是一门新技术,只是一个新的术语。
通过jQuery,将服务端返回的JSON格式的字符串转为js对象
$.parseJSON(data)
使用fastjson,将JSON对象转为JSON字符串,语法正确的是
JSONObject json = new JSONObject(); json.put(“x”,x); json.toJSONString()
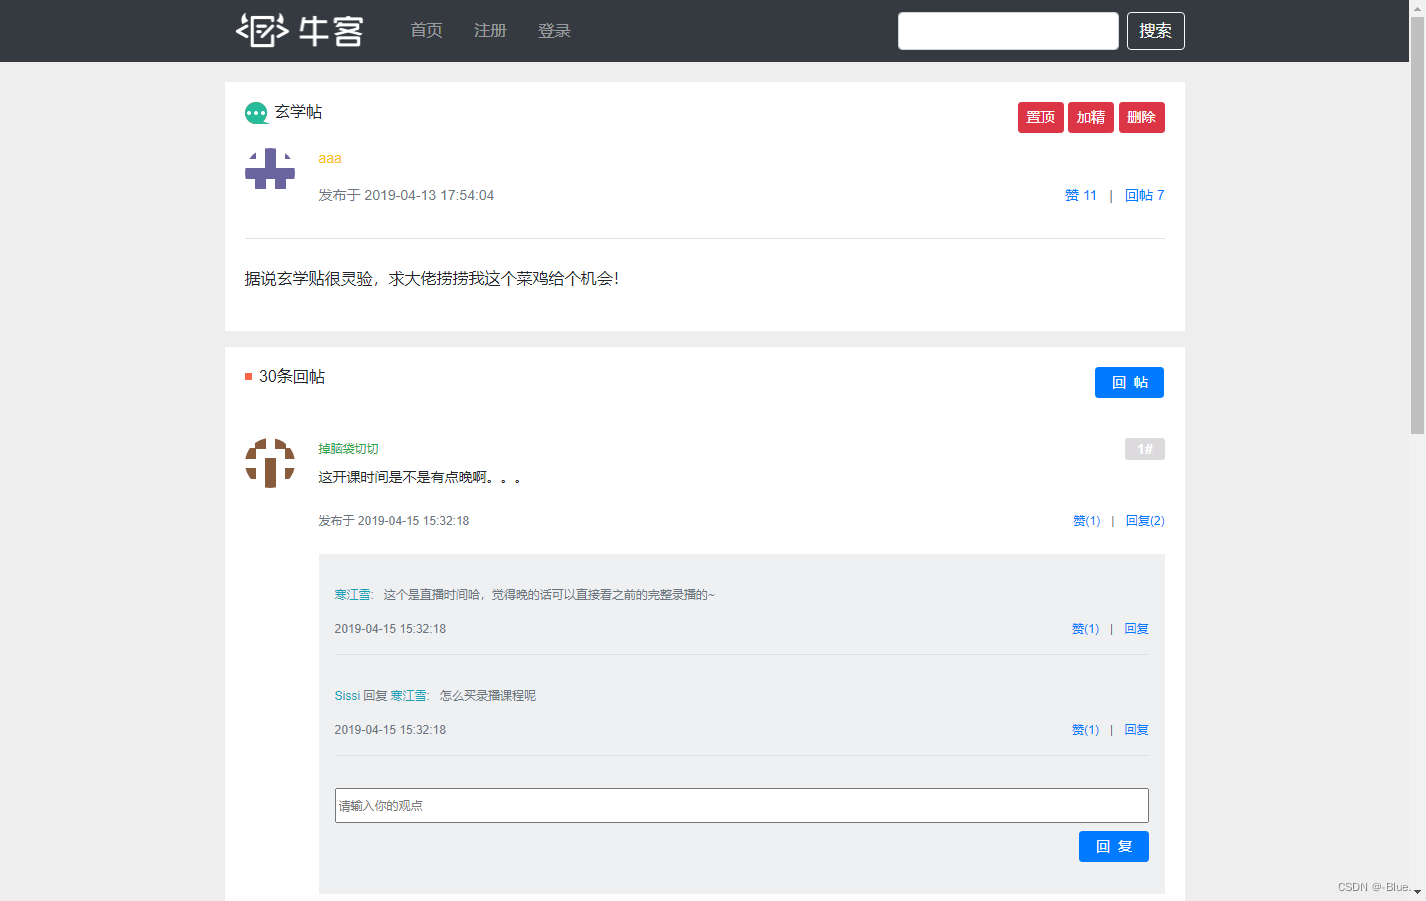
三、帖子详情

- DiscussPostMapper
- DiscussPostService
- DiscussPostController
1、数据访问dao层——DiscussPostMapper
- 根据帖子id,查询出帖子的详细信息
    // 根据帖子id,查询出帖子的详细信息
    DiscussPost selectDiscussPostById(int id);
sql语句实现方法——discusspost-mapper.xml
    <select id="selectDiscussPostById" resultType="DiscussPost">
        select <include refid="selectFields"></include>
        from discuss_post
        where id = #{id}
    </select>
2、service业务层——DiscussPostService
   public DiscussPost findDiscussPostById(int id) {
        return discussPostMapper.selectDiscussPostById(id);
    }
3、视图层——DiscussPostController
  @RequestMapping(path = "/detail/{discussPostId}", method = RequestMethod.GET)
    public String getDiscussPost(@PathVariable("discussPostId") int discussPostId, Model model) {
        // 帖子
        DiscussPost post = discussPostService.findDiscussPostById(discussPostId);
        model.addAttribute("post", post);
        // 作者
        User user = userService.findUserById(post.getUserId());
        model.addAttribute("user", user);

        return "/site/discuss-detail";
    }
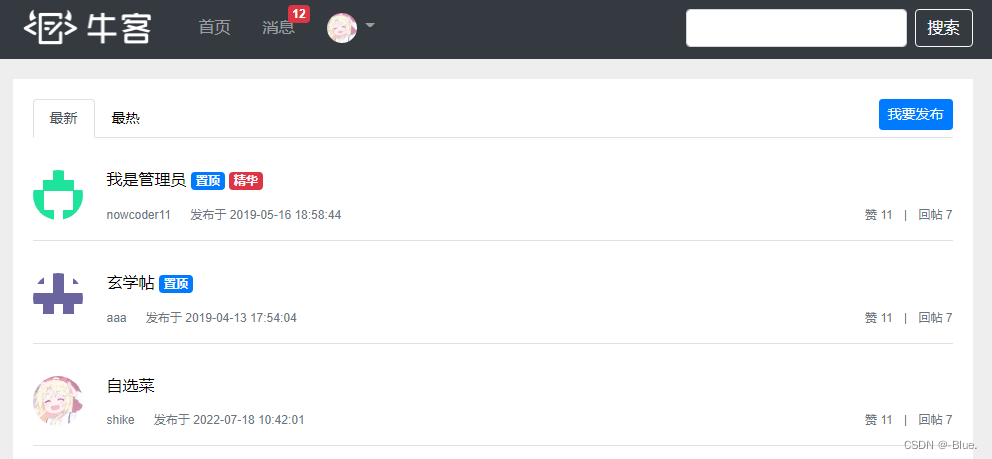
4、首页——index
竖线中可以加,变量和常量
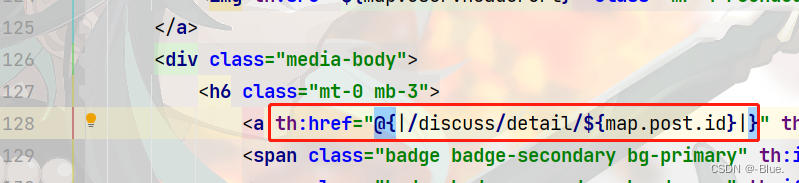
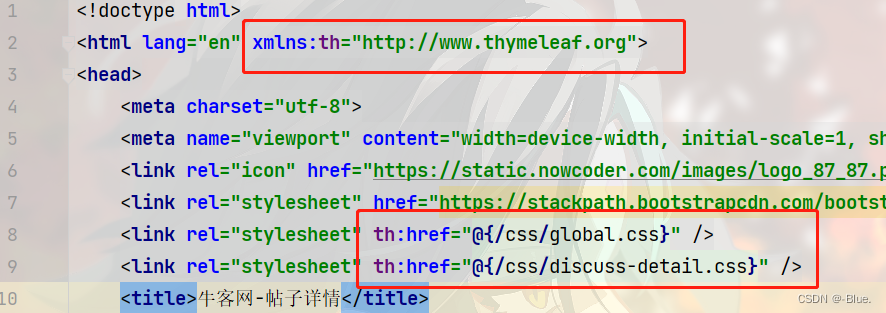
5、帖子详情页——discuss-detail.html
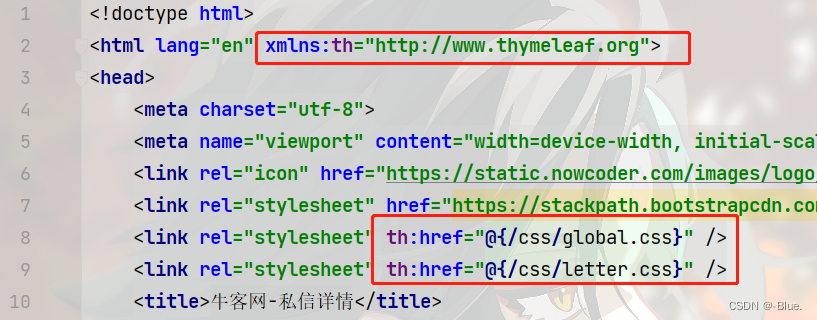
静态资源路径
需要用thymeleaf

头部实现复用

帖子内容
utext:可以显示标签

- 作者头像
- 用户名
- 帖子发布日期
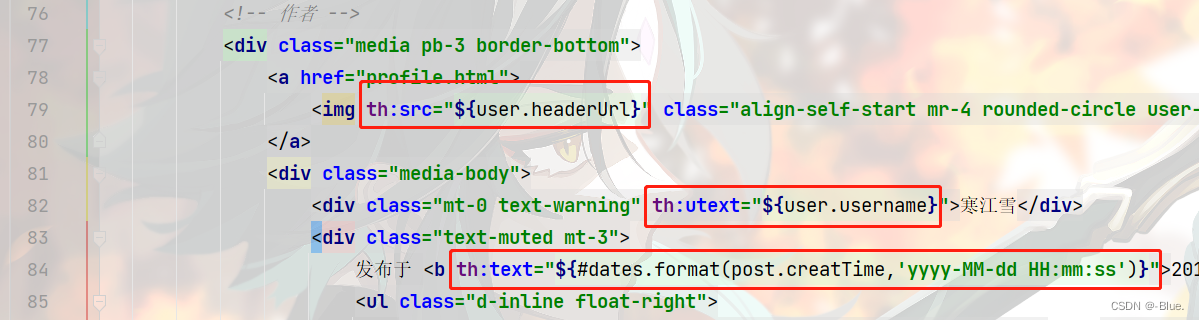
正文

6、测试
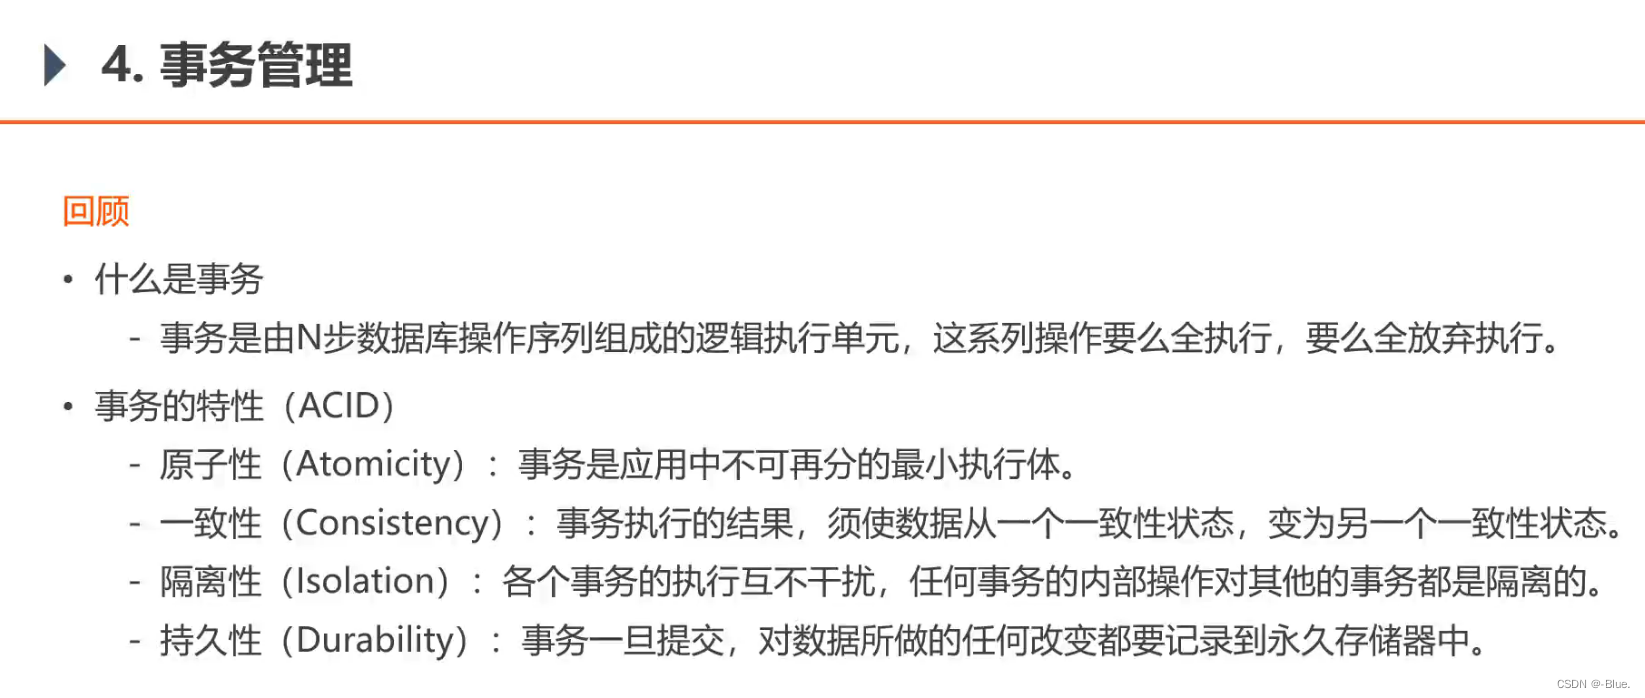
四、事务管理
1、基础知识
什么是事务?
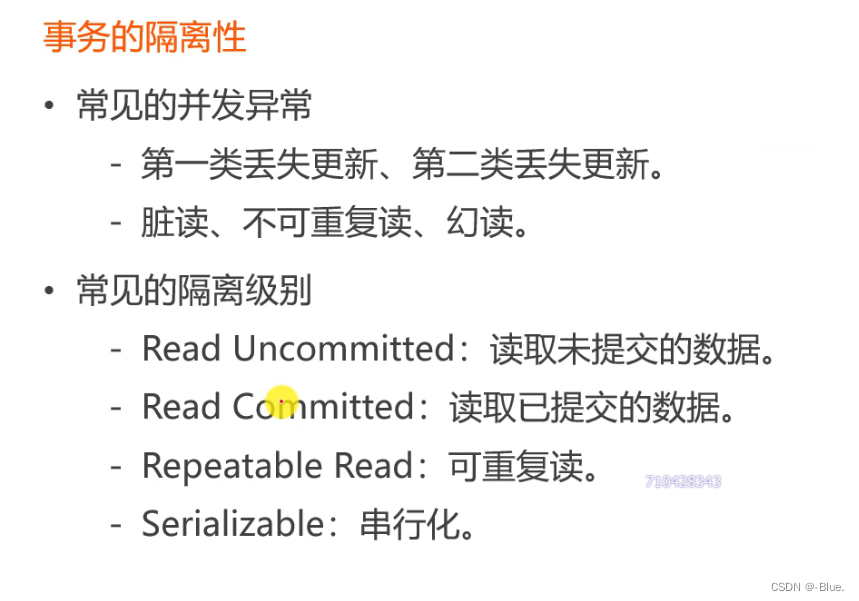
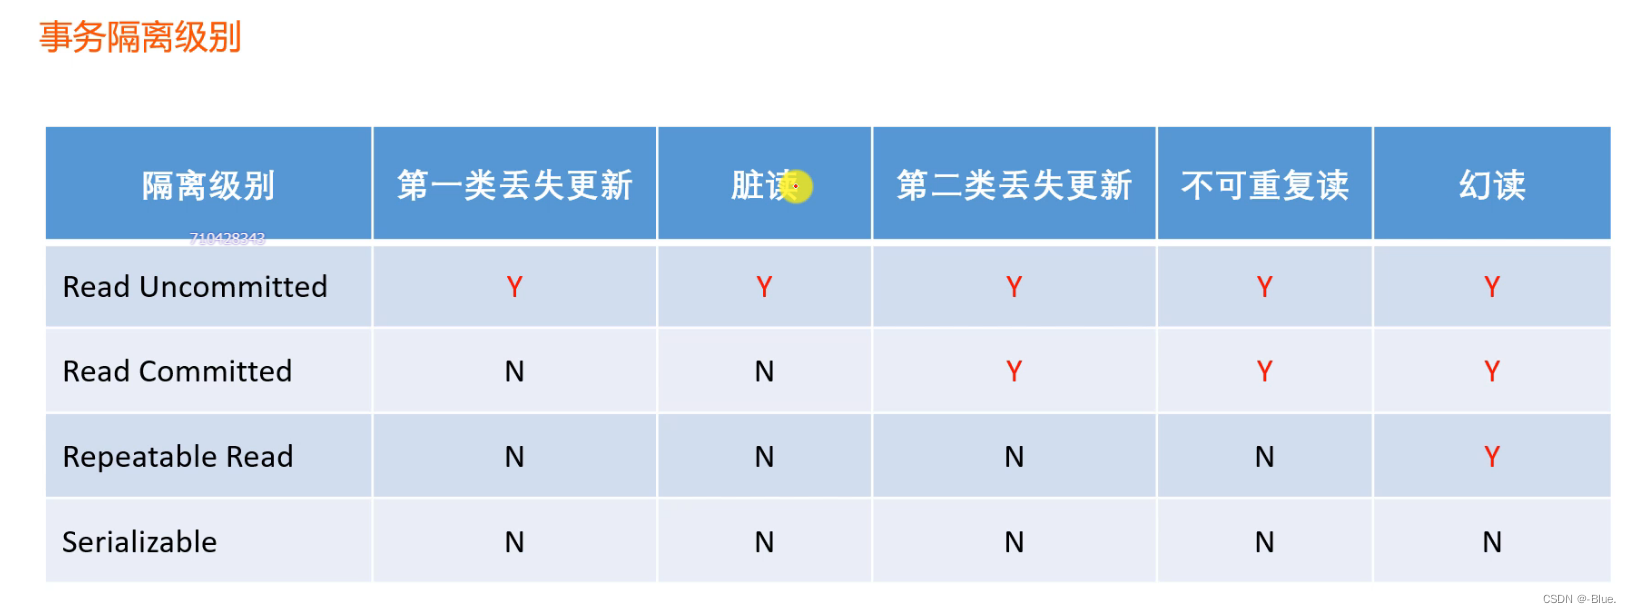
事物的隔离性
- 加锁会降低性能
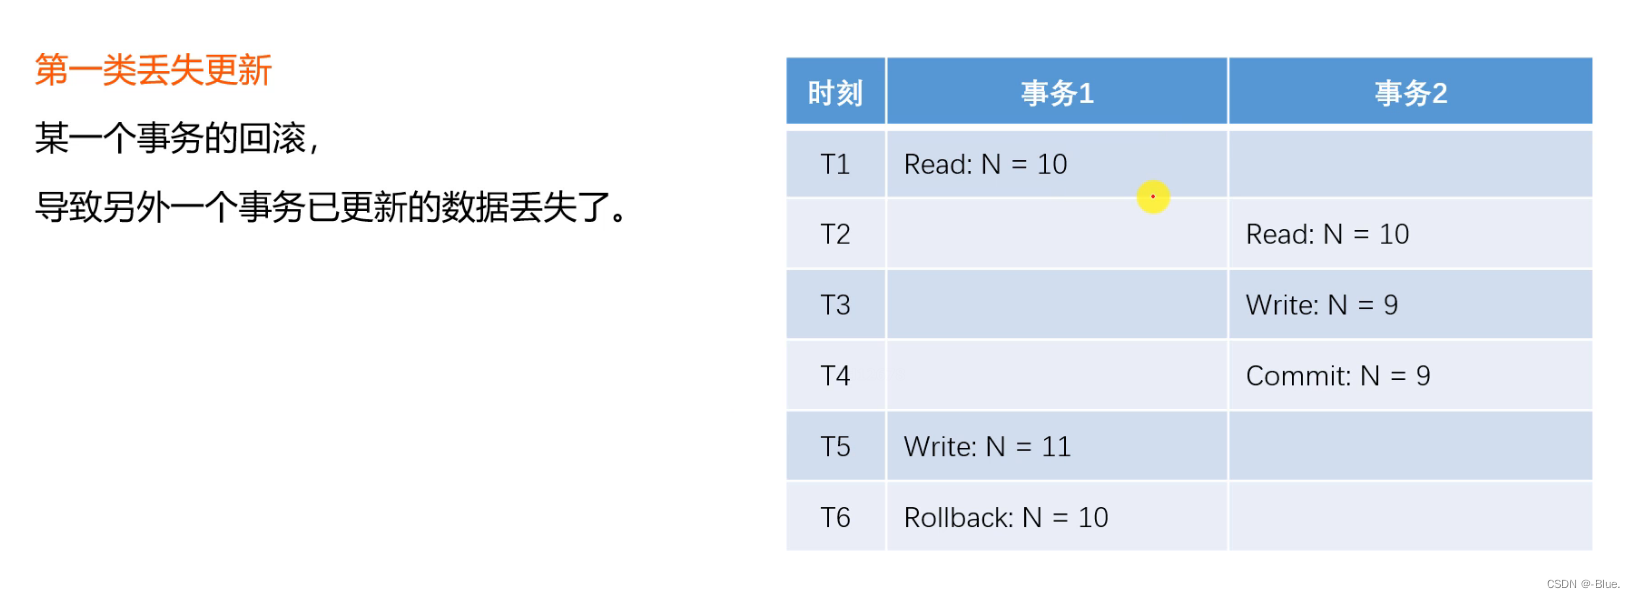
第一类丢失更新
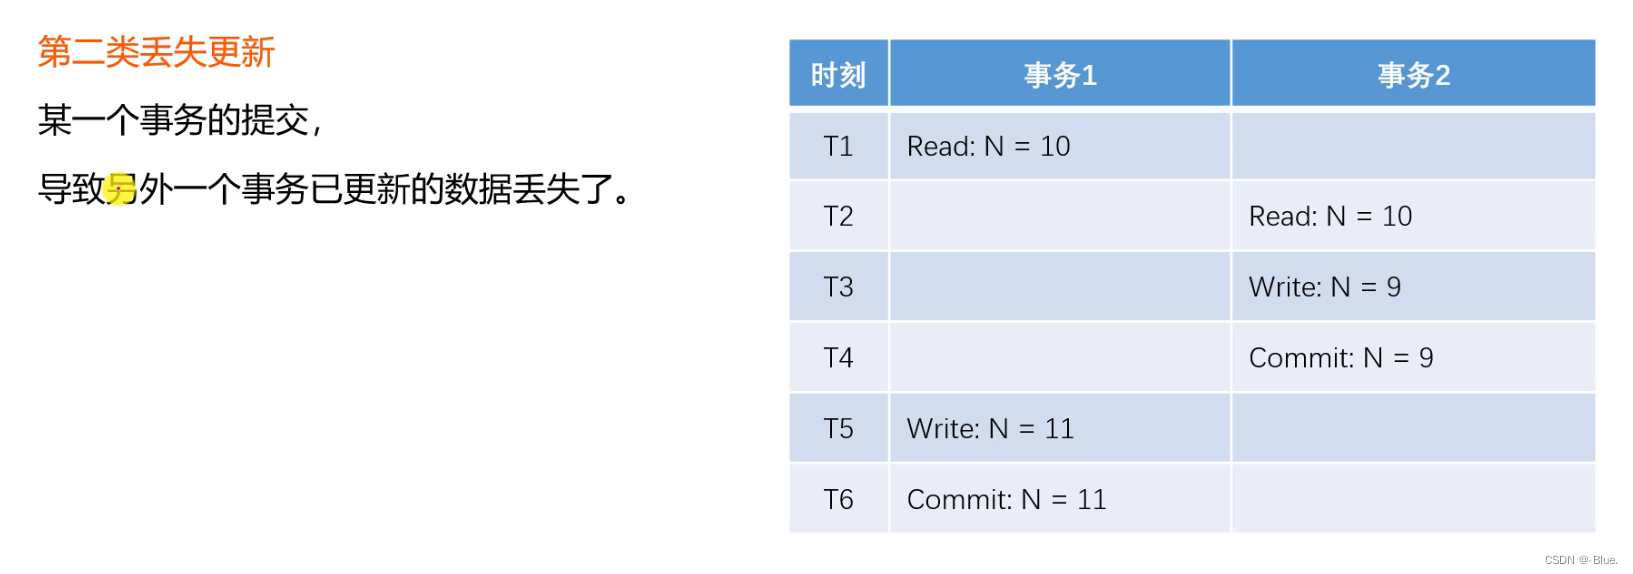
第二类丢失更新
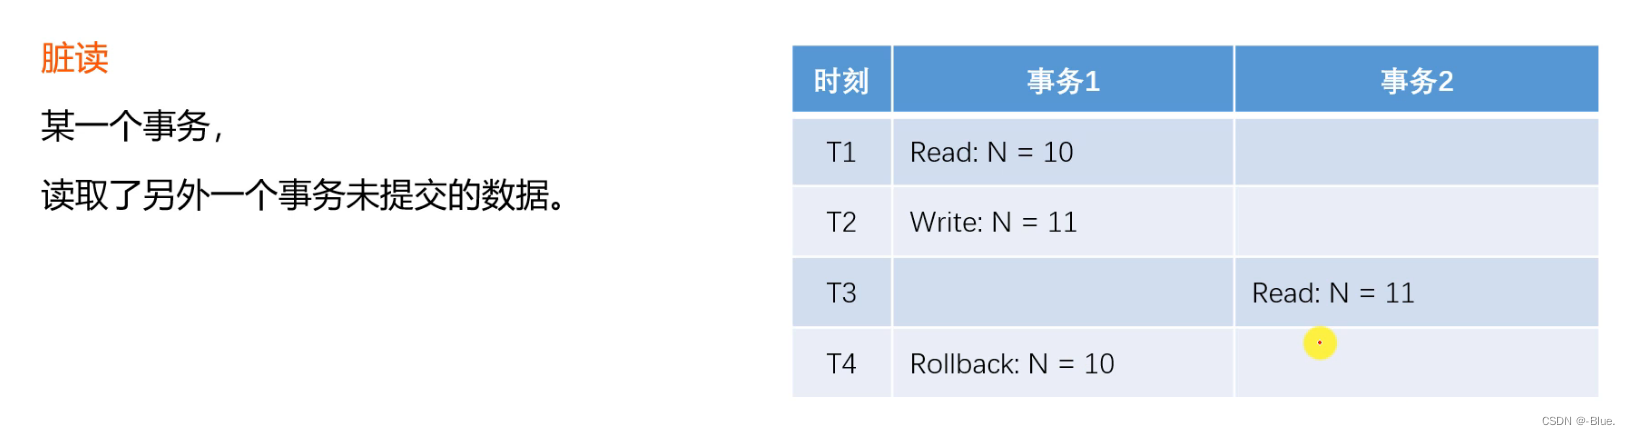
脏读
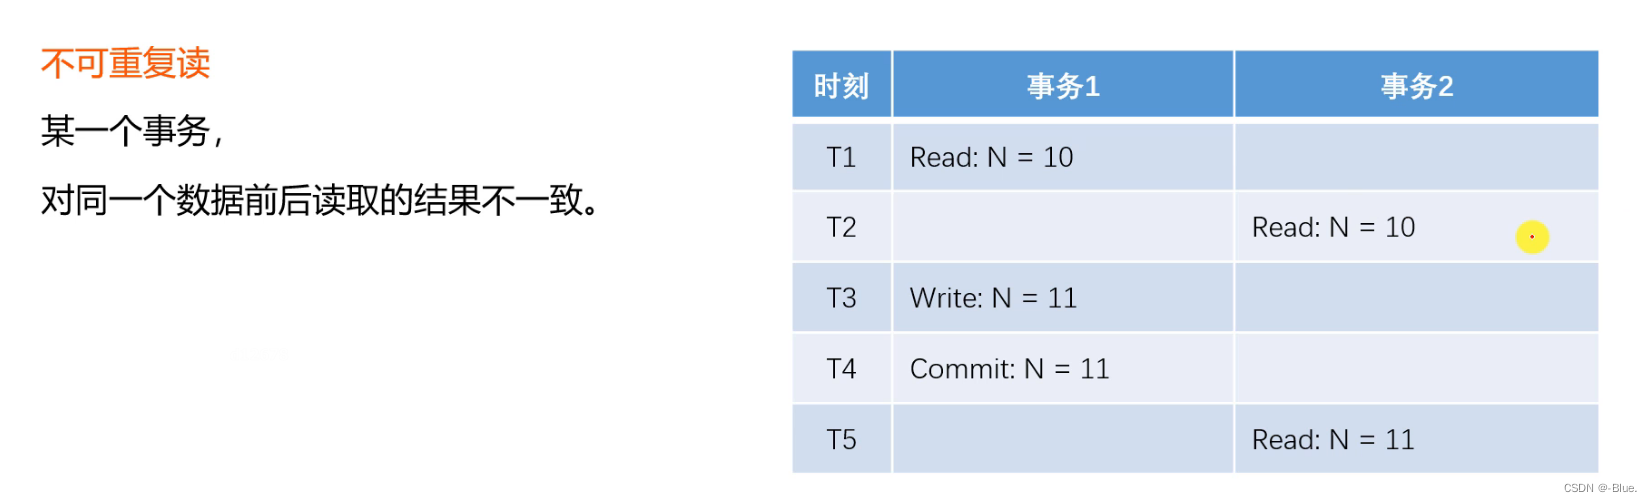
不可重复读
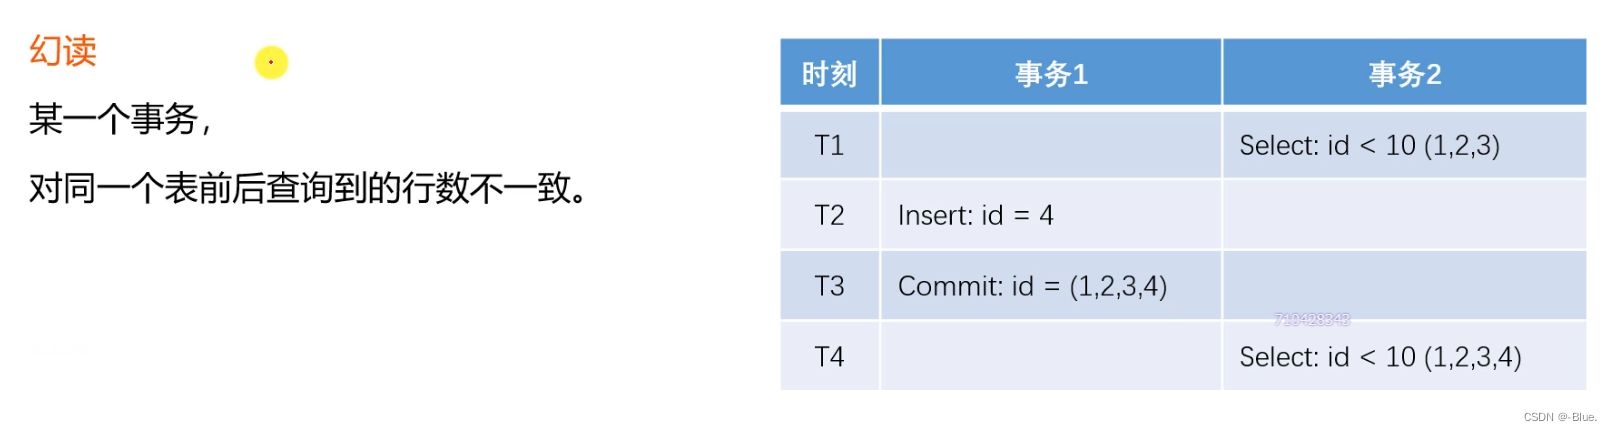
幻读
事物的隔离级别
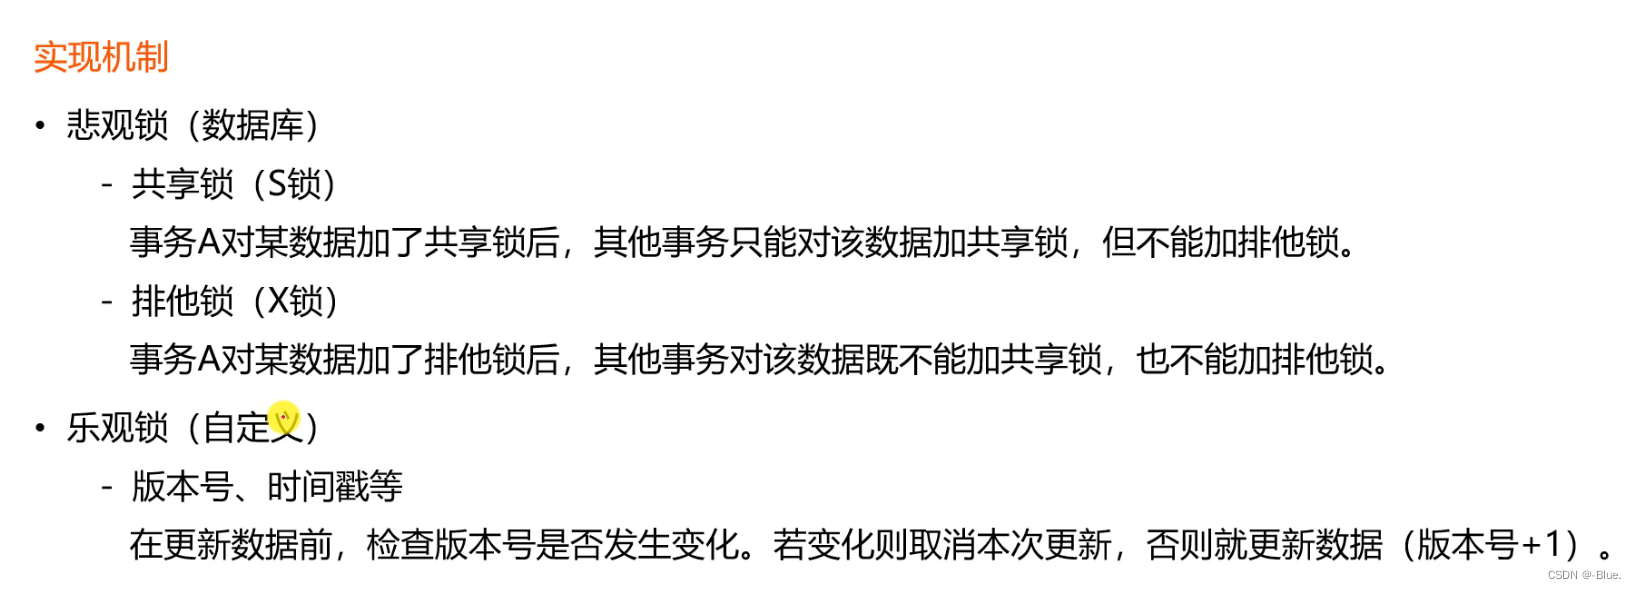
实现机制
2、管理事务——AlphaService
- @Transactional:开启事务
- 一般用第一种
- 业务复杂管理一小部分,用第二种
// REQUIRED: 支持当前事务(外部事务),如果不存在则创建新事务.
    // REQUIRES_NEW: 创建一个新事务,并且暂停当前事务(外部事务).
    // NESTED: 如果当前存在事务(外部事务),则嵌套在该事务中执行(独立的提交和回滚),否则就会REQUIRED一样.
    @Transactional(isolation = Isolation.READ_COMMITTED, propagation = Propagation.REQUIRED)
    public Object save1() {
        // 新增用户
        User user = new User();
        user.setUsername("alpha");
        user.setSalt(CommunityUtil.generateUUID().substring(0, 5));
        user.setPassword(CommunityUtil.md5("123" + user.getSalt()));
        user.setEmail("alpha@qq.com");
        user.setHeaderUrl("http://image.nowcoder.com/head/99t.png");
        user.setCreateTime(new Date());
        userMapper.insertUser(user);

        // 新增帖子
        DiscussPost post = new DiscussPost();
        post.setUserId(user.getId());
        post.setTitle("Hello");
        post.setContent("新人报道!");
        post.setCreateTime(new Date());
        discussPostMapper.insertDiscussPost(post);

        Integer.valueOf("abc");

        return "ok";
    }

    public Object save2() {
        transactionTemplate.setIsolationLevel(TransactionDefinition.ISOLATION_READ_COMMITTED);
        transactionTemplate.setPropagationBehavior(TransactionDefinition.PROPAGATION_REQUIRED);

        return transactionTemplate.execute(new TransactionCallback<Object>() {
            @Override
            public Object doInTransaction(TransactionStatus status) {
                // 新增用户
                User user = new User();
                user.setUsername("beta");
                user.setSalt(CommunityUtil.generateUUID().substring(0, 5));
                user.setPassword(CommunityUtil.md5("123" + user.getSalt()));
                user.setEmail("beta@qq.com");
                user.setHeaderUrl("http://image.nowcoder.com/head/999t.png");
                user.setCreateTime(new Date());
                userMapper.insertUser(user);

                // 新增帖子
                DiscussPost post = new DiscussPost();
                post.setUserId(user.getId());
                post.setTitle("你好");
                post.setContent("我是新人!");
                post.setCreateTime(new Date());
                discussPostMapper.insertDiscussPost(post);

                Integer.valueOf("abc");

                return "ok";
            }
        });
    }
3、测试类——TransactionTests
@RunWith(SpringRunner.class)
@SpringBootTest
@ContextConfiguration(classes = CommunityApplication.class)
public class TransactionTests {

    @Autowired
    private AlphaService alphaService;

    @Test
    public void testSave1() {
        Object obj = alphaService.save1();
        System.out.println(obj);
    }

    @Test
    public void testSave2() {
        Object obj = alphaService.save2();
        System.out.println(obj);
    }

}
4、总结
关于事务的特性
- 原子性,即事务是应用中不可再分的最小执行体
- 一致性,即事务执行的结果,必须使数据从一个一致性状态,变为另一个一致性状态
- 隔离性,即各个事务的执行互不干扰,任何事务的内部操作对其他的事务都是隔离的
- 持久性(Durability):事务一旦提交,对数据所做的任何改变都要记录到永久存储器中。
关于隔离级别的实现机制
- 实现隔离级别的基本方式是对数据加锁,而锁分为悲观锁和乐观锁
- 数据库默认采用的是悲观锁,它又可分为共享锁和排他锁
- 锁在提高安全性的同时,会降低数据库的性能,应根据实际业务选择合适的锁
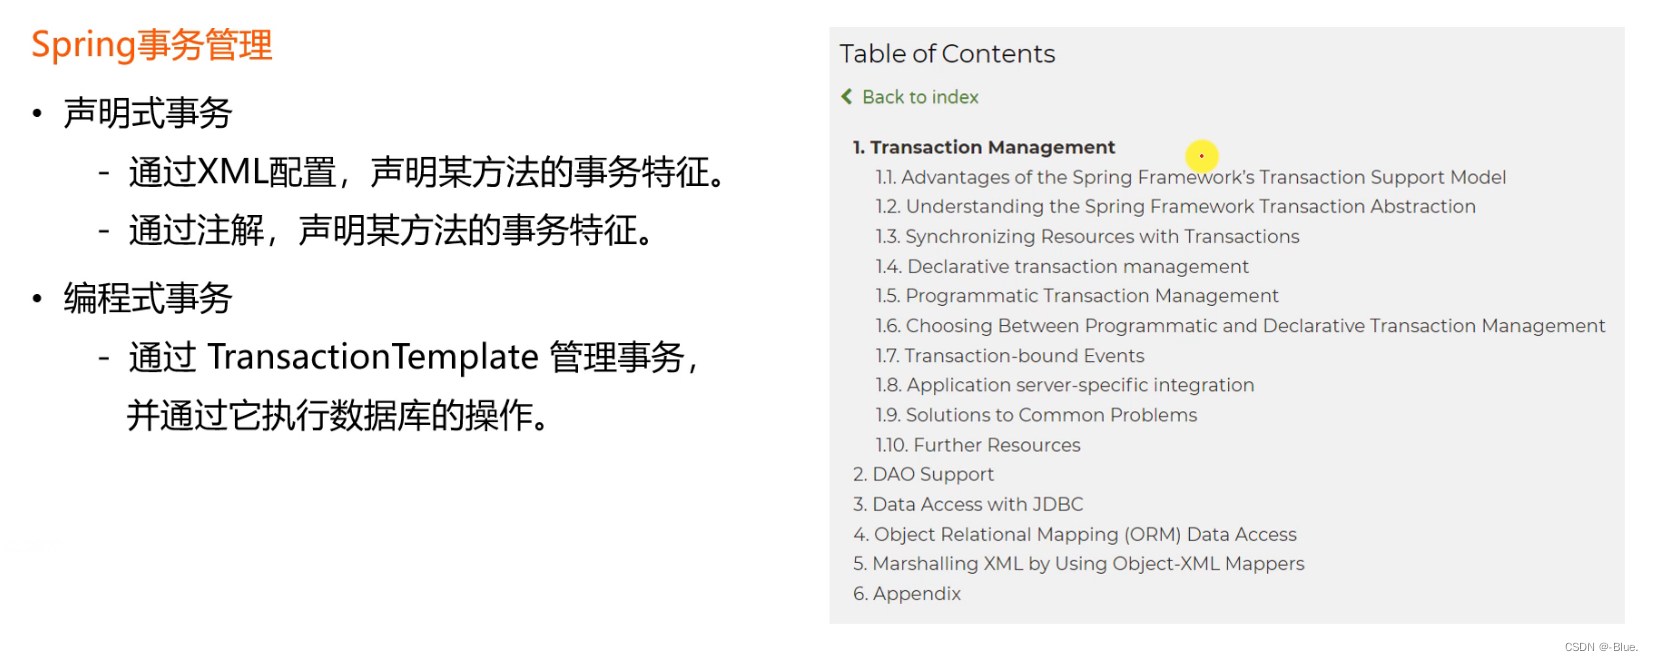
下列关于Spring事务管理的描述
- Spring提供了声明式事务、编程式事务两种事务管理方案
- 声明式事务,只需通过XML或注解进行配置,即可实现对事务的管理
- 编程式事务,需要通过TransactionTemplate组件执行SQL,达到管理事务的目的
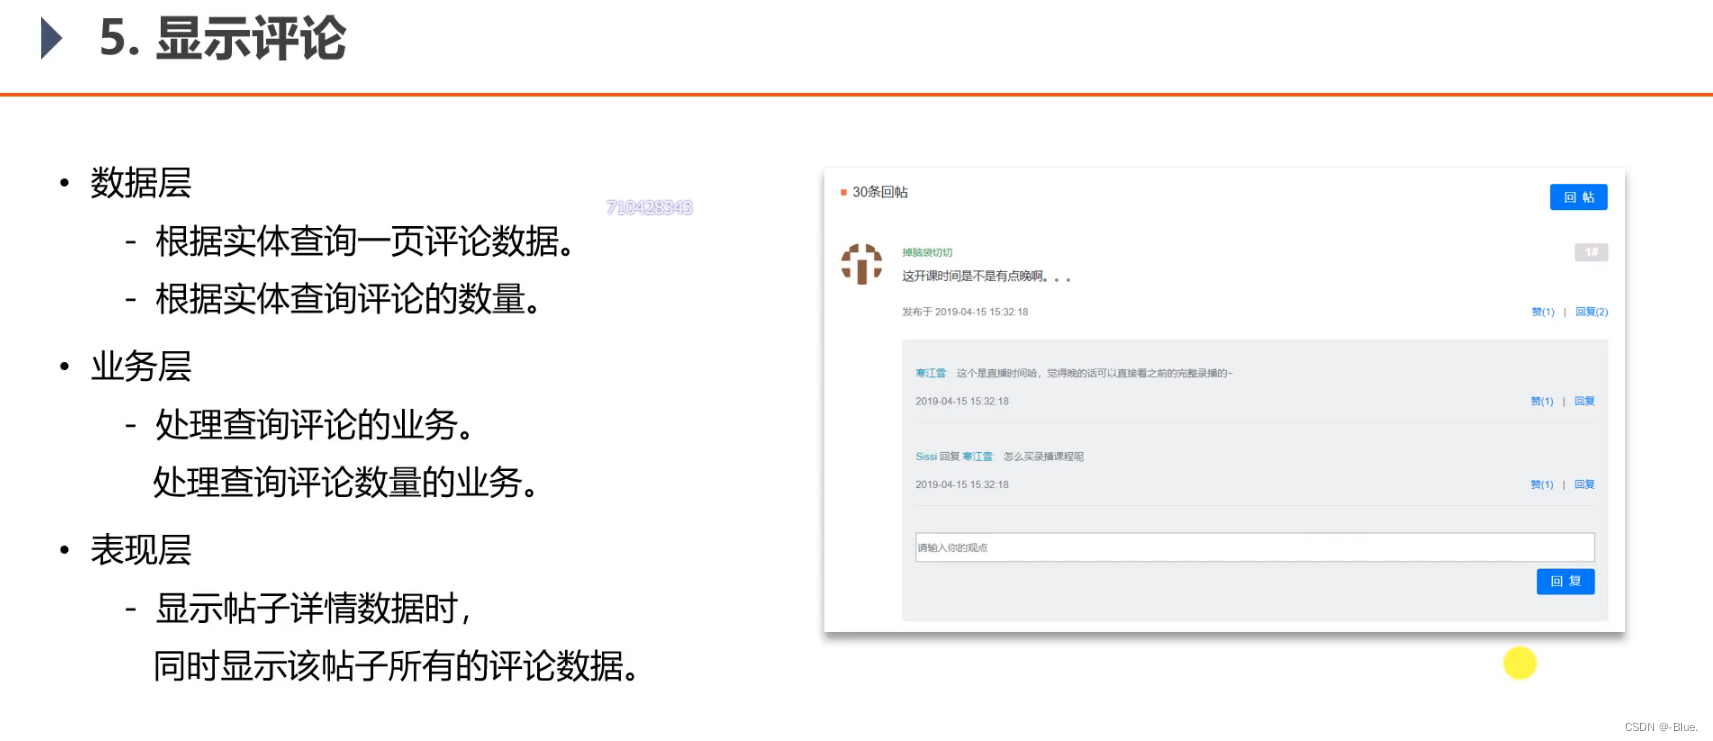
五、显示评论
评论目标类别:
- 1:帖子
- 评论
- 用户
- 题
- 课程
entity_id 这个类型的目标:
- id为多少的帖子
target_id 指向人的评论

1、数据访问层 dao
实体类——Comment
- getter setter
- tostring
public class Comment {

    private int id;
    private int userId;
    private int entityType;
    private int entityId;
    private int targetId;
    private String content;
    private int status;
    private Date createTime;
实现接口——CommentMapper
- 分页查询
package com.nowcoder.community.dao;

import com.nowcoder.community.entity.Comment;
import org.apache.ibatis.annotations.Mapper;

import java.util.List;

@Mapper
public interface CommentMapper {

    // 查询帖子实体,根据实体
    /**
     *
     * @param entityType:实体评论类别
     * @param entityId:指向目标类型
     * @param offset:分页
     * @param limit:行数限制
     * @return
     */
    List<Comment> selectCommentsByEntity(int entityType, int entityId, int offset, int limit);

    int selectCountByEntity(int entityType, int entityId);

}
SQL语句——comment-mapper.xml
- 查询某一页数据
- 查询一共有多少条数据,返回整数
<?xml version="1.0" encoding="UTF-8" ?>
<!DOCTYPE mapper
        PUBLIC "-//mybatis.org//DTD Mapper 3.0//EN"
        "http://mybatis.org/dtd/mybatis-3-mapper.dtd">
<mapper namespace="com.nowcoder.community.dao.CommentMapper">

    <sql id="selectFields">
        id, user_id, entity_type, entity_id, target_id, content, status, create_time
    </sql>

    <select id="selectCommentsByEntity" resultType="Comment">
        select <include refid="selectFields"></include>
        from comment
        where status = 0
        and entity_type = #{entityType}
        and entity_id = #{entityId}
        order by create_time asc
        limit #{offset}, #{limit}
    </select>

    <select id="selectCountByEntity" resultType="int">
        select count(id)
        from comment
        where status = 0
        and entity_type = #{entityType}
        and entity_id = #{entityId}
    </select>

</mapper>
2、业务层 service
CommentService
package com.nowcoder.community.service;

import com.nowcoder.community.dao.CommentMapper;
import com.nowcoder.community.entity.Comment;
import org.springframework.beans.factory.annotation.Autowired;
import org.springframework.stereotype.Service;

import java.util.List;

@Service
public class CommentService {

    @Autowired
    private CommentMapper commentMapper;

    // 查询某一页数据
    public List<Comment> findCommentsByEntity(int entityType, int entityId, int offset, int limit) {
        return commentMapper.selectCommentsByEntity(entityType, entityId, offset, limit);
    }

    public int findCommentCount(int entityType, int entityId) {
        return commentMapper.selectCountByEntity(entityType, entityId);
    }

}
3、视图层——controller
在上一节帖子详情中补充——DiscussPostController
    // 查询帖子详情数据
    @RequestMapping(path = "/detail/{discussPostId}", method = RequestMethod.GET)
    public String getDiscussPost(@PathVariable("discussPostId") int discussPostId, Model model, Page page) {
        // 帖子
        DiscussPost post = discussPostService.findDiscussPostById(discussPostId);
        model.addAttribute("post", post);
        // 作者
        User user = userService.findUserById(post.getUserId());
        model.addAttribute("user", user);


        // 评论分页信息
        page.setLimit(5);
        page.setPath("/discuss/detail/" + discussPostId);
        page.setRows(post.getCommentCount()); // 一共多少条评论数据

        // 评论: 给帖子的评论
        // 回复: 给评论的评论
        // 评论列表
        List<Comment> commentList = commentService.findCommentsByEntity(
                ENTITY_TYPE_POST, post.getId(), page.getOffset(), page.getLimit());
        // 评论VO列表  显示
        List<Map<String, Object>> commentVoList = new ArrayList<>();
        if (commentList != null) {
            for (Comment comment : commentList) {
                // 评论VO
                Map<String, Object> commentVo = new HashMap<>();
                // 评论
                commentVo.put("comment", comment);
                // 作者
                commentVo.put("user", userService.findUserById(comment.getUserId()));

                // 回复列表, 不分页,有多少查多少
                List<Comment> replyList = commentService.findCommentsByEntity(
                        ENTITY_TYPE_COMMENT, comment.getId(), 0, Integer.MAX_VALUE);
                // 回复VO列表
                List<Map<String, Object>> replyVoList = new ArrayList<>();
                if (replyList != null) {
                    for (Comment reply : replyList) {
                        Map<String, Object> replyVo = new HashMap<>();
                        // 回复
                        replyVo.put("reply", reply);
                        // 作者
                        replyVo.put("user", userService.findUserById(reply.getUserId()));
                        // 回复目标
                        User target = reply.getTargetId() == 0 ? null : userService.findUserById(reply.getTargetId());
                        replyVo.put("target", target);

                        replyVoList.add(replyVo);
                    }
                }
                commentVo.put("replys", replyVoList);

                // 回复数量
                int replyCount = commentService.findCommentCount(ENTITY_TYPE_COMMENT, comment.getId());
                commentVo.put("replyCount", replyCount);

                commentVoList.add(commentVo);
            }
        }
        // 传给模板
        model.addAttribute("comments", commentVoList);

        return "/site/discuss-detail";
    }
常量接口——CommunityConstant
    /**
     * 实体类型: 帖子
     */
    int ENTITY_TYPE_POST = 1;

    /**
     * 实体类型: 评论
     */
    int ENTITY_TYPE_COMMENT = 2;
4、首页
回帖

分页

5、帖子详情页面——discuss-detail.html
回帖

遍历展示帖子
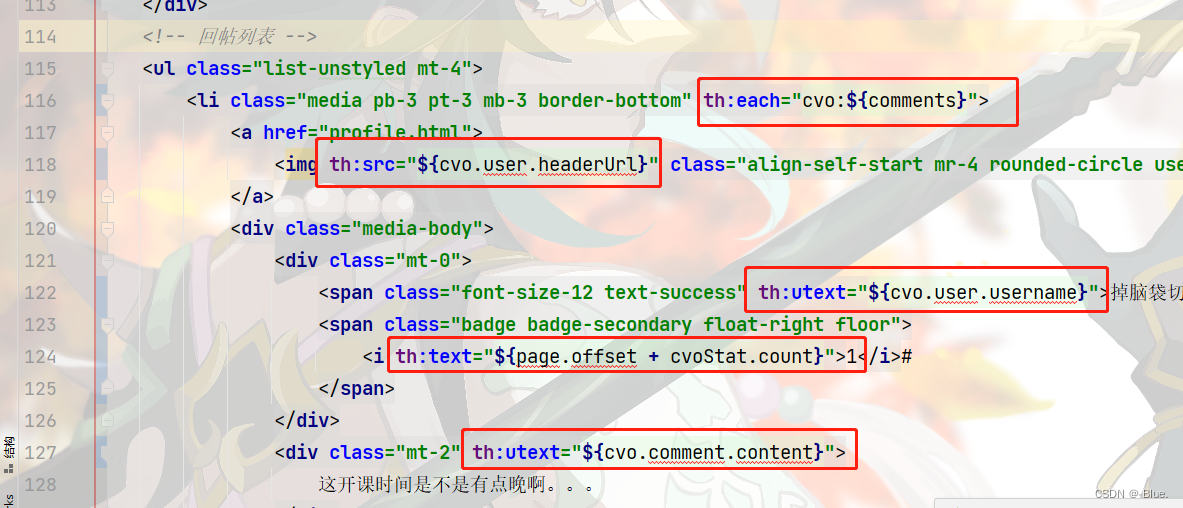
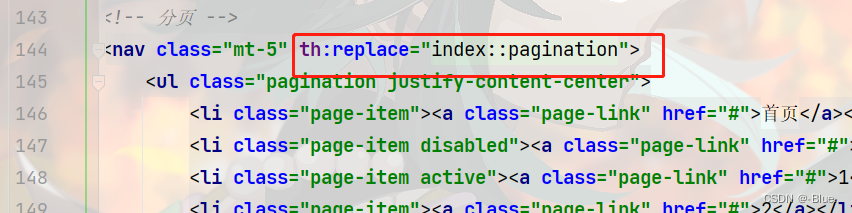
分页复用

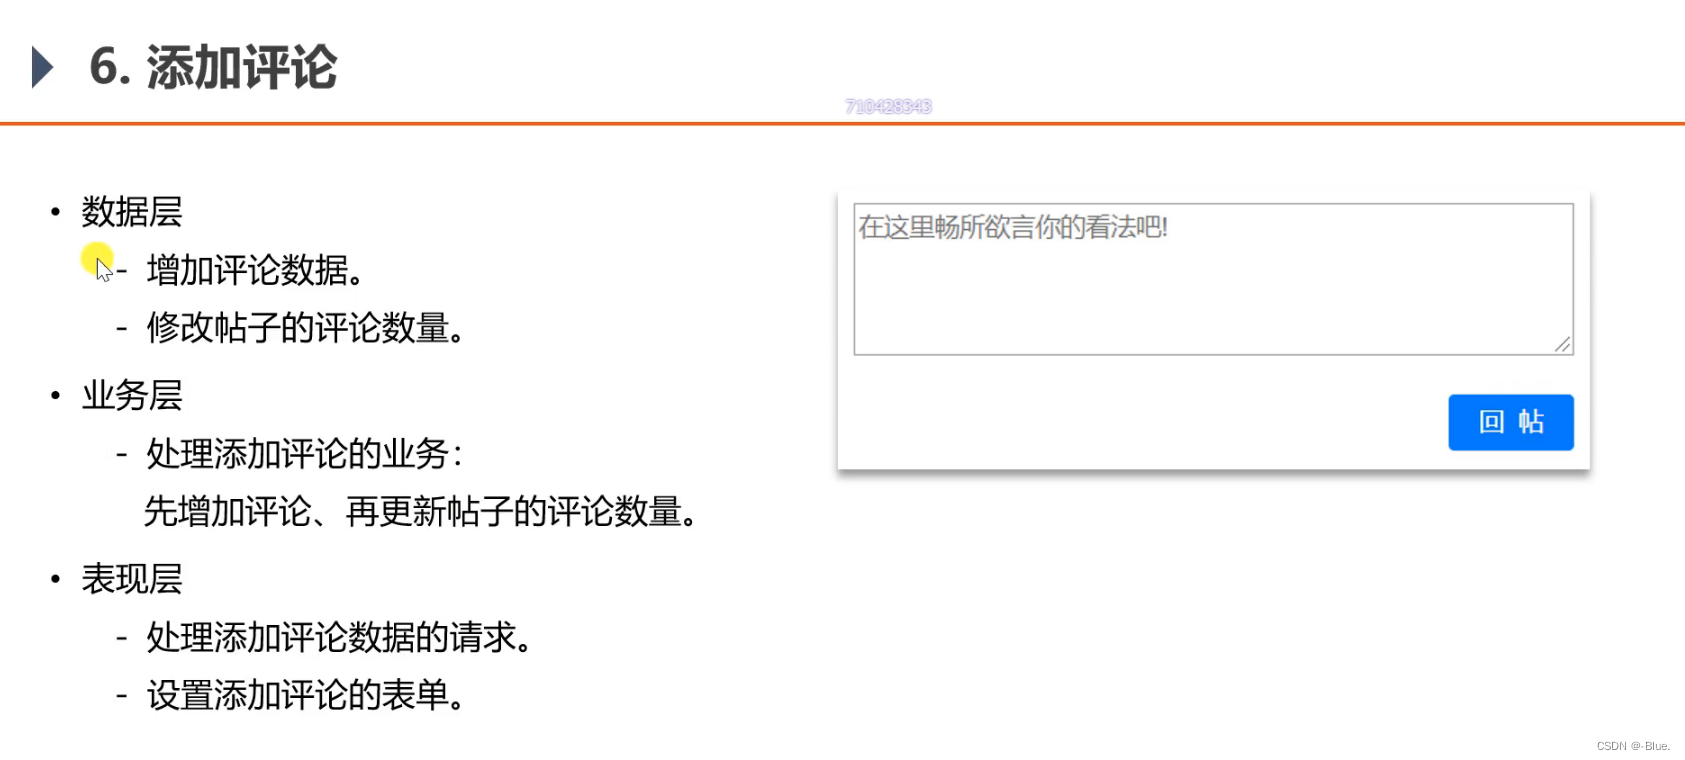
六、添加评论
1、数据访问层 dao
实现接口——CommentMapper
    /**
     * 增加评论的方法
     * @param comment:实体类
     * @return
     */
    int insertComment(Comment comment);
SQL语句——comment-mapper.xml
<sql id="insertFields">
    user_id, entity_type, entity_id, target_id, content, status, create_time
</sql>

<insert id="insertComment" parameterType="Comment">
    insert into comment(<include refid="insertFields"></include>)
    values(#{userId},#{entityType},#{entityId},#{targetId},#{content},#{status},#{createTime})
</insert>
更新评论数量
- 增加帖子评论的数量
- 更新这个
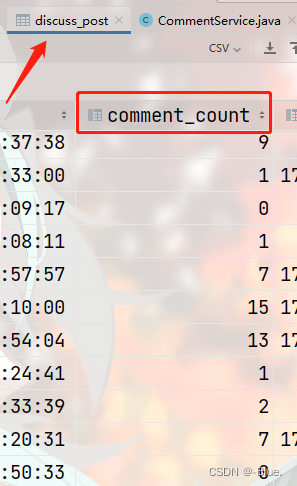
DiscussPostMapper
    /**
     * 更新评论数量,返回整数
     * @param id:帖子id
     * @param commentCount:评论数量
     * @return
     */
    int updateCommentCount(int id, int commentCount);
discusspost-mapper.xml
    <update id="updateCommentCount">
        update discuss_post set comment_count = #{commentCount} where id = #{id}
    </update>
2、业务层 service
- 处理添加评论的业务
- 先增加评论、再更新帖子的评论数量。
事务管理——CommentService
   @Autowired
    private SensitiveFilter sensitiveFilter;    // 敏感词过滤

    @Autowired
    private DiscussPostService discussPostService;

	 /**
     * 事务管理增加评论
     * @Transactional : 事务管理,级别 读取已提交的数据
     * @param comment:主体
     * @return
     */
    @Transactional(isolation = Isolation.READ_COMMITTED, propagation = Propagation.REQUIRED)
    public int addComment(Comment comment) {
        if (comment == null) {
            throw new IllegalArgumentException("参数不能为空!");
        }

        // 添加评论
        comment.setContent(HtmlUtils.htmlEscape(comment.getContent()));   //
        comment.setContent(sensitiveFilter.filter(comment.getContent()));  //过滤敏感词
        int rows = commentMapper.insertComment(comment);   // 存库里

        // 更新帖子评论数量
        if (comment.getEntityType() == ENTITY_TYPE_POST) {
            int count = commentMapper.selectCountByEntity(comment.getEntityType(), comment.getEntityId());
            discussPostService.updateCommentCount(comment.getEntityId(), count);
        }

        return rows;
    }
3、视图层——controller
- 处理添加评论数据的请求
- 设置添加评论的表单
CommentController
package com.nowcoder.community.controller;

import com.nowcoder.community.entity.Comment;
import com.nowcoder.community.service.CommentService;
import com.nowcoder.community.util.HostHolder;
import org.springframework.beans.factory.annotation.Autowired;
import org.springframework.stereotype.Controller;
import org.springframework.web.bind.annotation.PathVariable;
import org.springframework.web.bind.annotation.RequestMapping;
import org.springframework.web.bind.annotation.RequestMethod;

import java.util.Date;

@Controller
@RequestMapping("/comment")
public class CommentController {

    @Autowired
    private CommentService commentService;

    @Autowired
    private HostHolder hostHolder;

    /**
     * 增加评论
     * @param discussPostId:帖子id,
     * @param comment:实体 (状态、时间)
     * @return
     */
    @RequestMapping(path = "/add/{discussPostId}", method = RequestMethod.POST)
    public String addComment(@PathVariable("discussPostId") int discussPostId, Comment comment) {
        comment.setUserId(hostHolder.getUser().getId());   // 当前用户id
        comment.setStatus(0);
        comment.setCreateTime(new Date());         // 当前时间
        commentService.addComment(comment);        // 添加

        // 帖子详情页面 + 帖子id
        return "redirect:/discuss/detail/" + discussPostId;
    }

}
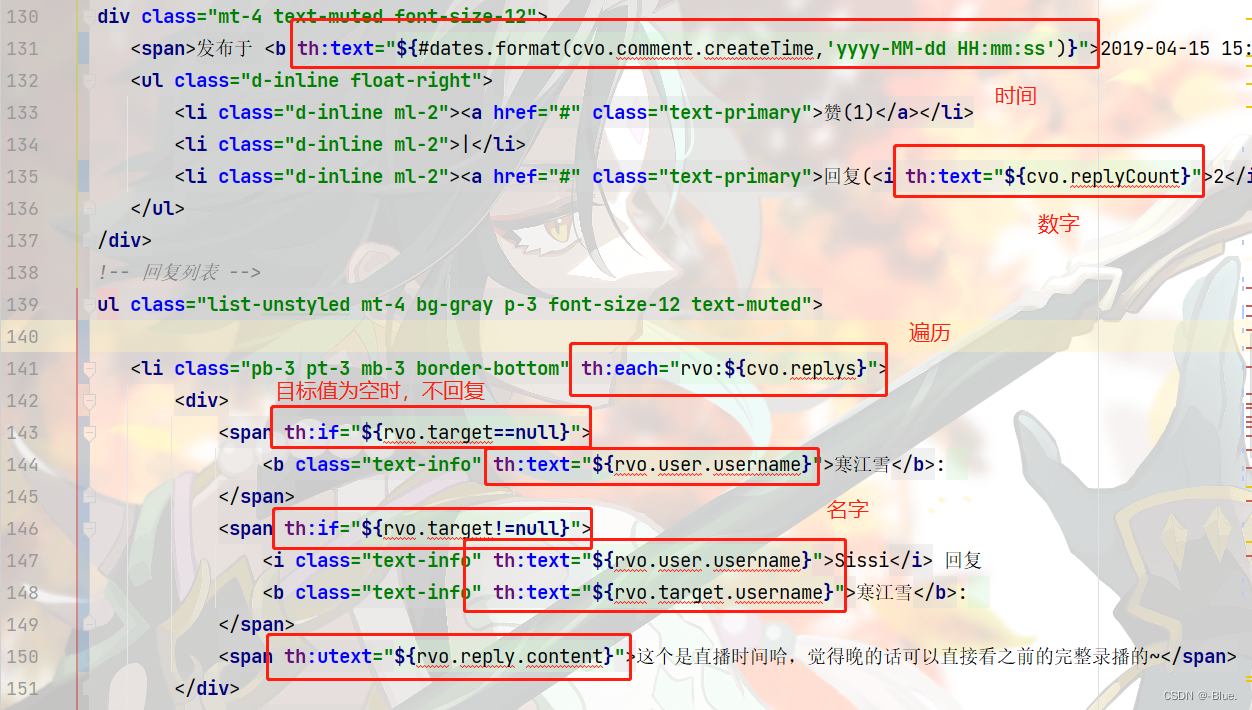
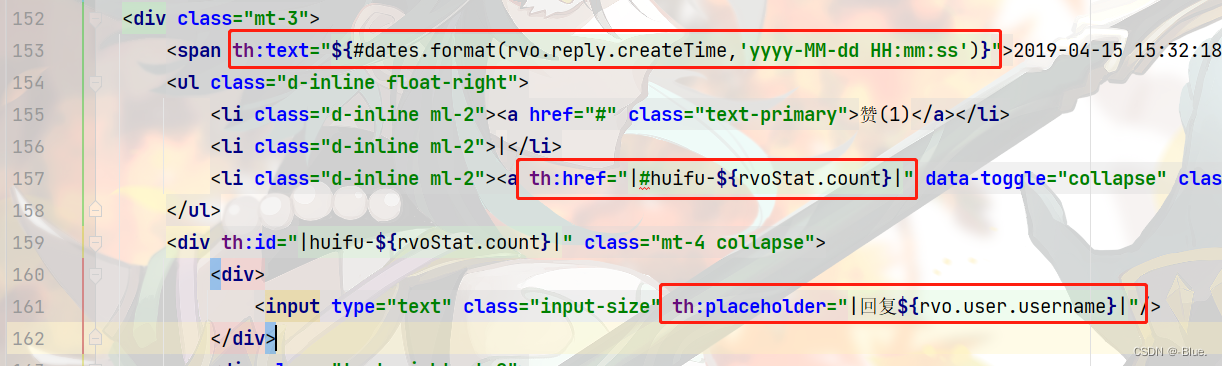
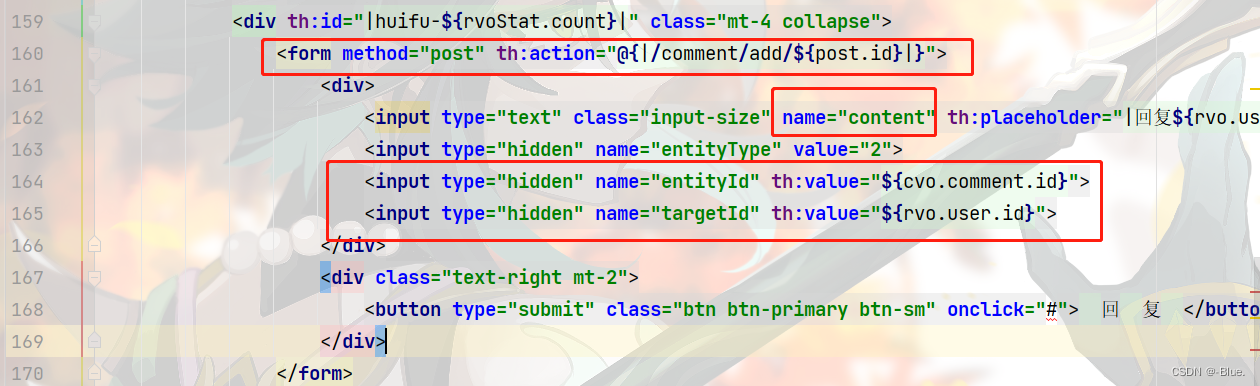
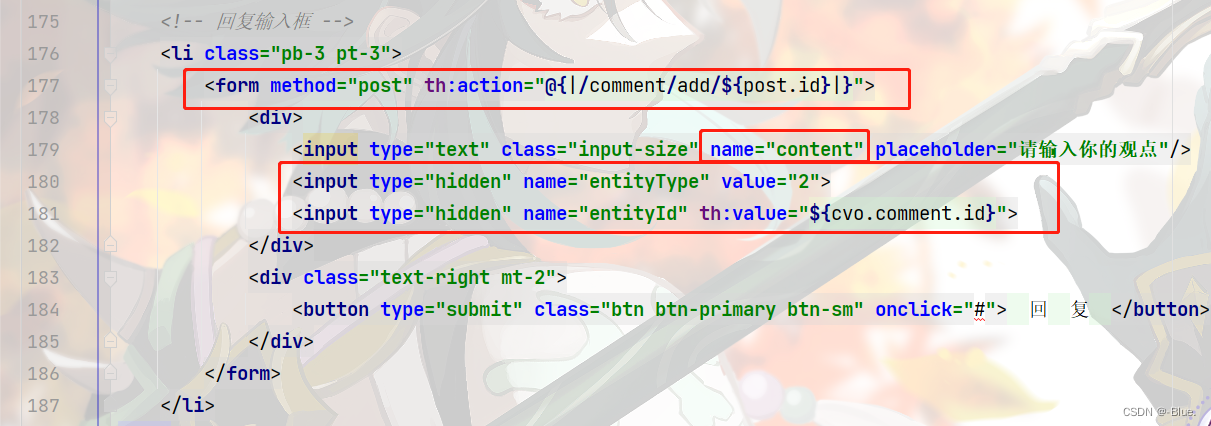
4、帖子详情页面——discuss-detail.html
- 声明提交方式
- 提交路径
action中,包含固定值+动态参数- 实体包含类型和id
hidden:隐藏框
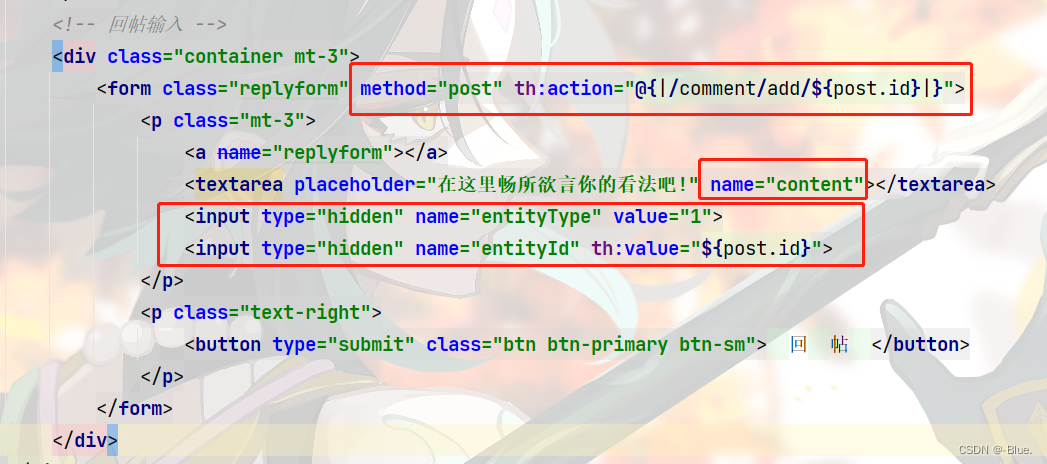
- 评论
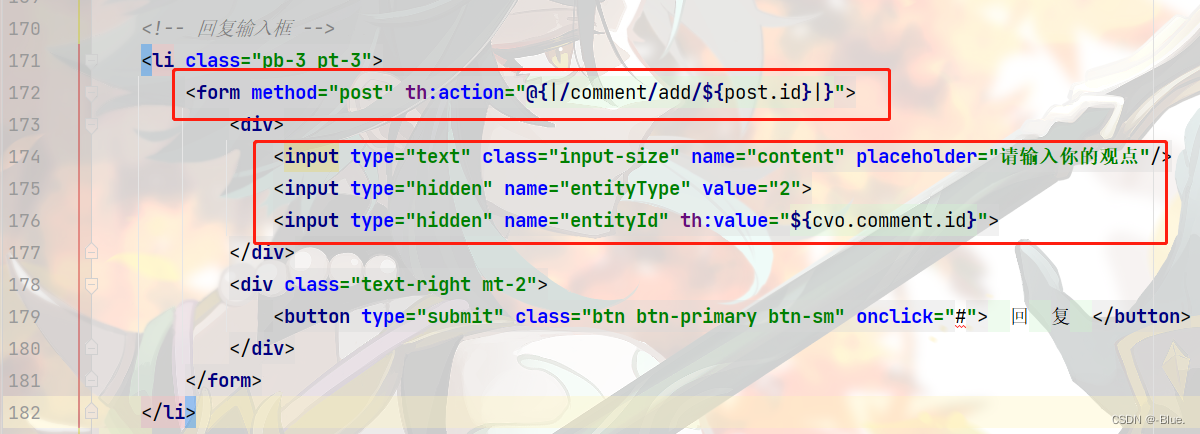
- 回复其他人的评论
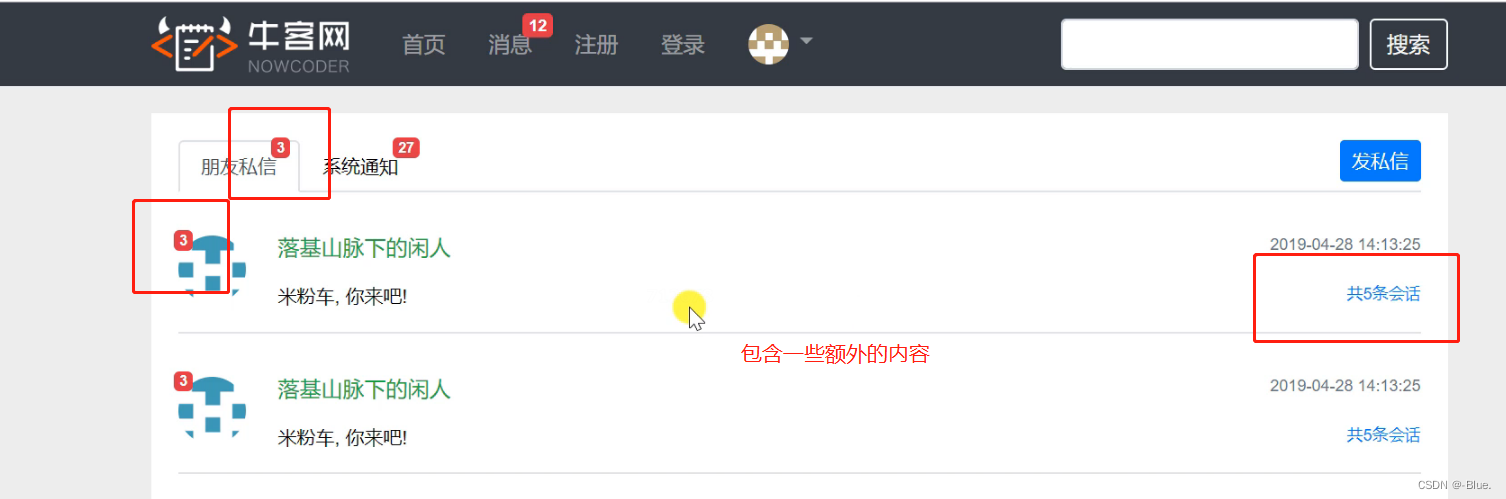
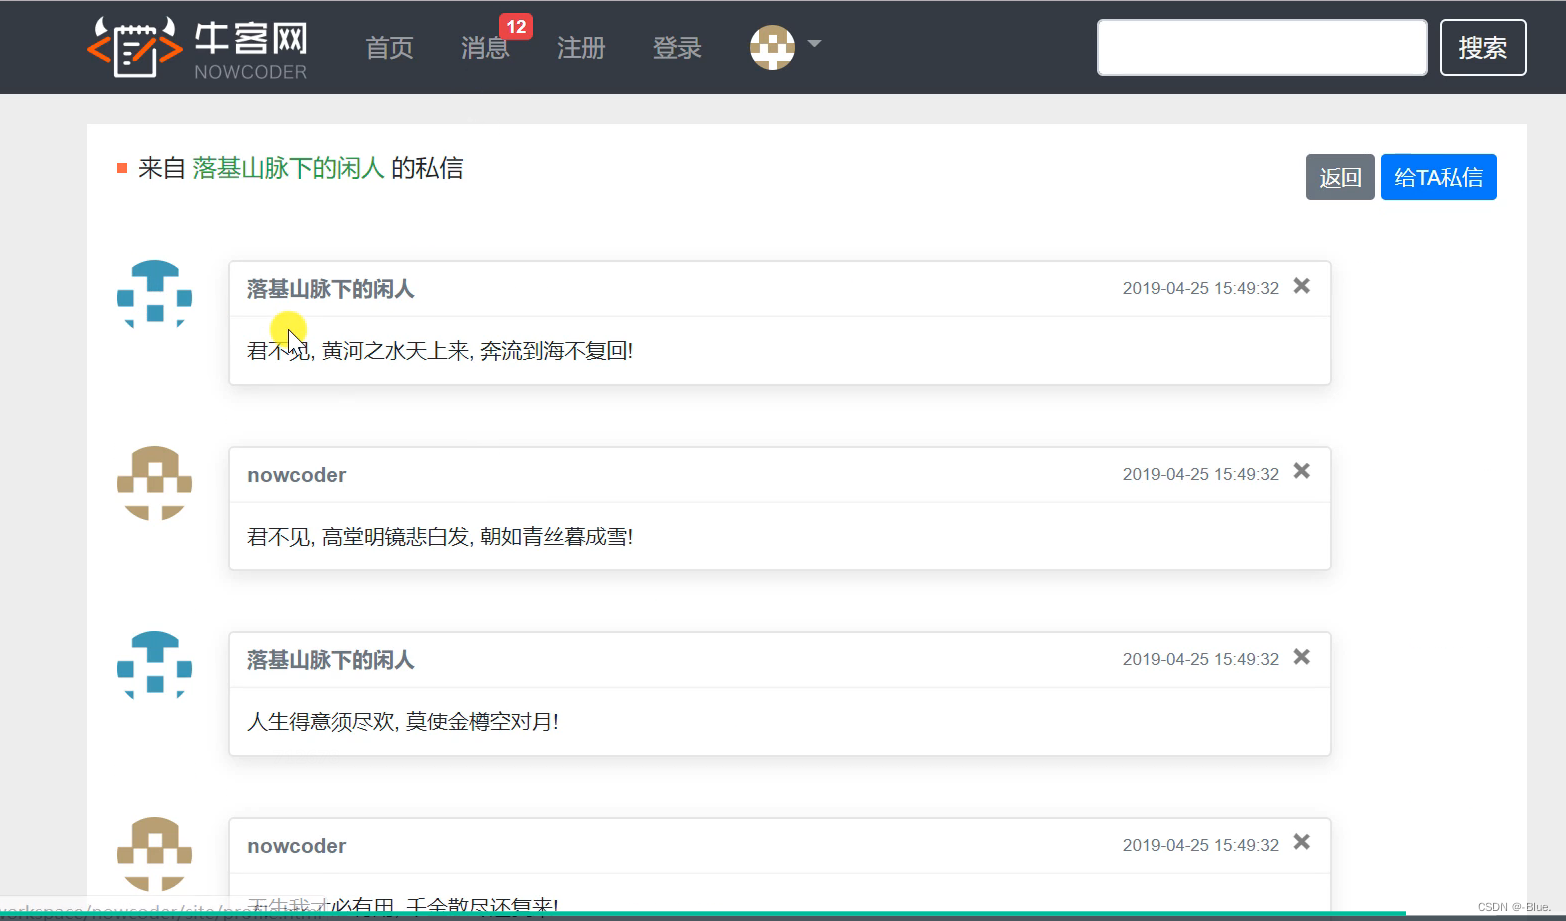
七、私信列表
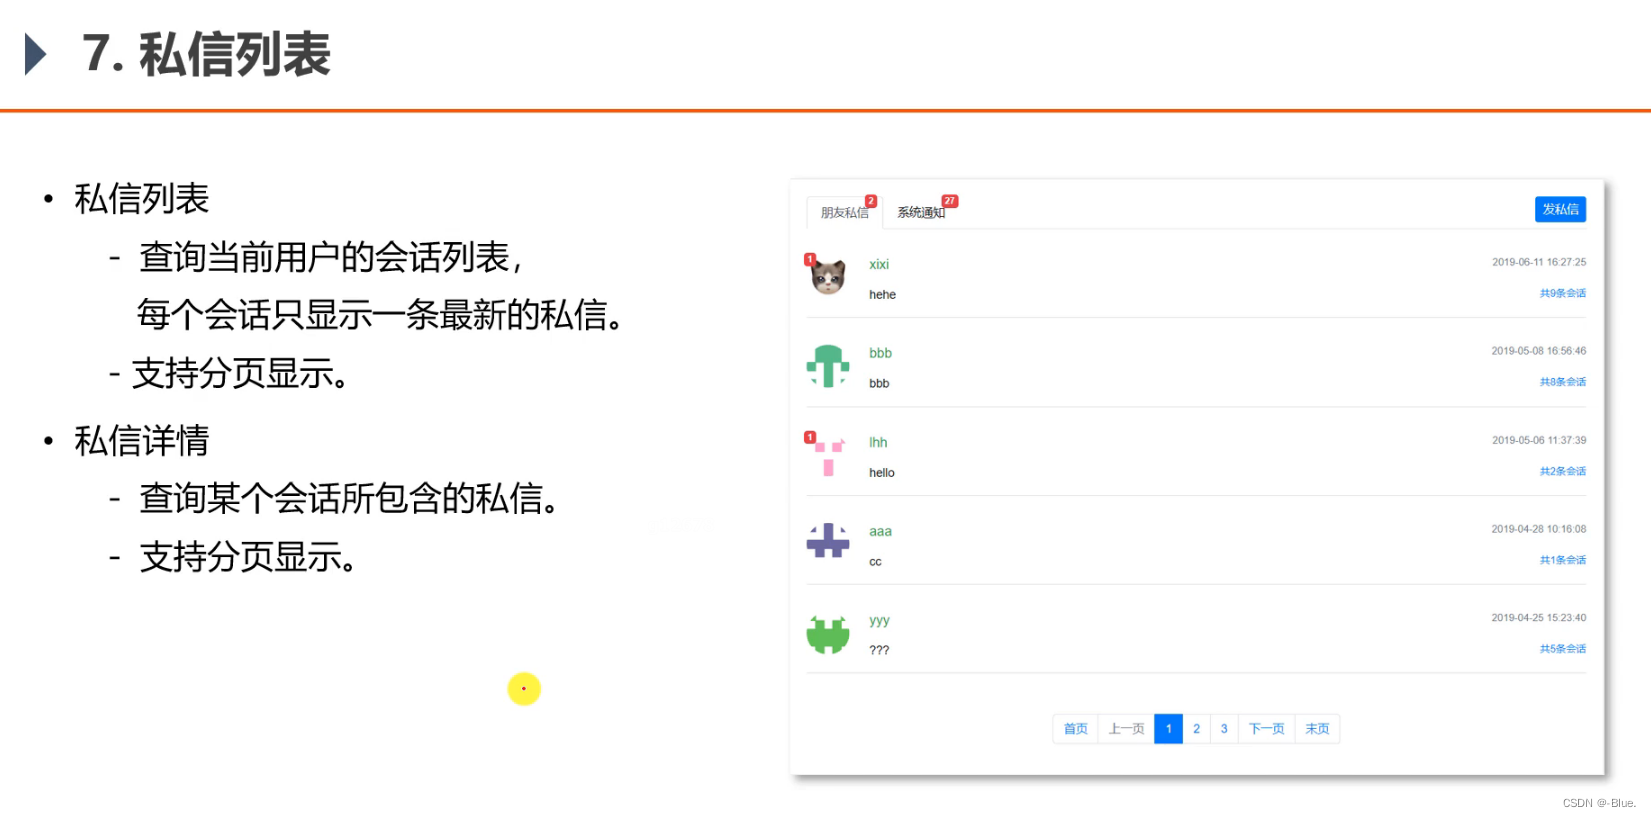
私信列表
- 查询当前用户的会话列表
- 每个会话只显示一条最新的私信
- 支持分页显示。
私信详情
- 查询某个会话所包含的私信
- 支持分页显示。
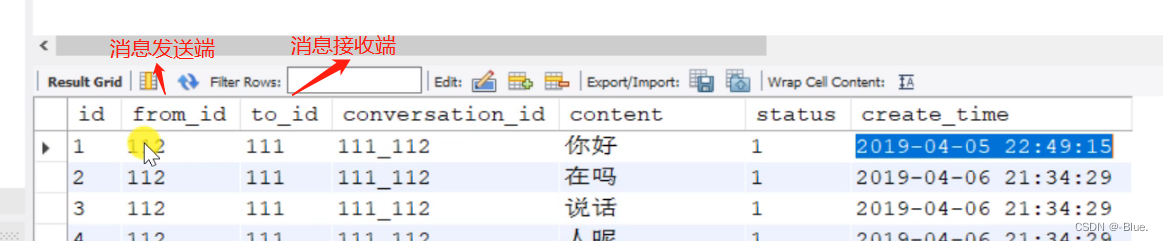
status:
- 0:未读
- 1:
- 2:删除
from_id:1为系统
私信列表
1、数据访问层 dao
主体——Message
/**
 * 消息主体
 * id:
 * fromId:私信发送方
 * toId:私信接收方
 * conversationId:
 * content:内容
 * status:状态
 * createTime:创建时间
 */
public class Message {

    private int id;
    private int fromId;
    private int toId;
    private String conversationId;
    private String content;
    private int status;
    private Date createTime;
方法——MessageMapper
- 查询私信这一页数据
- 查询私信总行数
- 某一个人的私信详情也是一个列表
- 未读消息总数量
- 某一个人未读消息数量
package com.nowcoder.community.dao;

import com.nowcoder.community.entity.Message;
import org.apache.ibatis.annotations.Mapper;

import java.util.List;

/**
 * 1、查询当前用户的会话列表,针对每个会话只返回一条最新的私信
 * 2、查询当前用户的会话数量
 */
@Mapper
public interface MessageMapper {


    /**
     * 查询当前用户的会话列表,针对每个会话只返回一条最新的私信
     * @param userId : 用户id
     * @param offset:分页,每页起始行的行号
     * @param limit:行数限制,每页最多显示多少条数据
     * @return
     */
    // 查询当前用户的会话列表,针对每个会话只返回一条最新的私信.
    List<Message> selectConversations(int userId, int offset, int limit);

    /**
     * 查询当前用户的会话数量
     */
    // 查询当前用户的会话数量.
    int selectConversationCount(int userId);

    /**
     * 查询某个会话所包含的私信列表
     * @param conversationId:会话id
     * @return
     */
    // 查询某个会话所包含的私信列表.
    List<Message> selectLetters(String conversationId, int offset, int limit);

    /**
     * 查询某个会话所包含的私信数量.
     * @param conversationId:会话id
     * @return
     */
    // 查询某个会话所包含的私信数量.
    int selectLetterCount(String conversationId);

    /**
     * 查询未读私信的数量
     * @param conversationId :会话id
     * @return
     */
    // 查询未读私信的数量
    int selectLetterUnreadCount(int userId, String conversationId);

}
SQL语句——message-mapper.xml

<?xml version="1.0" encoding="UTF-8" ?>
<!DOCTYPE mapper
        PUBLIC "-//mybatis.org//DTD Mapper 3.0//EN"
        "http://mybatis.org/dtd/mybatis-3-mapper.dtd">
<mapper namespace="com.nowcoder.community.dao.MessageMapper">

    <sql id="selectFields">
        id, from_id, to_id, conversation_id, content, status, create_time
    </sql>

    <select id="selectConversations" resultType="Message">
        select <include refid="selectFields"></include>
        from message
        where id in (
            select max(id) from message
            where status != 2
            and from_id != 1
            and (from_id = #{userId} or to_id = #{userId})
            group by conversation_id
        )
        order by id desc
        limit #{offset}, #{limit}
    </select>

    <select id="selectConversationCount" resultType="int">
        select count(m.maxid) from (
            select max(id) as maxid from message
            where status != 2
            and from_id != 1
            and (from_id = #{userId} or to_id = #{userId})
            group by conversation_id
        ) as m
    </select>

    <select id="selectLetters" resultType="Message">
        select <include refid="selectFields"></include>
        from message
        where status != 2
        and from_id != 1
        and conversation_id = #{conversationId}
        order by id desc
        limit #{offset}, #{limit}
    </select>

    <select id="selectLetterCount" resultType="int">
        select count(id)
        from message
        where status != 2
        and from_id != 1
        and conversation_id = #{conversationId}
    </select>

    <select id="selectLetterUnreadCount" resultType="int">
        select count(id)
        from message
        where status = 0
        and from_id != 1
        and to_id = #{userId}
        <if test="conversationId!=null">
            and conversation_id = #{conversationId}
        </if>
    </select>

</mapper>
测试
 @Test
    public void testSelectLetters() {
        List<Message> list = messageMapper.selectConversations(111, 0, 20);
        for (Message message : list) {
            System.out.println(message);
        }

        int count = messageMapper.selectConversationCount(111);
        System.out.println(count);

        list = messageMapper.selectLetters("111_112", 0, 10);
        for (Message message : list) {
            System.out.println(message);
        }

        count = messageMapper.selectLetterCount("111_112");
        System.out.println(count);

        count = messageMapper.selectLetterUnreadCount(131, "111_131");
        System.out.println(count);

    }
2、业务层 service

package com.nowcoder.community.service;

import com.nowcoder.community.dao.MessageMapper;
import com.nowcoder.community.entity.Message;
import org.springframework.beans.factory.annotation.Autowired;
import org.springframework.stereotype.Service;

import java.util.List;

@Service
public class MessageService {

    @Autowired
    private MessageMapper messageMapper;

    public List<Message> findConversations(int userId, int offset, int limit) {
        return messageMapper.selectConversations(userId, offset, limit);
    }

    public int findConversationCount(int userId) {
        return messageMapper.selectConversationCount(userId);
    }

    public List<Message> findLetters(String conversationId, int offset, int limit) {
        return messageMapper.selectLetters(conversationId, offset, limit);
    }

    public int findLetterCount(String conversationId) {
        return messageMapper.selectLetterCount(conversationId);
    }

    public int findLetterUnreadCount(int userId, String conversationId) {
        return messageMapper.selectLetterUnreadCount(userId, conversationId);
    }

}
3、视图层——controller
私信页面
- 分页信息
- 会话列表
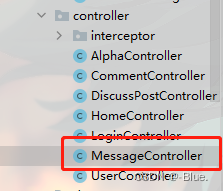
@Controller
public class MessageController {

    @Autowired
    private MessageService messageService;

    @Autowired
    private HostHolder hostHolder;

    @Autowired
    private UserService userService;

    // 私信列表
    @RequestMapping(path = "/letter/list", method = RequestMethod.GET)
    public String getLetterList(Model model, Page page) {
        User user = hostHolder.getUser();
        // 分页信息
        page.setLimit(5);
        page.setPath("/letter/list");
        page.setRows(messageService.findConversationCount(user.getId()));

        // 会话列表
        List<Message> conversationList = messageService.findConversations(
                user.getId(), page.getOffset(), page.getLimit());
        List<Map<String, Object>> conversations = new ArrayList<>();
        if (conversationList != null) {
            for (Message message : conversationList) {
                Map<String, Object> map = new HashMap<>();
                map.put("conversation", message);
                map.put("letterCount", messageService.findLetterCount(message.getConversationId()));
                map.put("unreadCount", messageService.findLetterUnreadCount(user.getId(), message.getConversationId()));
                int targetId = user.getId() == message.getFromId() ? message.getToId() : message.getFromId();
                map.put("target", userService.findUserById(targetId));

                conversations.add(map);
            }
        }
        model.addAttribute("conversations", conversations);

        // 查询未读消息数量
        int letterUnreadCount = messageService.findLetterUnreadCount(user.getId(), null);
        model.addAttribute("letterUnreadCount", letterUnreadCount);

        return "/site/letter";
    }
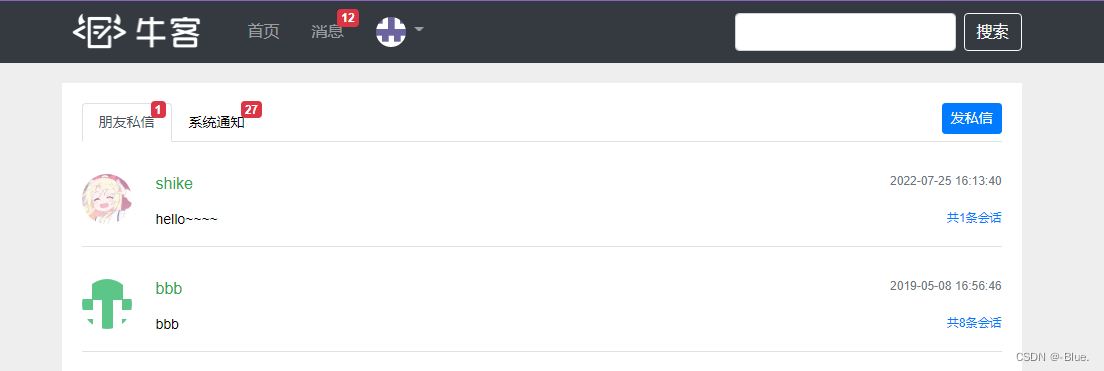
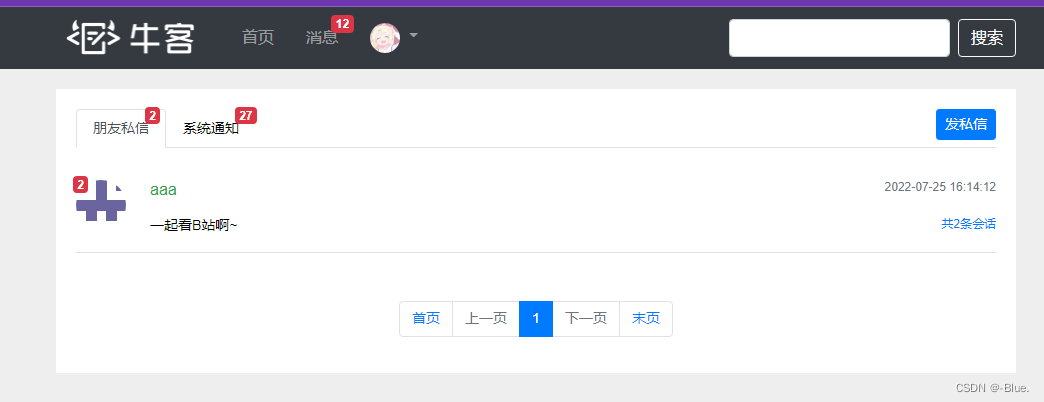
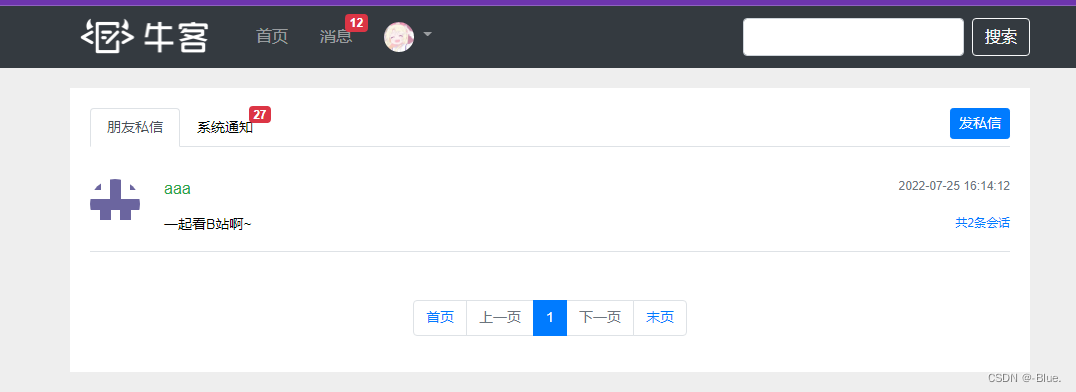
首页——index

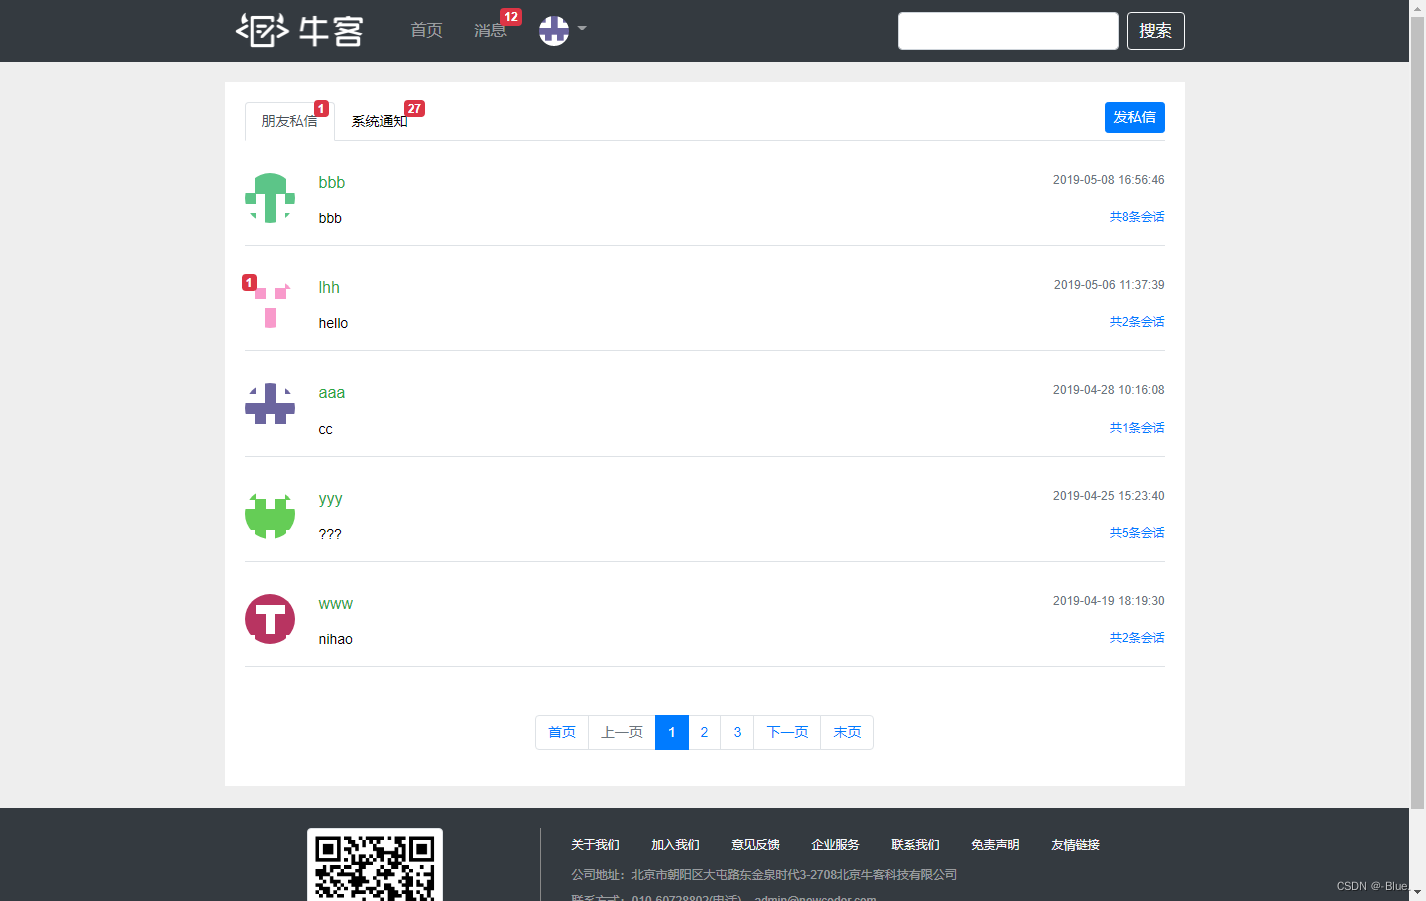
私信页面——letter.html
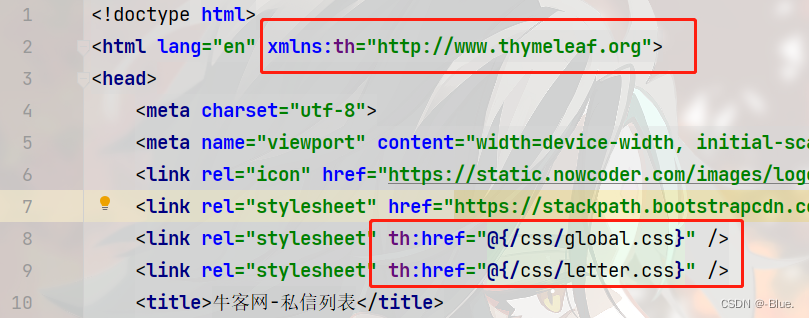

头部复用首页

私信

私信列表
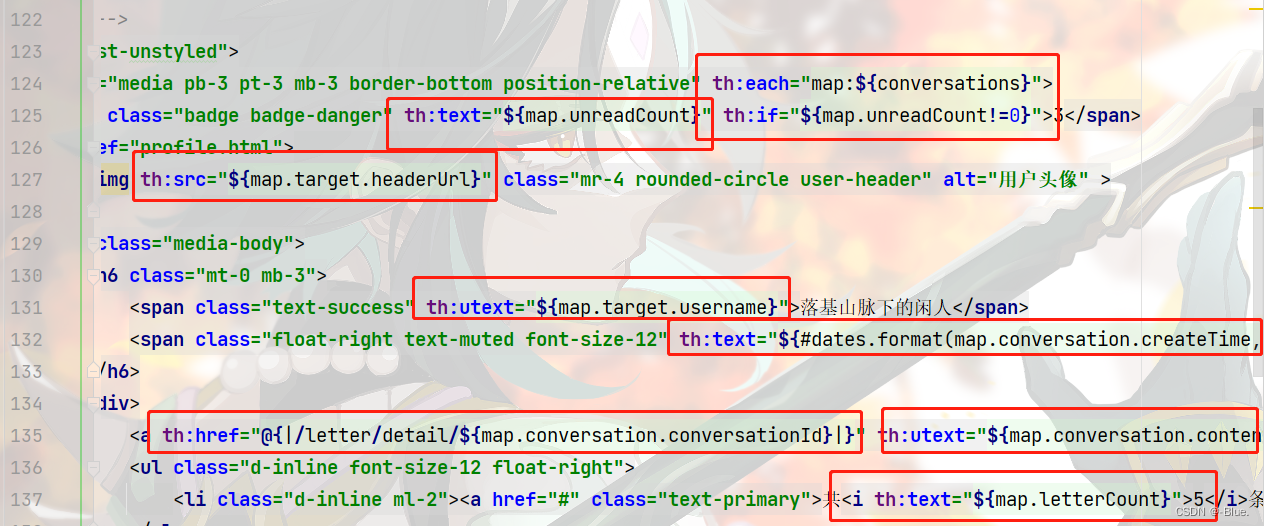
分页
测试
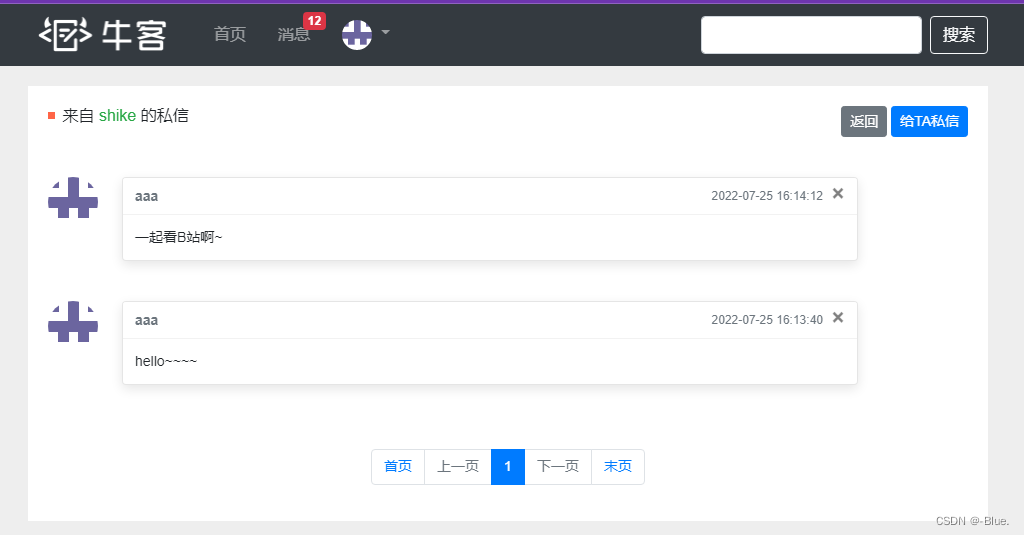
私信详情页面
 @RequestMapping(path = "/letter/detail/{conversationId}", method = RequestMethod.GET)
    public String getLetterDetail(@PathVariable("conversationId") String conversationId, Page page, Model model) {
        // 分页信息
        page.setLimit(5);
        page.setPath("/letter/detail/" + conversationId);
        page.setRows(messageService.findLetterCount(conversationId));

        // 私信列表
        List<Message> letterList = messageService.findLetters(conversationId, page.getOffset(), page.getLimit());
        List<Map<String, Object>> letters = new ArrayList<>();
        if (letterList != null) {
            for (Message message : letterList) {
                Map<String, Object> map = new HashMap<>();
                map.put("letter", message);
                map.put("fromUser", userService.findUserById(message.getFromId()));
                letters.add(map);
            }
        }
        model.addAttribute("letters", letters);

        // 私信目标
        model.addAttribute("target", getLetterTarget(conversationId));

        return "/site/letter-detail";
    }

    private User getLetterTarget(String conversationId) {
        String[] ids = conversationId.split("_");
        int id0 = Integer.parseInt(ids[0]);
        int id1 = Integer.parseInt(ids[1]);

        if (hostHolder.getUser().getId() == id0) {
            return userService.findUserById(id1);
        } else {
            return userService.findUserById(id0);
        }
    }
私信——letter.html

私信详情页面——letter-detail.html
thymeleaf 模板

私信列表

分页

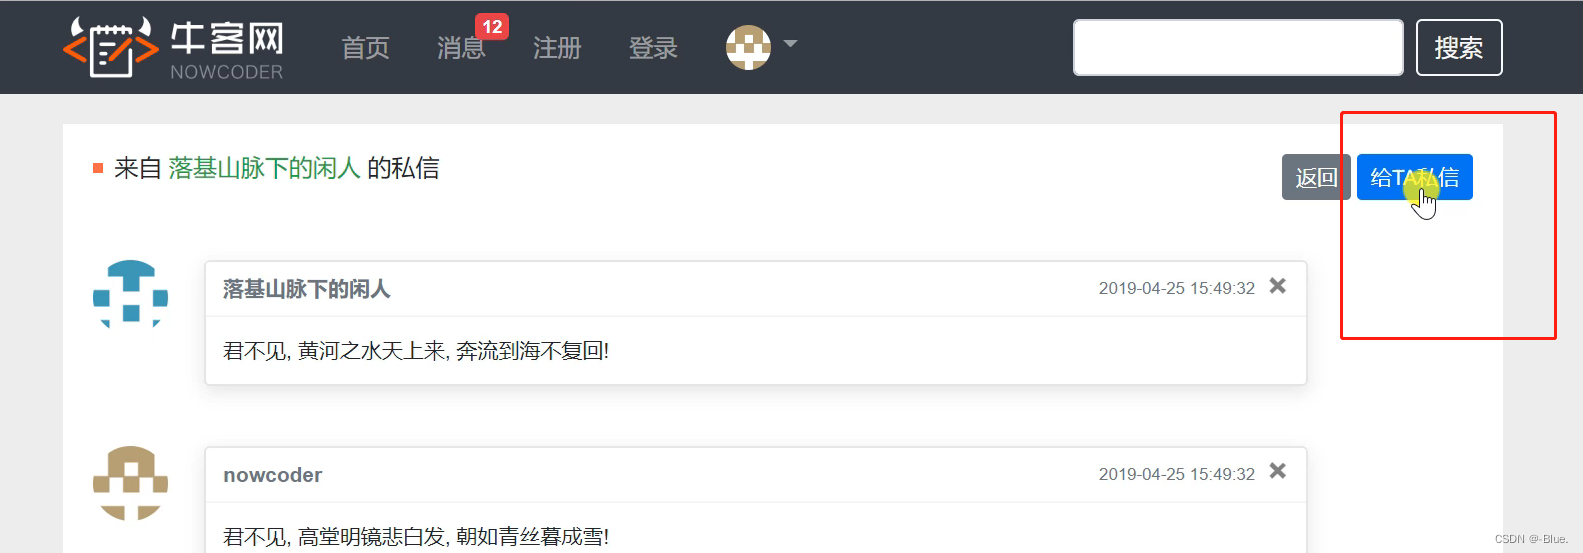
返回页面

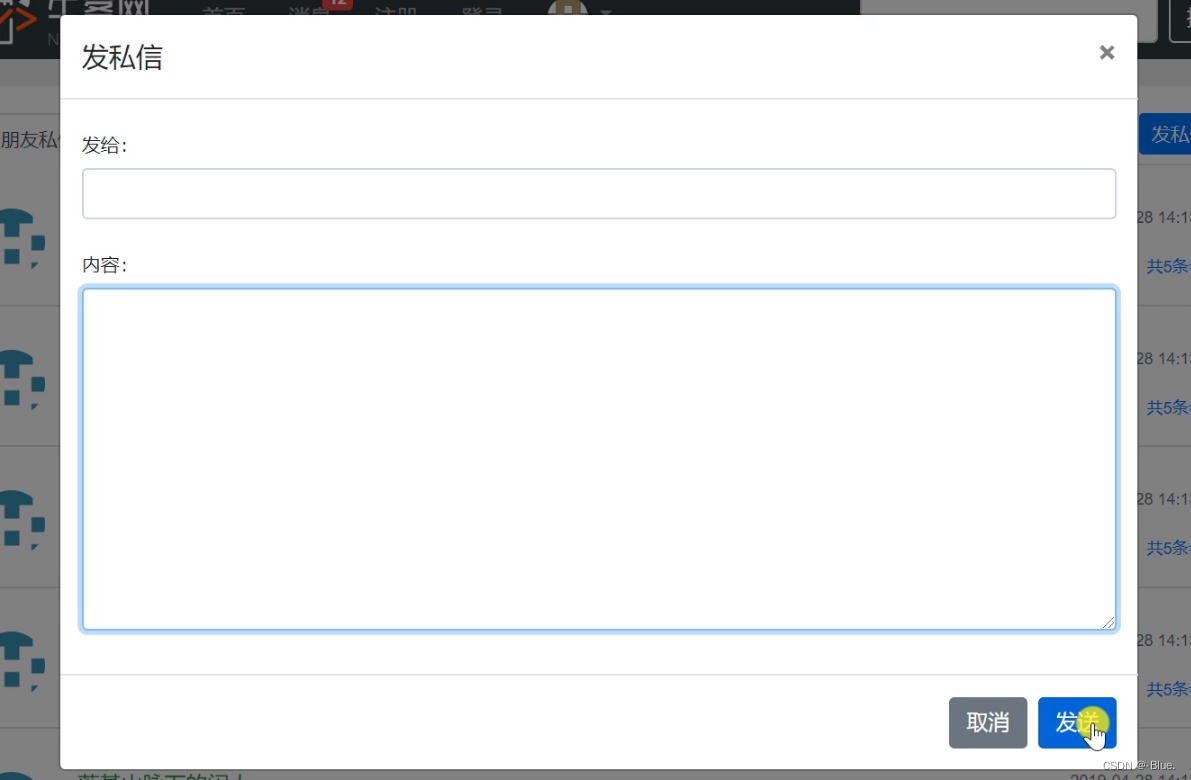
八、发送私信

1、数据访问层 dao
方法——MessageMapper
    /**
     * 新增消息
     */
    // 新增消息
    int insertMessage(Message message);

    /**
     * 修改消息的状态
     * @param ids:id的集合(多个id)
     * @param status:消息状态——设置已读、删除
     * @return
     */
    // 修改消息的状态
    int updateStatus(List<Integer> ids, int status);
SQL语句——message-mapper.xml
    <insert id="insertMessage" parameterType="Message" keyProperty="id">
        insert into message(<include refid="insertFields"></include>)
        values(#{fromId},#{toId},#{conversationId},#{content},#{status},#{createTime})
    </insert>

    <update id="updateStatus">
        update message set status = #{status}
        where id in
        <foreach collection="ids" item="id" open="(" separator="," close=")">
            #{id}
        </foreach>
    </update>
2、业务层 service
    @Autowired
    private SensitiveFilter sensitiveFilter;

    /**
     * 添加消息:对内容标签、敏感词过滤
     * @param message
     * @return
     */
    public int addMessage(Message message) {
        message.setContent(HtmlUtils.htmlEscape(message.getContent()));
        message.setContent(sensitiveFilter.filter(message.getContent()));
        return messageMapper.insertMessage(message);
    }

    /**
     * 读取消息:
     * @param ids:id集合
     * @return
     */
    public int readMessage(List<Integer> ids) {
        return messageMapper.updateStatus(ids, 1);
    }
3、视图层——controller
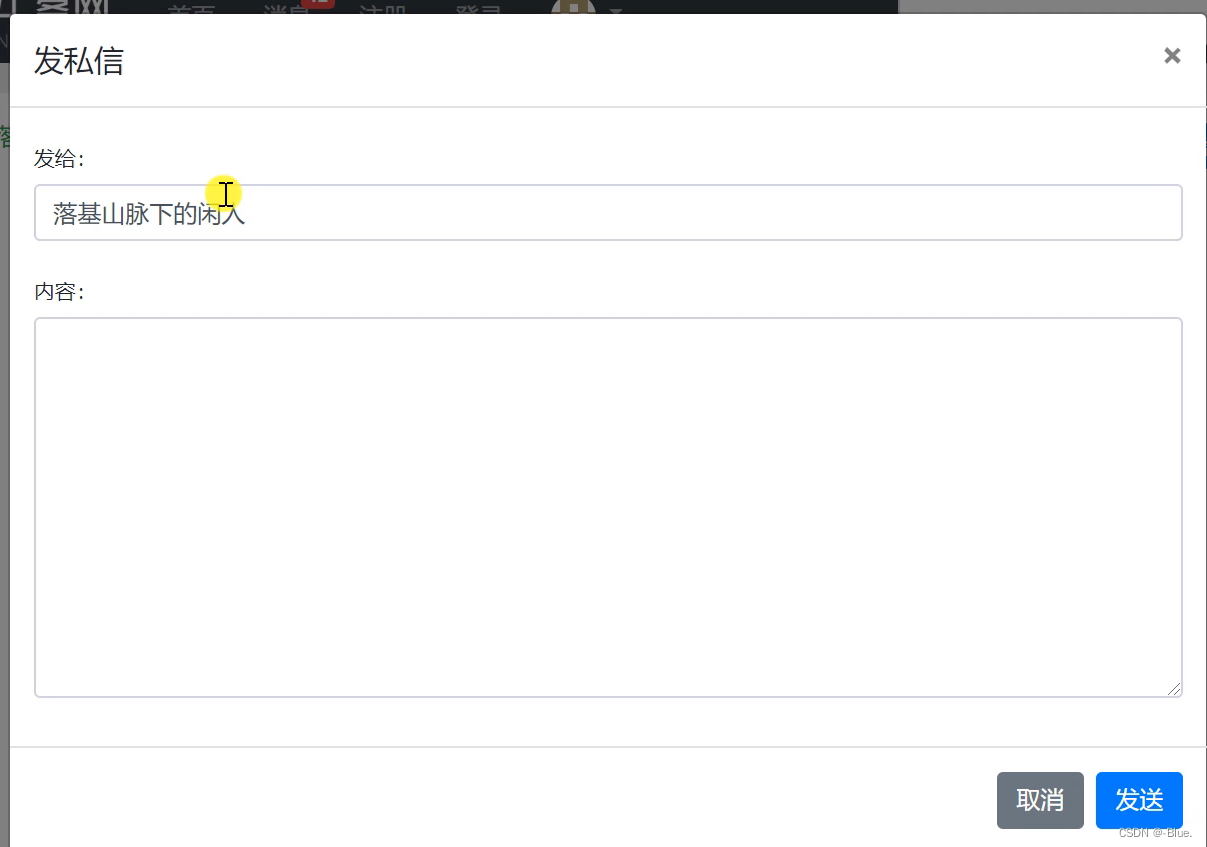
 @RequestMapping(path = "/letter/send", method = RequestMethod.POST)
    @ResponseBody
    public String sendLetter(String toName, String content) {
        User target = userService.findUserByName(toName);
        if (target == null) {
            return CommunityUtil.getJSONString(1, "目标用户不存在!");
        }

        Message message = new Message();
        message.setFromId(hostHolder.getUser().getId());
        message.setToId(target.getId());
        if (message.getFromId() < message.getToId()) {
            message.setConversationId(message.getFromId() + "_" + message.getToId());
        } else {
            message.setConversationId(message.getToId() + "_" + message.getFromId());
        }
        message.setContent(content);
        message.setCreateTime(new Date());
        messageService.addMessage(message);

        return CommunityUtil.getJSONString(0);
    }
4、前端页面
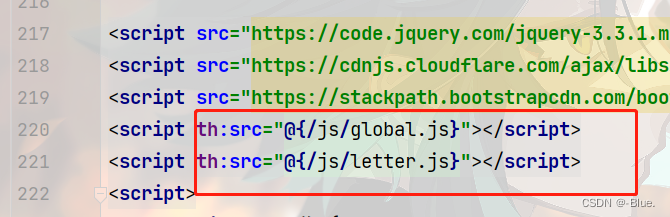
消息页面——letter.js
function send_letter() {
	$("#sendModal").modal("hide");

	var toName = $("#recipient-name").val();
	var content = $("#message-text").val();
	$.post(
		CONTEXT_PATH + "/letter/send",
		{"toName":toName,"content":content},
		function(data) {
			data = $.parseJSON(data);
			if(data.code == 0) {
				$("#hintBody").text("发送成功!");
			} else {
				$("#hintBody").text(data.msg);
			}

			$("#hintModal").modal("show");
			setTimeout(function(){
				$("#hintModal").modal("hide");
				location.reload();  // 刷新页面
			}, 2000);
		}
	);
}
消息详情页面——letter-detail.html
对话目标

测试
把未读的消息,变成已读
 /**
     * 得到未读消息的id,把未读的消息,变成已读
     * @param letterList
     * @return
     */
    private List<Integer> getLetterIds(List<Message> letterList) {
        List<Integer> ids = new ArrayList<>();

        if (letterList != null) {
            for (Message message : letterList) {
                if (hostHolder.getUser().getId() == message.getToId() && message.getStatus() == 0) {
                    ids.add(message.getId());
                }
            }
        }

        return ids;
    }

	@RequestMapping(path = "/letter/detail/{conversationId}", method = RequestMethod.GET)
    public String getLetterDetail(@PathVariable("conversationId") String conversationId, Page page, Model model) {
        // 分页信息
        page.setLimit(5);
        page.setPath("/letter/detail/" + conversationId);
        page.setRows(messageService.findLetterCount(conversationId));

        // 私信列表
        List<Message> letterList = messageService.findLetters(conversationId, page.getOffset(), page.getLimit());
        List<Map<String, Object>> letters = new ArrayList<>();
        if (letterList != null) {
            for (Message message : letterList) {
                Map<String, Object> map = new HashMap<>();
                map.put("letter", message);
                map.put("fromUser", userService.findUserById(message.getFromId()));
                letters.add(map);
            }
        }
        model.addAttribute("letters", letters);

        // 私信目标
        model.addAttribute("target", getLetterTarget(conversationId));

        // 设置已读
        List<Integer> ids = getLetterIds(letterList);
        if (!ids.isEmpty()) {
            messageService.readMessage(ids);
        }

        return "/site/letter-detail";
    }
测试
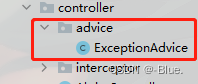
九、统一处理异常
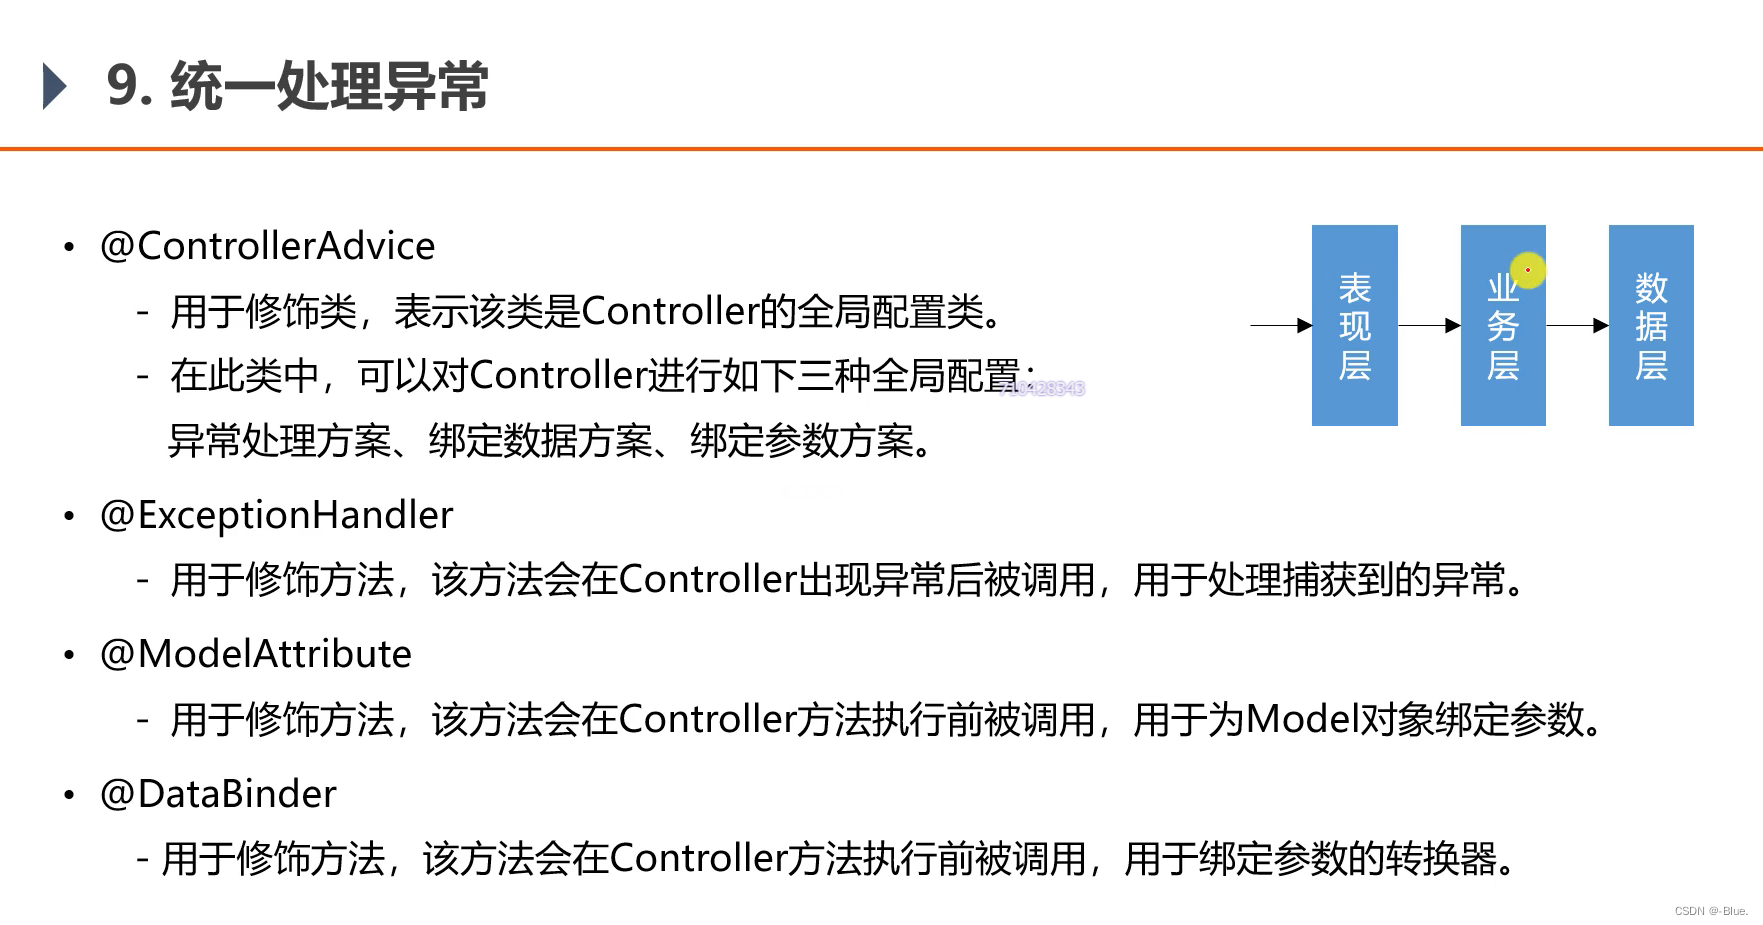
- 针对表现层,处理异常
- 控制器
常用注解
@ControllerAdvice
- 用于修饰类,表示该类是Controller的全局配置类。
- 在此类中,可以对Controlleri进行如下三种全局配置:s异常处理方案、绑定数据方案、绑定参数方案。
@ExceptionHandler
- 用于修饰方法,该方法会在Control川er出现异常后被调用,用于处理捕获到的异常。
@ModelAttribute
- 用于修饰方法,该方法会在Controller,方法执行前被调用,用于为Model对象绑定参数。
@DataBinder
- 用于修饰方法,该方法会在Controller方法执行前被调用,用于绑定参数的转换器。
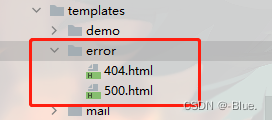
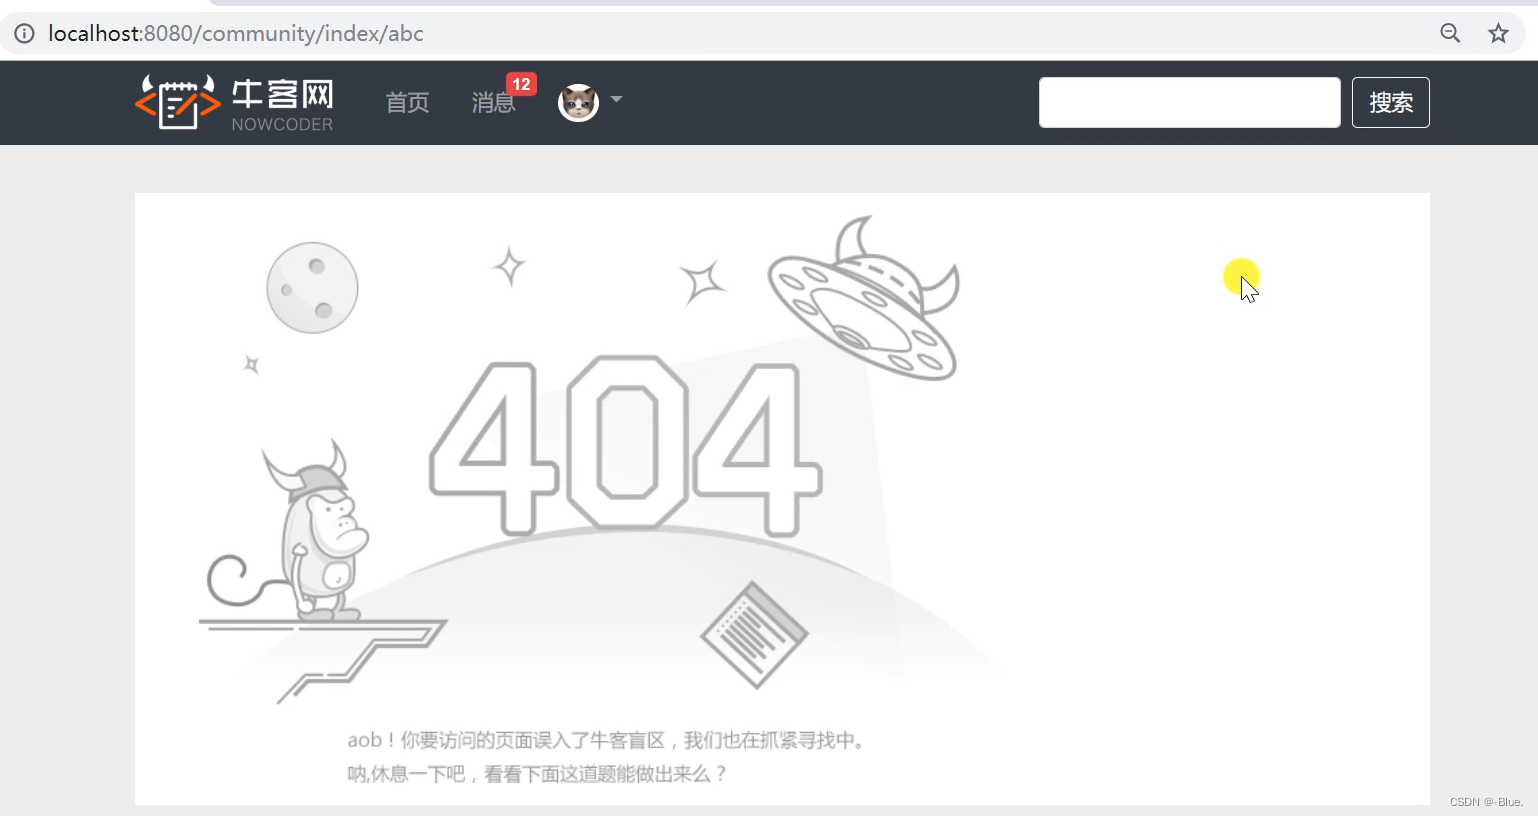
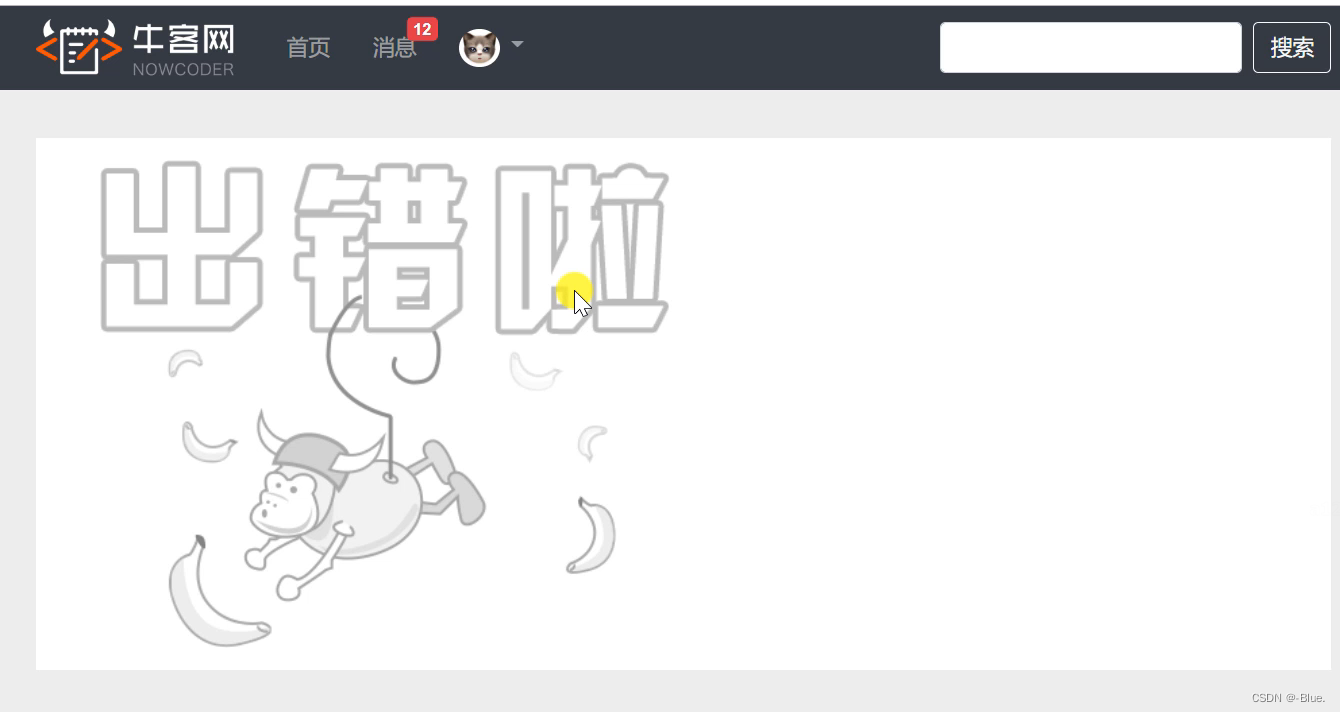
处理异常
HomeController
    /**
     * 错误页面的请求处理
     * @return
     */
    @RequestMapping(path = "/error", method = RequestMethod.GET)
    public String getErrorPage() {
        return "/error/500";
    }
ExceptionAdvice
    /**
     * 处理异常
     * @param e : controller中的异常
     * @param request:请求
     * @param response:响应
     * @throws IOException
     */
    @ExceptionHandler({Exception.class})
    public void handleException(Exception e, HttpServletRequest request, HttpServletResponse response) throws IOException {
        logger.error("服务器发生异常: " + e.getMessage());
        for (StackTraceElement element : e.getStackTrace()) {
            logger.error(element.toString());
        }

        String xRequestedWith = request.getHeader("x-requested-with");
        if ("XMLHttpRequest".equals(xRequestedWith)) {
            response.setContentType("application/plain;charset=utf-8");
            PrintWriter writer = response.getWriter();
            writer.write(CommunityUtil.getJSONString(1, "服务器异常!"));
        } else {
            response.sendRedirect(request.getContextPath() + "/error");
        }
    }
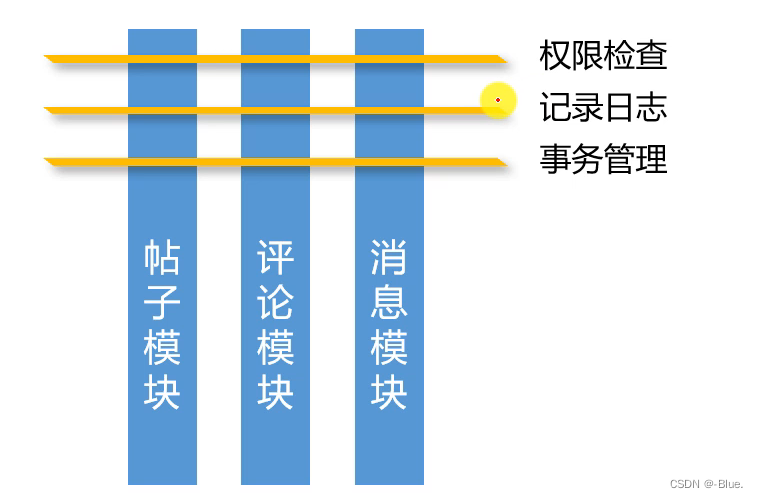
十、统一记录日志
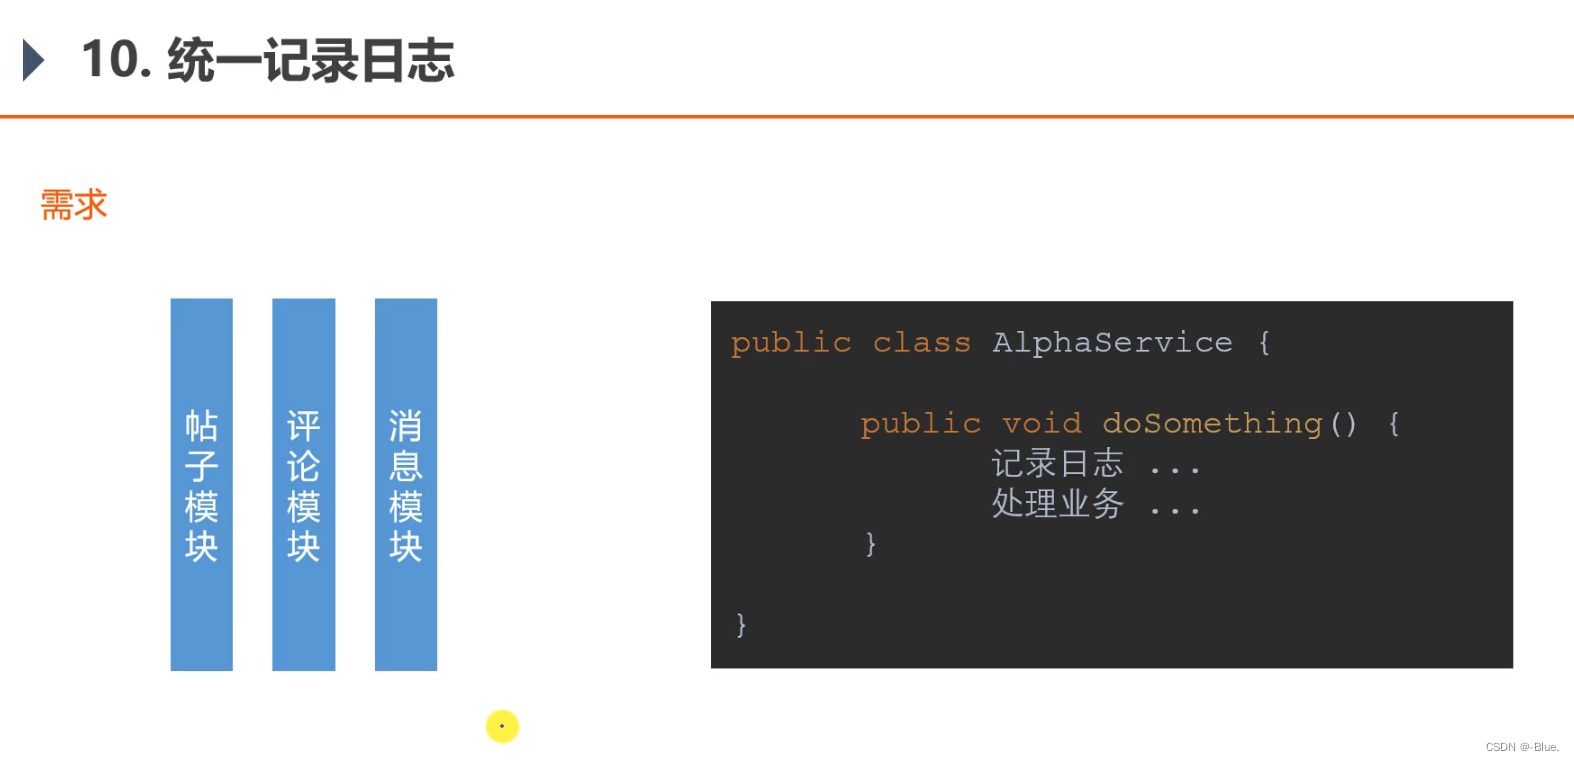
AOP
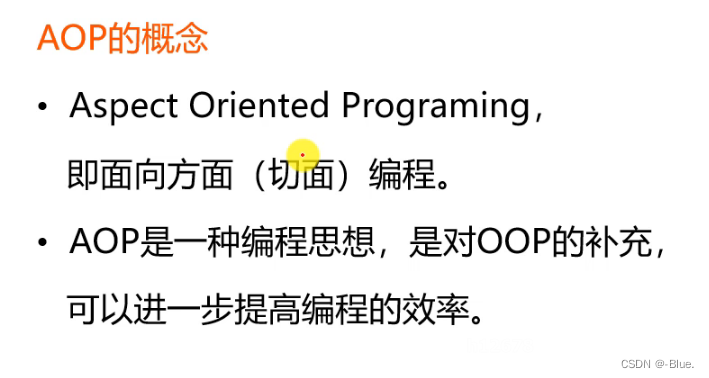
AOP的概念
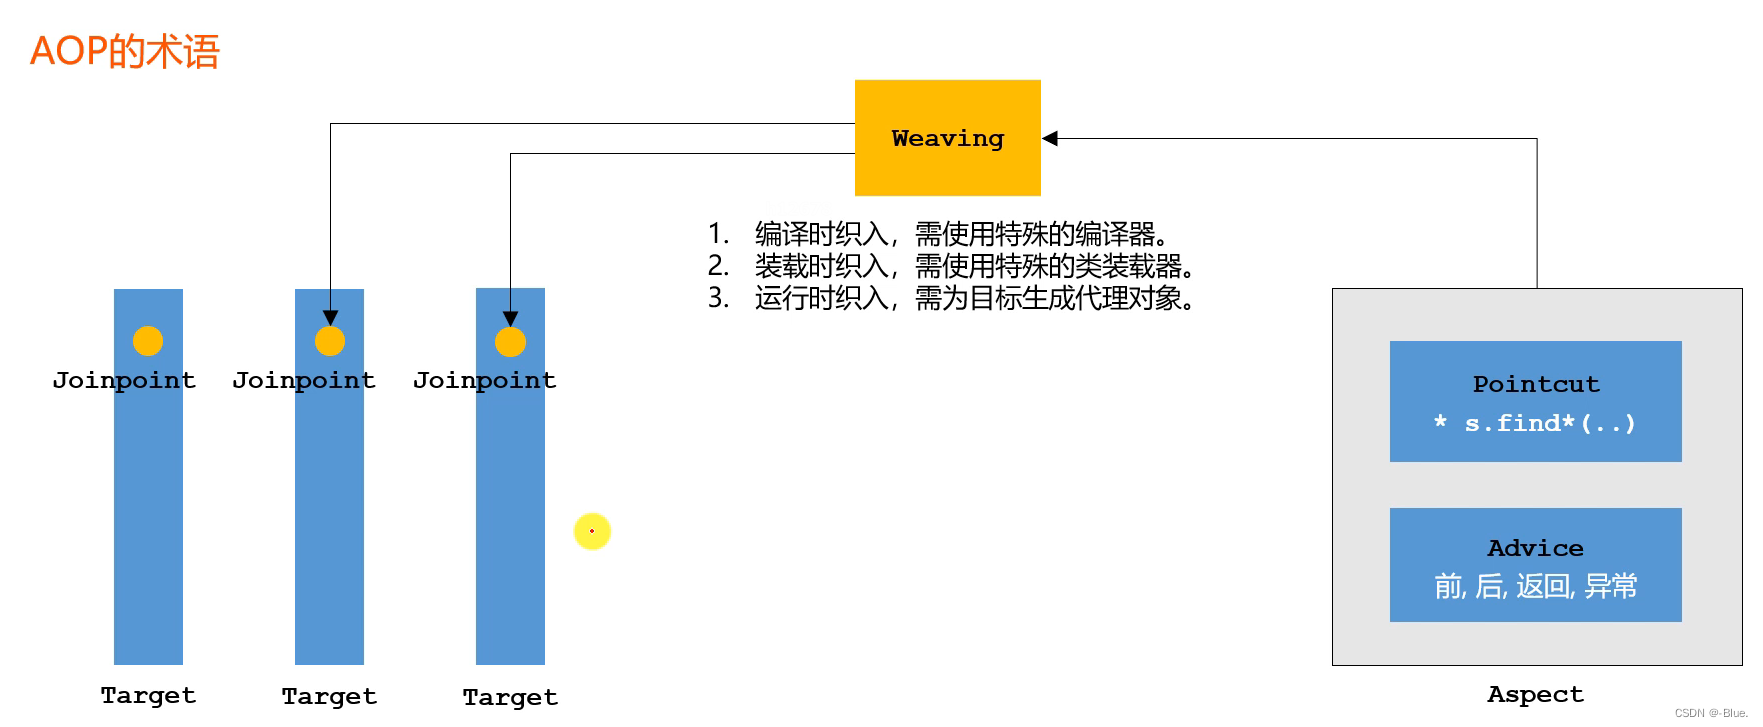
AOP的术语
连接点
aspect:方便组件
aop 统一解决系统需求的方式是将代码定义的方便组件里
切点声明
AOP的实现
AlphaAspect
package com.nowcoder.community.aspect;

import org.aspectj.lang.ProceedingJoinPoint;
import org.aspectj.lang.annotation.*;

// @Component:
// @Aspect:方便组件
public class AlphaAspect {

    // @Pointcut
    @Pointcut("execution(* com.nowcoder.community.service.*.*(..))")
    public void pointcut() {

    }

    @Before("pointcut()")
    public void before() {
        System.out.println("before");
    }

    @After("pointcut()")
    public void after() {
        System.out.println("after");
    }

    @AfterReturning("pointcut()")
    public void afterRetuning() {
        System.out.println("afterRetuning");
    }

    @AfterThrowing("pointcut()")
    public void afterThrowing() {
        System.out.println("afterThrowing");
    }

    @Around("pointcut()")
    public Object around(ProceedingJoinPoint joinPoint) throws Throwable {
        System.out.println("around before");
        Object obj = joinPoint.proceed();
        System.out.println("around after");
        return obj;
    }

}
ServiceLogAspect
@Component
@Aspect
public class ServiceLogAspect {

    private static final Logger logger = LoggerFactory.getLogger(ServiceLogAspect.class);

    @Pointcut("execution(* com.nowcoder.community.service.*.*(..))")
    public void pointcut() {

    }

    @Before("pointcut()")
    public void before(JoinPoint joinPoint) {
        // 用户[1.2.3.4],在[xxx],访问了[com.nowcoder.community.service.xxx()].
        ServletRequestAttributes attributes = (ServletRequestAttributes) RequestContextHolder.getRequestAttributes();
        HttpServletRequest request = attributes.getRequest();
        String ip = request.getRemoteHost();
        String now = new SimpleDateFormat("yyyy-MM-dd HH:mm:ss").format(new Date());
        String target = joinPoint.getSignature().getDeclaringTypeName() + "." + joinPoint.getSignature().getName();
        logger.info(String.format("用户[%s],在[%s],访问了[%s].", ip, now, target));
    }

}
总结
关于AOP概念
- AOP是Aspect Oriented Programing的缩写,意为面向方面编程
- AOP常见的使用场景有权限检查、记录日志、事务管理
- AOP是一种编程思想,是对OOP的补充,可以进一步提高编程的效率
关于AOP术语
- Joinpoint,是指目标对象上织入代码的位置
- Pointcut,是用来定义当前的横切逻辑准备织入到哪些连接点上
- Advice,用来定义横切逻辑,即在连接点上准备织入什么样的逻辑
- Aspect,是一个用来封装切点和通知的组件
织入
- 织入,就是将方面组件中定义的横切逻辑,织入到目标对象的连接点的过程
- 可以在编译时织入,需要使用特殊的编译器
- 可以在装载类时织入,需要使用特殊的类装载器
- 可以在运行时织入,需要为目标生成代理对象
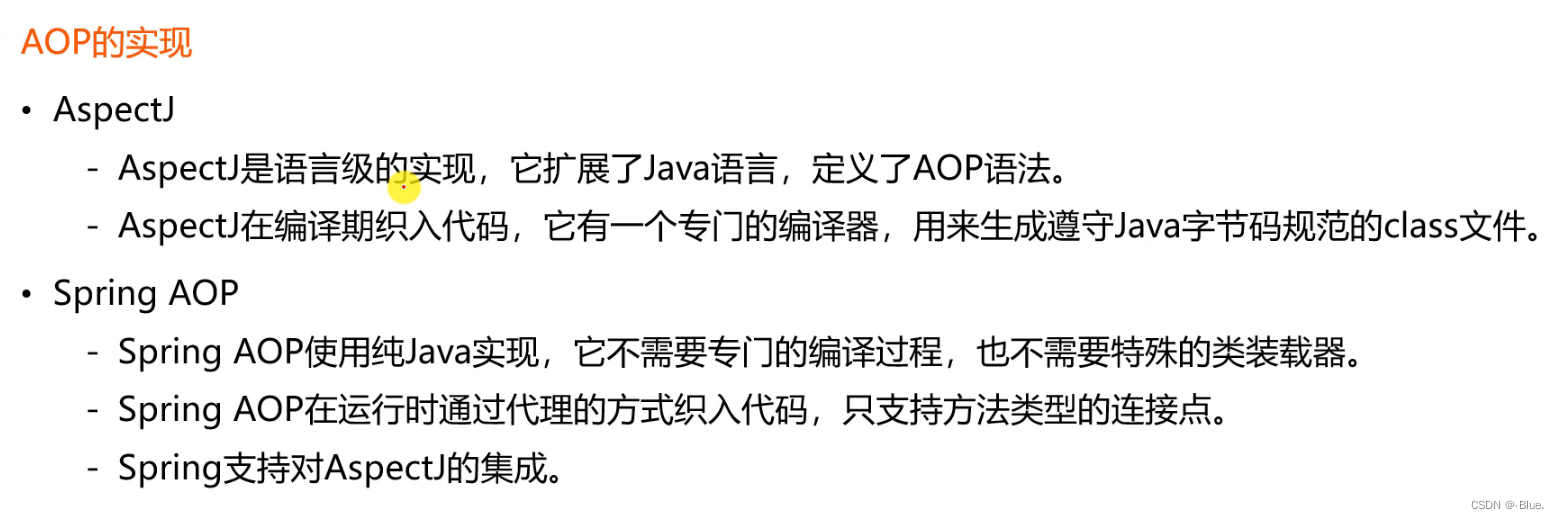
AOP的实现
- AspectJ是语言级的实现,它扩展了Java语言,定义了AOP的语法
- AspectJ在编译期织入代码,它有一个专门的编译器,用来生成遵守Java字节码规范的class文件
- Spring AOP使用纯Java实现,它不需要专门的编译器,也不需要特殊的类加载器
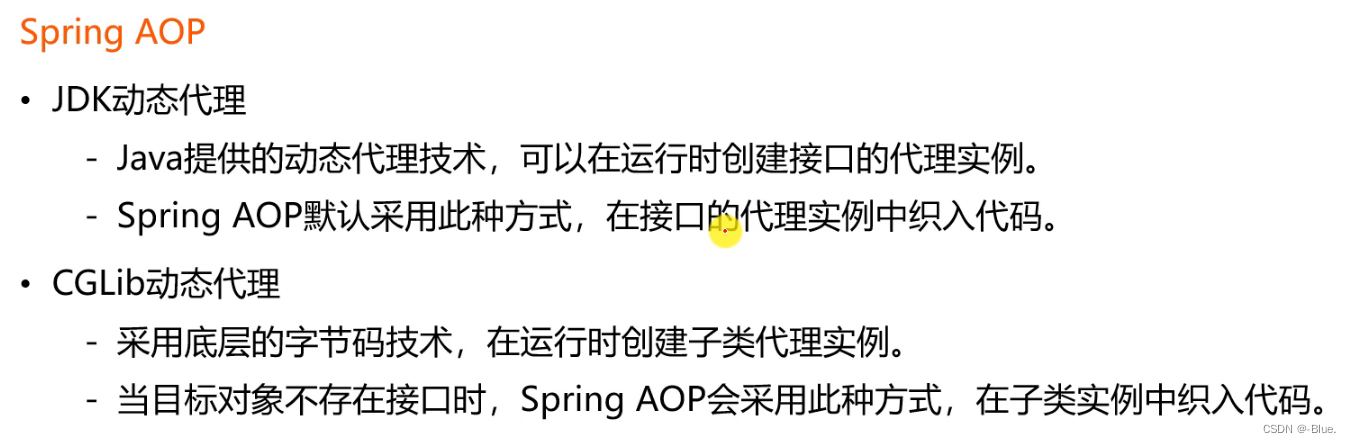
Spring AOP的实现机制
- Spring AOP默认采用JDK动态代理,在接口的代理实例中织入代码
- CGLib动态代理,采用底层的字节码技术,在运行时创建子类代理实例
- 当目标对象不存在接口时,Spring AOP会采用CGLib动态代理的方式,在子类实例中织入代码

瓜分20万奖金 获得内推名额 丰厚实物奖励 易参与易上手
更多推荐

 3
3 0
0- 0


 已为社区贡献3条内容

所有评论(0)