

ESP8285+WS2812+MAX9814制作的音乐律动氛围灯
该项目主要参考了立创EDA开源广场的项目:esp8285芯片ESP-01F模块为主控,MAX9814音频采集模块,WS2812 2020rgb灯珠,Arduino编程环境简单制作一个律动灯条。因为正在学习硬件PCB,所以只能算是一个仿照。下面附上原理图和pcb:相比原项目,我做的只是一个学习项目,为了能白嫖pcb打样,原来的30个ws2812我只用了20个,原项目的自动下载电路IMH3A因为太贵了
该项目主要参考了立创EDA开源广场的项目:
esp8285芯片ESP-01F模块为主控,MAX9814音频采集模块,WS2812 2020rgb灯珠,Arduino编程环境简单制作一个律动灯条。
因为正在学习硬件PCB,所以只能算是一个仿照。

硬件:
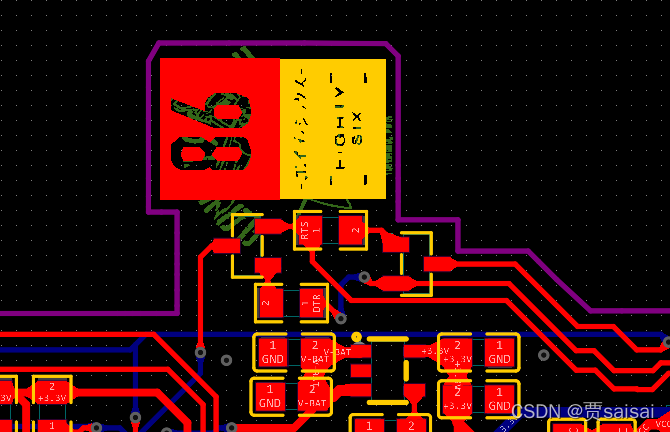
下面附上原理图和pcb:


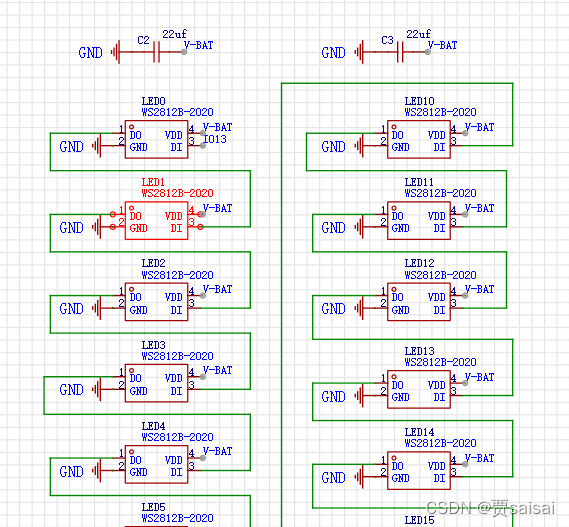
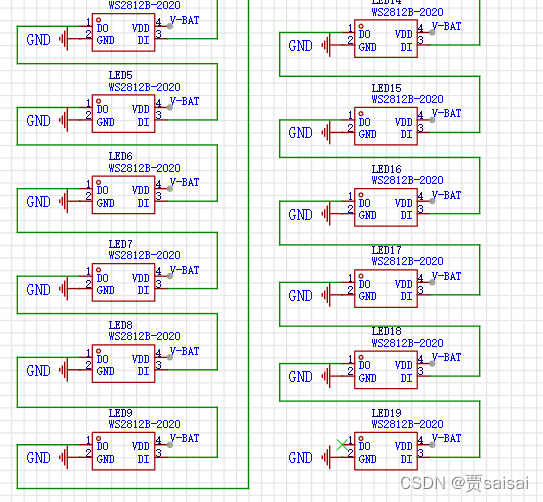
相比原项目,我做的只是一个学习项目,为了能白嫖pcb打样,原来的30个ws2812我只用了20个,原项目的自动下载电路IMH3A因为太贵了淘宝还不包邮就换成了两个L8050Q,因为是后面画好pcb买材料时发现的,所以L8050Q没有位置放了,所以pcb就不是长条形状了。只能往外面扩展了。
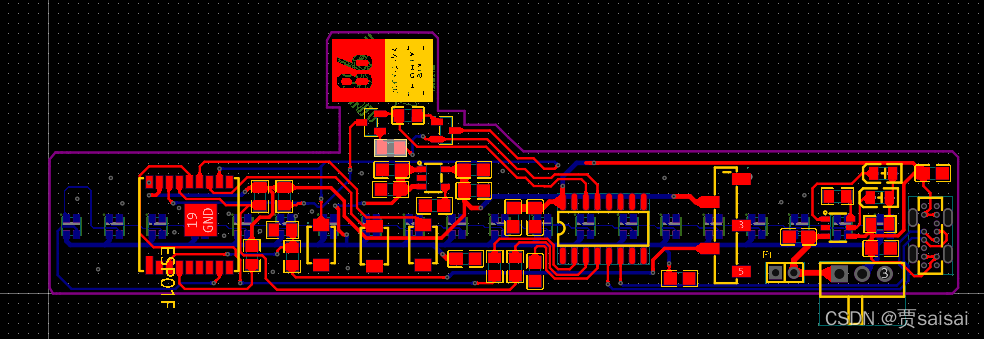
为了板子好看所以把所有元件的丝印都去掉了,看的时候不是很方便。我第一次尝试很小的板子布线,过孔也不少,但还是学到些东西。
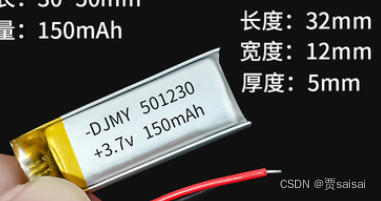
这个项目主要采用的一节锂电池就行,大概在4v左右,标的是3.7v。通过typeC充电,LED指示。
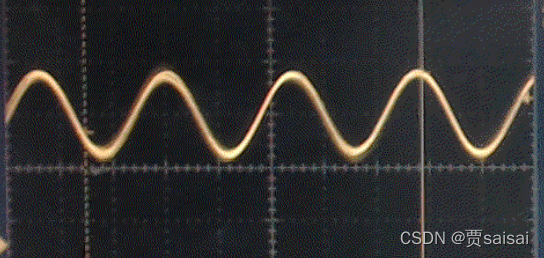
通过MAX9814进行音频采集模拟值。
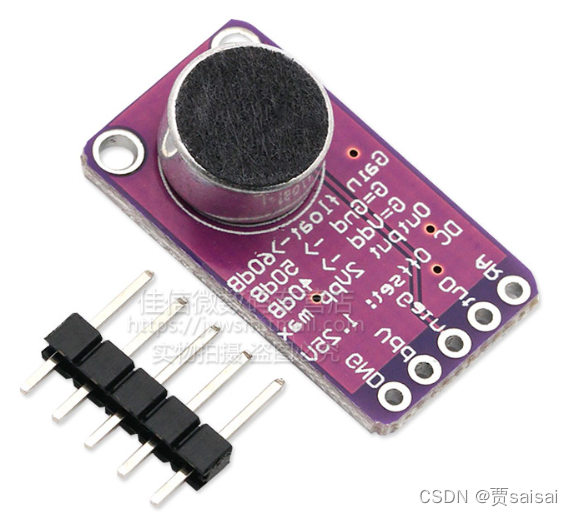
上面标注了DC offset(直流偏移):1.2v。而esp8285或者8266的ADC采样只能接收1v,所以采集的ADC信号要进行串联电阻分压,具体咪头电路详解可以参照:
所以电压信号是一个在不断变化的类似交流信号向上偏置的结果。
下面附上pcb和原理图资料:
软件:
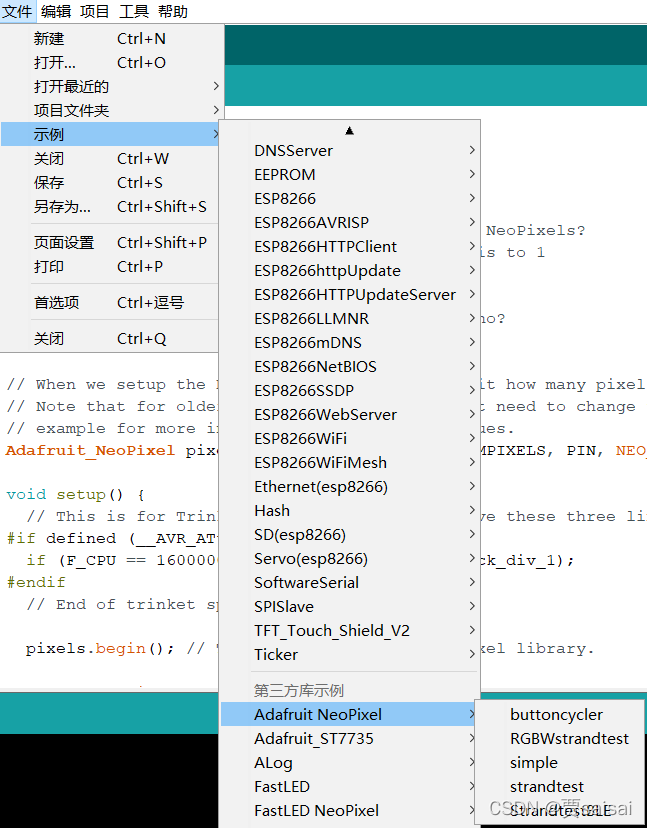
主要需要库有:
![]()
注意这个库的最新版本我的有错误,如果运行发现程序出错的显示库里面有错,建议下载旧版本试试。
ADC采样:
![]()
采集ADC的引脚是A0。

因为是关于1.25v上下波动的,所以把采集到的ADC减去1.25v即默认没有声音下采集到的电压值。(我测到的是480)
ws2812灯的点亮:
利用这个simple库可以轻松点亮灯以及改变颜色。
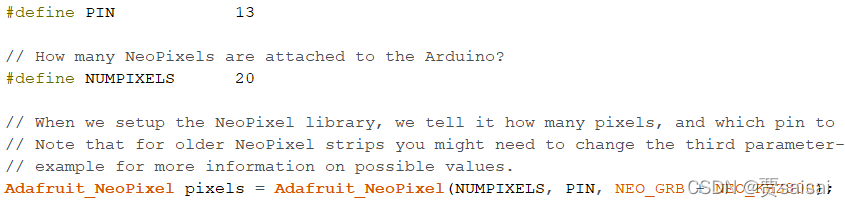
定义好引脚和灯的数量
![]()
用 RGB点亮第i个灯。
滤波:
我利用过均值滤波,冒泡排序取中值发现效果都不好,所以又去掉了,采用了十个值求平均值,这里可以再试试不滤波
下面把均值滤波+冒泡排序滤波和普通均值滤波两种最后调出的可行的代码附上:
均值滤波+冒泡排序滤波:
参考:
十大排序算法详解(一)冒泡排序、选择排序、插入排序、快速排序、希尔排序
// NeoPixel Ring simple sketch (c) 2013 Shae Erisson
// released under the GPLv3 license to match the rest of the AdaFruit NeoPixel library

#include <Adafruit_NeoPixel.h>

#define NOISE 5       //噪音底线

#ifdef __AVR__
  #include <avr/power.h>
#endif

// Which pin on the Arduino is connected to the NeoPixels?
// On a Trinket or Gemma we suggest changing this to 1
#define PIN            13

// How many NeoPixels are attached to the Arduino?
#define NUMPIXELS      20

// When we setup the NeoPixel library, we tell it how many pixels, and which pin to use to send signals.
// Note that for older NeoPixel strips you might need to change the third parameter--see the strandtest
// example for more information on possible values.
Adafruit_NeoPixel pixels = Adafruit_NeoPixel(NUMPIXELS, PIN, NEO_GRB + NEO_KHZ800);

int delayval = 10; // delay for half a second

void setup() {
  // This is for Trinket 5V 16MHz, you can remove these three lines if you are not using a Trinket
#if defined (__AVR_ATtiny85__)
  if (F_CPU == 16000000) clock_prescale_set(clock_div_1);
#endif
  // End of trinket special code

  pixels.begin(); // This initializes the NeoPixel library.

   Serial.begin(115200);
}

void loop() {

    int ADC_VALUE[100];
    int last_VALUE=0;
    int ADC_sort[10];
    int light_ADC=0;


    for(int i=0;i<100;i++)
    {
      ADC_VALUE[i]=analogRead(A0);
    }
    for(int i=0;i<10;i++)
    {
       int ADC_compute=0;
      for(int j=i*10;j<(i*10+10);j++)
      {
        ADC_compute+=ADC_VALUE[j];
      }
      ADC_sort[i]=ADC_compute/10;
    }
       last_VALUE=last_VALUE/10;

    //平均值滤波,10个,上面

    //下面冒泡排序,优化版本
    int my_position = 9;
    for(int i=0;i<9;i++)
    {
      boolean isSwap = false;
      int newPosition = 0;
      for(int j=0;j<my_position;j++)
      {
        if(ADC_sort[j]>ADC_sort[j+1])
        {
          int temp=ADC_sort[j];
          ADC_sort[j]=ADC_sort[j+1];
          ADC_sort[j+1]=temp;
          isSwap = true;
          newPosition = j;
        }

         if(!isSwap){
              break;
            }
         my_position = newPosition;
      }
    }


    light_ADC=(ADC_sort[5]+ADC_sort[6])/2;
    light_ADC = abs(475 - light_ADC);
  //  Serial.println( light_ADC);
    light_ADC = (light_ADC <= NOISE) ? 0 : light_ADC;
    int num;
    if(light_ADC<12)
    {
     num=light_ADC/2;
    }
    else
    {
     num=light_ADC/3;
    }
    if(num>=21)
    {
      num=20;
    }
    for(int i=0;i<num;i++)
    {
      if(i<=10)
      {
      pixels.setPixelColor(i, pixels.Color(50,255-i*25,0)); // Moderately bright green color.
      pixels.show(); // This sends the updated pixel color to the hardware.
      delay(7);
      }
      else
      {
      pixels.setPixelColor(i, pixels.Color(50,5,255-(i-10)*25)); // Moderately bright green color.
      pixels.show(); // This sends the updated pixel color to the hardware.
      delay(7);
      }
    }

    for(int i=num;i>=0;i--)
    {
      pixels.setPixelColor(i, pixels.Color(0,0,0)); // Moderately bright green color.
      pixels.show(); // This sends the updated pixel color to the hardware.
      delay(7);
    }

}

  // For a set of NeoPixels the first NeoPixel is 0, second is 1, all the way up to the count of pixels minus one.
普通均值滤波:
// NeoPixel Ring simple sketch (c) 2013 Shae Erisson
// released under the GPLv3 license to match the rest of the AdaFruit NeoPixel library

#include <Adafruit_NeoPixel.h>

#define NOISE 40       //噪音底线

#ifdef __AVR__
  #include <avr/power.h>
#endif

// Which pin on the Arduino is connected to the NeoPixels?
// On a Trinket or Gemma we suggest changing this to 1
#define PIN            13

// How many NeoPixels are attached to the Arduino?
#define NUMPIXELS      20

// When we setup the NeoPixel library, we tell it how many pixels, and which pin to use to send signals.
// Note that for older NeoPixel strips you might need to change the third parameter--see the strandtest
// example for more information on possible values.
Adafruit_NeoPixel pixels = Adafruit_NeoPixel(NUMPIXELS, PIN, NEO_GRB + NEO_KHZ800);

void setup() {
  // This is for Trinket 5V 16MHz, you can remove these three lines if you are not using a Trinket
#if defined (__AVR_ATtiny85__)
  if (F_CPU == 16000000) clock_prescale_set(clock_div_1);
#endif
  // End of trinket special code

  pixels.begin(); // This initializes the NeoPixel library.

   Serial.begin(115200);
}

void loop() {

    int ADC_VALUE[100];
    int last_VALUE=0;
    int ADC_sort[10];
    int light_ADC=0;


     int ADC_compute=0;
    for(int i=0;i<10;i++)
    {
     ADC_compute+=analogRead(A0);
    }
     last_VALUE=ADC_compute/10;

    //平均值滤波,10个,上面
    light_ADC=last_VALUE;
    light_ADC=abs(last_VALUE-480);
    light_ADC = (light_ADC <= NOISE) ? 0 :(light_ADC-15);
    Serial.println(abs(last_VALUE-480));
    int num;

    num=light_ADC/8;
    if(num>=21)
    {
      num=20;
    }
    for(int i=0;i<num;i++)
    {
      if(i<=10)
      {
      pixels.setPixelColor(i, pixels.Color(50,255-i*25,0)); // Moderately bright green color.
      pixels.show(); // This sends the updated pixel color to the hardware.
      delay(10);
      }
      else
      {
      pixels.setPixelColor(i, pixels.Color(50,5,255-(i-10)*25)); // Moderately bright green color.
      pixels.show(); // This sends the updated pixel color to the hardware.
      delay(10);
      }
    }
   // delay(10);
    for(int i=num;i>=0;i--)
    {
      pixels.setPixelColor(i, pixels.Color(0,0,0)); // Moderately bright green color.
      pixels.show(); // This sends the updated pixel color to the hardware.
      delay(1);
    }

}

  // For a set of NeoPixels the first NeoPixel is 0, second is 1, all the way up to the count of pixels minus one.
主要是把灯挨个点亮,再挨个熄灭,把采集到的ADC除以某个数计算点的个数。
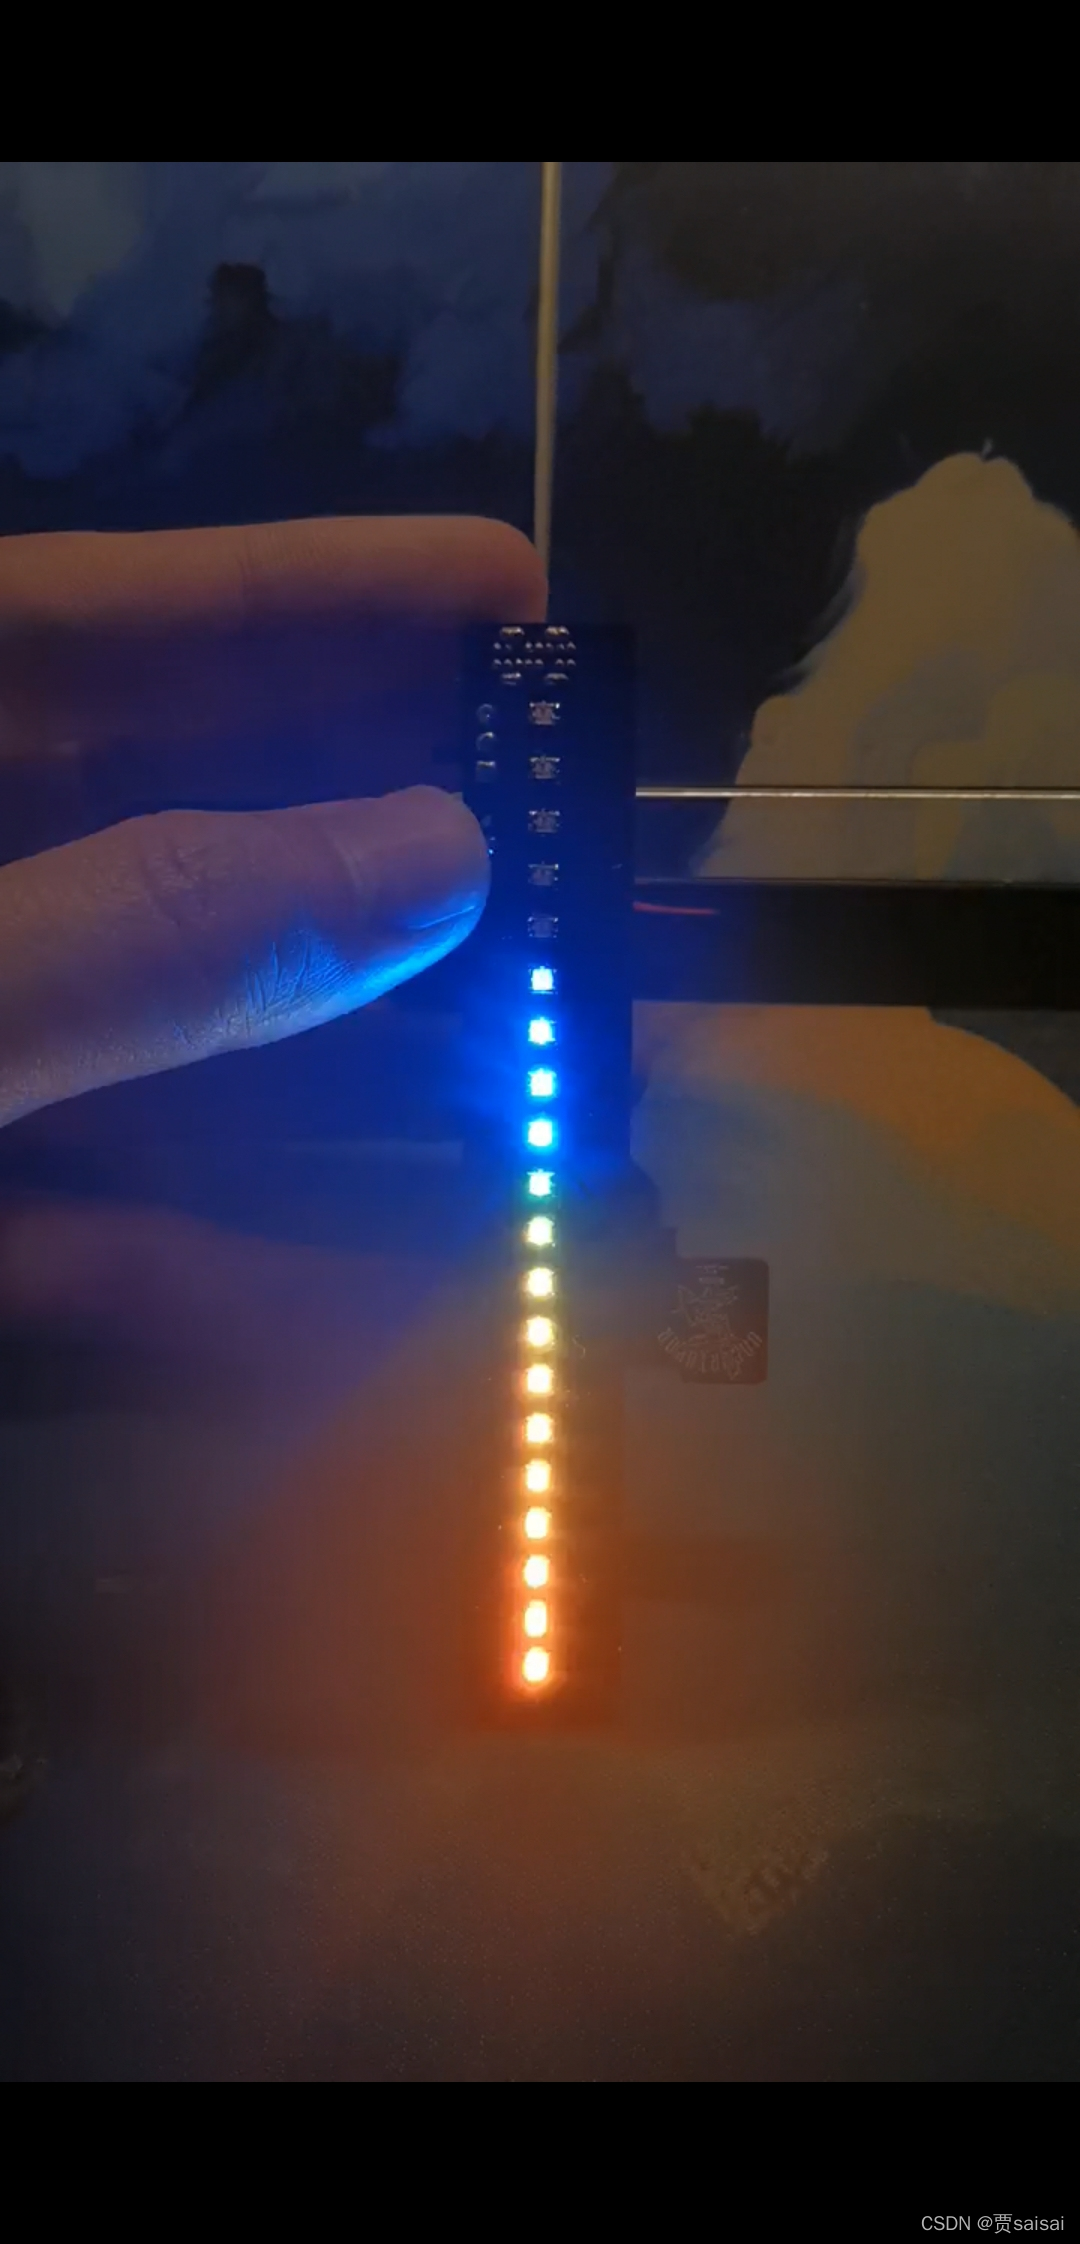
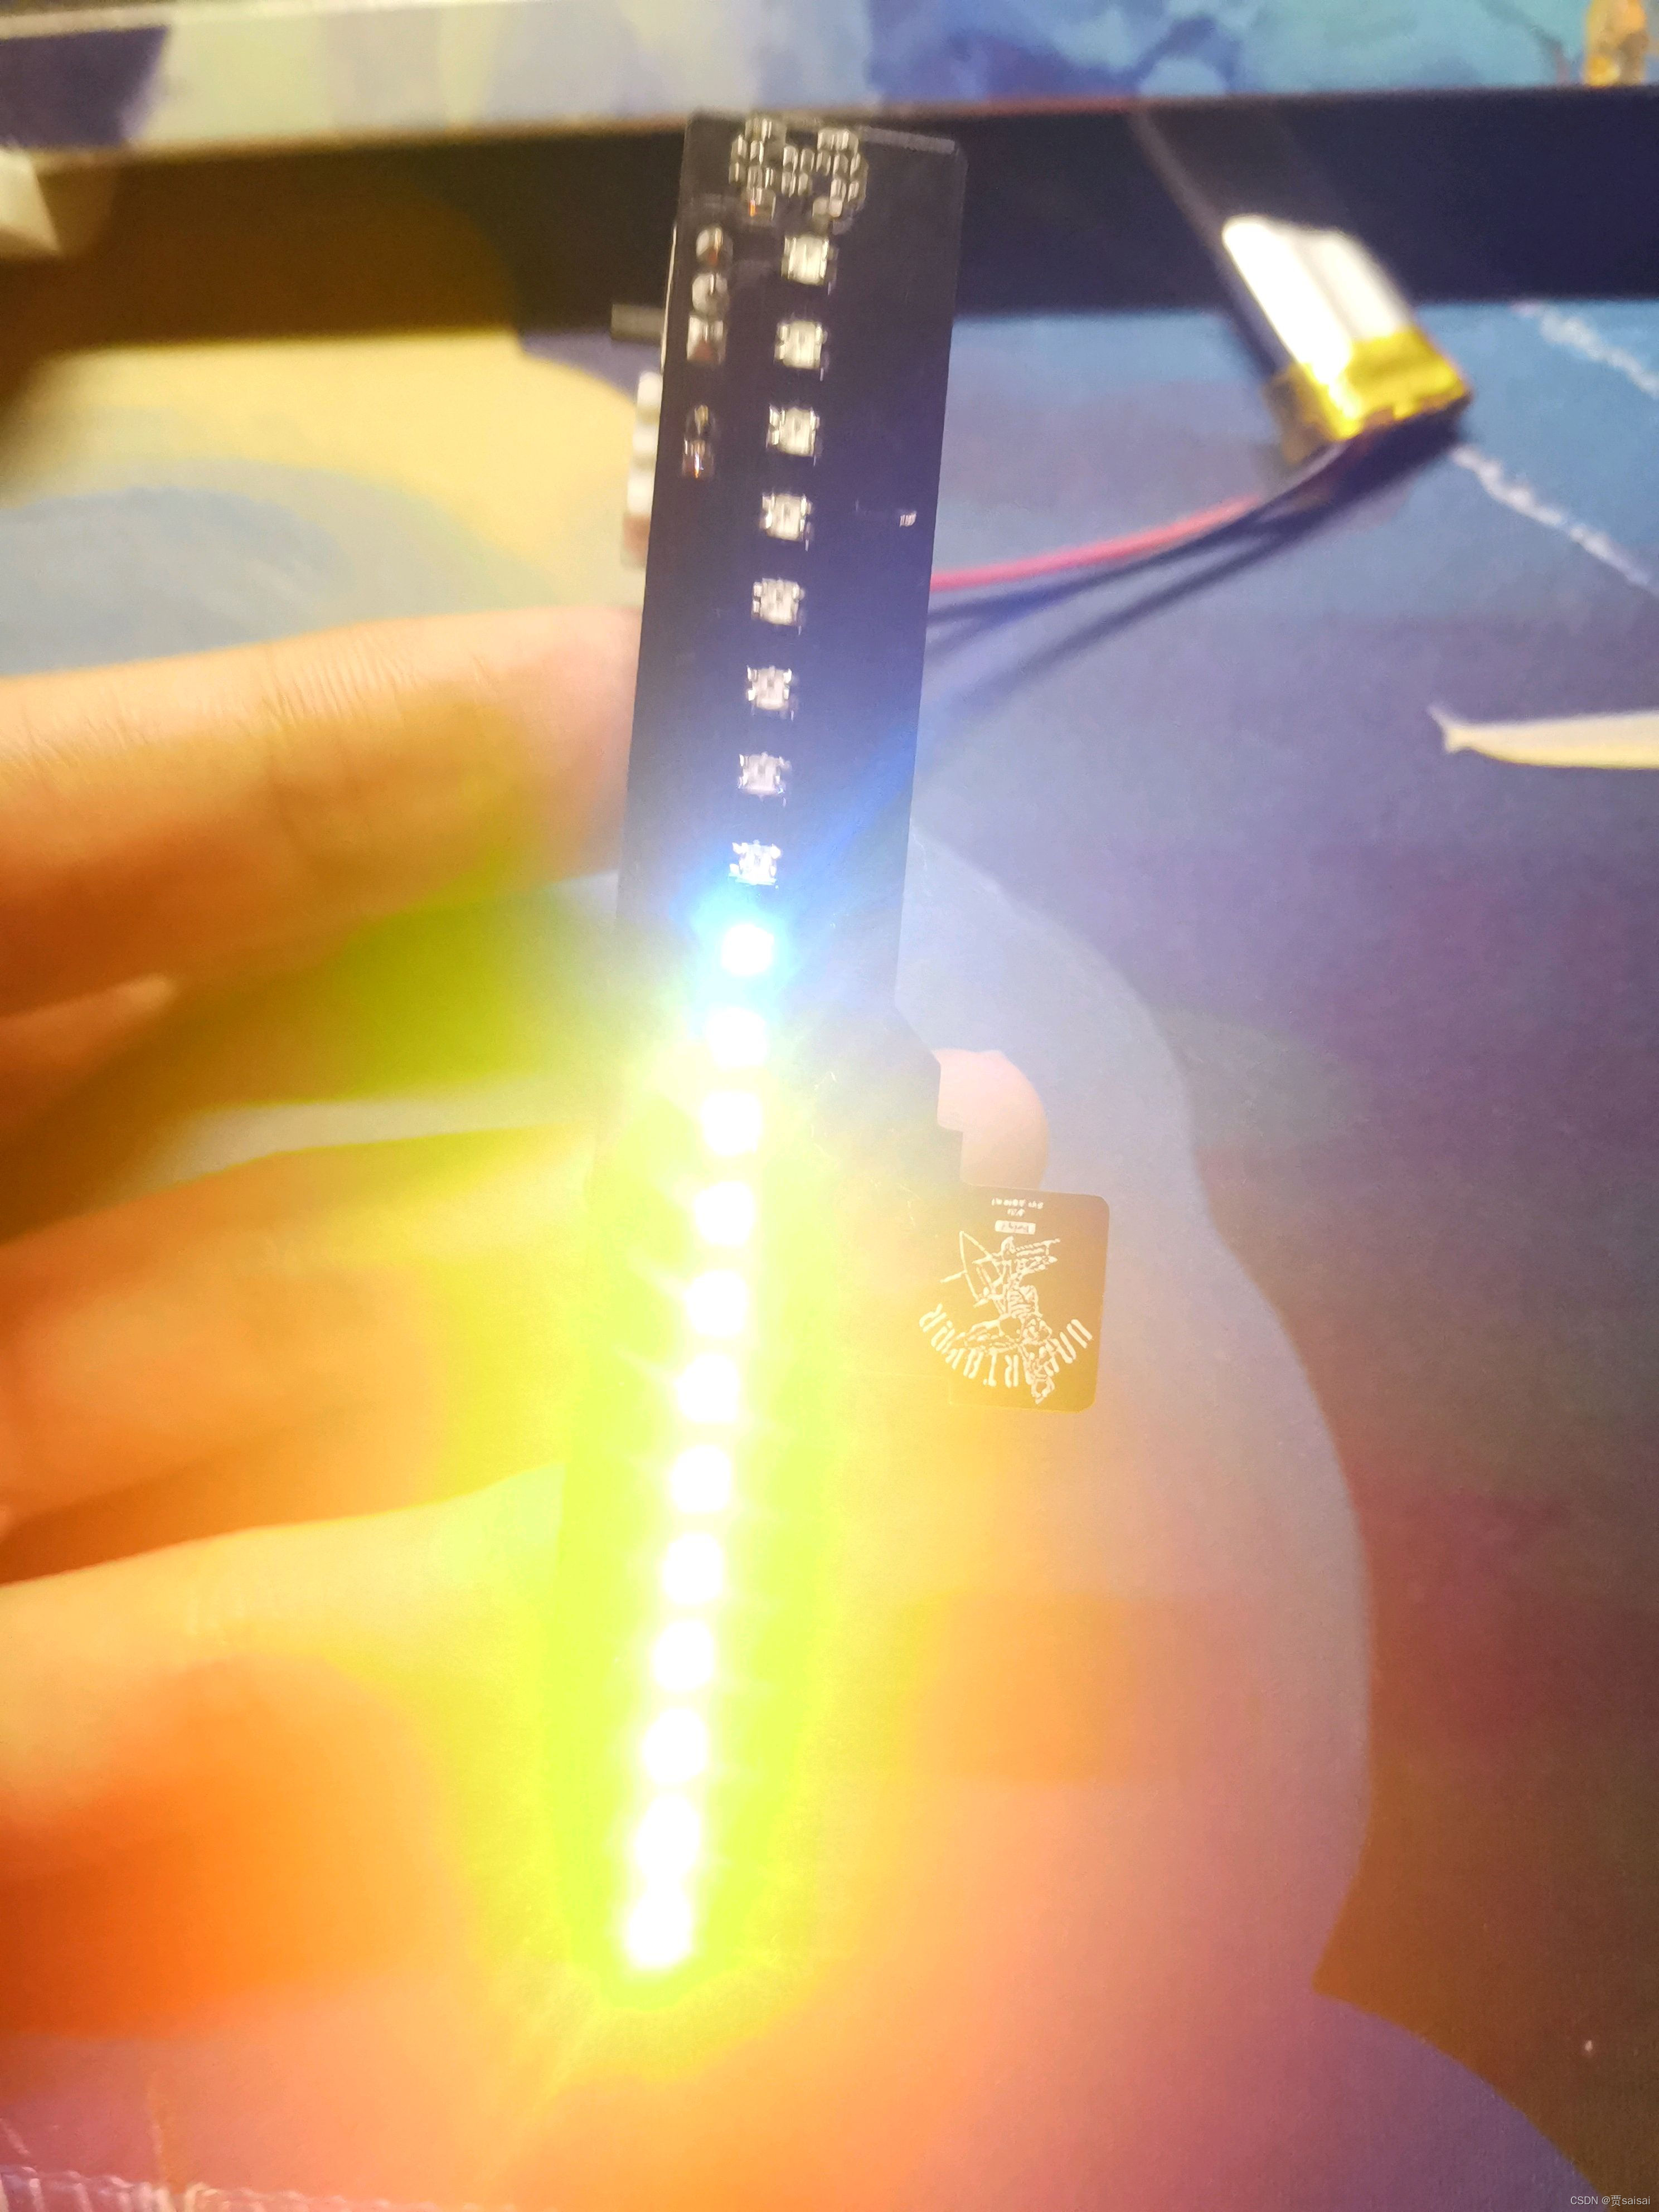
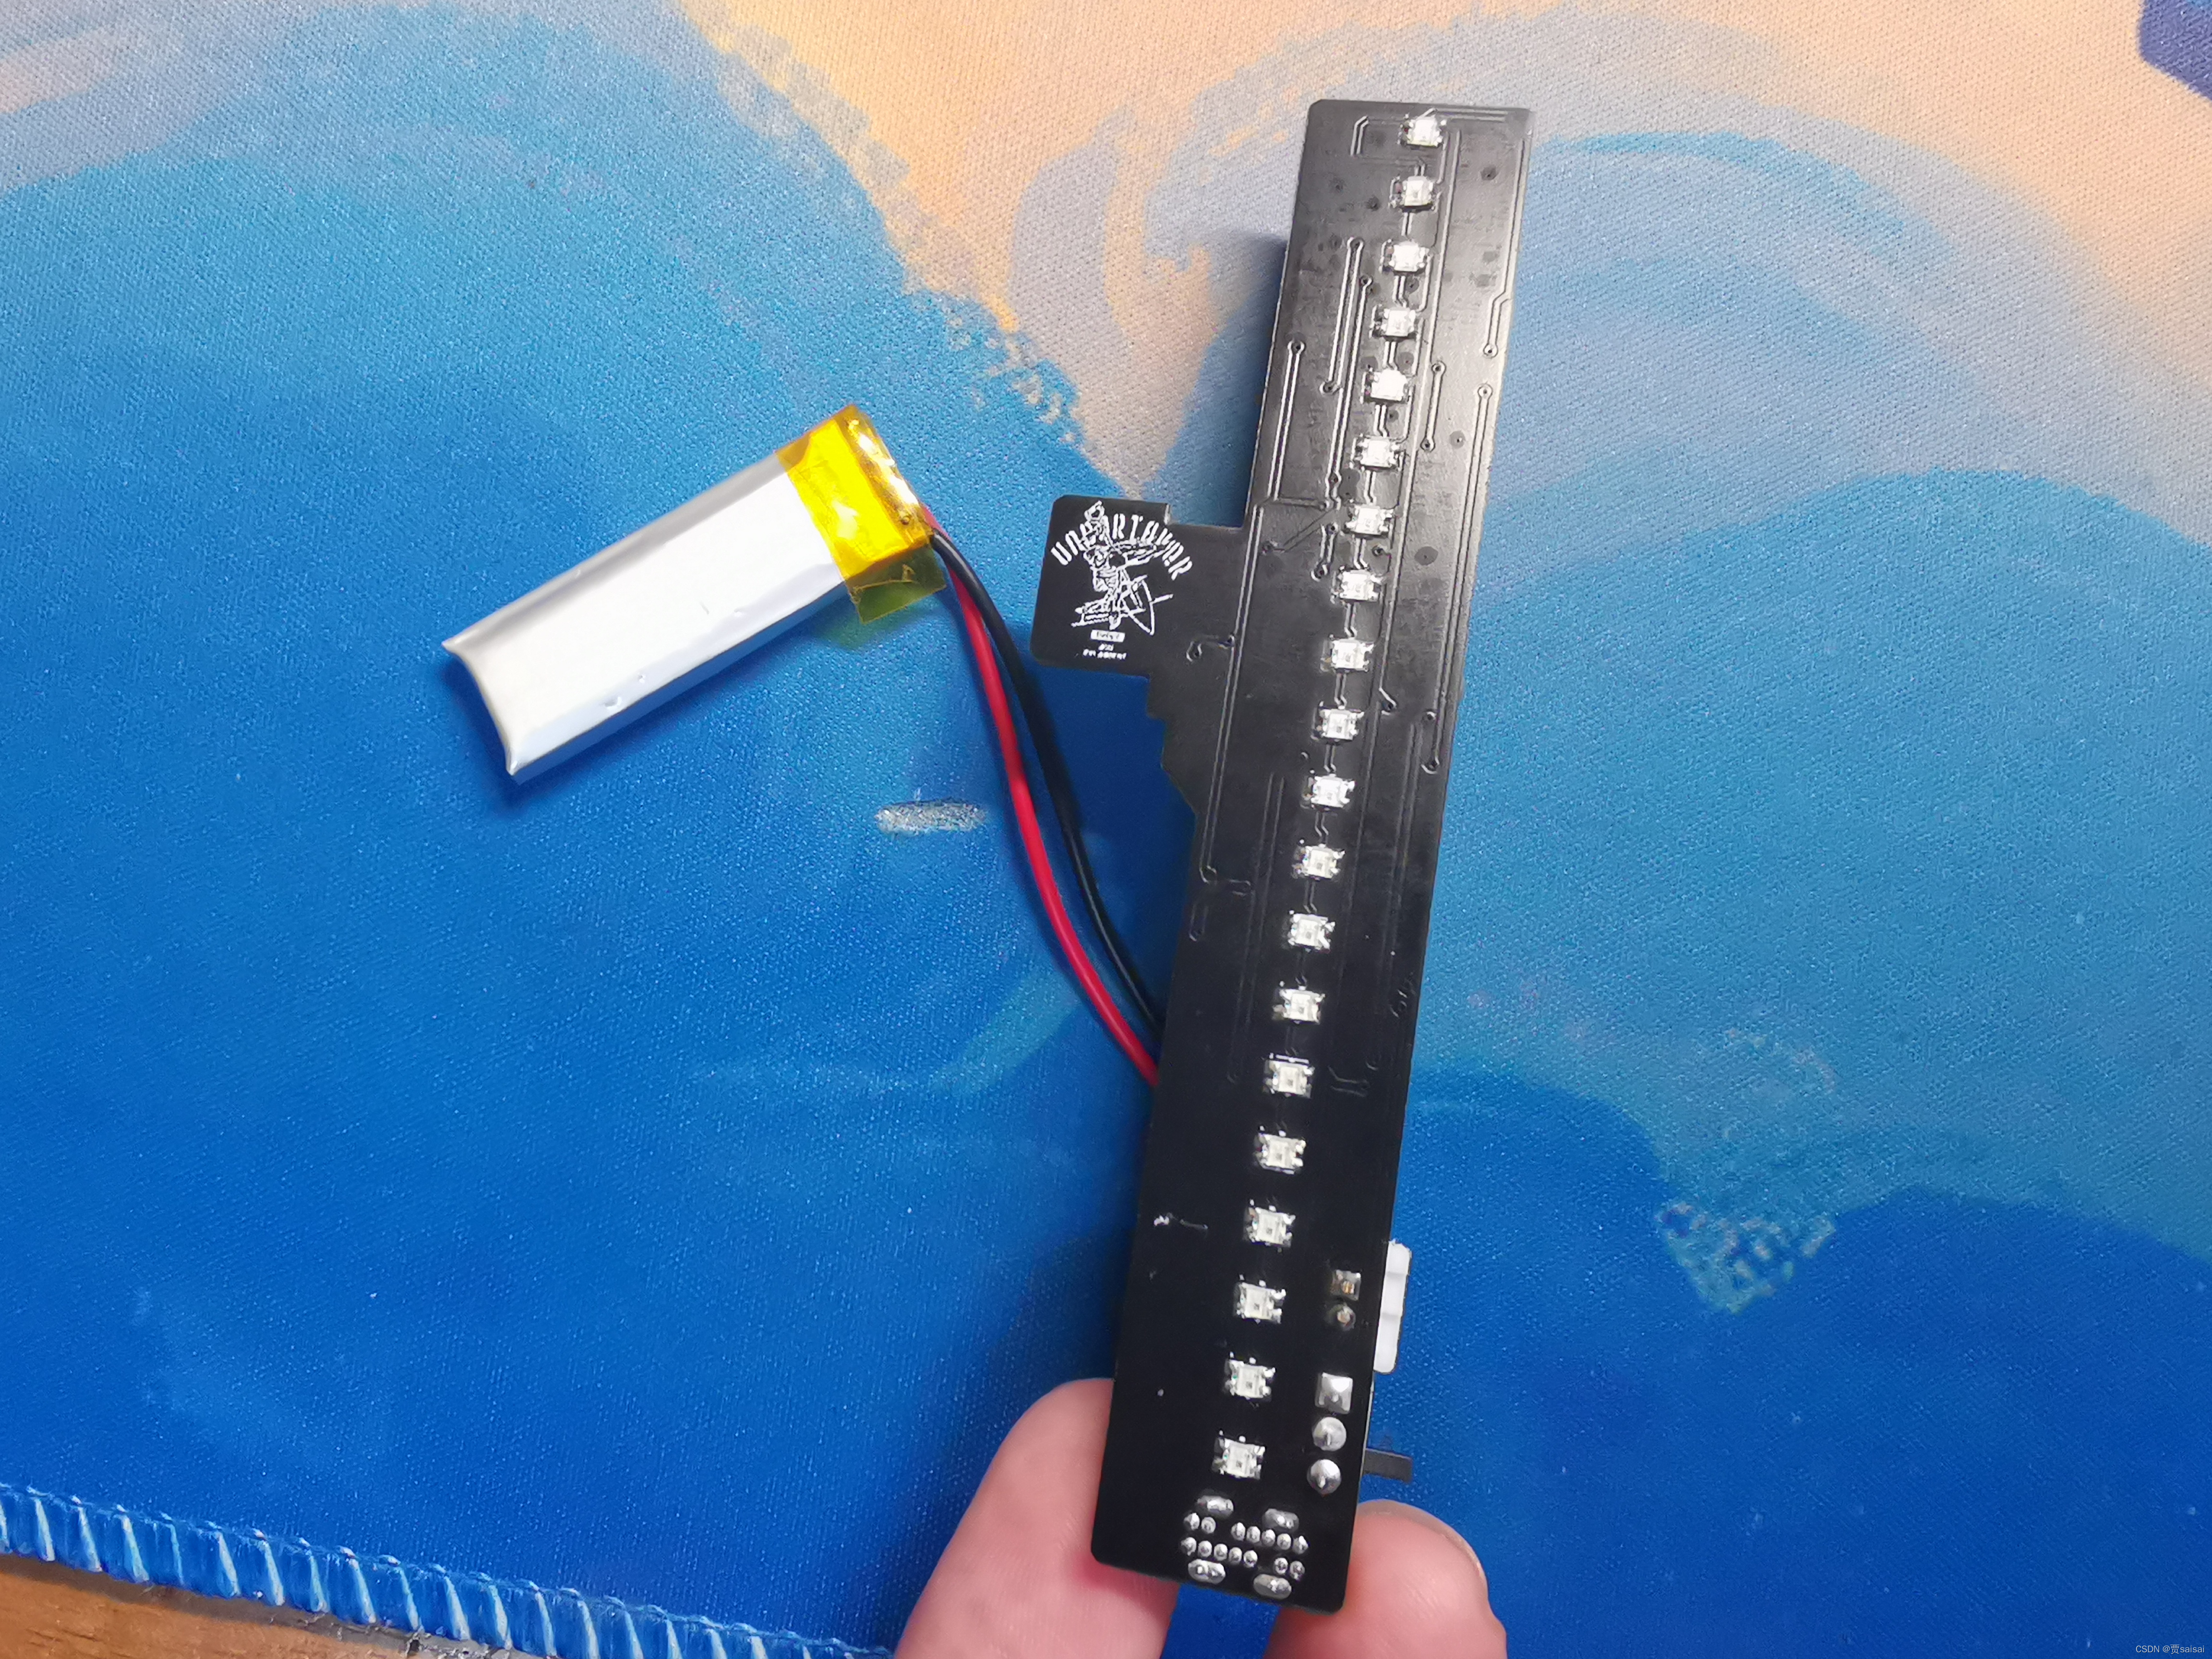
附上实物图:
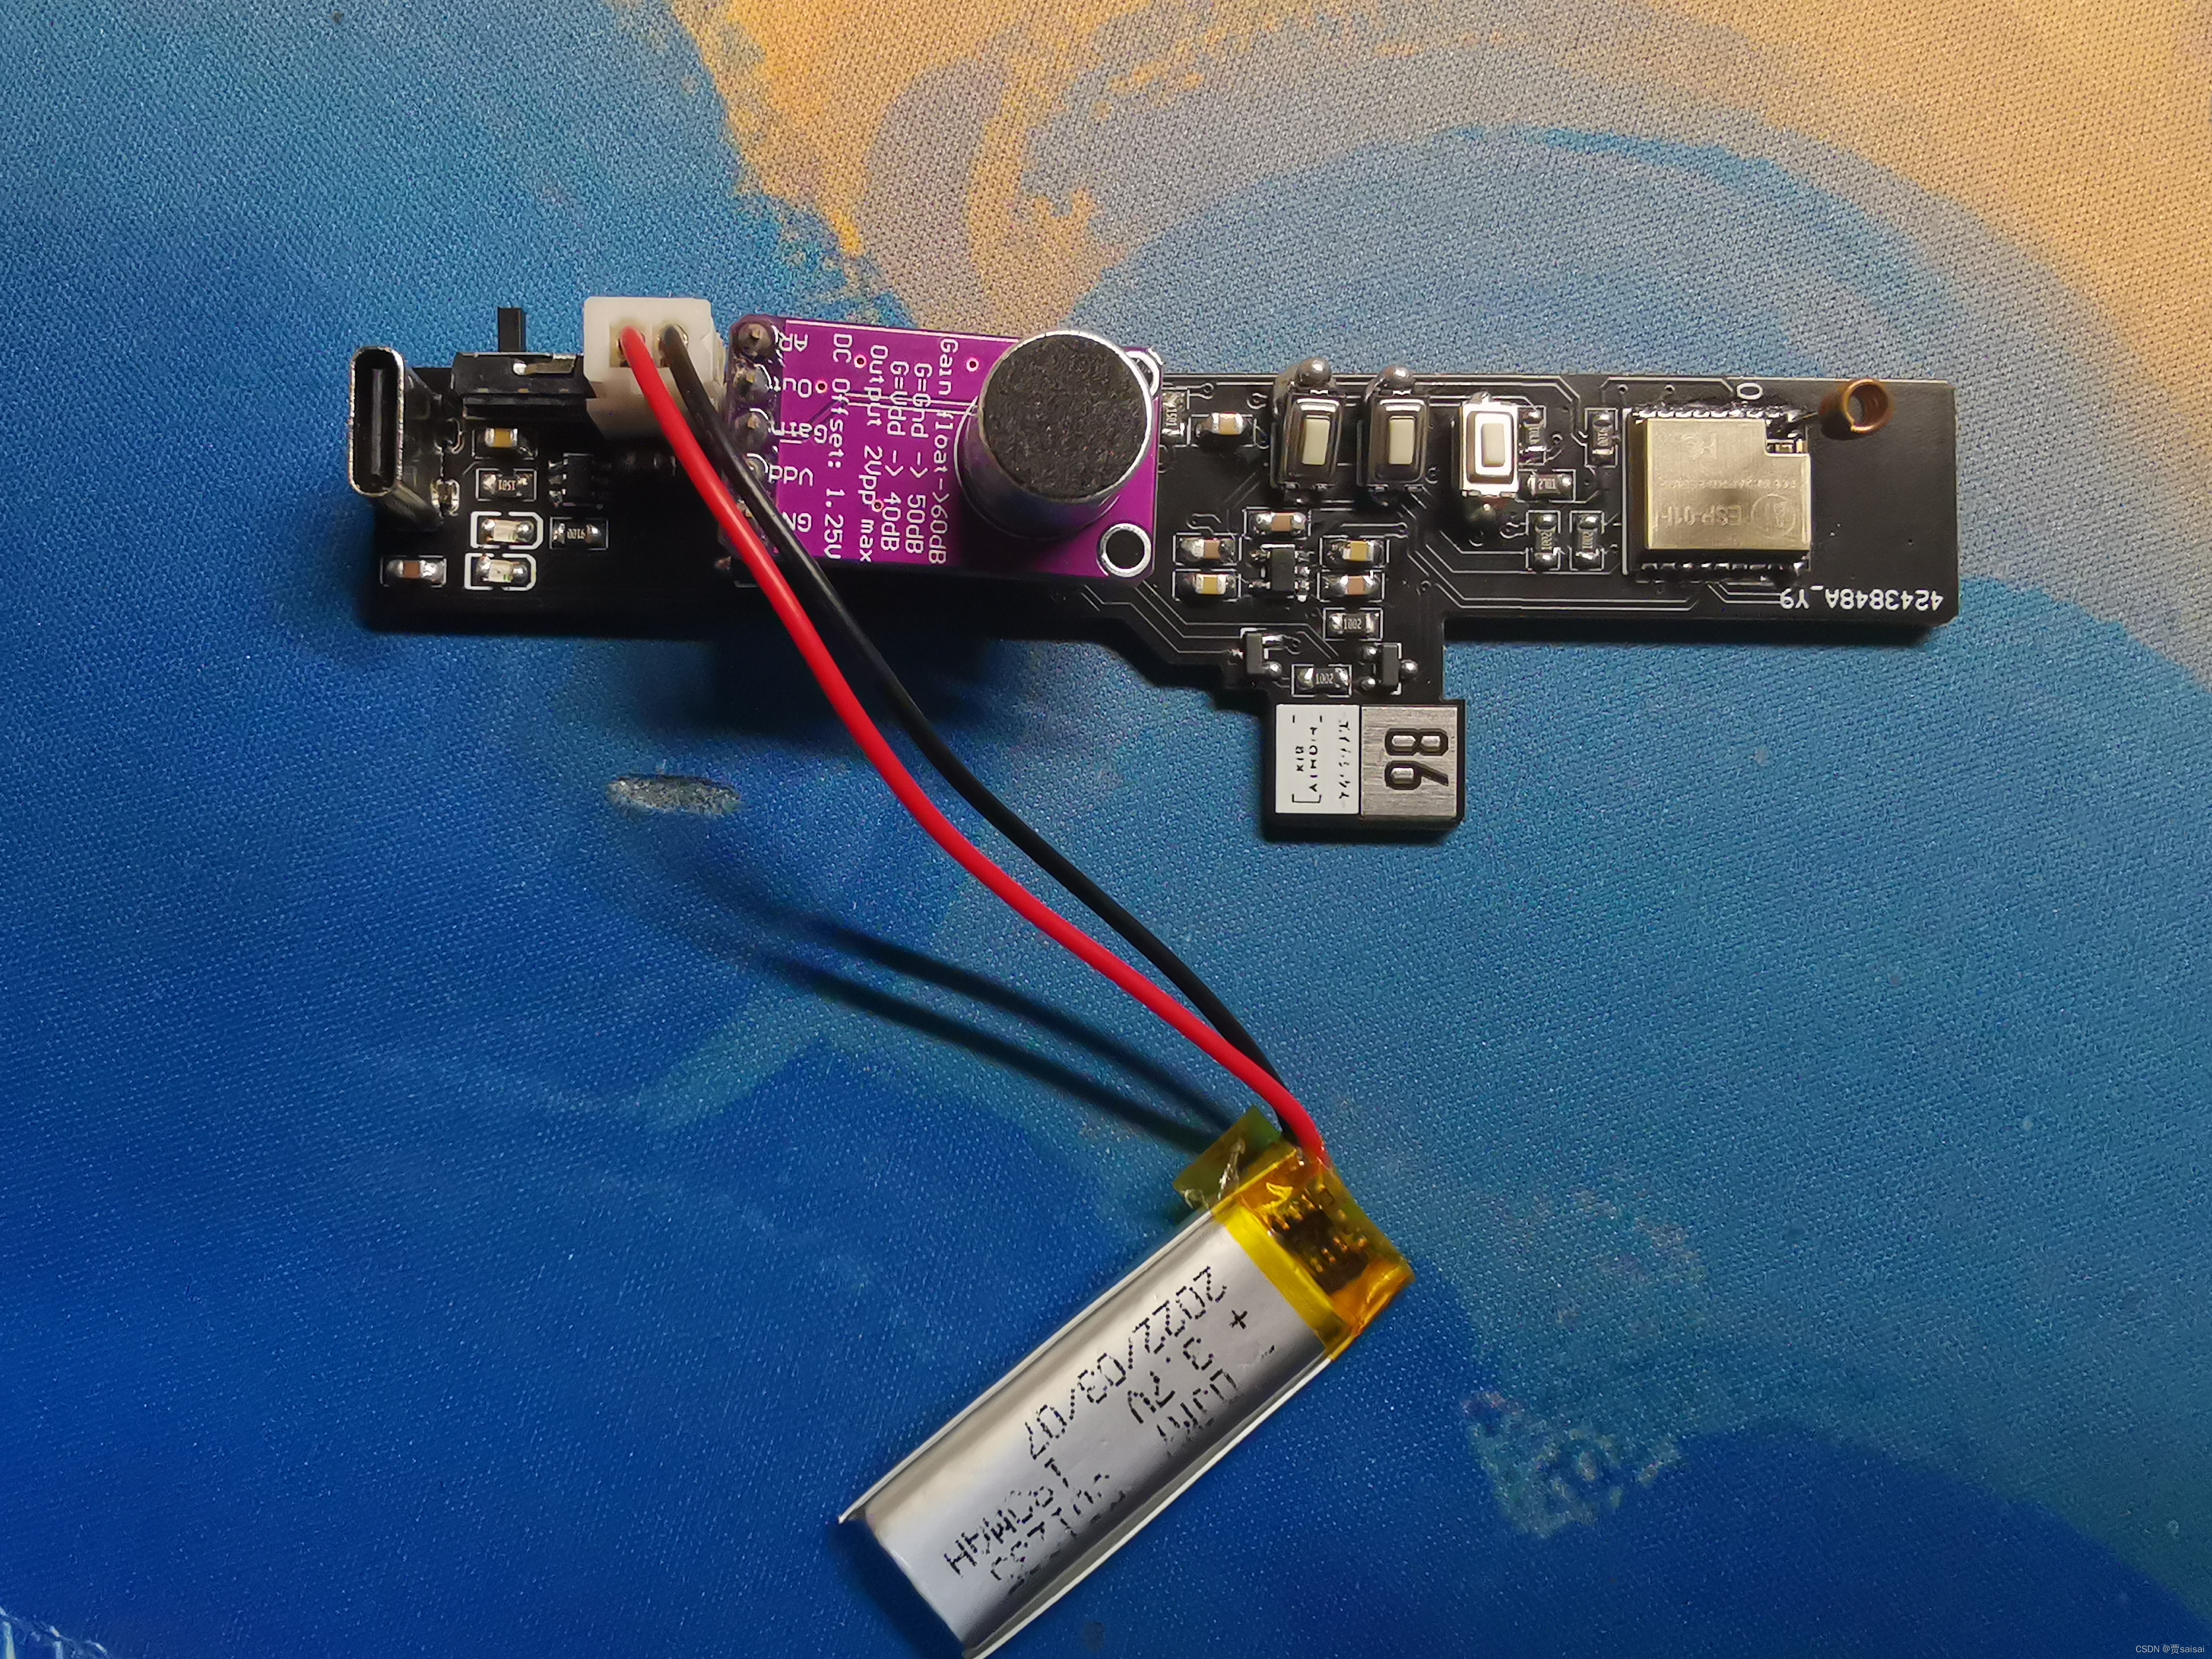
按键买错了,所以焊接成那样了
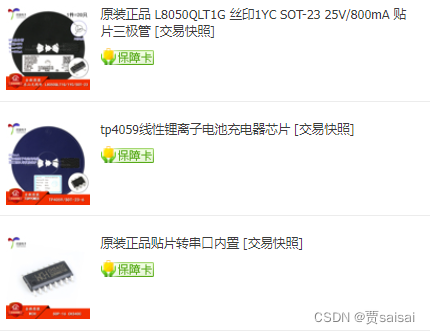
主要材料:


这个轻触开关我买错了,封装买大了:


不完善之处:这个灯感觉采集的值不是线性的,所以计算点亮灯的个数的计算方法还有待改进,按键啥的还没用到,网页啥的也没写,esp8266这些感觉开发不是很方便,库隐藏起来还需要到本地文件找,下载程序也比起keil要慢一些。

旨在为数千万中国开发者提供一个无缝且高效的云端环境,以支持学习、使用和贡献开源项目。
更多推荐


 12
12 0
0- 0


 已为社区贡献4条内容

所有评论(0)