
ATeam社区(牛客网项目第八章)
项目发布与总结1. 单元测试1.1 注解简介1.2 测试2. 项目监控2.1 使用简介2.2 项目监控功能实现3. 项目部署3.1 系统环境3.2 安装软件3.2.1 远程连接服务器的软件3.2.2 安装unzip3.2.3 安装java1.83.2.4 安装Maven3.2.5 安装MySQL3.2.5 安装Redis3.2.6 安装Kafka3.2.7 安装Elasticsearch3.2.8
1. 单元测试
- Spring Boot Testing
- 依赖:spring-boot-starter-test
- 包括:Junit、Spring Test、AssertJ、…
- Test Case
- 要求:保证测试方法的独立性
- 步骤:初始化数据、执行测试代码、验证测试数据
- 常用注解:@BeforeClass、@AfterClass、@Before、@After
1.1 注解简介
@BeforeClass:注解的方法在该类加载前运行
@AfterClass:注解的方法在给类销毁后运行
@Before:注解的方法在该类中的任何测试方法执行前运行
@After:注解的方法在该类中的任何测试方法执行后运行
1.2 测试
@Before,@After方便我们在没有条件时,创造条件进行测试。
例如,在我们测试数据库的增删改查时,那么每个方法测试前,先写一个往数据库里增加一条数据的方法,该方法用@Before注解,运行测试方法后,再用@After注解的方法里销毁数据。
执行测试类时,会依次执行测试类的所有测试方法。
于是,在一个测试类中写好测试数据库中某张表的增删改查的方法后,可以直接执行这个测试类,用断言Assert比较测试结果和预期结果是否一致,一致就程序执行成功,不一致就会抛出异常。于是,只要执行这个测试类,就可以把数据库这张表的所有业务service方法测试完成,如果没有报错,就说明数据库这张表的所有业务service方法都正确,如果有某个测试方法抛异常,就说明该测试方法测试的方法有错误。
在test包下,新建一个测试类SpringBootTests
@RunWith(SpringRunner.class)
@SpringBootTest
@ContextConfiguration(classes = CommunityApplication.class)
public class SpringBootTests {

    @Autowired
    private DiscussPostService discussPostService;

    private DiscussPost discussPost;

    @BeforeClass
    public static void beforeClass() {
        System.out.println("beforeClass");
    }

    @AfterClass
    public static void AfterClass() {
        System.out.println("afterClass");
    }

    @Before
    public void before() {
        System.out.println("before");
        // 初试haul数据
        discussPost = new DiscussPost();
        discussPost.setUserId(111);
        discussPost.setTitle("Test Title");
        discussPost.setContent("Test Content");
        discussPost.setCreateTime(new Date());
        discussPostService.addDiscussPost(discussPost);
    }

    @After
    public void after() {

        // 删除测试数据
        discussPostService.updateStatus(discussPost.getId(),2);
        System.out.println("after");
    }

    @Test
    public void test1(){
        System.out.println("test1");
    }

    @Test
    public void test2(){
        System.out.println("test2");
    }

    @Test
    public void testFindById(){
        DiscussPost post = discussPostService.findDiscussPostById(discussPost.getId());
        Assert.assertNotNull(discussPost);
        Assert.assertEquals(discussPost.getTitle(),post.getTitle());
        Assert.assertEquals(discussPost.toString(),post.toString());
    }

    @Test
    public void testUpdateScore(){
        int rows = discussPostService.updateScore(discussPost.getId(), 2000.00);
        Assert.assertEquals(1,rows);
        DiscussPost post = discussPostService.findDiscussPostById(discussPost.getId());
        Assert.assertEquals(2000.00,post.getScore(),2); // 判断到2位小数
    }

}
2. 项目监控
- Spring Boot Actuator
- Endpoints:监控应用的入口,Spring Boot内置了很多断点,也支持自定义断点
- 监控方式:HTTP 或 JMX
- 访问路径:例如"/actuator/health"
- 注意事项:按需要暴露的端点,并对所有断点进行权限控制
2.1 使用简介
访问:http://localhost:8080/community/actuator/端点名字(如health、info、loogers,也可以是自定义端点的名字,如database)
返回:JSON字符串
比如:
| 访问路径 | 返回 |
|---|---|
| http://localhost:8080/community/actuator/health | 当前服务的健康状况。返回:{“status”:“DOWN”} |
| http://localhost:8080/community/actuator/info | 返回服务端的一些相关信息。如果没有,返回:{} |
| http://localhost:8080/community/actuator/beans | http://localhost:8080/community/actuator/beans |
| http://localhost:8080/community/actuator/loggers | 所有日志 |
2.2 项目监控功能实现
- 引入依赖
<!--    Actuator-->
<dependency>
    <groupId>org.springframework.boot</groupId>
    <artifactId>spring-boot-starter-actuator</artifactId>
</dependency>
- 相关配置
在application.properties文件中,进行配置
# actuator
# 暴露哪些端点,'*'代表全部
management.endpoints.web.exposure.include=*
# 排除哪些端点,就是哪些端点不暴露。
management.endpoints.web.exposure.exclude=info,caches
- 自定义端点
新建一个包actuator,新建一个类DatabaseEndpoint,该端点是用来监控数据库的连接是否正常。
package com.ateam.community.actuator;

import com.ateam.community.controller.interceptor.DataInterceptor;
import com.ateam.community.util.CommunityUtil;
import org.slf4j.Logger;
import org.slf4j.LoggerFactory;
import org.springframework.beans.factory.annotation.Autowired;
import org.springframework.beans.factory.annotation.Qualifier;
import org.springframework.boot.actuate.autoconfigure.metrics.export.prometheus.PrometheusMetricsExportAutoConfiguration;
import org.springframework.boot.actuate.endpoint.annotation.Endpoint;
import org.springframework.boot.actuate.endpoint.annotation.ReadOperation;
import org.springframework.stereotype.Component;

import javax.annotation.Resource;
import javax.sql.DataSource;
import java.sql.Connection;
import java.sql.SQLException;


@Component
@Endpoint(id = "database")//自定义端点的id为database,好通过id访问它。即访问路径:http://localhost:8080/community/actuator/database。
public class DatabaseEndpoint {

    private static final Logger logger = LoggerFactory.getLogger(DatabaseEndpoint.class);


    @Resource
    private DataSource dataSource;

    @ReadOperation
     //@ReadOperation表明这个方法只能通过get请求来访问。@WriteOperation注释的方法只能通过post/put请求来访问
    public String checkConnection() {
        try (
                Connection connection = dataSource.getConnection();
        ){
            return CommunityUtil.getJSONString(0,"获取连接成功");
        } catch (SQLException e) {
            logger.error("数据库连接失败:" + e.getMessage());
            return CommunityUtil.getJSONString(1,"获取连接失败");
        }
    }

}
3. 项目部署

正向代理即是客户端代理, 代理客户端, 服务端不知道实际发起请求的客户端。
反向代理即是服务端代理, 代理服务端, 客户端不知道实际提供服务的服务端。
总结:正向代理隐藏真实客户端,反向代理隐藏真实服务端。
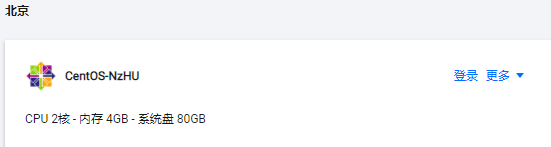
3.1 系统环境
使用的是腾讯云轻量级服务器

3.2 安装软件
3.2.1 远程连接服务器的软件
使用的是Xshell,版本是6

3.2.2 安装unzip
yum安装unzip
# 安装unzip,用于解压zip包
[root@VM-16-4-centos /]# yum list unzip*		# yum list xx*,该命令在根目录"/"下才有效果
[root@VM-16-4-centos /]# yum install -y unzip.x86_64 # y的含义是在安装的过程中,有选择“是”或“否”时,一律选择"是”
3.2.3 安装java1.8
yum安装Java1.8
[root@VM-16-4-centos /]# yum list java*
[root@VM-16-4-centos /]# yum install -y java-1.8.0-openjdk.x86_64
安装完成后,检测是否安装成功
[root@VM-16-4-centos ~]# java -version
java version "1.8.0_261"
Java(TM) SE Runtime Environment (build 1.8.0_261-b12)
Java HotSpot(TM) 64-Bit Server VM (build 25.261-b12, mixed mode)
3.2.4 安装Maven
将一下的压缩包都放在/root/communitySoftware/目录下,方便进行安装
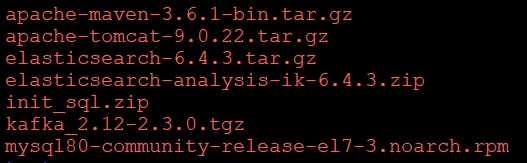
压缩包安装Maven
[root@VM-16-4-centos communitySoftware]# tar -zxvf apache-maven-3.6.1-bin.tar.gz -C /opt
[root@VM-16-4-centos ~]# cd /opt
[root@VM-16-4-centos opt]# cd apache-maven-3.6.1/
[root@VM-16-4-centos apache-maven-3.6.1]# pwd
/opt/apache-maven-3.6.1
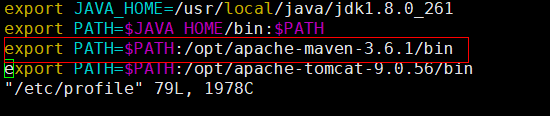
[root@VM-16-4-centos apache-maven-3.6.1]# vim /etc/profile # 在最后追加一行
export PATH=$PATH:/opt/apache-maven-3.8.1/bin
[root@VM-16-4-centos apache-maven-3.6.1]# source /etc/profile # 让配置文件/etc/profile生效
安装完成后,检测是否安装成功
[root@VM-16-4-centos apache-maven-3.6.1]# mvn -version
Apache Maven 3.6.1 (d66c9c0b3152b2e69ee9bac180bb8fcc8e6af555; 2019-04-05T03:00:29+08:00)
Maven home: /opt/apache-maven-3.6.1
Java version: 1.8.0_261, vendor: Oracle Corporation, runtime: /usr/local/java/jdk1.8.0_261/jre
Default locale: en_US, platform encoding: UTF-8
OS name: "linux", version: "3.10.0-1160.11.1.el7.x86_64", arch: "amd64", family: "unix"
配置Maven(阿里云镜像)
[root@VM-16-4-centos apache-maven-3.6.1]#vim /opt/apache-maven-3.6.1/conf/settings.xml # 下方复制到两个mirrors里
    <mirror>
		  <id>alimaven</id>
	      <name>aliyun maven</name>
		  <url>http://maven.aliyun.com/nexus/content/groups/public/</url>
		  <mirrorOf>central</mirrorOf>
    </mirror>
3.2.5 安装MySQL
先装MySQL的yum库文件,这样可以安装到比较新的mysql
[root@VM-16-4-centos ~]# yum install -y /root/communitySoftware/mysql80-community-release-el7-4.noarch.rpm
再安装MySQL
[root@VM-16-4-centos  ~]# yum list mysql*
[root@VM-16-4-centos  ~]# yum install -y mysql-community-server.x86_64
安装完成后,启动MySQL
[root@VM-16-4-centos  ~]# systemctl start mysqld
[root@VM-16-4-centos  ~]# systemctl status mysqld
● mysqld.service - MySQL Server
   Loaded: loaded (/usr/lib/systemd/system/mysqld.service; enabled; vendor preset: disabled)
   Active: active (running) since Thu 2021-12-09 10:14:52 CST; 4 weeks 0 days ago
     Docs: man:mysqld(8)
           http://dev.mysql.com/doc/refman/en/using-systemd.html
 Main PID: 18677 (mysqld)
   Status: "Server is operational"
   CGroup: /system.slice/mysqld.service
           └─18677 /usr/sbin/mysqld

Dec 09 10:14:43 VM-16-4-centos systemd[1]: Starting MySQL Server...
Dec 09 10:14:52 VM-16-4-centos systemd[1]: Started MySQL Server.
找到MySQL临时密码
[root@VM-16-4-centos  ~]# grep 'password' /var/log/mysqld.log  # mysql会有一个临时密码,在该日志文件中
[root@VM-16-4-centos  ~]#mysql -u root -p Eoz7f<IfjzdE
登录到MySQL后,修改自己的密码
alter user root@localhost identified by 'Nowcoder_123';

解压缩SQL文件
[root@VM-16-4-centos ~]# unzip -d /root/communitySoftware community-init-sql-1.5.zip
再次登录MySQL
[root@VM-16-4-centos  ~]# mysql -u root -p
[root@VM-16-4-centos  ~]# mysql -u root -p你自己的密码


mysql> create database community;
mysql> use community
mysql> source /root/communitySoftware/community-init-sql-1.5/init_schema.sql
mysql> source /root/communitySoftware/community-init-sql-1.5/init_data.sql
mysql> source /root/communitySoftware/community-init-sql-1.5/tables_mysql_innodb.sql
mysql> show tables;
mysql> select id,username,header_url from user;
mysql> update user set header_url ='http://images.nowcoder.com/head/666t.png' where header_url like '%localhost%';
mysql> exit
Bye
3.2.5 安装Redis
yum安装Redis
[root@VM-16-4-centos  ~]# yum list redis*
[root@VM-16-4-centos  ~]# yum install -y redis.x86_64
启动Redis
[root@VM-16-4-centos  ~]# systemctl start redis
[root@VM-16-4-centos  ~]# systemctl status redis
● redis.service - Redis persistent key-value database
   Loaded: loaded (/usr/lib/systemd/system/redis.service; disabled; vendor preset: disabled)
  Drop-In: /etc/systemd/system/redis.service.d
           └─limit.conf
   Active: active (running) since Thu 2021-12-09 10:44:04 CST; 4 weeks 0 days ago
 Main PID: 24489 (redis-server)
   CGroup: /system.slice/redis.service
           └─24489 /usr/bin/redis-server 127.0.0.1:6379

Dec 09 10:44:04 VM-16-4-centos systemd[1]: Starting Redis persistent key-value database...
Dec 09 10:44:04 VM-16-4-centos systemd[1]: Started Redis persistent key-value database
测试一下
[root@VM-16-4-centos  ~]# redis-cli
127.0.0.1:6379> exit
3.2.6 安装Kafka
压缩包安装Kafka
[root@VM-16-4-centos communitySoftware]# tar -zvxf kafka_2.12-2.3.0.tgz -C /opt
[root@VM-16-4-centos communitySoftware]# cd /opt/kafka_2.12-2.3.0
启动Kafka
[root@VM-16-4-centos kafka_2.12-2.3.0]# bin/zookeeper-server-start.sh -daemon config/zookeeper.properties   # 后台启动zookeeper
[root@VM-16-4-centos kafka_2.12-2.3.0]# nohup bin/kafka-server-start.sh config/server.properties 1>/dev/null 2>&1 &  # 后台启动Kafka
[1] 2932
[root@VM-16-4-centos kafka_2.12-2.3.0]# bin/kafka-topics.sh --list --bootstrap-server localhost:9092  # 测试Kafka,查看当前有哪些主题
3.2.7 安装Elasticsearch
压缩包安装Elasticsearch
[root@VM-16-4-centos communitySoftware]#  tar -zvxf elasticsearch-6.4.3.tar.gz -C /opt
[root@VM-16-4-centos communitySoftware]#  unzip -d /opt/elasticsearch-6.4.3/plugins/ik elasticsearch-analysis-ik-6.4.3.zip
配置Elasticsearch
[root@VM-16-4-centos  ~]#  vim /opt/elasticsearch-6.4.3/config/elasticsearch.yml 	# 取消下方内容的注释,修改以下内容
path.data: /tmp/elastic/data
path.logs: /tmp/elastic/logs
[root@VM-16-4-centos  ~]#vim /opt/elasticsearch-6.4.3/config/jvm.options	# 取消下方内容的注释,修改以下内容,这两个参数要顶格写。
-Xms256m
-Xmx512m
启动ES (为安全考虑,Elasticsearch不允许 root 启动,新建用户)
[root@VM-16-4-centos  ~]# groupadd nowcoder
[root@VM-16-4-centos  ~]# useradd nowcoder1 -p 123456 -g nowcoder
[root@VM-16-4-centos  ~]#cd /opt
[root@VM-16-4-centos  opt]# chown -R nowcoder1:nowcoder * # 给nowcoder1 用户访问/opt目录下所有文件的权限
[root@VM-16-4-centos  opt]#  cd /tmp
[root@VM-16-4-centos  tmp]#  chown -R nowcoder1:nowcoder * # 给nowcoder1 用户访问/tmp目录下所有文件的权限
[root@VM-16-4-centos  tmp]# su - nowcoder1
[root@VM-16-4-centos  ~]# /opt/elasticsearch-6.4.3/bin/elasticsearch -d	# 后台启动es
测试ES是否成功启动
[root@VM-16-4-centos ~]# su -
Password:
[root@VM-16-4-centos ~]# curl -X GET "localhost:9200/_cat/health?v"
epoch      timestamp cluster        status node.total node.data shards pri relo init unassign pending_tasks max_task_wait_time active_shards_percent
1641477911 22:05:11  my-application green
3.2.8 安装wkhtmltopdf
yum安装wkhtmltopdf
[root@VM-16-4-centos ~]# yum list wk*
[root@VM-16-4-centos ~]# yum install -y wkhtmltopdf.x86_64
yum安装xvfb,这是安装虚拟GUI,因为wkhtmltopdf会生成图片,需要GUI
  208  2021-12-09 11:29:15 yum list *xvfb*
  209  2021-12-09 11:30:22 yum install -y xorg-x11-server-Xvfb.x86_64
测试一下
[root@VM-16-4-centos ~]# cd /root
[root@VM-16-4-centos ~]# mkdir test
[root@VM-16-4-centos ~]# cd test/
[root@VM-16-4-centos test]# xvfb-run --server-args="-screen 0, 1024x768x24" wkhtmltoimage https://www.baidu.com 1.png
[root@VM-16-4-centos test]# ll
-rw-r--r-- 1 root root 4435767 Dec  9 11:35 1.png
简化命令
[root@VM-16-4-centos test]# cd /opt/
[root@VM-16-4-centos opt]# vim wkhtmltoimage.sh     # /opt/wkhtmltoimage.sh文件里只有这一句话
xvfb-run --server-args="-screen 0, 1024x768x24" wkhtmltoimage "$@"
测试
[root@VM-16-4-centos opt]#  chmod +x wkhtmltoimage.sh
[root@VM-16-4-centos opt]#  cd /root/test
[root@VM-16-4-centos test]# /opt/wkhtmltoimage.sh "http://www.baidu.com" 2.png
[root@VM-16-4-centos test]# ll
-rw-r--r-- 1 root root 4435767 Dec  9 11:35 1.png
-rw-r--r-- 1 root root 4435767 Dec  9 11:39 2.png
3.2.9 安装Tomcat
压缩包安装Tomcat
[root@VM-16-4-centos ~]# cd /root/communitySoftware/
[root@VM-16-4-centos communitySoftware]# tar -zvxf apache-tomcat-9.0.56.tar.gz -C /opt
配置环境变量
[root@VM-16-4-centos ~]# vim /etc/profile # 在末尾填上如下一行
export PATH=$PATH:/opt/apache-tomcat-9.0.56/bin
[root@VM-16-4-centos ~]#  source /etc/profile

启动Tomcat
[root@VM-16-4-centos ~]# startup.sh
测试Tomcat是否启动成功
注意服务器防火墙的配置,开放端口

Tomcat默认端口为8080

关闭Tomca
[root@VM-16-4-centos ~]# shutdown.sh
3.2.10 安装Nginx
yum安装Nginx
 [root@VM-16-4-centos ~]# yum list nginx*
 [root@VM-16-4-centos ~]# yum install -y nginx.x86_64
配置Nginx
[root@VM-16-4-centos ~]# vim /etc/nginx/nginx.conf
http的大括号里,去掉原先的server,加上下面这个

http是80端口,https是443端口。默认是80端口,于是访问120.55.53.217会变为120.55.53.217:80,然后被服务器中的nginx映射到120.77.151.233:8080,即本机的Tomcat服务器。
启动Nginx
[root@VM-16-4-centos ~]#  systemctl start nginx
[root@VM-16-4-centos ~]#  systemctl status nginx
● nginx.service - The nginx HTTP and reverse proxy server
  Loaded: loaded (/usr/lib/systemd/system/nginx.service; disabled; vendor preset: disabled)
  Active: active (running) since Thu 2021-12-09 14:38:28 CST; 4 weeks 1 days ago
Main PID: 6585 (nginx)
  CGroup: /system.slice/nginx.service
          ├─6585 nginx: master process /usr/sbin/nginx
          ├─6586 nginx: worker process
          └─6587 nginx: worker process

Dec 09 14:38:28 VM-16-4-centos systemd[1]: Starting The nginx HTTP and reverse proxy server...
Dec 09 14:38:28 VM-16-4-centos nginx[6579]: nginx: the configuration file /etc/nginx/nginx.conf syntax is ok
Dec 09 14:38:28 VM-16-4-centos nginx[6579]: nginx: configuration file /etc/nginx/nginx.conf test is successful
Dec 09 14:38:28 VM-16-4-centos systemd[1]: Started The nginx HTTP and reverse proxy server.
3.3 项目访问逻辑

浏览器访问1.1.1.0时,会访问1.1.1.0:80,然后被Nginx分发到1.1.1.1:8080,即Tomcat服务器,访问Tomcat服务器会默认到ROOT项目的首页。如果想访问Tomcat服务器西下其他项目,比如community项目,则需要1.1.1.0/community来访问。
如果我们有域名,nowcoder.com与1.1.1.0绑定,当我们访问nowcoder.com时,会进行域名解析,最终还是访问Tomcat服务器会默认到ROOT项目的首页;nowcoder.com/examples,访问Tomcat服务器下的examples项目。
但我们一把放我baidu.com时,就自动到百度的首页,而不是baidu.com/xxx,来访问。所以要对上述访问方案进行修改,删掉Tomcat服务器下原理的ROOT项目,将我们的项目打包成ROOT.war,这样访问1.1.1.0时,就会直接访问我们自己的项目。

其中,/ = /index的含义是,我们直接访问项目首页的路径是“xxx/index”,我们可以通过转发,或者重定向,让访问路径为"xxx/"时,也和路径“xxx/index”有一样的效果,即访问到项目的首页。
3.4 项目部署前的修改
3.4.1 服务器端修改
将/opt/apache-tomcat-9.0.56/webapps下所有的文件删除
[root@VM-16-4-centos webapps]# rm -rf *
3.4.2 项目代码修改
- 项目去掉路径“community”
# 在application.properties文件中
server.servlet.context-path=
# 在global.js文件中
var CONTEXT_PATH = "";
- 访问"/“时转发到”/index"
// HomeController.java加一个方法
    @RequestMapping(path = "/", method = RequestMethod.GET)
    public String root() {
        return "forward:/index";
    }
- 默认打包为jar包,现在要的是war包,并设置的的war包名为ROOT
pom.xml增加< packaging >和< finalName >两行
    <name>community</name>
    <description>ATeam community</description>
    <packaging>war</packaging>


	<build>
		<finalName>ROOT</finalName>
		<plugins>
			<plugin>
				<groupId>org.springframework.boot</groupId>
				<artifactId>spring-boot-maven-plugin</artifactId>
			</plugin>
		</plugins>
	</build>
- 多套配置文件,一套开发时的配置文件,一套生产(上线)的配置文件。通过主配置文件,决定使用哪个配置文件。
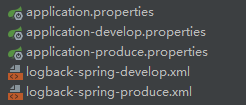
主配置文件为application.properties,通过修改spring.profiles.active=produce/develop,就可以选择想选的配置文件
# profile
spring.profiles.active=produce

# logback
logging.config=classpath:logback-spring-${spring.profiles.active}.xml
- application-develop.properties和application-produce.properties相比,后者修改的地方
# ServerProperties
server.servlet.context-path=

# ThymeleafProperties
spring.thymeleaf.cache=true

# DataSourceProperties	# 因为访问的是你自己电脑上的mysql->服务器的mysql,可能两个mysql你设置的用户名密码不一致。
spring.datasource.username=root
spring.datasource.password=a1b2c3

# community
community.path.domain=http://120.77.134.263		# 你的要部署的服务器的IP地址
community.path.upload=/tmp/uploads

# wk
wk.image.command=/opt/wkhtmltoimage.sh
wk.image.storage=/tmp/wk-images
- logback-spring-develop.xml和logback-spring-produce.xml相比,后者修改的地方
    <contextName>community</contextName>
    <property name="LOG_PATH" value="/tmp/community/logs"/> <!--只改了这里"/tmp/community/logs"-->
    <property name="APPDIR" value="community"/>
- Tomcat服务器本身就是java程序,有自己的启动方法,即main方法,而我们的项目也有自己的启动main方法,于是二者需要一个桥梁。
在项目中新建一个类CommunityServletInitializer.java,继承SpringBootServletInitialize类,重写configure方法。
public class CommunityServletInitializer extends SpringBootServletInitializer {

    @Override
    protected SpringApplicationBuilder configure(SpringApplicationBuilder builder) {

        // Tomcat 通过该类启动项目
        return builder.sources(CommunityApplication.class);
    }
}
3.5 项目上线
大致思路是:将项目上传到Linux服务器中,用Maven编译打包,将生成的Root.war包移动到Tomcat服务器的webapps目录下,再启动Tomcat。
- 删除生成的target文件,方便上传到服务器

- 将项目压缩成zip压缩包,上传到服务器的 “/root/communitySoftware/”文件中,在解压到“/root ”目录下
[root@VM-16-4-centos ~]# unzip -d /root /root/communitySoftware/community.zip
- 将项目打成war包
[root@VM-16-4-centos ~]# cd community
[root@VM-16-4-centos community]#  mvn clean package -Dmaven.test.skip=true	# 用maven把项目编译并且打包,跳过测试,因为我们前面的测试类写的都不标准,最后单独讲的那个测试才是标准的测试。耗时较长。
- 将生成的war包移动到Tomcat服务器webapps目录下
[root@VM-16-4-centos community]# cd target/
[root@VM-16-4-centos target]# mv ROOT.war /opt/apache-tomcat-9.0.56/webapps/
- 启动Tomcat服务器
[root@VM-16-4-centos ~]# startup.sh
4. 项目总结

图中的最下三行是项目中的基石。
图中带下划线和@的内容是重点,需着重理解。
算法:前缀树过滤敏感词。
数据结构:Redis的数据结构。Redis有许多种数据结构,每种数据结构适合解决什么样的问题,适合缓存什么样的数据。
Kafka:重点是生产者与消费者模式,只有你理解了,才能明白什么时候用哪些功能来解决什么问题。
ElasticSearch:重点是它的数据结构,以索引(表)方式来存。建议找文章自己学习ES的索引。
Caffeine:本地缓存,有一定局限性,把它和Redis一起回顾,因为它们都是缓存。
从运维角度来看整个项目(分布式部署)

静态资源(图片等)和动态资源(controller)是部署在两个服务器上的。比如:牛客网的是在域名nowcoder.com上,牛客网的图片是在static.nowcoder.com上,这两个是不同的域名,会对应到两个不同的服务器。
客户端找nginx请求动态资源,找CDN请求静态资源。
- nginx:能对服务器做反向代理,如果你有多个服务器,它能对服务器做负载均衡。nginx会主从备份,即有两台服务器,一台处理客户端请求,一台只是备份。
- CDN:把你的资源部署到各地的多个服务器上,用户访问网站时,会从最近的服务器加载资源。
有多台服务器,nginx会把客户端请求发送到某一台服务器,每台服务器中都有项目community和本地缓存。
数据库通常要做读写分离的,一台数据库复制读,一台数据库负责写。负责写的数据库在写入数据以后,会把数据同步到负责读取的数据库里。
为什么Redis、Kafka、ElasticSearch都是部署多个,但是数据库却只进行主从备份?因为数据库部署和它们一样做集群式部署的话的话,那么就要处理分布式事务,这个比较麻烦,所以我们一般尽量避免这种情况。而且,一般的业务也达不到要部署多个数据库,因为在访问数据库前,会先访问本地缓存,再访问Redis,最后都没有才访问数据库
5. 常见面试题
悲观锁:不允许出问题。
乐观锁:出问题了我再去解决。
更新数据很频繁,用悲观锁。
更新数据不频繁,查询数据多,用乐观锁。
数据库中,事务是为了保证安全,索引是为了提高效率。

Interceptor拦截器的三个方法:preHandle()、postHandle()、afterCompletion()。
客户端发出请求。
- DispatcherServlet:核心。客户端发出的请求由它来处理,它调用一系列组件来解决该请求。
- HandlerMapping:根据客户端访问路径找到其对应的Controller。
- HandlerExecutionChain:封装了:1、解决该请求的Controller,2、对该请求实现拦截的拦截器。它把这两样交给了DispatcherServlet。
- HandlerAdapter:从DispatcherServlet得到Controller并调用。
- ModelAndView:由Controller返回ModelAndView给DispatcherServlet。
- ViewResolver:从DispatcherServlet得到ModelAndView,ViewResolver会找到模板引擎,把数据给模板,就是View。
- View:也叫模板引擎,它向客户端做渲染和展现。

瓜分20万奖金 获得内推名额 丰厚实物奖励 易参与易上手
更多推荐

 0
0 0
0- 0


 已为社区贡献2条内容

所有评论(0)