

【小沐学Android】Android实现socket网络通信
🍺SOCKET网络通信系列文章链接如下:🍺🎈【小沐学python】(一)Python简介和安装🎈🎈Python实现socket网络通信🎈🎈C++实现socket网络通信(Windows)🎈🎈Android实现socket网络通信🎈🎈nodejs实现socket网络通信🎈Android实现socket网络通信1、简介1.1 socket流程1.2 需要在子线程运行1.3 需要
🍺SOCKET网络通信系列文章链接如下:🍺
🎈【小沐学python】(一)Python简介和安装🎈
🎈Python实现socket网络通信🎈
🎈C++实现socket网络通信(Windows)🎈
🎈Android实现socket网络通信🎈
🎈nodejs实现socket网络通信🎈

Android实现socket网络通信
1、简介
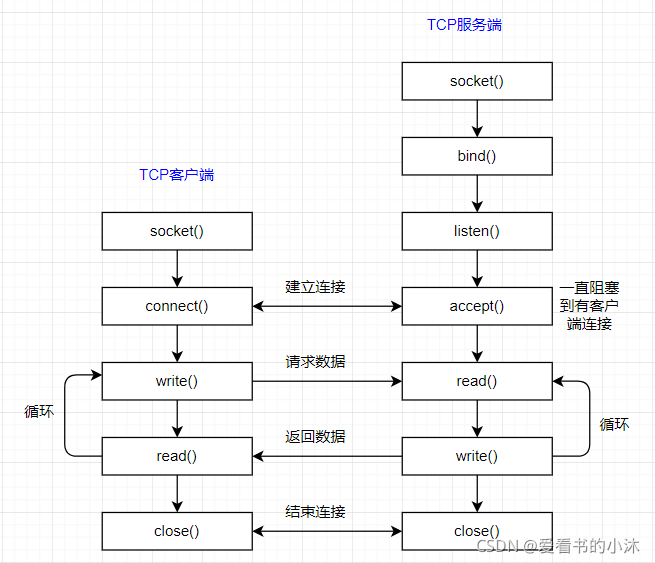
1.1 socket流程
Android在包java.net包下提供了ServerSocket和Socket类。当连接成功,客户端和服务端都会产生一个Socket实例,通过此Socket进行通信。
- ServerSocket:用于创建服务器的Socket。
https://developer.android.google.cn/reference/java/net/ServerSocket?hl=zh-cn - Socket:用于实例化客户端的Socket。
https://developer.android.google.cn/reference/java/net/Socket?hl=zh-cn - DatagramSocket:Android中使用 DatagramSocket 进行UDP数据发送接收。
https://developer.android.google.cn/reference/kotlin/java/net/DatagramSocket
基于TCP协议的客户端/服务器程序的一般流程:
1.2 需要在子线程运行
直接在主线程中调用相关网络接口会报错:
Caused by: android.os.NetworkOnMainThreadException
从Android4.0以后,就不支持在主线程中直接初始化socket了。
所以当进行网络请求的时候 还是需要开辟一个子线程,然后等到数据返回成功后再刷新UI。
为了避免创建无响应的界面,请勿在主线程上执行网络操作。默认情况下,Android 要求在非主界面线程上执行网络操作;否则将抛出 NetworkOnMainThreadException。
The exception that is thrown when an application attempts to perform a
networking operation on its main thread.This is only thrown for applications targeting the Honeycomb SDK or
higher. Applications targeting earlier SDK versions are allowed to do
networking on their main event loop threads, but it’s heavily
discouraged.
https://developer.android.com/reference/android/os/NetworkOnMainThreadException
1.3 需要的权限
若要在您的应用中执行网络操作,您的清单必须包含以下权限:
<uses-permission android:name="android.permission.INTERNET" />
<uses-permission android:name="android.permission.ACCESS_NETWORK_STATE" />
注意:Internet 和 ACCESS_NETWORK_STATE 权限都是普通权限,这意味着这些权限会在安装时授予,不需要在运行时请求。
2、环境配置
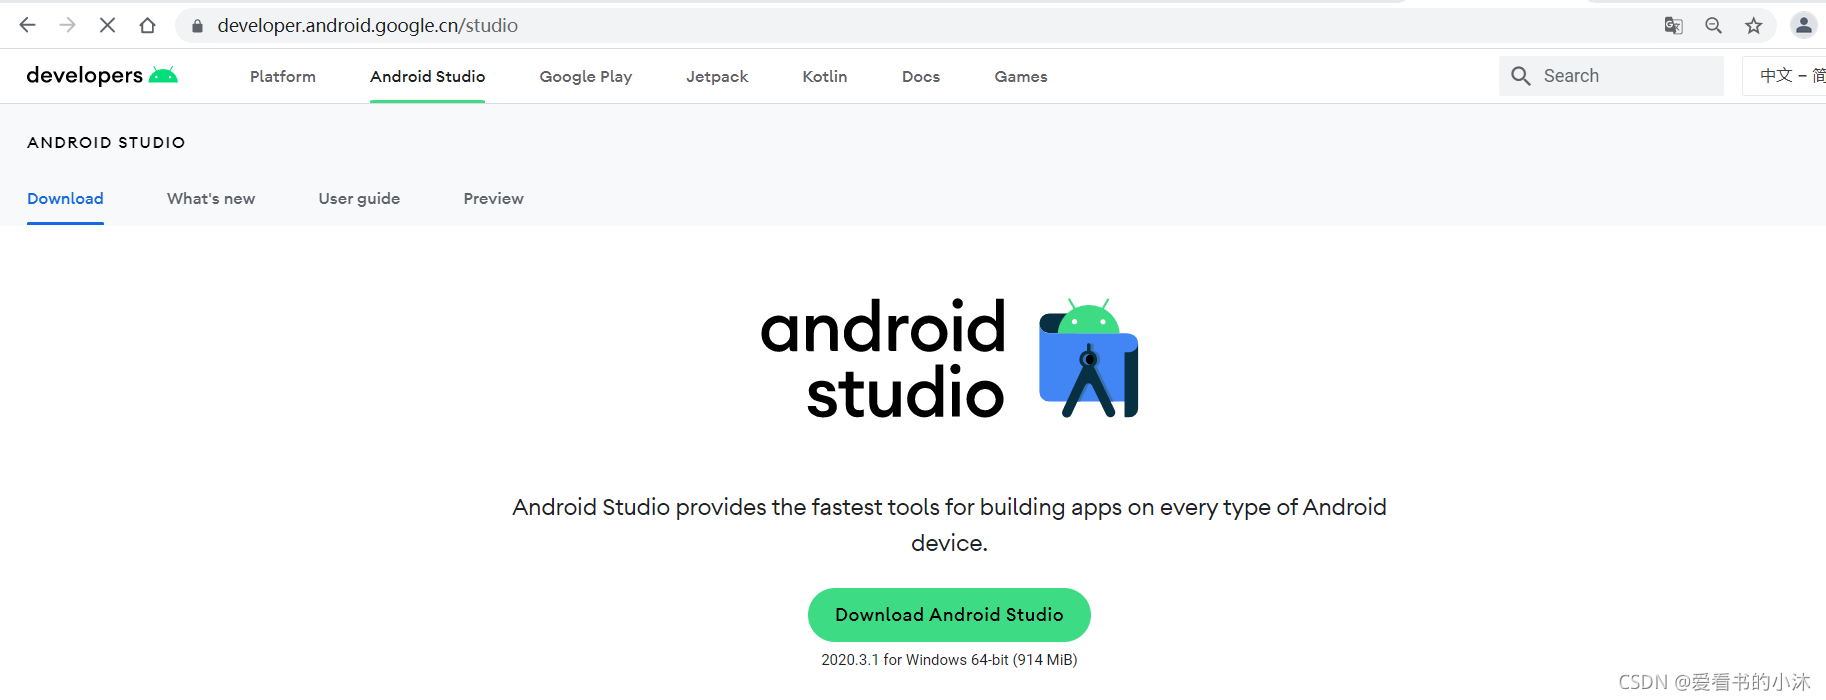
2.1 Android Studio下载
Download Android Studio and SDK tools | Android Developers
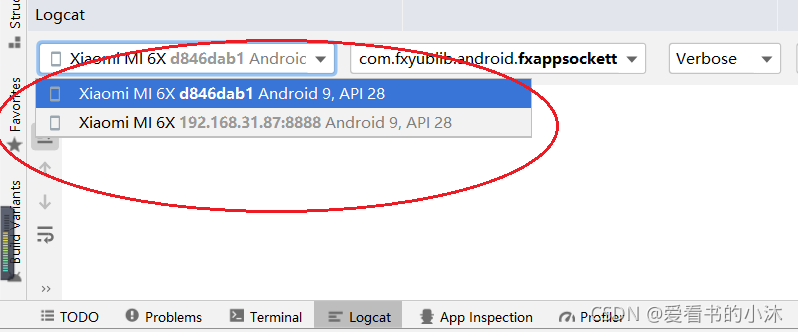
2.2 真机无线调试
-
将手机与电脑连接在同一局域网内
电脑端开放热点,手机连上电脑端的热点,即保证手机与电脑在同一局域网内(或者手机给电脑开热点)。 -
手机与电脑通过USB线连接
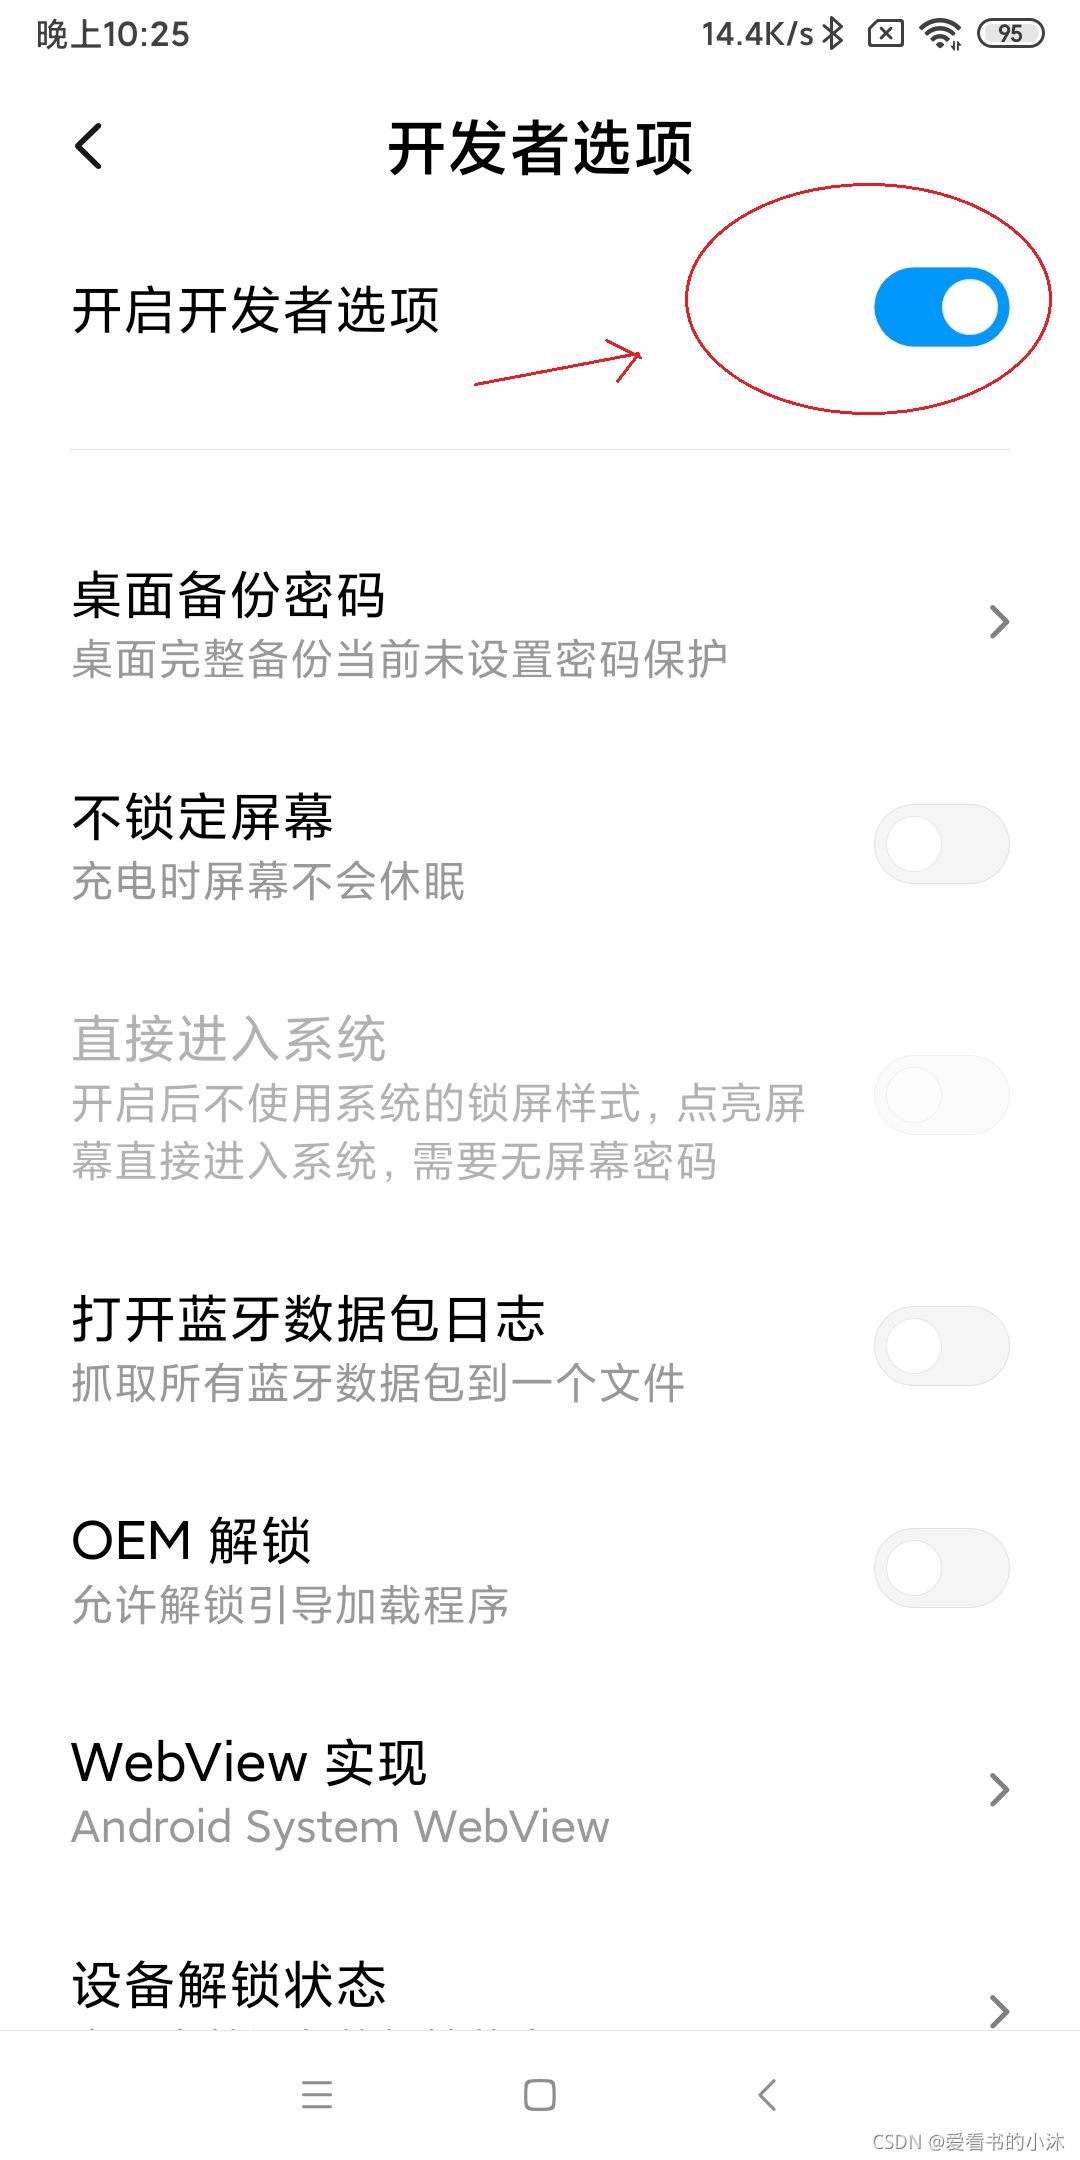
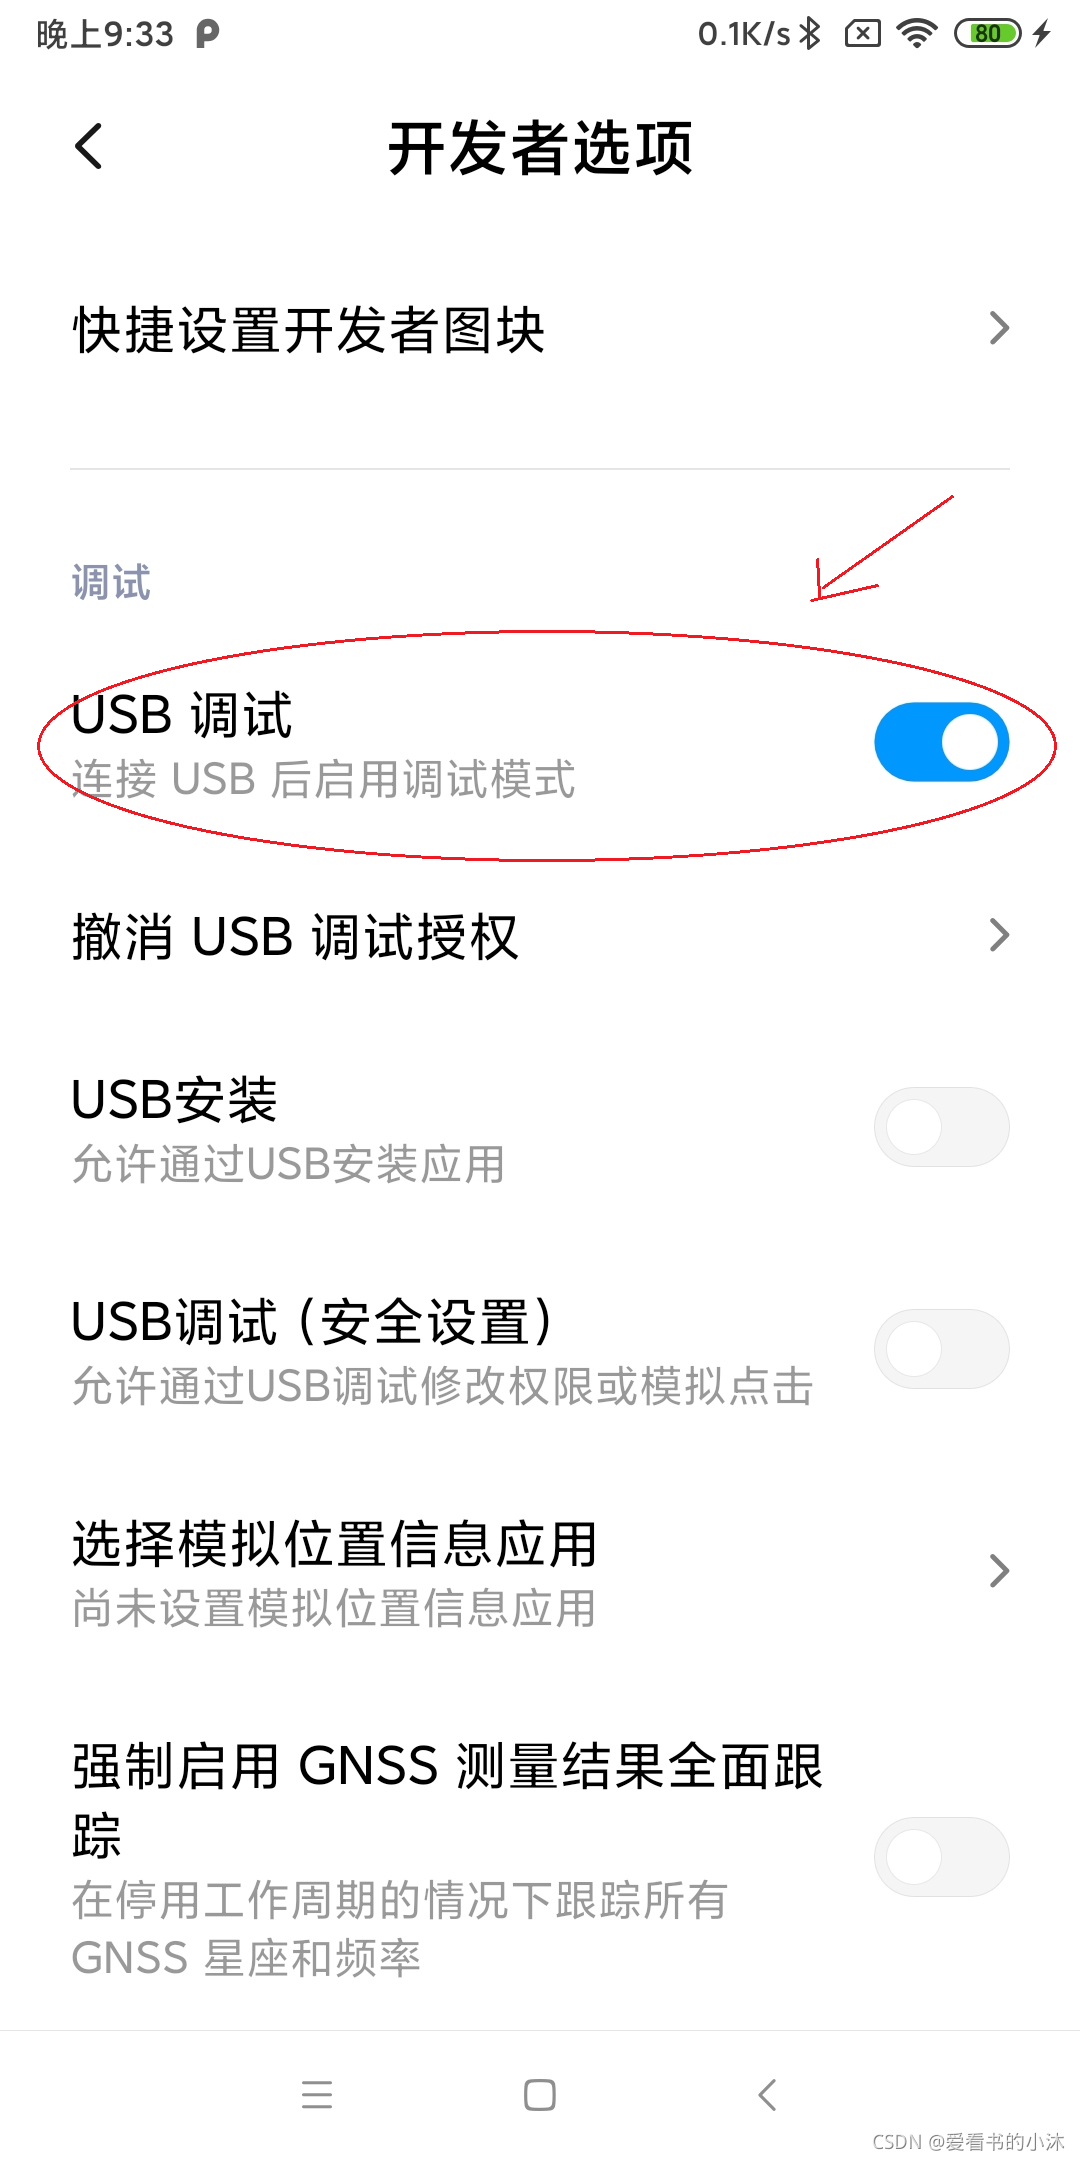
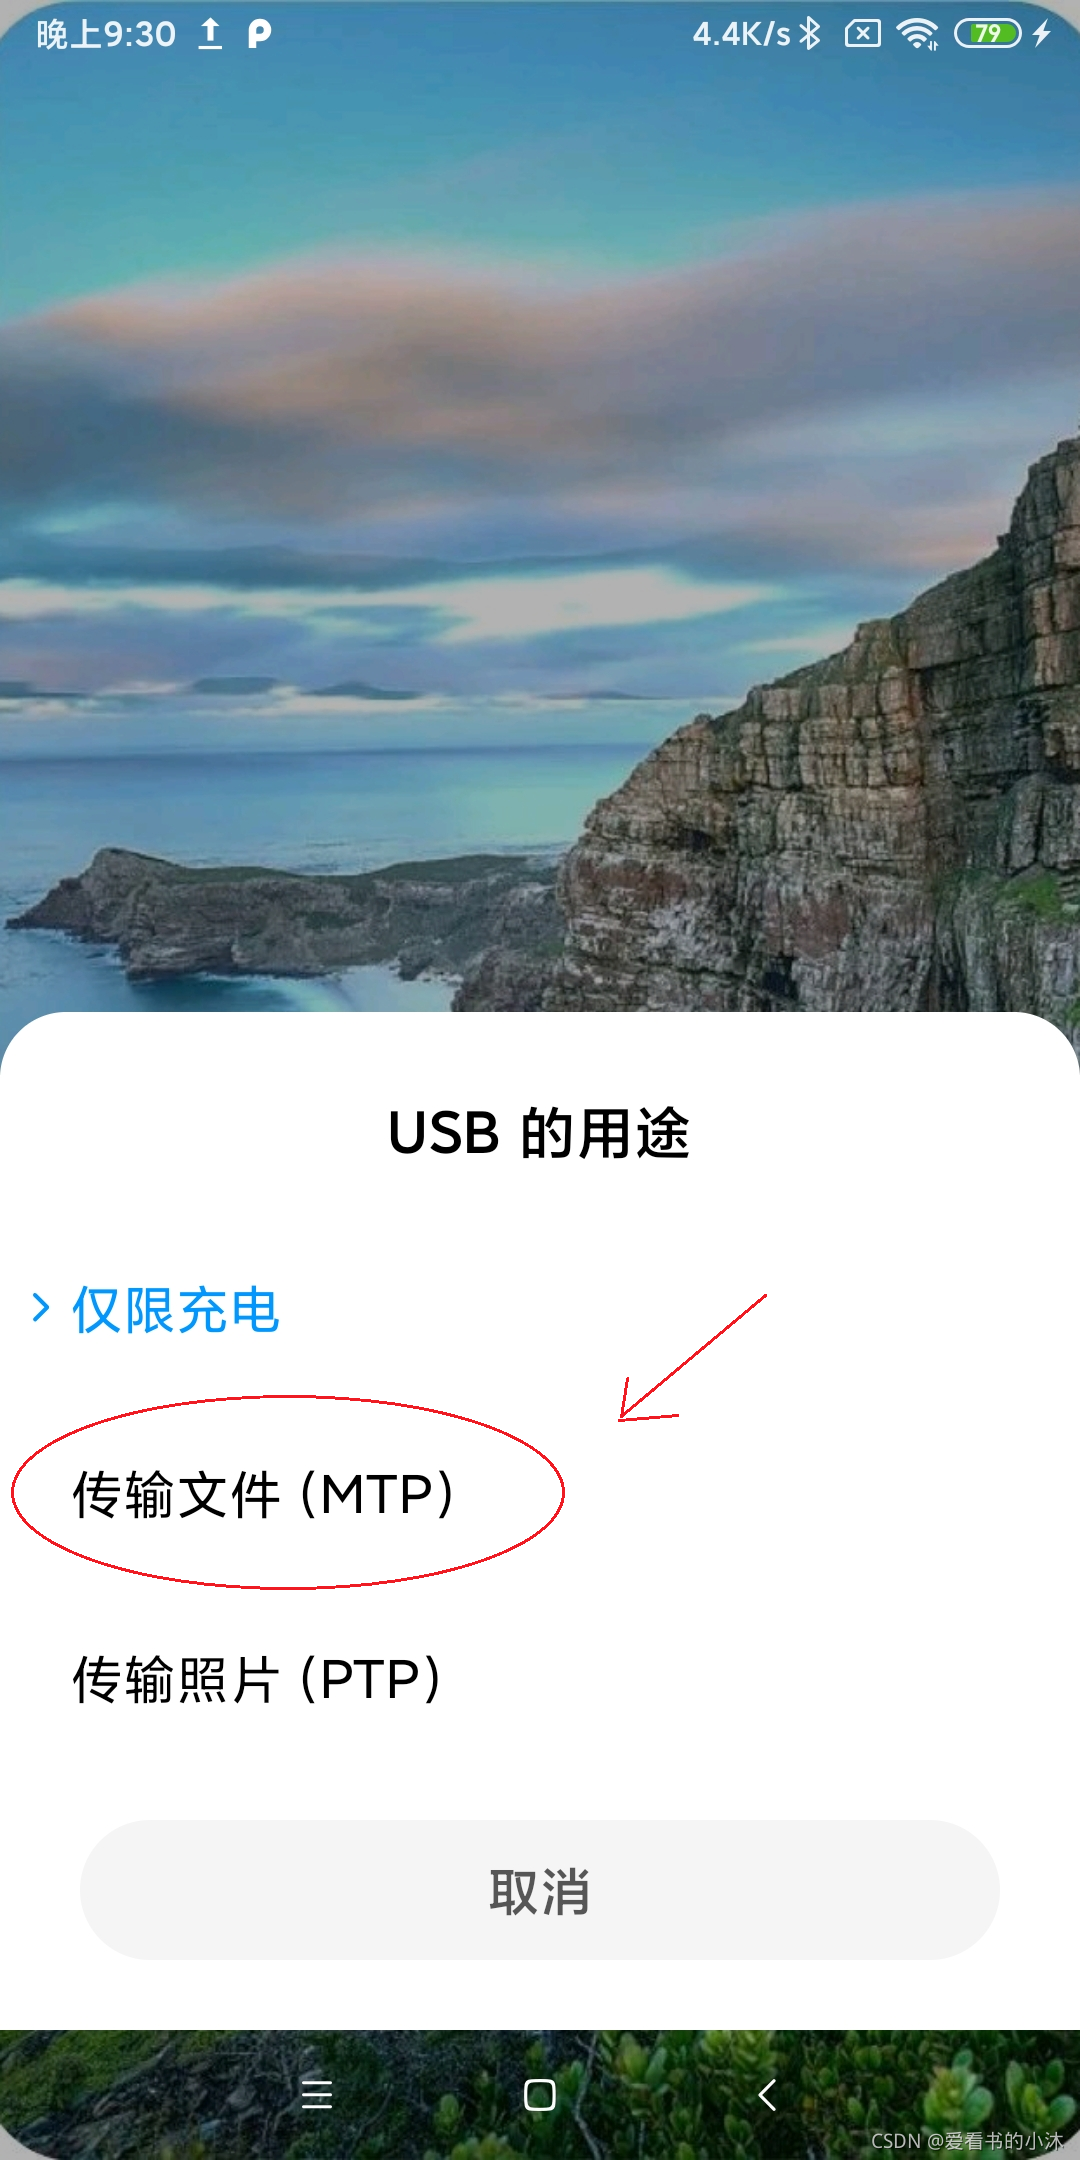
手机端:“开发者选项” – “打开USB调试” –“打开 连接USB时总是弹出提示”-- ”选择USB配置–MTP“
AndroidStudio中 能看到连接的设备即代表USB线连接成功。
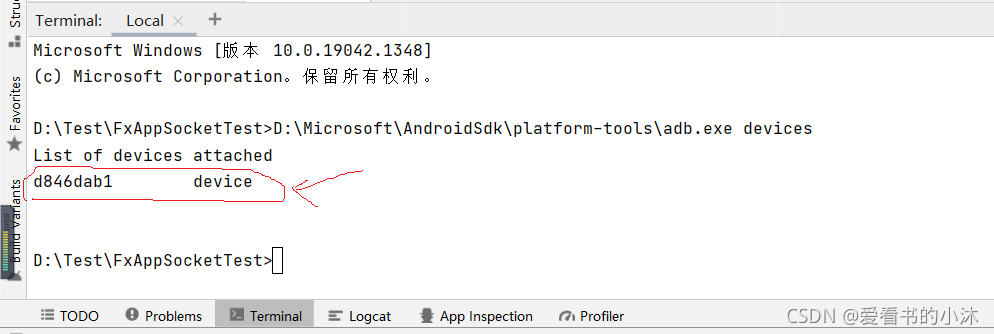
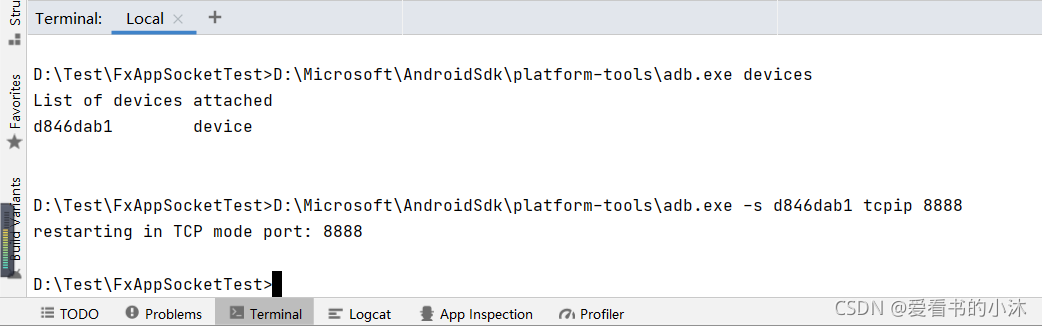
3. Android Studio中"Terminal窗口"或者"cmd窗口",依次输入命令,实现无线连接。(此处以Terminal窗口为例)
每台电脑的adb.exe的安装路径都不相同,比如
D:\Microsoft\AndroidSdk\platform-tools\adb.exe
-
命令1:
adb devices
-
命令2
adb -s <设备号> tcpip <端口号>
或者
adb tcpip <端口号>
-
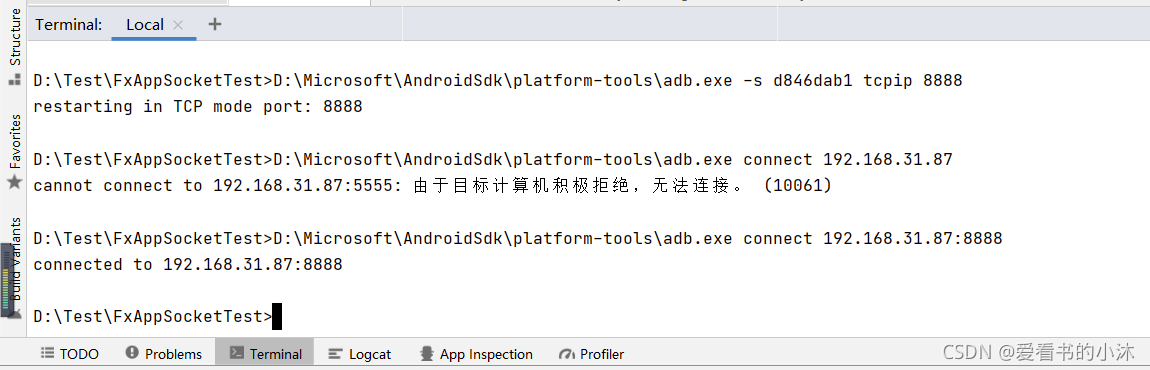
命令3
adb connect <手机IP地址:8888>
-
命令4
adb disconnect <手机IP地址>:8888 -
其他命令
执行adb kill-server 再执行 adb start-server,重启adb。
-
通过以上步骤,到AndroidStudio中,看到有两个设备连接,就代表无线连接成功了。
-
此时拔掉USB数据线,看到上面一个设备名。
-
测试一下,无线真机调试通道是否已经打通。
3、TCP方式
3.1 服务端
MyServerSocket.java如下:
package com.fxyublib.android.fxappsockettest;

import android.os.Handler;
import android.os.Message;
import android.util.Log;
import android.widget.Toast;

import java.io.IOException;
import java.io.InputStream;
import java.io.OutputStream;
import java.net.ServerSocket;
import java.net.Socket;

public class MyServerSocket extends Thread{
    private final static String TAG = "MyServerSocket";
    private ServerSocket mServerSocket = null;
    private Socket mSocket = null;
    private InputStream mInStream = null;
    private OutputStream mOutStream = null;
    private Boolean isConnected = false;
    private int mPort = 12345;
    private Handler mHandler = null;

    MyServerSocket(int port, Handler handler) {
        mPort = port;
        mHandler = handler;
    }

    @Override
    public void run() {
        System.out.println("MyServerSocket: " + Thread.currentThread().getName());

        try {
            mServerSocket = new ServerSocket(mPort);

            //等待客户端的连接,Accept会阻塞,直到建立连接,
            //所以需要放在子线程中运行。
            Log.d(TAG, "run: start0");
            mSocket = mServerSocket.accept();
            Log.d(TAG, "run: start1");

            //获取输入流
            mInStream = mSocket.getInputStream();
            //获取输出流
            mOutStream = mSocket.getOutputStream();

            isConnected = true;
            writeMsgInternal("### A message from MyServerSocket.");
            readMsgInternal();

        } catch (IOException e) {
            e.printStackTrace();
            mHandler.sendEmptyMessage(MyEnum.MSG_SOCKET_ACCEPTFAIL);
            isConnected = false;
            Log.d(TAG, "run: err");
        }
        //Log.i(TAG, "accept success");
        mHandler.sendEmptyMessage(MyEnum.MSG_SOCKET_CONNECTOK);
        Log.d(TAG, "run: end");
    }

    private void readMsgInternal() {
        while (isConnected) {
            byte[] buffer = new byte[1024];
            //循环执行read,用来接收数据。
            //数据存在buffer中,count为读取到的数据长度。
            try {
                Log.d(TAG, "readMsgInternal:start0");
                int count = mInStream.read(buffer);
                String str = new String(buffer, "UTF-8");
                Log.d(TAG, "readMsgInternal:start1");

                Message msg = new Message();
                msg.what = MyEnum.MSG_SOCKET_READ;
                msg.obj = str;
                if(mHandler != null) mHandler.sendMessage ( msg );
            } catch (IOException e) {
                e.printStackTrace();
                Log.d(TAG, "readMsgInternal:err");
                isConnected = false;
            }
        }

        Log.d(TAG, "readMsgInternal:end");
    }

    private void writeMsgInternal(String msg){
        if(msg.length() == 0 || mOutStream == null)
            return;

        try {   //发送
            mOutStream.write(msg.getBytes());
            mOutStream.flush();
        }catch (Exception e) {
            e.printStackTrace();
            isConnected = false;
        }
    }

    public void writeMsg(String str) {
        new Thread(new Runnable() {
            @Override
            public void run() {
                writeMsgInternal(str);
            }
        }).start();
    }

    public void close() {
        isConnected = false;

        if(mServerSocket != null){
            try {
                mServerSocket.close();
            } catch (IOException e) {
                e.printStackTrace();
            }
            mServerSocket = null;
        }

        if(mSocket != null) {
            try {
                mSocket.close();
            } catch (IOException e) {
                e.printStackTrace();
            }
            mSocket = null;
        }
    }
}
3.2 客户端
MyClientSocket.java如下:
package com.fxyublib.android.fxappsockettest;

import android.os.Handler;
import android.os.Message;

import java.io.IOException;
import java.io.InputStream;
import java.io.OutputStream;
import java.net.Socket;

public class MyClientSocket extends Thread{

    private Socket mSocket = null;
    private InputStream mInStream = null;
    private OutputStream mOutStream = null;
    private Boolean isConnected = false;
    private String mIP;
    private int mPort = 12345;
    private Handler mHandler = null;

    MyClientSocket(String ip, int port, Handler handler) {
        mIP = ip;
        mPort = port;
        mHandler = handler;
    }

    public void run(){
        System.out.println("MyClientSocket: " + Thread.currentThread().getName());

        try {
            //指定ip地址和端口号
            mSocket = new Socket(mIP, mPort);

            //获取输出流、输入流
            mOutStream = mSocket.getOutputStream();
            mInStream = mSocket.getInputStream();

            isConnected = true;
            writeMsgInternal("### A message from MyClientSocket.");
            readMsgInternal();

        } catch (Exception e) {
            e.printStackTrace();
            mHandler.sendEmptyMessage(MyEnum.MSG_SOCKET_CONNECTFAIL);
            isConnected = false;
            return;
        }

        mHandler.sendEmptyMessage(MyEnum.MSG_SOCKET_CONNECTOK);
    }

    private void readMsgInternal() {
        while (isConnected) {
            byte[] buffer = new byte[1024];
            //循环执行read,用来接收数据。
            //数据存在buffer中,count为读取到的数据长度。
            try {
                int count = mInStream.read(buffer);
                String str = new String(buffer, "UTF-8");

                Message msg = new Message();
                msg.what = MyEnum.MSG_SOCKET_READ;
                msg.obj = str;
                if(mHandler != null) mHandler.sendMessage ( msg );
            } catch (IOException e) {
                e.printStackTrace();
                isConnected = false;
            }
        }
    }

    private void writeMsgInternal(String msg){
        if(msg.length() == 0 || mOutStream == null)
            return;
        try {   //发送
            mOutStream.write(msg.getBytes());
            mOutStream.flush();
        }catch (Exception e) {
            e.printStackTrace();
            isConnected = false;
        }
    }

    public void writeMsg(String str) {
        new Thread(new Runnable() {
            @Override
            public void run() {
                writeMsgInternal(str);
            }
        }).start();
    }

    public void close(){
        isConnected = false;

        try {
            if (mOutStream != null) {
                mOutStream.close();
                mOutStream = null;
            }
            if (mInStream != null) {
                mInStream.close();
                mInStream = null;
            }
            if(mSocket != null){
                mSocket.close();
                mSocket = null;
            }
        } catch (IOException e) {
            e.printStackTrace();
        }
    }
}
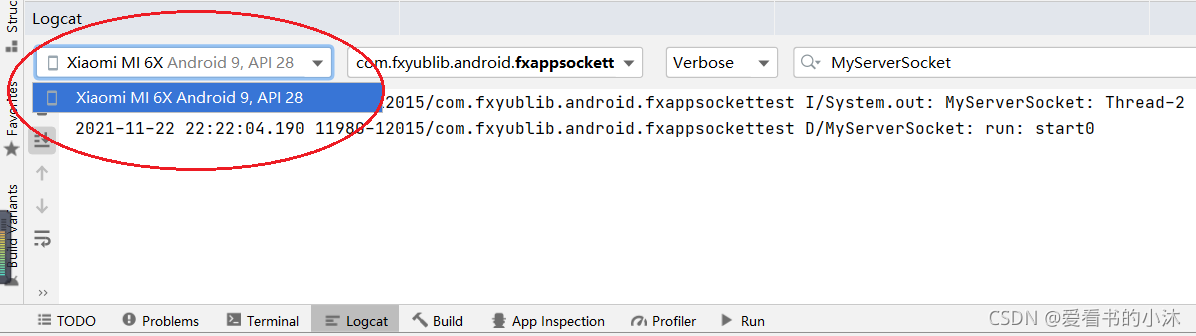
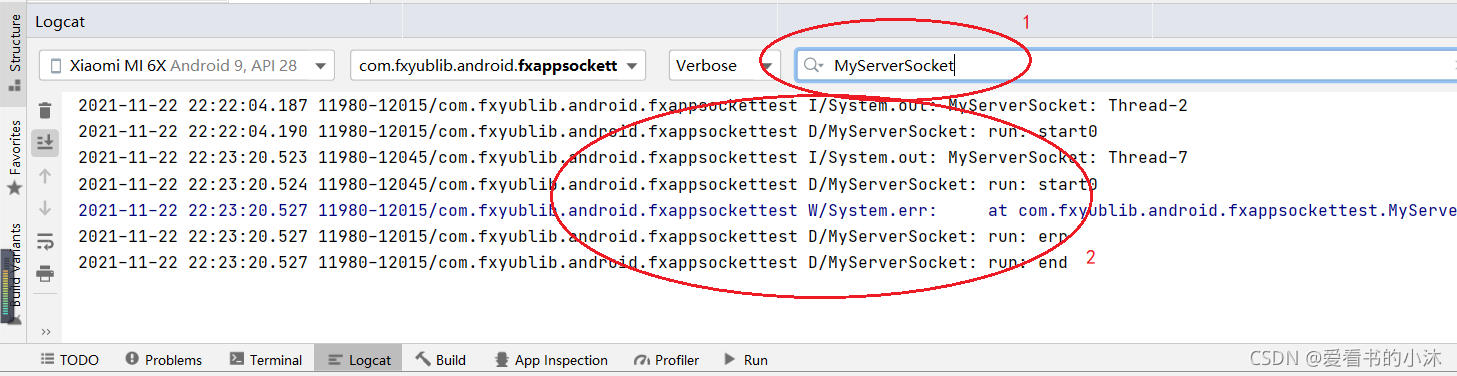
3.3 运行结果
- Android的TCP服务器和客户端的界面如下:
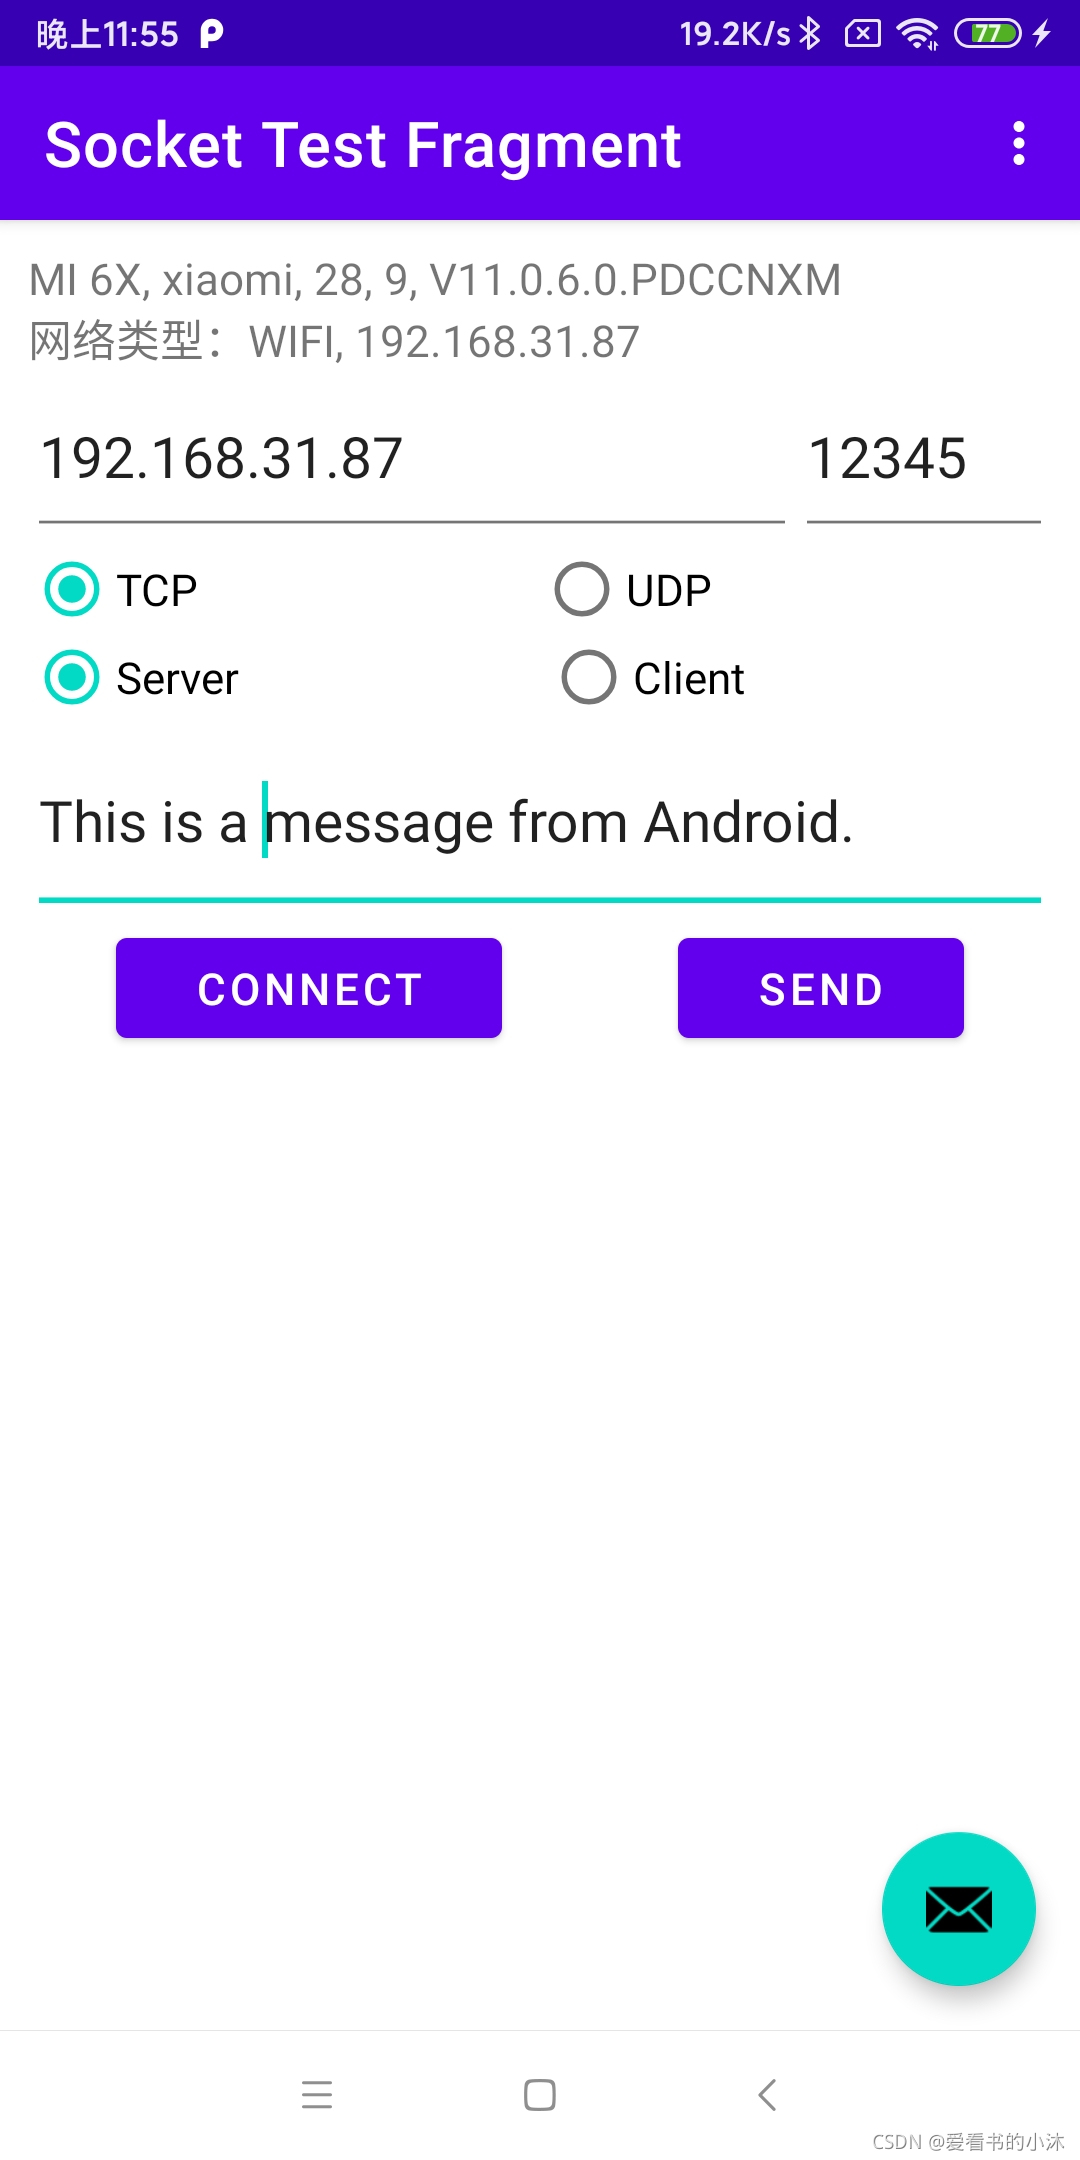
窗口界面布局文件内容如下:
<?xml version="1.0" encoding="utf-8"?>
<androidx.constraintlayout.widget.ConstraintLayout xmlns:android="http://schemas.android.com/apk/res/android"
    xmlns:app="http://schemas.android.com/apk/res-auto"
    xmlns:tools="http://schemas.android.com/tools"
    android:layout_width="match_parent"
    android:layout_height="match_parent"
    android:layout_margin="10dp"
    tools:context=".FirstFragment">

    <TextView
        android:id="@+id/textview_first"
        android:layout_width="match_parent"
        android:layout_height="wrap_content"
        android:text="@string/hello_first_fragment"
        android:minHeight="32dp"
        app:layout_constraintEnd_toEndOf="parent"
        app:layout_constraintStart_toStartOf="parent"
        app:layout_constraintTop_toTopOf="parent" />

    <LinearLayout
        android:id="@+id/ll_ip"
        android:layout_width="match_parent"
        android:layout_height="wrap_content"
        android:orientation="horizontal"
        app:layout_constraintTop_toBottomOf="@id/textview_first">

        <EditText
            android:id="@+id/edit_ip"
            android:layout_width="match_parent"
            android:layout_height="wrap_content"
            android:ems="10"
            android:inputType="textPersonName"
            android:minHeight="64dp"
            android:hint = "IP地址"
            android:text="192.168.31.223"
            android:singleLine="true"
            android:layout_weight="1.0"
            android:importantForAutofill="no" />

        <EditText
            android:id="@+id/edit_port"
            android:layout_width="match_parent"
            android:layout_height="wrap_content"
            android:ems="10"
            android:inputType="number"
            android:minHeight="64dp"
            android:hint = "端口号"
            android:text="12345"
            android:singleLine="true"
            android:layout_weight="3"
            android:importantForAutofill="no" />

    </LinearLayout>

    <RadioGroup
        android:id="@+id/ll_tcpudp"
        android:layout_width="match_parent"
        android:layout_height="32dp"
        android:orientation="horizontal"
        app:layout_constraintTop_toBottomOf="@id/ll_ip">

        <RadioButton
            android:id="@+id/radio_tcp"
            android:layout_width="wrap_content"
            android:layout_height="wrap_content"
            android:text="TCP"
            android:layout_weight="1" />

        <RadioButton
            android:id="@+id/radio_udp"
            android:layout_width="wrap_content"
            android:layout_height="wrap_content"
            android:text="UDP"
            android:layout_weight="1" />

    </RadioGroup>

    <RadioGroup
        android:id="@+id/ll_serverclient"
        android:layout_width="match_parent"
        android:layout_height="32dp"
        android:orientation="horizontal"
        app:layout_constraintTop_toBottomOf="@id/ll_tcpudp">

        <RadioButton
            android:id="@+id/radio_server"
            android:layout_width="wrap_content"
            android:layout_height="wrap_content"
            android:layout_weight="1"
            android:text="Server" />

        <RadioButton
            android:id="@+id/radio_client"
            android:layout_width="wrap_content"
            android:layout_height="wrap_content"
            android:layout_weight="1"
            android:text="Client" />
    </RadioGroup>

    <EditText
        android:id="@+id/edit_send"
        android:layout_width="match_parent"
        android:layout_height="wrap_content"
        app:layout_constraintTop_toBottomOf="@id/ll_serverclient"
        android:ems="10"
        android:minLines="2"
        android:inputType="textMultiLine"
        tools:ignore="MissingConstraints" />

    <LinearLayout
        android:id="@+id/ll_button"
        android:layout_width="match_parent"
        android:layout_height="wrap_content"
        android:orientation="horizontal"
        app:layout_constraintTop_toBottomOf="@id/edit_send">

        <Button
            android:id="@+id/button_connect"
            android:layout_width="wrap_content"
            android:layout_height="wrap_content"
            android:layout_weight="1"
            android:insetLeft="32dp"
            android:insetRight="32dp"
            android:text="Connect" />

        <Button
            android:id="@+id/button_send"
            android:layout_width="wrap_content"
            android:layout_height="wrap_content"
            android:text="Send"
            android:insetLeft="32dp"
            android:insetRight="32dp"
            android:layout_weight="1"/>

    </LinearLayout>

    <TextView
        android:id="@+id/textView_log"
        android:layout_width="match_parent"
        android:layout_height="wrap_content"
        app:layout_constraintTop_toBottomOf="@id/ll_button"
        android:text="" />

</androidx.constraintlayout.widget.ConstraintLayout>
- 对应测试的Python服务端:
#!/usr/bin/python
# -*- coding: UTF-8 -*-
# !/usr/bin/env python
# coding=utf-8
# filename:test_tcp_server.py
# creator: tomcat
# date: 2021-11-16

from socket import *
from time import ctime
from datetime import datetime


IP = gethostbyname(gethostname())
print("本机IP: ", IP)
ADDR = (IP, 12345)
BUFSIZ = 1024

s = socket(AF_INET, SOCK_STREAM)
s.setsockopt(SOL_SOCKET, SO_REUSEADDR, 1)
s.bind(ADDR)
s.listen(5)

while True:
    print('waiting for clients ...')
    c, addr = s.accept()

    t = datetime.now ().strftime ('%H:%M:%S')
    print('   connnecting from: [', t, "]", addr)

    while True:
        data = c.recv(BUFSIZ)
        if not data:
            break

        t = datetime.now().strftime('%H:%M:%S')
        print("recv: ", t, data )

        c.send(('[%s] %s' % (ctime(), "A message from python server.")).encode())
    c.close()

s.close()
- 对应测试的Python客户端:
#!/usr/bin/python
# -*- coding: UTF-8 -*-
# filename:test_tcp_client.py
# creator: tomcat
# date: 2021-11-16

from socket import *
from time import ctime
from datetime import datetime

BUFSIZ = 1024
ADDR = ('192.168.31.87', 12345) # or 'localhost' 127.0.0.1

c = socket(AF_INET, SOCK_STREAM)
c.connect(ADDR)
while True:
    #data = input('Input: ')
    #if not data:
    #    break
    #c.send(data.encode())
    data = c.recv(BUFSIZ)
    if not data:
        break

    t = datetime.now().strftime('%H:%M:%S')
    print("[", t,"]",data.decode('utf-8'))
    c.send(t.encode())
print("End!");
c.close()
后记
如果你觉得该方法或代码有一点点用处,可以给作者点个赞;╮( ̄▽ ̄)╭
如果你感觉方法或代码不咋地//(ㄒoㄒ)//,就在评论处留言,作者继续改进。o_O???
谢谢各位童鞋们啦( ´ ▽´ )ノ ( ´ ▽´)っ!!!

旨在为数千万中国开发者提供一个无缝且高效的云端环境,以支持学习、使用和贡献开源项目。
更多推荐


 21
21 0
0- 0


 已为社区贡献9条内容

所有评论(0)