springboot入门级项目(一)学生管理系统(springboot+mybatis+bootstrap+thymeleaf)
目录一、新建maven空项目springboot-system一、新建maven空项目springboot-system点击next点击finish建立好空项目后删除src文件夹,这是项目结构:在项目中右键选择新建module左边选择Spring Initializr,改一下这三个内容,等一下next添加需要的依赖...
目录
先看项目效果
1、登录页面 ,支持中英文切换
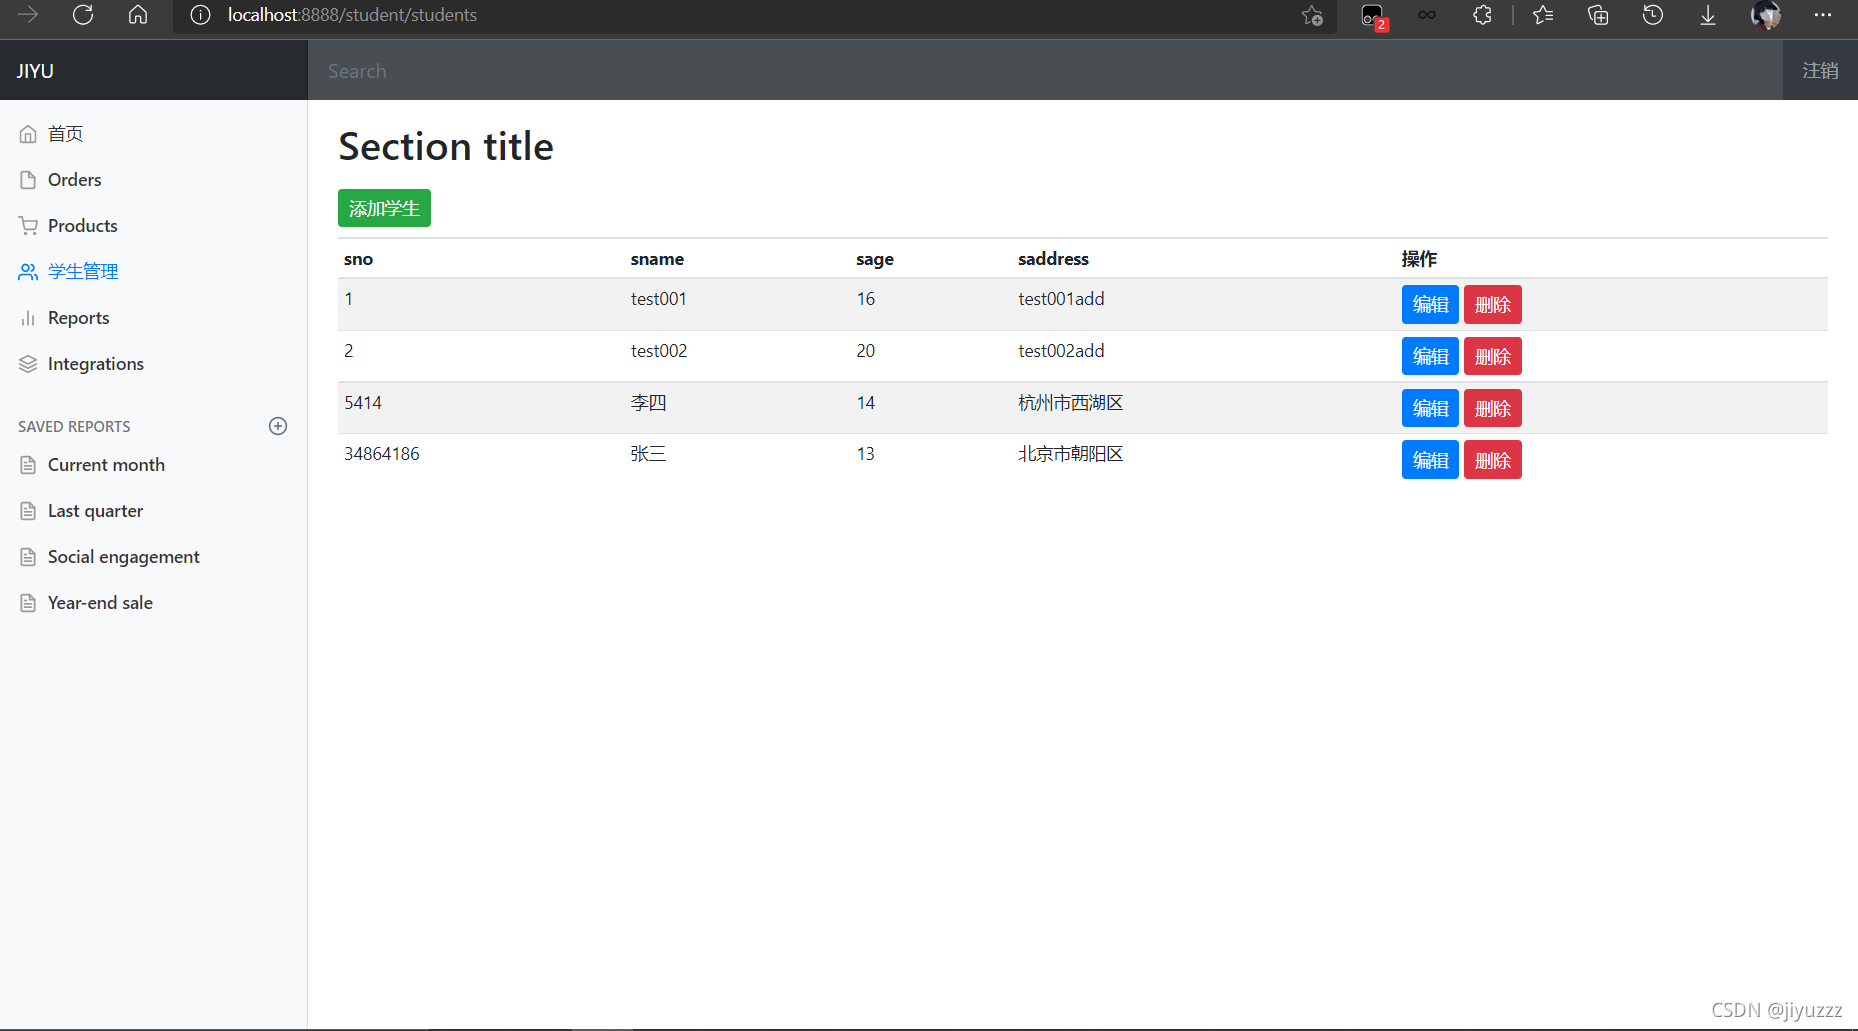
2、学生管理页面,支持增删改查(这里就不演示了,操作时间太长,录制的gif太大,传不上来,直接看主页面)

前言
跟着B站的狂神老师学习了一段时间的springboot,打算写个小项目练练手当做复习(我还是新手)。前端直接用的bootstrap已有的模板。
大家可以看看狂神的员工管理系统:https://www.bilibili.com/video/BV1PE411i7CV?p=20
学生管理系统资源获取:百度网盘
链接:https://pan.baidu.com/s/10_Ikc0I73brdkmPGejSaVA
提取码:jiyu
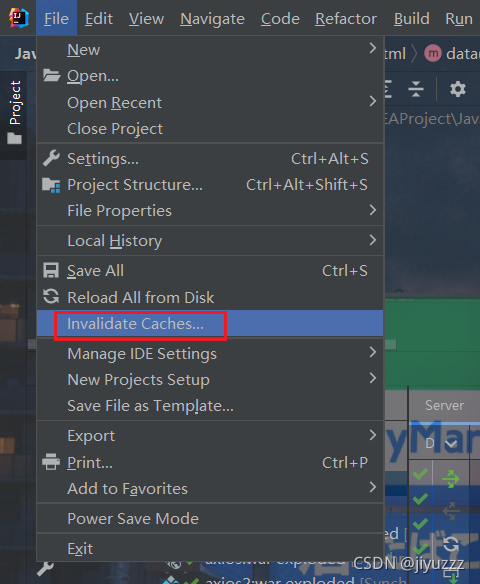
出现怎么都解决不了的问题但是觉得自己没错的话,可以尝试清除浏览器缓存或者idea缓存
清除浏览器缓存:快捷键ctrl+shift+del

idea清除缓存:
一、初始配置
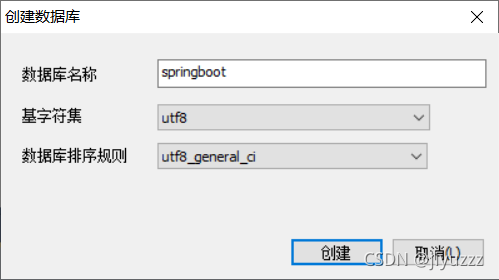
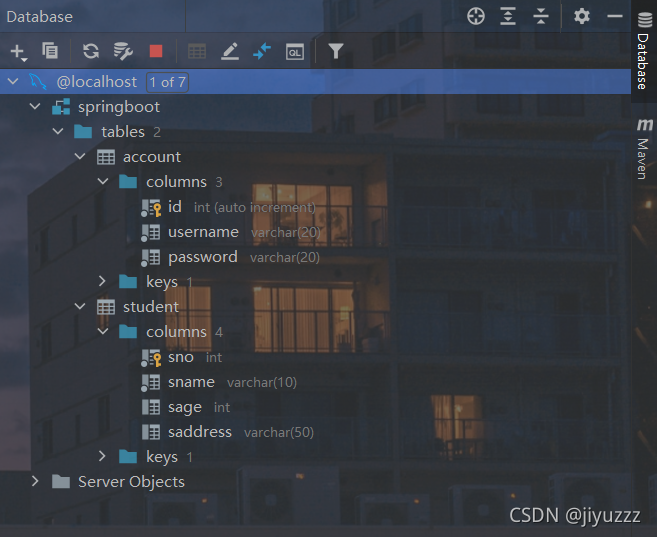
1、sqlyog中新建数据库springboot
下面两种方法,选一个即可
1)使用sql
CREATE DATABASE `springboot`CHARACTER SET utf8 COLLATE utf8_general_ci;
USE `springboot`;
CREATE TABLE `springboot`.`account`( `id` INT(4) NOT NULL AUTO_INCREMENT COMMENT '用户id', `username` VARCHAR(20) NOT NULL COMMENT '用户名', `password` VARCHAR(20) NOT NULL COMMENT '用户密码', PRIMARY KEY (`id`) ) ENGINE=INNODB CHARSET=utf8 COLLATE=utf8_general_ci;
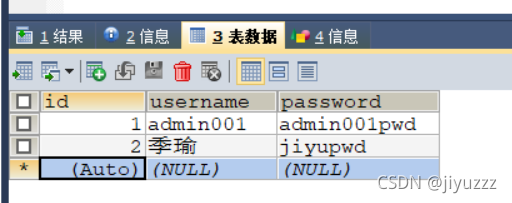
INSERT INTO `springboot`.`account` (`username`, `password`) VALUES ('admin001', 'admin001pwd');
INSERT INTO `springboot`.`account` (`username`, `password`) VALUES ('季瑜', 'jiyupwd');
USE `springboot`;
CREATE TABLE `springboot`.`student`( `sno` INT(10) NOT NULL COMMENT '学生学号', `sname` VARCHAR(10) NOT NULL COMMENT '学生姓名', `sage` INT(3) COMMENT '学生年龄', `saddress` VARCHAR(50) COMMENT '学生住址', PRIMARY KEY (`sno`) ) ENGINE=INNODB CHARSET=utf8 COLLATE=utf8_general_ci;
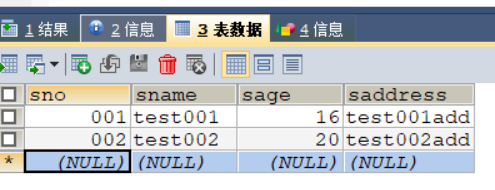
INSERT INTO `springboot`.`student` (`sno`, `sname`, `sage`, `saddress`) VALUES ('001', 'test001', '16', 'test001add');
INSERT INTO `springboot`.`student` (`sno`, `sname`, `sage`, `saddress`) VALUES ('002', 'test002', '20', 'test002add');
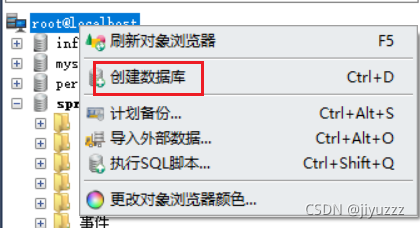
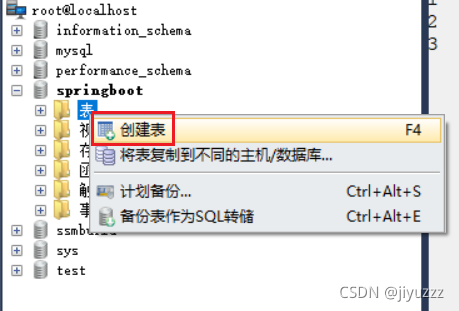
2)使用可视化工具sqlyog
创建数据库
创建表
account表

student表

打开account表

增加数据
打开表student,增加数据
2、idea中新建空项目springboot-system
1)建立空项目
建立空项目方便把多个模块放在一起,因为前期做的都是很简单的springboot项目,所以放在一起方便复习。(真正开发不会这么做)
选择空项目
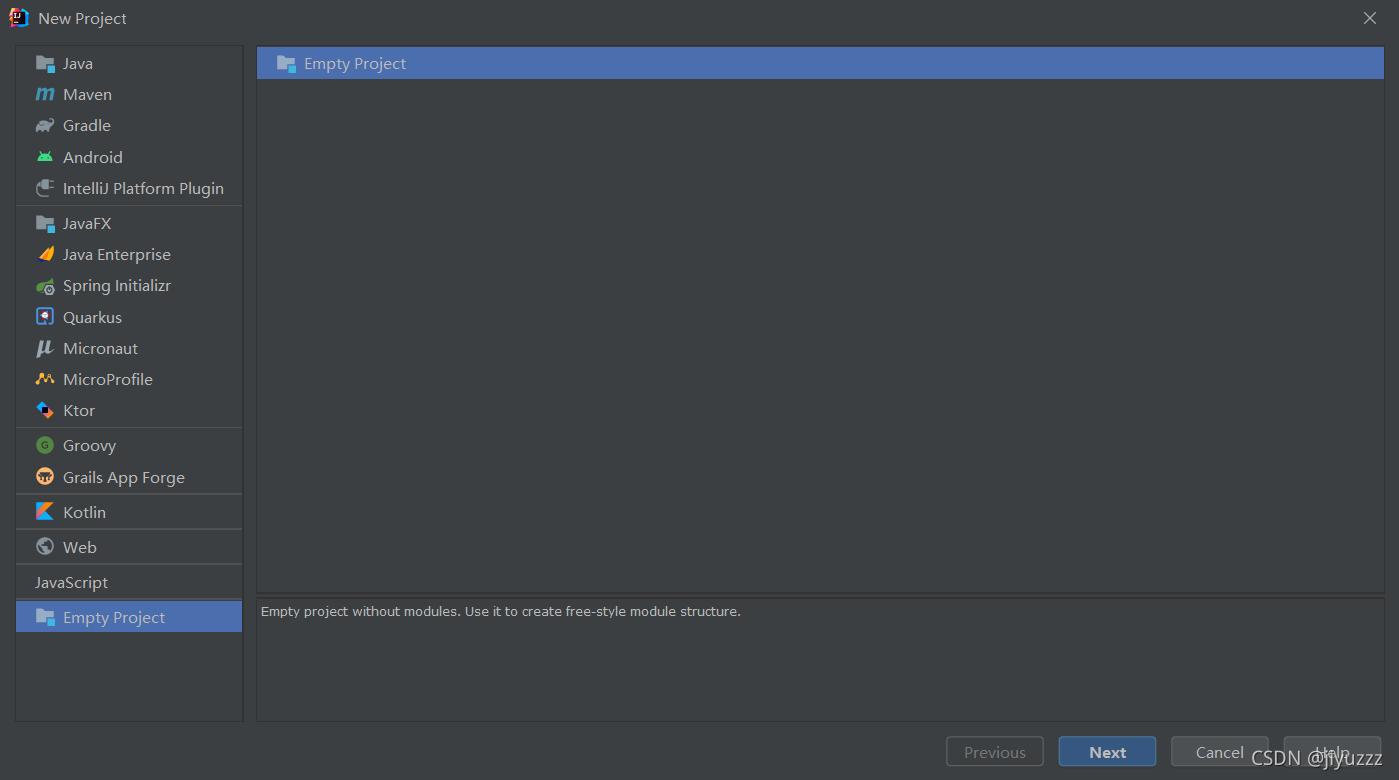
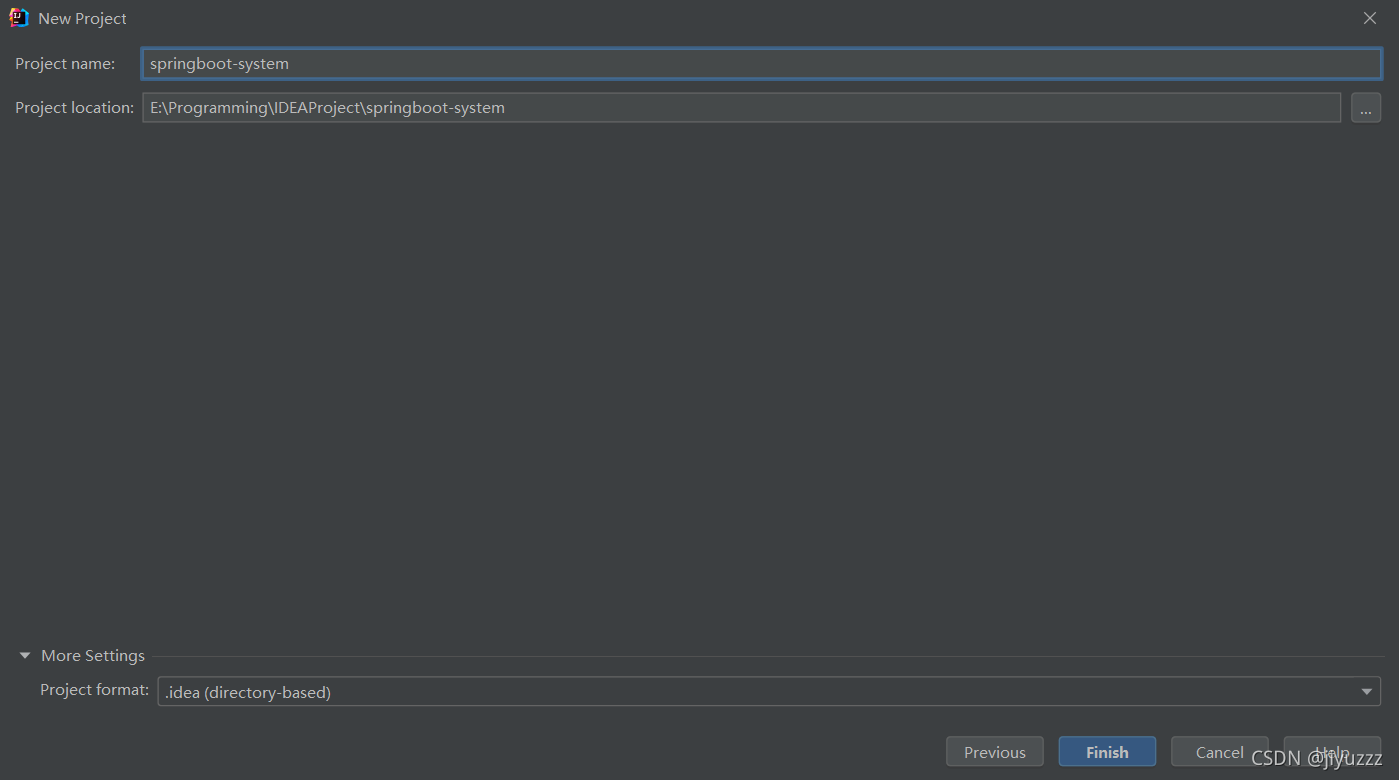
输入项目名springboot-system
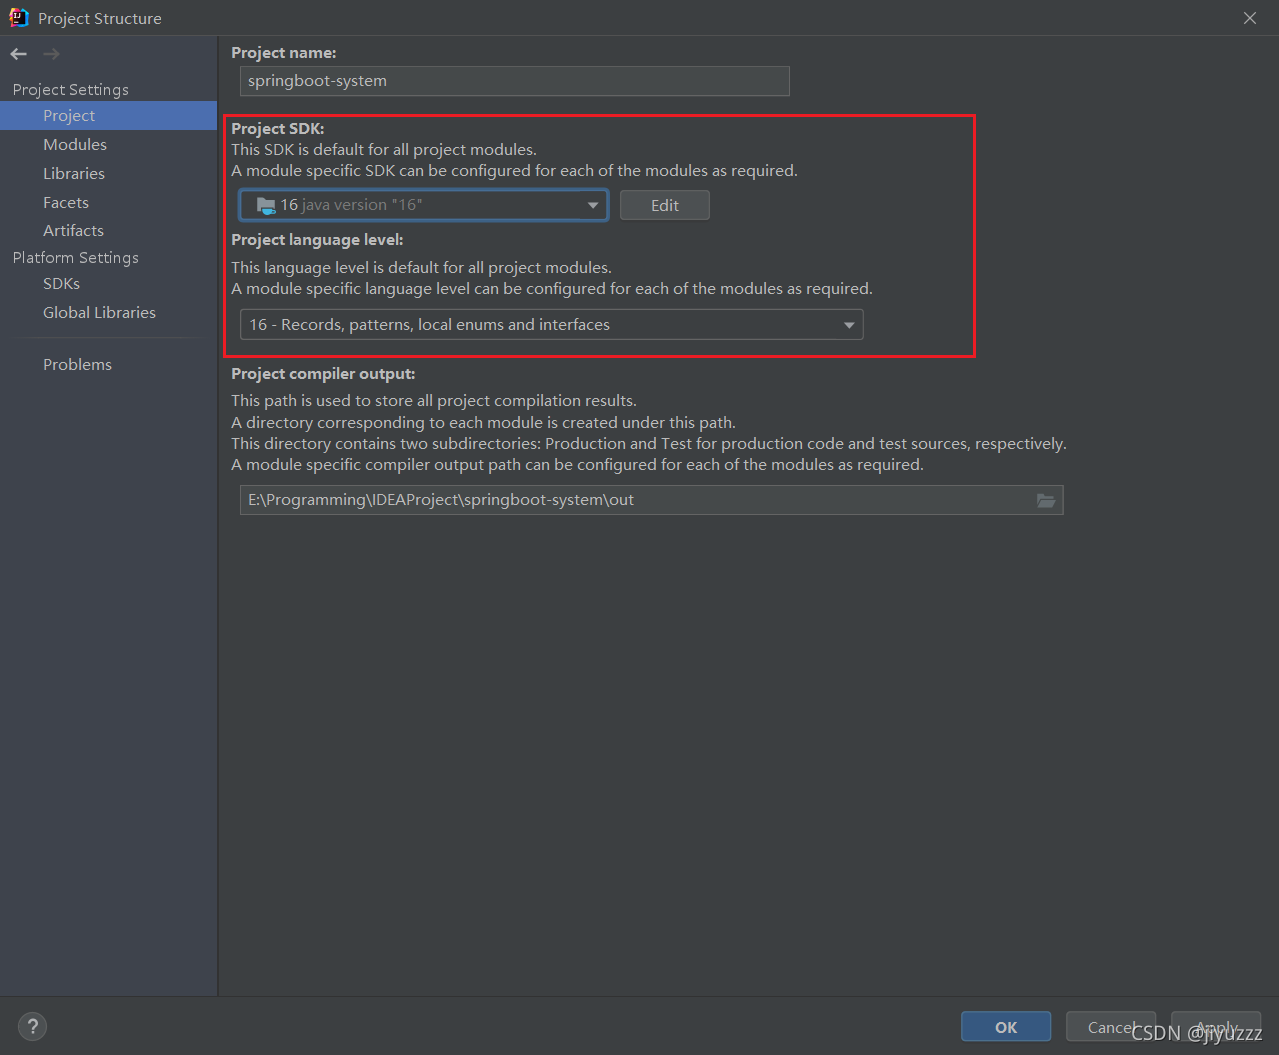
这两个地方选择我们使用的jdk版本,再点apply和ok
项目结构很干净
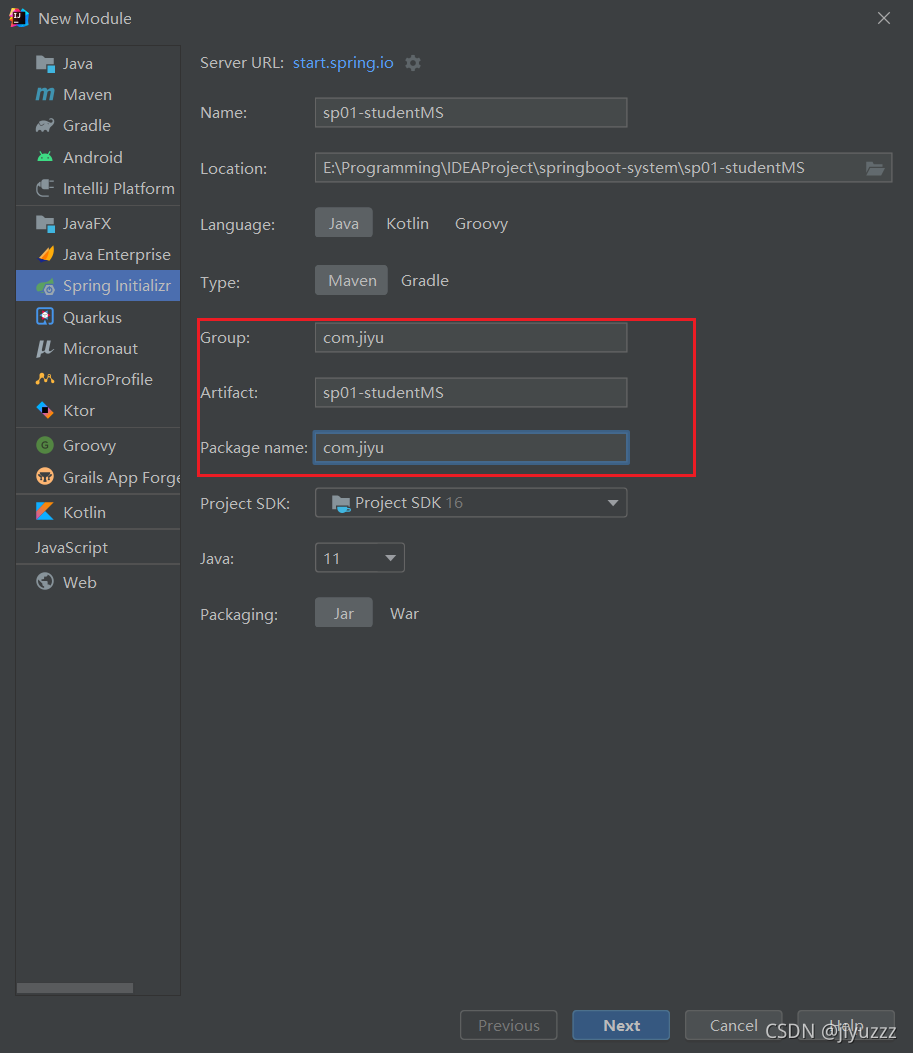
2)建立springboot模块

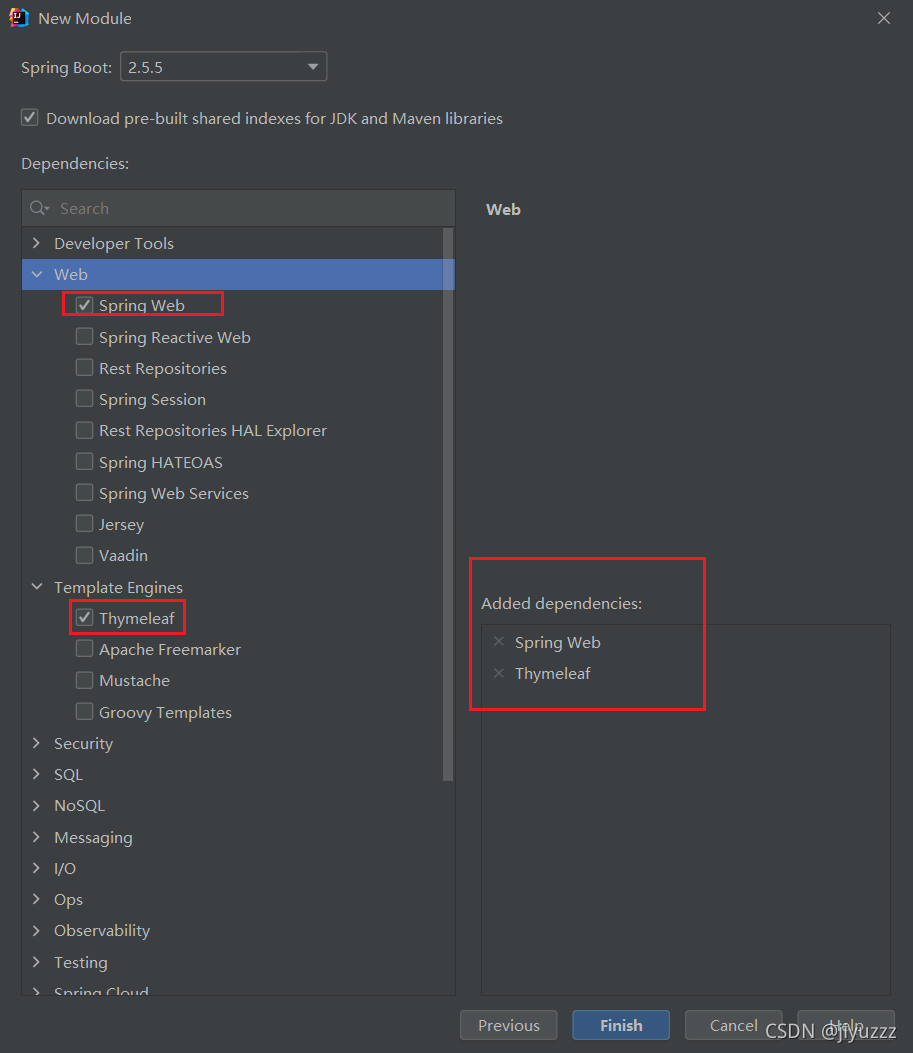
主要修改这几处
先选择我们需要的web和thymeleaf依赖,之后用到的可以在pom中添加
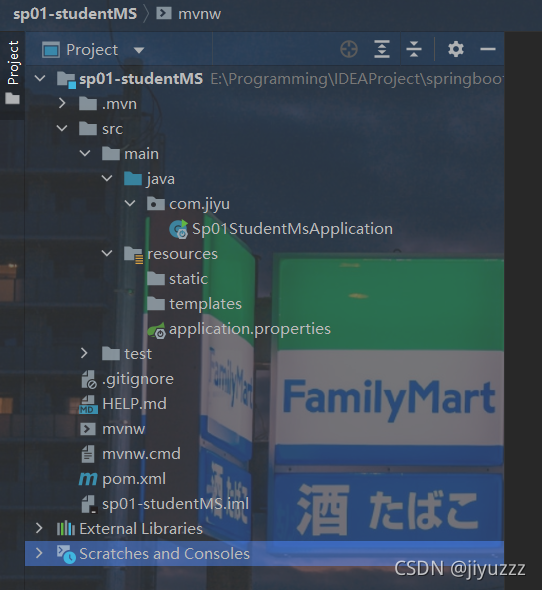
模块的结构
3)测试springboot是否可用
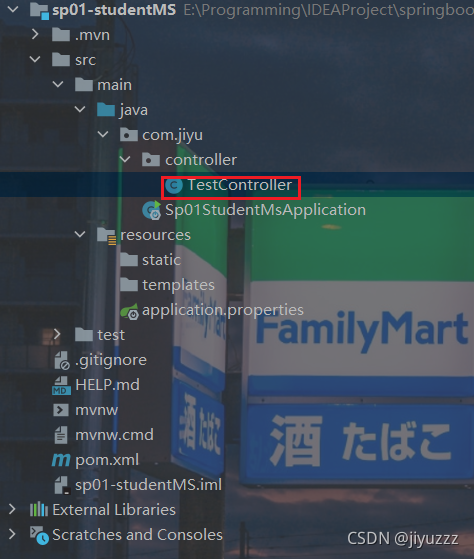
在com.jiyu包下建立包:controller
在controller中建立类TestController
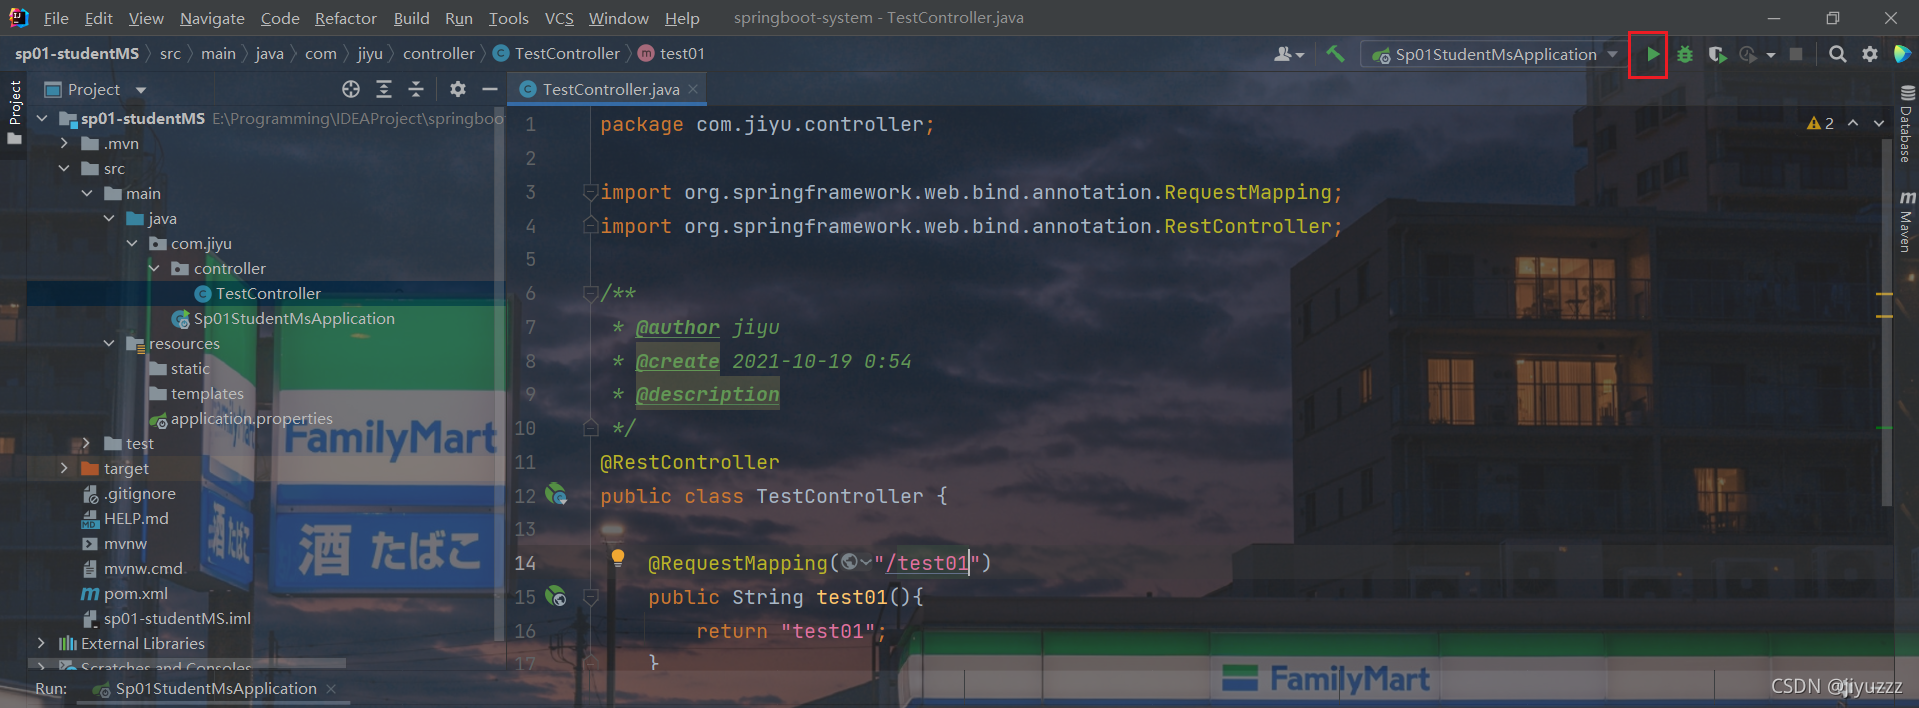
package com.jiyu.controller;

import org.springframework.web.bind.annotation.RequestMapping;
import org.springframework.web.bind.annotation.RestController;

@RestController
public class TestController {

    @RequestMapping("/test01")
    public String test01(){
        return "test01";
    }
}
@RestController注解相当于@ResponseBody + @Controller合在一起的作用
表示方法的返回值直接以指定的格式写入Http response body中,而不是解析为跳转路径。
点击这里运行
进入浏览器输入http://localhost:8080/test01
出现test01说明环境搭建成功

二、连接数据库
1、引入JDBC
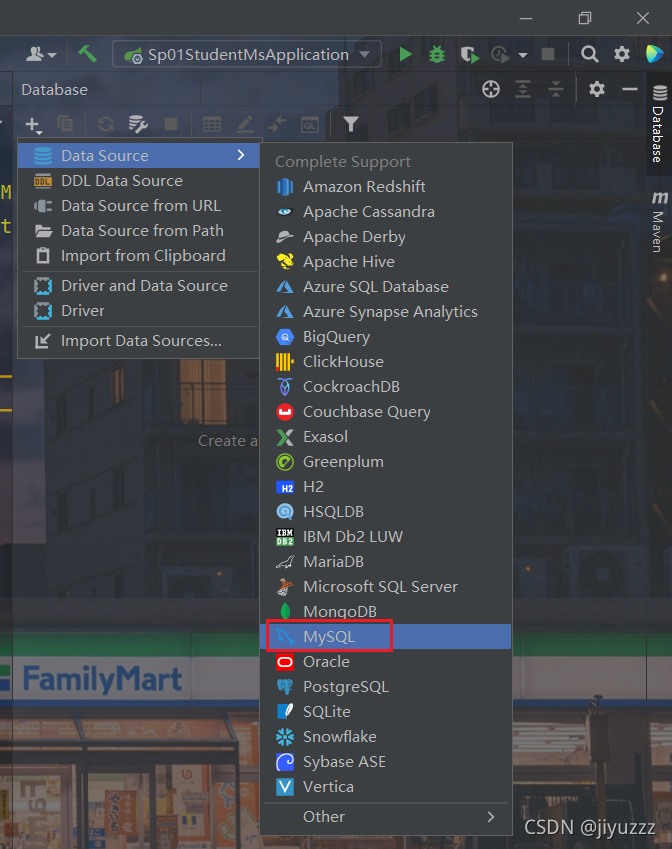
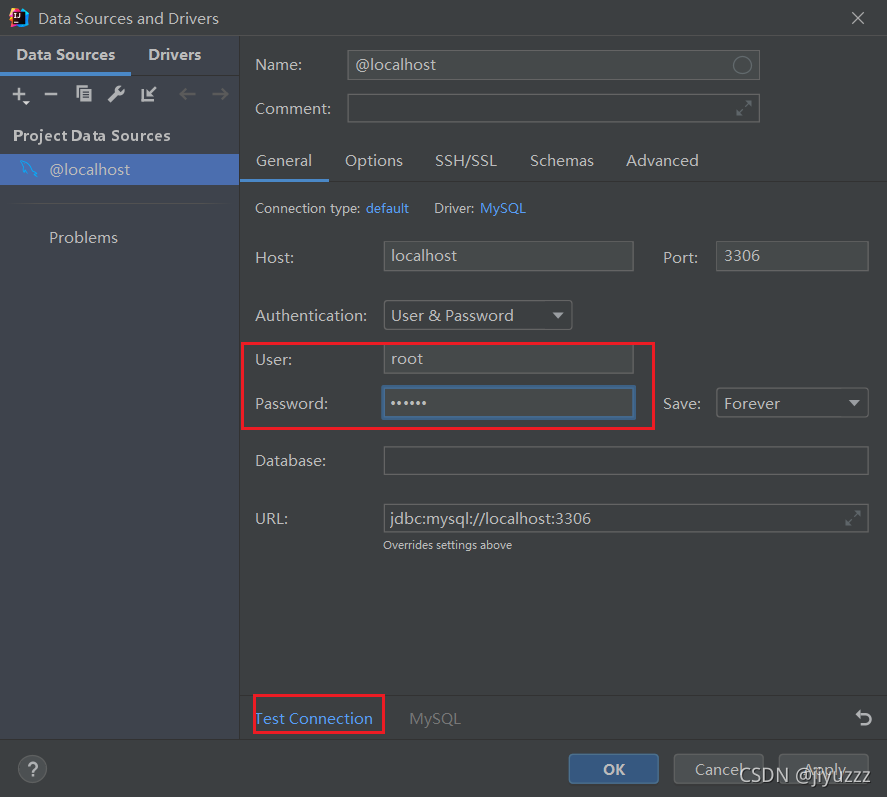
1)idea连接数据库
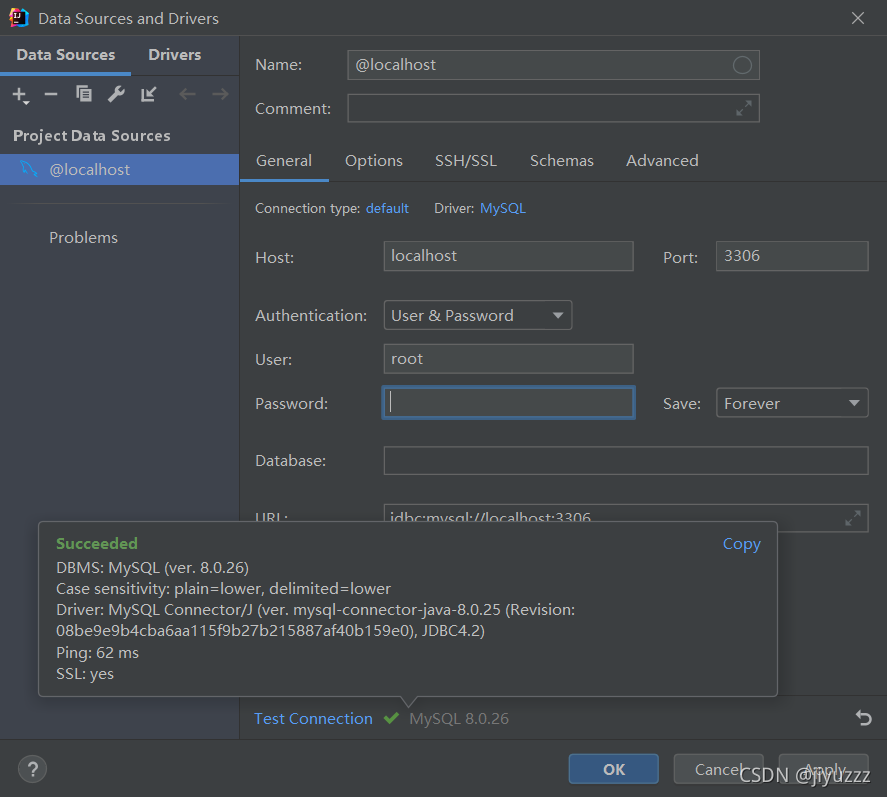
输入账号密码后测试连接
连接成功
选择需要的数据库,先apply再ok
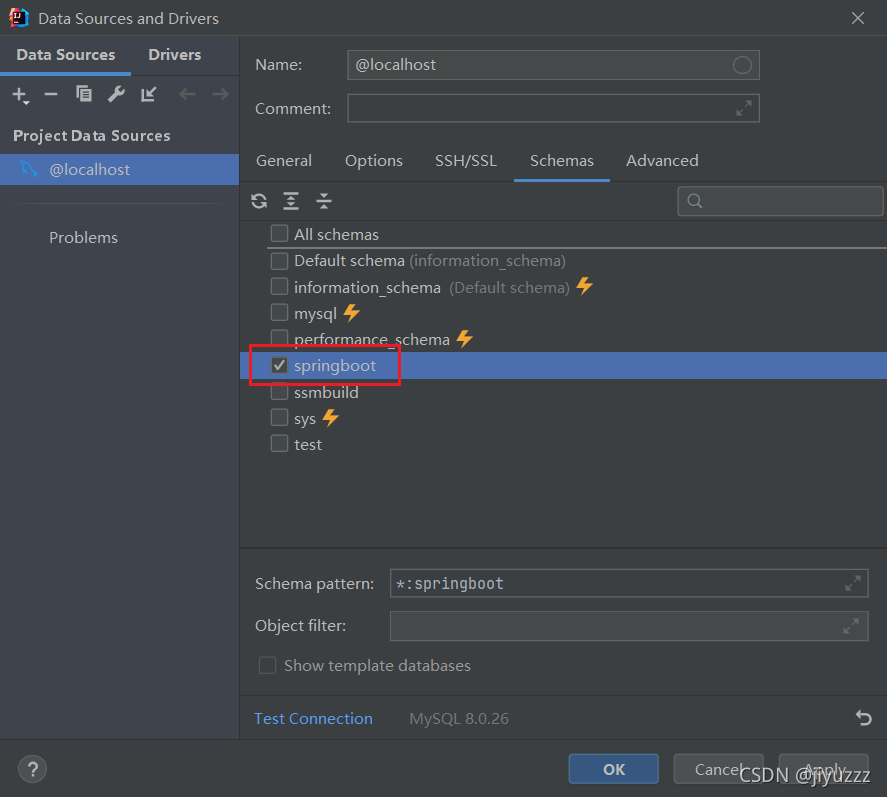
已经可以看到两个表了
2)导入Mybatis及jdbc、mysql连接驱动的依赖
导入以下几个依赖:jdbc、mysql-connector-java、mybatis-spring-boot-starter
 		<dependency>
            <groupId>org.springframework.boot</groupId>
            <artifactId>spring-boot-starter-jdbc</artifactId>
        </dependency>

        <dependency>
            <groupId>mysql</groupId>
            <artifactId>mysql-connector-java</artifactId>
            <scope>runtime</scope>
        </dependency>

        <!-- https://mvnrepository.com/artifact/org.mybatis.spring.boot/mybatis-spring-boot-starter -->
        <dependency>
            <groupId>org.mybatis.spring.boot</groupId>
            <artifactId>mybatis-spring-boot-starter</artifactId>
            <version>2.2.0</version>
        </dependency>
项目中本就导入了web、thymeleaf
所以目前的所有依赖如下
    <dependencies>
        <dependency>
            <groupId>org.springframework.boot</groupId>
            <artifactId>spring-boot-starter-thymeleaf</artifactId>
        </dependency>
        <dependency>
            <groupId>org.springframework.boot</groupId>
            <artifactId>spring-boot-starter-web</artifactId>
        </dependency>

        <dependency>
            <groupId>org.springframework.boot</groupId>
            <artifactId>spring-boot-starter-jdbc</artifactId>
        </dependency>

        <dependency>
            <groupId>mysql</groupId>
            <artifactId>mysql-connector-java</artifactId>
            <scope>runtime</scope>
        </dependency>

        <!-- https://mvnrepository.com/artifact/org.mybatis.spring.boot/mybatis-spring-boot-starter -->
        <dependency>
            <groupId>org.mybatis.spring.boot</groupId>
            <artifactId>mybatis-spring-boot-starter</artifactId>
            <version>2.2.0</version>
        </dependency>

        <dependency>
            <groupId>org.springframework.boot</groupId>
            <artifactId>spring-boot-starter-test</artifactId>
            <scope>test</scope>
        </dependency>
    </dependencies>
3)在application.yaml中配置
将application.properties重命名为application.yaml
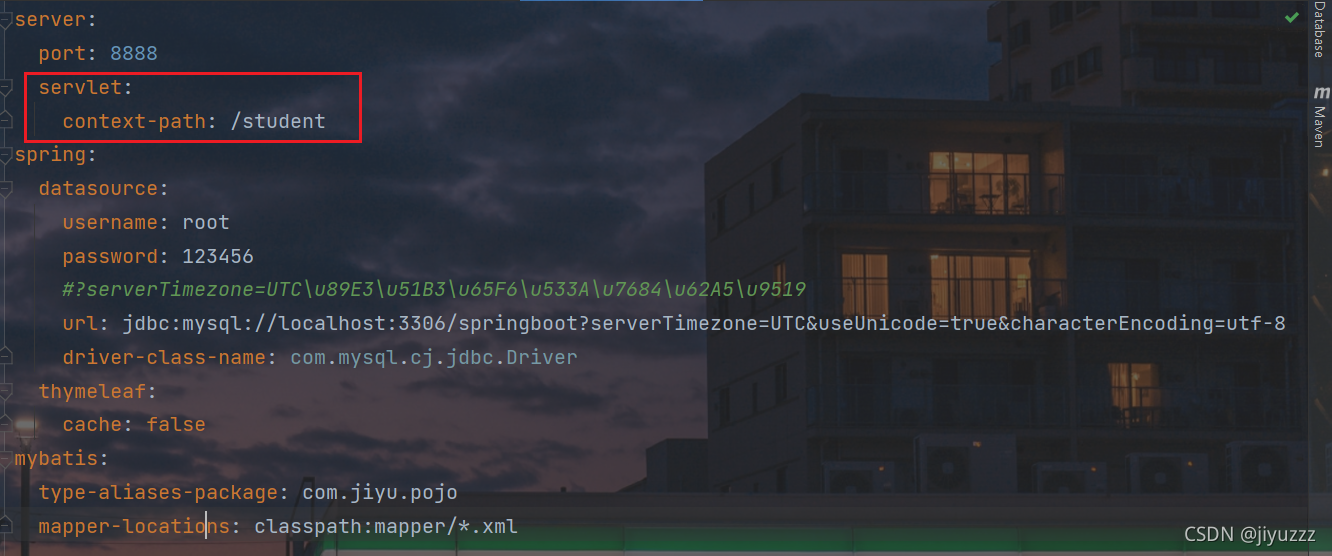
配置application.yaml,注意严格控制空格
在这里我们将端口号改为8888,并且连接了名为springboot的数据库
server:
  port: 8888
spring:
  datasource:
    username: root
    password: 123456
    #?serverTimezone=UTC解决时区的报错
    url: jdbc:mysql://localhost:3306/springboot?serverTimezone=UTC&useUnicode=true&characterEncoding=utf-8
    driver-class-name: com.mysql.cj.jdbc.Driver
4)测试mysql连接
在该测试类中添加测试方法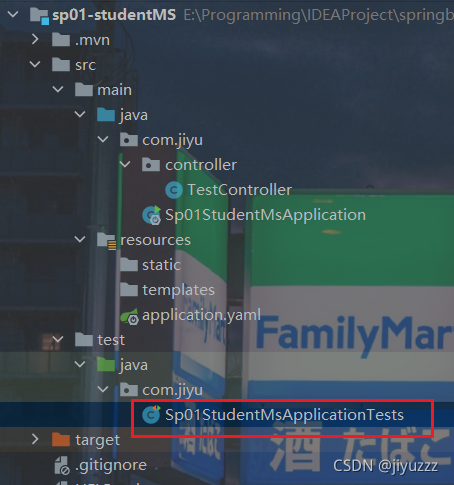
@SpringBootTest
class StudentMsApplicationTests {
    @Autowired
    DataSource dataSource;

    @Test//测试DataSource
    void contextLoads() throws SQLException {
        System.out.println(dataSource.getClass());
        System.out.println(dataSource.getConnection());
    }

}
@Autowired 注释,可以对类成员变量、方法及构造函数进行标注,完成自动装配的工作。 通过 @Autowired的使用可以消除 set ,get方法。
运行结果如下

无论如何,connection一定是com.mysql.cj.jdbc.ConnectionImpl
class和使用的连接池有关,在我们不配置的时候默认使用Springboot的HikariDataSource
2、整合Mybatis
1)配置application.yamml

在配置文件中插入以下这段代码,表示我们使用了Mybatis。
type-aliases-package让mybatis自动扫描到我们自定义的entity,说明这个包下面的类都使用别名,这就不用写长长的一串全限定名了。别名默认为就是类名小写(如:com.jiyu.pojo.Account就是account)
mapper-locations用于配置mapper.xml路径,我这样就是mapper.xml 路径在 resources/mapper/ 下面(所以下面我们要建立新的xml文件)
mybatis:
  type-aliases-package: com.jiyu.pojo
  mapper-locations: classpath:mapper/*.xml
springboot中的classpath就是main/java + main/resources +target/classes的根目录。main/java下的源程序、resource下的静态资源都会打包到target/classes目录。

在resources文件夹下新建一个mapper文件夹,里面创建一个空文件AccountMapper.xml文件,等会再进行配置

2)新建Account实体类
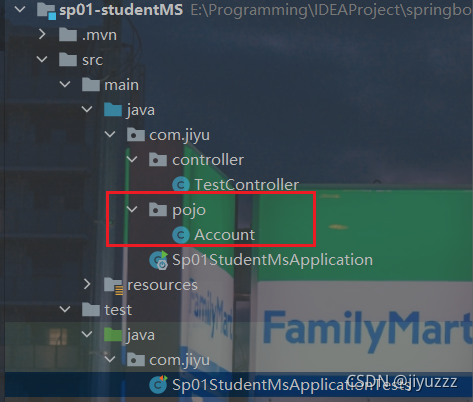
POJO(Plain Ordinary Java Object)简单的Java对象,实际就是普通JavaBeans,是为了避免和EJB混淆所创造的简称。
public class Account {
    private int id;
    private String username;
    private String password;

    public Account() {
    }

    public Account(String username, String password) {
        this.username = username;
        this.password = password;
    }

    public int getId() {
        return id;
    }

    public void setId(int id) {
        this.id = id;
    }

    public String getUsername() {
        return username;
    }

    public void setUsername(String username) {
        this.username = username;
    }

    public String getPassword() {
        return password;
    }

    public void setPassword(String password) {
        this.password = password;
    }

    @Override
    public String toString() {
        return "Account{" +
                "id=" + id +
                ", username='" + username + '\'' +
                ", password='" + password + '\'' +
                '}';
    }
}
注意有参构造器不包含id,因为对应的表的id是自增的,所以只需要我们设置好username和password就可以构造Account对象了
3)mapper接口以及对应的xml映射文件(dao层)
建立mapper文件夹,下面创建AccountMapper接口
里面就是我们写的dao层方法的定义,对应的sql实现写在映射文件AccountMapper.xml中

package com.jiyu.mapper;

import com.jiyu.pojo.Account;
import org.apache.ibatis.annotations.Mapper;
import org.springframework.stereotype.Repository;

import java.util.List;

//@Mapper : 表示本类是MyBatis的一个Mapper;直接在Mapper类上面添加注解@Mapper,这种方式要求每一个mapper类都需要添加此注解
// 也可以在Sp01StudentMsApplication.java添加@MapperScan("com.jiyu.mapper"),可以指定要扫描的Mapper类的包的路径
// 使用@MapperScan注解多个包:@MapperScan({"com.jiyu.demo","com.jiyu.mapper"})

@Mapper
@Repository//Dao层
public interface AccountMapper {
    // 获取所有Account信息
    List<Account> queryAccountList();

    // 通过id获得Account信息
    Account queryAccountById(Integer id);

	//通过username获得Account信息
    Account queryAccountByUsername(String username);

    // 新增一个Account
    int addAccount(Account account);

    // 通过id删除Account
    int deleteAccount(Integer id);

    //更新Account信息
    int updateAccount(Account account);
}
这里写上了CRUD的几个基本方法,有的不一定用得到,不过可以拿来测试或者参考
接下来编写AccountMapper.xml
<?xml version="1.0" encoding="UTF-8" ?>
<!DOCTYPE mapper
        PUBLIC "-//mybatis.org//DTD Mapper 3.0//EN"
        "http://mybatis.org/dtd/mybatis-3-mapper.dtd">

<mapper namespace="com.jiyu.mapper.AccountMapper">

    <select id="queryAccountList" resultType="account">
        select * from account;
    </select>

    <select id="queryAccountById" resultType="account" parameterType="int">
        select * from account where id = #{id};
    </select>

	<select id="queryAccountByUsername" resultType="account" parameterType="string">
        select * from account where username = #{username};
    </select>

    <insert id="addAccount" parameterType="account">
        insert into account (username, password)
        values (#{username},#{password});
    </insert>

    <delete id="deleteAccount" parameterType="int">
        delete
        from account
        where id=#{id};
    </delete>

    <update id="updateAccount" parameterType="account">
        update account
        set username = #{username},password=#{password}
        where id=#{id};
    </update>
</mapper>
学到springboot的人正常都有Mybatis的基础了,我就简单讲解一下
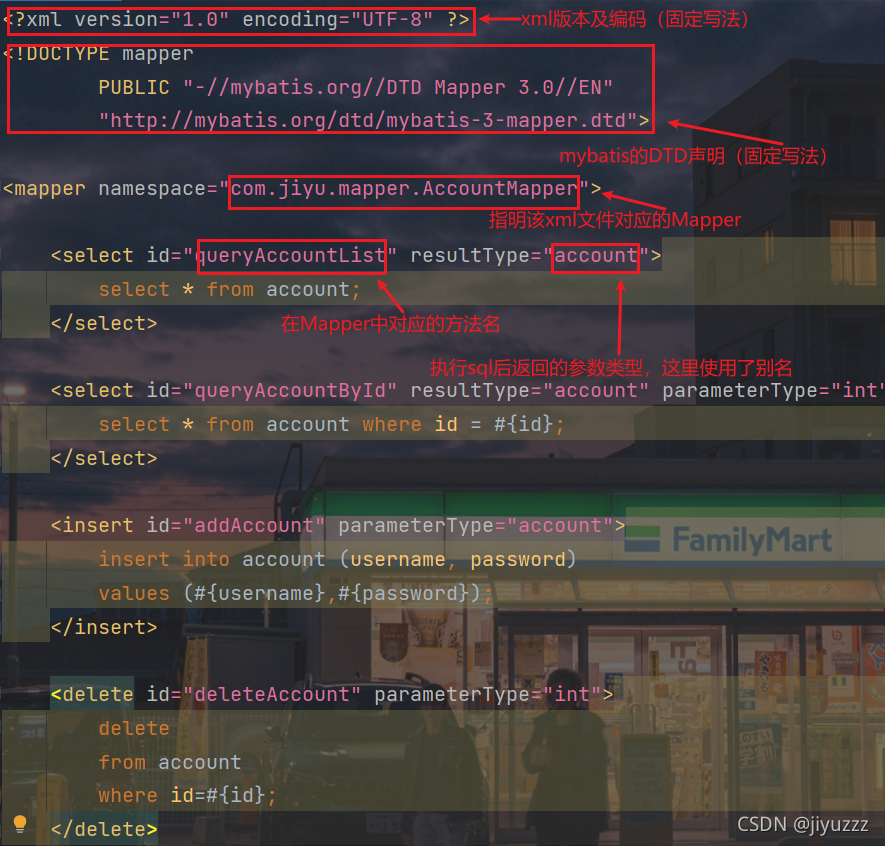
在这个文件中我们基本只需要专注于sql的编写,非常的方便
4)测试mybatis
在测试类Sp01StudentMsApplicationTests中
新建一个方法testMybatis,里面用到了queryAccountList方法,用于查询表中所有数据
因为要使用AccountMapper,所以要使用@Autowired自动装配
框住的代码都是要写的
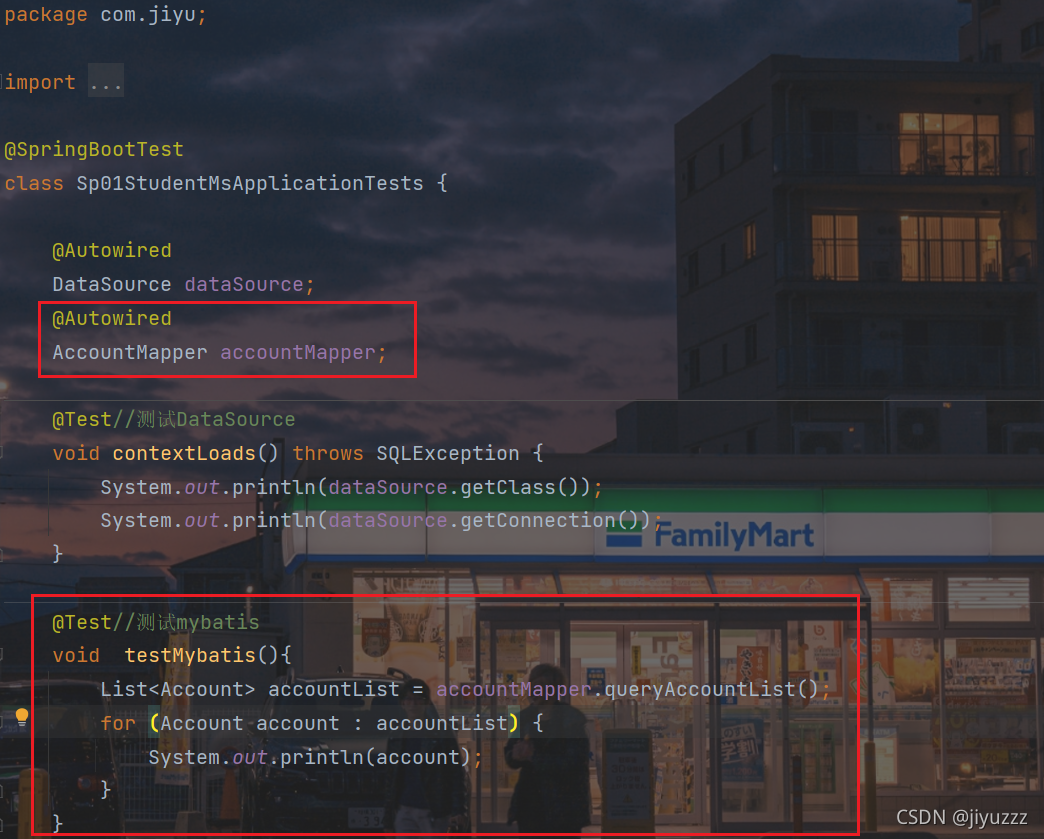
	@Test//测试mybatis
    void  testMybatis(){
        List<Account> accountList = accountMapper.queryAccountList();
        for (Account account : accountList) {
            System.out.println(account);
        }
    }
下面是运行结果,至此可以确定mybatis的配置成功了,按照正常的开发,接下来就要配置service层了,不过登录注册功能较为简单,所以我们可以直接在controller层调用dao层的方法

三、功能开发
springboot中的controller层就是一个注解了@Controller或者@RestController的类,里面的每个方法都是一个controller,代表着一个功能,比如返回json或者跳转页面
1、登录(index.html)
1)使用thymeleaf
前端开发使用到了thymeleaf,先在application.yaml中关闭他的缓存,注意thymeleaf是和上面的datasource对齐的

然后改一下项目根路径,这样就要通过localhost:8888/student访问项目的根路径了
然后在resources/static目录下引入以下静态资源

然后在resources/templates引入index.html
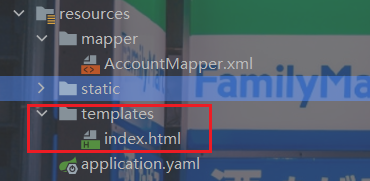
在templates目录下的所有页面,只能通过controller的跳转来访问。
比如访问 http://localhost:8888/student/index.html 就不能成功,你们可以自行尝试
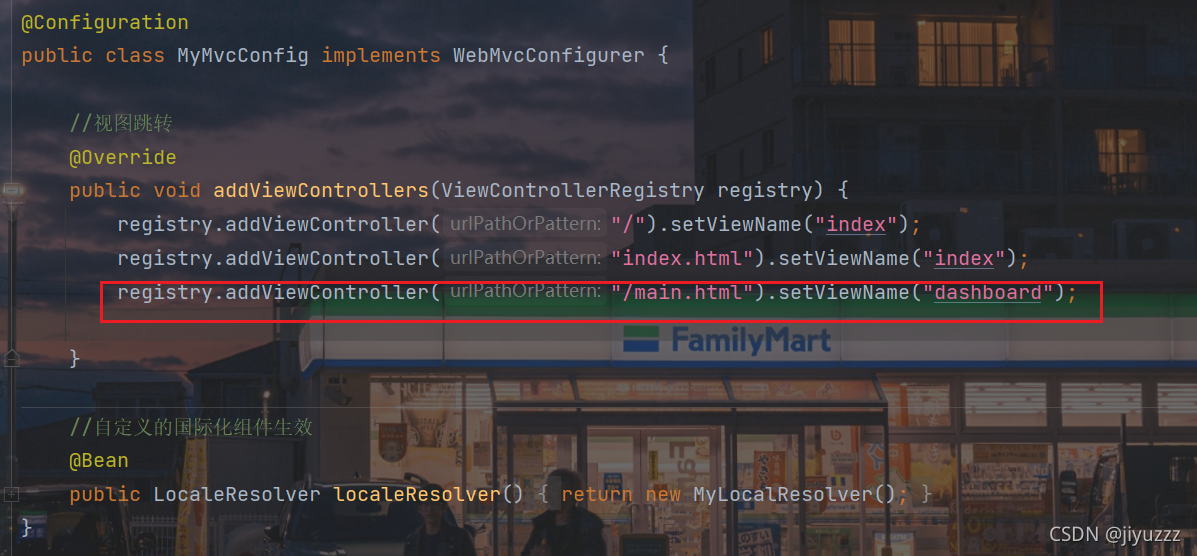
建立config包,再建立配置类MyMvcConfig,进行springMVC功能的实现。
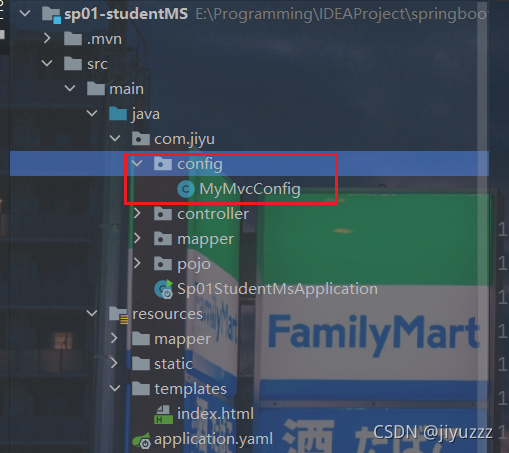
先实现视图跳转
package com.jiyu.config;

import org.springframework.context.annotation.Configuration;
import org.springframework.web.servlet.config.annotation.ViewControllerRegistry;
import org.springframework.web.servlet.config.annotation.WebMvcConfigurer;

@Configuration
public class MyMvcConfig implements WebMvcConfigurer {

    //视图跳转
    @Override
    public void addViewControllers(ViewControllerRegistry registry) {
        registry.addViewController("/").setViewName("index");
        registry.addViewController("index.html").setViewName("index");

    }
}
实现了WebMvcConfigurer的类就可以进行springMVC的配置了,通过重写addViewControllers方法,我们可以添加自定义的页面跳转方式。上面的例子就是访问http://localhost:8888/student或者http://localhost:8888/student/index.html会跳转到index.html
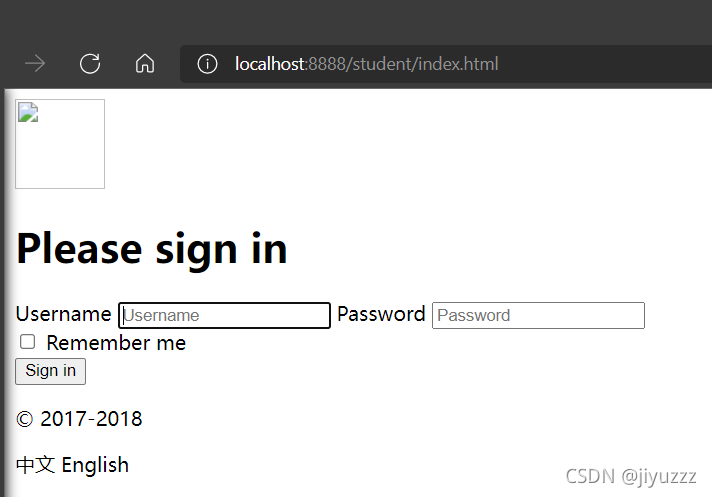
现在我们访问到了index.html,但是页面的图片、css、js都没加载出来,这是因为我们html页面中没有使用Thymeleaf,我们需要将其中的语法改为Thymeleaf,才能在springboot中访问到页面的静态资源。
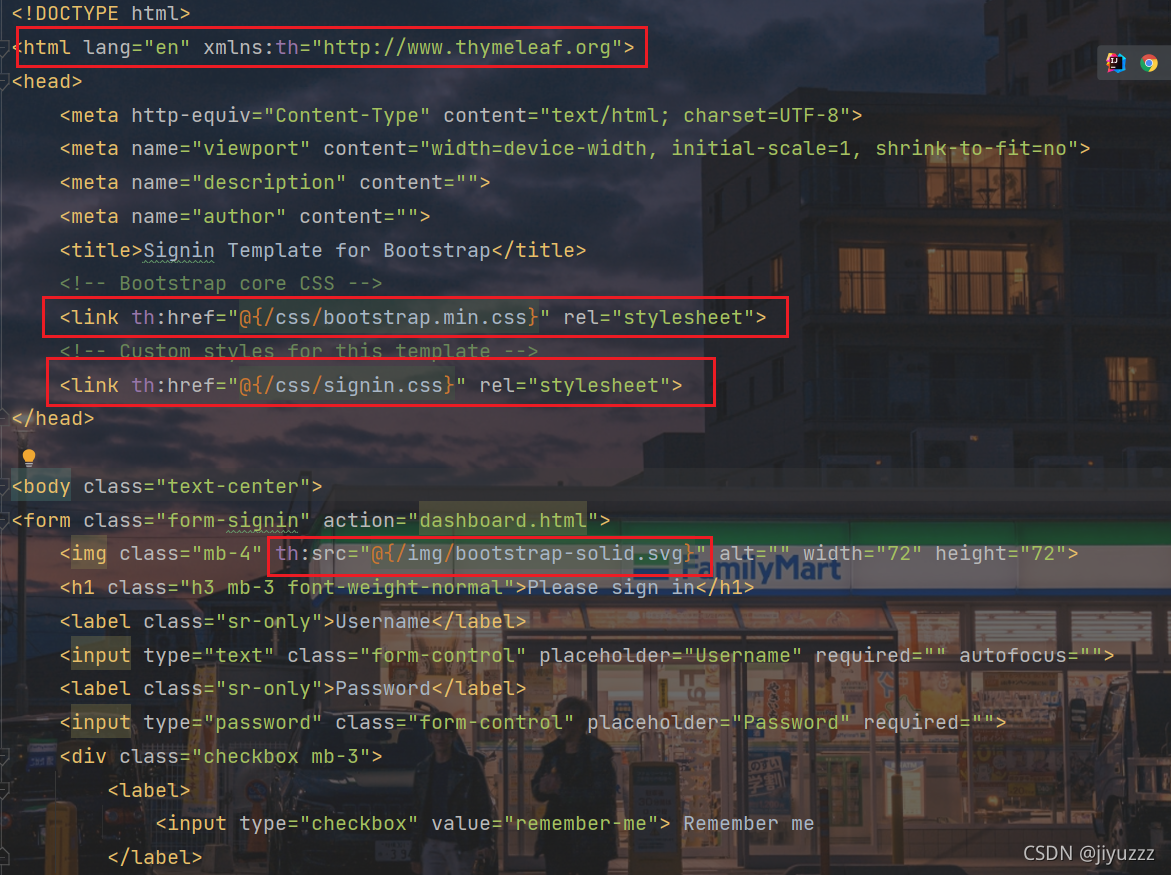
所有html都需要引入Thymeleaf命名空间
xmlns:th="http://www.thymeleaf.org"
然后修改所有页面静态资源的引入,使用@{...} 表达式
修改下面四处引用了静态资源的地方
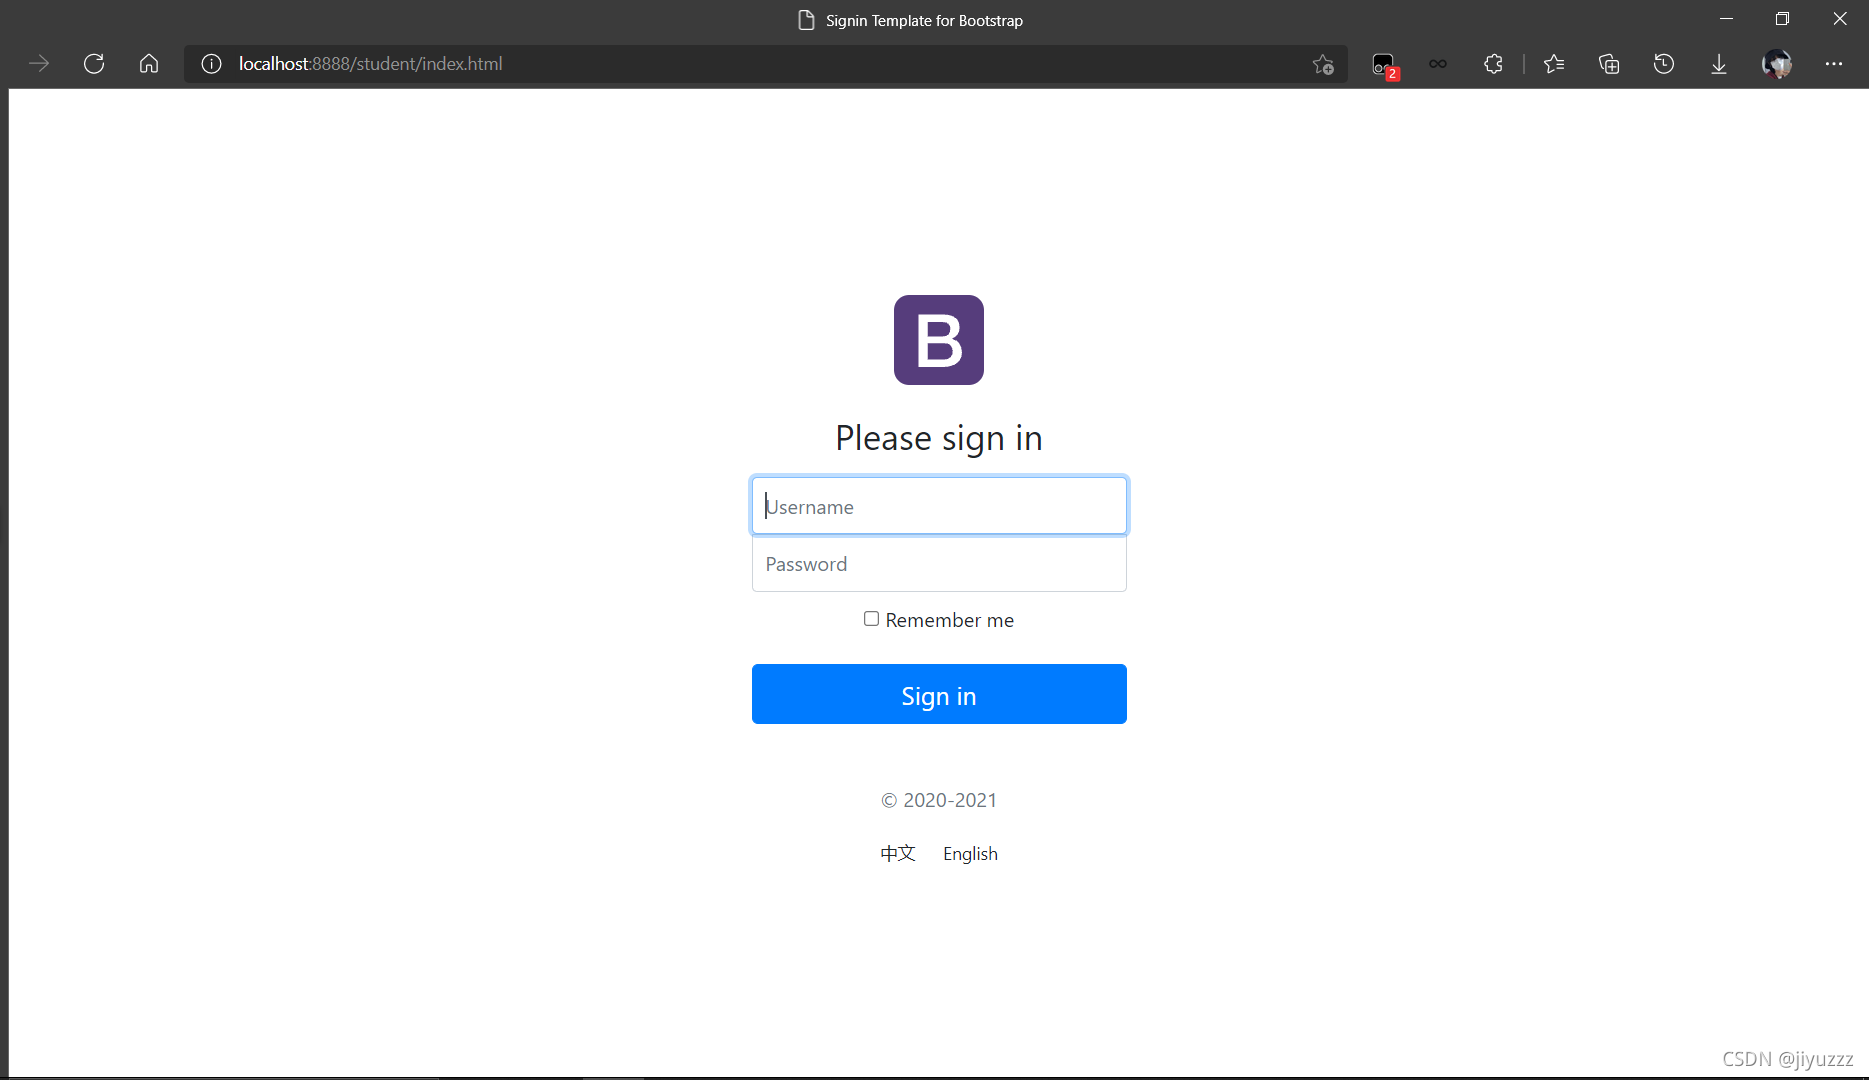
重新运行并访问index.html,样式加载成功
2)页面中英文切换
在这之前需要更改idea中properties文件的编码,这几处都修改成utf-8

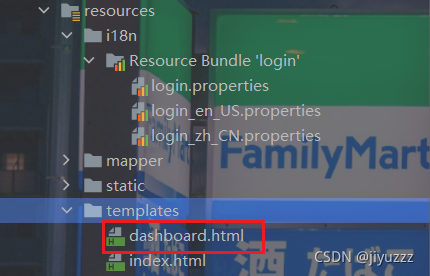
然后在resources下建立i18n文件夹,在文件夹下建立三个文件
i18n就是单词:国际化的简写
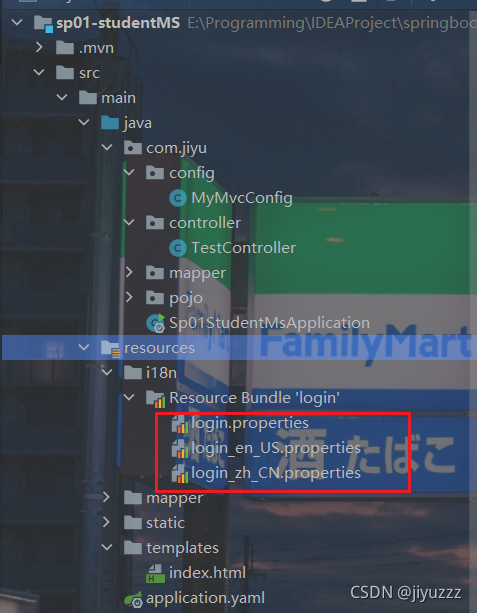
在文件夹下建立了这三个文件后,idea会自动识别,并在上方生成“Resource Bundle login”,表示识别到了我们的国际化配置
命名格式:文件名_语言_国家.properties
login.properties
login.tip=请登录
login.password=密码
login.remember=记住我
login.btn=登录
login.username=用户名
login_en_US.properties
login.tip=Please sign in
login.password=password
login.remember=remember me
login.btn=login
login.username=username
login_zh_CN.properties
login.tip=请登录
login.password=密码
login.remember=记住我
login.btn=登录
login.username=用户名
自定义了国际化资源文件,需要在application.yaml中指定配置文件名称,主要修改basename为文件路径,这里是文件夹i18n下的login
encoding:资源文件内容的编码格式
cache-second:重新加载资源文件的时间频度(以秒为单位。当设置为-1时,捆绑包将被永久缓存。)

再修改这几处,用#{...} 表达式,可以获取国际化的值
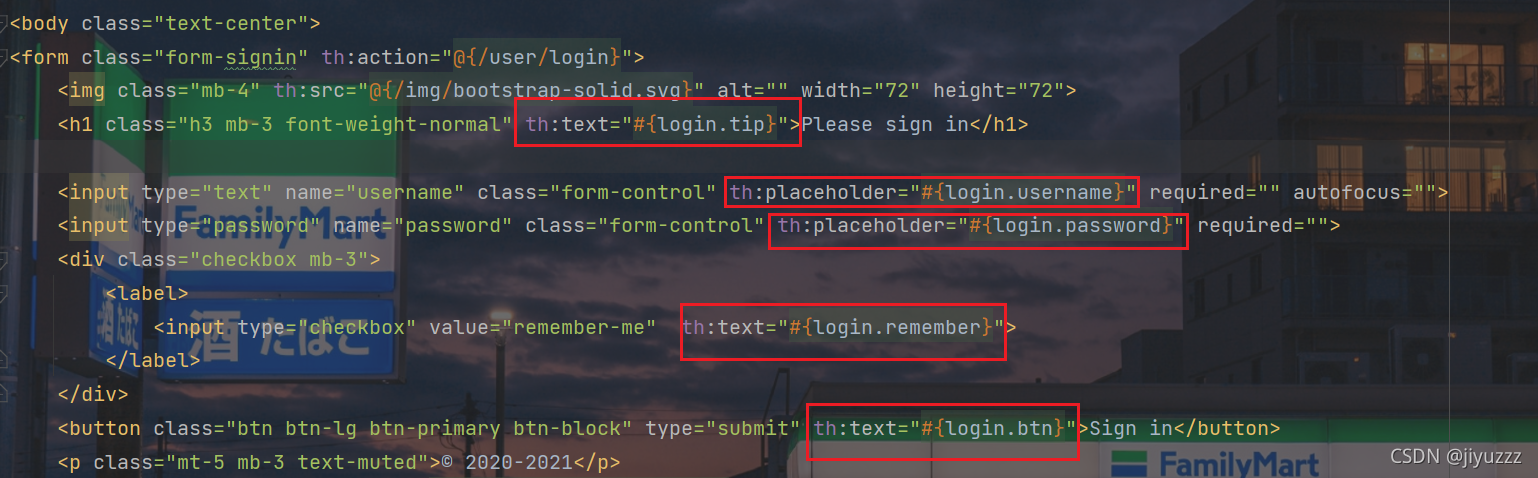
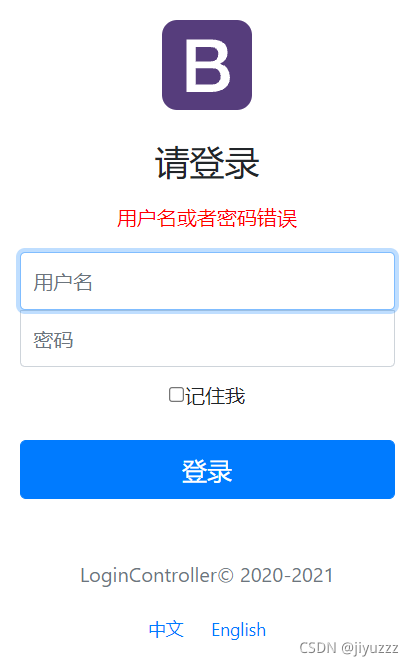
重启项目,访问index.html,可以发现已经自动识别为中文

接下来要实现点击下方的中文或者English可以切换中英文
在这两个标签上加上链接和参数

l是传到后端的参数,代表用户在前端选择的语言
	<a class="btn btn-sm" th:href="@{/index.html(l='zh_CN')}">中文</a>
	<a class="btn btn-sm" th:href="@{/index.html(l='en_US')}">English</a>
在config包下新建MyLocalResolver类, 实现LocaleResolver接口,处理前端传来的两个带参数的请求,这就是我们自定义的地区解析器

package com.jiyu.config;

import org.springframework.util.StringUtils;
import org.springframework.web.servlet.LocaleResolver;

import javax.servlet.http.HttpServletRequest;
import javax.servlet.http.HttpServletResponse;
import java.util.Locale;

public class MyLocalResolver implements LocaleResolver {
    //解析请求
    @Override
    public Locale resolveLocale(HttpServletRequest request) {
        //获取请求中的语音参数
        String language=request.getParameter("l");
        Locale locale=Locale.getDefault();//如果没有就使用默认的
        //如果请求的链接携带了国际化的参数
        if(!StringUtils.isEmpty(language)){
            //zh_CN
            String[] split=language.split("_");
            //国家,地区
            locale = new Locale(split[0], split[1]);
        }
        return locale;
    }

    @Override
    public void setLocale(HttpServletRequest request, HttpServletResponse response, Locale locale) {

    }
}
为了让自定义的国际化组件生效,我们需要在MvcConofig配置类下添加bean
    //自定义的国际化组件生效
    @Bean
    public LocaleResolver localeResolver(){
        return new MyLocalResolver();
    }
重启项目,访问index.html,点击中英文可以成功切换
并且点击中英文后地址栏都会变化
点击中文,跳转到http://localhost:8888/student/index.html?l=zh_CN,显示中文

点击English,跳转到http://localhost:8888/student/index.html?l=en_US,显示英文
3)连接数据库
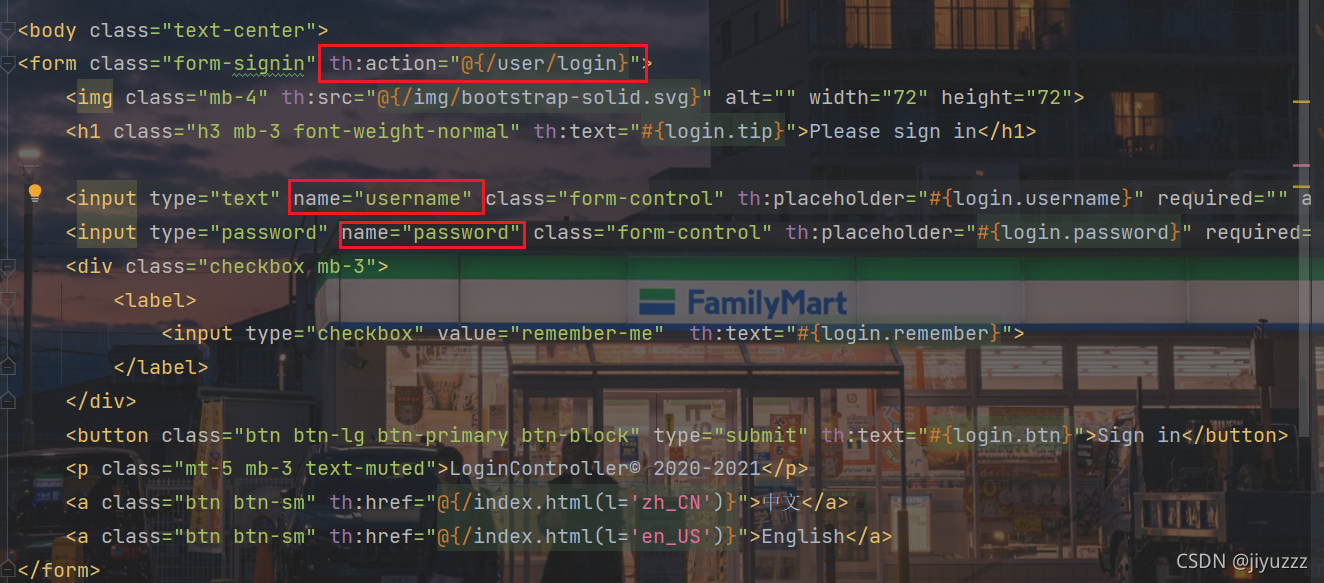
现在我们要编写controller层,实现点击登录按钮会进入dashboard.html页面
先引入dashboard.html
修改form的action,并给两个输入框添加name属性
删除controller包下的测试用的TestController,新建LoginController
这里我们先不连接数据库,先进行简单的测试
package com.jiyu.controller;
import org.springframework.stereotype.Controller;
import org.springframework.ui.Model;
import org.springframework.web.bind.annotation.RequestMapping;
import org.springframework.web.bind.annotation.RequestParam;
import javax.servlet.http.HttpSession;
@Controller
public class LoginController {
@RequestMapping("/user/login")
public String login(@RequestParam("username") String username, @RequestParam("password") String password, Model model, HttpSession session) {
//如果用户名和密码正确
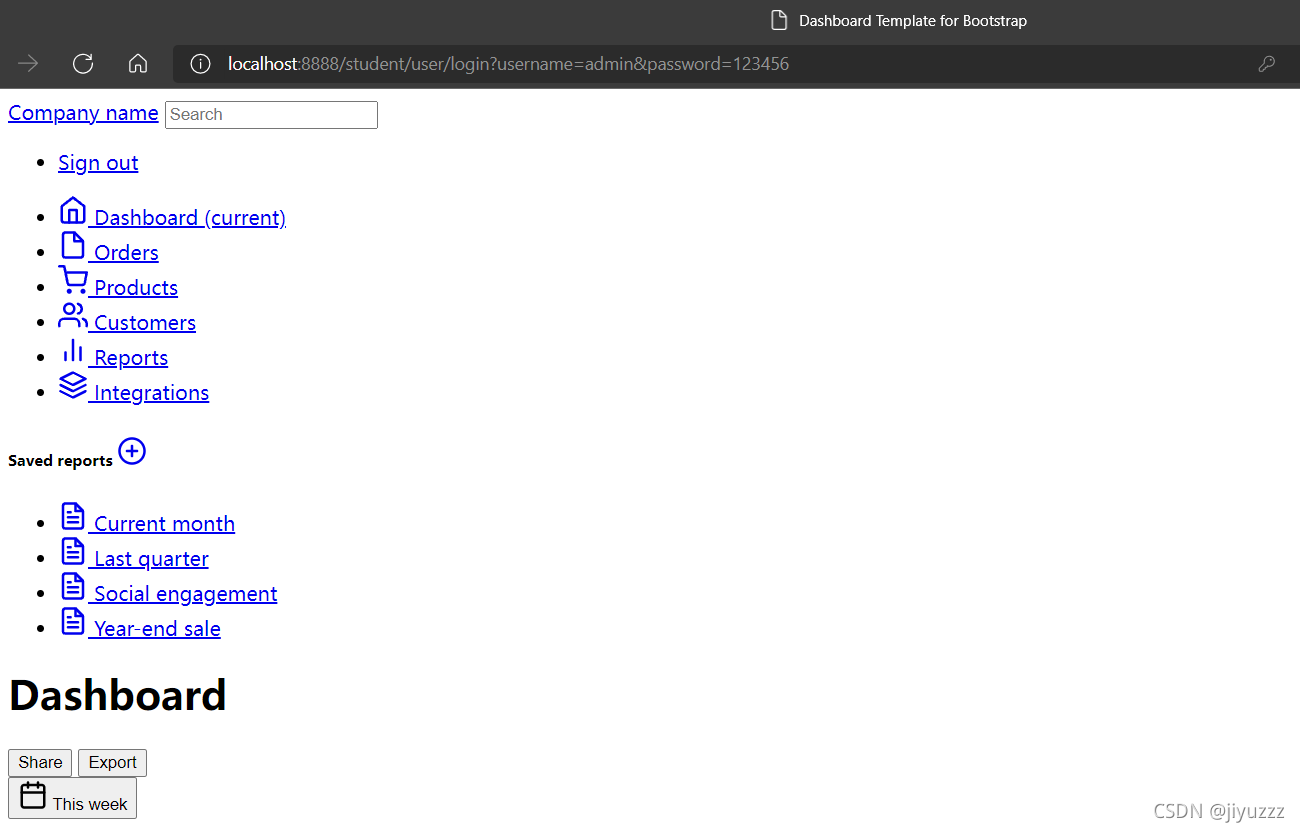
if ("admin".equals(username) && "123456".equals(password)){
session.setAttribute("LoginUser", username);//用户名传到session,用于安全控制
return "dashboard";//跳转到dashboard页面
}
//如果用户名或者密码不正确
else {
model.addAttribute("msg", "用户名或者密码错误");//显示错误信息
return "index";//跳转到首页
}
}
}
在index.html首页中加一个标签用来显示controller返回的错误信息
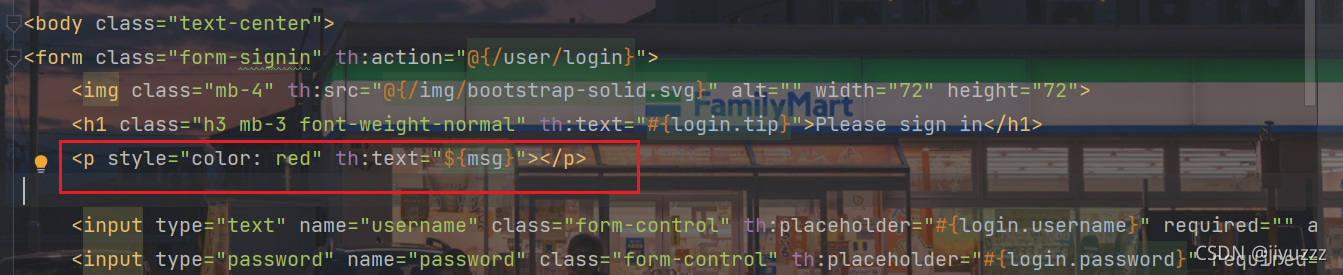
<p style="color: red" th:text="${msg}"></p>
输入用户名、密码

进入dashboard页面,没有样式是因为我们没有使用thymeleaf,再去修改dashboard.html
修改引用资源的几处(类比index.html),重新登录进入,显示了样式

当我们输入错误的账号密码时会自动清空表单并且提示登录错误信息
现在我们进行连接数据库的登录功能的实现
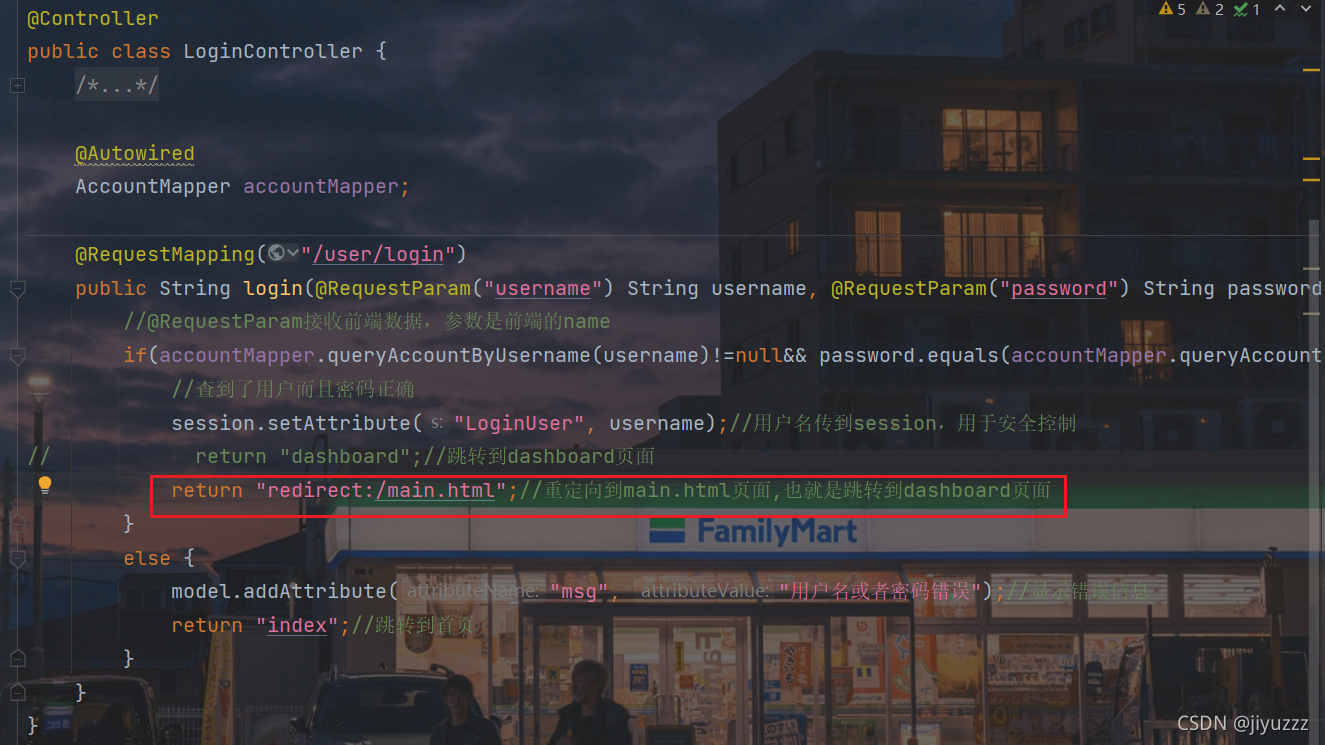
将刚才的controller中的login方法注释掉,重新写一个方法
此时的LoginController 如下
@Controller
public class LoginController {
@Autowired
AccountMapper accountMapper;
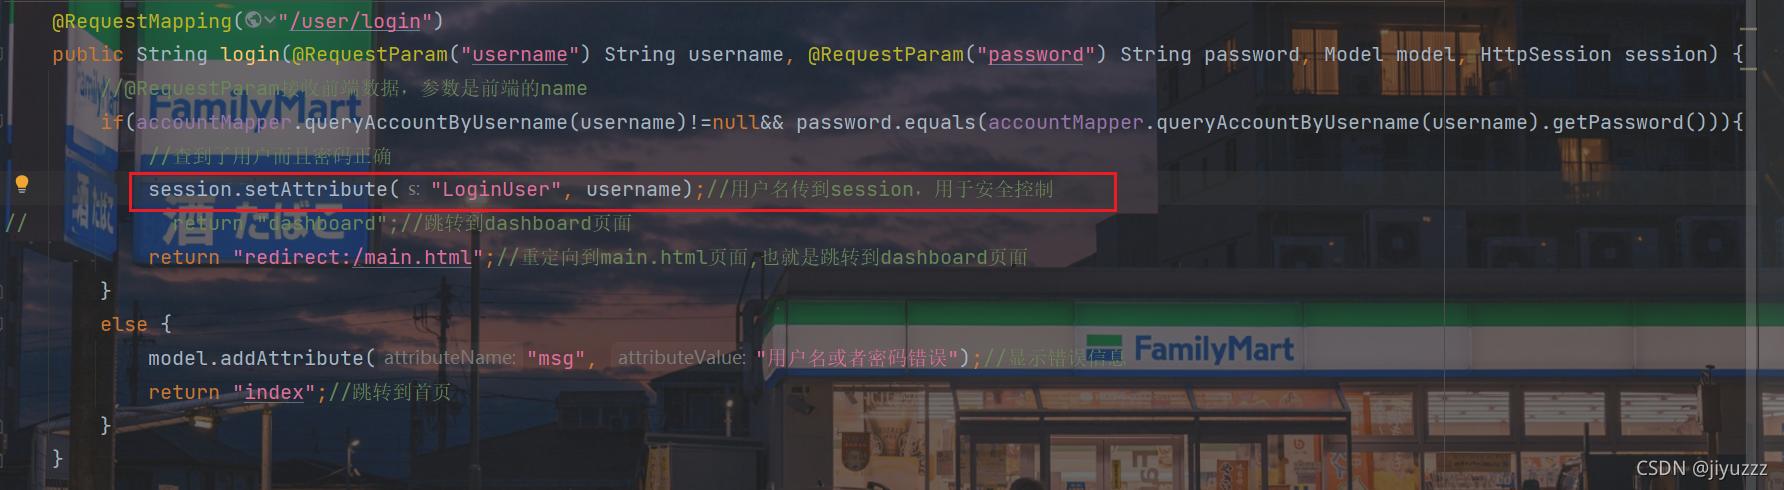
@RequestMapping("/user/login")
public String login(@RequestParam("username") String username, @RequestParam("password") String password, Model model, HttpSession session) {
//@RequestParam接收前端数据,参数是前端的name
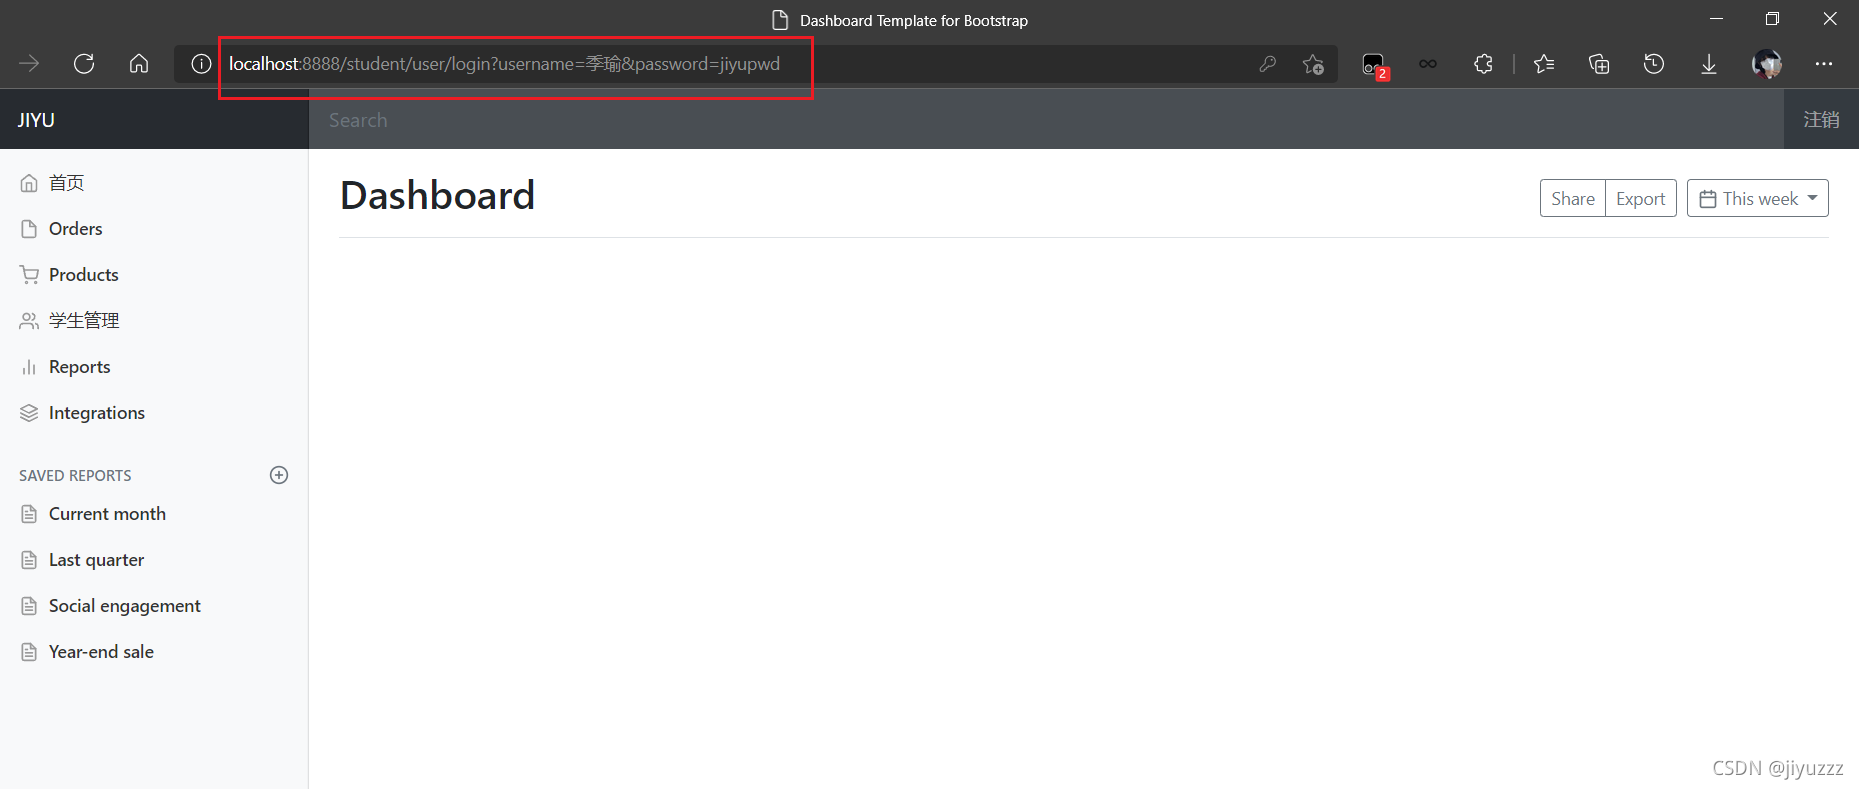
if(accountMapper.queryAccountByUsername(username)!=null&& password.equals(accountMapper.queryAccountByUsername(username).getPassword())){
//查到了用户而且密码正确
session.setAttribute("LoginUser", username);//用户名传到session,用于安全控制
return "dashboard";//跳转到dashboard页面
}
else {
model.addAttribute("msg", "用户名或者密码错误");//显示错误信息
return "index";//跳转到首页
}
}
}
测试后可以跳转到dashboard页面,而且中文也是可以的,但是出现了新的问题:浏览器的url暴露了用户的用户名和密码
4)解决URL泄露用户信息的问题
我们在自定义的配置类MyMvcConfig中加一句代码
registry.addViewController("/main.html").setViewName("dashboard");
然后修改LoginController返回的界面,当登录成功时重定向到main.html页面,也就跳转到了dashboard页面
return "redirect:/main.html";
问题解决
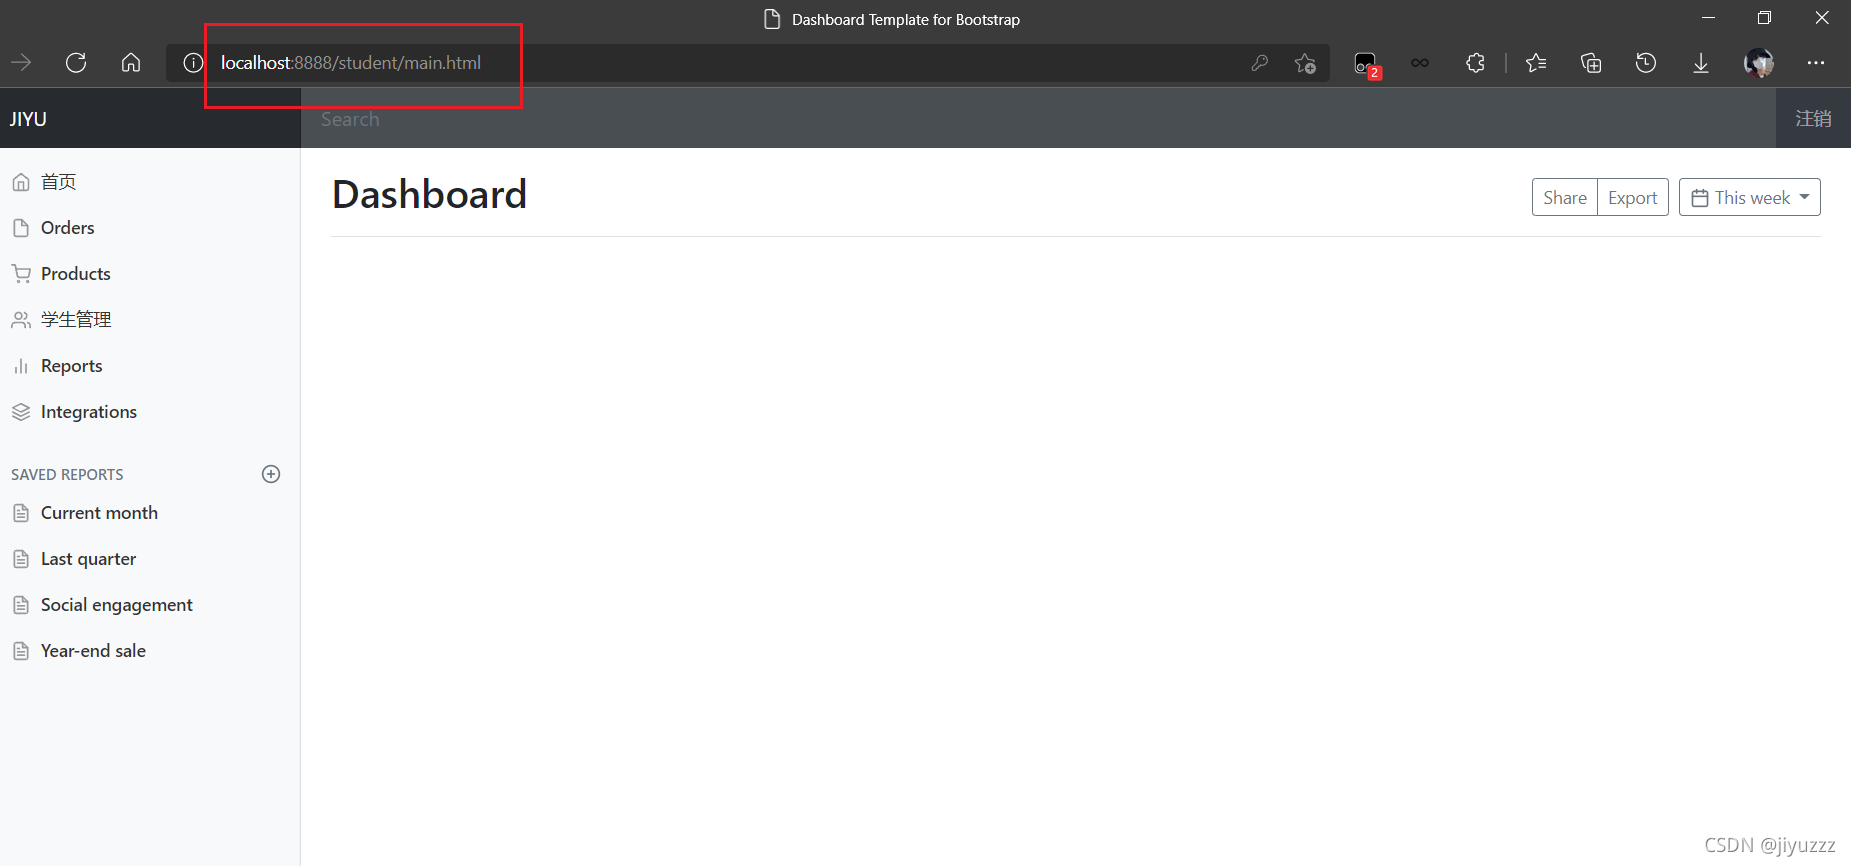
但是可以发现,无论登不登陆,我们访问localhost/main.html都会跳转到dashboard页面,所以我们要使用springboot自带的拦截器
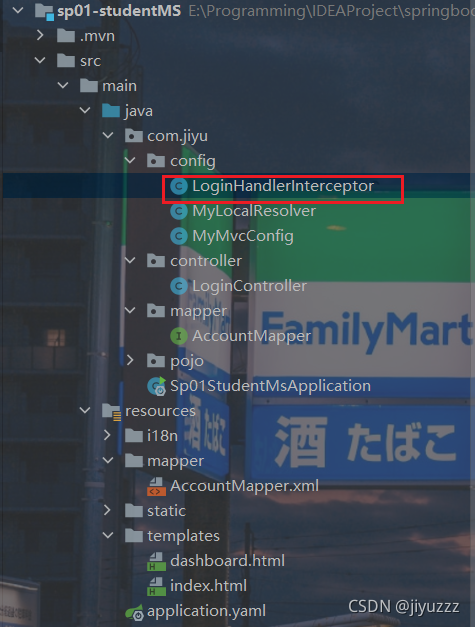
5)解决直接通过URL可以进入dashboard页面的问题
在config目录下,新建一个登录拦截器LoginHandlerInterceptor
package com.jiyu.config;
import org.springframework.web.servlet.HandlerInterceptor;
import javax.servlet.http.HttpServletRequest;
import javax.servlet.http.HttpServletResponse;
public class LoginHandlerInterceptor implements HandlerInterceptor {
@Override
public boolean preHandle(HttpServletRequest request, HttpServletResponse response, Object handler) throws Exception {
//用户登录成功后,会存入session
Object session = request.getSession().getAttribute("LoginUser");
if (session == null) {
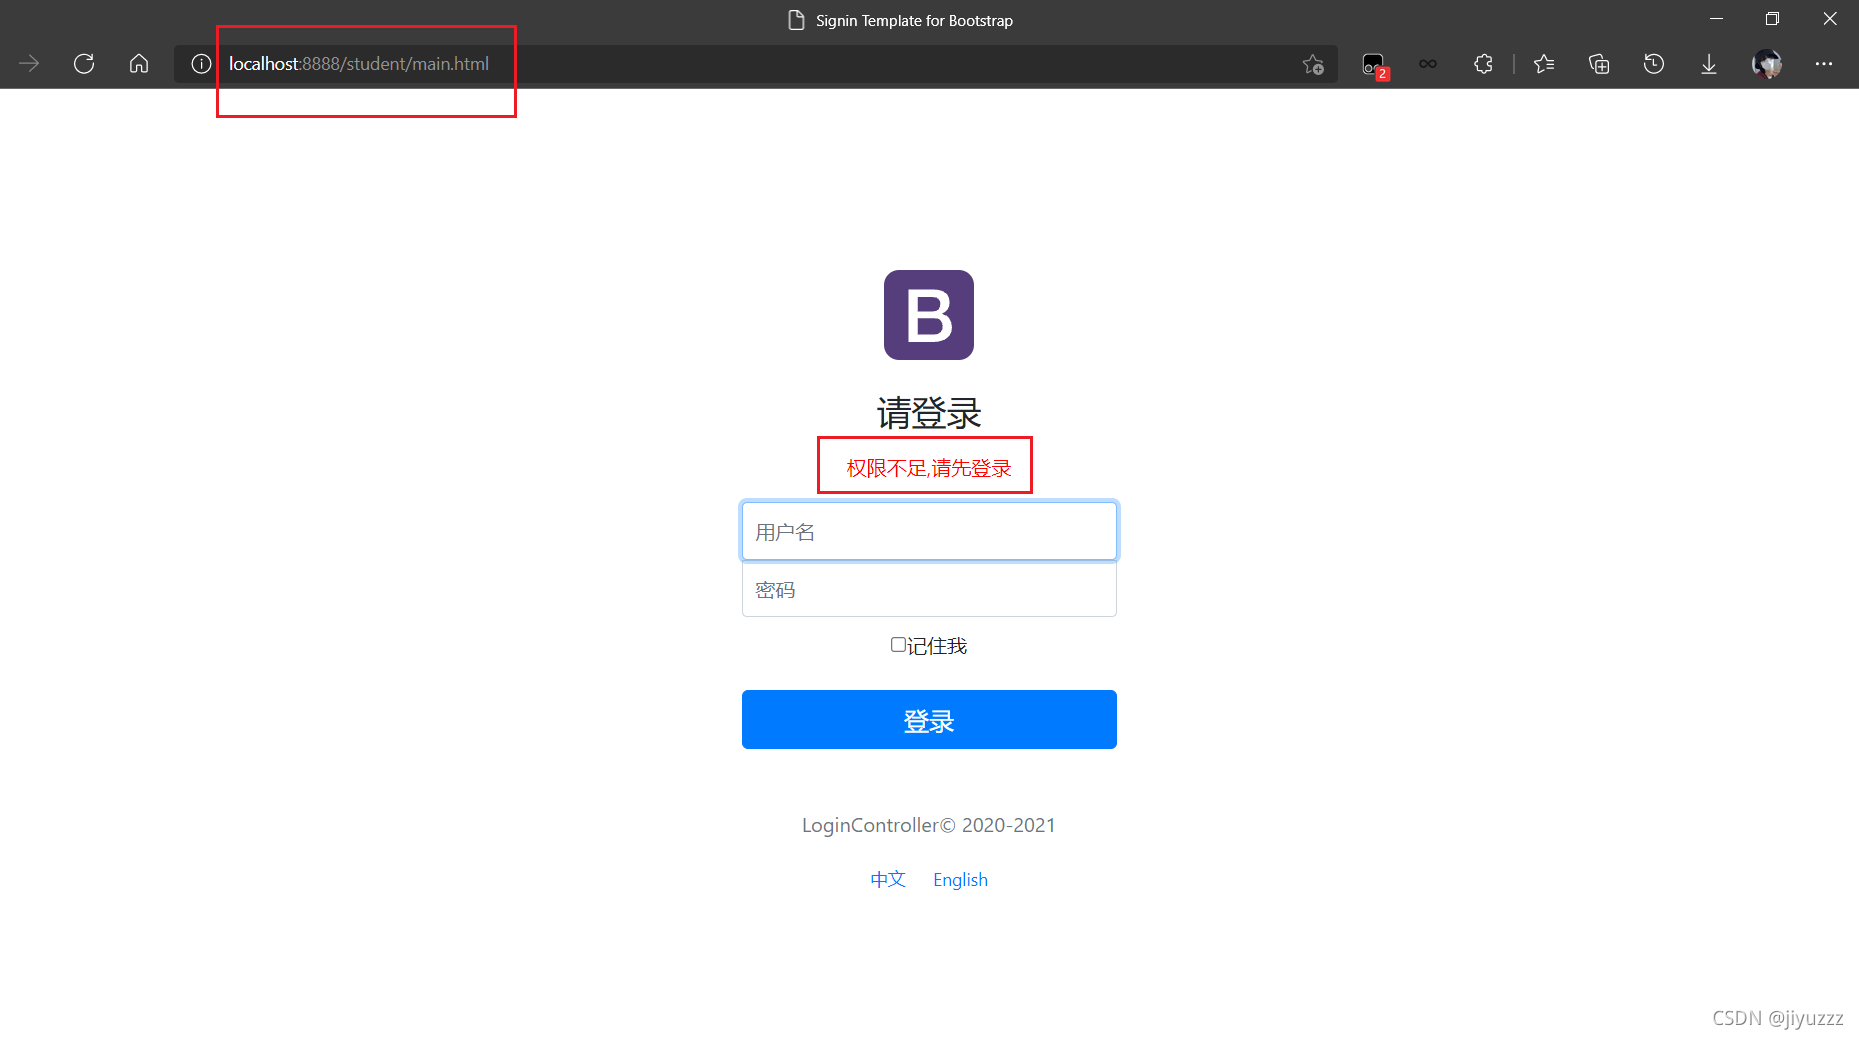
request.setAttribute("msg", "权限不足,请先登录");
request.getRequestDispatcher("/index.html").forward(request, response);
return false;
} else {
return true;//放行当前的request
}
}
}
当用户登录时将用户信息存入session中,访问页面时先判断session中有没有用户的信息,如果没有,拦截器进行拦截(return false)并且提示权限不足。如果有,拦截器放行( return true)
在MyMvcConfig配置类中,重写关于拦截器的方法,添加我们自定义的拦截器,注意屏蔽静态资源及主页以及相关请求的拦截
@Override
public void addInterceptors(InterceptorRegistry registry) {
    registry.addInterceptor(new LoginHandlerInterceptor())
            .addPathPatterns("/**")
            .excludePathPatterns("/index.html", "/", "/user/login", "/css/**", "/js/**", "/img/**");
}
重启程序,直接访问http://localhost:8888/student/main.html,提示权限不足
如果登录成功了再访问main.html就可以直接进入,你们可以自行测试
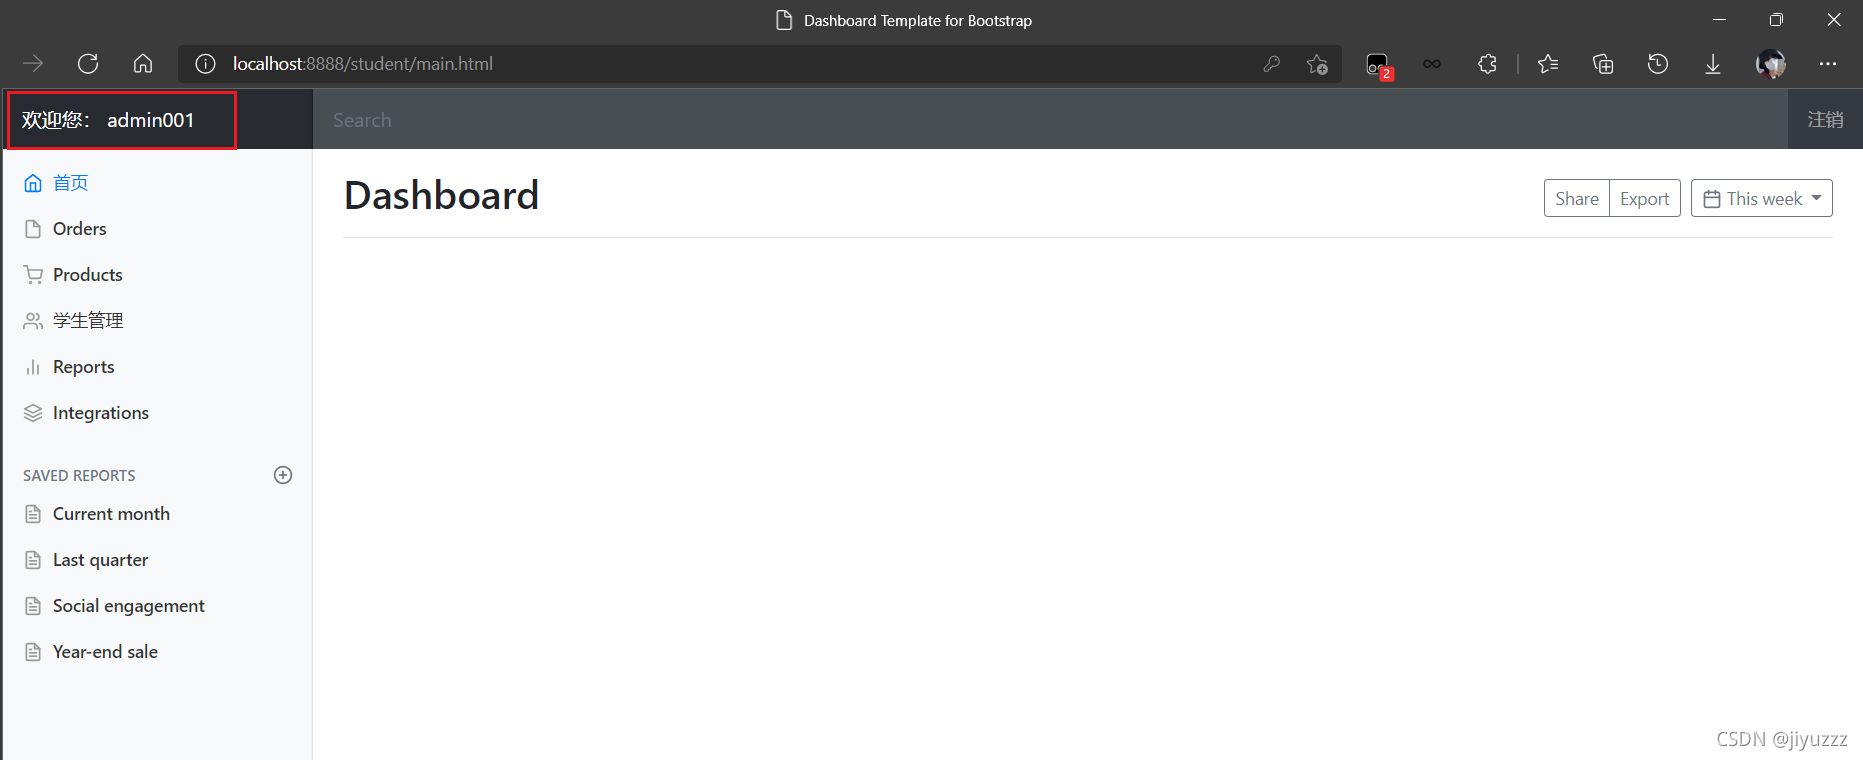
6)在主页设置欢迎词
在LoginController中修改这行代码
修改为
session.setAttribute("LoginUser", "欢迎您: "+username);
这样就把欢迎词存入session了
然后在commons.html中的顶部导航栏找到这行代码
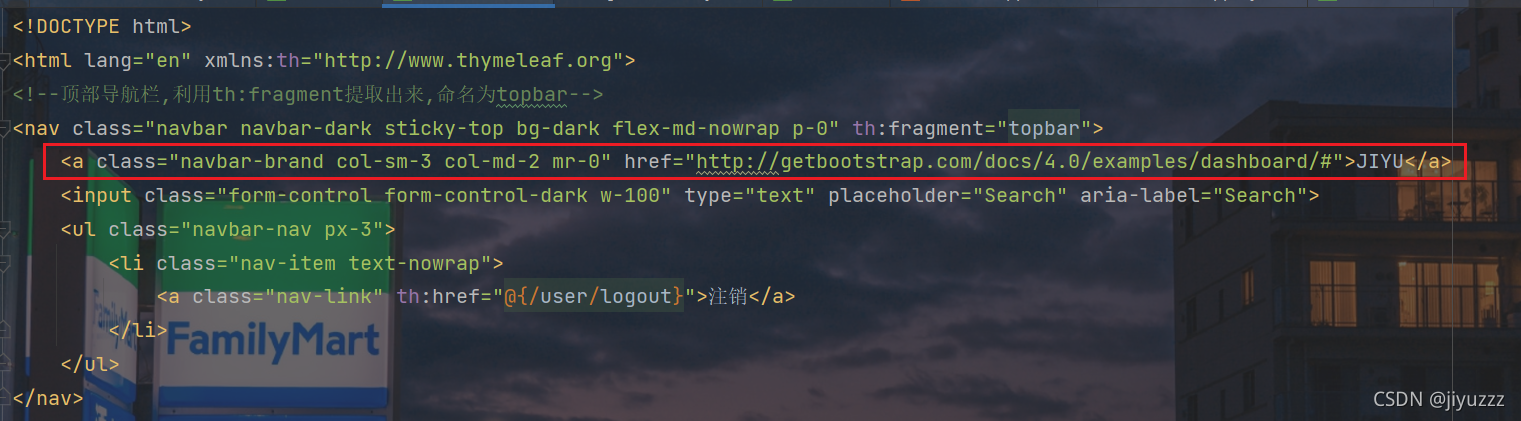
修改为
<a class="navbar-brand col-sm-3 col-md-2 mr-0" href="#" th:text="${session.LoginUser}"></a>
这样就会自动获取session中的欢迎词了
重启程序进入主页面就可以看到了
2、显示所有学生信息(list.html)
1)Student实体类、StudentMapper、StudentMapper.xml
我们先做好基础的设计
1、在pojo包下建立Student实体类
package com.jiyu.pojo;

public class Student {
    private Integer sno;
    private String sname;
    private Integer sage;
    private String saddress;

    public Student() {
    }

    public Student(Integer sno, String sname, Integer sage, String saddress) {
        this.sno = sno;
        this.sname = sname;
        this.sage = sage;
        this.saddress = saddress;
    }

    public Integer getSno() {
        return sno;
    }

    public void setSno(Integer sno) {
        this.sno = sno;
    }

    public String getSname() {
        return sname;
    }

    public void setSname(String sname) {
        this.sname = sname;
    }

    public Integer getSage() {
        return sage;
    }

    public void setSage(Integer sage) {
        this.sage = sage;
    }

    public String getSaddress() {
        return saddress;
    }

    public void setSaddress(String saddress) {
        this.saddress = saddress;
    }

    @Override
    public String toString() {
        return "Student{" +
                "sno=" + sno +
                ", sname='" + sname + '\'' +
                ", sage=" + sage +
                ", saddress='" + saddress + '\'' +
                '}';
    }
}
2、在mapper包下建立StudentMapper
package com.jiyu.mapper;

import com.jiyu.pojo.Student;

import java.util.List;

@Mapper
@Repository//Dao层
public interface StudentMapper {
    // 获取所有Student信息
    List<Student> queryStudentList();

    // 通过sno获得Student信息
    Student queryStudentBySno(Integer sno);

    // 新增一个Student
    int addStudent(Student student);

    // 通过sno删除Student
    int deleteStudent(Integer sno);

    //更新Student信息
    int updateStudent(Student student);
}
3、在resources/mapper下建立StudentMapper.xml
<?xml version="1.0" encoding="UTF-8" ?>
<!DOCTYPE mapper
        PUBLIC "-//mybatis.org//DTD Mapper 3.0//EN"
        "http://mybatis.org/dtd/mybatis-3-mapper.dtd">

<mapper namespace="com.jiyu.mapper.StudentMapper">

    <select id="queryStudentList" resultType="student">
        select * from student;
    </select>

    <select id="queryStudentBySno" resultType="student" parameterType="int">
        select * from student where sno = #{sno};
    </select>

    <insert id="addStudent" parameterType="student">
        insert into student (sno, sname,sage,saddress)
        values (#{sno},#{sname},#{sage},#{saddress});
    </insert>

    <delete id="deleteStudent" parameterType="int">
        delete
        from student
        where sno=#{sno};
    </delete>

    <update id="updateStudent" parameterType="student">
        update student
        set sname=#{sname},sage=#{sage},saddress=#{saddress}
        where sno=#{sno};
    </update>
</mapper>
4、在测试类中验证是否可以成功连接数据库
	@Test
    void testStudent(){
        List<Student> studentList = studentMapper.queryStudentList();
        for (Student student : studentList) {
            System.out.println(student);
        }
    }
运行结果正确

2)视图跳转
接下来要实现一个功能:点击dashboard.html页面中的 学生管理 跳转到list.html页面显示所有学生信息

先给dashboard.html中的学生管理标签添加href属性
在templates目录下新建一个文件夹student,用来放所有关于学生信息的页面,将list.html页面移入该文件夹
同样修改list.html,把引用资源、使用链接的部分像之前那样改成thymeleaf的格式,然后学生管理标签也和dashboard.html一样添加同样的href属性
在controller包下,新建一个StudentController类
package com.jiyu.controller;

import com.jiyu.mapper.StudentMapper;
import com.jiyu.pojo.Student;
import org.springframework.beans.factory.annotation.Autowired;
import org.springframework.stereotype.Controller;
import org.springframework.ui.Model;
import org.springframework.web.bind.annotation.RequestMapping;

import java.util.List;

@Controller
public class StudentController {

    @Autowired
    StudentMapper studentMapper;

    @RequestMapping("/students")
    public String queryStudentList(Model model){
        List<Student> studentList = studentMapper.queryStudentList();
        model.addAttribute(studentList);
        return "student/list";//返回到list页面
    }
}
这个类是让我们进行视图跳转的,目的是显示所有学生信息
重启主程序,在dashboard页面,点击学生管理,成功跳转
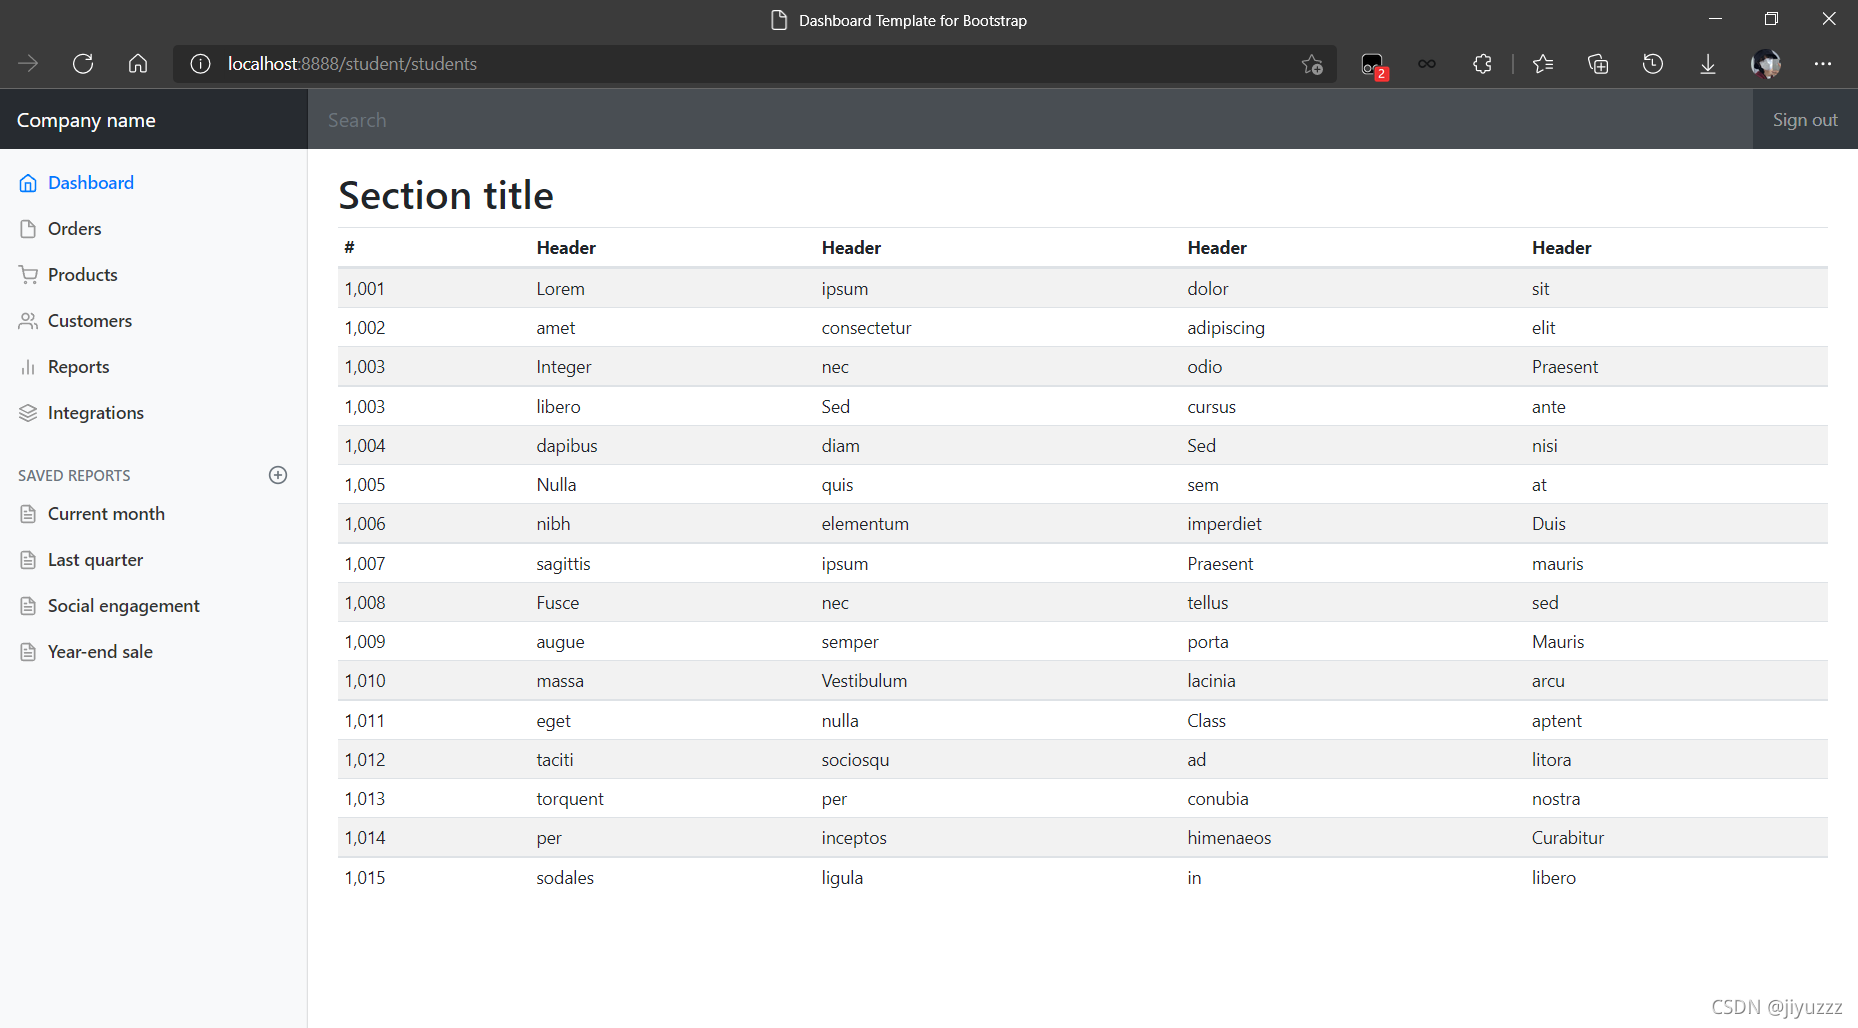
不过里面并不是我们需要的信息,具体实现我们之后再说
现在先讨论下面的两个问题
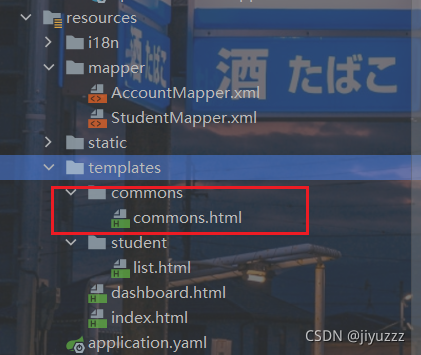
3)提取页面公共部分
list.html和dashboard.html页面的侧边栏和顶部栏是相同的,他们相同的代码可以抽取出来,再通过thymeleaf的th:fragment配合 th:replace就可以实现代码的复用
在templates目录下新建一个commons包,里面新建commons.html用来放置公共页面代码
<!DOCTYPE html>
<html lang="en" xmlns:th="http://www.thymeleaf.org">
<!--顶部导航栏,利用th:fragment提取出来,命名为topbar-->
<nav class="navbar navbar-dark sticky-top bg-dark flex-md-nowrap p-0" th:fragment="topbar">
<a class="navbar-brand col-sm-3 col-md-2 mr-0" href="http://getbootstrap.com/docs/4.0/examples/dashboard/#">Company
name</a>
<input class="form-control form-control-dark w-100" type="text" placeholder="Search" aria-label="Search">
<ul class="navbar-nav px-3">
<li class="nav-item text-nowrap">
<a class="nav-link" href="http://getbootstrap.com/docs/4.0/examples/dashboard/#">Sign out</a>
</li>
</ul>
</nav>
<!--侧边栏,利用th:fragment提取出来,命名为sidebar-->
<nav class="col-md-2 d-none d-md-block bg-light sidebar" th:fragment="sidebar">
<div class="sidebar-sticky">
<ul class="nav flex-column">
<li class="nav-item">
<a class="nav-link active" href="http://getbootstrap.com/docs/4.0/examples/dashboard/#">
<svg xmlns="http://www.w3.org/2000/svg" width="24" height="24" viewBox="0 0 24 24"
fill="none" stroke="currentColor" stroke-width="2" stroke-linecap="round"
stroke-linejoin="round" class="feather feather-home">
<path d="M3 9l9-7 9 7v11a2 2 0 0 1-2 2H5a2 2 0 0 1-2-2z"></path>
<polyline points="9 22 9 12 15 12 15 22"></polyline>
</svg>
Dashboard <span class="sr-only">(current)</span>
</a>
</li>
<li class="nav-item">
<a class="nav-link" href="http://getbootstrap.com/docs/4.0/examples/dashboard/#">
<svg xmlns="http://www.w3.org/2000/svg" width="24" height="24" viewBox="0 0 24 24"
fill="none" stroke="currentColor" stroke-width="2" stroke-linecap="round"
stroke-linejoin="round" class="feather feather-file">
<path d="M13 2H6a2 2 0 0 0-2 2v16a2 2 0 0 0 2 2h12a2 2 0 0 0 2-2V9z"></path>
<polyline points="13 2 13 9 20 9"></polyline>
</svg>
Orders
</a>
</li>
<li class="nav-item">
<a class="nav-link" href="http://getbootstrap.com/docs/4.0/examples/dashboard/#">
<svg xmlns="http://www.w3.org/2000/svg" width="24" height="24" viewBox="0 0 24 24"
fill="none" stroke="currentColor" stroke-width="2" stroke-linecap="round"
stroke-linejoin="round" class="feather feather-shopping-cart">
<circle cx="9" cy="21" r="1"></circle>
<circle cx="20" cy="21" r="1"></circle>
<path d="M1 1h4l2.68 13.39a2 2 0 0 0 2 1.61h9.72a2 2 0 0 0 2-1.61L23 6H6"></path>
</svg>
Products
</a>
</li>
<li class="nav-item">
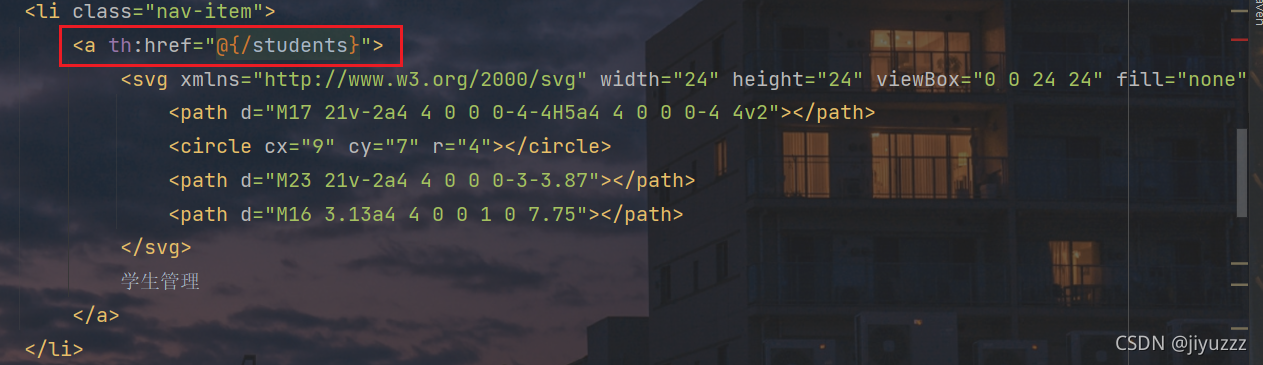
<a class="nav-link" th:href="@{/students}">
<svg xmlns="http://www.w3.org/2000/svg" width="24" height="24" viewBox="0 0 24 24"
fill="none" stroke="currentColor" stroke-width="2" stroke-linecap="round"
stroke-linejoin="round" class="feather feather-users">
<path d="M17 21v-2a4 4 0 0 0-4-4H5a4 4 0 0 0-4 4v2"></path>
<circle cx="9" cy="7" r="4"></circle>
<path d="M23 21v-2a4 4 0 0 0-3-3.87"></path>
<path d="M16 3.13a4 4 0 0 1 0 7.75"></path>
</svg>
学生管理
</a>
</li>
<li class="nav-item">
<a class="nav-link" href="http://getbootstrap.com/docs/4.0/examples/dashboard/#">
<svg xmlns="http://www.w3.org/2000/svg" width="24" height="24" viewBox="0 0 24 24"
fill="none" stroke="currentColor" stroke-width="2" stroke-linecap="round"
stroke-linejoin="round" class="feather feather-bar-chart-2">
<line x1="18" y1="20" x2="18" y2="10"></line>
<line x1="12" y1="20" x2="12" y2="4"></line>
<line x1="6" y1="20" x2="6" y2="14"></line>
</svg>
Reports
</a>
</li>
<li class="nav-item">
<a class="nav-link" href="http://getbootstrap.com/docs/4.0/examples/dashboard/#">
<svg xmlns="http://www.w3.org/2000/svg" width="24" height="24" viewBox="0 0 24 24"
fill="none" stroke="currentColor" stroke-width="2" stroke-linecap="round"
stroke-linejoin="round" class="feather feather-layers">
<polygon points="12 2 2 7 12 12 22 7 12 2"></polygon>
<polyline points="2 17 12 22 22 17"></polyline>
<polyline points="2 12 12 17 22 12"></polyline>
</svg>
Integrations
</a>
</li>
</ul>
<h6 class="sidebar-heading d-flex justify-content-between align-items-center px-3 mt-4 mb-1 text-muted">
<span>Saved reports</span>
<a class="d-flex align-items-center text-muted"
href="http://getbootstrap.com/docs/4.0/examples/dashboard/#">
<svg xmlns="http://www.w3.org/2000/svg" width="24" height="24" viewBox="0 0 24 24" fill="none"
stroke="currentColor" stroke-width="2" stroke-linecap="round" stroke-linejoin="round"
class="feather feather-plus-circle">
<circle cx="12" cy="12" r="10"></circle>
<line x1="12" y1="8" x2="12" y2="16"></line>
<line x1="8" y1="12" x2="16" y2="12"></line>
</svg>
</a>
</h6>
<ul class="nav flex-column mb-2">
<li class="nav-item">
<a class="nav-link" href="http://getbootstrap.com/docs/4.0/examples/dashboard/#">
<svg xmlns="http://www.w3.org/2000/svg" width="24" height="24" viewBox="0 0 24 24"
fill="none" stroke="currentColor" stroke-width="2" stroke-linecap="round"
stroke-linejoin="round" class="feather feather-file-text">
<path d="M14 2H6a2 2 0 0 0-2 2v16a2 2 0 0 0 2 2h12a2 2 0 0 0 2-2V8z"></path>
<polyline points="14 2 14 8 20 8"></polyline>
<line x1="16" y1="13" x2="8" y2="13"></line>
<line x1="16" y1="17" x2="8" y2="17"></line>
<polyline points="10 9 9 9 8 9"></polyline>
</svg>
Current month
</a>
</li>
<li class="nav-item">
<a class="nav-link" href="http://getbootstrap.com/docs/4.0/examples/dashboard/#">
<svg xmlns="http://www.w3.org/2000/svg" width="24" height="24" viewBox="0 0 24 24"
fill="none" stroke="currentColor" stroke-width="2" stroke-linecap="round"
stroke-linejoin="round" class="feather feather-file-text">
<path d="M14 2H6a2 2 0 0 0-2 2v16a2 2 0 0 0 2 2h12a2 2 0 0 0 2-2V8z"></path>
<polyline points="14 2 14 8 20 8"></polyline>
<line x1="16" y1="13" x2="8" y2="13"></line>
<line x1="16" y1="17" x2="8" y2="17"></line>
<polyline points="10 9 9 9 8 9"></polyline>
</svg>
Last quarter
</a>
</li>
<li class="nav-item">
<a class="nav-link" href="http://getbootstrap.com/docs/4.0/examples/dashboard/#">
<svg xmlns="http://www.w3.org/2000/svg" width="24" height="24" viewBox="0 0 24 24"
fill="none" stroke="currentColor" stroke-width="2" stroke-linecap="round"
stroke-linejoin="round" class="feather feather-file-text">
<path d="M14 2H6a2 2 0 0 0-2 2v16a2 2 0 0 0 2 2h12a2 2 0 0 0 2-2V8z"></path>
<polyline points="14 2 14 8 20 8"></polyline>
<line x1="16" y1="13" x2="8" y2="13"></line>
<line x1="16" y1="17" x2="8" y2="17"></line>
<polyline points="10 9 9 9 8 9"></polyline>
</svg>
Social engagement
</a>
</li>
<li class="nav-item">
<a class="nav-link" href="http://getbootstrap.com/docs/4.0/examples/dashboard/#">
<svg xmlns="http://www.w3.org/2000/svg" width="24" height="24" viewBox="0 0 24 24"
fill="none" stroke="currentColor" stroke-width="2" stroke-linecap="round"
stroke-linejoin="round" class="feather feather-file-text">
<path d="M14 2H6a2 2 0 0 0-2 2v16a2 2 0 0 0 2 2h12a2 2 0 0 0 2-2V8z"></path>
<polyline points="14 2 14 8 20 8"></polyline>
<line x1="16" y1="13" x2="8" y2="13"></line>
<line x1="16" y1="17" x2="8" y2="17"></line>
<polyline points="10 9 9 9 8 9"></polyline>
</svg>
Year-end sale
</a>
</li>
</ul>
</div>
</nav>
</html>
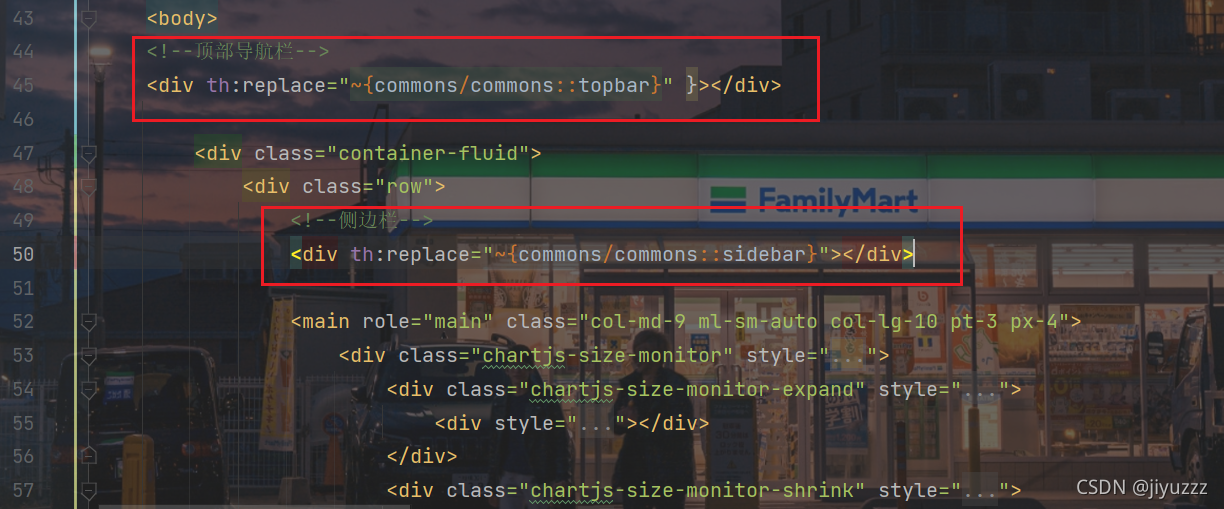
然后删除dashboard.html和list.html中顶部导航栏和侧边栏的代码(下面的我框住的部分)
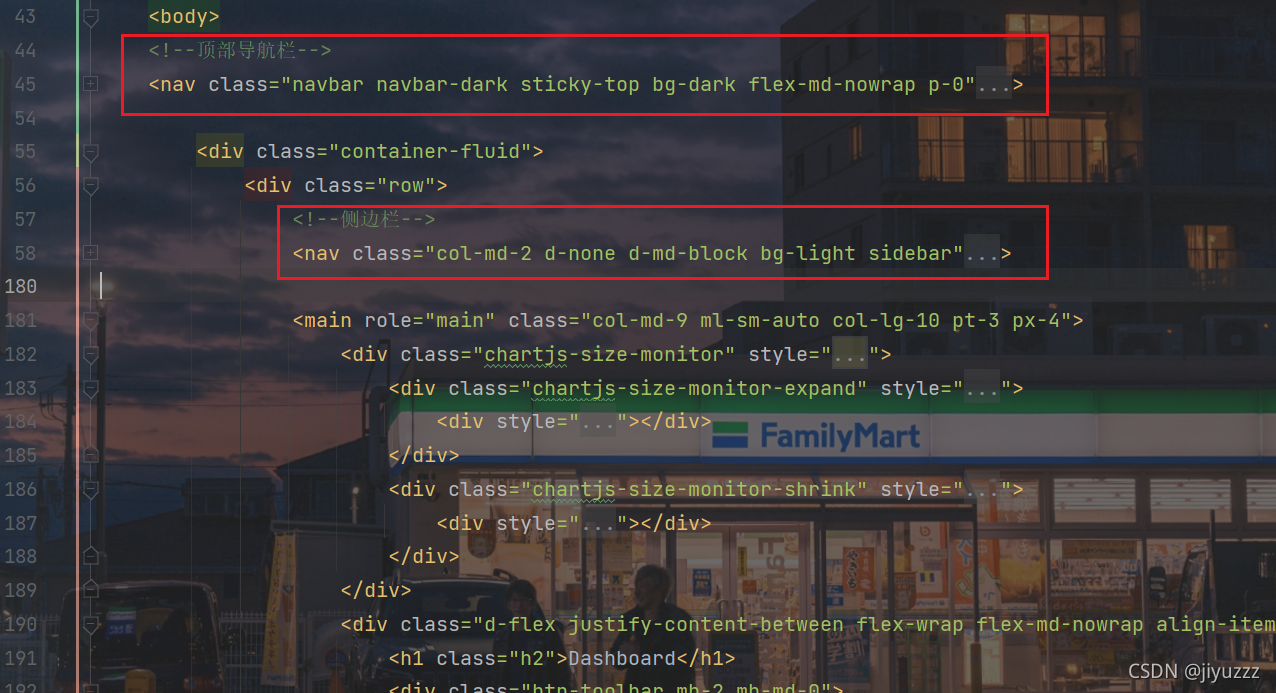
在原位置替换成div标签,配合 th:replace使用,两个冒号::后面的名字就是我们在commons.html中利用 th:fragment使用的命名
<!--顶部导航栏-->
<div th:replace="~{commons/commons::topbar}" }></div>
<!--侧边栏-->
<div th:replace="~{commons/commons::sidebar}"></div>
重启主程序,在dashboard.html可以看到侧边栏和顶部栏

4)使点击的标签高亮
可以发现,在我们点击 学生管理 标签后,该标签并不会高亮
使链接高亮的代码是class="nav-link active"属性
我们可以通过传递参数来判断点击了哪个标签,以便实现相应标签的高亮
先在dashboard.html的侧边栏标签传递参数active为dashboard.html
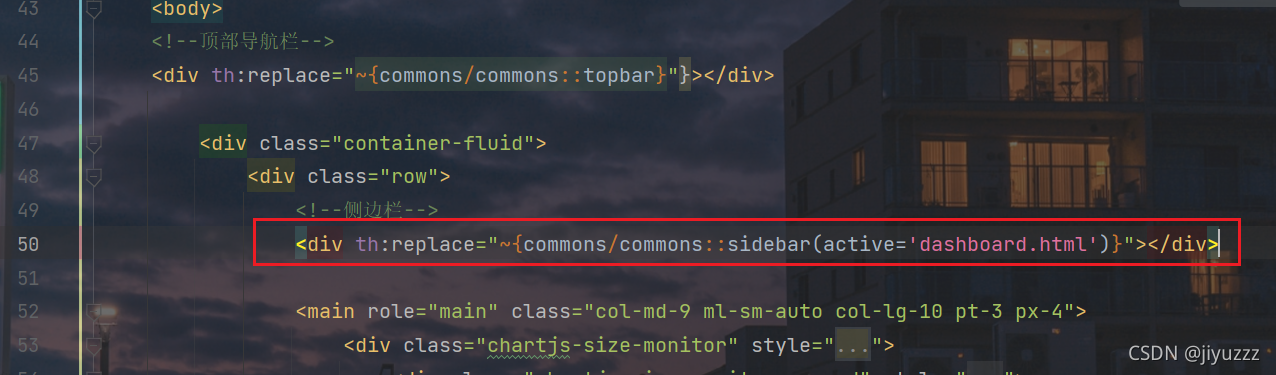
在list.html的侧边栏标签传递参数active为list.html

在公共页面commons.html相应的标签,利用thymeleaf接收参数active,通过三元运算符判断决定是否高亮(在这里idea会报错,别管他)
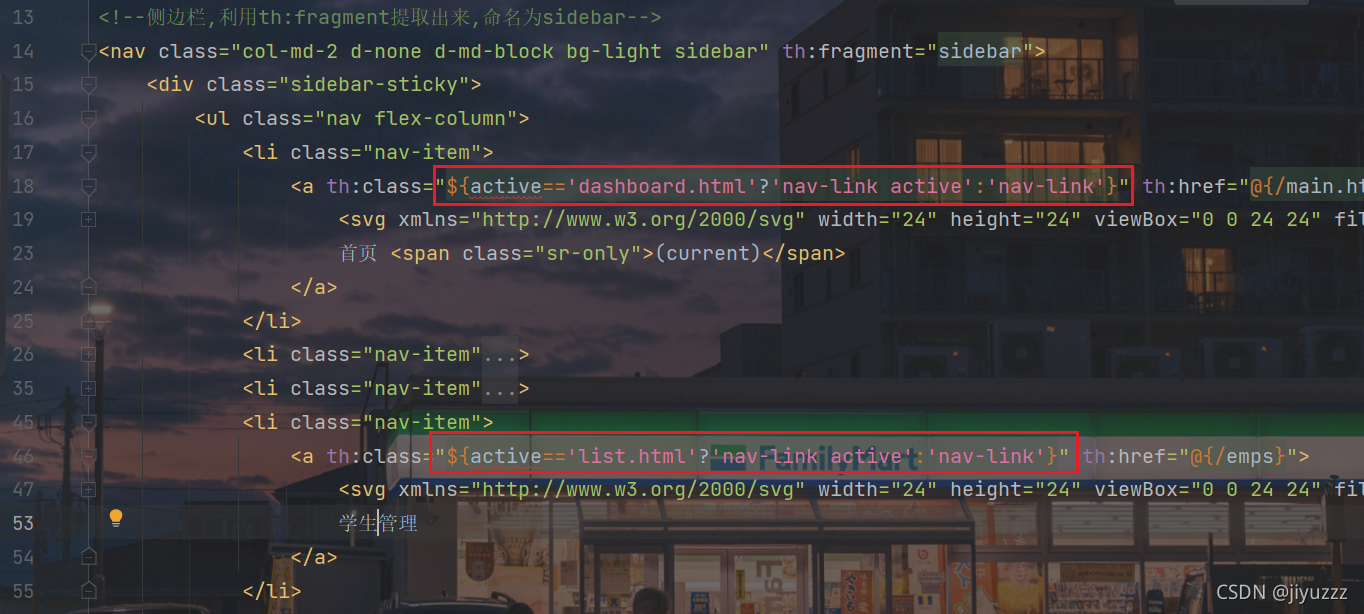
重启,点击 学生管理,可以高亮了
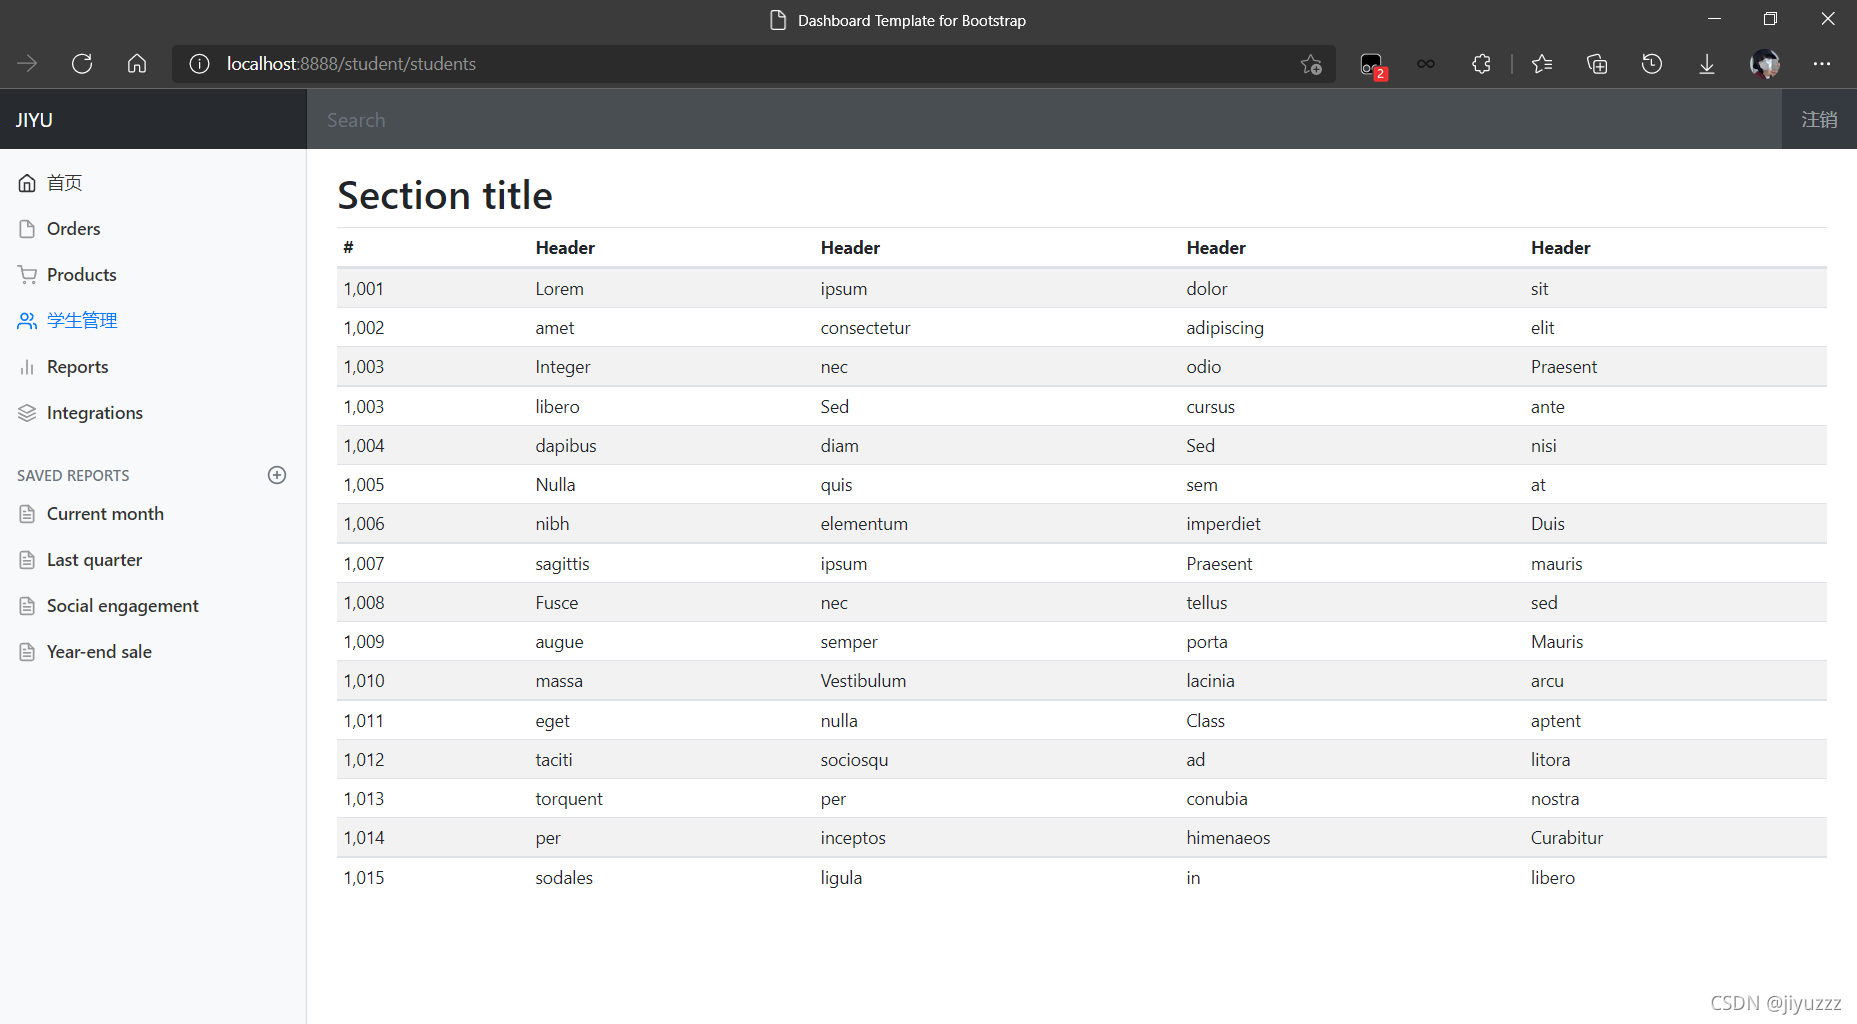
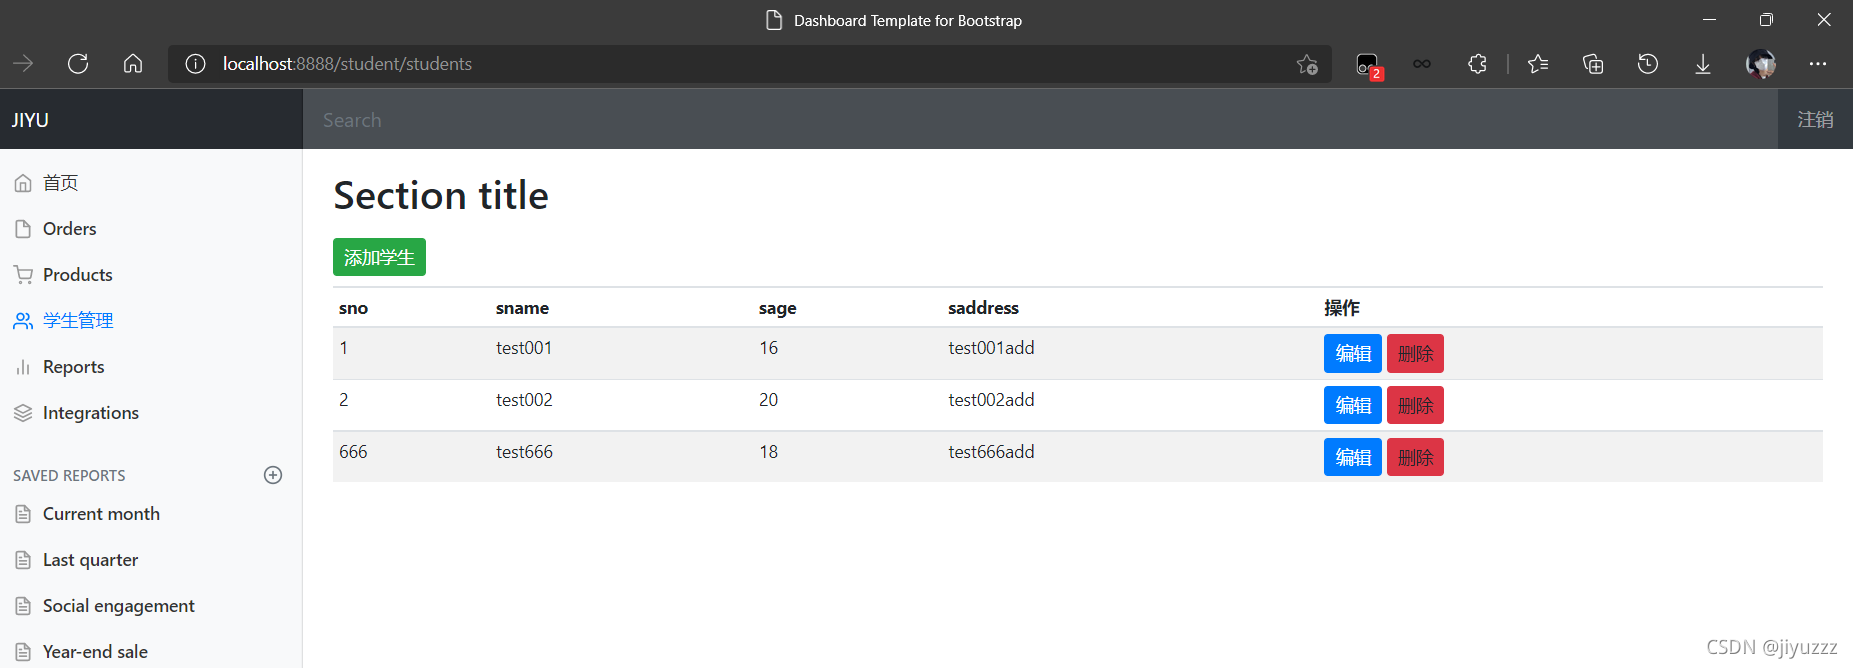
5)修改list.html页面
修改list.html,获取后端传来的studentList,通过th:each和th:text展示所有学生的信息。并添加增加学生、删除、修改的按钮,在接下来逐个实现他们的功能

list.html代码如下
<!DOCTYPE html>
<!-- saved from url=(0052)http://getbootstrap.com/docs/4.0/examples/dashboard/ -->
<html lang="en"  xmlns:th="http://www.thymeleaf.org">

<head>
	<meta http-equiv="Content-Type" content="text/html; charset=UTF-8">
	<meta name="viewport" content="width=device-width, initial-scale=1, shrink-to-fit=no">
	<meta name="description" content="">
	<meta name="author" content="">

	<title>Dashboard Template for Bootstrap</title>
	<!-- Bootstrap core CSS -->
	<link th:href="@{/css/bootstrap.min.css}" rel="stylesheet">

	<!-- Custom styles for this template -->
	<link th:href="@{/css/dashboard.css}" rel="stylesheet">
	<style type="text/css">
		/* Chart.js */

		@-webkit-keyframes chartjs-render-animation {
			from {
				opacity: 0.99
			}
			to {
				opacity: 1
			}
		}

		@keyframes chartjs-render-animation {
			from {
				opacity: 0.99
			}
			to {
				opacity: 1
			}
		}

		.chartjs-render-monitor {
			-webkit-animation: chartjs-render-animation 0.001s;
			animation: chartjs-render-animation 0.001s;
		}
	</style>
</head>

<body>
<!--顶部导航栏-->
<div th:replace="~{commons/commons::topbar}" }></div>

<div class="container-fluid">
	<div class="row">
		<!--侧边栏,括号传参list.html-->
		<div th:replace="~{commons/commons::sidebar(active='list.html')}"></div>

		<main role="main" class="col-md-9 ml-sm-auto col-lg-10 pt-3 px-4">
			<h2>Section title</h2>
			<h2><a class="btn btn-sm btn-success">添加学生</a></h2>
			<div class="table-responsive">
				<table class="table table-striped table-sm">
					<thead>
					<tr>
						<th>sno</th>
						<th>sname</th>
						<th>sage</th>
						<th>saddress</th>
						<th>操作</th>
					</tr>
					</thead>
					<tbody>
					<tr th:each="student:${studentList}">
						<td th:text="${student.getSno()}"></td>
						<td th:text="${student.getSname()}"></td>
						<td th:text="${student.getSage()}"></td>
						<td th:text="${student.getSaddress()}"></td>
						<td>
							<a class="btn btn-sm btn-primary">编辑</a>
							<a class="btn btn-sm btn-danger">删除</a>
						</td>
					</tr>
					</tbody>
				</table>
			</div>
		</main>
	</div>
</div>

<!-- Bootstrap core JavaScript
================================================== -->
<!-- Placed at the end of the document so the pages load faster -->
<script type="text/javascript" src="asserts/js/jquery-3.2.1.slim.min.js"></script>
<script type="text/javascript" src="asserts/js/popper.min.js"></script>
<script type="text/javascript" src="asserts/js/bootstrap.min.js"></script>

<!-- Icons -->
<script type="text/javascript" src="asserts/js/feather.min.js"></script>
<script>
	feather.replace()
</script>

<!-- Graphs -->
<script type="text/javascript" src="asserts/js/Chart.min.js"></script>
<script>
	var ctx = document.getElementById("myChart");
	var myChart = new Chart(ctx, {
		type: 'line',
		data: {
			labels: ["Sunday", "Monday", "Tuesday", "Wednesday", "Thursday", "Friday", "Saturday"],
			datasets: [{
				data: [15339, 21345, 18483, 24003, 23489, 24092, 12034],
				lineTension: 0,
				backgroundColor: 'transparent',
				borderColor: '#007bff',
				borderWidth: 4,
				pointBackgroundColor: '#007bff'
			}]
		},
		options: {
			scales: {
				yAxes: [{
					ticks: {
						beginAtZero: false
					}
				}]
			},
			legend: {
				display: false,
			}
		}
	});
</script>

</body>

</html>
重启主程序后登录,页面显示正确

3、增加学生信息(add.html)
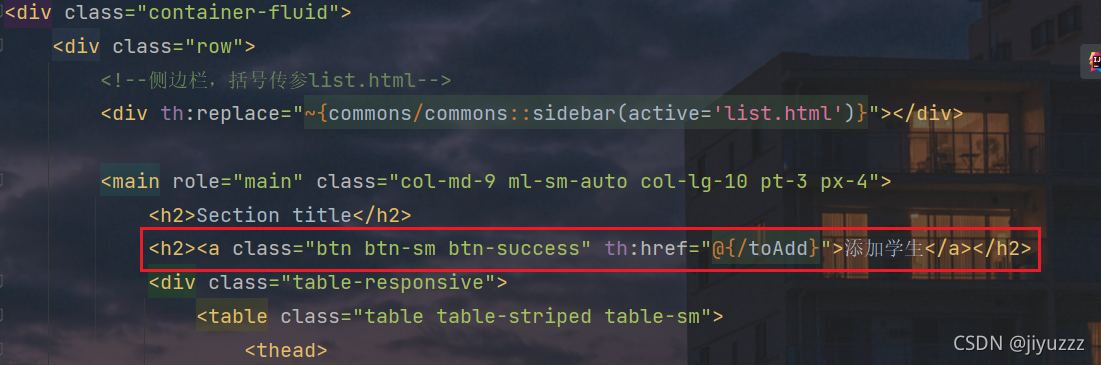
1)添加学生按钮
给 添加学生 按钮添加一个请求toAdd
<h2><a class="btn btn-sm btn-success" th:href="@{/toAdd}">添加学生</a></h2>
然后编写对应的controller,在StudentController中添加一个方法,用来跳转到添加页面add.html
	@GetMapping("/toAdd")
    public String toAdd() {
        return "emp/add";//返回到添加学生页面
    }
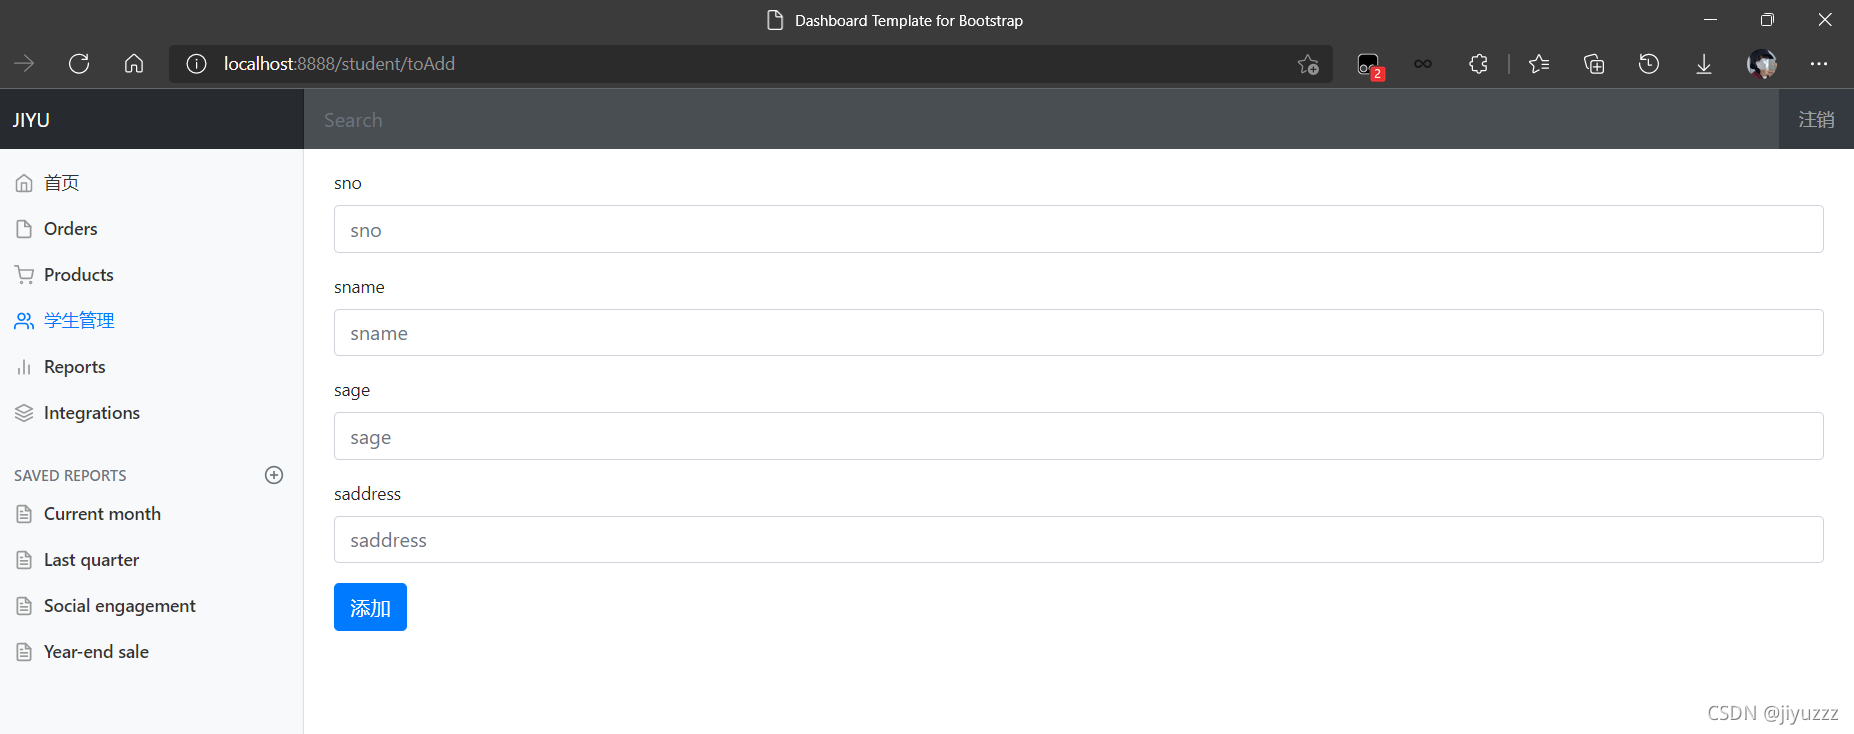
2)添加学生页面add.html
在templates/student下新建一个add.html
代码如下:
<!DOCTYPE html>
<!-- saved from url=(0052)http://getbootstrap.com/docs/4.0/examples/dashboard/ -->
<html lang="en" xmlns:th="http://www.thymeleaf.org">

<head>
    <meta http-equiv="Content-Type" content="text/html; charset=UTF-8">
    <meta name="viewport" content="width=device-width, initial-scale=1, shrink-to-fit=no">
    <meta name="description" content="">
    <meta name="author" content="">

    <title>Dashboard Template for Bootstrap</title>
    <!-- Bootstrap core CSS -->
    <link th:href="@{/css/bootstrap.min.css}" rel="stylesheet">

    <!-- Custom styles for this template -->
    <link th:href="@{/css/dashboard.css}" rel="stylesheet">
    <style type="text/css">
        /* Chart.js */

        @-webkit-keyframes chartjs-render-animation {
            from {
                opacity: 0.99
            }
            to {
                opacity: 1
            }
        }

        @keyframes chartjs-render-animation {
            from {
                opacity: 0.99
            }
            to {
                opacity: 1
            }
        }

        .chartjs-render-monitor {
            -webkit-animation: chartjs-render-animation 0.001s;
            animation: chartjs-render-animation 0.001s;
        }

        /*消除input type=number箭头*/
        input::-webkit-outer-spin-button,
        input::-webkit-inner-spin-button {
            -webkit-appearance: none;
        }
        input[type="number"]{
            -moz-appearance: textfield;
        }
    </style>
</head>

<body>
<!--顶部导航栏-->
<div th:replace="~{commons/commons::topbar}" }></div>

<div class="container-fluid">
    <div class="row">
        <!--侧边栏-->
        <div th:replace="~{commons/commons::sidebar(active='list.html')}"></div>

        <main role="main" class="col-md-9 ml-sm-auto col-lg-10 pt-3 px-4">
            <form th:action="@{/add}" method="post">
                <div class="form-group">
                    <label>sno</label>
                    <input type="number" name="sno" class="form-control" placeholder="sno">
                </div>
                <div class="form-group">
                    <label>sname</label>
                    <input type="text" name="sname" class="form-control" placeholder="sname">
                </div>
                <div class="form-group">
                    <label>sage</label>
                    <input type="number" name="sage" class="form-control" placeholder="sage">
                </div>
                <div class="form-group">
                    <label>saddress</label>
                    <input type="text" name="saddress" class="form-control" placeholder="saddress">
                </div>
                <button type="submit" class="btn btn-primary">添加</button>
            </form>
        </main>
    </div>
</div>

<!-- Bootstrap core JavaScript
================================================== -->
<!-- Placed at the end of the document so the pages load faster -->
<script type="text/javascript" th:src="@{/js/jquery-3.2.1.slim.min.js}"></script>
<script type="text/javascript" th:src="@{/js/popper.min.js}"></script>
<script type="text/javascript" th:src="@{/js/bootstrap.min.js}"></script>

<!-- Icons -->
<script type="text/javascript" th:src="@{/js/feather.min.js}"></script>
<script>
    feather.replace()
</script>

<!-- Graphs -->
<script type="text/javascript" th:src="@{/js/Chart.min.js}"></script>
<script>
    var ctx = document.getElementById("myChart");
    var myChart = new Chart(ctx, {
        type: 'line',
        data: {
            labels: ["Sunday", "Monday", "Tuesday", "Wednesday", "Thursday", "Friday", "Saturday"],
            datasets: [{
                data: [15339, 21345, 18483, 24003, 23489, 24092, 12034],
                lineTension: 0,
                backgroundColor: 'transparent',
                borderColor: '#007bff',
                borderWidth: 4,
                pointBackgroundColor: '#007bff'
            }]
        },
        options: {
            scales: {
                yAxes: [{
                    ticks: {
                        beginAtZero: false
                    }
                }]
            },
            legend: {
                display: false,
            }
        }
    });
</script>

</body>

</html>
其中,这几处改变样式的代码是去除input type="number"时,输入框右侧会出现的上下箭头(比较难看,强迫症不喜欢)

重启主程序后点击添加学生的按钮,效果如下
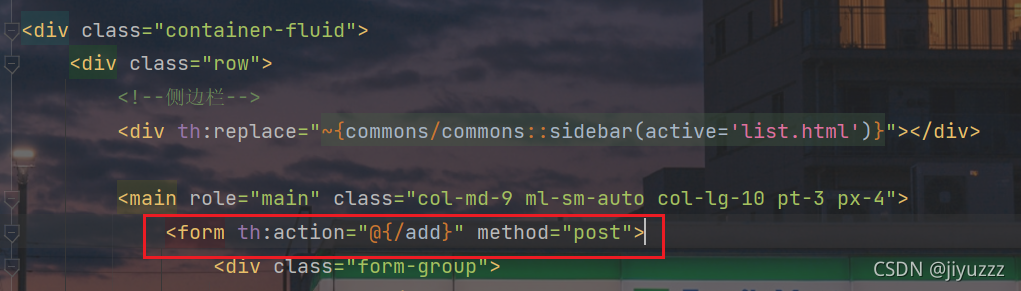
3)add页面的添加按钮
在add.html页面,当我们填写完信息,点击添加按钮,要将数据添加到数据库并且返回到list.html
然后编写对应的controller,在StudentController中添加一个方法,用于提交添加信息
	@PostMapping("/add")
    public String add(Student student) {
        System.out.println("add: "+student);
        studentMapper.addStudent(student);//添加一个员工
        return "redirect:/students";//重定向到/students,刷新列表,返回到list页面
    }
重启主程序,进入添加页面,填写信息
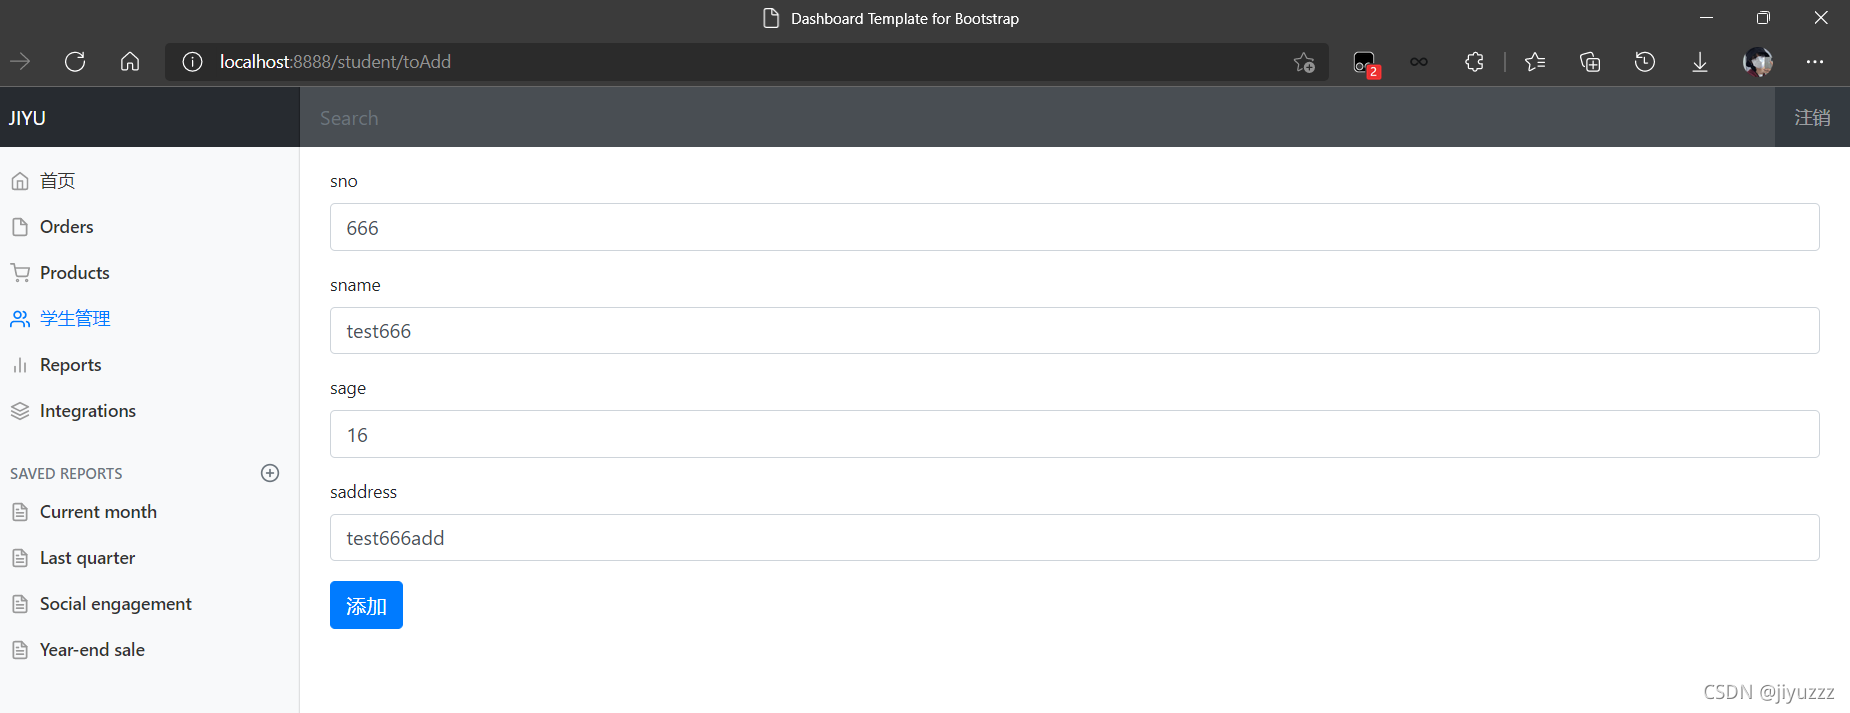
点击添加按钮,添加成功

数据库中也插入成功了
4、修改学生信息(edit.html)
1)编辑 按钮
当我们点击编辑标签时,应该跳转到编辑页面edit.html,并且携带编辑的学生的信息(学号设置为只读,不可修改)
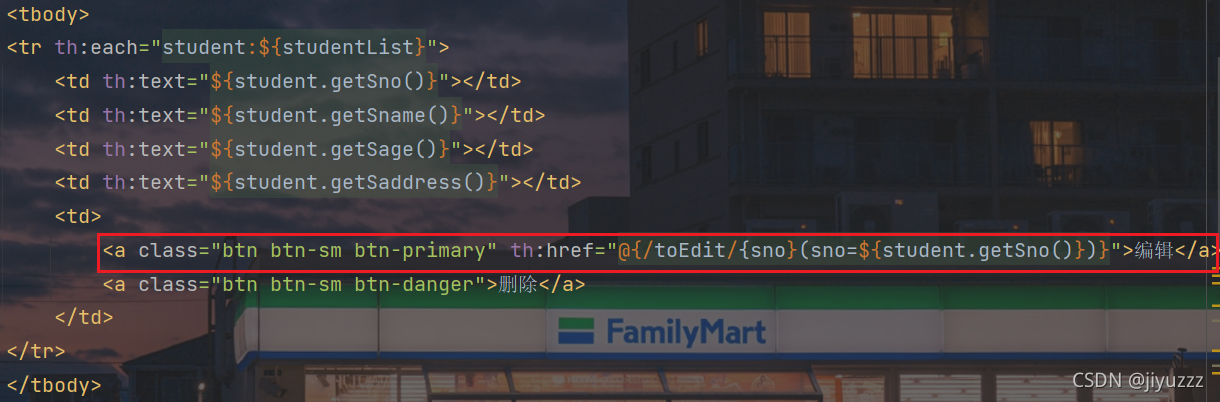
在list.html中将编辑标签添加href属性
<a class="btn btn-sm btn-primary" th:href="@{/toEdit/{sno}(sno=${student.getSno()})}">编辑</a>
然后编写对应的controller,在StudentController中添加一个方法,用于跳转到编辑界面
//restful风格接收参数
    @RequestMapping("/toEdit/{sno}")
    public String toEdit(@PathVariable("sno") int sno, Model model) {
        //查询指定sno的学生,用于前端接收
        Student student = studentMapper.queryStudentBySno(sno);
        System.out.println("before editing: "+student);
        model.addAttribute("student", student);
        return "student/edit";//返回到编辑学生页面
    }
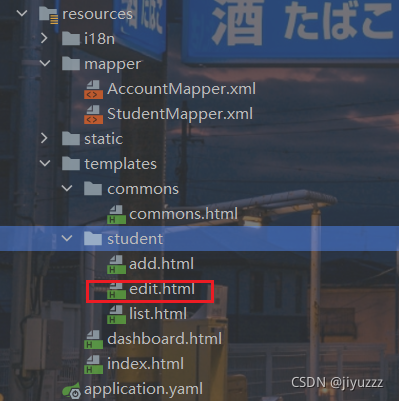
2)编辑学生页面edit.html
在templates/student下新建一个edit.html
代码和add.html差不多
<!DOCTYPE html>
<!-- saved from url=(0052)http://getbootstrap.com/docs/4.0/examples/dashboard/ -->
<html lang="en" xmlns:th="http://www.thymeleaf.org">

<head>
    <meta http-equiv="Content-Type" content="text/html; charset=UTF-8">
    <meta name="viewport" content="width=device-width, initial-scale=1, shrink-to-fit=no">
    <meta name="description" content="">
    <meta name="author" content="">

    <title>Dashboard Template for Bootstrap</title>
    <!-- Bootstrap core CSS -->
    <link th:href="@{/css/bootstrap.min.css}" rel="stylesheet">

    <!-- Custom styles for this template -->
    <link th:href="@{/css/dashboard.css}" rel="stylesheet">
    <style type="text/css">
        /* Chart.js */

        @-webkit-keyframes chartjs-render-animation {
            from {
                opacity: 0.99
            }
            to {
                opacity: 1
            }
        }

        @keyframes chartjs-render-animation {
            from {
                opacity: 0.99
            }
            to {
                opacity: 1
            }
        }

        .chartjs-render-monitor {
            -webkit-animation: chartjs-render-animation 0.001s;
            animation: chartjs-render-animation 0.001s;
        }

        /*消除input type=number箭头*/
        input::-webkit-outer-spin-button,
        input::-webkit-inner-spin-button {
            -webkit-appearance: none;
        }
        input[type="number"]{
            -moz-appearance: textfield;
        }
    </style>
</head>

<body>
<!--顶部导航栏-->
<div th:replace="~{commons/commons::topbar}" }></div>

<div class="container-fluid">
    <div class="row">
        <!--侧边栏-->
        <div th:replace="~{commons/commons::sidebar(active='list.html')}"></div>

        <main role="main" class="col-md-9 ml-sm-auto col-lg-10 pt-3 px-4">
            <form th:action="@{/edit}" method="post">
                <div class="form-group">
                    <label>sno</label>
                    <input th:value="${student.getSno()}" type="number" name="sno" class="form-control" placeholder="sno" readonly>
                </div>
                <div class="form-group">
                    <label>sname</label>
                    <input th:value="${student.getSname()}" type="text" name="sname" class="form-control" placeholder="sname">
                </div>
                <div class="form-group">
                    <label>sage</label>
                    <input th:value="${student.getSage()}" type="number" name="sage" class="form-control" placeholder="sage">
                </div>
                <div class="form-group">
                    <label>saddress</label>
                    <input th:value="${student.getSaddress()}" type="text" name="saddress" class="form-control" placeholder="saddress">
                </div>
                <button type="submit" class="btn btn-primary">修改</button>
            </form>
        </main>
    </div>
</div>

<!-- Bootstrap core JavaScript
================================================== -->
<!-- Placed at the end of the document so the pages load faster -->
<script type="text/javascript" th:src="@{/js/jquery-3.2.1.slim.min.js}"></script>
<script type="text/javascript" th:src="@{/js/popper.min.js}"></script>
<script type="text/javascript" th:src="@{/js/bootstrap.min.js}"></script>

<!-- Icons -->
<script type="text/javascript" th:src="@{/js/feather.min.js}"></script>
<script>
    feather.replace()
</script>

<!-- Graphs -->
<script type="text/javascript" th:src="@{/js/Chart.min.js}"></script>
<script>
    var ctx = document.getElementById("myChart");
    var myChart = new Chart(ctx, {
        type: 'line',
        data: {
            labels: ["Sunday", "Monday", "Tuesday", "Wednesday", "Thursday", "Friday", "Saturday"],
            datasets: [{
                data: [15339, 21345, 18483, 24003, 23489, 24092, 12034],
                lineTension: 0,
                backgroundColor: 'transparent',
                borderColor: '#007bff',
                borderWidth: 4,
                pointBackgroundColor: '#007bff'
            }]
        },
        options: {
            scales: {
                yAxes: [{
                    ticks: {
                        beginAtZero: false
                    }
                }]
            },
            legend: {
                display: false,
            }
        }
    });
</script>

</body>

</html>
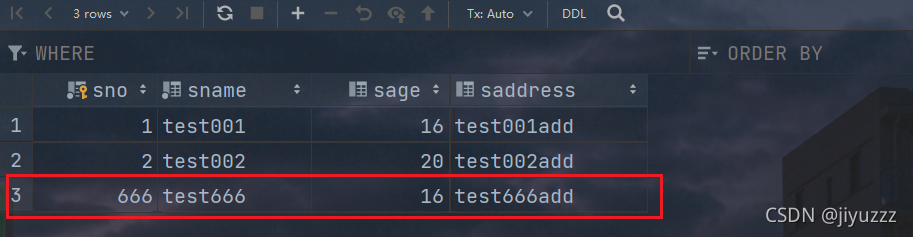
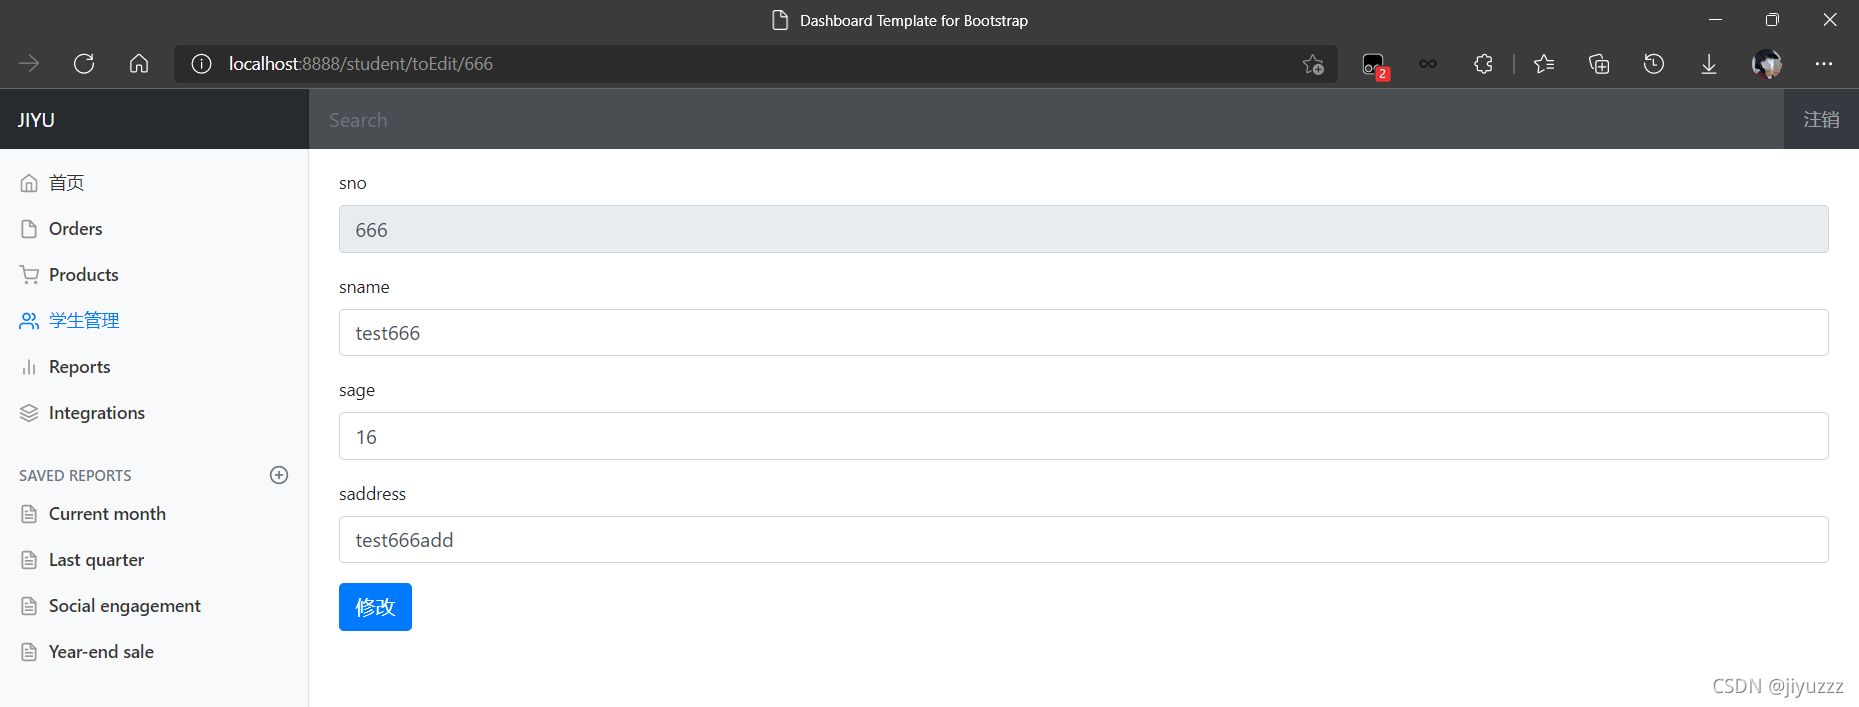
启动主程序测试,点击编辑学号666的学生
成功跳转到edit.html,且所选学生信息正确
3) edit页面的修改按钮
在StudentController中添加一个方法,用于提交修改信息
	@PostMapping("/edit")
    public String edit(Student student) {
        studentMapper.updateStudent(student);
        System.out.println("after editing: "+student);
        return "redirect:/students";//添加完成重定向到/students,刷新列表
    }
重启测试,把test666的年龄修改为18

点击 修改 按钮
成功修改并返回到list.html
5、删除学生信息
在list.html修改删除标签
<a class="btn btn-sm btn-danger" th:href="@{/delete/{sno}(sno=${student.getSno()})}">删除</a>

然后编写对应的controller,删除指定学生
 	@GetMapping("/delete/{sno}")
    public String delete(@PathVariable("sno") Integer sno) {
        studentMapper.deleteStudent(sno);
        return "redirect:/students";
    }
重启测试,点击删除按钮即可删除指定学生
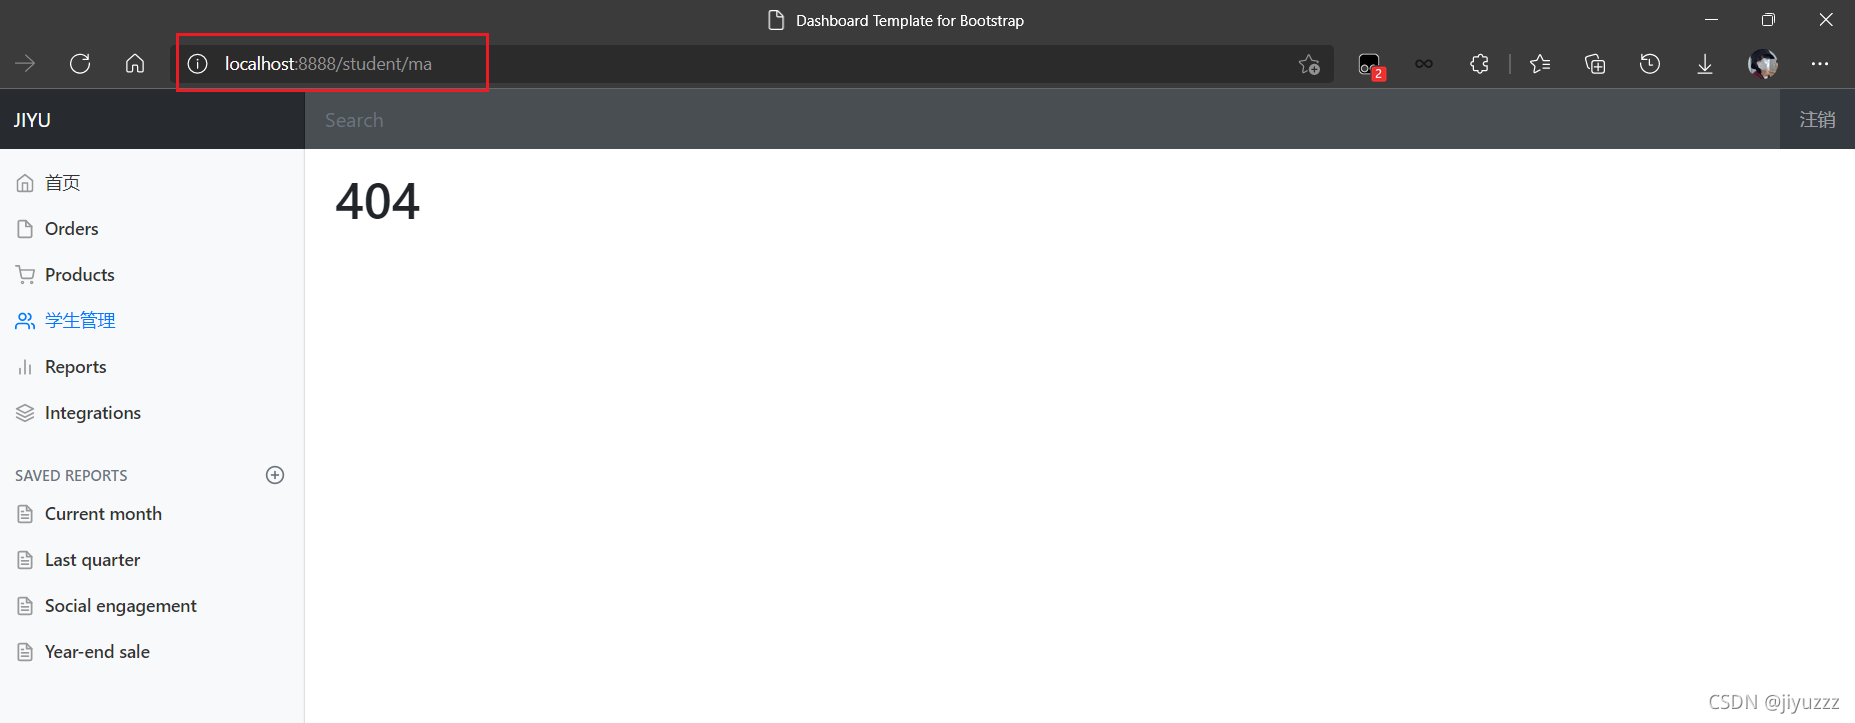
6、404页面(404.html)
在templates目录下新建一个error文件夹,然后引入404.htm,SpringBoot报错时就会自动找到这个页面

重启程序测试,随便访问一个不存在的页面
出现的404页面就是我们自己的404.html
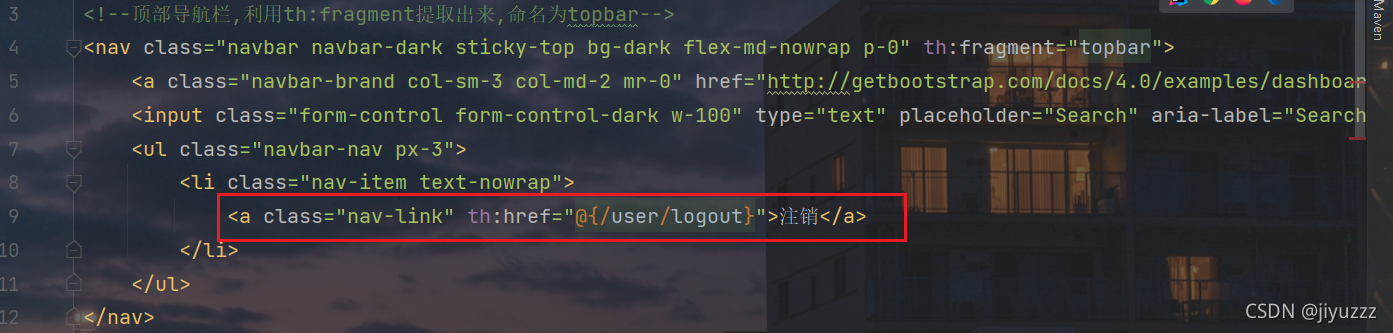
7、注销操作
在公共commons页面,顶部导航栏处的标签添加href属性
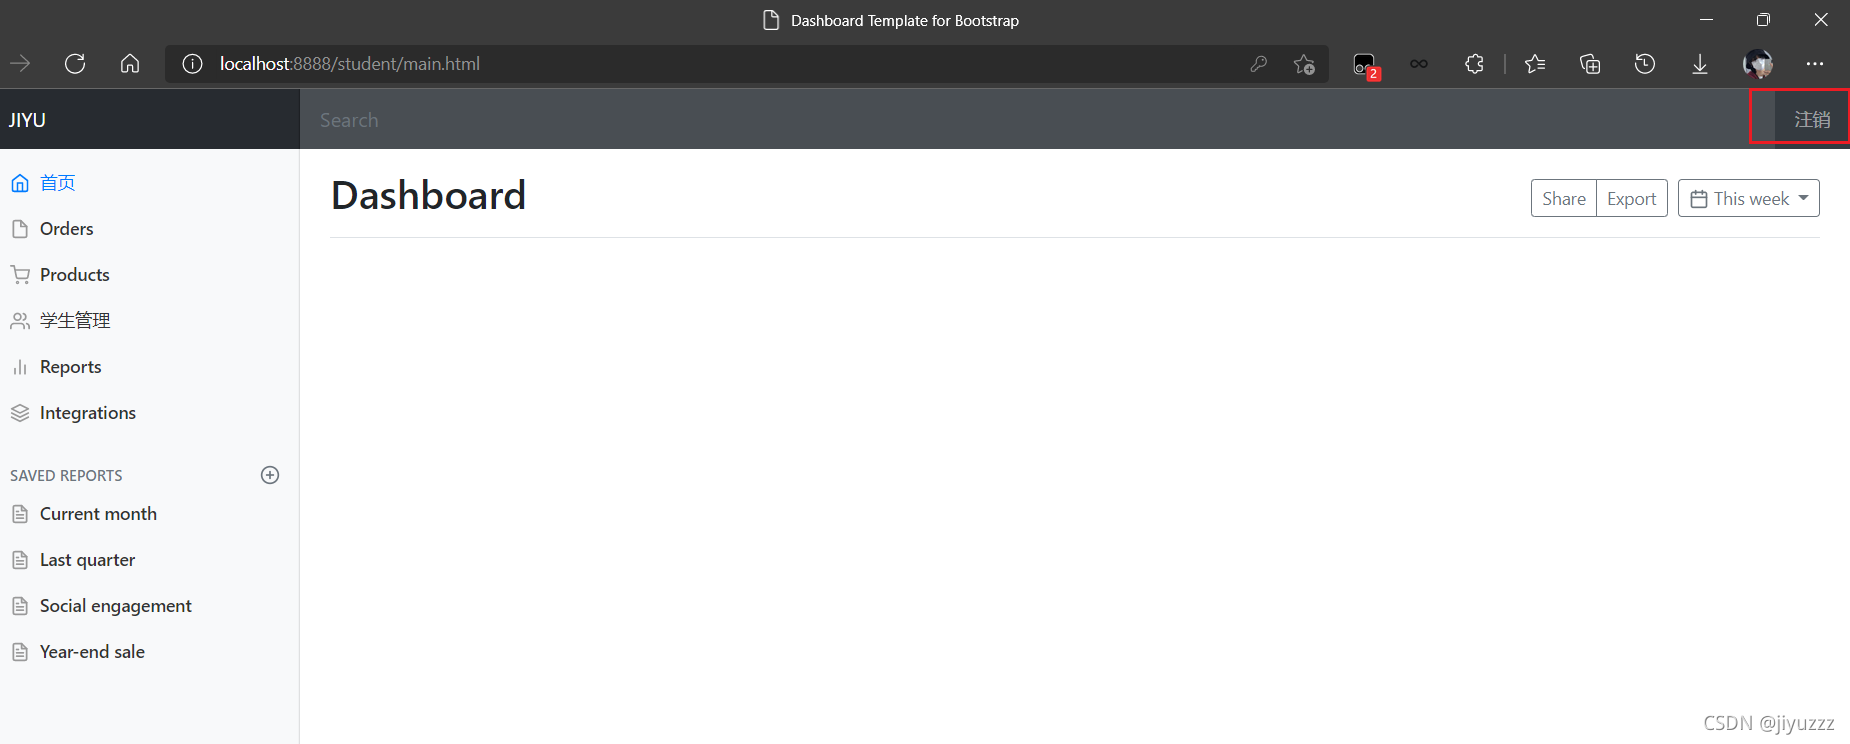
然后在LoginController中编写对应的方法,处理点击注销标签的请求,清除session,并重定向到首页
	@RequestMapping("/user/logout")
    public String logout(HttpSession session) {
        session.invalidate();
        return "redirect:/index.html";
    }
重启测试,登录成功后,点击 注销 即可退出到首页
再说几句话
至此,基本的功能我们就开发完了,接下来也可以选择继续开发新的功能,因为侧边栏很多链接我们都没有实现。可以做几个和account表有关的功能,比如修改密码、注销账户、注册账号等,这些还是比较简单的,你们可以自行实现。对student表的操作有表格的分页、搜索等,这些我也没有做,知道原理很容易实现,只要写对sql就成功一大半了。这个项目只是方便初学者整合所学、轻松入门的,没有太高深的地方,大佬就别喷我了。。。可以直接路过。
接下来我还会做几个使用不同技术的项目,会陆续发在springboot专栏里。感谢看到这里的人~

为开发者提供学习成长、分享交流、生态实践、资源工具等服务,帮助开发者快速成长。
更多推荐


 43
43 0
0- 0


 已为社区贡献1条内容

所有评论(0)