
《看透SpringMVC源代码分析与实践》网站基础知识、俯视SpringMVC请求处理流程、SpringMVC组件概述
目录Java中Socket的用法详解ServletTomcat的分析一、Java中Socket的用法二、 详解Servlet三、 Tomcat的分析
目录
一、Java中Socket的用法
- 普通Socket的用法
- NioSocket的用法
二、Java中Servlet详解
- GenericServlet和HttpServlet
三、Tomcat的分析
- Tomcat的顶层结构
- Server的启动过程
四、俯视SpringMVC
- 使用
- 整体结构
- Environment
- HttpServletBean
- FrameworkServlet
- DispatchServlet
五、 SpringMVC组件概述
一、Java中Socket的用法
1、普通Socket的用法
1、HTTP协议是在应用层解析内容的,只需要按照它的报文的格式封装和解析数据就可以了,主要面向的是主机通信。具体传输还是使用Socket,可以把Socket看做是TCP和HTTP的过渡状态,主要面向的是进程间通信
2、Java中的网络通信是由Socket实现的,Socket分为
- ServerSocket:服务于服务端,可以通过accept方法监听请求,监听到请求后返回Socket
- Socket:完成数据传输,客户端直接使用Socket发起请求并传输数据
3、ServerSocket的使用分为三步
- 创建ServerSocket,含有绑定端口的构造参数
- accept监听:阻塞监听,收到请求返回Socket实例
- 客户端接收到Socke实例t进行通信
4、举栗


2、NioSocket的用法
从JDK1.4开始,Java新增的新的IO模式,NIO(NEW IO)
- 底层采用的新的处理方式,提高了IO的效率:可以简单理解处理请求为多路复用模式
- 提供的非阻塞的ServerSocketChannel和阻塞的SocketChannel:ServerSocketChannel通过configBlocking方法设置是否采用阻塞模式,非阻塞模式才能使用Selector
- 涉及三个概念:Buffer缓冲、Channel通道、Selector分发,工作流程就是先建立通道,然后注册分发,接下来就可以使用分发处理请求了
服务端流程

1、Buffer类专门用于存储数据,有4个属性非常重要

二、 Java中Servlet详解
Servlet 是 Server + Applet的缩写,表示一个服务器应用,简单理解Servlet就是一套规范接口,我们按照鞋套规范写代码就可以直接在Java服务器上面运行

1、Servlet接口
package javax.servlet;

import java.io.IOException;

public interface Servlet {

	// 方法在容器启动时被容器调用,只会调用一次,也可以使用web.xml文件中的<load-on-startup>配置init的时机
	// 被调用时接受 ServletConfig  参数,是容器传进去的(Tomcat)
	// 在web.xml配置的信息,如SpringMVC的contextConfigLocation信息
    void init(ServletConfig var1) throws ServletException;

	// 用于获取ServletConfig
    ServletConfig getServletConfig();
	// 具体处理一个请求
    void service(ServletRequest var1, ServletResponse var2) throws ServletException, IOException;
	// 获取Servlet相关的一些信息,版权、作者等,这个方法需要自己实现,默认返回空字符串
    String getServletInfo();

	// 服务器关闭,Servlet销毁时释放一些资源,也只会调用一次
    void destroy();
}


package javax.servlet;

import java.util.Enumeration;

public interface ServletConfig {
    String getServletName();

    ServletContext getServletContext();

    String getInitParameter(String var1);

    Enumeration<String> getInitParameterNames();
}
2、Tomcat和Servlet的关系
1、Tomcat的初始化initServlet方法需要封装了StandardWrapper的StandardWrapperFaced,这两个类都实现ServletConfig,我们配置web.xml的信息借助ServletConfig读取封装到StandardWrapper进而到StandardWrapperFaced中
package org.apache.catalina.core;

import java.util.Enumeration;
import javax.servlet.ServletConfig;
import javax.servlet.ServletContext;

public final class StandardWrapperFacade implements ServletConfig {
    private final ServletConfig config;
    private ServletContext context = null;

    public StandardWrapperFacade(StandardWrapper config) {
        this.config = config;
    }

    public String getServletName() {
        return this.config.getServletName();
    }

    public ServletContext getServletContext() {
        if (this.context == null) {
            this.context = this.config.getServletContext();
            if (this.context instanceof ApplicationContext) {
                this.context = ((ApplicationContext)this.context).getFacade();
            }
        }

        return this.context;
    }

    public String getInitParameter(String name) {
        return this.config.getInitParameter(name);
    }

    public Enumeration<String> getInitParameterNames() {
        return this.config.getInitParameterNames();
    }
}
// Tomcat的org.apache.catalina.core#StandardWrapper类初调用Servlet的init方法

 private synchronized void initServlet(Servlet servlet) throws ServletException {
        if (!this.instanceInitialized || this.singleThreadModel) {
            try {
                if (Globals.IS_SECURITY_ENABLED) {
                    boolean success = false;

                    try {
                        Object[] args = new Object[]{this.facade};
                        SecurityUtil.doAsPrivilege("init", servlet, classType, args);
                        success = true;
                    } finally {
                        if (!success) {
                            SecurityUtil.remove(servlet);
                        }

                    }
                } else {
                // facade 就是 StandardWrapperFacade
                // StandardWrapperFacade implements ServletConfig
                    servlet.init(this.facade);
                }

                this.instanceInitialized = true;
            } catch (UnavailableException var10) {
                this.unavailable(var10);
                throw var10;
            } catch (ServletException var11) {
                throw var11;
            } catch (Throwable var12) {
                ExceptionUtils.handleThrowable(var12);
                this.getServletContext().log(sm.getString("standardWrapper.initException", new Object[]{this.getName()}), var12);
                throw new ServletException(sm.getString("standardWrapper.initException", new Object[]{this.getName()}), var12);
            }
        }
    }


1、GenericServlet和HttpServlet

1、GenericServlet是Servlet的默认实现,主要做了三件事
- 实现了ServletConfig接口,我们可以直接调用ServletConfig里面的方法,因此无需getServletconfig().getServletContext(),直接getServletContext
- 提供了无参的init方法,封装ServletConfig实例config变为自己的成员变量然后调用自己的无参init方法,方便之后子类实现的时候,重写init之后,不用关心ServletConfig
- 提供了log方法
2、HttpServlet是用HTTP协议实现的Servlet的基类,写Servlet直接继承它就可以了,不需要从头实现Servlet接口
- SpringMVC的DispatchServlet就是继承了HttpServlet
- HttpServlet主要重写了service方法处理请求,在service方法首先将ServletRequest、ServletResponse转为HttpServletRequest、HttpServletResponse,然后根据请求方式的不通,路由到不同的处理方法
public void service(ServletRequest req, ServletResponse res) throws ServletException, IOException {
        HttpServletRequest request;
        HttpServletResponse response;
        try {
            request = (HttpServletRequest)req;
            response = (HttpServletResponse)res;
        } catch (ClassCastException var6) {
            throw new ServletException(lStrings.getString("http.non_http"));
        }
		// 重载方法
        this.service(request, response);
    }
protected void service(HttpServletRequest req, HttpServletResponse resp) throws ServletException, IOException {
        String method = req.getMethod();
        long lastModified;
        if (method.equals("GET")) {
            lastModified = this.getLastModified(req);
            if (lastModified == -1L) {
                this.doGet(req, resp);
            } else {
                long ifModifiedSince;
                try {
                    ifModifiedSince = req.getDateHeader("If-Modified-Since");
                } catch (IllegalArgumentException var9) {
                    ifModifiedSince = -1L;
                }

                if (ifModifiedSince < lastModified / 1000L * 1000L) {
                    this.maybeSetLastModified(resp, lastModified);
                    this.doGet(req, resp);
                } else {
                    resp.setStatus(304);
                }
            }
        } else if (method.equals("HEAD")) {
            lastModified = this.getLastModified(req);
            this.maybeSetLastModified(resp, lastModified);
            this.doHead(req, resp);
        } else if (method.equals("POST")) {
            this.doPost(req, resp);
        } else if (method.equals("PUT")) {
            this.doPut(req, resp);
        } else if (method.equals("DELETE")) {
            this.doDelete(req, resp);
        } else if (method.equals("OPTIONS")) {
            this.doOptions(req, resp);
        } else if (method.equals("TRACE")) {
            this.doTrace(req, resp);
        } else {
            String errMsg = lStrings.getString("http.method_not_implemented");
            Object[] errArgs = new Object[]{method};
            errMsg = MessageFormat.format(errMsg, errArgs);
            resp.sendError(501, errMsg);
        }

    }
需要注意的是SpringMVC的处理思路并不是这样的,又将所有的请求合并到一个统一方法进行处理,后续详细介绍
三、 Tomcat的分析
1、Tomcat的顶层结构
- Tomcat可以抽象为一个顶层的Server,代表整个服务器,可以包含至少一个Service
- 一个Service包含两部分
- Connector:可以多个,处理请求连接,提供Socket、request、response之间转化
- Container:只有一个,封装管理Servlet,如DispatchServlet
1、org.apache.catalina.startup#Catalina类主要进行的是对Server 进行生命周期处理,通过反射调用Server对应的方法,自己的方法
- start()
- load():加载配置文件,创建初始化Server,加载Tomcat的conf/server.xml文件,调用通过反射调用server的init()方法,进而调用Servlet接口实现类HttpServletBean的init()方法
- stop()
- await()
2、org.apache.catalina.startup#Bootstrap类才是Tomcat的入口,也就是main方法所在,类似CatalinaAdapter,这样做的好处可以把启动入口和具体的管理类分开,从而可以很方便的创建出多种启动方式,每种启动方式只需写一个对应的CatalinaAdapter即可
public static void main(String[] args) {
        synchronized(daemonLock) {
            if (daemon == null) {
            	// 新建一个BootStrap
                Bootstrap bootstrap = new Bootstrap();

                try {
                	// 初始化了ClassLoader,并用ClassLoder创建了Catalina实例,赋值给catalianDaemon变量
                    bootstrap.init();
                } catch (Throwable var5) {
                    handleThrowable(var5);
                    var5.printStackTrace();
                    return;
                }

                daemon = bootstrap;
            } else {
                Thread.currentThread().setContextClassLoader(daemon.catalinaLoader);
            }
        }

        try {
        	// 处理main方法传入的参数,为空执行satrt
            String command = "start";
            if (args.length > 0) {
                command = args[args.length - 1];
            }

            if (command.equals("startd")) {
                args[args.length - 1] = "start";
                daemon.load(args);
                daemon.start();
            } else if (command.equals("stopd")) {
                args[args.length - 1] = "stop";
                daemon.stop();
            } else if (command.equals("start")) {
                daemon.setAwait(true);
                // 这里调用Servlet的init()方法
                daemon.load(args);
                daemon.start();
                if (null == daemon.getServer()) {
                    System.exit(1);
                }
            } else if (command.equals("stop")) {
                daemon.stopServer(args);
            } else if (command.equals("configtest")) {
                daemon.load(args);
                if (null == daemon.getServer()) {
                    System.exit(1);
                }

                System.exit(0);
            } else {
                log.warn("Bootstrap: command \"" + command + "\" does not exist.");
            }
        } catch (Throwable var7) {
            Throwable t = var7;
            if (var7 instanceof InvocationTargetException && var7.getCause() != null) {
                t = var7.getCause();
            }

            handleThrowable(t);
            t.printStackTrace();
            System.exit(1);
        }

    }
(1)Bootstrap 的init()初始化了ClassLoader,并用ClassLoder创建了Catalina实例,赋值给catalianDaemon变量,方便后续catalianDaemon调用load()、start()
// BootStrap Tomcat入口类的init()方法,主要是反射创建 catalinaDaemon  实例,调用load()
public void init() throws Exception {
        this.initClassLoaders();
        Thread.currentThread().setContextClassLoader(this.catalinaLoader);
        SecurityClassLoad.securityClassLoad(this.catalinaLoader);
        // 省略日志代码
        String methodName = "setParentClassLoader";
        Class<?>[] paramTypes = new Class[]{Class.forName("java.lang.ClassLoader")};
        Object[] paramValues = new Object[]{this.sharedLoader};
        Method method = startupInstance.getClass().getMethod(methodName, paramTypes);
        method.invoke(startupInstance, paramValues);
        this.catalinaDaemon = startupInstance;
    }
(2)Bootstrap的start()反射调用catalinaDaemon的start()方法
public void start() throws Exception {
		// 无实例 先init()
        if (this.catalinaDaemon == null) {
            this.init();
        }

        Method method = this.catalinaDaemon.getClass().getMethod("start", (Class[])null);
        method.invoke(this.catalinaDaemon, (Object[])null);
    }
2、Server启动过程
1、Server先启动,它的方法
- addService、removeServce添加删除Service
- init、start方法接着依次调用每个service的init()和start()

package org.apache.catalina;

import java.io.File;
import java.util.concurrent.ScheduledExecutorService;
import javax.naming.Context;
import org.apache.catalina.deploy.NamingResourcesImpl;
import org.apache.catalina.startup.Catalina;

public interface Server extends Lifecycle {
    NamingResourcesImpl getGlobalNamingResources();

    void setGlobalNamingResources(NamingResourcesImpl var1);

    Context getGlobalNamingContext();

    int getPort();

    void setPort(int var1);

    int getPortOffset();

    void setPortOffset(int var1);

    int getPortWithOffset();

    String getAddress();

    void setAddress(String var1);

    String getShutdown();

    void setShutdown(String var1);

    ClassLoader getParentClassLoader();

    void setParentClassLoader(ClassLoader var1);

    Catalina getCatalina();

    void setCatalina(Catalina var1);

    File getCatalinaBase();

    void setCatalinaBase(File var1);

    File getCatalinaHome();

    void setCatalinaHome(File var1);

    int getUtilityThreads();

    void setUtilityThreads(int var1);

    void addService(Service var1);

    void await();

    Service findService(String var1);

    Service[] findServices();

    void removeService(Service var1);

    Object getNamingToken();

    ScheduledExecutorService getUtilityExecutor();
}
1、StandardServer自己的initInternal个startInternal方法,就是Tomcat声明周期的管理方式,分别循环调用每个Service的start和init方法
protected void initInternal() throws LifecycleException {
 // 省略其他代码

// 调用每个service的init()
        for(int i = 0; i < this.services.length; ++i) {
            this.services[i].init();
        }

    }
 protected void startInternal() throws LifecycleException {
        this.fireLifecycleEvent("configure_start", (Object)null);
        this.setState(LifecycleState.STARTING);
        this.globalNamingResources.start();
        synchronized(this.servicesLock) {
            int i = 0;

            while(true) {
                if (i >= this.services.length) {
                    break;
                }
				// 调用每个service的start()
                this.services[i].start();
                ++i;
            }
        }

        if (this.periodicEventDelay > 0) {
            this.monitorFuture = this.getUtilityExecutor().scheduleWithFixedDelay(new Runnable() {
                public void run() {
                    StandardServer.this.startPeriodicLifecycleEvent();
                }
            }, 0L, 60L, TimeUnit.SECONDS);
        }

    }
更多Tomcat知识省略
四、俯视SpringMVC
1、使用
使用步骤
- 导依赖在web.xml中配置Servlet,也就是DispatchServlet
- 创建.xml配置文件,默认xml文件路径在WEB-INFO下
- 创建controller和view


2、整体结构

接口说明
-
XxxAware类:简单理解用处就是某个类想要使用spring的一些东西,需要实现XxxAware告诉spring,spring看到之后就会传送过来,接受唯一方式是重写XxxAware接口的ser-Xxx方法
public interface ApplicationContextAware extends Aware {
    void setApplicationContext(ApplicationContext var1) throws BeansException;
}
public interface EnvironmentAware extends Aware {
    void setEnvironment(Environment var1);
}
// 可以自己写一个Cobtroller然后实现 EnvironmentAware 重写setEnvironment方法,直接向spring通过方法参数的方式要数据
-
ApplicationContext:类似前面的ServletContext
-
Environment:环境,实际在HttpServletBean的Environment使用的是Standard-Servlet-Environment,封装了ServletContext、ServletConfig、JndiProperty、系统环境变量和系统属性,这些封装到了HttpServletBean的propertySources属性下
Servlet的创建过程
- Servlet接口:服务器(Tomcat Server其实是实现子类StandardServer)启动start()之后,调用每个Service的Servlet接口init(有参)方法初始化,调用子类HttpServletBean实现的init(有参)方法。
- HttpServletBean:入口方法init(有参)方法
- 第一步:调用createEnvironment() 获取Environment:init()内部需要获取配置环境配置,通过实现EnvironmetAware接口,获得容器中的的servlet配置信息Environment,转为ConfigurableEnvironment类型保存到environment 成员变量
- 第二步:调用init()无参方法
- init()内部需要获取上下文配置:通过调用ServletContext的getServletContext方法
- init()内部需要获取环境配置:直接拿到成员变量environment
- init()内部需要初始化DispatchServlet:调用模板方法initBaseWrapper(BeanWrapper),具体实现在子类,BeanWrapper就是DispatchServlet,然后将 environment 设置到DispatchServlet
- 最后 调用模板方法this.initServletBean();即子类FrameworkServlet实现的方法
- FrameworkServlet:入口方法 initServletBean()
- 初始化WebApplicationontext调用initWebApplicationContext()完成初始化、设置spring根容器、设置到ServletContext(类似IOC的ApplicationContext),设置监听器并刷新内部调用refresh()方法,内部调用onRefresh()模板方法,也就是DispatchServlet的入口方法
- DispatchServlet:入口方法onRefresh()
- onRefresh()调用initStrategies()加载SpringMVC的9大组件
请求处理过程
- Servlet接口:调用接口的void service(ServletRequest var1, ServletResponse var2)()方法
- GenericServlet:有抽象方法abstract void service(ServletRequest var1, ServletResponse var2)
- FrameworkServlet:模板方法protected void service(HttpServletRequest request, HttpServletResponse response),对于非PATCH方法调用本类的this.processRequest(request, response);该方法内部实际调用的是doService(request, response),在本类是一个抽象方法,实际也就是DispatchServlet的请求出口方法
- DispatchServlet:这里是核心的SpringMVC处理请求的地方,调用本类的doDispatch(request, response)
1、Envirment
org.springframework.web.context.support#StandardServletEnvironment 类封装创建Servlet的环境
//
// Source code recreated from a .class file by IntelliJ IDEA
// (powered by Fernflower decompiler)
//

package org.springframework.web.context.support;


public class StandardServletEnvironment extends StandardEnvironment implements ConfigurableWebEnvironment {
	// web.xml中的servletContext相关key
    public static final String SERVLET_CONTEXT_PROPERTY_SOURCE_NAME = "servletContextInitParams";
    // web.xml中的servletConfig相关key
    public static final String SERVLET_CONFIG_PROPERTY_SOURCE_NAME = "servletConfigInitParams";
    public static final String JNDI_PROPERTY_SOURCE_NAME = "jndiProperties";

    public StandardServletEnvironment() {
    }

    protected void customizePropertySources(MutablePropertySources propertySources) {
        propertySources.addLast(new StubPropertySource("servletConfigInitParams"));
        propertySources.addLast(new StubPropertySource("servletContextInitParams"));
        if (JndiLocatorDelegate.isDefaultJndiEnvironmentAvailable()) {
            propertySources.addLast(new JndiPropertySource("jndiProperties"));
        }
		// 调用父类StandardEnvironment的方法,将配置传给父类
        super.customizePropertySources(propertySources);
    }

    public void initPropertySources(@Nullable ServletContext servletContext, @Nullable ServletConfig servletConfig) {
        WebApplicationContextUtils.initServletPropertySources(this.getPropertySources(), servletContext, servletConfig);
    }
}
2、HttpServletBean
org.springframework.web.servlet#HttpServletBean类,主要参与了创建的工作,并没有涉及请求的处理
//
// Source code recreated from a .class file by IntelliJ IDEA
// (powered by Fernflower decompiler)
//

package org.springframework.web.servlet;


public abstract class HttpServletBean extends HttpServlet implements EnvironmentCapable, EnvironmentAware {
    protected final Log logger = LogFactory.getLog(this.getClass());
    @Nullable
    private ConfigurableEnvironment environment;
    private final Set<String> requiredProperties = new HashSet(4);

    public HttpServletBean() {
    }

    protected final void addRequiredProperty(String property) {
        this.requiredProperties.add(property);
    }

	//1.  直接从sring容器活的ServletConfig
    public void setEnvironment(Environment environment) {
        Assert.isInstanceOf(ConfigurableEnvironment.class, environment, "ConfigurableEnvironment required");
        // 转为ConfigurableEnvironment类型
        this.environment = (ConfigurableEnvironment)environment;
    }

    public ConfigurableEnvironment getEnvironment() {
        if (this.environment == null) {
            this.environment = this.createEnvironment();
        }

        return this.environment;
    }

    protected ConfigurableEnvironment createEnvironment() {
    	// 使用 StandardServletEnvironment 作为配置文件的载体
        return new StandardServletEnvironment();
    }

	//2. 初始化方法,
    public final void init() throws ServletException {
    	// 2.1封装ServletConfig
        PropertyValues pvs = new HttpServletBean.ServletConfigPropertyValues(this.getServletConfig(), this.requiredProperties);
        if (!pvs.isEmpty()) {
            try {
                BeanWrapper bw = PropertyAccessorFactory.forBeanPropertyAccess(this);
                ResourceLoader resourceLoader = new ServletContextResourceLoader(this.getServletContext());
                bw.registerCustomEditor(Resource.class, new ResourceEditor(resourceLoader, this.getEnvironment()));
                //2.2 初始化DispatchServlet
                this.initBeanWrapper(bw);
                // 2.3 设置DispatchSrvlet信息,其实就是environment
                bw.setPropertyValues(pvs, true);
            } catch (BeansException var4) {
                if (this.logger.isErrorEnabled()) {
                    this.logger.error("Failed to set bean properties on servlet '" + this.getServletName() + "'", var4);
                }

                throw var4;
            }
        }

		// 2.4 模板方法,调用子类方法,也就是FrameworkServlet重写的方法
        this.initServletBean();
    }


 	// 子类模板,也就是调用子类
    protected void initServletBean() throws ServletException {
    }


	// 静态内部类,为了解析ServletConfig的配置信息
    private static class ServletConfigPropertyValues extends MutablePropertyValues {
        public ServletConfigPropertyValues(ServletConfig config, Set<String> requiredProperties) throws ServletException {
			// 是否含必要的配置,不含为null,下面抛异常
            Set<String> missingProps = !CollectionUtils.isEmpty(requiredProperties) ? new HashSet(requiredProperties) : null;
			// 配置项key
            Enumeration paramNames = config.getInitParameterNames();
			// 获取配置项value,调用addPropertyValue(),实际执行this.requiredProperties.add(property);
            while(paramNames.hasMoreElements()) {
                String property = (String)paramNames.nextElement();
                Object value = config.getInitParameter(property);
                this.addPropertyValue(new PropertyValue(property, value));
                // 检查全部必须项
                if (missingProps != null) {
                    missingProps.remove(property);
                }
            }

            if (!CollectionUtils.isEmpty(missingProps)) {
                throw new ServletException("Initialization from ServletConfig for servlet '" + config.getServletName() + "' failed; the following required properties were missing: " + StringUtils.collectionToDelimitedString(missingProps, ", "));
            }
        }
    }
}
// HttpServletBean需要 Envirment类转为ConfigurableEnvironment
public interface ConfigurableEnvironment extends Environment, ConfigurablePropertyResolver {
    void setActiveProfiles(String... var1);

    void addActiveProfile(String var1);

    void setDefaultProfiles(String... var1);

    MutablePropertySources getPropertySources();

    Map<String, Object> getSystemProperties();

    Map<String, Object> getSystemEnvironment();

    void merge(ConfigurableEnvironment var1);
}
可以看到在HttpServletBean的init中,
- 首先Servlet将配置参数使用BeanWrapper设置到DispatchServlet的相关属性
- 然后调用模板方法initServletBean(),子类(FrameworkServlet)就是通过这个方法初始化

3、FrameworkServlet
3.1初始化WebApplicationContext
由HttpServletBean得知,FrameworkServlet的初始化入口方法应该是initServletBean(),由父类HttpServletBean调用,主要作用是初始化 WebApplicationContext
// 父类HttpServletBean 的init()方法调用
 protected final void initServletBean() throws ServletException {
        ...

        long startTime = System.currentTimeMillis();

        try {
			// 1. 初始化 initWebApplicationContext
            this.webApplicationContext = this.initWebApplicationContext();
			// 2. 初始化 initFrameworkServlet,模板方法,可由子类重写
            this.initFrameworkServlet();
        } catch (RuntimeException | ServletException var4) {
            this.logger.error("Context initialization failed", var4);
            throw var4;
        }
		...


    }
HttpServletBean的initWebApplicationContext()方法,做了三件事
- 获取spring的根容器rootContext:默认情况下spring会将自己的IOC容器设置成ServletContext的成员属性,默认根容器的key是
String ROOT_WEB_APPLICATION_CONTEXT_ATTRIBUTE = WebApplicationContext.class.getName() + ".ROOT"; - 设置webApplicationContext并根据情况调用onRefresh()方法,这也是模板方法,也就是调用子类DispatchServlet的方法,也就是这个方法加载SpringMVC的组件
- 将spring的webApplicationContext设置到ServletContext中
protected WebApplicationContext initWebApplicationContext() {
WebApplicationContext rootContext = WebApplicationContextUtils.getWebApplicationContext(this.getServletContext());
WebApplicationContext wac = null;
// 已有 webApplicationContext
// 情况1:如果已经通过构造方法设置 webApplicationContext ,刷新上下文,刷新SpringMVC
if (this.webApplicationContext != null) {
wac = this.webApplicationContext;
if (wac instanceof ConfigurableWebApplicationContext) {
ConfigurableWebApplicationContext cwac = (ConfigurableWebApplicationContext)wac;
if (!cwac.isActive()) {
if (cwac.getParent() == null) {
cwac.setParent(rootContext);
}
this.configureAndRefreshWebApplicationContext(cwac);
}
}
}
//情况2: 寻找 webApplicationContext
if (wac == null) {
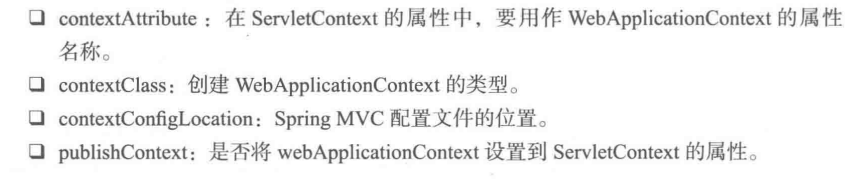
// 当webApplicationContext 已经存在ServletContext之后,通过Servlet的contextAttribute参数获取
wac = this.findWebApplicationContext();
}
//情况3: 创建 webApplicationContext
if (wac == null) {
// 上一步没获取到,也就是还没创建,此处创建
wac = this.createWebApplicationContext(rootContext);
}
// 刷新 webApplicationContext 及 DispatchServlet
if (!this.refreshEventReceived) {
// 刚获取容器默认需要刷新
// 当ContextRefreshEvent事件没有被触发时调用,模板方法,子类可重写,简单理解就是重写加载DispatchServlet
synchronized(this.onRefreshMonitor) {
this.onRefresh(wac);
}
}
if (this.publishContext) {
// WebApplicationContext设置到ServletContext
String attrName = this.getServletContextAttributeName();
this.getServletContext().setAttribute(attrName, wac);
}
return wac;
}
情况1
- 在构造方法中已经传递webApplicationContext参数,这时候只要进行一些设置即可
- 这种方法主要用在Servlet3.0之后再程序中使用Servlet.addServlet方式注册Servlet
- 这个时候就可以在新建FrameworkServlet和其子类的时候通过构造方法传递已经创建好的webApplicationContext
情况2
- webApplicationContext已经存在ServletContext
- 这时候只需配置Servlet时候将ServletContext的webApplicationContext的name配置到contextAttribute属性就可以了

情况3
- 前两种方式都无效的情况下自己创建一个。正常情况就是使用这种方式createWebApplicationContext
- 然后configureAndRefreshWebApplicationContext添加监听器(为了保证webApplicationContext改变后刷新SpringMVC,区别首次初始化webApplicationContext的刷新)并refresh()刷新,导致最终调用DispatchServlet的onRefresh(),实现原理:
- SourceFilteringListener此监听器可以指定参数,实际监听的是ContextRefreshListener,而他又是FrameworkServlet的内部类,监听ContextRefreshedEvent 事件,当接到ContextRefreshedEvent 事件调用FrameworkServle的onApplicationEvent方法,在onApplicationEvent会在调用一次onRefresh()方法,并将refreshEventReceived标志设置为true,对应着initWebApplicationContext方法的if判断
protected WebApplicationContext createWebApplicationContext(@Nullable ApplicationContext parent) {

		// 获取创建类型
        Class<?> contextClass = this.getContextClass();
        // 检查创建类型
        if (!ConfigurableWebApplicationContext.class.isAssignableFrom(contextClass)) {
            throw new ApplicationContextException("Fatal initialization error in servlet with name '" + this.getServletName() + "': custom WebApplicationContext class [" + contextClass.getName() + "] is not of type ConfigurableWebApplicationContext");
        } else {
			// 具体创建
            ConfigurableWebApplicationContext wac = (ConfigurableWebApplicationContext)BeanUtils.instantiateClass(contextClass);
            wac.setEnvironment(this.getEnvironment());
            wac.setParent(parent);
            // 将设置的contextConfigLocation参数传给wac,默认WEB-INFO/[ServletName]-Servlet.xml
            String configLocation = this.getContextConfigLocation();
            if (configLocation != null) {
                wac.setConfigLocation(configLocation);
            }

			// 给wac添加监听器
            this.configureAndRefreshWebApplicationContext(wac);
            return wac;
        }
    }

protected void configureAndRefreshWebApplicationContext(ConfigurableWebApplicationContext wac) {
        if (ObjectUtils.identityToString(wac).equals(wac.getId())) {
            if (this.contextId != null) {
                wac.setId(this.contextId);
            } else {
                wac.setId(ConfigurableWebApplicationContext.APPLICATION_CONTEXT_ID_PREFIX + ObjectUtils.getDisplayString(this.getServletContext().getContextPath()) + '/' + this.getServletName());
            }
        }

        wac.setServletContext(this.getServletContext());
        wac.setServletConfig(this.getServletConfig());
        wac.setNamespace(this.getNamespace());
        // 添加监听器
        // 实际监听的是 ContextRefreshListener 所监听的事件
        wac.addApplicationListener(new SourceFilteringListener(wac, new FrameworkServlet.ContextRefreshListener()));
        ConfigurableEnvironment env = wac.getEnvironment();
        if (env instanceof ConfigurableWebEnvironment) {
            ((ConfigurableWebEnvironment)env).initPropertySources(this.getServletContext(), this.getServletConfig());
        }

        this.postProcessWebApplicationContext(wac);
        this.applyInitializers(wac);
		// 刷新,等下被监听器监听
        wac.refresh();
    }
FrameworkServlet的内部类,监听ContextRefreshedEvent 事件
// 监听
 private class ContextRefreshListener implements ApplicationListener<ContextRefreshedEvent> {
        private ContextRefreshListener() {
        }

        public void onApplicationEvent(ContextRefreshedEvent event) {
            FrameworkServlet.this.onApplicationEvent(event);
        }
    }

  // 刷新,模板方法,子类DispatchServlet的方法
  public void onApplicationEvent(ContextRefreshedEvent event) {
        this.refreshEventReceived = true;
        synchronized(this.onRefreshMonitor) {
            this.onRefresh(event.getApplicationContext());
        }
    }
3.2将WebApplicationContext设置到ServletContext中
// FrameworkServlet的initWebApplicationContext方法
 if (this.publishContext) {
            String attrName = this.getServletContextAttributeName();
            this.getServletContext().setAttribute(attrName, wac);
        }
最后会根据 publishContext 标志判断是都将创建出来的webApplicationContext设置到ServletContext中
- publishContext可以在配置Servlet的web.xml文件中通过init-param参数进行设置
- HttpServletBean初始化时将会设置到publishContext参数
3.3处理请求
Servlet的处理过程
-
在HttpServlet重写service()方法根据请求的类型路由到了doGet、doPost…
-
在FrameworkServlet中重写了service、doGet、doPost…新增了PATCH方法的处理。需要DispatchServlet统一处理的的doGet、doPost、doPut、doDelete方法由统一入口processRequest()方法统一处理。
-
processRequest主要做了:对LocaleContext和RequestAttributes的设置及恢复(装饰者模式),对于RequestAttributes是spring的一个接口,有方法removeAttribute(),根据scope参数判断操作的是request还是session,这里具体适用的是ServletrequestAttributes

- 处理完后发布ServletRequestHandlerEvent消息
FrameworkServlet的service()方法
protected void service(HttpServletRequest request, HttpServletResponse response) throws ServletException, IOException {
        HttpMethod httpMethod = HttpMethod.resolve(request.getMethod());
        if (httpMethod != HttpMethod.PATCH && httpMethod != null) {
            super.service(request, response);
        } else {
        	//1. 4种请求,自己处理
            this.processRequest(request, response);
        }

    }

// 调用接下来 processRequest
 protected final void processRequest(HttpServletRequest request, HttpServletResponse response) throws ServletException, IOException {
        long startTime = System.currentTimeMillis();
        Throwable failureCause = null;

        // 获取LocaleContextHolder中原来保存的 localeContext (国际化)
        LocaleContext previousLocaleContext = LocaleContextHolder.getLocaleContext();

        // 当前请求的 localeContext (国际化)
        LocaleContext localeContext = this.buildLocaleContext(request);

       // 获取RequestContextHolder中原来保存的 requestAttributes
        RequestAttributes previousAttributes = RequestContextHolder.getRequestAttributes();

       // 获取请求的中原来保存的 requestAttributes
        ServletRequestAttributes requestAttributes = this.buildRequestAttributes(request, response, previousAttributes);
        WebAsyncManager asyncManager = WebAsyncUtils.getAsyncManager(request);
        asyncManager.registerCallableInterceptor(FrameworkServlet.class.getName(), new FrameworkServlet.RequestBindingInterceptor());
		// 设置当前请求的 localeContext,requestAttributes 到 LocaleContextHolder
        this.initContextHolders(request, localeContext, requestAttributes);

        try {
        	// 2. 调用 doService,实际请求处理入口
        	// 模板方法,在DispatchServlet中实现
            this.doService(request, response);
        } catch (IOException | ServletException var16) {
            failureCause = var16;
            throw var16;
        } catch (Throwable var17) {
            failureCause = var17;
            throw new NestedServletException("Request processing failed", var17);
        } finally {
            this.resetContextHolders(request, previousLocaleContext, previousAttributes);
            if (requestAttributes != null) {
                requestAttributes.requestCompleted();
            }

            this.logResult(request, response, (Throwable)failureCause, asyncManager);
			// 2.1发布ServletRequestHandlerEvent消息
            this.publishRequestHandledEvent(request, response, startTime, (Throwable)failureCause);
        }

    }
// 3. 调用模板的方法,子类实现,也就是DispatchServlet的方法
protected abstract void doService(HttpServletRequest var1, HttpServletResponse var2) throws Exception;

// 调用接下来 processRequest
protected final void doGet(HttpServletRequest request, HttpServletResponse response) throws ServletException, IOException {
        this.processRequest(request, response);
    }

    protected final void doPost(HttpServletRequest request, HttpServletResponse response) throws ServletException, IOException {
        this.processRequest(request, response);
    }

    protected final void doPut(HttpServletRequest request, HttpServletResponse response) throws ServletException, IOException {
        this.processRequest(request, response);
    }

    protected final void doDelete(HttpServletRequest request, HttpServletResponse response) throws ServletException, IOException {
        this.processRequest(request, response);
    }
注意
- 我们发现这里FrameworkServlet使用了和HttpServlet中不同类型的请求路由处理思路相反,这里将请求合并到了processrequest方法,这里是为了将不同的请求使用不同的Handler处理,细节见后面
- 这里不是直接覆盖service(),而是加了processRequest()直接处理全部,不在内部调用super.service()不是更简单吗?这里采用了较为笨拙的方式其实是为了处理某些特殊需求,如在Post请求之前处理request,这时候需要新建一个类继承DispatchServlet的类,然后覆盖doPost方法,之后在调用super.doPost()方法,但是DispatchServlet并无doPost方法,直接调用FrameworkServlet的doPost处理更为方便
3.4XxxContextHolder


3.5publishRequestHandledEvent发布消息
 private void publishRequestHandledEvent(HttpServletRequest request, HttpServletResponse response, long startTime, @Nullable Throwable failureCause) {
 		// publishEvents  可在配置Servlet在web.xml是设置,默认为true
		// 我们可以针针对这个做一些事情,如记录日志
        if (this.publishEvents && this.webApplicationContext != null) {
            long processingTime = System.currentTimeMillis() - startTime;
            // 无论执行成功失败都要发布
            this.webApplicationContext.publishEvent(new ServletRequestHandledEvent(this, request.getRequestURI(), request.getRemoteAddr(), request.getMethod(), this.getServletConfig().getServletName(), WebUtils.getSessionId(request), this.getUsernameForRequest(request), processingTime, failureCause, response.getStatus()));
        }

    }
举栗


4、DispatchServlet
4.1初始化
FrameworkServlet的模板方法onRefresh方法是DispatcherServlet的入口方法,调用了initStrategies,其中有9个初始化方法,对应就是9大组件
/**
	 * This implementation calls {@link #initStrategies}.
	 */
	@Override
	protected void onRefresh(ApplicationContext context) {
		initStrategies(context);
	}

	/**
	 * Initialize the strategy objects that this servlet uses.
	 * <p>May be overridden in subclasses in order to initialize further strategy objects.
	 */
	 // 9 个组件初始化
	protected void initStrategies(ApplicationContext context) {
		initMultipartResolver(context);
		initLocaleResolver(context);
		initThemeResolver(context);
		initHandlerMappings(context);
		initHandlerAdapters(context);
		initHandlerExceptionResolvers(context);
		initRequestToViewNameTranslator(context);
		initViewResolvers(context);
		initFlashMapManager(context);
	}
4.2具体的初始化过程
1、以LocalResolver为例,组件初始化分两步
- 首先通过context.getBean在容器获取(根据注册名称或者类型,所以在SpringMVC的配置文件中只需要配置想应组件,容器就能找到,找不到就是用默认的getDefaultStrategy)。需要注意的是这里的context是FrameworkContext创建的WebApplicationContext,而不是ServletContext
/**
	 * Initialize the LocaleResolver used by this class.
	 * <p>If no bean is defined with the given name in the BeanFactory for this namespace,
	 * we default to AcceptHeaderLocaleResolver.
	 */
	private void initLocaleResolver(ApplicationContext context) {
		try {
			// 在context中获取
			this.localeResolver = context.getBean(LOCALE_RESOLVER_BEAN_NAME, LocaleResolver.class);
			if (logger.isTraceEnabled()) {
				logger.trace("Detected " + this.localeResolver);
			}
			else if (logger.isDebugEnabled()) {
				logger.debug("Detected " + this.localeResolver.getClass().getSimpleName());
			}
		}
		catch (NoSuchBeanDefinitionException ex) {
			// We need to use the default.
			// 使用默认策略
			this.localeResolver = getDefaultStrategy(context, LocaleResolver.class);
			if (logger.isTraceEnabled()) {
				logger.trace("No LocaleResolver '" + LOCALE_RESOLVER_BEAN_NAME +
						"': using default [" + this.localeResolver.getClass().getSimpleName() + "]");
			}
		}
	}
getDefaultStrategy获取默认组件策略,因为HandleMapping的组件可能有多个,需要返回List,对于其他的去list.get(0)即可
**
	 * Return the default strategy object for the given strategy interface.
	 * <p>The default implementation delegates to {@link #getDefaultStrategies},
	 * expecting a single object in the list.
	 * @param context the current WebApplicationContext
	 * @param strategyInterface the strategy interface
	 * @return the corresponding strategy object
	 * @see #getDefaultStrategies
	 */
	protected <T> T getDefaultStrategy(ApplicationContext context, Class<T> strategyInterface) {
		// 调用 getDefaultStrategies 获取所有默认策略
		List<T> strategies = getDefaultStrategies(context, strategyInterface);
		if (strategies.size() != 1) {
			throw new BeanInitializationException(
					"DispatcherServlet needs exactly 1 strategy for interface [" + strategyInterface.getName() + "]");
		}
		// 因为HandleMapping的组件可能有多个,需要返回List,对于其他的去list.get(0)即可

		return strategies.get(0);
	}

	/**
	 * Create a List of default strategy objects for the given strategy interface.
	 * <p>The default implementation uses the "DispatcherServlet.properties" file (in the same
	 * package as the DispatcherServlet class) to determine the class names. It instantiates
	 * the strategy objects through the context's BeanFactory.
	 * @param context the current WebApplicationContext
	 * @param strategyInterface the strategy interface
	 * @return the List of corresponding strategy objects
	 */
	@SuppressWarnings("unchecked")
	protected <T> List<T> getDefaultStrategies(ApplicationContext context, Class<T> strategyInterface) {
		String key = strategyInterface.getName();
		// 从 defaultStrategies 获取所需策略的类型
		String value = defaultStrategies.getProperty(key);
		if (value != null) {
			// 策略有多个,以逗号分割数组
			String[] classNames = StringUtils.commaDelimitedListToStringArray(value);
			List<T> strategies = new ArrayList<>(classNames.length);
			for (String className : classNames) {
				try {
					// 按获取到的类型初始化策略
					Class<?> clazz = ClassUtils.forName(className, DispatcherServlet.class.getClassLoader());
					Object strategy = createDefaultStrategy(context, clazz);
					strategies.add((T) strategy);
				}
				catch (ClassNotFoundException ex) {
					throw new BeanInitializationException(
							"Could not find DispatcherServlet's default strategy class [" + className +
							"] for interface [" + key + "]", ex);
				}
				catch (LinkageError err) {
					throw new BeanInitializationException(
							"Unresolvable class definition for DispatcherServlet's default strategy class [" +
							className + "] for interface [" + key + "]", err);
				}
			}
			return strategies;
		}
		else {
			return new LinkedList<>();
		}
	}
核心代码Class<?> clazz = ClassUtils.forName(className, DispatcherServlet.class.getClassLoader());
- 参数className来自classNames
- classNames来自value
- value来自defaultStrategies.getPrpperty(key)
private static final Properties defaultStrategies;是静态成员变量,通过静态代码快赋值
static {
		// Load default strategy implementations from properties file.
		// This is currently strictly internal and not meant to be customized
		// by application developers.
		try {
			// 也就是DispatcherServlet.properties特定键值对
			ClassPathResource resource = new ClassPathResource(DEFAULT_STRATEGIES_PATH, DispatcherServlet.class);
			defaultStrategies = PropertiesLoaderUtils.loadProperties(resource);
		}
		catch (IOException ex) {
			throw new IllegalStateException("Could not load '" + DEFAULT_STRATEGIES_PATH + "': " + ex.getMessage());
		}
	}

可以看到一共8各组件,对于处理上传组件MultipartResolver无默认配置
- 默认配置并不是最优配置,有的已经被弃用
- 使用
<mvc:annoncation-driven/>之后,并不会全部使用默认配置,因为它配置;额HandlerMapping、HandlerAdapter、Handler-ExceptionResolver并且还做了很多别的工作


4.3处理请求
DispatchServlet是SpringMVC最核心的类,整个处理过程的顶层设计都在这里
- DispatchServlet的执行入口方法应该是doService(),内部调用本类的doDispatch()
- 在doService()做的事情:首先判断是不是include请求,如果是则对request的Attribute做个快照备份,等待doDispatch()处理完成后进行还原,做完快照之后,又对request设置了一些属性
org.springframework.web.servlet#DispatchServlet类
protected void doService(HttpServletRequest request, HttpServletResponse response) throws Exception {
this.logRequest(request);
// 1. 快照
Map<String, Object> attributesSnapshot = null;
if (WebUtils.isIncludeRequest(request)) {
attributesSnapshot = new HashMap();
Enumeration attrNames = request.getAttributeNames();
label95:
while(true) {
String attrName;
do {
if (!attrNames.hasMoreElements()) {
break label95;
}
attrName = (String)attrNames.nextElement();
} while(!this.cleanupAfterInclude && !attrName.startsWith("org.springframework.web.servlet"));
// 快照
attributesSnapshot.put(attrName, request.getAttribute(attrName));
}
}
// 2. 新设置属性,跟springMVC的组件相关,后续介绍
request.setAttribute(WEB_APPLICATION_CONTEXT_ATTRIBUTE, this.getWebApplicationContext());
request.setAttribute(LOCALE_RESOLVER_ATTRIBUTE, this.localeResolver);
request.setAttribute(THEME_RESOLVER_ATTRIBUTE, this.themeResolver);
request.setAttribute(THEME_SOURCE_ATTRIBUTE, this.getThemeSource());
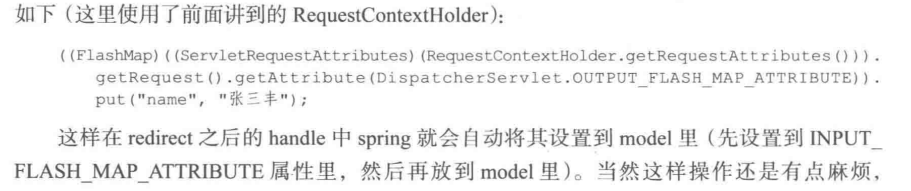
// 3. 下面这些都是跟flushMap相关,主要适用于Redirect转发时的参数的传递
// 比如为了避免重复提交问题,可以在处理完post请求之后重定向到get请求,这样即使用户刷新也无重复提交为
// 一般需要post提交的数据进行回显,但是redirect本身没有传递参数的功能,放到url不合适,这时就可以使用flushMap来进行传递,只需要将传递的参数写入 OUTPUT_FLASH_MAP_ATTRIBUTE,举栗见下面
//
if (this.flashMapManager != null) {
FlashMap inputFlashMap = this.flashMapManager.retrieveAndUpdate(request, response);
if (inputFlashMap != null) {
request.setAttribute(INPUT_FLASH_MAP_ATTRIBUTE, Collections.unmodifiableMap(inputFlashMap));
}
request.setAttribute(OUTPUT_FLASH_MAP_ATTRIBUTE, new FlashMap());
request.setAttribute(FLASH_MAP_MANAGER_ATTRIBUTE, this.flashMapManager);
}
try {
//4. 实际处理
this.doDispatch(request, response);
} finally {
if (!WebAsyncUtils.getAsyncManager(request).isConcurrentHandlingStarted() && attributesSnapshot != null) {
// 快照还原
this.restoreAttributesAfterInclude(request, attributesSnapshot);
}
}
}
说明
-
对于上述3重定向使用flushMap举栗,可以使用原生方法使用,也可以使用spring封装好的RedirectsAttributes,这样就可以将数据自动设置到model里面
- 原生方法
- 封装方法

- 原生方法
4.4doDispatch方法
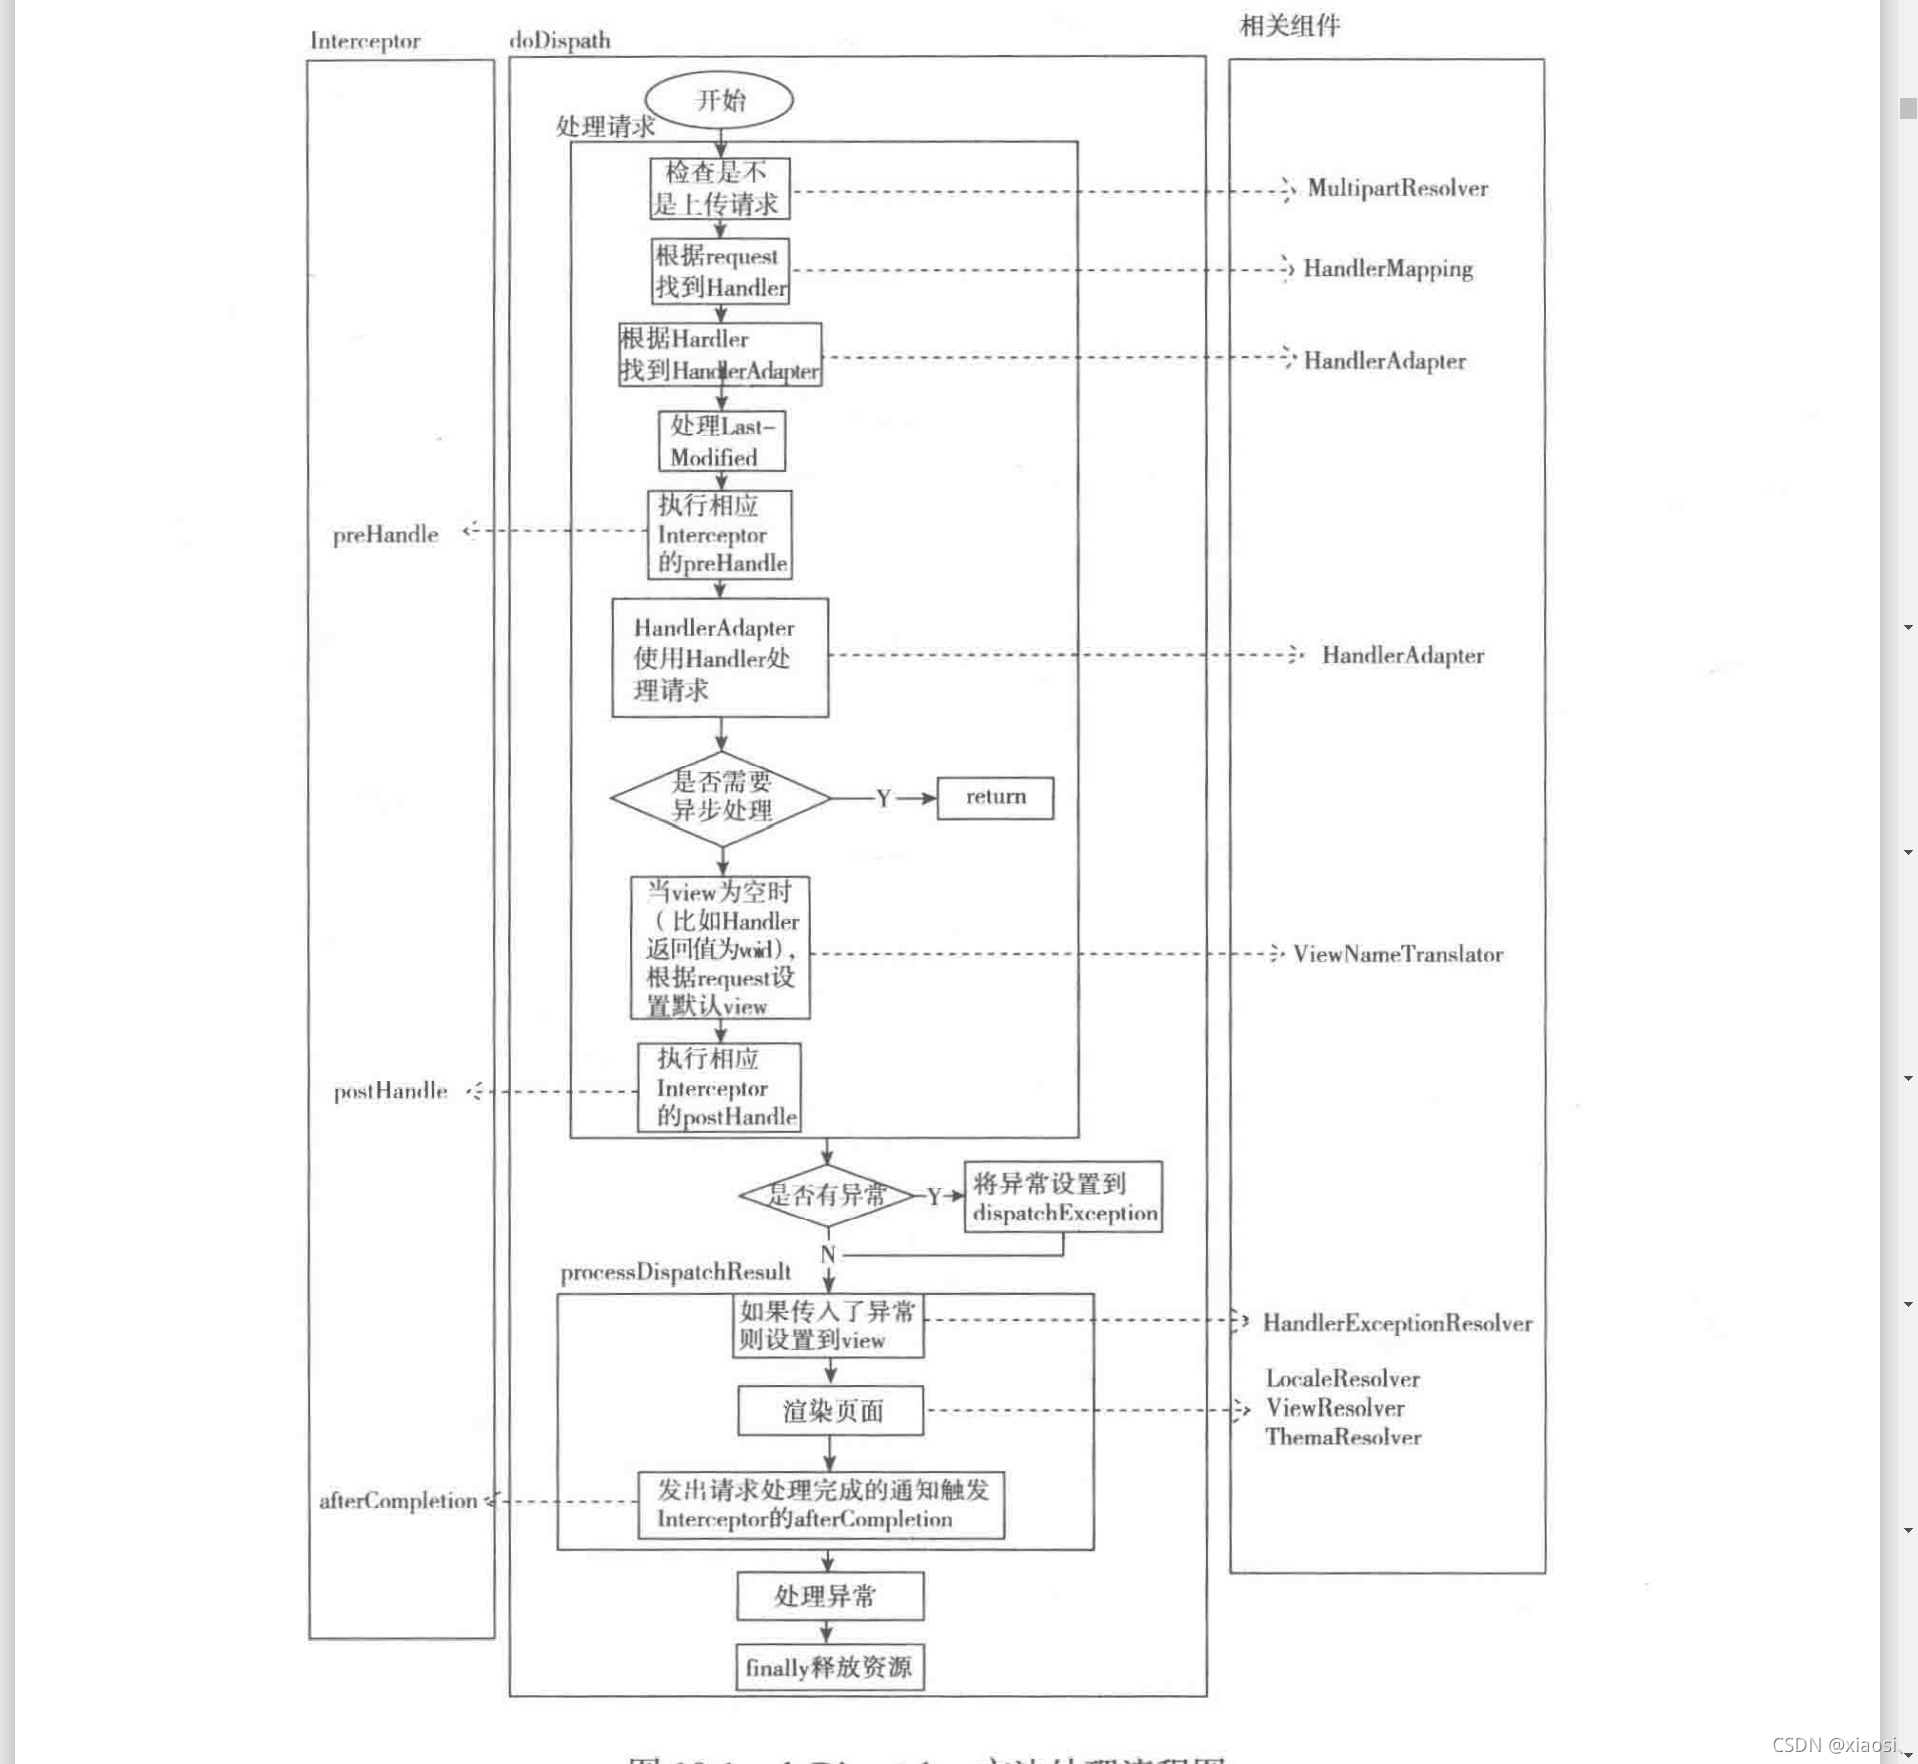
该方法也非常简洁,从顶层设计了整个请求处理的过程,核心代码只有4句,任务分别是
- 根据request找到handler
- 根据handler找到handlerAdapter
- 使用handlerAdapter处理handler
- 调用porcessDispatchResult方法处理上面处理之后的结果(包含找到View并渲染给输出用户)

组件概念:简单理解就是handler就是用来干活的工具,handlerMapping根据根据所需干的活找到相应二段工具,handlerAdapter就是使用工具干活的人
- HandlerMapping:映射器,用来查找Handler的,具体请求对应到Handler
- Handler:处理器,他直接对应的就是Controller层,可以是类、方法,如标注@RequestMapping的都可以看做是Handler
- HandlerAdapter:处理器适配器,灵活处理让Handler处理请求
另外View 和 ViewResolver的原理和上述类似,ViewResolver用来查找View,可以理解为干完活需要写报告,View就是报告的模板,model就是报告的数据
结构
protected void doDispatch(HttpServletRequest request, HttpServletResponse response) throws Exception {
        HttpServletRequest processedRequest = request;
        HandlerExecutionChain mappedHandler = null;
        boolean multipartRequestParsed = false;
        WebAsyncManager asyncManager = WebAsyncUtils.getAsyncManager(request);

        try {
            try {
                ModelAndView mv = null;
                Object dispatchException = null;

                try {
                	// 1. 检查是不是上传请求
                    processedRequest = this.checkMultipart(request);
                    multipartRequestParsed = processedRequest != request;
					// 2. 根据request找到Handler
                    mappedHandler = this.getHandler(processedRequest);
                    if (mappedHandler == null) {

                        this.noHandlerFound(processedRequest, response);
                        return;
                    }
					// 3. 根据handler找到handlerAdapter
                    HandlerAdapter ha = this.getHandlerAdapter(mappedHandler.getHandler());
                    String method = request.getMethod();
					// 4. 分析请求类型
                    boolean isGet = "GET".equals(method);
                    if (isGet || "HEAD".equals(method)) {
                    	// 处理GET、Head请求的Last-Modified
                    	// 当浏览器第一次跟服务器请求资源的时候,服务器哎请求头中包含Last-Modified,之后的请求会带上这个时间,服务器会跟该资源最后修改的时间对比,资源过期就返回新的资源,否则返回304百世资源未过期,直接使用浏览器的缓存
                        long lastModified = ha.getLastModified(request, mappedHandler.getHandler());
                        if ((new ServletWebRequest(request, response)).checkNotModified(lastModified) && isGet) {
                            return;
                        }
                    }
					// 5. 执行响应Interceptor的preHandler
                    if (!mappedHandler.applyPreHandle(processedRequest, response)) {
                        return;
                    }
					// 6. 获取handler处理的ModelAndView
                    mv = ha.handle(processedRequest, response, mappedHandler.getHandler());
                    // 需要异步处理,直接返回
                    // // 异步处理 处理完成之后,触发Intercepter的afterComplection
                    if (asyncManager.isConcurrentHandlingStarted()) {
                        return;
                    }
					// 当view为空时(比如controller返回了void),根据request设置默认view
                    this.applyDefaultViewName(processedRequest, mv);
                    // 执行Interceptor的postHandle
                    mappedHandler.applyPostHandle(processedRequest, response, mv);
                } catch (Exception var20) {
                    dispatchException = var20;
                } catch (Throwable var21) {
                    dispatchException = new NestedServletException("Handler dispatch failed", var21);
                }
				// 7. 处理返回结果,包含异常处理,页面渲染,发出完成通知触发Interceptor的afterCompletion
                this.processDispatchResult(processedRequest, response, mappedHandler, mv, (Exception)dispatchException);
            } catch (Exception var22) {
                this.triggerAfterCompletion(processedRequest, response, mappedHandler, var22);
            } catch (Throwable var23) {
                this.triggerAfterCompletion(processedRequest, response, mappedHandler, new NestedServletException("Handler processing failed", var23));
            }

        } finally {
        	// 是否异步请求
            if (asyncManager.isConcurrentHandlingStarted()) {
                if (mappedHandler != null) {
                    mappedHandler.applyAfterConcurrentHandlingStarted(processedRequest, response);
                }
            } else if (multipartRequestParsed) {
            // 删除上传的资源
                this.cleanupMultipart(processedRequest);
            }

        }
    }
doDispatch大致可以分为两部分:处理请求、渲染页面,开头定义了几个成员变量,方便后续操作判断

4.5getHandler获取Handler处理器链
然后通过上述代码2的getHandler获得Handler处理链,包含handler和interceptor拦截器
 @Nullable
    protected HandlerExecutionChain getHandler(HttpServletRequest request) throws Exception {
        if (this.handlerMappings != null) {
        // 映射器链
            Iterator var2 = this.handlerMappings.iterator();

            while(var2.hasNext()) {
                HandlerMapping mapping = (HandlerMapping)var2.next();
                HandlerExecutionChain handler = mapping.getHandler(request);
                if (handler != null) {
                    return handler;
                }
            }
        }

        return null;
    }
4.6请求处理完成
说明
- 简单理解都是请求需要先经过拦截器的preHandle,而返回的响应之后还需要经过拦截器的postHandle
- 处理完preHandle就到了关键的地方,让handlerAdapter使用handler处理请求(这也是到了我们的controller层)
- 如果需要异步进行controller则直接返回,否则判断是否需要设置默认的View,使用ViewNameTranslator进行设置,然后执行Inteceptor的postHandle方法
- 接下来就是使用processDispatchResult处理前面返回的结果
4.7异常处理机构
有两层异常捕获
- 内层捕获处理过程抛出的异常,设置到成员变量dispatchException变量,在processDispatchResult处理
- 外层捕获是处理渲染页面时抛出的,直接处理processDispatchResult抛出的异常
 private void processDispatchResult(HttpServletRequest request, HttpServletResponse response, @Nullable HandlerExecutionChain mappedHandler, @Nullable ModelAndView mv, @Nullable Exception exception) throws Exception {
        boolean errorView = false;
        // 内层异常
        if (exception != null) {
            if (exception instanceof ModelAndViewDefiningException) {
                this.logger.debug("ModelAndViewDefiningException encountered", exception);
                mv = ((ModelAndViewDefiningException)exception).getModelAndView();
            } else {
                Object handler = mappedHandler != null ? mappedHandler.getHandler() : null;			// 错误页面设置到View
                mv = this.processHandlerException(request, response, handler, exception);
                // // 错误页面设置到View
                errorView = mv != null;
            }
        }
		// 渲染页面
        if (mv != null && !mv.wasCleared()) {
        	// 具体渲染页面
            this.render(mv, request, response);
            if (errorView) {
                WebUtils.clearErrorRequestAttributes(request);
            }
        } else if (this.logger.isTraceEnabled()) {
            this.logger.trace("No view rendering, null ModelAndView returned.");
        }
		// 异步处理,发出处理完成的通知,触发Intercepter的afterComplection
        if (!WebAsyncUtils.getAsyncManager(request).isConcurrentHandlingStarted()) {
            if (mappedHandler != null) {
                mappedHandler.triggerAfterCompletion(request, response, (Exception)null);
            }

        }
    }

// rander()页面渲染
protected void render(ModelAndView mv, HttpServletRequest request, HttpServletResponse response) throws Exception {
        Locale locale = this.localeResolver != null ? this.localeResolver.resolveLocale(request) : request.getLocale();
        response.setLocale(locale);
        String viewName = mv.getViewName();
        View view;
        if (viewName != null) {
        	// 得到实际的view
            view = this.resolveViewName(viewName, mv.getModelInternal(), locale, request);
            if (view == null) {
                throw new ServletException("Could not resolve view with name '" + mv.getViewName() + "' in servlet with name '" + this.getServletName() + "'");
            }
        } else {
            view = mv.getView();
            if (view == null) {
                throw new ServletException("ModelAndView [" + mv + "] neither contains a view name nor a View object in servlet with name '" + this.getServletName() + "'");
            }
        }

        if (this.logger.isTraceEnabled()) {
            this.logger.trace("Rendering view [" + view + "] ");
        }

        try {
            if (mv.getStatus() != null) {
                response.setStatus(mv.getStatus().value());
            }
			// 实际渲染,过程使用ThmemeResolver
            view.render(mv.getModelInternal(), request, response);
        } catch (Exception var8) {
            if (this.logger.isDebugEnabled()) {
                this.logger.debug("Error rendering view [" + view + "]", var8);
            }

            throw var8;
        }
    }
4.8请求处理小结

五、SpringMVC组件概述·
1、HandlerMapping
概述
- 他的作用是根据request找到相应的处理器Handlerhe和Interceptors
- 接口内只有一个方法
HandlerExecutionChain getHandler(HttpServletRequest request) throws Exception; - 方法的实现非常灵活,主要使用Request返回HandlerExecutionChain就可以了,我们可以自己定义XxxHandlerMapping去实现HandlerMapiing接口,重写getHandler方法
举栗

另外
- 上面的举栗只是大致原理伪代码,因为还需要创建对应的Handler
- 返回值除了有Handler还应该包含Interceptor
- 映射的规则需要维护一个对应多个请求的map,对于SimpleUrlHandlerMapping的基本原理就是那样
- HandlerMapping需要注册进容器,注册也很简单,可以在web.xml配置文件中写个Bean即可
- 对于HandlerMapping的顺序需要通过order指定,值越小优先级越高
/**
	 * Return the HandlerExecutionChain for this request.
	 * <p>Tries all handler mappings in order.
	 * @param request current HTTP request
	 * @return the HandlerExecutionChain, or {@code null} if no handler could be found
	 */
	@Nullable
	protected HandlerExecutionChain getHandler(HttpServletRequest request) throws Exception {
		if (this.handlerMappings != null) {
		// 按照顺序获取Handler
			// /** List of HandlerMappings used by this servlet. */
			//@Nullable
			//private List<HandlerMapping> handlerMappings;
			for (HandlerMapping mapping : this.handlerMappings) {
				HandlerExecutionChain handler = mapping.getHandler(request);
				if (handler != null) {
					return handler;
				}
			}
		}
		return null;
	}
2、HandlerAdapter
概念
- 他可以理解为操作处理器Handler干活的老板
- 接口内共三个方法:supports(Object handler)可以判断是否可以使用某个Handler、handler()是具体使用Handler的、getLastModified是获取资源的Last-Modified,Last-Modified 是资源的最后一次修改时间
- 使用HandlerAdapter是因为SpringMVC中没有对处理器做任何限制,处理器可以以任何合理的方式来实现,从support的方式看出来时Object类型,处理器Handler可以使用任何的方式实现,一个类、方法、别的合理的方式
/*
 * Copyright 2002-2018 the original author or authors.
 *
 * Licensed under the Apache License, Version 2.0 (the "License");
 * you may not use this file except in compliance with the License.
 * You may obtain a copy of the License at
 *
 *      https://www.apache.org/licenses/LICENSE-2.0
 *
 * Unless required by applicable law or agreed to in writing, software
 * distributed under the License is distributed on an "AS IS" BASIS,
 * WITHOUT WARRANTIES OR CONDITIONS OF ANY KIND, either express or implied.
 * See the License for the specific language governing permissions and
 * limitations under the License.
 */

package org.springframework.web.servlet;


/**
 * MVC framework SPI, allowing parameterization of the core MVC workflow.
 *
 * <p>Interface that must be implemented for each handler type to handle a request.
 * This interface is used to allow the {@link DispatcherServlet} to be indefinitely
 * extensible. The {@code DispatcherServlet} accesses all installed handlers through
 * this interface, meaning that it does not contain code specific to any handler type.
 *
 * <p>Note that a handler can be of type {@code Object}. This is to enable
 * handlers from other frameworks to be integrated with this framework without
 * custom coding, as well as to allow for annotation-driven handler objects that
 * do not obey any specific Java interface.
 *
 * <p>This interface is not intended for application developers. It is available
 * to handlers who want to develop their own web workflow.
 *
 * <p>Note: {@code HandlerAdapter} implementors may implement the {@link
 * org.springframework.core.Ordered} interface to be able to specify a sorting
 * order (and thus a priority) for getting applied by the {@code DispatcherServlet}.
 * Non-Ordered instances get treated as lowest priority.
 *
 * @author Rod Johnson
 * @author Juergen Hoeller
 * @see org.springframework.web.servlet.mvc.SimpleControllerHandlerAdapter
 * @see org.springframework.web.servlet.handler.SimpleServletHandlerAdapter
 */
public interface HandlerAdapter {

	/**
	 * Given a handler instance, return whether or not this {@code HandlerAdapter}
	 * can support it. Typical HandlerAdapters will base the decision on the handler
	 * type. HandlerAdapters will usually only support one handler type each.
	 * <p>A typical implementation:
	 * <p>{@code
	 * return (handler instanceof MyHandler);
	 * }
	 * @param handler handler object to check
	 * @return whether or not this object can use the given handler
	 */
	boolean supports(Object handler);

	/**
	 * Use the given handler to handle this request.
	 * The workflow that is required may vary widely.
	 * @param request current HTTP request
	 * @param response current HTTP response
	 * @param handler handler to use. This object must have previously been passed
	 * to the {@code supports} method of this interface, which must have
	 * returned {@code true}.
	 * @throws Exception in case of errors
	 * @return a ModelAndView object with the name of the view and the required
	 * model data, or {@code null} if the request has been handled directly
	 */
	@Nullable
	ModelAndView handle(HttpServletRequest request, HttpServletResponse response, Object handler) throws Exception;

	/**
	 * Same contract as for HttpServlet's {@code getLastModified} method.
	 * Can simply return -1 if there's no support in the handler class.
	 * @param request current HTTP request
	 * @param handler handler to use
	 * @return the lastModified value for the given handler
	 * @see javax.servlet.http.HttpServlet#getLastModified
	 * @see org.springframework.web.servlet.mvc.LastModified#getLastModified
	 */
	long getLastModified(HttpServletRequest request, Object handler);

}
举栗
- 先创建自己的XxxController,写一个处理请求的方法
- 创建XxxHandlerAdapter实现HnadlerAdaptet重写方法,也就是handler方法调用XxxController的xxx方法

实现类SimpleControllerHandlerAdapter
这个类实现了HandlerAdapter接口,为默认的处理器适配器
package org.springframework.web.servlet.mvc;


/**
 * Adapter to use the plain {@link Controller} workflow interface with
 * the generic {@link org.springframework.web.servlet.DispatcherServlet}.
 * Supports handlers that implement the {@link LastModified} interface.
 *
 * <p>This is an SPI class, not used directly by application code.
 *
 * @author Rod Johnson
 * @author Juergen Hoeller
 * @see org.springframework.web.servlet.DispatcherServlet
 * @see Controller
 * @see LastModified
 * @see HttpRequestHandlerAdapter
 */
public class SimpleControllerHandlerAdapter implements HandlerAdapter {

	@Override
	public boolean supports(Object handler) {
		return (handler instanceof Controller);
	}

	@Override
	@Nullable
	public ModelAndView handle(HttpServletRequest request, HttpServletResponse response, Object handler)
			throws Exception {

		// 使用了实现Controller接口的处理器,也就是自己写的XxxController
		return ((Controller) handler).handleRequest(request, response);
	}

	@Override
	public long getLastModified(HttpServletRequest request, Object handler) {
		if (handler instanceof LastModified) {
			return ((LastModified) handler).getLastModified(request);
		}
		return -1L;
	}

}

// Controller接口
@FunctionalInterface
public interface Controller {

	/**
	 * Process the request and return a ModelAndView object which the DispatcherServlet
	 * will render. A {@code null} return value is not an error: it indicates that
	 * this object completed request processing itself and that there is therefore no
	 * ModelAndView to render.
	 * @param request current HTTP request
	 * @param response current HTTP response
	 * @return a ModelAndView to render, or {@code null} if handled directly
	 * @throws Exception in case of errors
	 */
	@Nullable
	ModelAndView handleRequest(HttpServletRequest request, HttpServletResponse response) throws Exception;

}
选取XxxHandlerAdapter方法
XxxHandlerAdapter可以有多个,选择方式
- 遍历全部的的HandlerAdapter,找到一个能处理当前handler的Adapter就停止并返回
- 这里的顺序是根据设置的order属性决定的
// DiapatchServlet类
	/**
	 * Return the HandlerAdapter for this handler object.
	 * @param handler the handler object to find an adapter for
	 * @throws ServletException if no HandlerAdapter can be found for the handler. This is a fatal error.
	 */
	protected HandlerAdapter getHandlerAdapter(Object handler) throws ServletException {
		if (this.handlerAdapters != null) {
		// 全部能找到的处理器适配器
			for (HandlerAdapter adapter : this.handlerAdapters) {
				if (adapter.supports(handler)) {
					return adapter;
				}
			}
		}
		throw new ServletException("No adapter for handler [" + handler +
				"]: The DispatcherServlet configuration needs to include a HandlerAdapter that supports this handler");
	}
3、HandlerExceptionResolver
概述
- 主要作用是做异常处理,具体点就是根据异常设置ModelAndView,之后交给rander渲染页面,rander并不关心ModelAndView怎么来的,这也就是SpringMVC设计优秀的一个体现,分工明确互不干涉
- 他只处理渲染之前的异常,对于rander的渲染异常不能处理
- 接口的方法只有一个resloveException()用于解析出ModelAndView,具体实现可以维护一个异常为key、View为value的map解析时直接从map获取View
package org.springframework.web.servlet;

public interface HandlerExceptionResolver {

	@Nullable
	ModelAndView resolveException(
			HttpServletRequest request, HttpServletResponse response, @Nullable Object handler, Exception ex);

}
4、ViewResolver
概述
- 主要用来将String类型的视图名(也叫逻辑视图)和Locale解析为View类型的视图
- 接口只有一个方法View resolveViewName(String viewName,Locale locale)
- View是用来渲染页面的,简单理解就是将程序返回的参数封装到模板里,生成html或者其他类型的文件,主要的问题就是是用那个模板?用什么技术将视图渲染?这就是ViewResolve主要需要做的工作
- 最常使用的UrlBasedViewResolver系列的解析器都是针对单一视图类型自己解析的,只需要找到使用的模板就可以了,常见的:
- InternalResourceViewResolver只针对jsp类型的视图
- FreeMarkerViewResolver只针对FreeMarker类型的视图
- VelocityViewREsolver只针对Velocity类型的视图
- ResourceBundleViewResolver、XmlViewResolver、BeanNameViewResolver等解析器可以同时解析多种类型的视图,如第一个根据propweties配置文件解析的,配置文件需要同时配置class和url两项内容
XmlViewResolver和ResourceBundleViewResolver类似,只不过它是实用xml文件来配置的
BeanNameViewResolver是根据ViewName从ApplicationContext容器查找相应的bean做View的,这个实现比较简单
package org.springframework.web.servlet.view;


public class BeanNameViewResolver extends WebApplicationObjectSupport implements ViewResolver, Ordered {

	private int order = Ordered.LOWEST_PRECEDENCE;  // default: same as non-Ordered


	/**
	 * Specify the order value for this ViewResolver bean.
	 * <p>The default value is {@code Ordered.LOWEST_PRECEDENCE}, meaning non-ordered.
	 * @see org.springframework.core.Ordered#getOrder()
	 */
	public void setOrder(int order) {
		this.order = order;
	}

	@Override
	public int getOrder() {
		return this.order;
	}


	@Override
	@Nullable
	public View resolveViewName(String viewName, Locale locale) throws BeansException {
		ApplicationContext context = obtainApplicationContext();
		if (!context.containsBean(viewName)) {
			// Allow for ViewResolver chaining...
			return null;
		}
		if (!context.isTypeMatch(viewName, View.class)) {
			if (logger.isDebugEnabled()) {
				logger.debug("Found bean named '" + viewName + "' but it does not implement View");
			}
			// Since we're looking into the general ApplicationContext here,
			// let's accept this as a non-match and allow for chaining as well...
			return null;
		}
		// 返回容器中对应ViewName的Bean
		return context.getBean(viewName, View.class);
	}

}
- ViewResolver使用需要注册到容器,默认使用的是InternalResourceViewResolver
5、RequestToViewNameTranslator
概述
- ViewResolver根据ViewName查找View,但是有的Hadndler处理完并没有设置View也没有设置ViewName,这时候就需要从request中获取viewName了
- 接口只有一个方法String getViewName(HttpServletRequest request)
举栗

6、LocaleResolver
概念
- 解析视图需要有两个参数:一个是视图名viewName,从controller中通过组件ViewResolver获取,或者是未指定的话需使用RequestToViewNameResolver从request获取默认视图名;另外一个是Locale,Locale从哪里来?这就是LocaleResolver要做的事情
- LocaleResolver用于从request解析出Locale,也就是国际化i18n的基础,接口有两个方法,分别表示从request获得Locale和把Locale设置给特定的request
- SpringMVC两个地方使用到了Locale,一个是ViewResolver解析视图的时候,另外一个是使用国际化资源和主题的时候。
7、其他的组件
-
ThemeResolver:资源组件
-
MultipartResolver:文件上传组件
-
FlushMapManager:管理FlushMap的组件
详细介绍持续更新…

CSDN联合极客时间,共同打造面向开发者的精品内容学习社区,助力成长!
更多推荐


 1
1 0
0- 0


 已为社区贡献11条内容

所有评论(0)