边缘识别+轮廓识别+边框+二值化
机器视觉 图片处理一:图片二值化1. 什么是二值化2. 代码3. 结果展示二:寻找物体轮廓1.主要函数2. 代码3.结果展示三:二值化+边框四:结语边缘识别+轮廓识别+边框+二值化环境:ubuntu+python部分代码摘自网络一:图片二值化1. 什么是二值化将图像上的像素点的灰度值设为0或255,整个图像呈现出黑白效果。所有灰度大于或等于阈值的像素被判定为属于特定物体,其灰度值为255表示,否则
边缘识别+轮廓识别+边框+二值化
环境:ubuntu+python
部分代码摘自网络
一:图片二值化
1. 什么是二值化
将图像上的像素点的灰度值设为0或255,整个图像呈现出黑白效果。
所有灰度大于或等于阈值的像素被判定为属于特定物体,其灰度值为255表示,
否则这些像素点被排除在物体区域以外,灰度值为0,表示背景或者例外的物体区域。
2. 代码
# 图片二值化
from PIL import Image
img = Image.open('p16.jpg')

# 模式L”为灰色图像
Img = img.convert('L')
Img.save("test1.jpg") #保存

# 自定义灰度界限
threshold = 200
table = []
for i in range(256):
    if i < threshold:
        table.append(0)
    else:
        table.append(1)

# 二值化并保存
photo = Img.point(table, '1')
photo.save("test2.jpg")
3. 结果展示


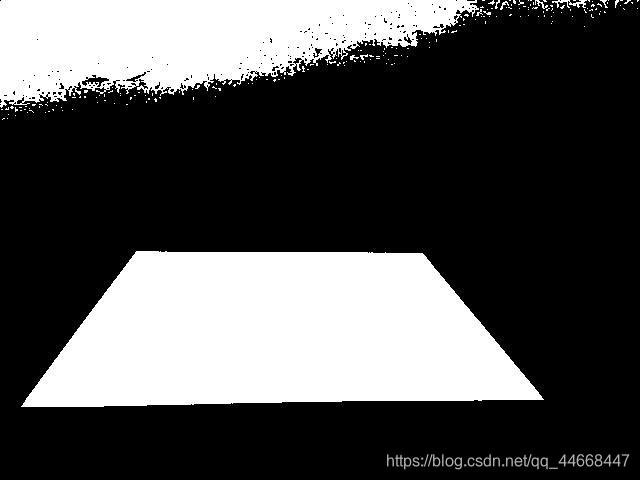
分别为原图-灰度图-黑白图,对结果不满意可进行进一步降噪操作。
二:寻找物体轮廓
本部分代码参考 Python+Opencv测量物体之间的距离
1. 主要函数
@图片处理
# 执行灰度变换
gray = cv2.cvtColor(image, cv2.COLOR_BGR2GRAY)#颜色空间转换函数,需要转换的图片,转换成何种格式。
gray = cv2.GaussianBlur(gray, (7, 7), 0) #高斯滤波
@边缘检测
edged = cv2.Canny(gray, 50, 100)# 执行Canny边缘检测
edged = cv2.dilate(edged, None, iterations=1)#膨胀:求局部最大值,使图像中的高亮区域逐渐增长
edged = cv2.erode(edged, None, iterations=1)#腐蚀:求局部最小值
#先膨胀后腐蚀,闭运算,填充物体内黑洞,连接邻近物体和平滑边界
@寻找轮廓
cnts = cv2.findContours(edged.copy(), cv2.RETR_EXTERNAL, cv2.CHAIN_APPROX_SIMPLE)
#参数1:原图像;参数2:轮廓信息的组织形式:只有外侧轮廓;参数3:压缩水平方向,垂直方向,对角线方向的元素,只保留端点;
返回值:输出:image图片(opencv3才有);
轮廓contours:list结构,列表中每个元素代表一个边沿信息。每个元素是(x,1,2)的三维向量,x表示该条边沿里共有多少个像素点,第三维的那个“2”表示每个点的横、纵坐标;
hierarchy:返回类型是(x,4)的二维ndarray。x和contours里的x是一样的意思。四列分别对应下一个轮廓编号、上一个轮廓编号、父轮廓编号、子轮廓编号,该值为负数表示没有对应项。
@外接矩形(打框)
box = cv2.minAreaRect(c) #计算最小的外接矩形,获取最小外接矩阵,中心点坐标,宽高,旋转角度
box = cv2.cv.BoxPoints(box) #获取矩形四个顶点,浮点型
box = np.array(box, dtype="int") #转成数组的ndarray对象,取整
box = perspective.order_points(box) #排序:左上、右上、右下、左下
@绘制轮廓与边框
cv2.drawContours(orig, [c.astype("int")],-1, (0, 255, 0), 2)#绘制边框
cv2.drawContours(orig, [box.astype("int")], -1, (0, 255, 0), 1)# 绘制轮廓
参数1:图片;参数2:轮廓;参数3:-1,绘制所有轮廓;参数4:color;参数5:轮廓线宽度
2. 代码
# coding=utf-8
# 导入相应的pthon包
from PIL import Image
from scipy.spatial import distance as dist
from imutils import perspective
from imutils import contours
import numpy as np
import argparse
import imutils
import cv2

def draw_rect(cnts,orig):
    for c in cnts:
	# 过滤点太小的轮廓点
       if cv2.contourArea(c) < 100:
           continue
	# 计算最小的外接矩形
       box = cv2.minAreaRect(c)
       box = cv2.cv.BoxPoints(box) if imutils.is_cv2() else cv2.boxPoints(box)
       box = np.array(box, dtype="int")

	# 对轮廓点进行排序:左上、右上、右下、左下
       box = perspective.order_points(box)

	# 绘制轮廓
	#cv2.drawContours(orig, [box.astype("int")], -1, (0, 255, 0), 1)
       cv2.drawContours(orig, [c.astype("int")],-1, (0, 255, 0), 2)
    return orig

# 进行参数配置和解析
ap = argparse.ArgumentParser()
ap.add_argument("-i", "--image", required=True, help="path to the input image")
args = vars(ap.parse_args())

# 读取图片
image = cv2.imread(args["image"])
#image = cv2.imread('/home/e/01.jpg')
# 执行灰度变换
#颜色空间转换函数,需要转换的图片,转换成何种格式。
gray = cv2.cvtColor(image, cv2.COLOR_BGR2GRAY)
# 执行高斯滤波
gray = cv2.GaussianBlur(gray, (7, 7), 0)

# 执行Canny边缘检测
edged = cv2.Canny(gray, 50, 100)
# 执行腐蚀和膨胀处理
edged = cv2.dilate(edged, None, iterations=1)
edged = cv2.erode(edged, None, iterations=1)
# 在边缘映射中寻找轮廓
cnts = cv2.findContours(edged.copy(), cv2.RETR_EXTERNAL, cv2.CHAIN_APPROX_SIMPLE)
cnts = imutils.grab_contours(cnts)

# 对轮廓点进行排序
(cnts, _) = contours.sort_contours(cnts)
# 设置显示颜色
colors = ((0, 0, 255), (240, 0, 159), (0, 165, 255), (255, 255, 0), (255, 0, 255))

orig=image.copy()
#画框
orig=draw_rect(cnts,orig)

# 显示结果
cv2.imshow("Image", orig)
cv2.imwrite('cnts.jpg',orig)

#cv2.imshow("mask", mask)
#cv2.imwrite('d.jpg',mask)

cv2.waitKey(0)
3.结果展示
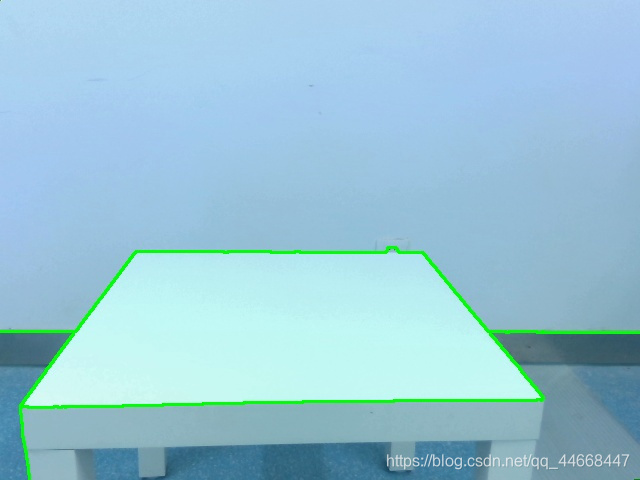
三:二值化+边框
实验发现,原图直接寻找轮廓打边框,不适用于本例中的立体图;现采用二值化后的图片进行打框操作。

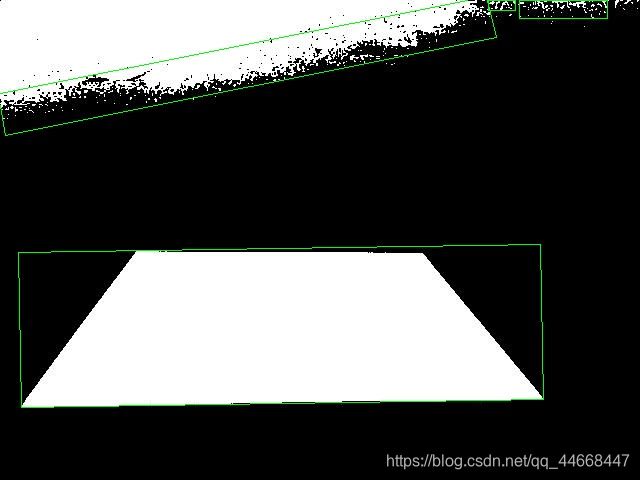
四:结语
canny+opencv 对于平面图有较好的效果,对于本例中的图片,不能很好的找到其轮廓和边框。三维物体轮廓识别待研究!

CSDN联合极客时间,共同打造面向开发者的精品内容学习社区,助力成长!
更多推荐


 16
16 0
0- 0


 已为社区贡献1条内容

所有评论(0)