

Hello everyone,
I'm back with another Linux tutorial. We are going to talk about something which is also my personal favorite - VIM.
We are all fed up with iDE's and text editors which takes years to open up and setting up these things takes more time than writing the whole code. That's why I have come up with the best solution.
What's Vim?
Before we go any further, let's talk about what vim is. Vim is a very lightweight text editor that can be customized however we want. It normally runs in the terminal and is very easy to learn.
Why Vim?
As I mentioned earlier, Vim is very fast and highly customizable. Also, who doesn't want to work on an IDE which opens up within a second? Another reason to choose vim is because of its keyboard shortcuts. While using vim you don't need to touch the mouse. This will reduce your coding time by half. I'm sure by the end of the day, you will be a fan. Let's get started now.
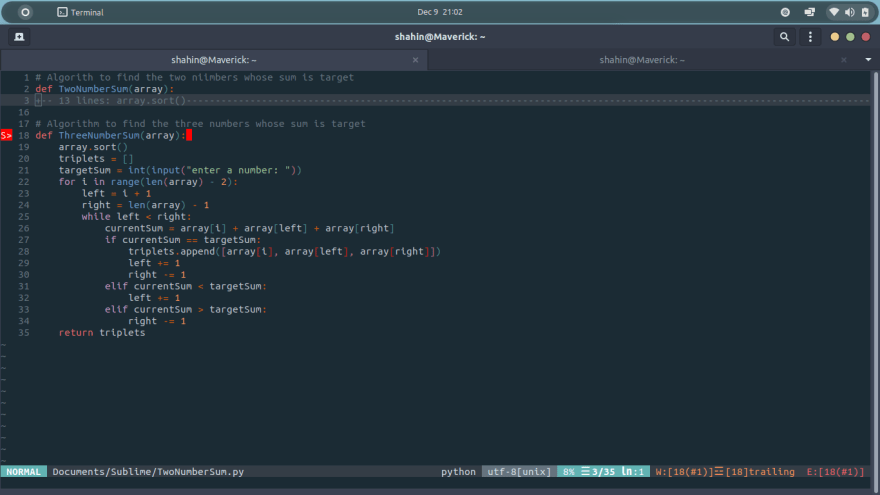
After this tutorial, our vim will look like :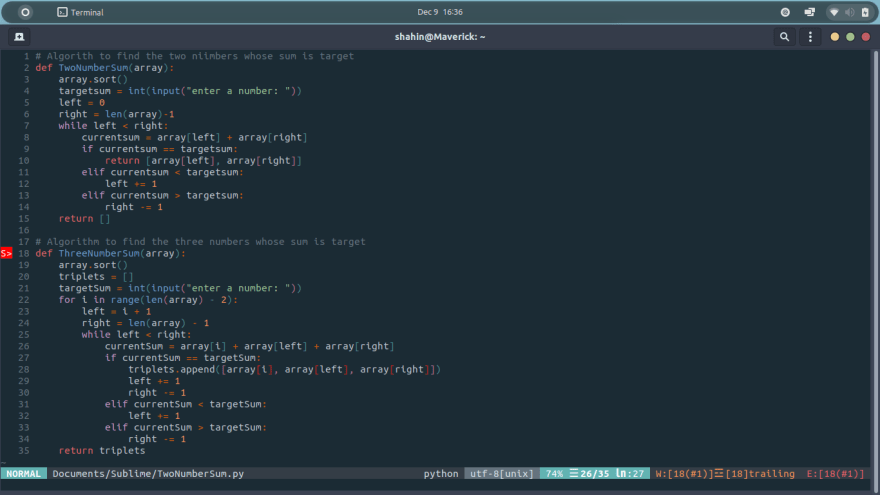
Installing Vim
Vim installation is a very easy step. For now, I'm going to focus on Linux installation but I'll provide the links for other operating systems.
Windows - Vim in windows
Mac - We are going to install vim using Homebrew. Open your terminal and type:
$ brew update
$ brew install vim
This will install vim on your machine.
Linux - Installing vim in Linux is very easy. Open your terminal and type:
- For Debian based distros:
$ apt-get remove vim-tiny
$ apt-get update
$ apt-get install vim
- For Arch based distros:
pacman -S vim
- For fedora:
dnf install vim-enhanced
Installing Plugin Manager
Vim comes with a native plugin manager but we have something better than that. We are going to install Vundle. It makes installing and updating packages trivial.
Let's install vundle:
- Open your terminal and type :
$ git clone https://github.com/gmarik/Vundle.vim.git ~/.vim/bundle/Vundle.vim
This will clone the vundle repository in your machine.
- Next step is the vim configuration file(vimrc). You will need this file throughout the tutorial. Do the following in your terminal:
$ cd ~
$ touch ~/.vimrc
- Add vundle to your vim configuration. Go to your terminal and type:
$ nano ~/.vimrc
this will open the vimrc file. Now copy the code below and paste it there.
filetype off                  " required

" set the runtime path to include Vundle and initialize
set rtp+=~/.vim/bundle/Vundle.vim
call vundle#begin()

" let Vundle manage Vundle, required
Plugin 'gmarik/Vundle.vim'

" All of your Plugins must be added before the following line
call vundle#end()
filetype plugin indent on
Now ctrl+o to write the file then press Enter and finally ctrl+x to exit the editor.
- Now let's install vundle plugin inside vim. fire up your terminal and type
vimand now vim will load up. Now type:PluginInstalland pressEnter.
Making Vim an IDE
Now comes the best part - Installing all plugins to make vim an IDE. This step is very easy, we are going to add a line in our vimrc and go to vim and install it. Dont worry this may look a bit confusing but it's very easy. Let's get started :
- Open your terminal type
sudo nano ~/.vimrcand clear everything there and then paste the code:
set nocompatible              " required
filetype off                  " required
set rtp+=~/.vim/bundle/Vundle.vim
call vundle#begin()
Plugin 'gmarik/Vundle.vim'

" All Plugins

Plugin 'mhartington/oceanic-next'
Plugin 'tmhedberg/SimpylFold'
Plugin 'vim-scripts/indentpython.vim'
Plugin 'vim-syntastic/syntastic'
Plugin 'nvie/vim-flake8'
Plugin 'scrooloose/nerdtree'
Plugin 'jistr/vim-nerdtree-tabs'
Plugin 'kien/ctrlp.vim'
Plugin 'tpope/vim-fugitive'
Plugin 'zxqfl/tabnine-vim'
Plugin 'frazrepo/vim-rainbow'
Plugin 'vim-airline/vim-airline'
Plugin 'vim-airline/vim-airline-themes'
Plugin 'davidhalter/jedi-vim'
Plugin 'ycm-core/YouCompleteMe'


call vundle#end()            " required
filetype plugin indent on    " required


" setting horizontal and vertical splits
set splitbelow
set splitright

"split navigations
nnoremap <C-J> <C-W><C-J>
nnoremap <C-K> <C-W><C-K>
nnoremap <C-L> <C-W><C-L>
nnoremap <C-H> <C-W><C-H>

" Enable folding
set foldmethod=indent
set foldlevel=99

" Enable folding with the spacebar
nnoremap <space> za


" Setting up indendation

au BufNewFile, BufRead *.py
    \ set tabstop=4 |
    \ set softtabstop=4 |
    \ set shiftwidth=4 |
    \ set textwidth=79 |
    \ set expandtab |
    \ set autoindent |
    \ set fileformat=unix

au BufNewFile, BufRead *.js, *.html, *.css
    \ set tabstop=2 |
    \ set softtabstop=2 |
    \ set shiftwidth=2

highlight BadWhitespace ctermbg=red guibg=darkred
au BufRead,BufNewFile *.py,*.pyw,*.c,*.h match BadWhitespace /\s\+$/

let g:ycm_autoclose_preview_window_after_completion=1
map <leader>g  :YcmCompleter GoToDefinitionElseDeclaration<CR>

" setting up pyflakes

let python_highlight_all=1
syntax on

" nerd tree settings
let NERDTreeIgnore=['\.pyc$', '\~$'] "ignore files in NERDTree

" setting up line numbering
set nu

" Rainbow bracket settings
let g:rainbow_active = 1
Just like we did before press ctrl+o to write and Enter to save. Then press Ctrl+x to exit.
-
The next step is to install everything using the plugin manager. Open the terminal and type
vim. Now, install the plugin by typing:PluginInstall. This will take some time but it will install all the plugins. -
The ycmserver error - when you open vim you may encounter some errors but don't worry, it's very easy to fix it. open your terminal and type:
$ pip install cmake
$ cd ~/.vim/bundle/YouCompleteMe
$ ./install.py
- Let's set up a color scheme for our IDE. We are going to install the oceanic theme for now. fire up your terminal and type:
$ git clone https://github.com/mhartington/oceanic-next.git
$ cd oceanic-next
$ cp colors/OceanicNext.vim ~/.vim/colors
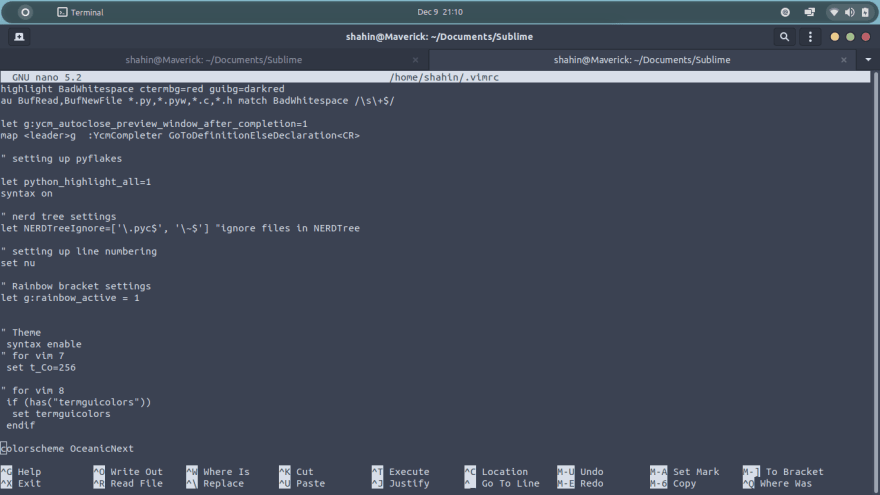
Now open your vimrc and add the color schemes. To do this open your terminal and type :
$ nano ~/.vimrc
this will open your vimrc file. Now paste the code below there:
" Theme
 syntax enable
" for vim 7
 set t_Co=256

" for vim 8
 if (has("termguicolors"))
  set termguicolors
 endif

colorscheme OceanicNext
Now Ctrl+o to write and press Enter to save it. Press Ctrl+x to exit.


Nicely done guys. We made vim a powerful yet lightweight ide.
Features of our new Vim IDE
We did so many things but I did not explain what we were doing or what features we added to our Vim-Ide. Trust me, you guys are going to be surprised when you hear the features of your new ide. Let's get into it now.
- Split layout - If you open a file with :sp , you split the layout vertically (opening the new file below the current file). If you reverse the keys to :vs , you get a horizontal split (opening the new file to the right of your current file).Key combos:
Ctrl+jmove to the split below,Ctrl+kmove to the split above,Ctrl+lmove to the split to the right,Ctrl+hmove to the split to the left.

- Code Folding - Modern IDEs can fold the codes at functions and import statements, by showing the first line only. You can also do it here by pressing the
Spacekey.
- Autocomplete - Just like any other IDE, vim can predict what you are going to do next.

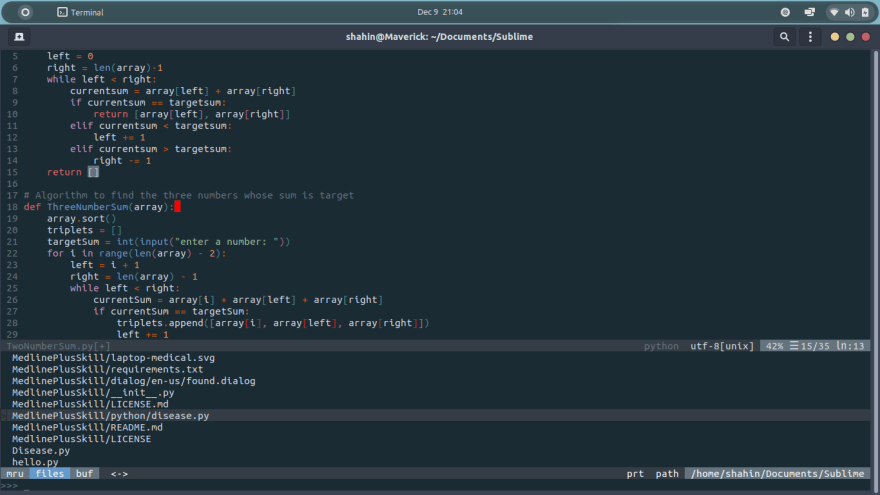
- Super Searching - You can navigate to any file or any tag just by pressing
Ctrl+p. This is one of my favorite features of vim.
- Syntax Checking/Highlighting - After you write the code in vim. Our flake-8 and syntastic plugin will highlight all the errors in your code and also tell you how to fix it.

We have added almost every feature of ide to our vim. You can now code in a feature-rich ide without having to wait an hour to open up.
Small Intro to Vim
I believe some of you have experience using vim. It's okay even if you don't have any, I will give you a small intro of the basics.
-
Modes - Vim is usually opened in command mode, this means that you can write anything but you do all other commands here like we installed the plugins. Commands usually start with
:. In order to change from command mode to writing mode pressi. You are now in insert mode, you can write everything here and go back to command mode by pressingEsc. -
Writing, saving, and exiting - When we change to insert mode from command mode(
i) we can edit the code. After we finish, we need to save this and exit, but how?
To do this, you need to go back to command mode by pressingEscand press:wto write everything. you can exit the editor by using the command:q. If we need to exit without saving, use the command:q!. -
Additional resource - If you need to learn more about vim and its features, go to vimcasts.
Conclusion
Vim is something every programmer should try at least once. I hope this blog helped someone or encouraged someone to try it out. There are tons of plugins out there, go find yours and try them out. If you find any difficulties, please let me know in the comments. That's it for today and I will be back with another tutorial soon.


 已为社区贡献12493条内容

所有评论(0)