

1, Pull image and publish application
1. Install the Publish Over SSH plug-in
Publish Over SSH plug-in can send Shell commands remotely, and Jenkins needs to be restarted after installation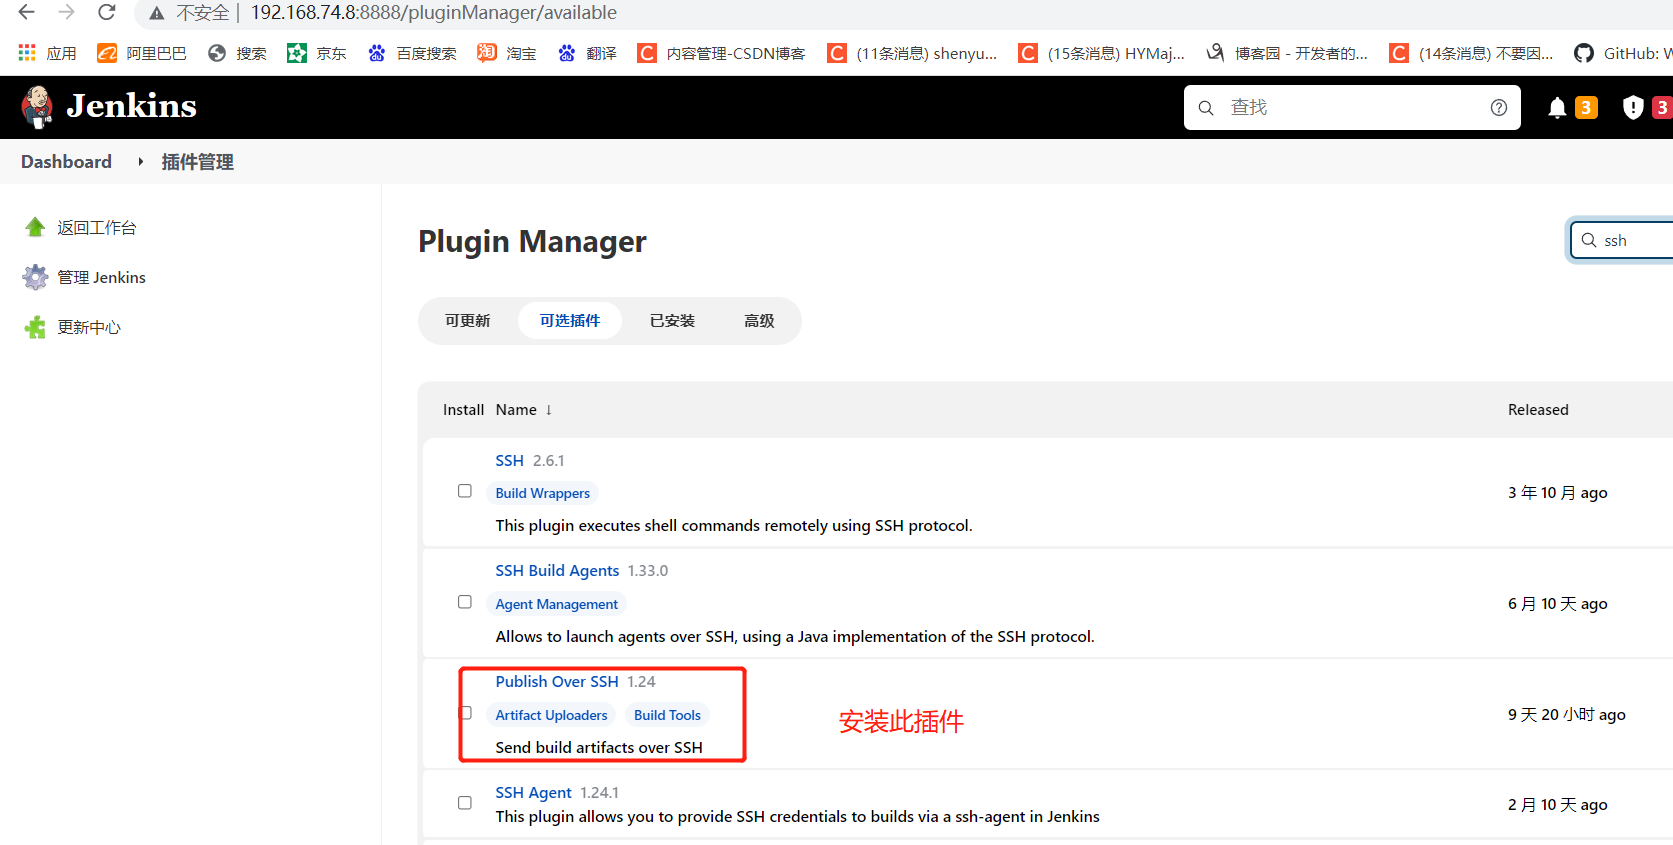
2. Configure remote deployment server
Copy the public key and copy it to the production server on the Jenkins server
[root@jenkins ~]# cd .ssh/
[root@jenkins .ssh]# ls
id_rsa  id_rsa.pub  known_hosts
[root@jenkins .ssh]# ssh-copy-id 192.168.74.12
#The above address is the web production server address
View credentials for production servers
[root@web1 ~]# cd .ssh/
[root@web1 .ssh]# ls
authorized_keys
[root@web1 .ssh]# cat authorized_keys

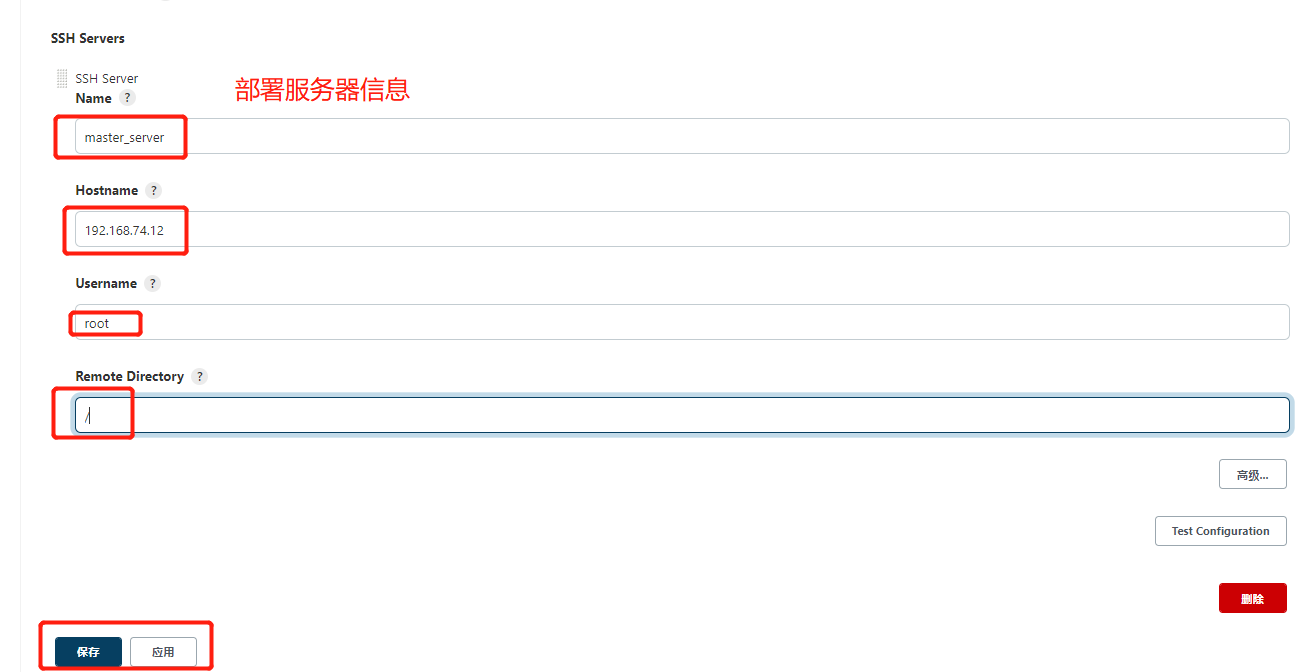
3. Add remote server in Jenkins system configuration
Dashboard->Configure System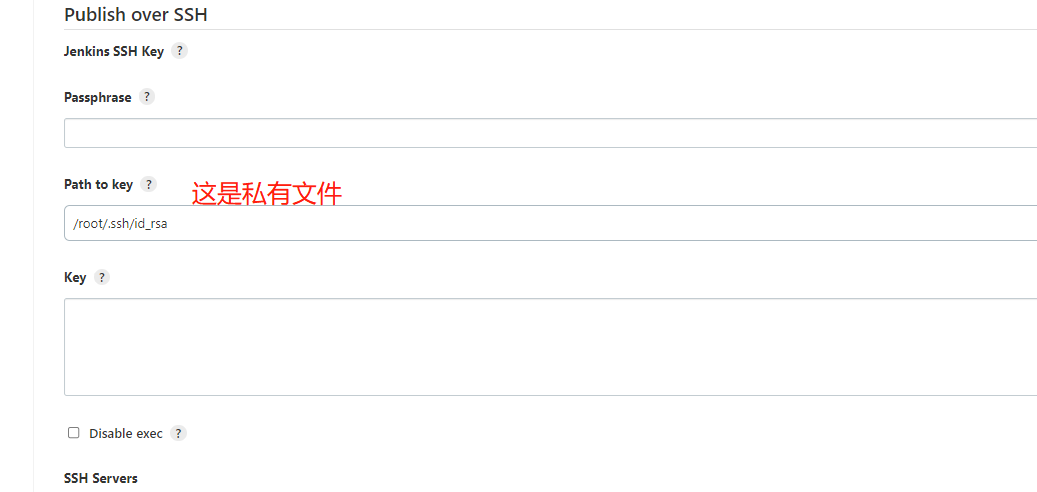
3. Modify Jenkins "le build script to generate remote call template code
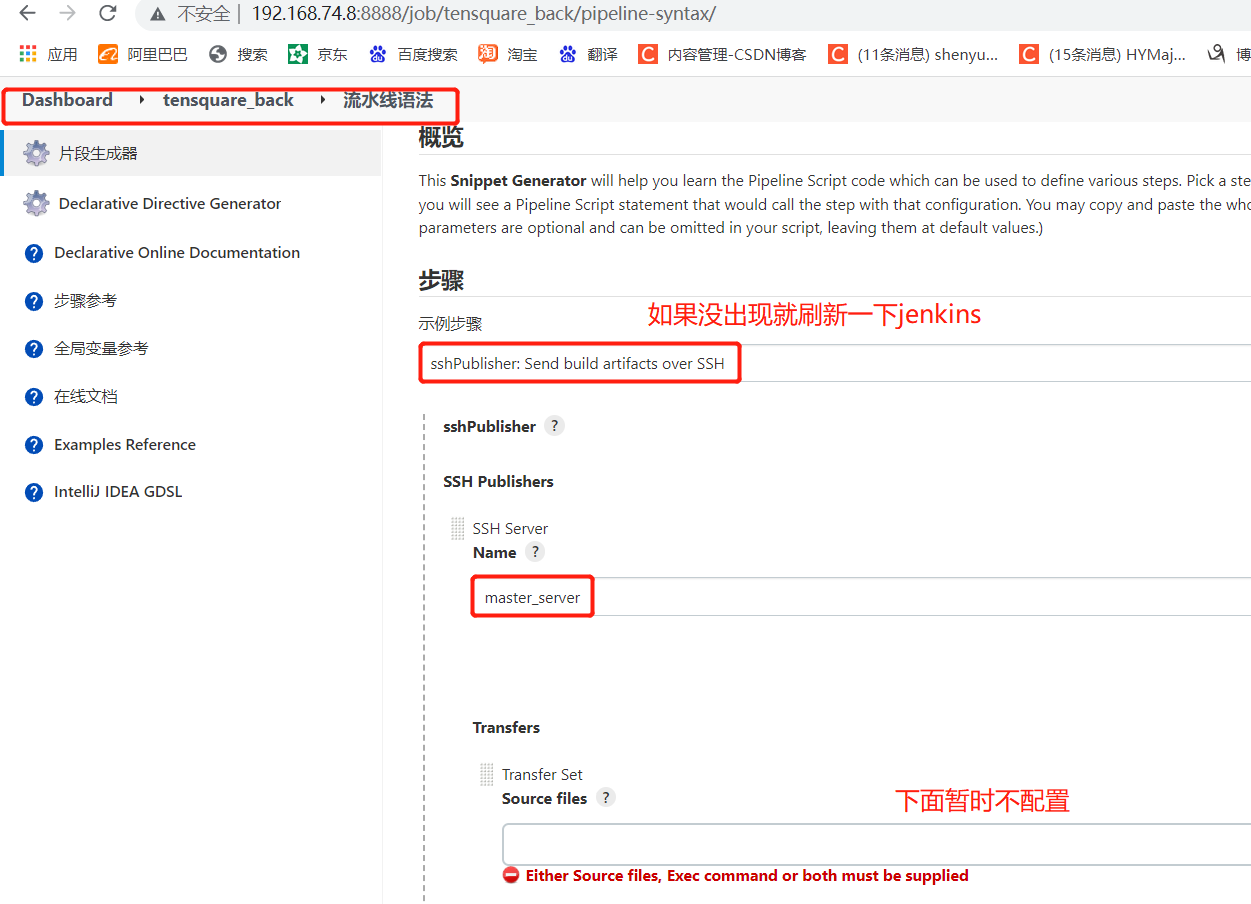
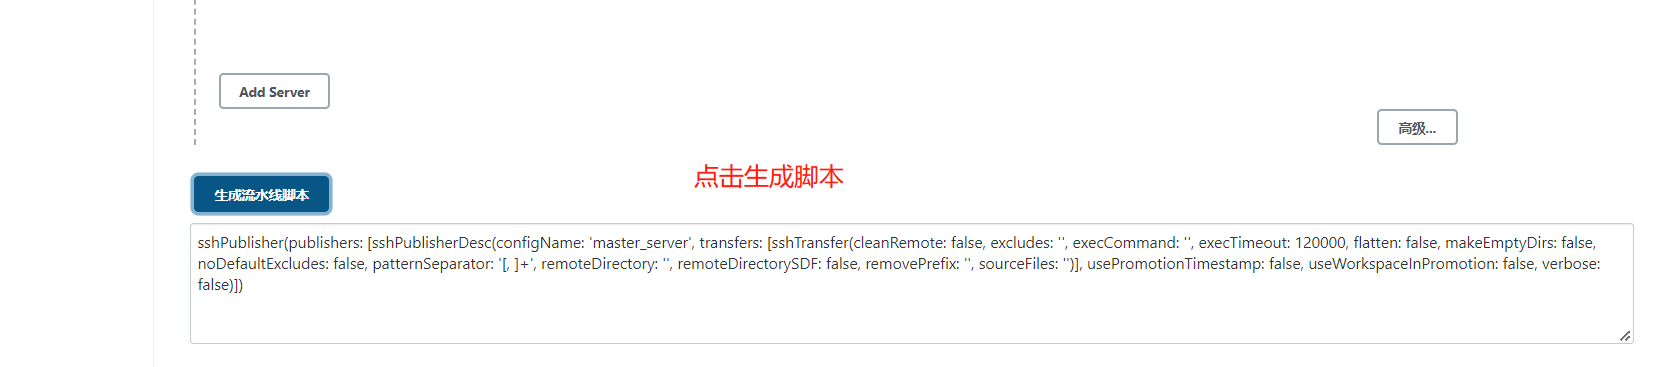
Paste into jenkinsfile script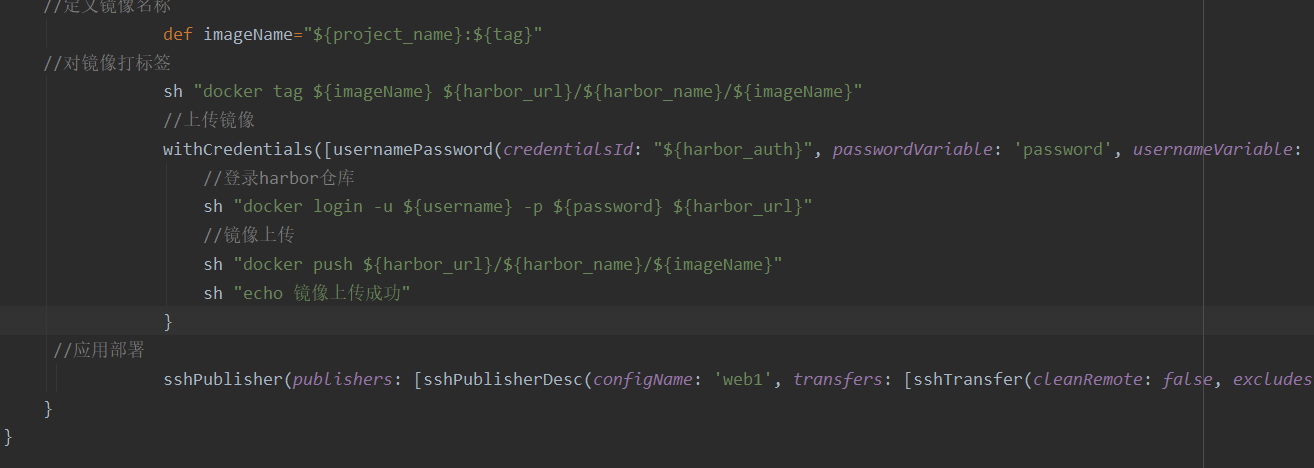
Currently Jenkinsfile script content
//git's credentials
def git_auth="0aa6d8b5-b2c8-4a66-8b76-a9d7d16c5bd5"
//URL of git
def git_url="git@192.168.74.11:kgc/tensquare_back.git"
//Mirror label
def tag="latest"
//url address of harbor
def harbor_url="192.168.74.7:85"
//Image warehouse name
def harbor_name="tensquare"
//Define the voucher of harbor
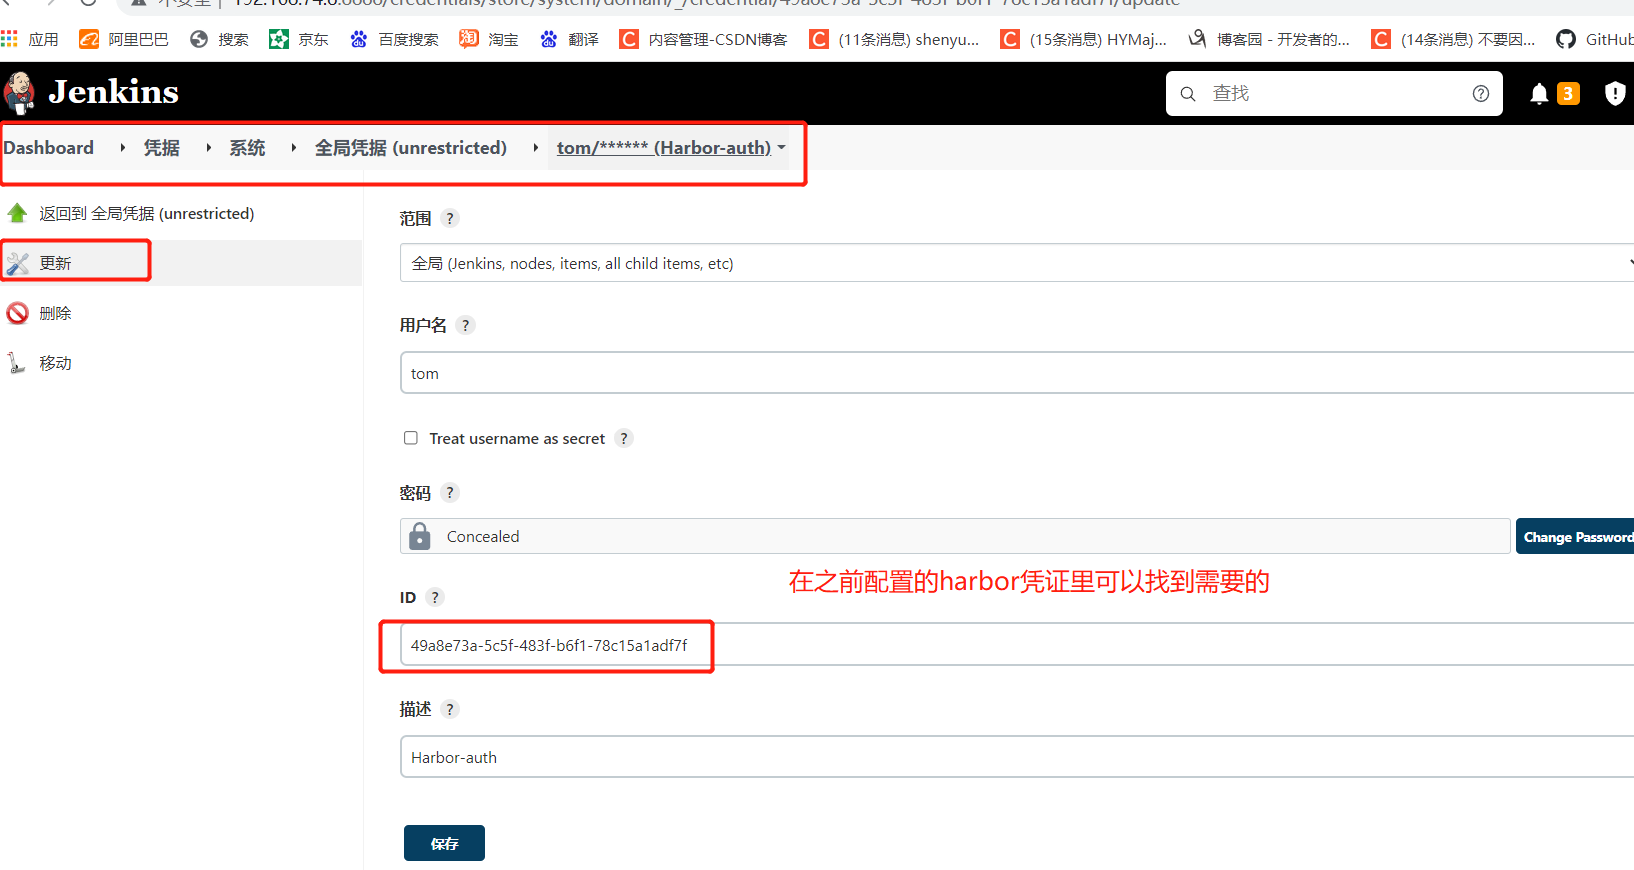
def harbor_auth="49a8e73a-5c5f-483f-b6f1-78c15a1adf7f"
node {
stage('pull code') {
//Switch to variable and use double quotation marks for string symbols
checkout([$class: 'GitSCM', branches: [[name: "*/${branch}"]], extensions: [], userRemoteConfigs: [[credentialsId: "${git_auth}", url: "${git_url}"]]])
}
stage('check code') {
//Define the SonarQubeScanner tool
def scannerHome = tool 'sonar-scanner'
//Reference SonarQube system environment
withSonarQubeEnv('sonarqube') {
sh """
cd ${project_name}
${scannerHome}/bin/sonar-scanner
"""
}
}
stage('make install public sub project') {
sh "mvn -f tensquare_common clean install"
}
//Package micro service projects and make images
stage('make package') {
sh "mvn -f ${project_name} clean package dockerfile:build"
//Define image name
def imageName="${project_name}:${tag}"
//Label images
sh "docker tag ${imageName} ${harbor_url}/${harbor_name}/${imageName}"
//Upload image
withCredentials([usernamePassword(credentialsId: "${harbor_auth}", passwordVariable: 'password', usernameVariable: 'username')]) {
//Log in to harbor warehouse
sh "docker login -u ${username} -p ${password} ${harbor_url}"
//Image upload
sh "docker push ${harbor_url}/${harbor_name}/${imageName}"
sh "echo Image upload succeeded"
}
//Application deployment
sshPublisher(publishers: [sshPublisherDesc(configName: 'web1', transfers: [sshTransfer(cleanRemote: false, excludes: '', execCommand: "/opt/jenkins_shell/deploy.sh ${harbor_url} ${harbor_name} ${project_name} ${tag} ${port}", execTimeout: 120000, flatten: false, makeEmptyDirs: false, noDefaultExcludes: false, patternSeparator: '[, ]+', remoteDirectory: '', remoteDirectorySDF: false, removePrefix: '', sourceFiles: '')], usePromotionTimestamp: false, useWorkspaceInPromotion: false, verbose: false)])
}
}
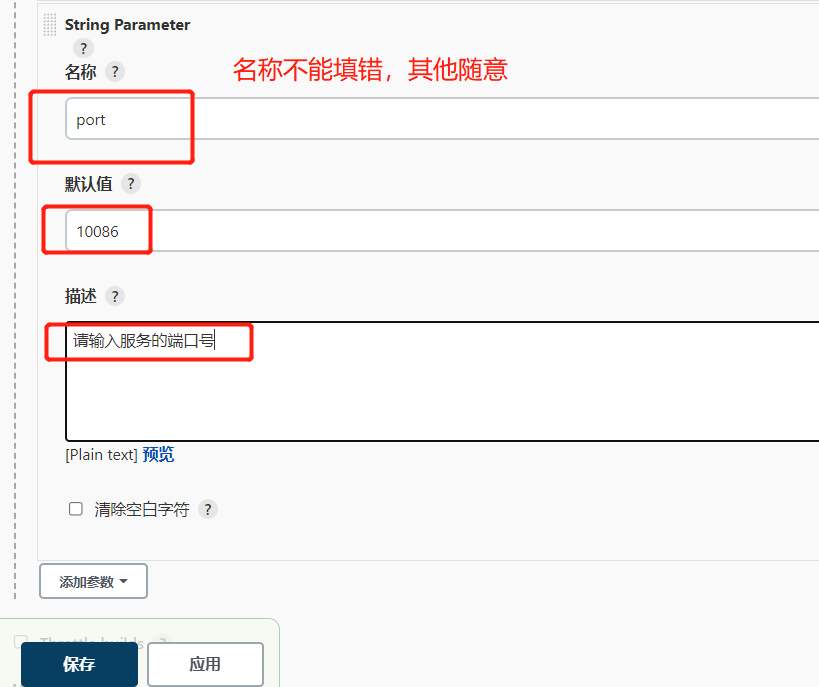
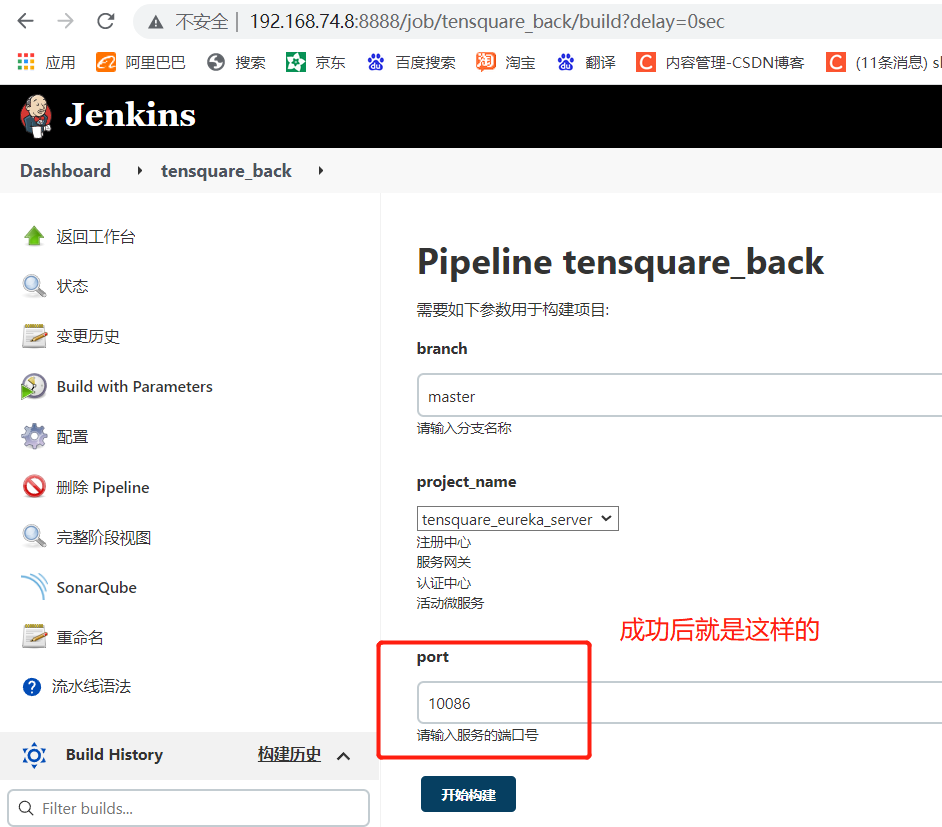
Add new port parameters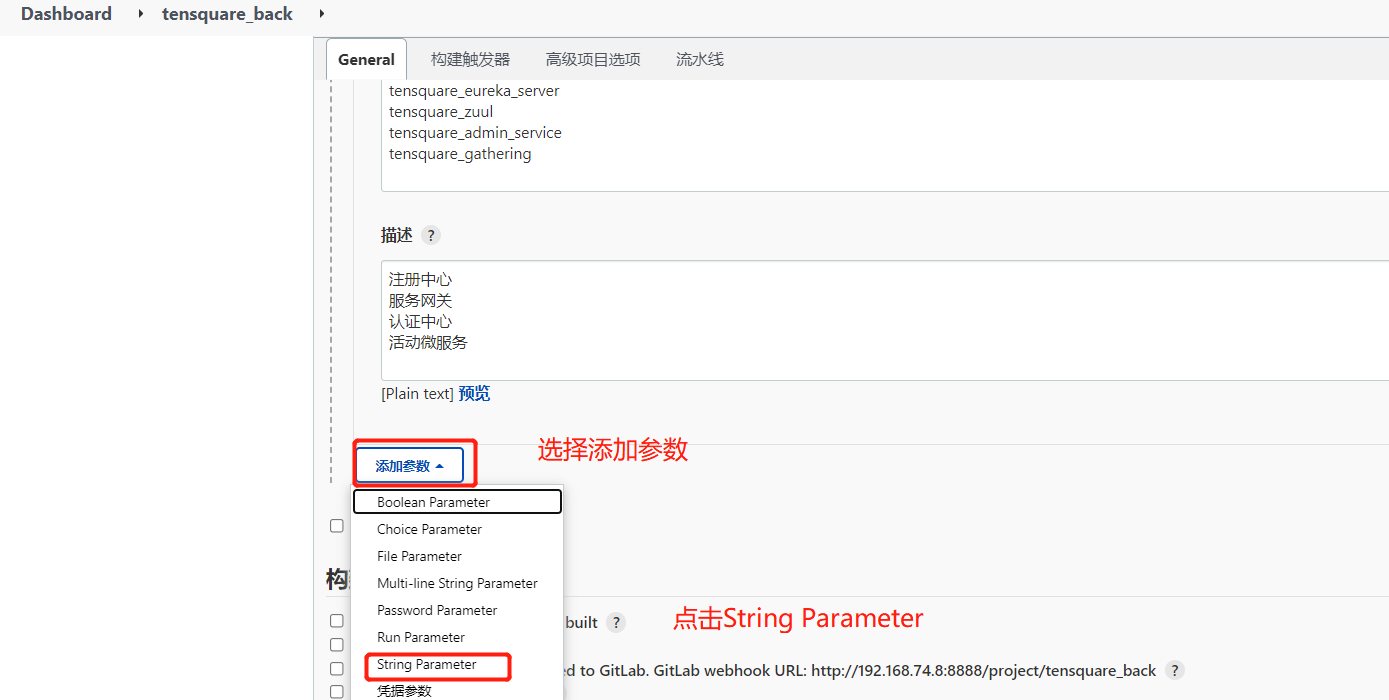
4. Deploy the script deploy. On the production server Content in Sh
First create directories and files and give permissions
mkdir /opt/jenkins_shell
cd /opt/jenkins_shell/
vim deploy.sh
chmod +x deploy.sh
Add script content
#! /bin/sh
#Receive external parameters
harbor_url=$1
harbor_project_name=$2
project_name=$3
tag=$4
port=$5

imageName=$harbor_url/$harbor_project_name/$project_name:$tag

echo "$imageName"

#Query whether the container exists, and delete it if it exists
containerId=`docker ps -a | grep -w ${project_name}:${tag}  | awk '{print $1}'`
if [ "$containerId" !=  "" ] ; then
    #Stop the container
    docker stop $containerId

    #Delete container
    docker rm $containerId

 echo "Successfully deleted container"
fi

#Query whether the image exists, and delete it if it exists
imageId=`docker images | grep -w $project_name  | awk '{print $3}'`

if [ "$imageId" !=  "" ] ; then

    #delete mirror
    docker rmi -f $imageId

 echo "Mirror deleted successfully"
fi

# Log in to Harbor
docker login -u tom -p Abcd1234 $harbor_url

# Download Image
docker pull $imageName

# Start container
docker run -di -p $port:$port $imageName

echo "Container started successfully"
In the script, the harbor user and password should be changed
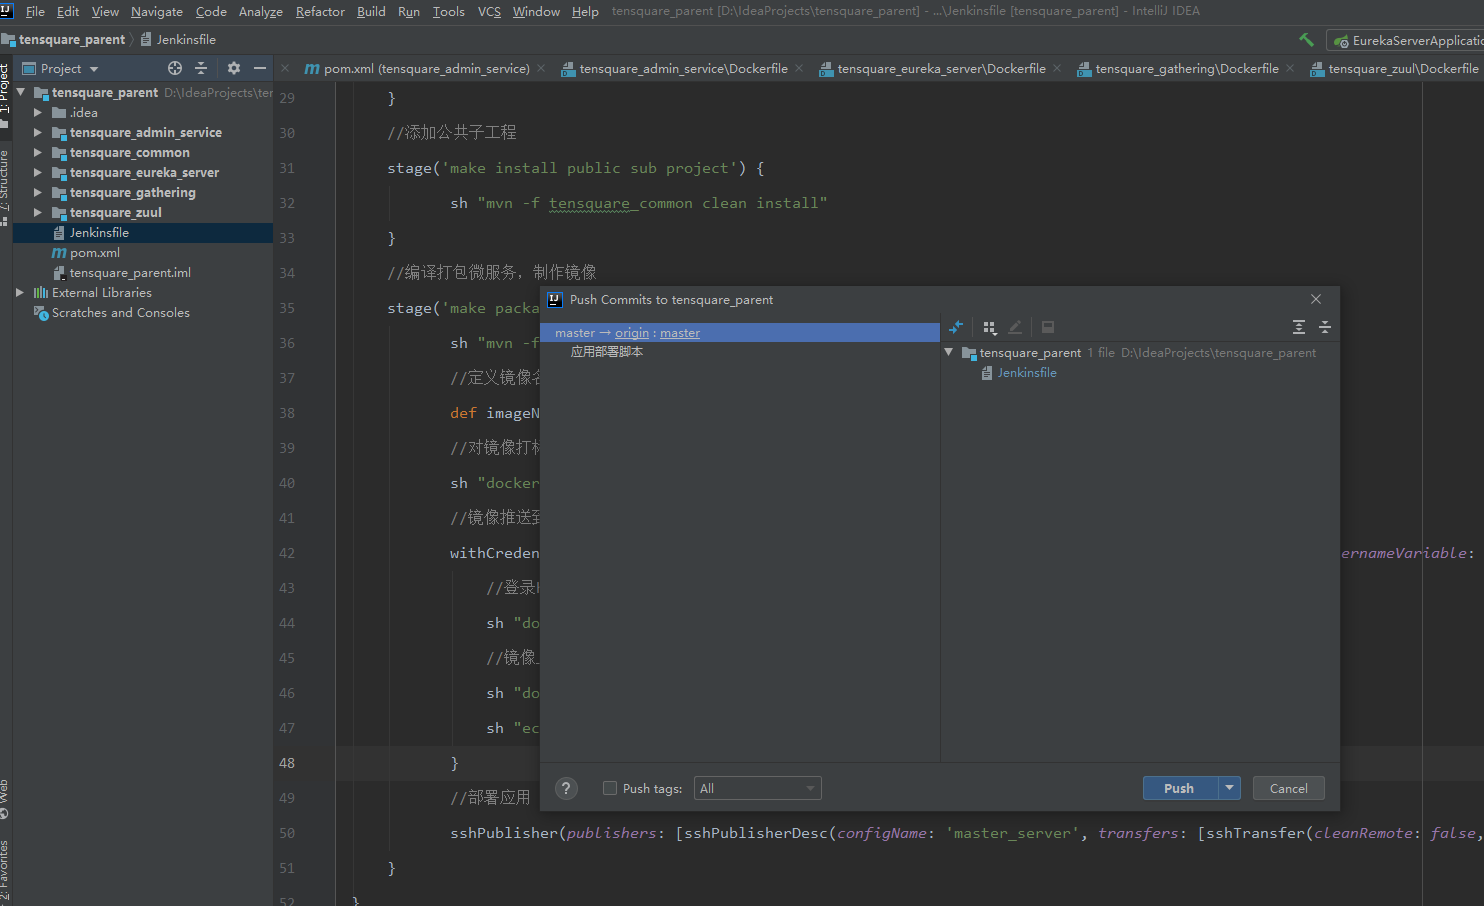
Jenkinsfile change submission for build testing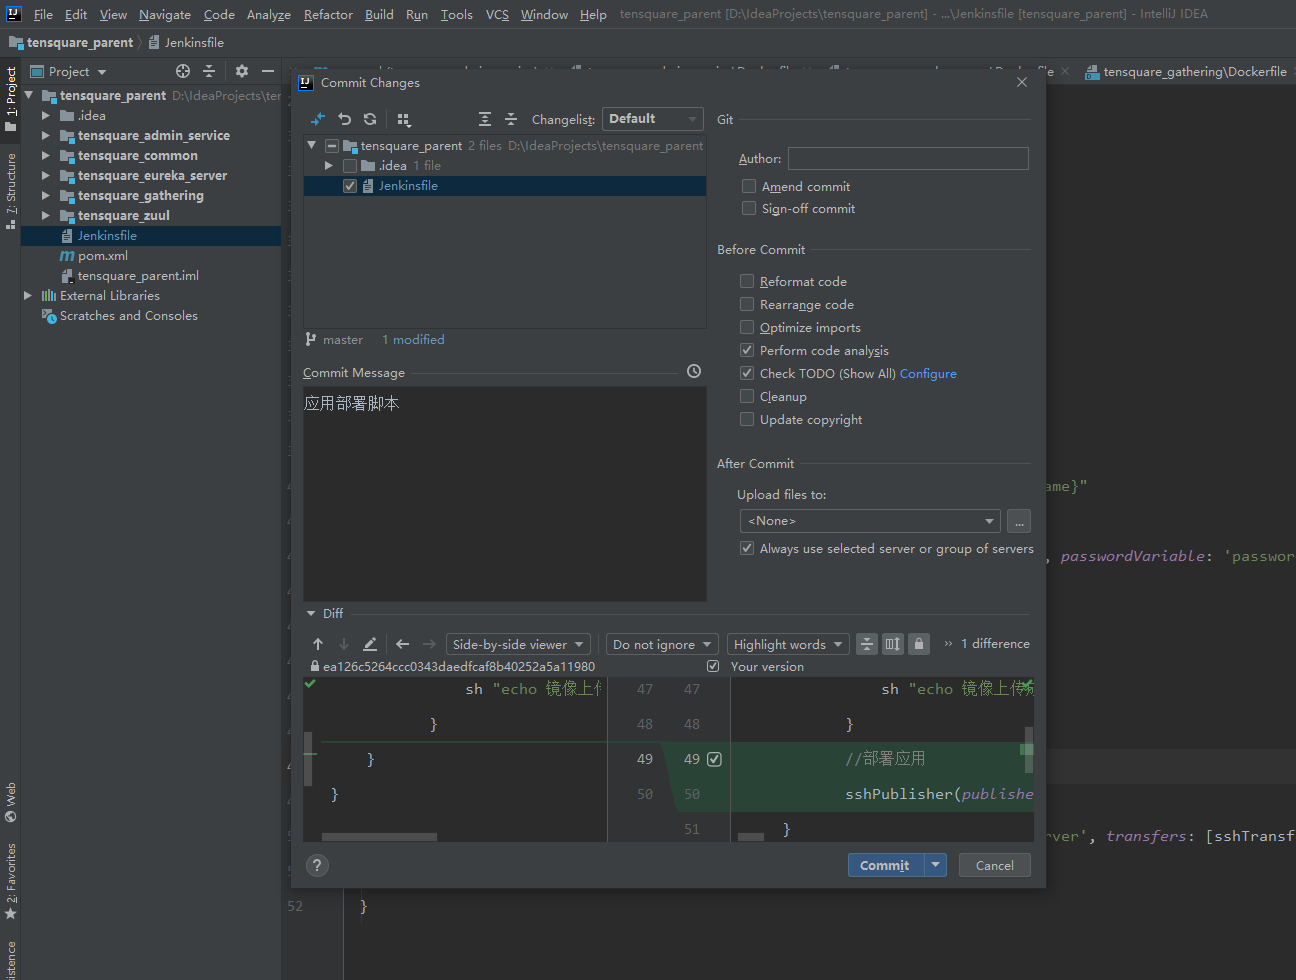
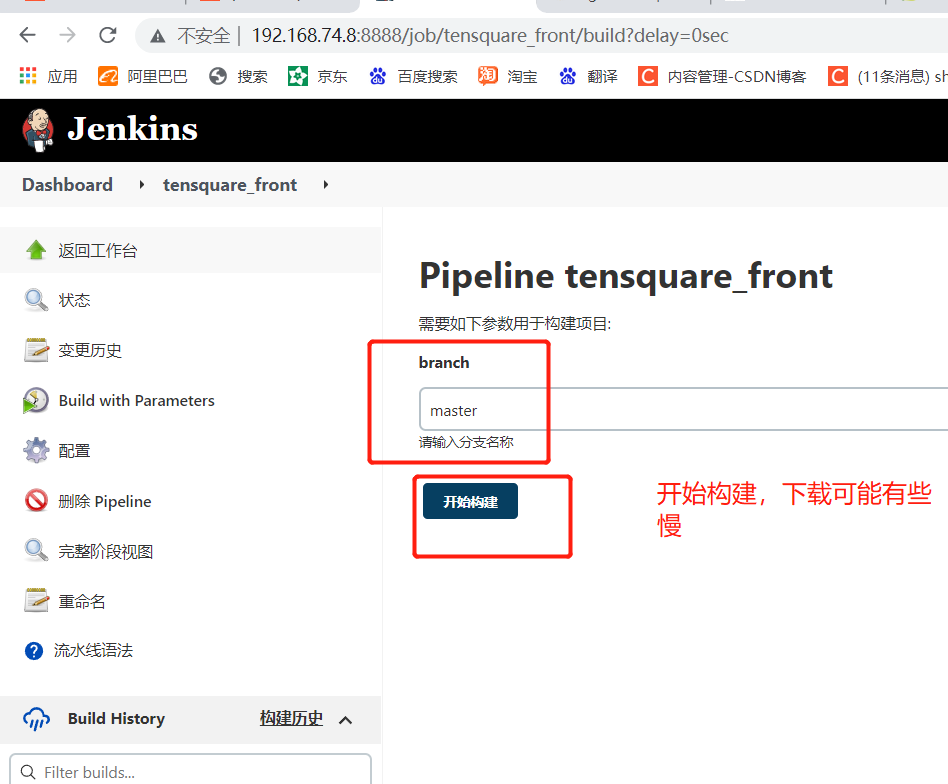
Start building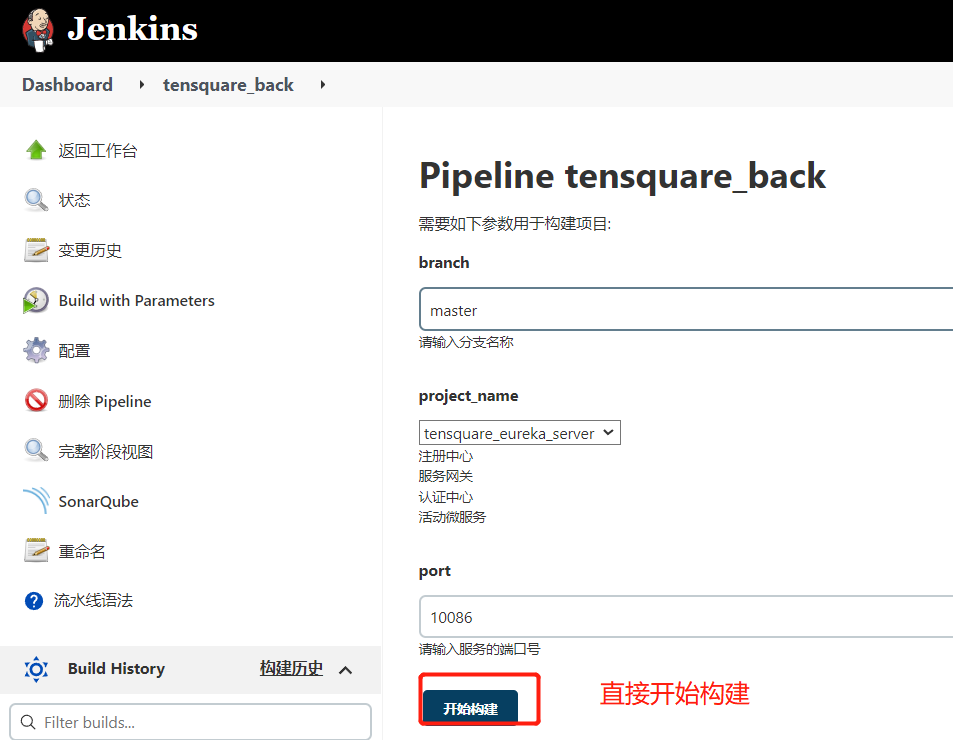
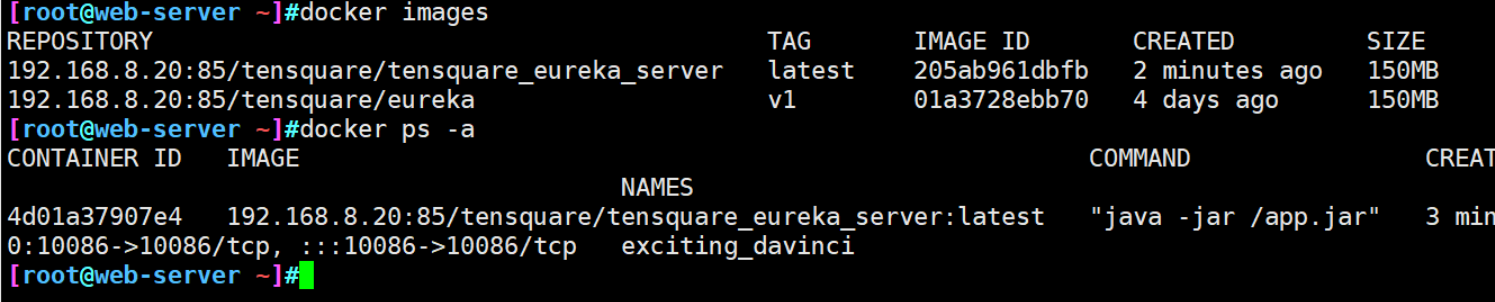
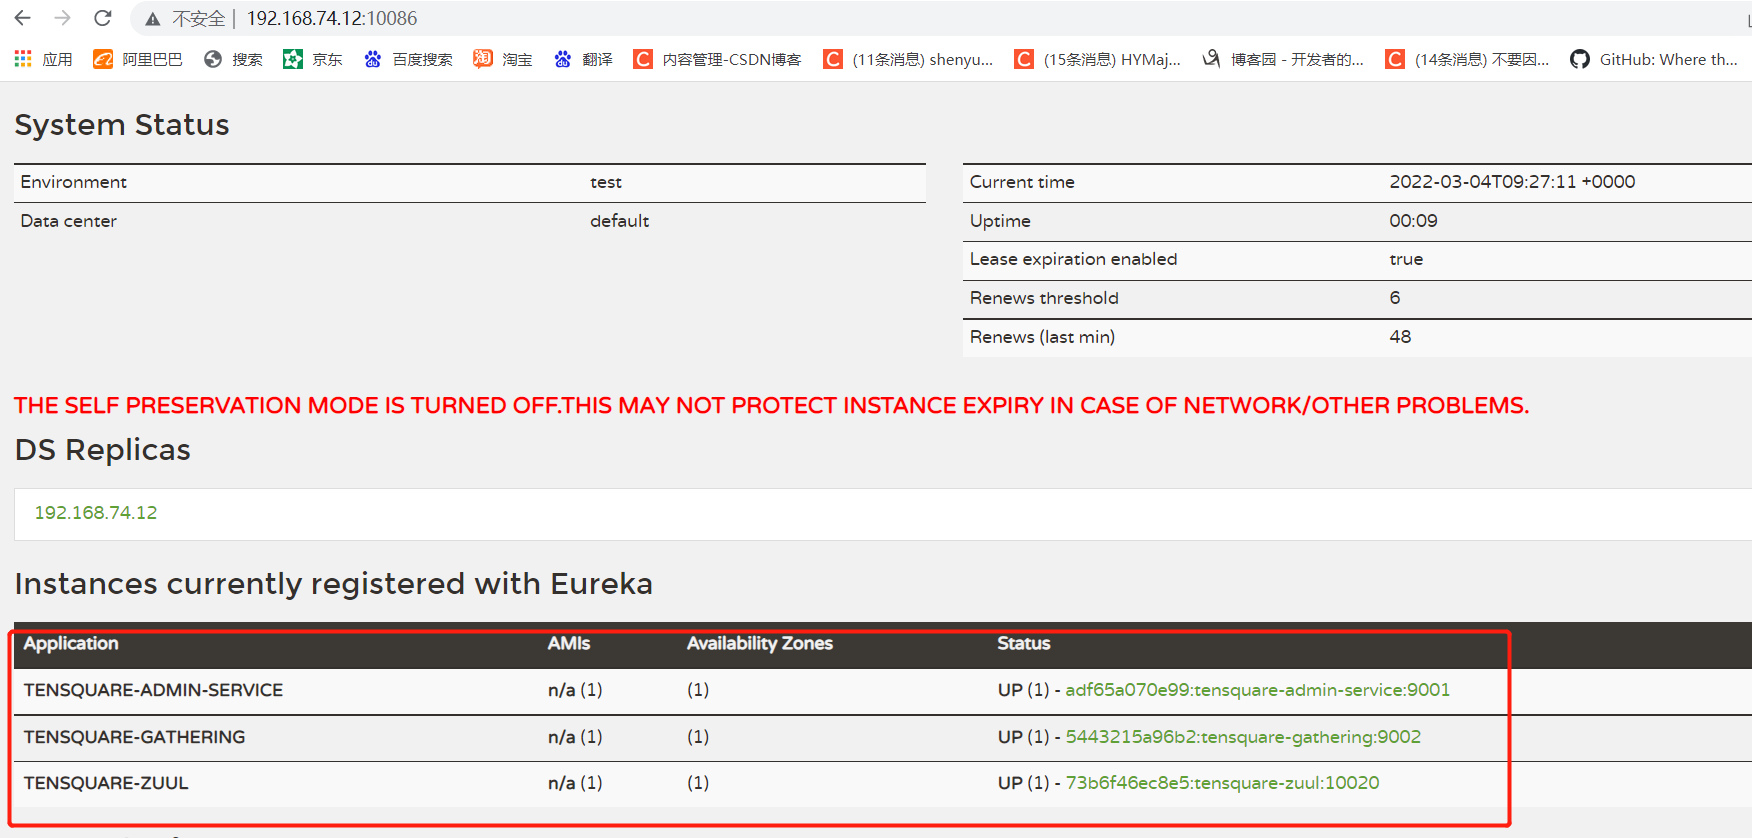
5. View results
2, Access back-end database through microservices
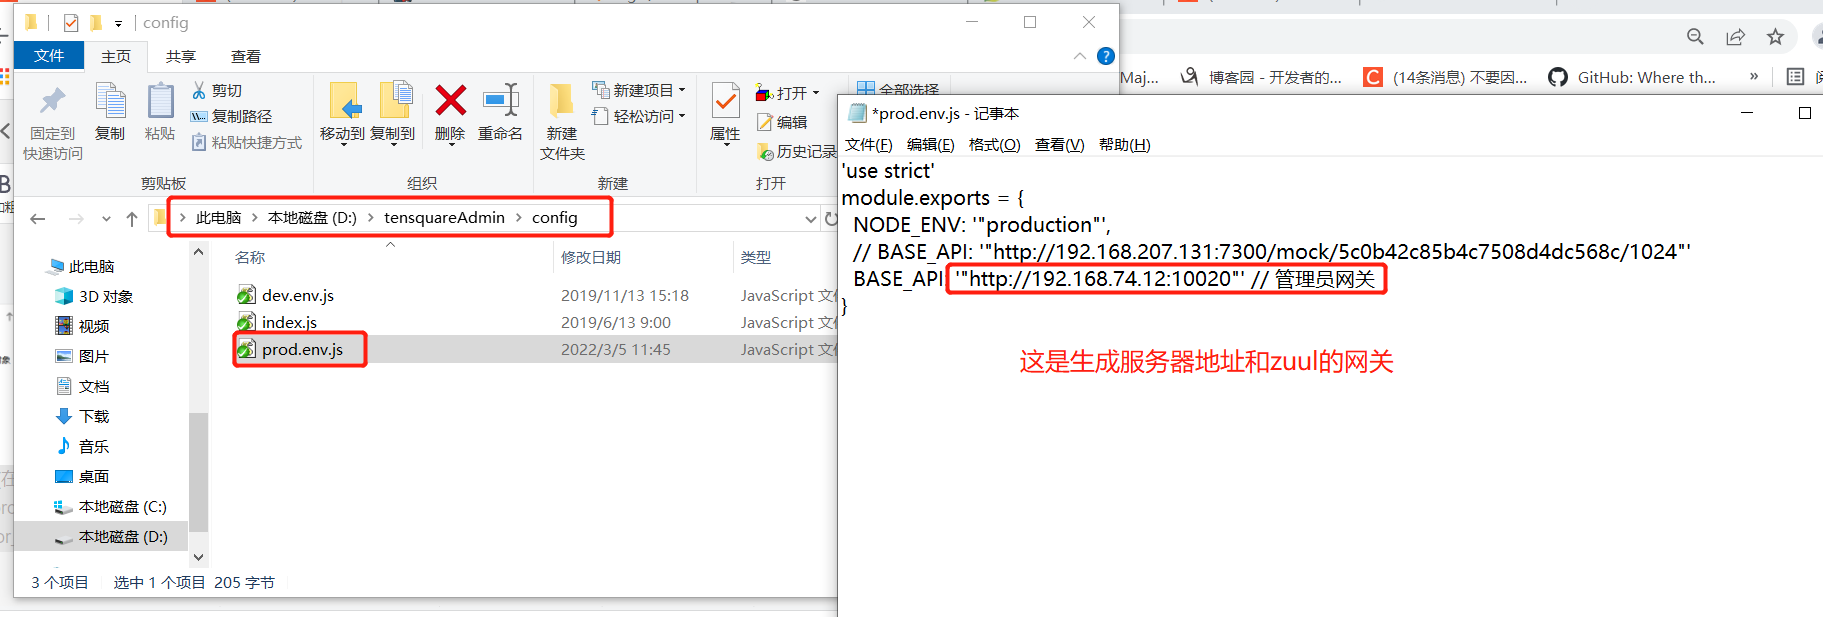
1. Modify the micro service configuration file in idea
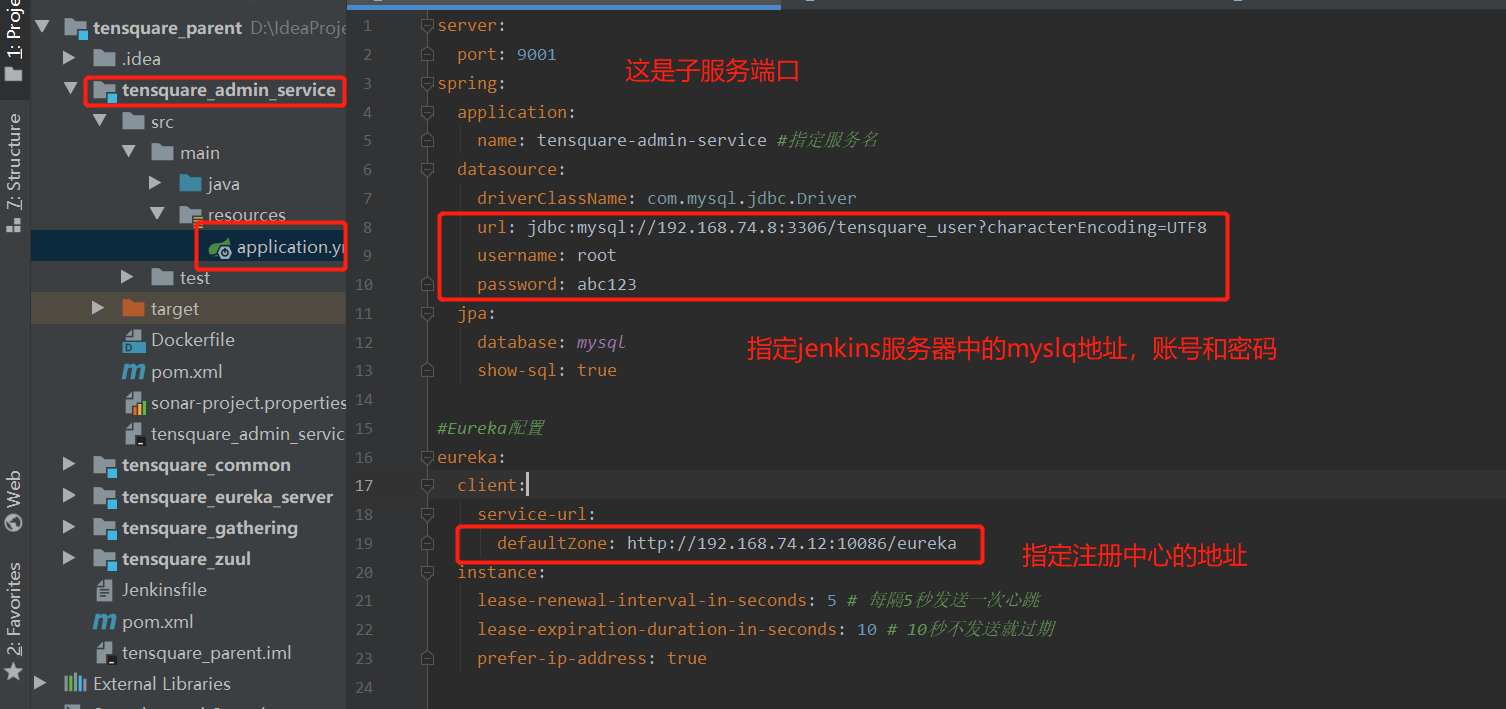
tensquare_admin_service file modification
tensquare_eureka_server file modification

tensquare_gathering file modification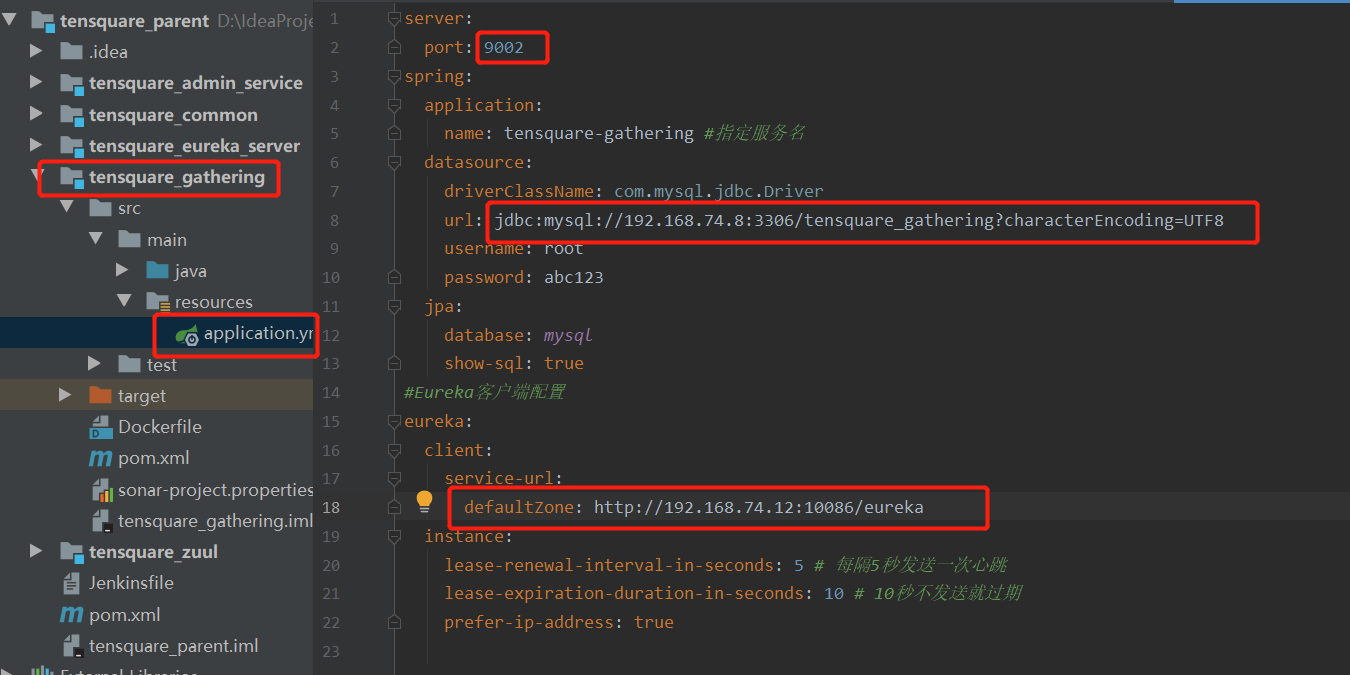
tensquare_zuul file modification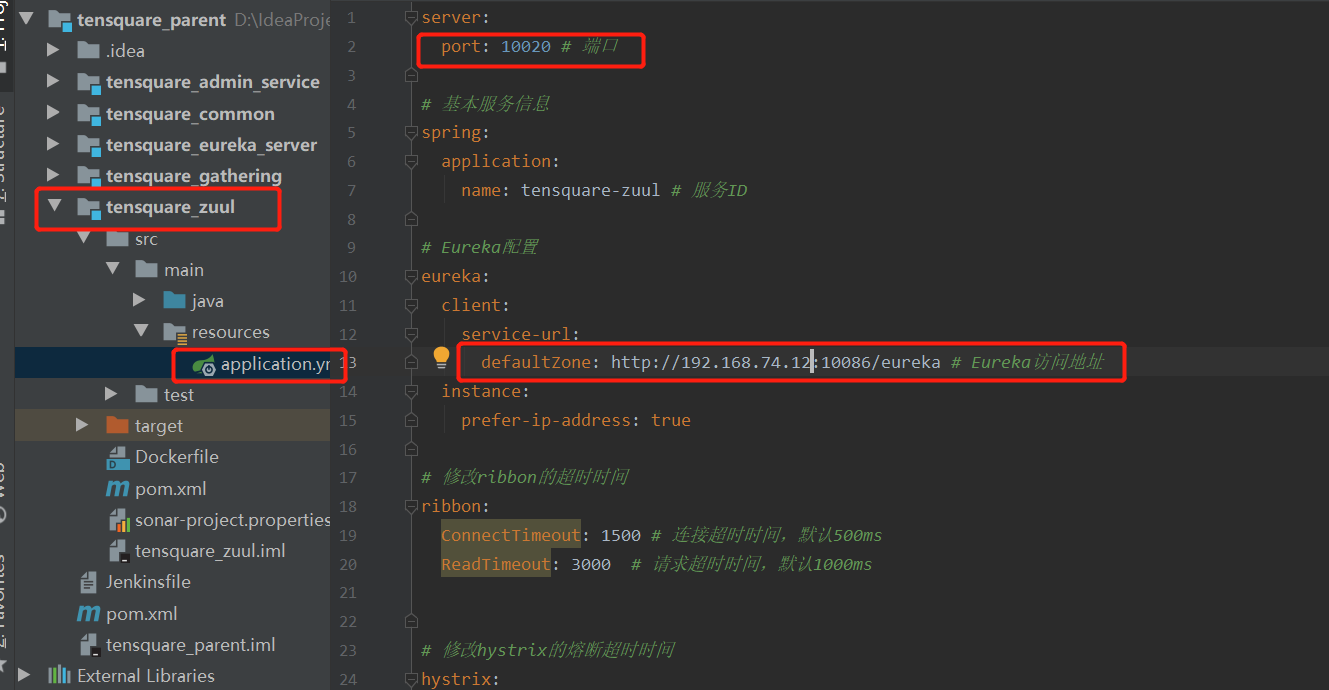
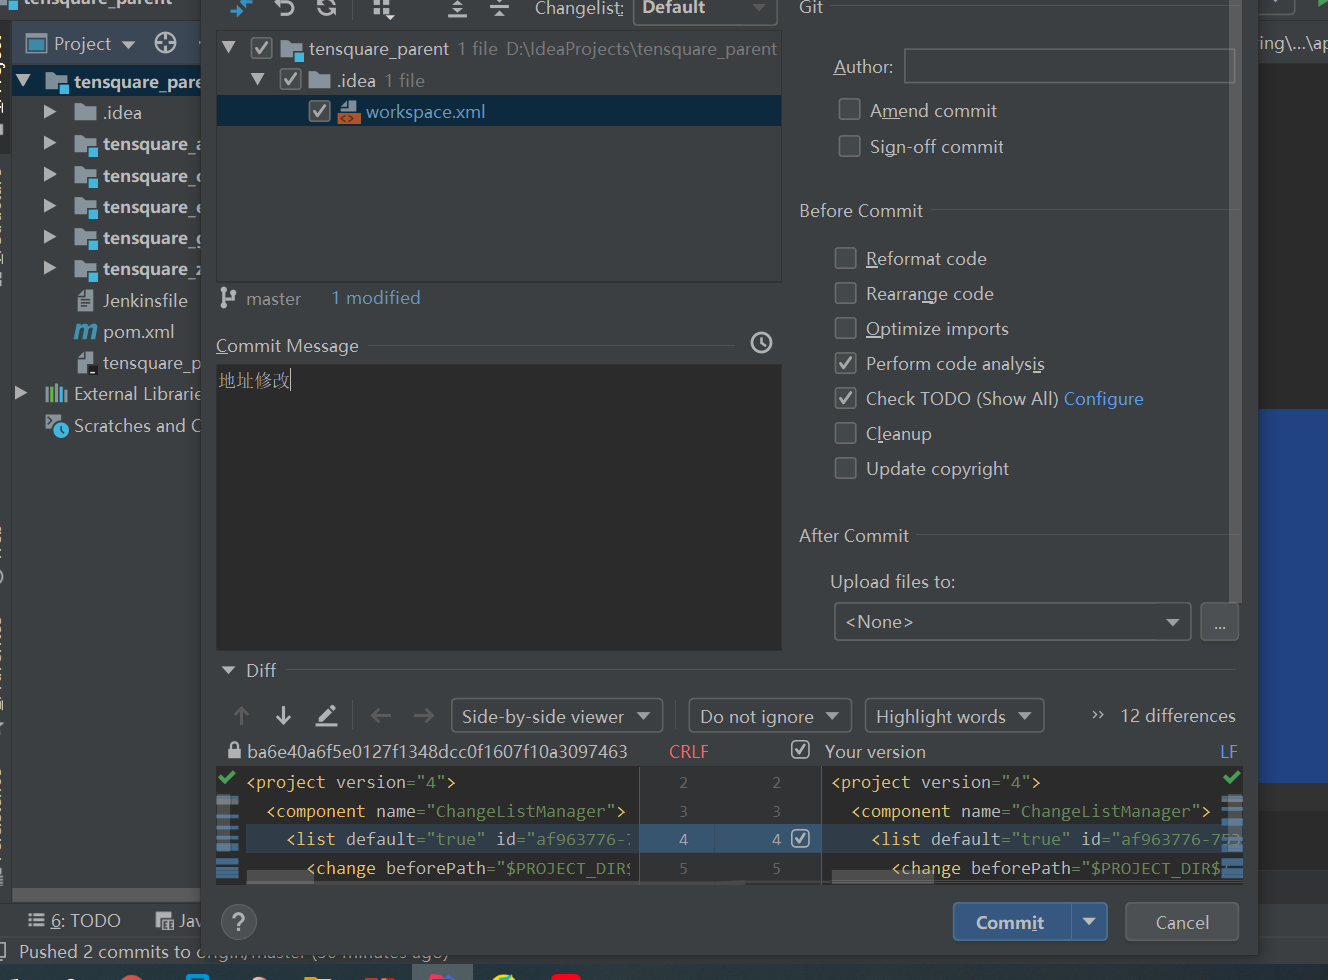
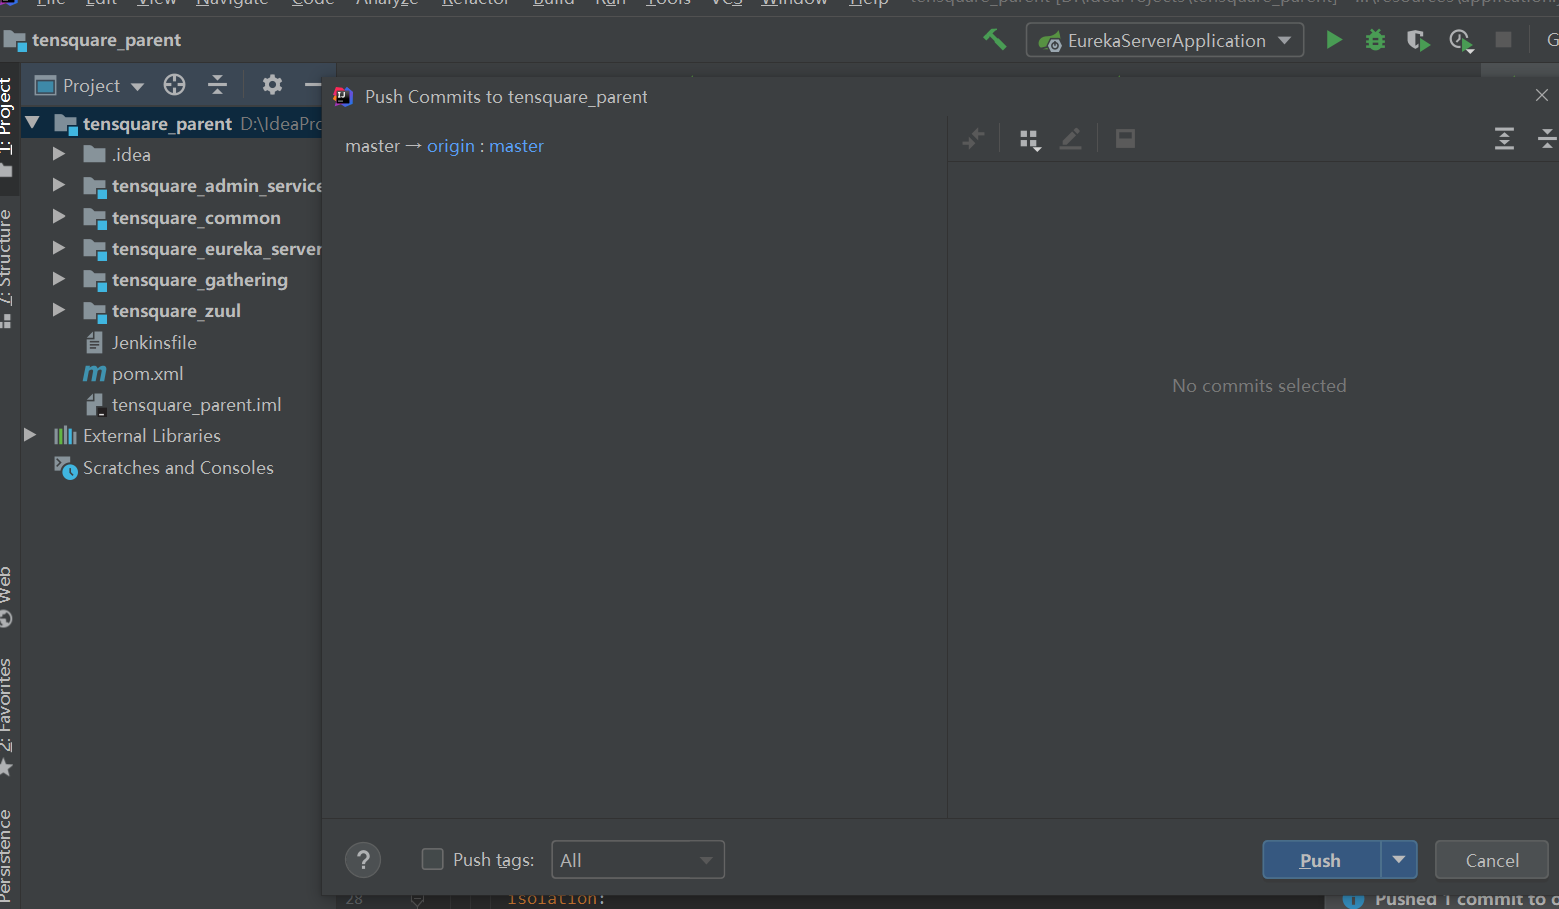
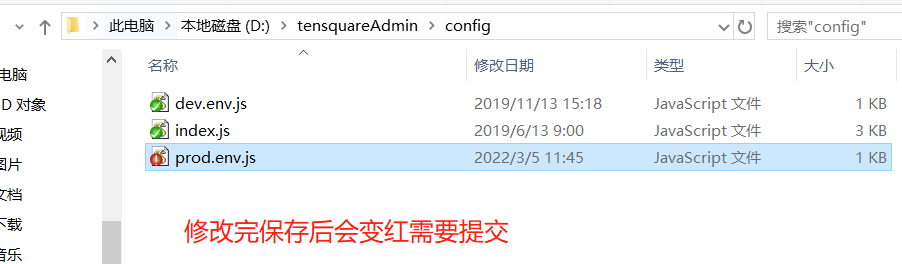
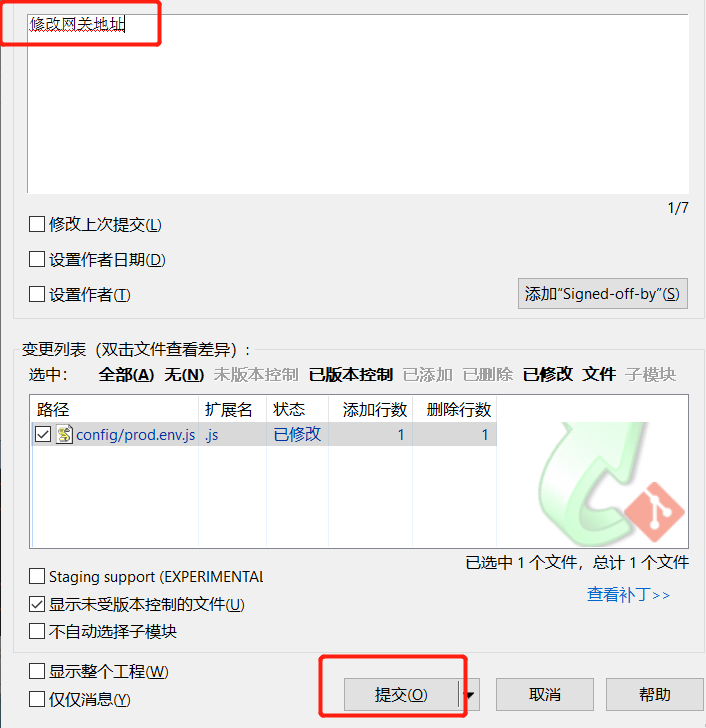
Submit the code warehouse after modification
4 builds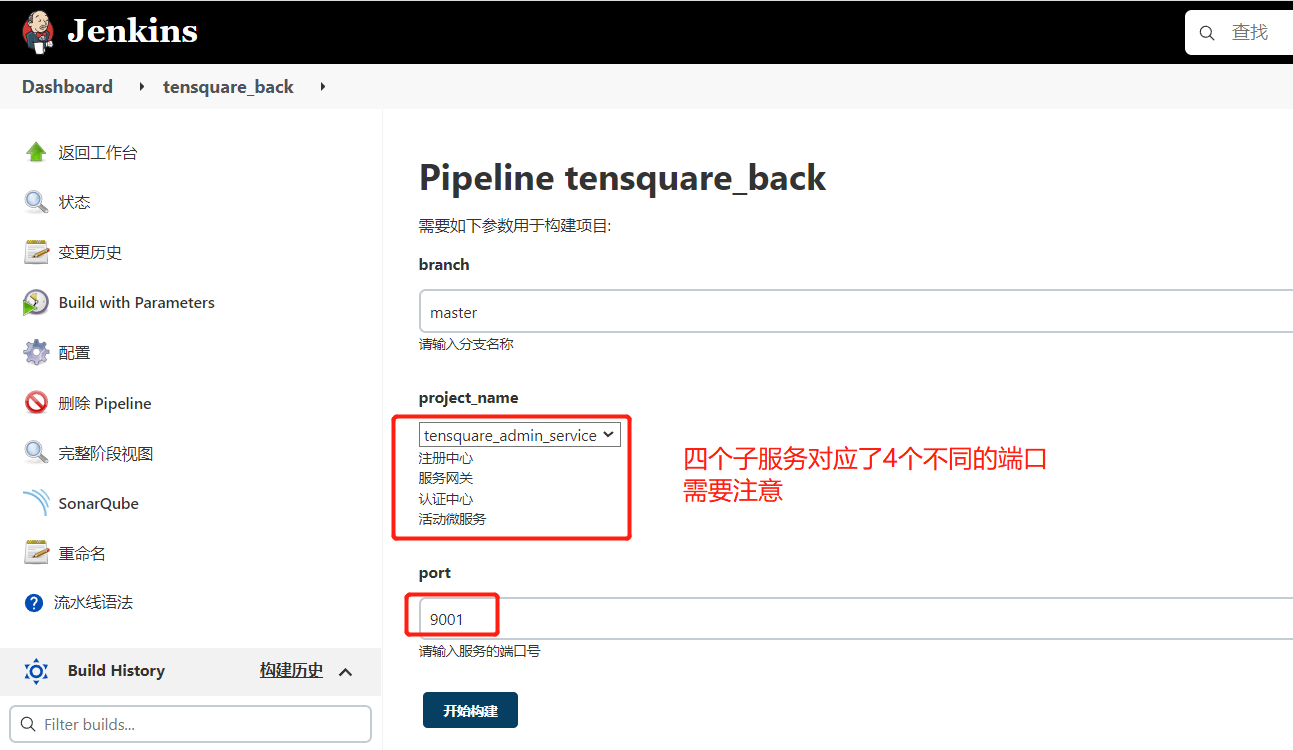
View results on production server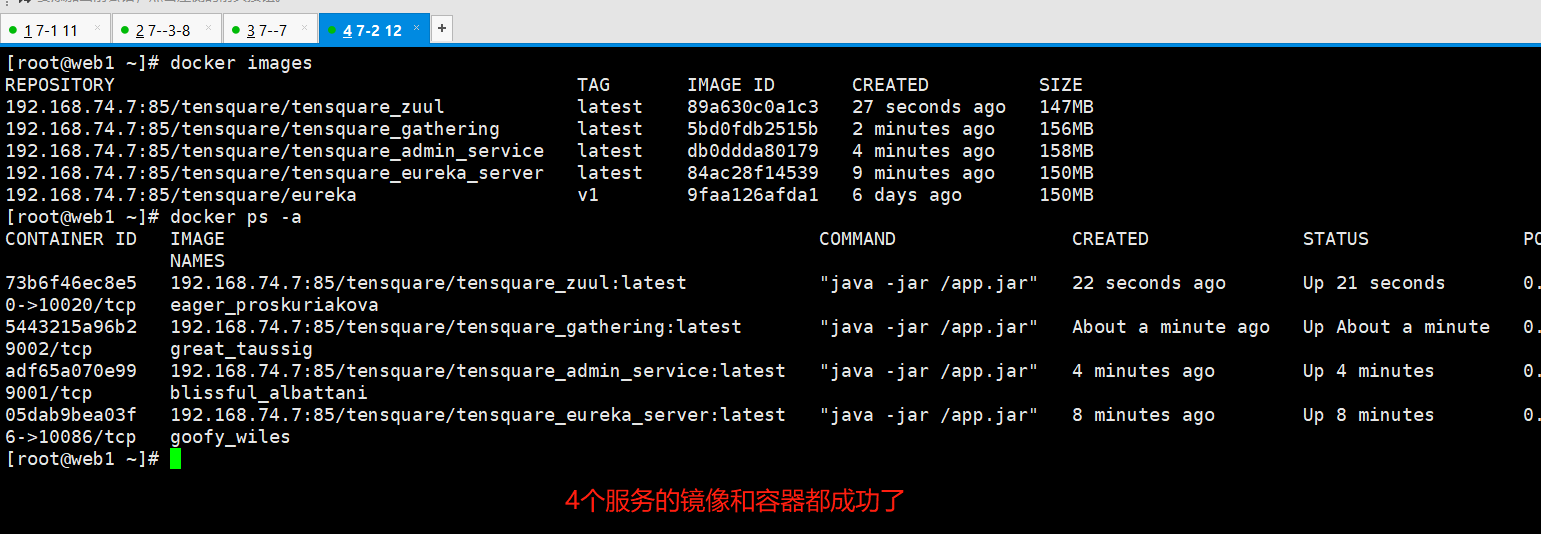
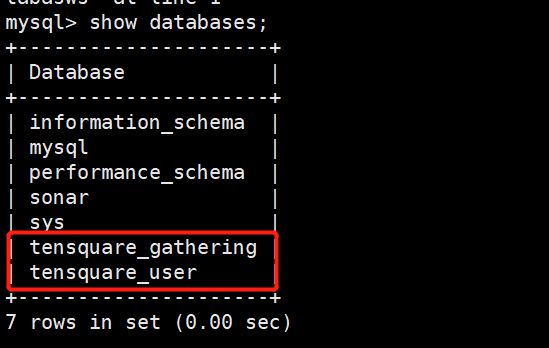
2. Authorize remote login in the database of jenkins server
Put the two script files in the / root / directory
mysql -uroot -pabc123
grant all privileges on *.* to 'root'@'%' identified by 'abc123' with grant option;

create database tensquare_gathering;
create database tensquare_user;

#Import script file
use tensquare_gathering;
source /root/tensquare_gathering.sql;

use tensquare_user;
source /root/tensquare_user.sql;
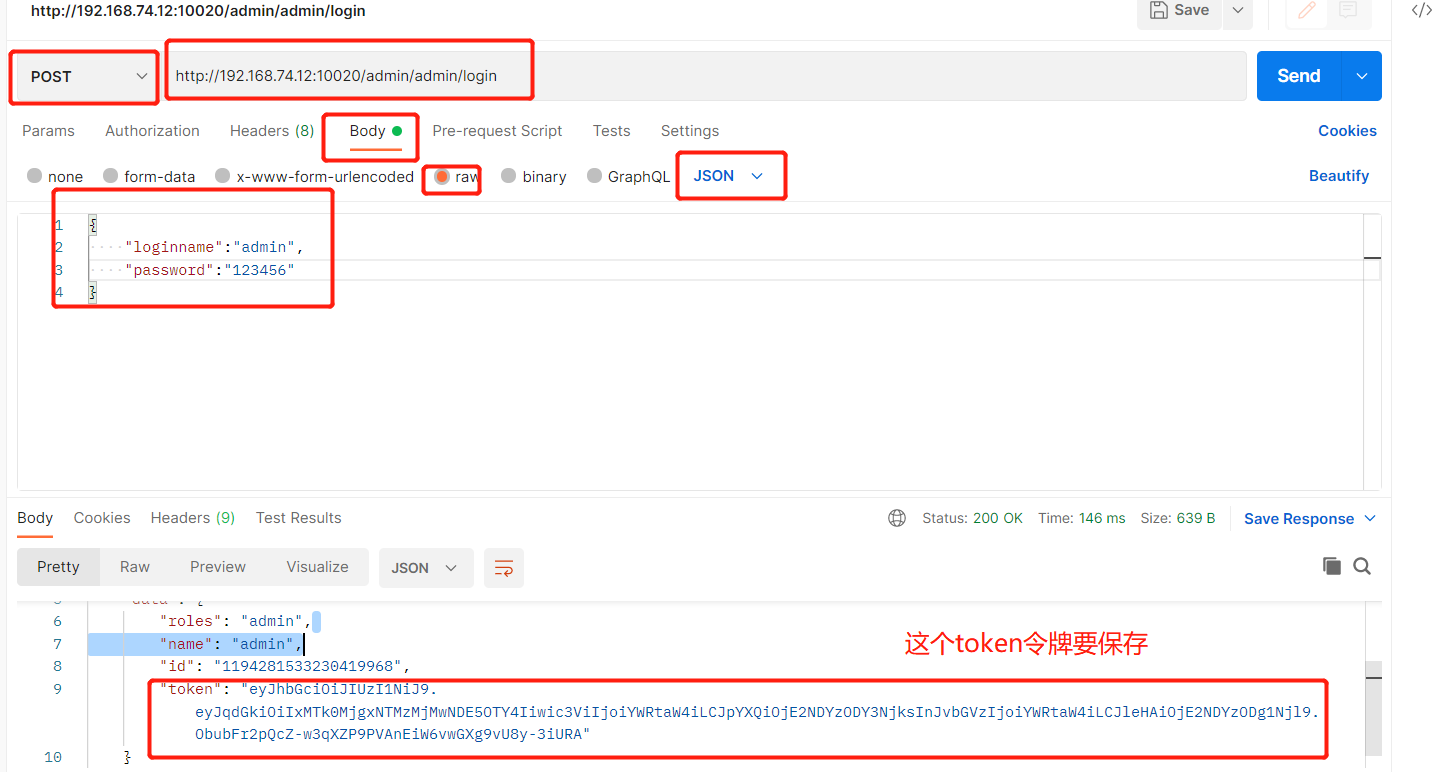
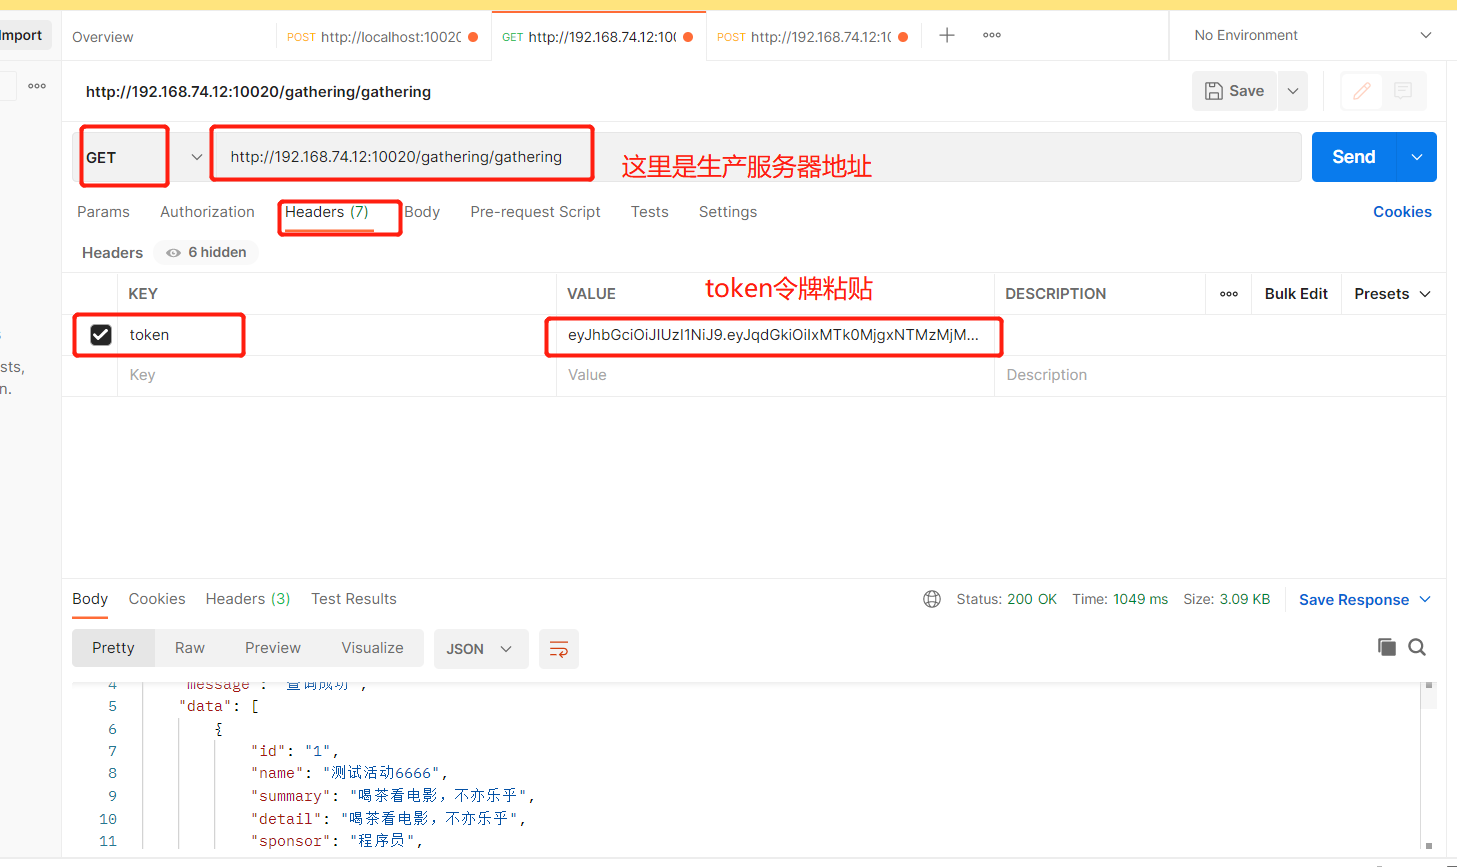
3. Use postman to test the background data connection
3, Deploy front-end static web site
Deploy nginx on the 192.168.74.6 server
1. Install nginx service
yum install -y epel-release
yum -y install nginx  #Installing nginx
Modify profile
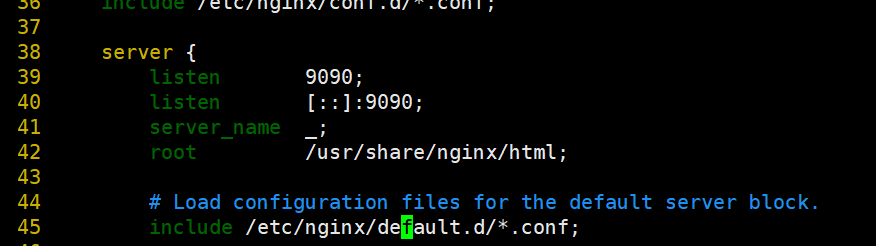
#Modify the port of nginx. The default value is 80. Change it to 9090
vim /etc/nginx/nginx.conf

    server {
        listen       9090;
        listen       [::]:9090;
        server_name  _;
        root         /usr/share/nginx/html;
#Close selinux and set SELINUX=disabled
setenforce 0 						#Temporarily close first
vim /etc/selinux/config 				#Edit the file and permanently close SELINUX=disabled

#Line 7
SELINUX=disabled
Start Nginx
systemctl enable nginx Set startup
systemctl start nginx start-up
systemctl stop nginx stop it
systemctl restart nginx restart
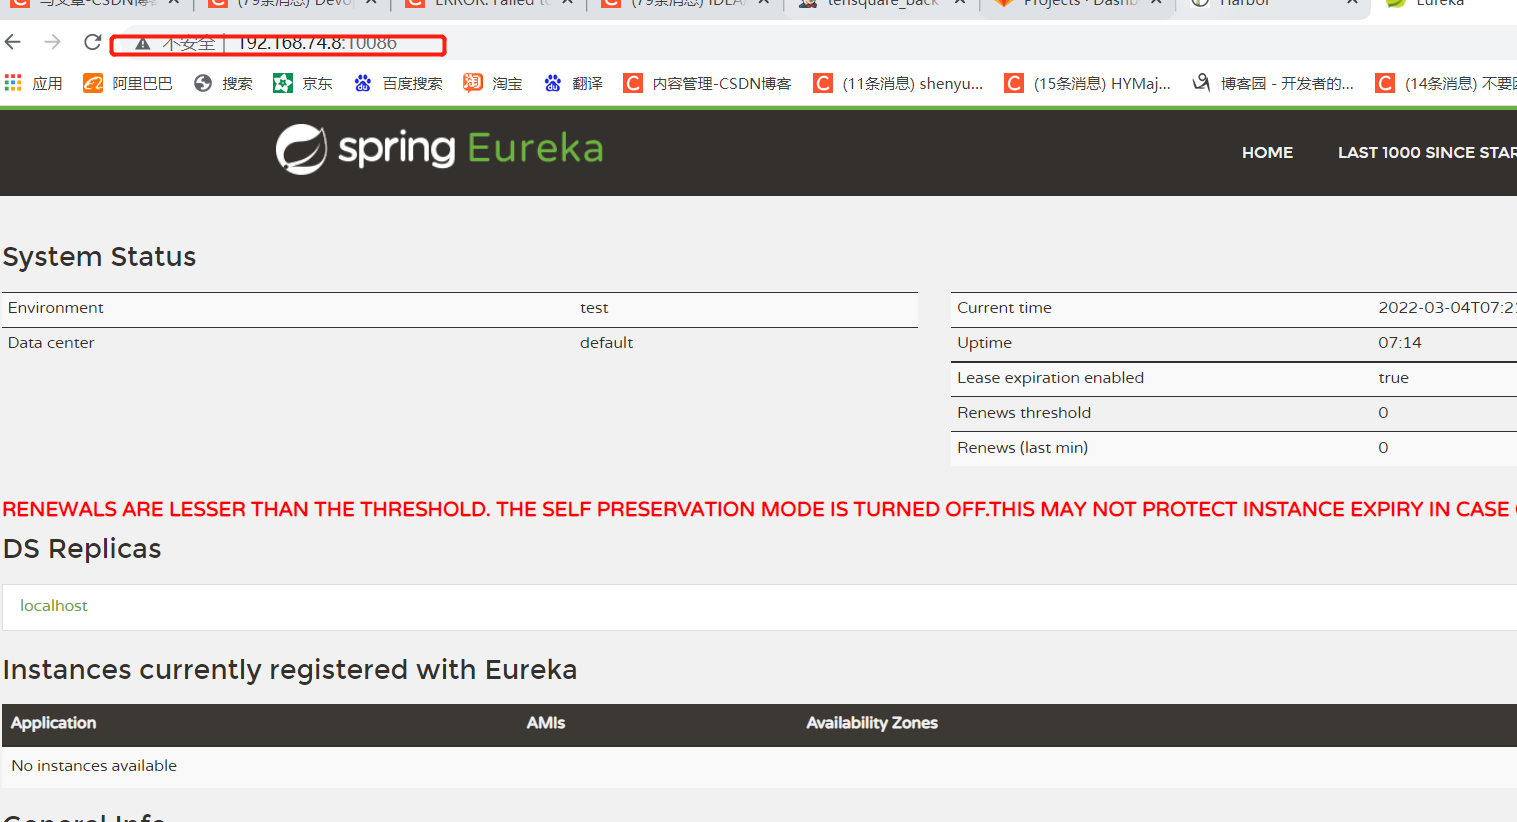
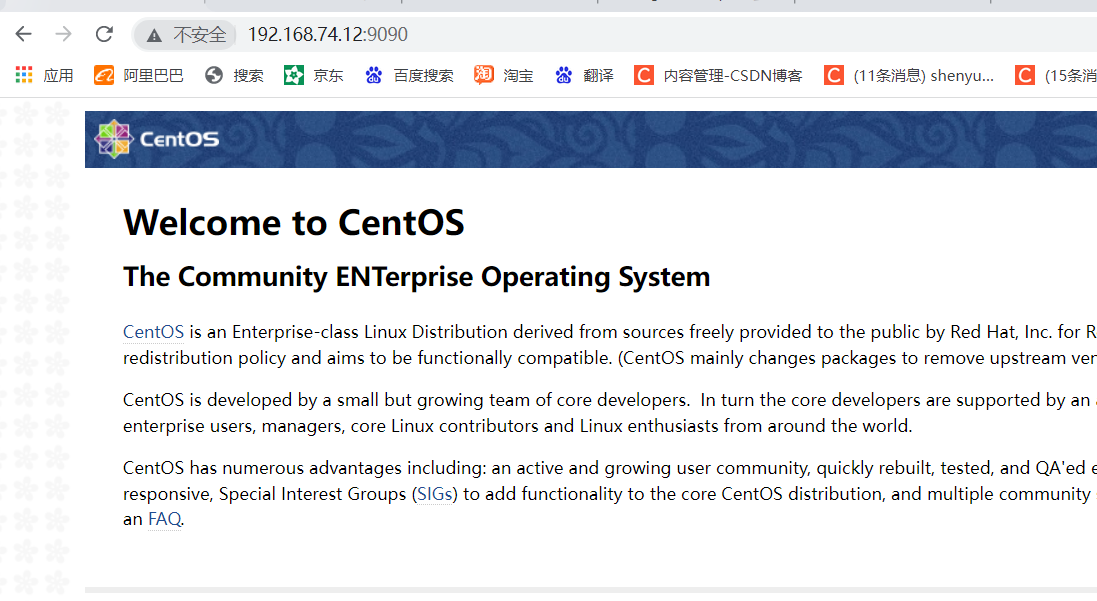
visit: http://192.168.74.12:9090/
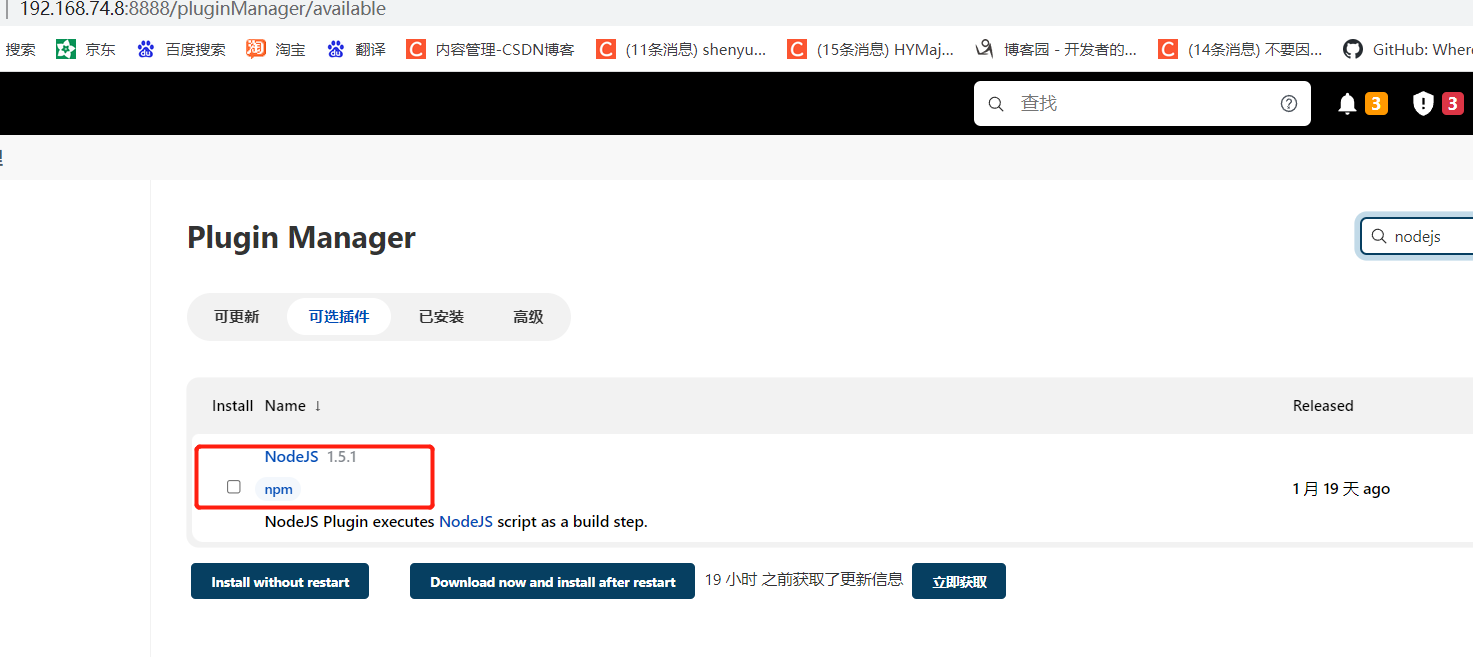
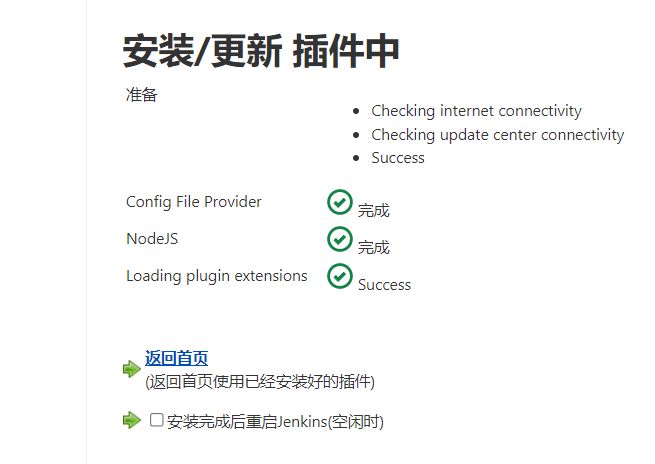
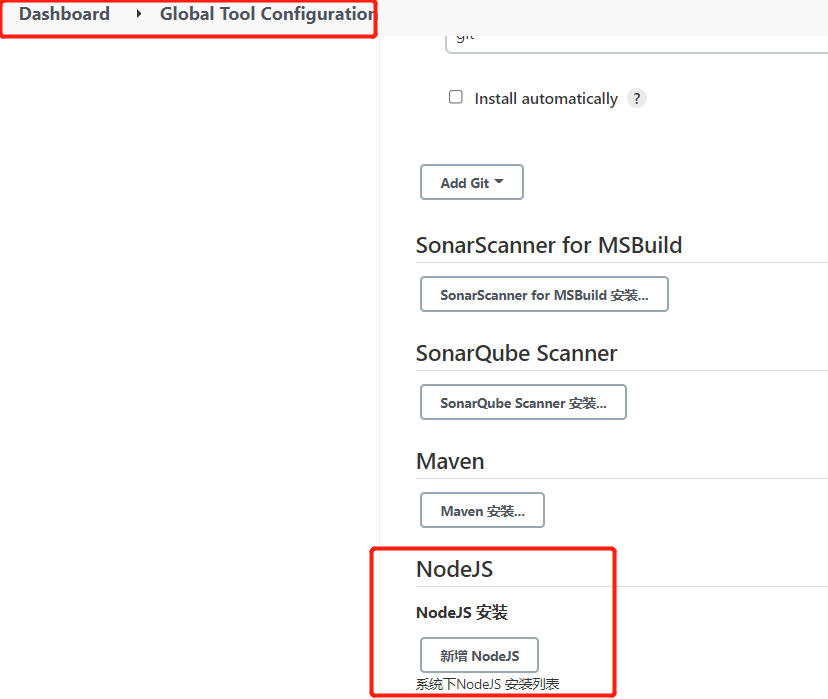
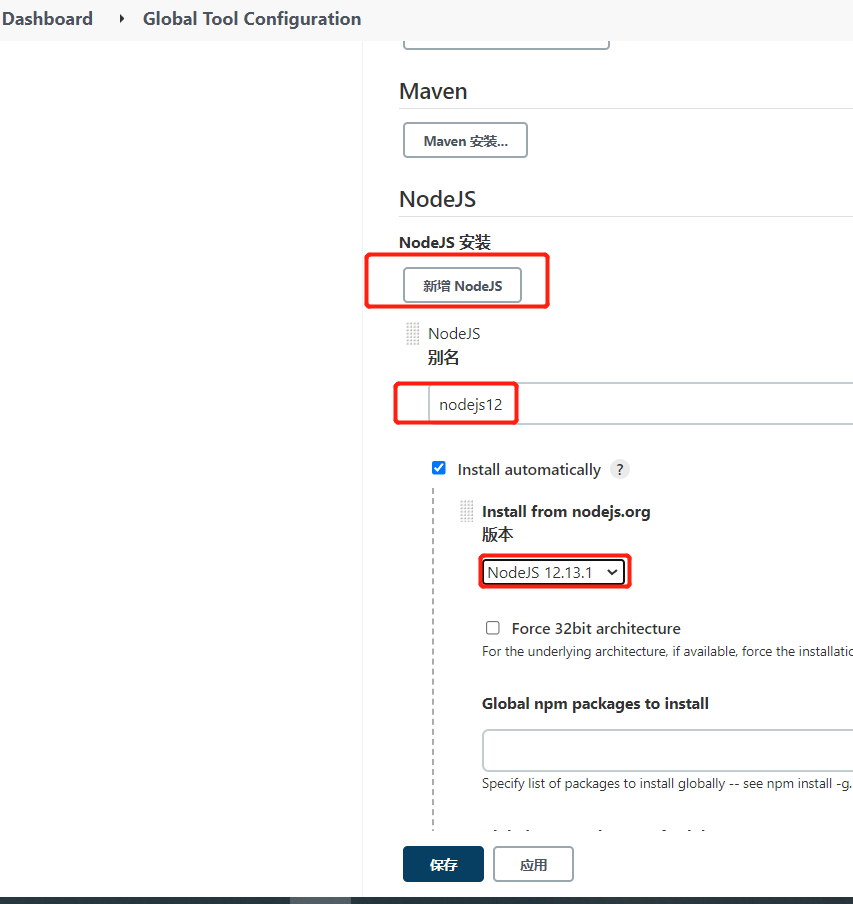
2. Install the NodeJS plug-in on Jenkins
3. Configure Nginx server on Jenkins
Manage Jenkins->Global Tool Configuration
Create front-end pipeline project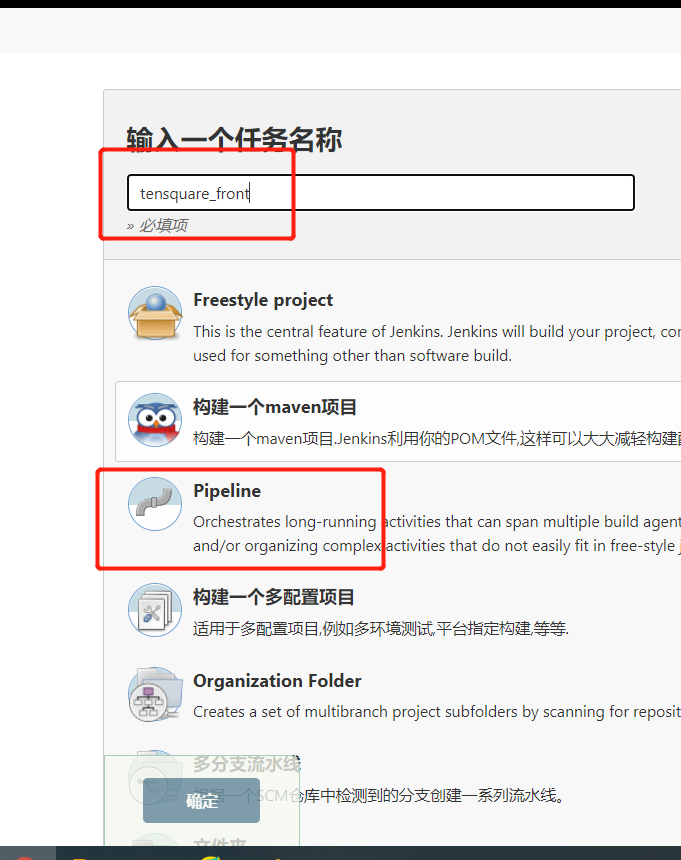
Add parametric build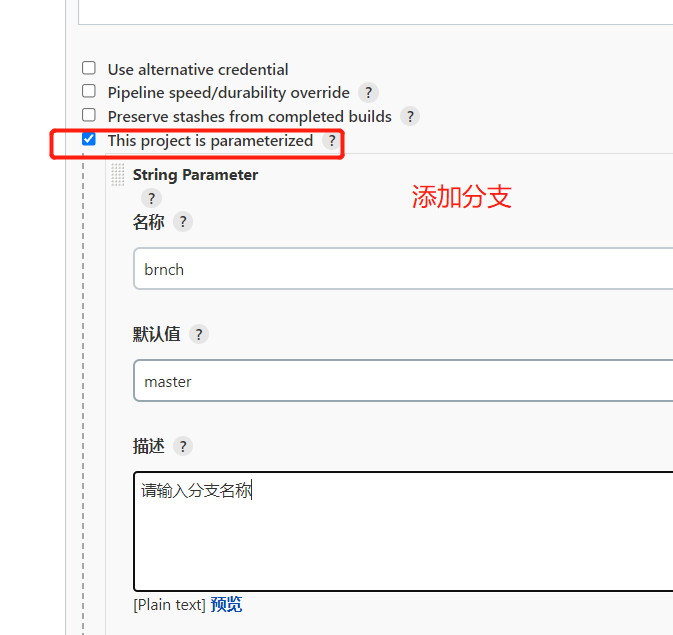
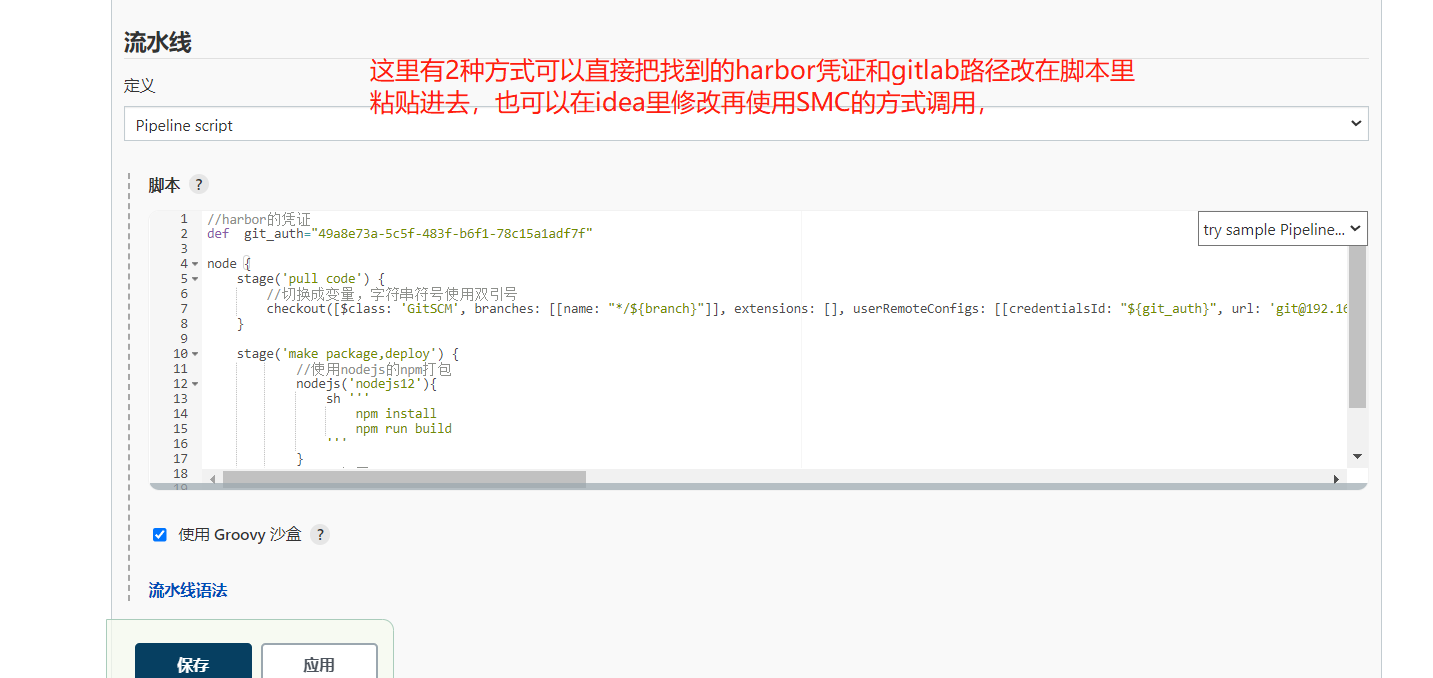
script
//Certificate of harbor
def git_auth="49a8e73a-5c5f-483f-b6f1-78c15a1adf7f"
node {
stage('pull code') {
//Switch to variable and use double quotation marks for string symbols
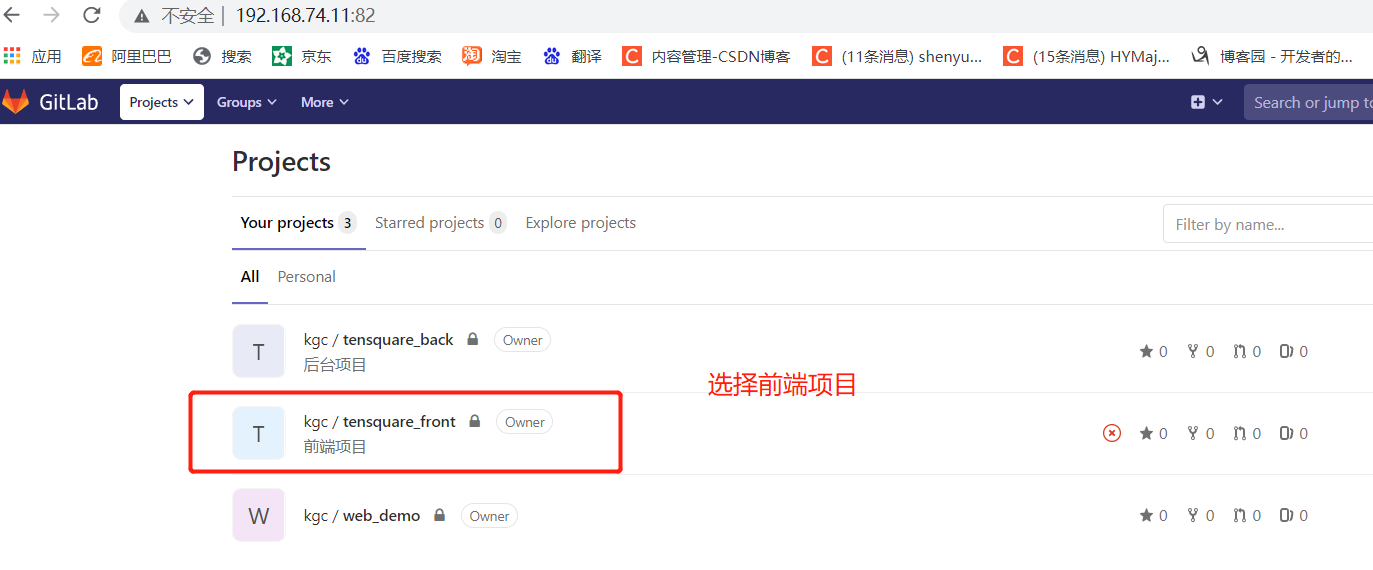
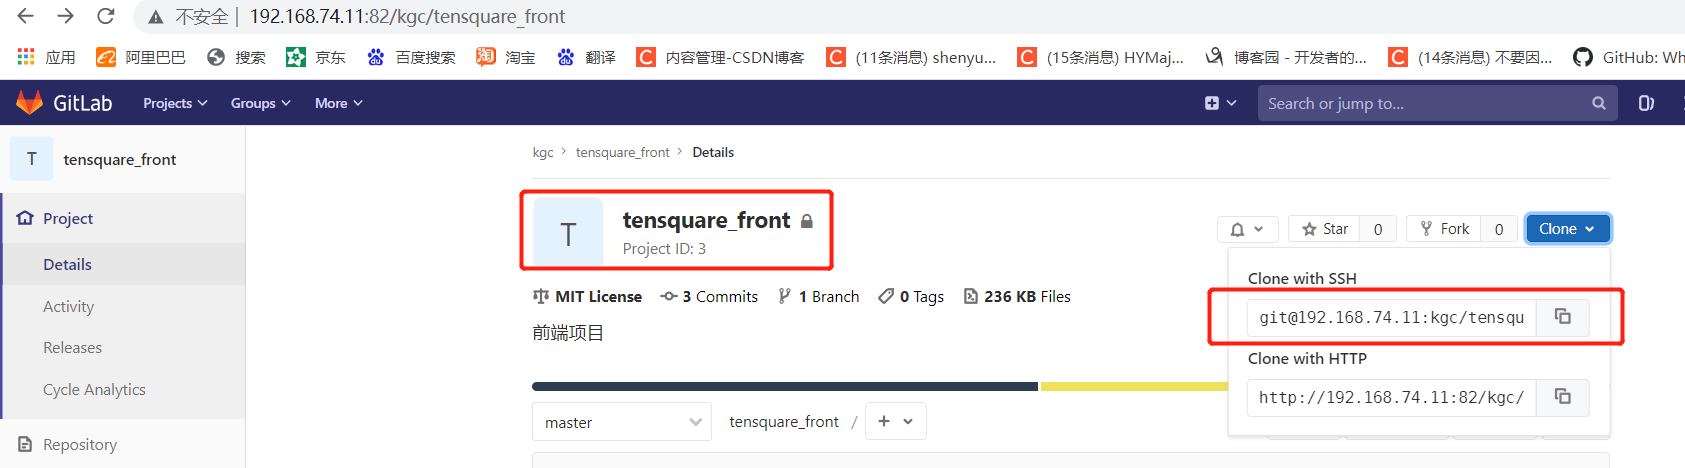
checkout([$class: 'GitSCM', branches: [[name: "*/${branch}"]], extensions: [], userRemoteConfigs: [[credentialsId: "${git_auth}", url: 'git@192.168.74.11:kgc/tensquare_front.git']]])
}
stage('make package,deploy') {
//npm packaging using nodejs
nodejs('nodejs12'){
sh '''
npm install
npm run build
'''
}
//Remote deployment
sshPublisher(publishers: [sshPublisherDesc(configName: 'master_server', transfers: [sshTransfer(cleanRemote: false, excludes: '', execCommand: '', execTimeout: 120000, flatten: false, makeEmptyDirs: false, noDefaultExcludes: false, patternSeparator: '[, ]+', remoteDirectory: '/usr/share/nginx/html', remoteDirectorySDF: false, removePrefix: 'dist', sourceFiles: 'dist/**')], usePromotionTimestamp: false, useWorkspaceInPromotion: false, verbose: false)])
}
}
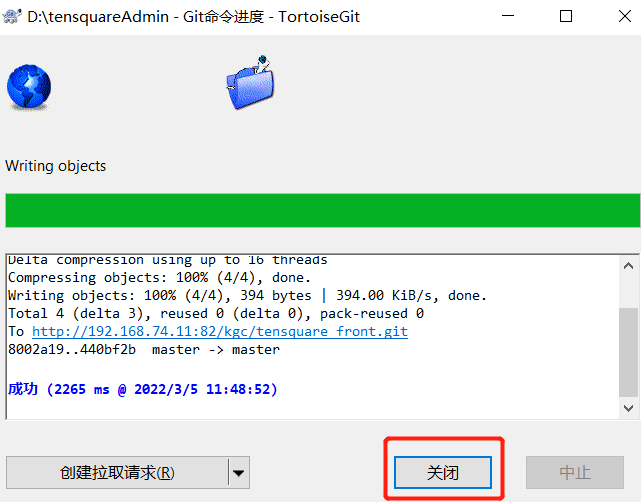
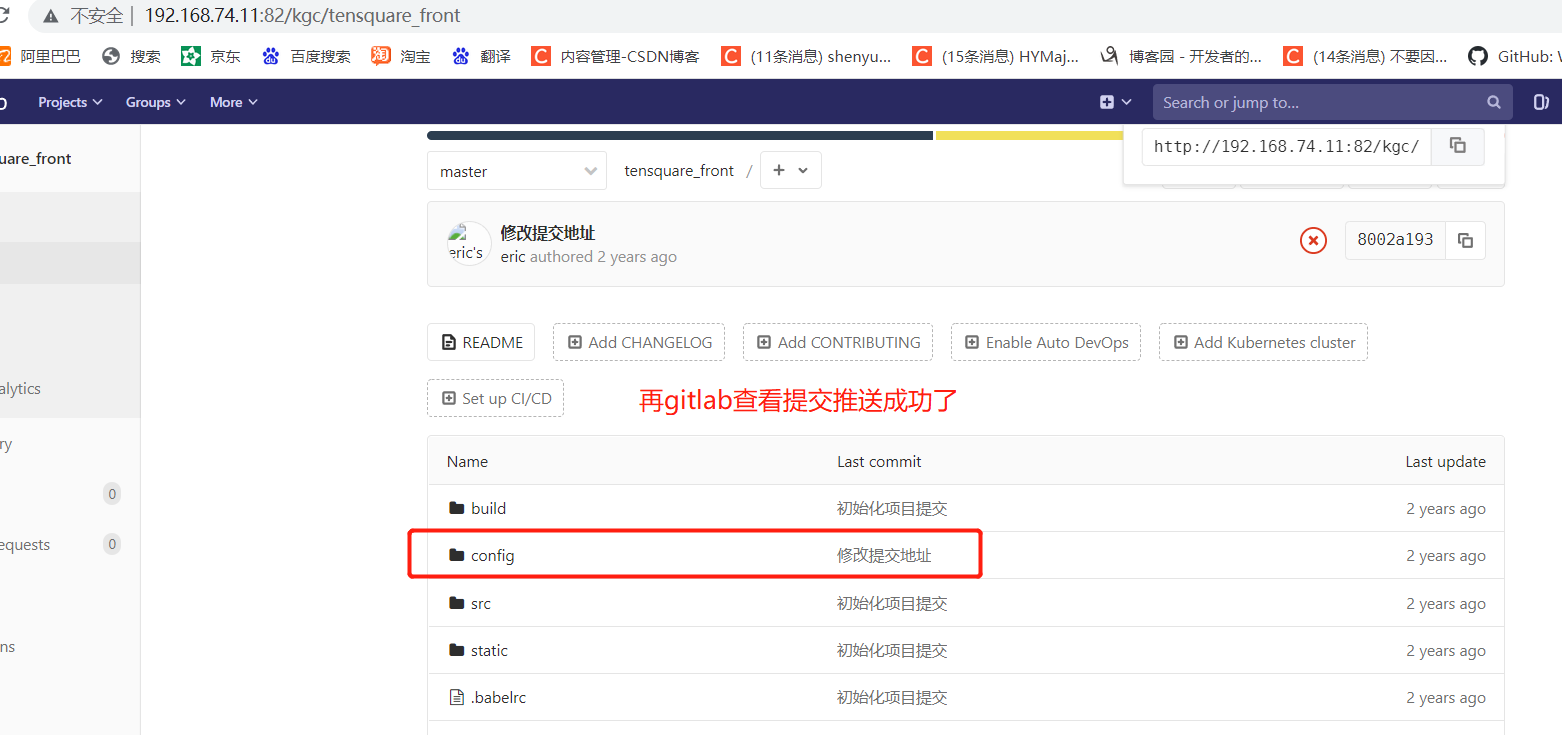
4. Modify the front-end code file and submit it with little turtle
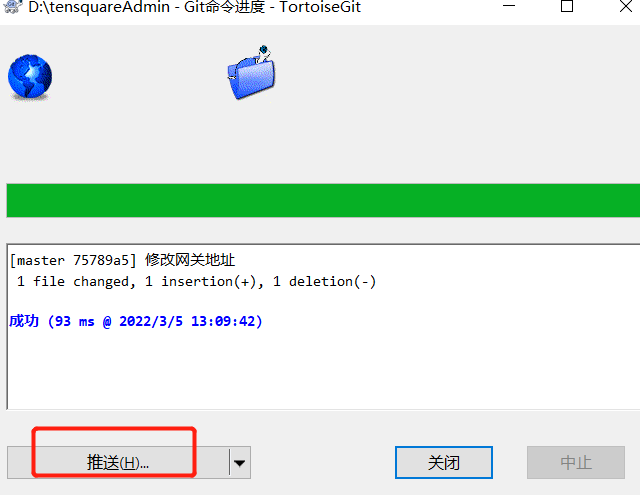
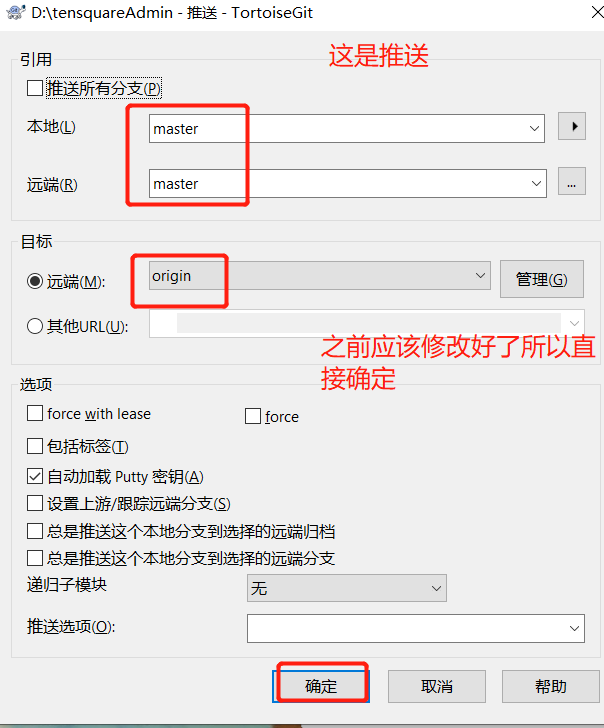
You may need to log in to gitlab in the middle. Just log in with the normal account password

After the build is completed, log in again at 192.168.74.12:9090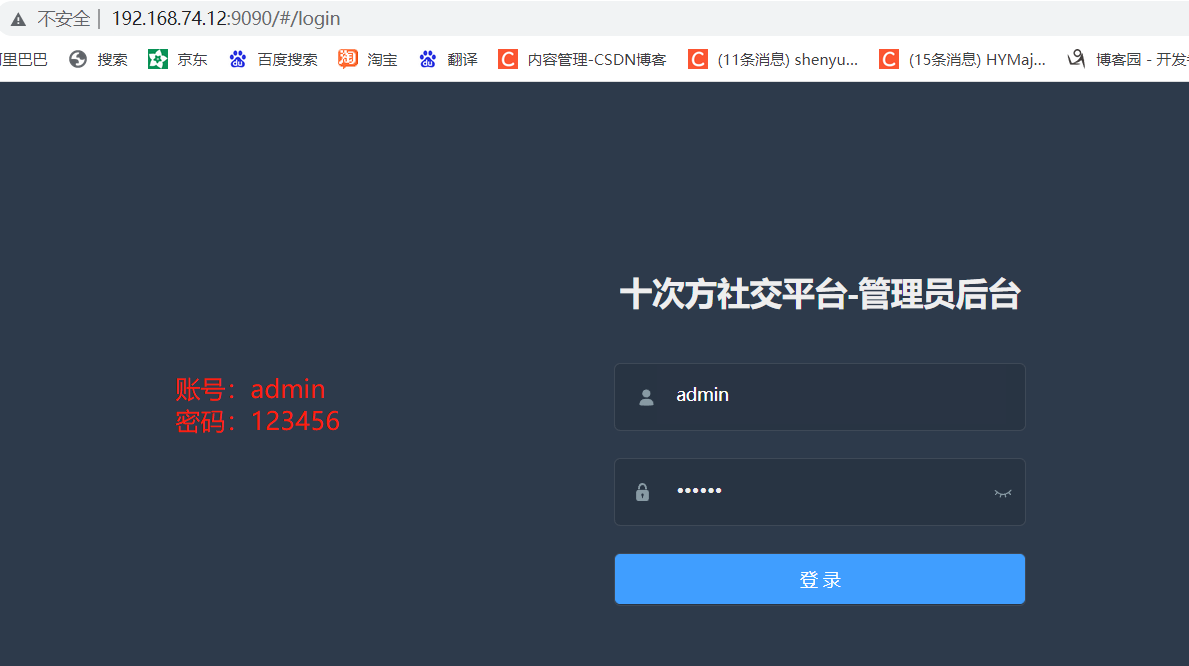
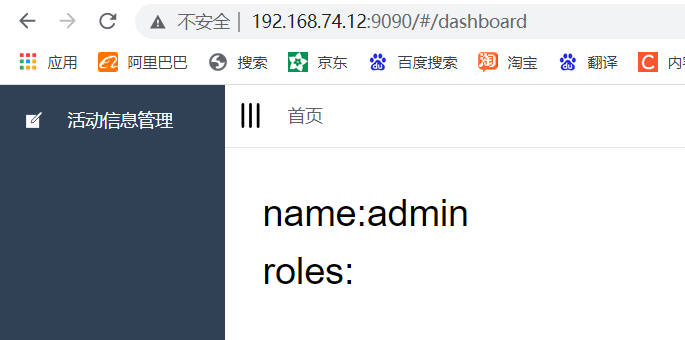
Website successfully deployed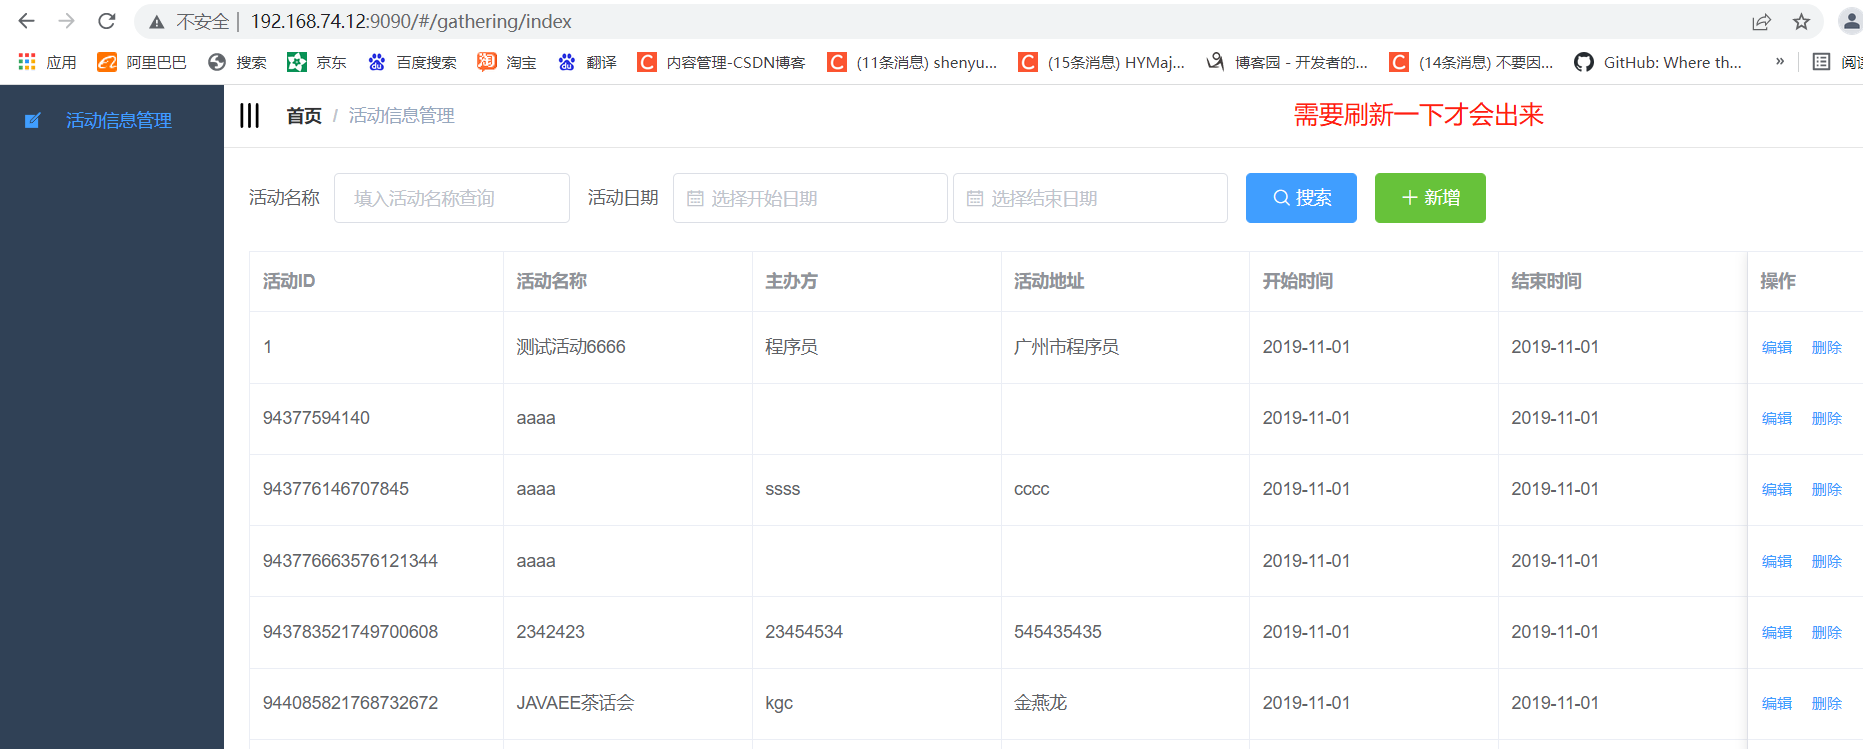
Production server validation view / usr/share/nginx/html root directory


 已为社区贡献13070条内容

所有评论(0)