Jenkins 管道,用于构建 Django 映像并将其推送到 dockerhub 和 GitHub webhook 集成。
这是系列文章的第四篇 使用 Jenkins 将 Django 应用程序部署到 AWS EC2 实例。詹金斯的温和指南。
在本文中,您将拼凑您所学的所有基础知识,并构建一个完整的 Jenkins 管道,该管道将构建 Django 映像并将其部署到 Dockerhub。您需要事先阅读过之前的文章
1.添加 init 阶段并加载script.groovy文件。
在您的 JenkinsFile 中,添加加载我们的 groovy 脚本的 init 阶段。
def gv  // we define this here to make it globally available.
pipeline {

    agent any
    stages {

        stage('Init') {

            steps {
                script {
                    gv = load "script.groovy"
                }
            }
        }
    }
}
请注意,您应该在项目的根目录中有一个script.groovy文件。如果没有,请通过以下方式创建它:
touch script.groovy
在script.groovy文件中添加以下代码
def buildApp() {
    echo "Building app"
}
return this // returns all the funcs inside the file.
2.将测试阶段添加到您的 JenkinsFile(可选)。
您现在将向 JenkinsFile 添加一个测试阶段。然而,这是可选的,如果你想运行一些测试,你可以添加它。
您将首先在您的script.groovy文件中添加一个testApp函数。
def testApp() {
    echo "Testing our application"
    // you can now run your test command here, e.g if using pytest you run
    sh "pytest"
}

def buildApp() {
    echo "Building app"
}

return this
您现在可以在 JenkinsFile 的测试阶段使用testApp函数。
stage ('test') {
            steps  {
                script {
                    gv.testApp()
                }
            }
        }
免责声明:此步骤是可选的,可以跳过,除非您有要运行的测试。
3.将构建阶段添加到您的管道。
您现在可以向 JenkinsFile 添加构建阶段,像往常一样,首先在script.groovy文件中添加buildApp函数。
您将使用之前介绍过的withPassword功能以及我们之前创建的 dockerhub 凭据。
def buildApp() {
    echo "Building app with build number #${env.BUILD_NUMBER}" // env variables are available and can be accesed in groovy files.
    withPassword([credentialsId:'dockerhub-id', passwordVariable: 'PASS', usernameVariable:'USER']){
        sh "docker build . -t YOUR_REPO_NAME:YOUR_TAG" // replace YOU_REPO_NAME and YOUR_TAG with the respective repo name and tag.
        sh "echo $PASS | docker login -u $USER --password-stdin"
        sh " docker push YOUR_REPO_NAME:YOUR_TAG" // replace YOU_REPO_NAME and YOUR_TAG with the respective repo name and tag.
    }
}
您现在可以在构建步骤中使用它
stage('build') {
            steps{
                script {
                    gv.buildApp()
                }
            }
        }
4.向 Jenkins 管道添加部署步骤。
您首先将deployApp添加到 script.groovy 文件中。
def deployApp() {
    echo "We will handle this in the next article!"
}
并在我们的 JenkinsFile 中使用它。
stage("deploy"){
            steps{
                gv.deployApp()
            }
        }
目前,您的script.groovy应该类似于
// script.groovy
def testApp() {
    echo "Testing our application"
    // you can now run your test command here, e.g if using pytest you run
    sh "pytest"
}

def buildApp() {
    echo "Building app with build number #${env.BUILD_NUMBER}" // env variables are available and can be accesed in groovy files.
    withPassword([credentialsId:'dockerhub-id', passwordVariable: 'PASS', usernameVariable:'USER']){
        sh "docker build . -t YOUR_REPO_NAME:YOUR_TAG" // replace YOU_REPO_NAME and YOUR_TAG with the respective repo name and tag.
        sh "echo $PASS | docker login -u $USER --password-stdin"
        sh " docker push YOUR_REPO_NAME:YOUR_TAG" // replace YOU_REPO_NAME and YOUR_TAG with the respective repo name and tag.
    }
}
def deployApp() {
    echo "We will handle this in the next article!"
}
return this
和詹金斯文件
def gv // define here for it to be globally available
pipeline {

    agent any
    parameters {
        choice(name: 'Version', choices:['1.1.0', '1.2.0', '1.3.0'], description:'')
    }
    stages {

        stage('Init') {

            steps {
                script {
                    gv = load "script.groovy"
                }
            }
        }
        stage ('test') {
            steps  {
                script {
                    gv.testApp()
                }
            }
        }
        stage('build') {
            steps{
                script {
                    gv.buildApp()
                }
            }
        }

        stage("deploy"){
            steps{
                gv.deployApp()
            }
        }
    }
}
您现在可以提交您的更改并将其推送到您选择的版本控制,然后转到您的 Jenkins 仪表板并构建。它应该成功构建而没有任何错误。如果您需要任何澄清,请发表评论,我会尽快回复。
5.与 GitHub 集成。
到目前为止,您一直在手动构建我们的工作,但是,在大型开发团队中,这是非常低效的。您现在将了解如何将 GitHub 与我们的 jenkins 服务器集成,以便作业可以自动运行。
转到您的 GitHub 仪表板并单击设置选项卡并导航到 webhook 部分。
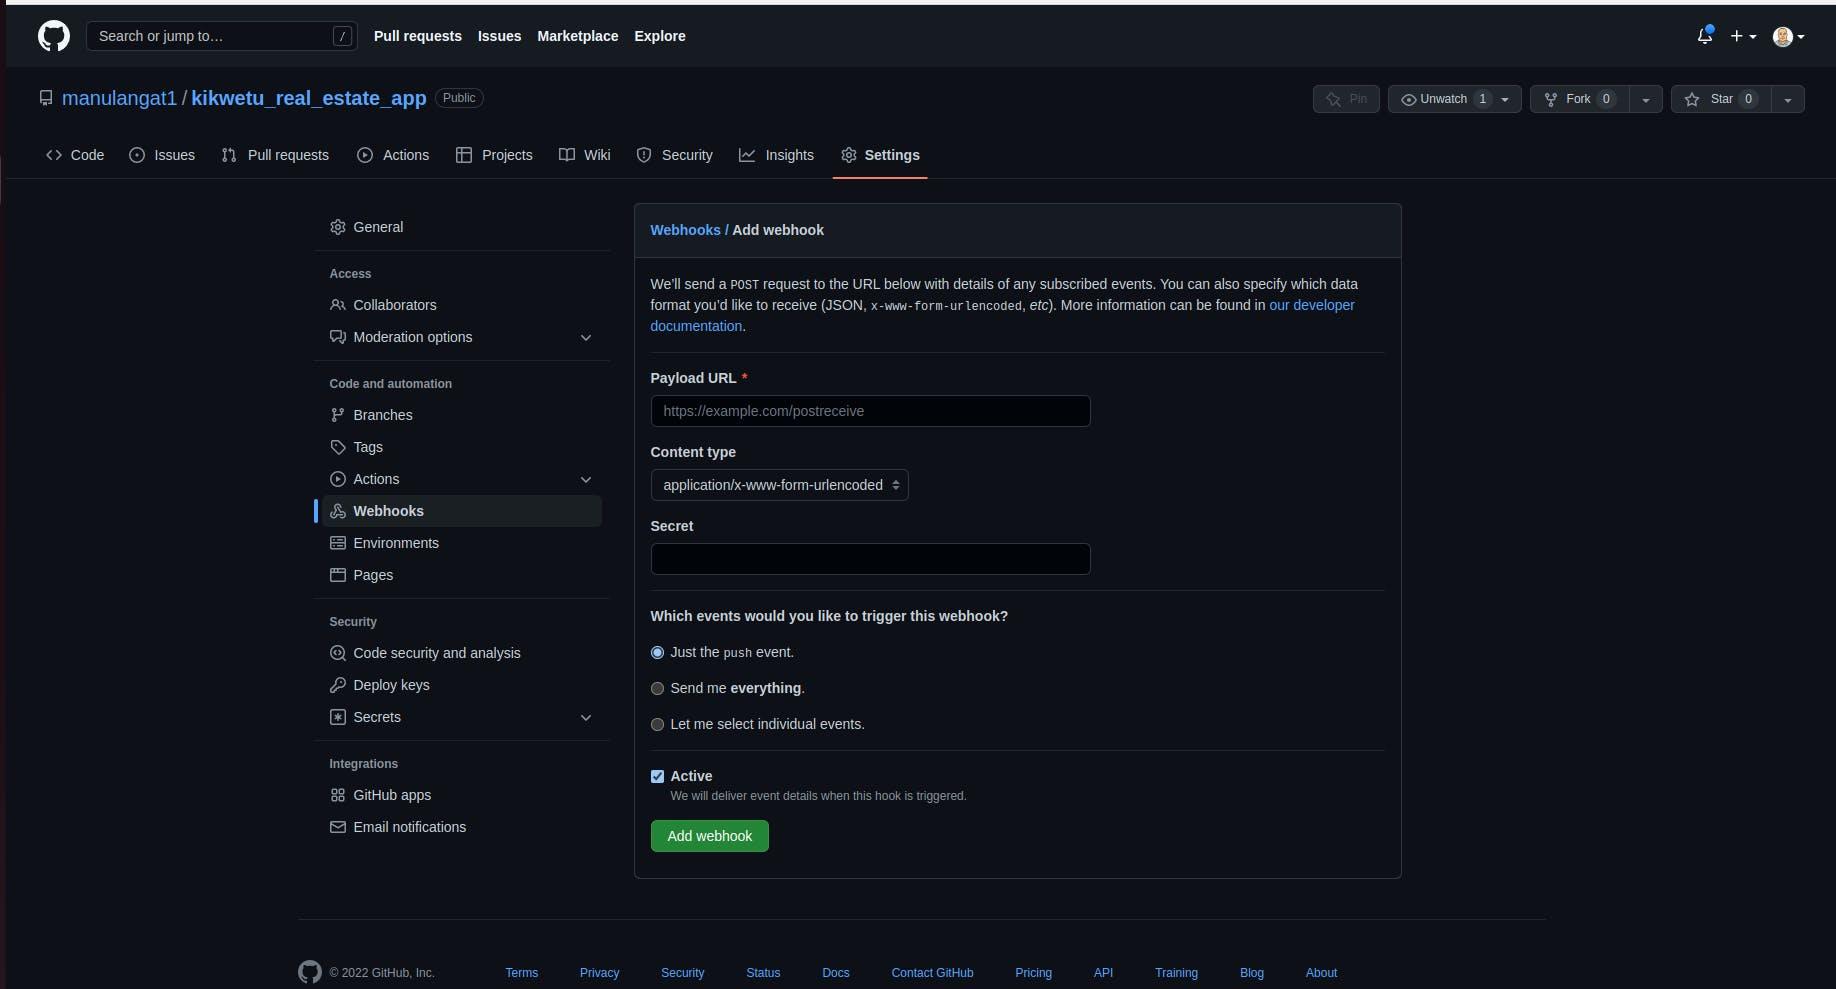
在“Payload URL”字段中,粘贴您的 Jenkins 环境 URL。在此 URL 的末尾添加 /github-webhook/。在“内容类型”中选择:“应用程序/json”并将“秘密”字段留空
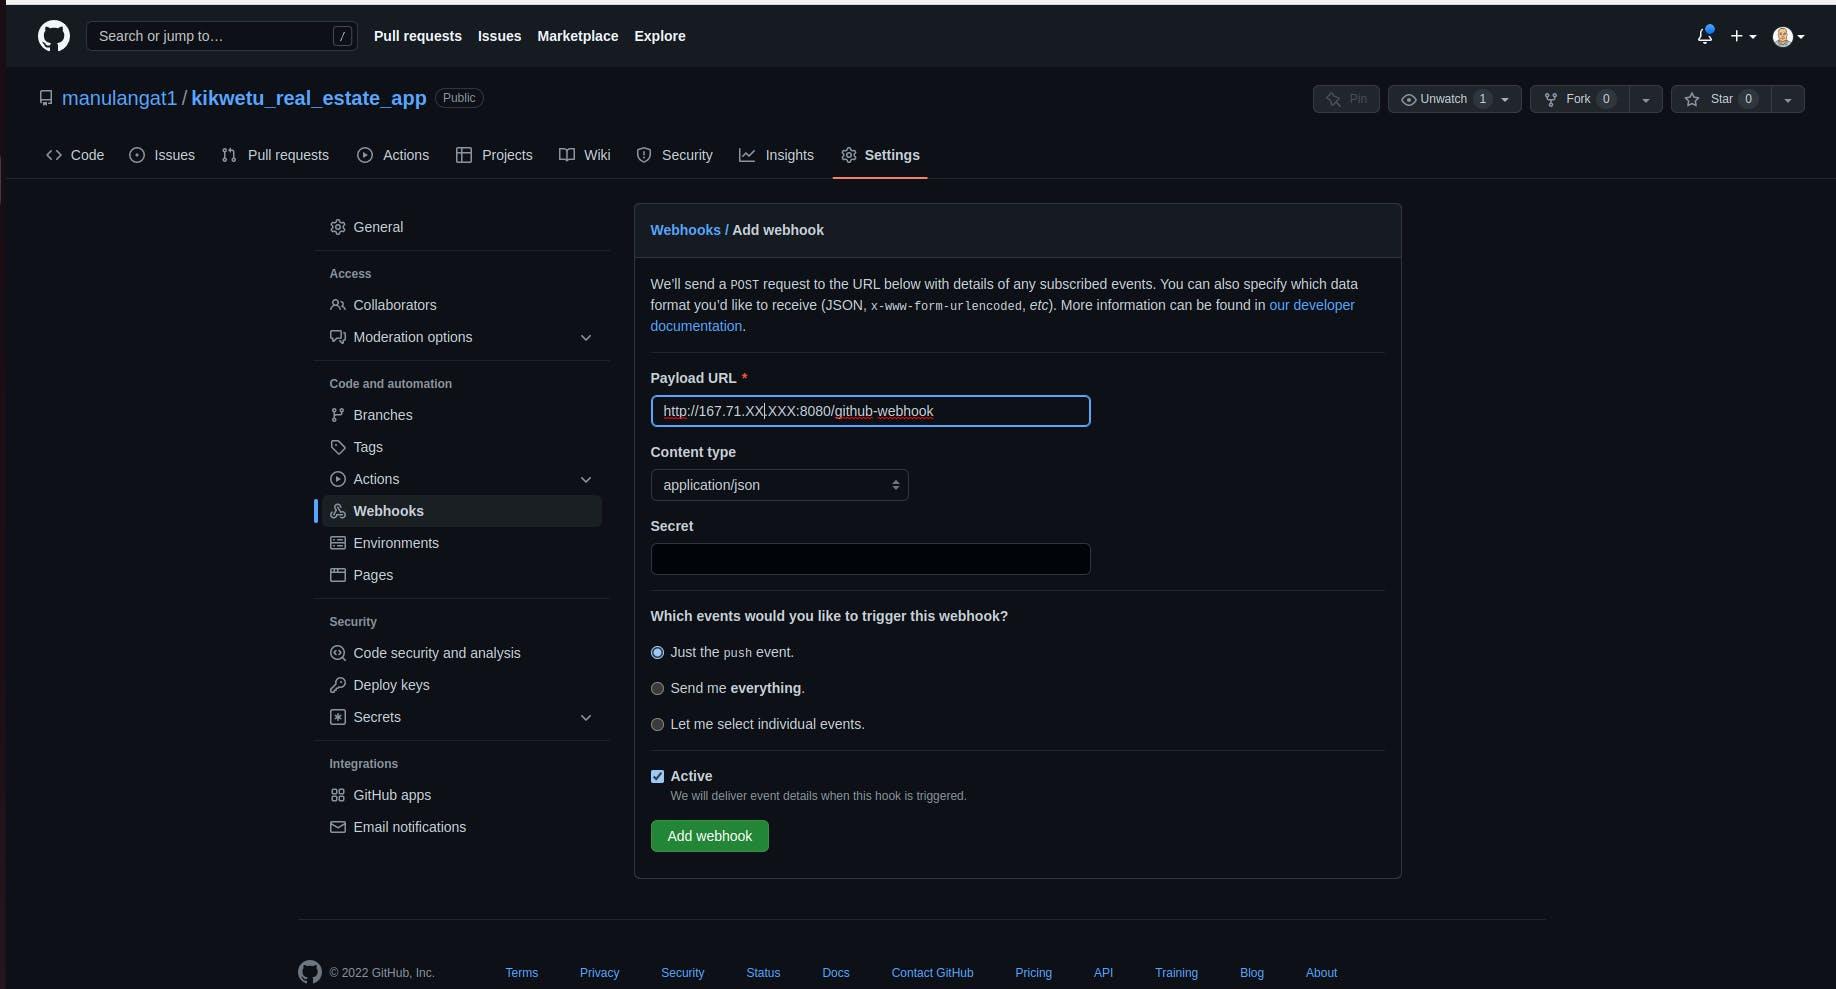
在“您希望哪些事件触发此 webhook?”页面上,选择“让我选择单个事件”。然后,选中“拉取请求”和“推送”。在此选项结束时,确保选中“Active”选项,然后单击“Add webhook”。
您在 GitHub 上完成了配置,现在转到您的 Jenkins 仪表板,选择您最初创建的作业,然后单击configure后选择Build triggers选项卡。

检查GitHub hook trigger for GITScm polling选项。
您现在已经成功地将 GitHub 与 Jenkins 集成。转到您的代码编辑器,进行更改,将其推送到 GitHub,您应该会看到构建自动运行。
在本文中,您提出了一个完整的 Jenkins 管道,它将 Django 映像推送到 dockerhub,并且您已将 GitHub 与 Jenkins 集成以进行自动构建。在下一篇文章中,您将学习如何使用Multi-branch pipelines,conditionals以及如何设置电子邮件通知(最终)
快乐的黑客。

CI/CD社区为您提供最前沿的新闻资讯和知识内容
更多推荐
 1
1 0
0- 0


 已为社区贡献13068条内容

所有评论(0)