
[Java+阿里云 SMS + Redis] 阿里云短信服务使用
·
一、阿里云短信SDK的申请
1.短信认证套餐的购买
要购买短信认证套餐,才能使用sdk发送验证码
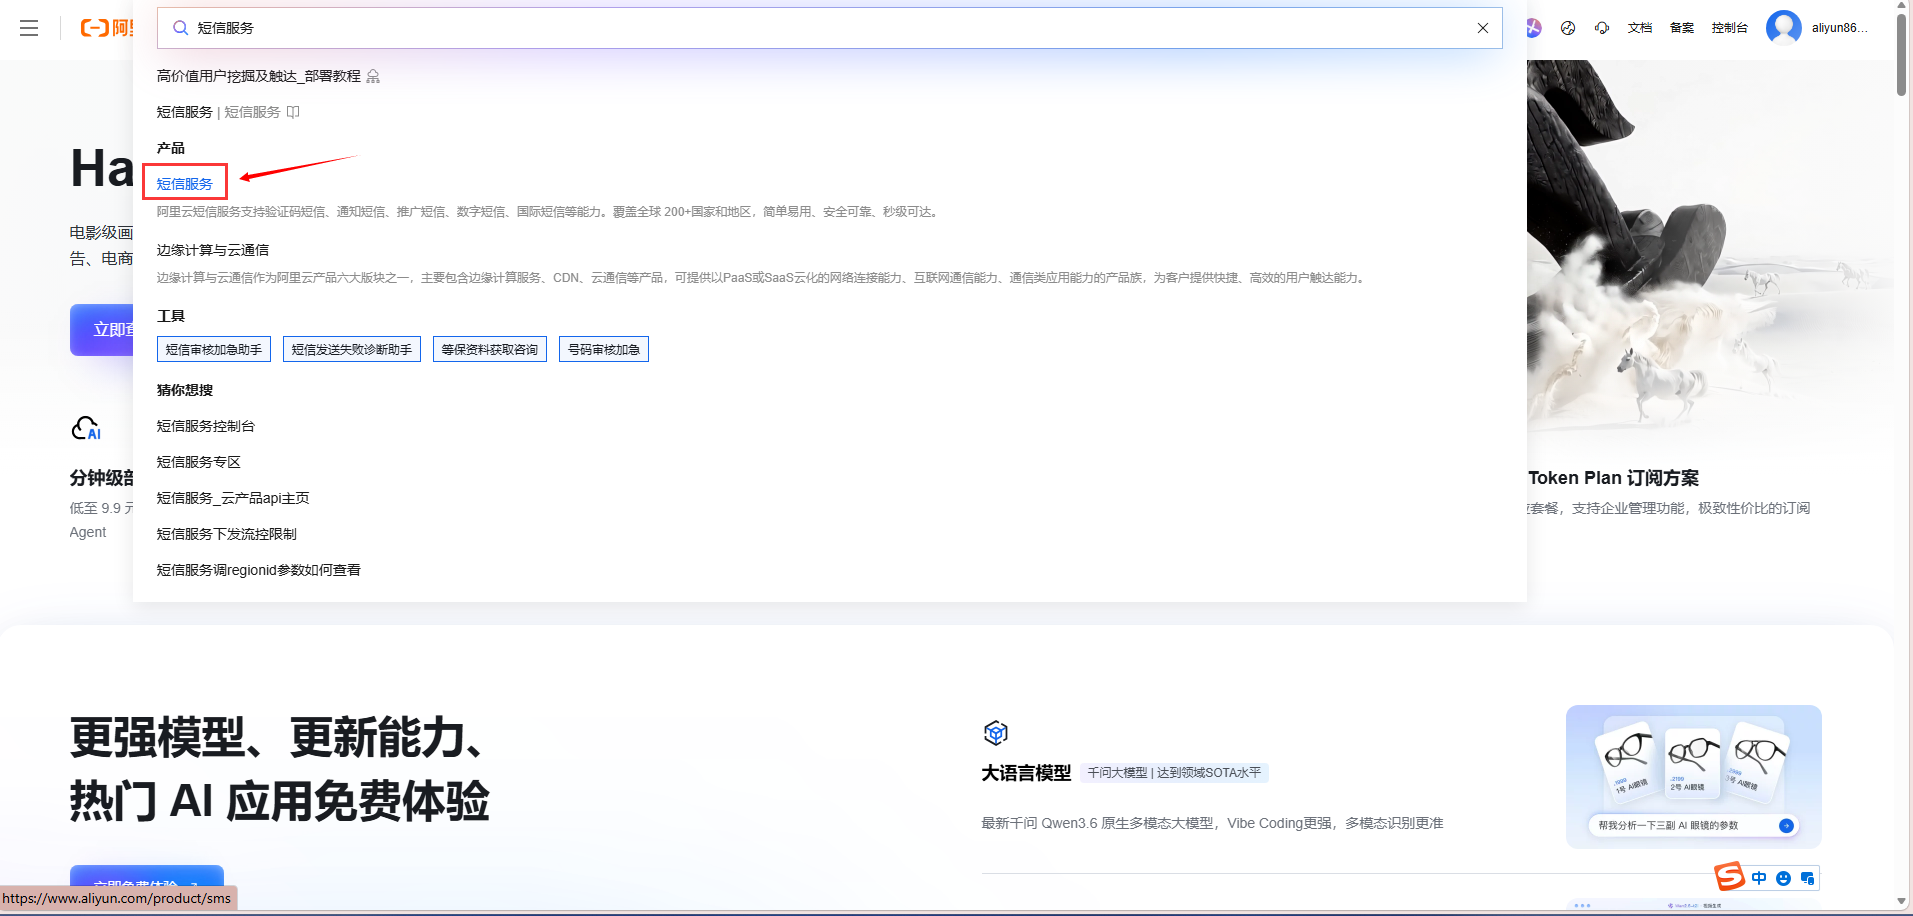
1.1首先进入阿里云官网搜索短信服务
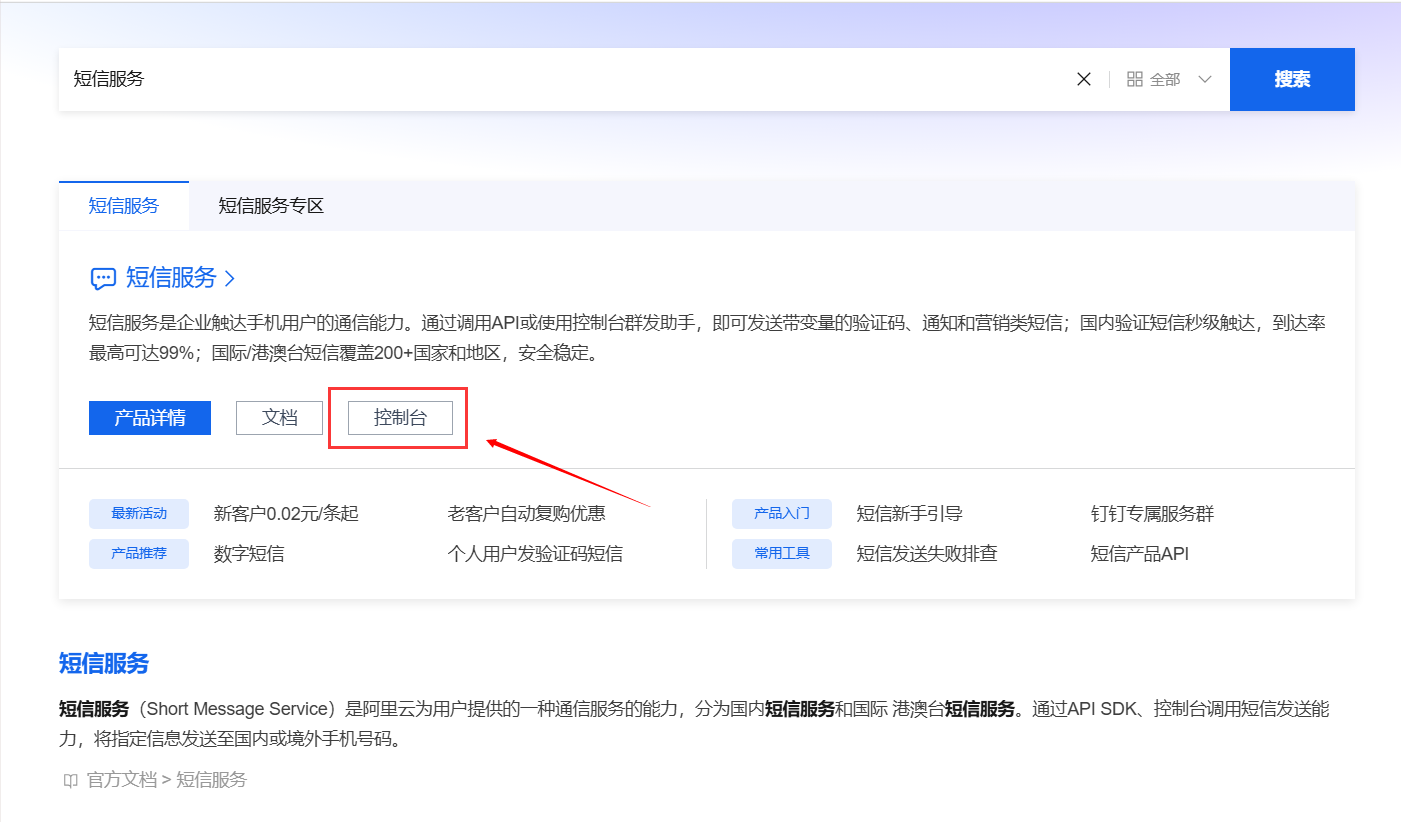
1.2进入控制台
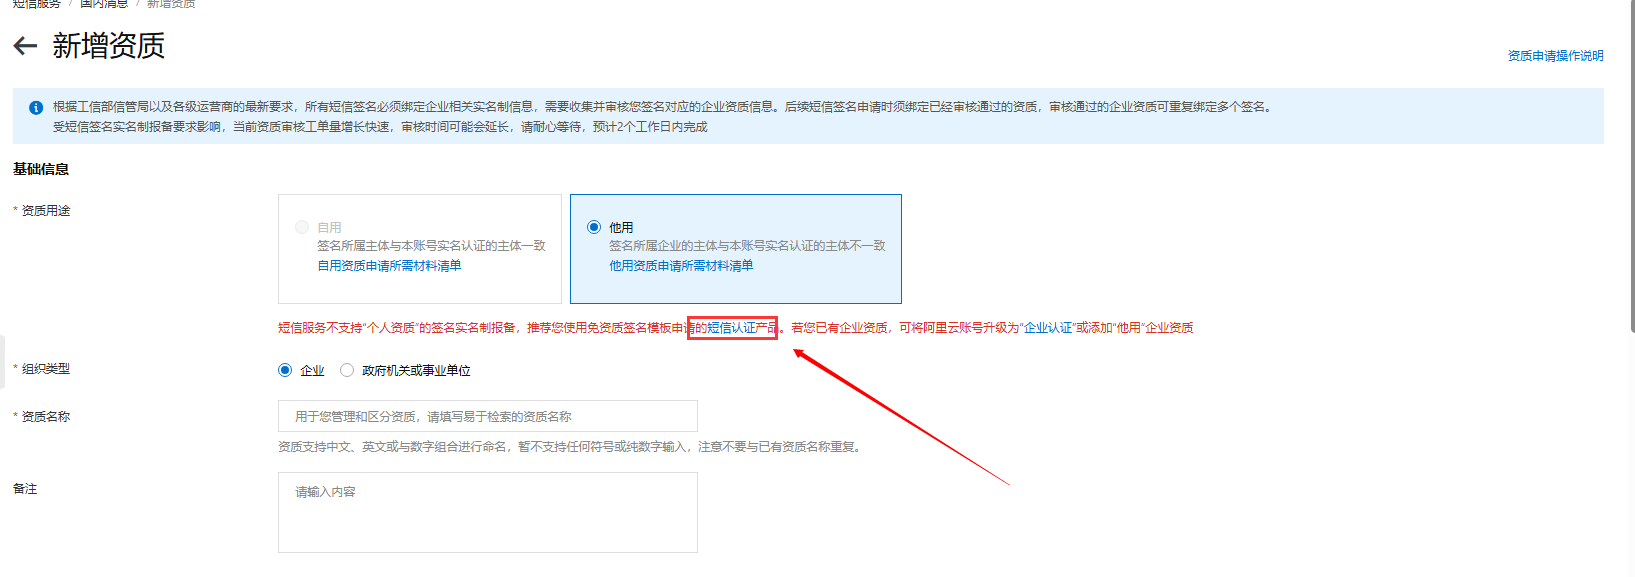
作者只是简单的实现 发送验证码的功能实现,并不是实际的企业项目
如果想进行企业项目的开发,根据公司进行申请签名
所以这里是选择了测试短信的流程
虽然作者不是企业项目
但是大概得流程应该是差不多的
1.3选择 发送测试短信
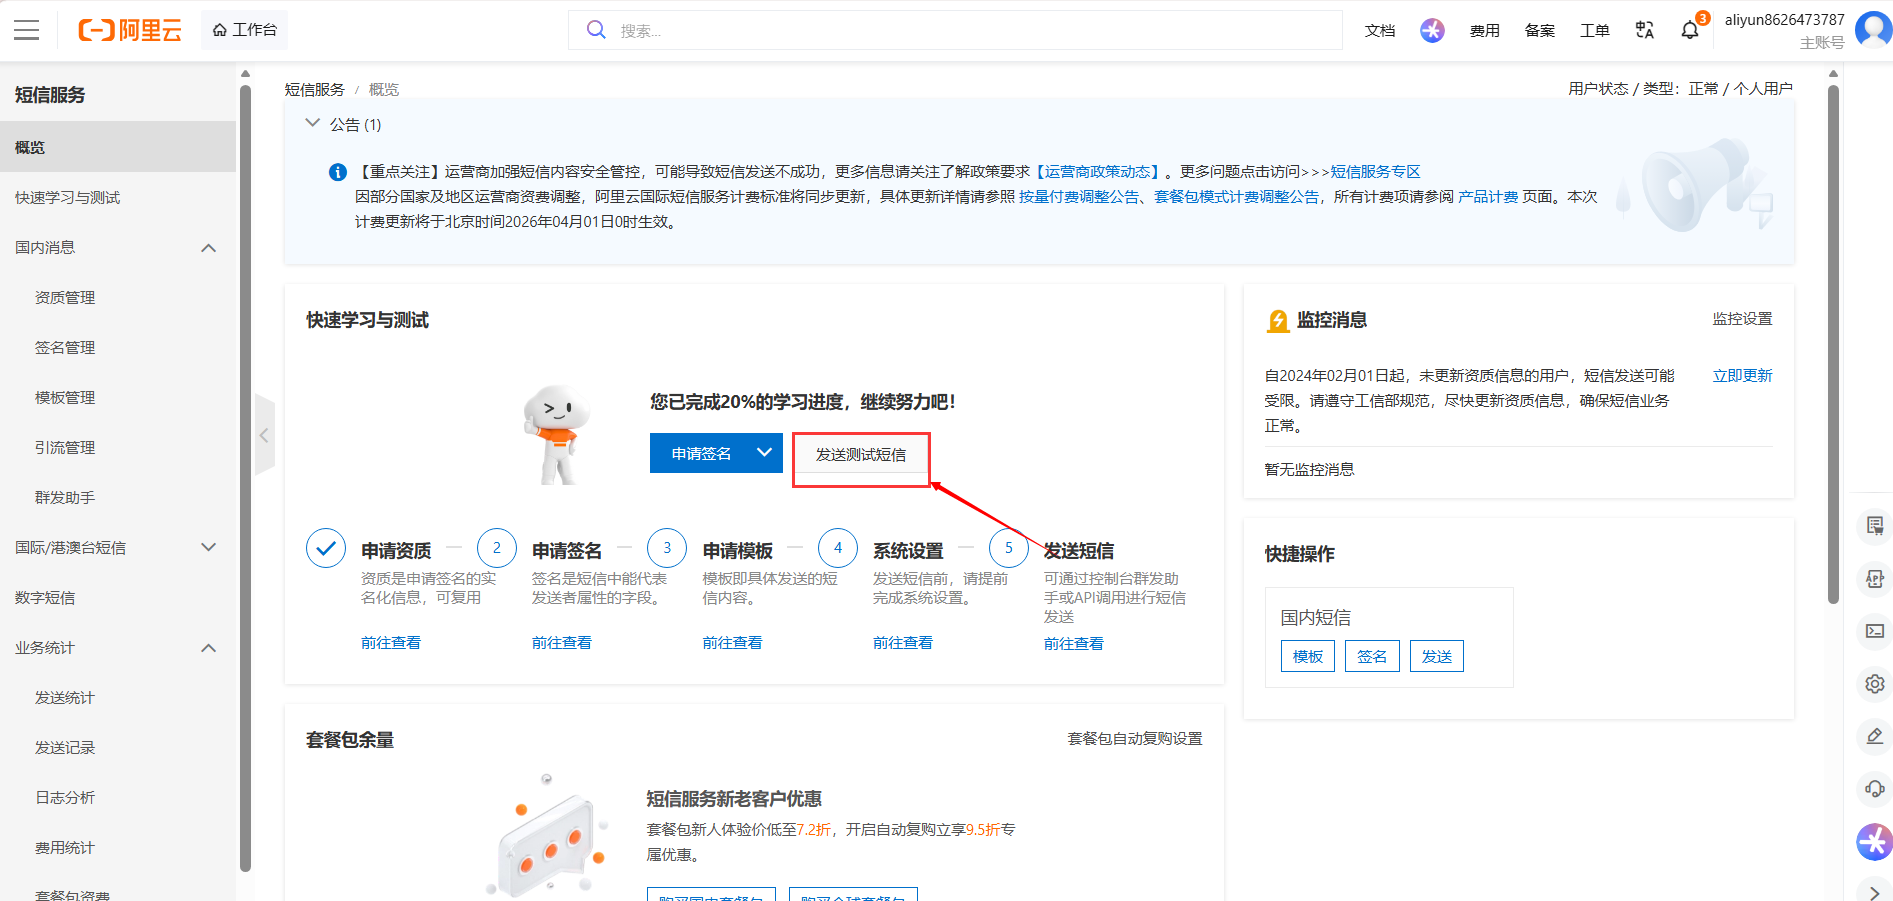
1.4 在发送测试短信之前,要买套餐
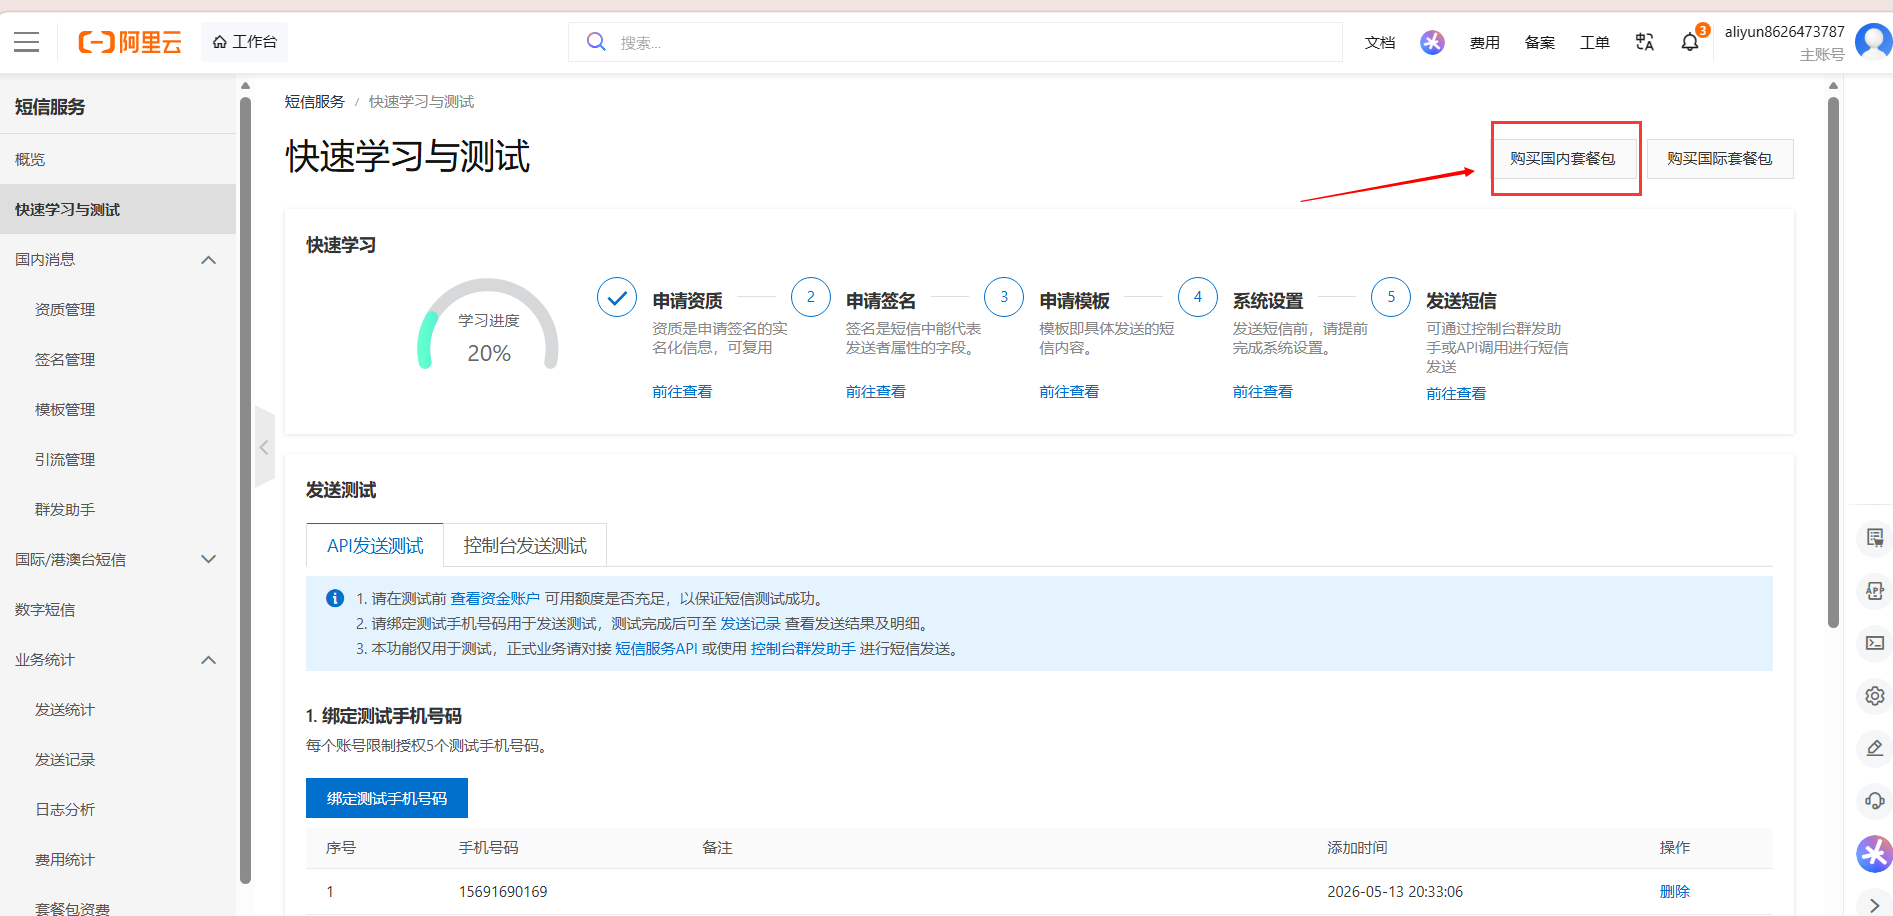
1.5 选择 短信认证
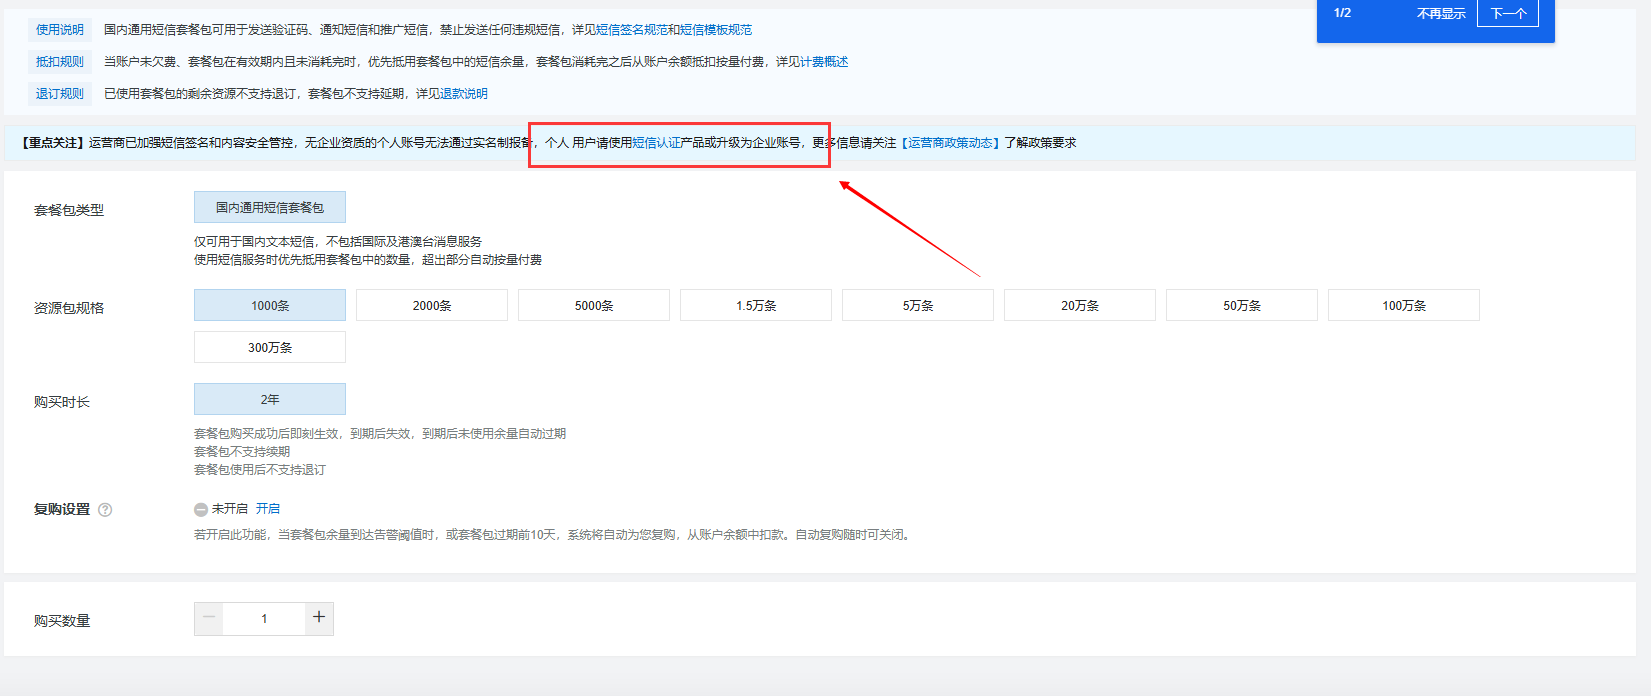
1.6 在新手指引这里,点击 购买短信认证套餐,(这个套餐应该是专门适用于验证码的,个人猜测,没有企业项目)
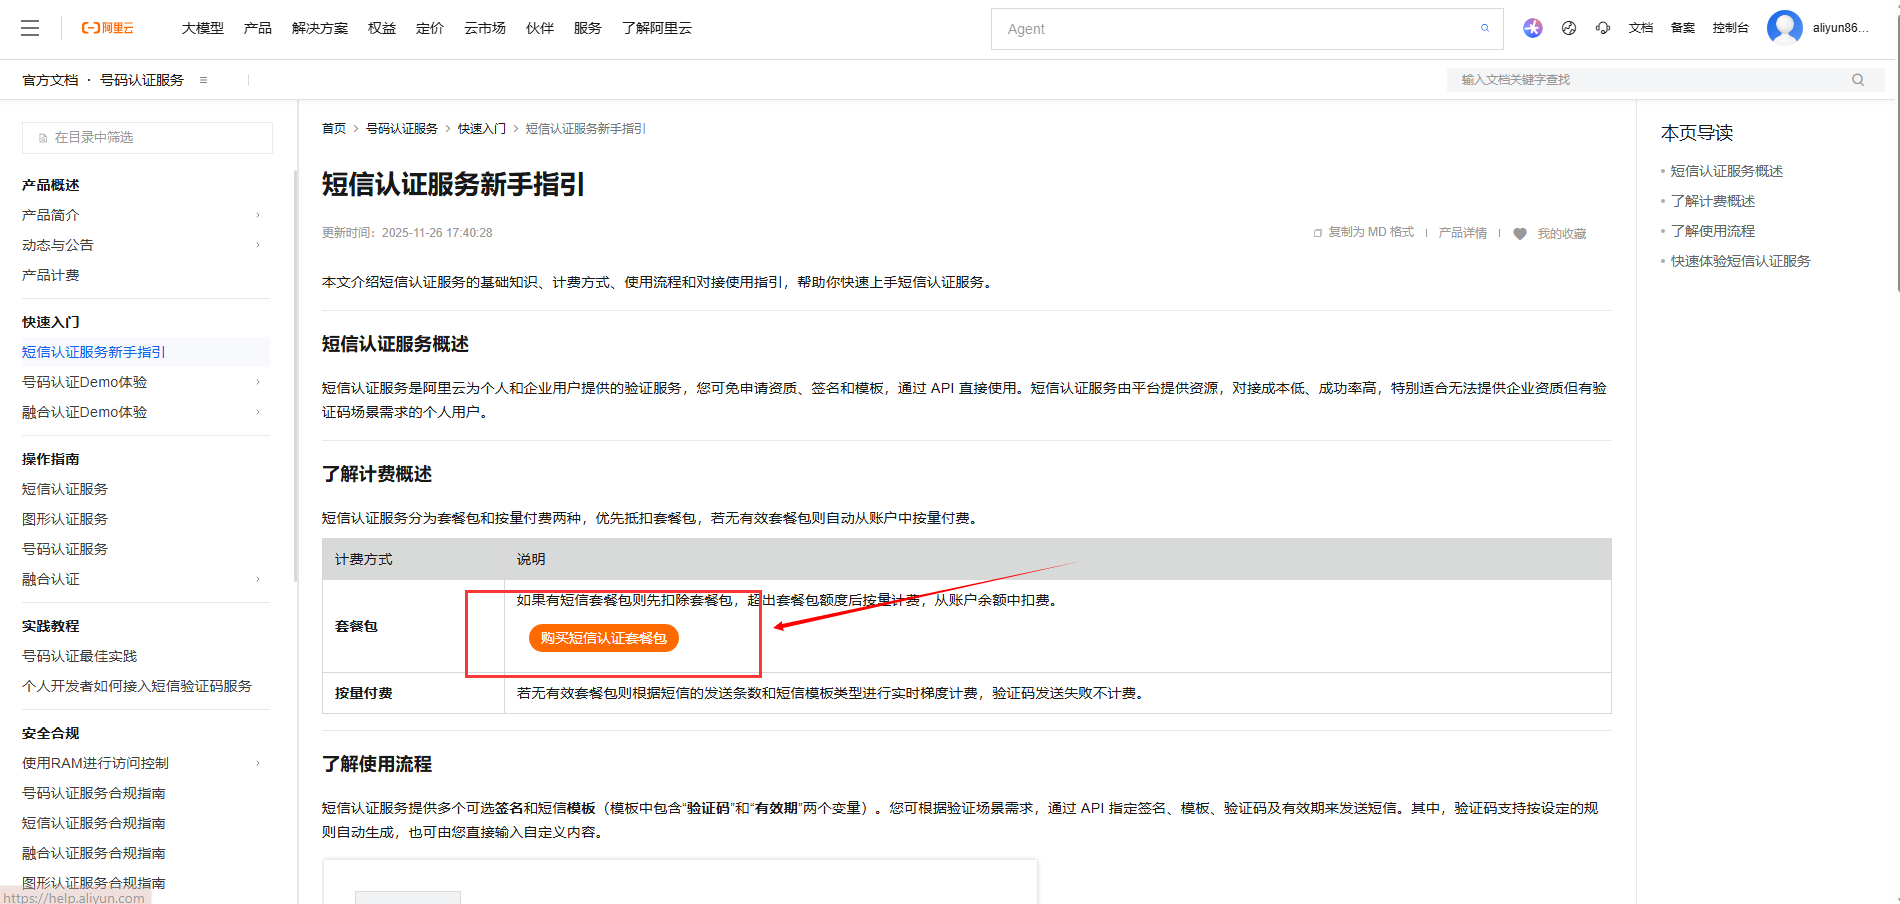
1.7 购买一个初级的套餐即可
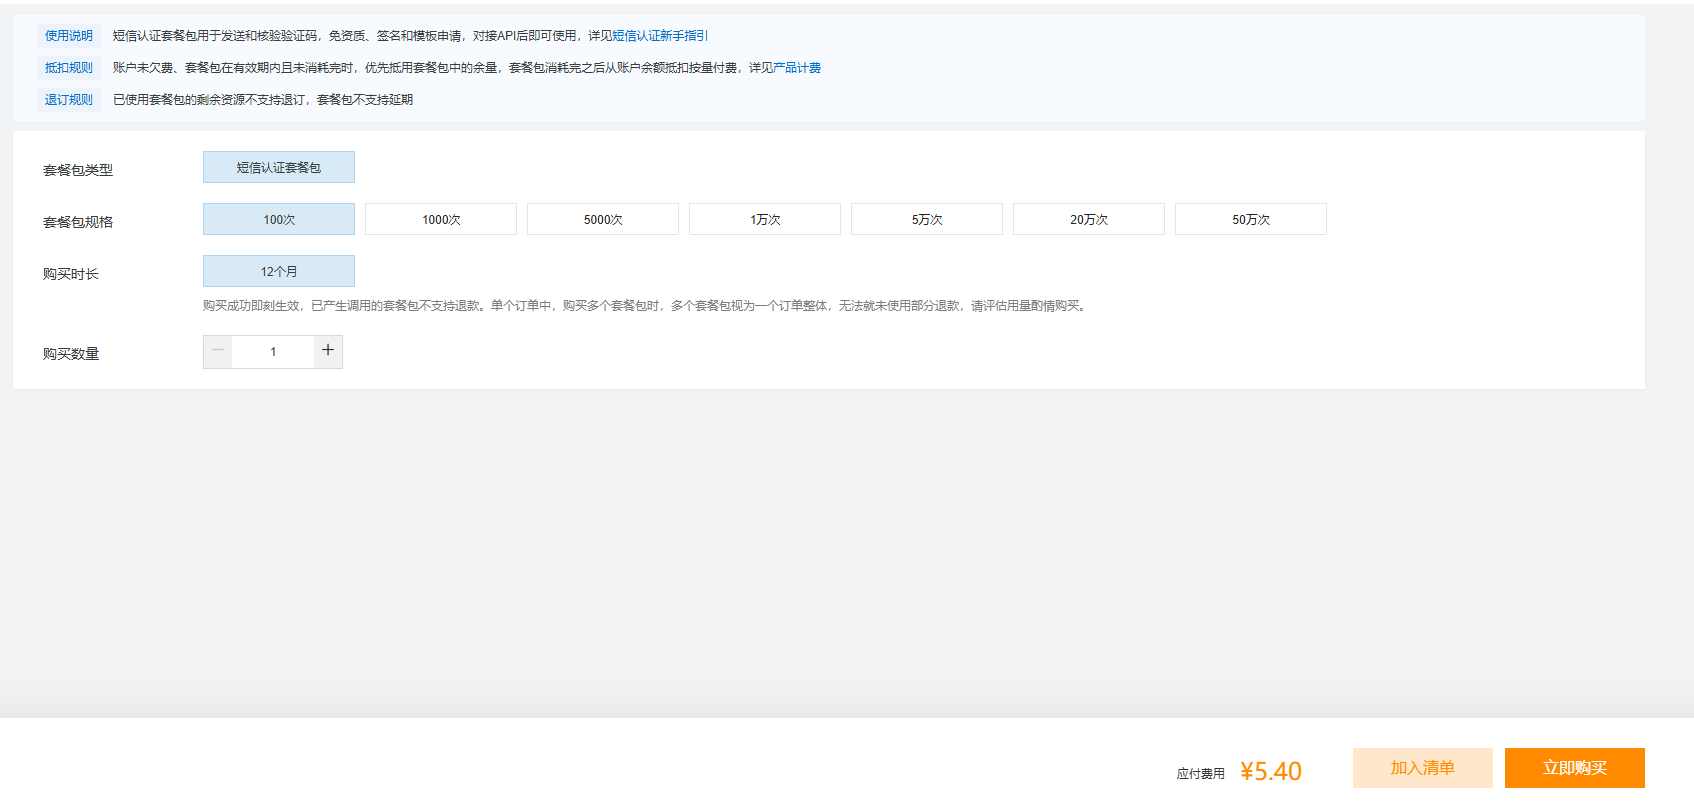
总结:首先购买一个基础短信认证套餐
2 绑定 测试手机号
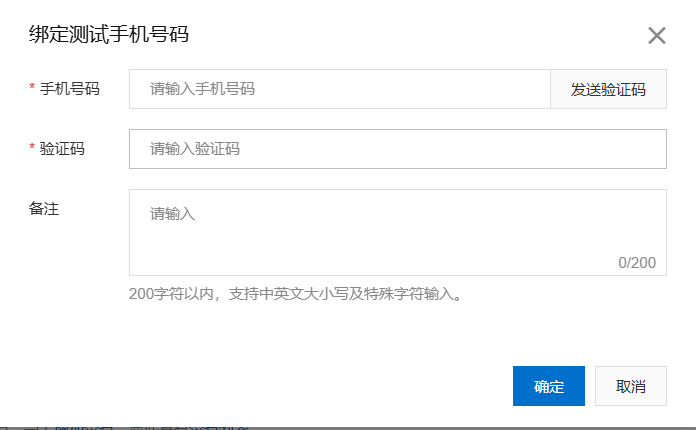
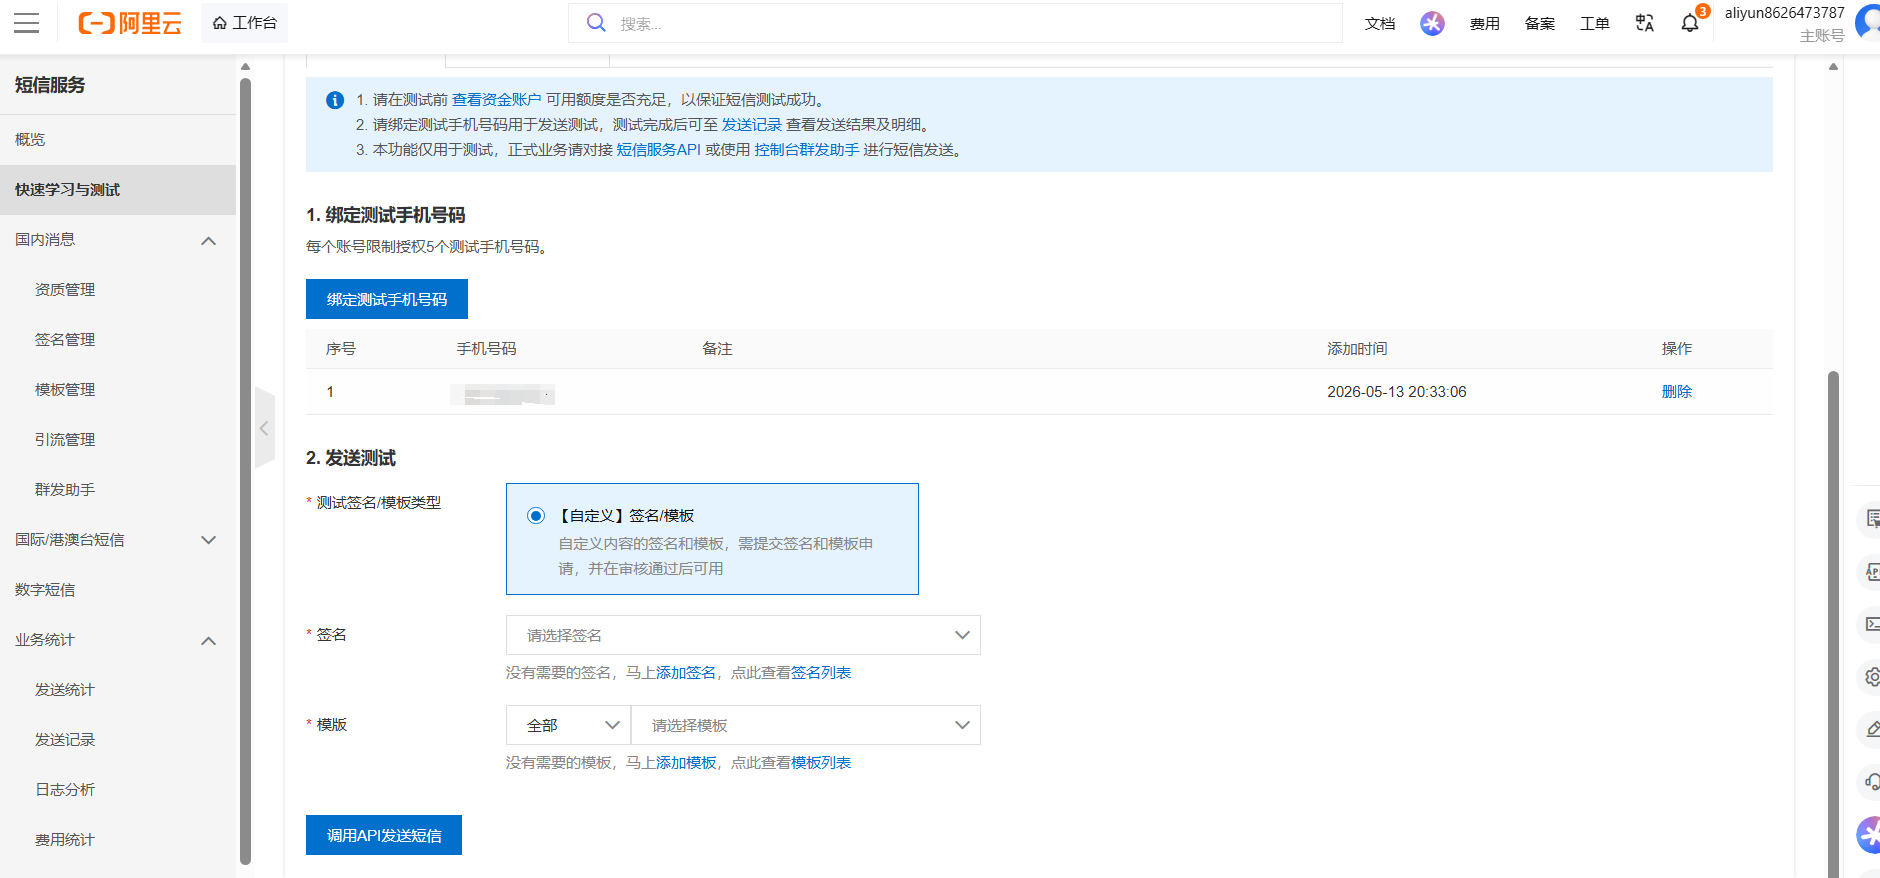
总结:添加一个测试号码
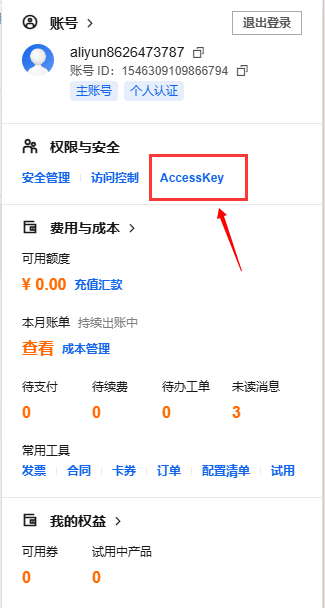
3 申请 AK(AccessKey)
3.1在个人信息页面,进入AccessKey
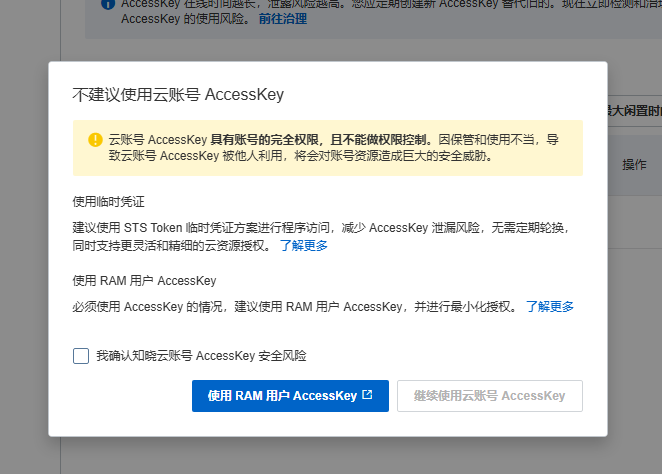
3.2 这里为了安全起见,使用RAM用户AccessKey
3.4 这里直接默认,执行配置
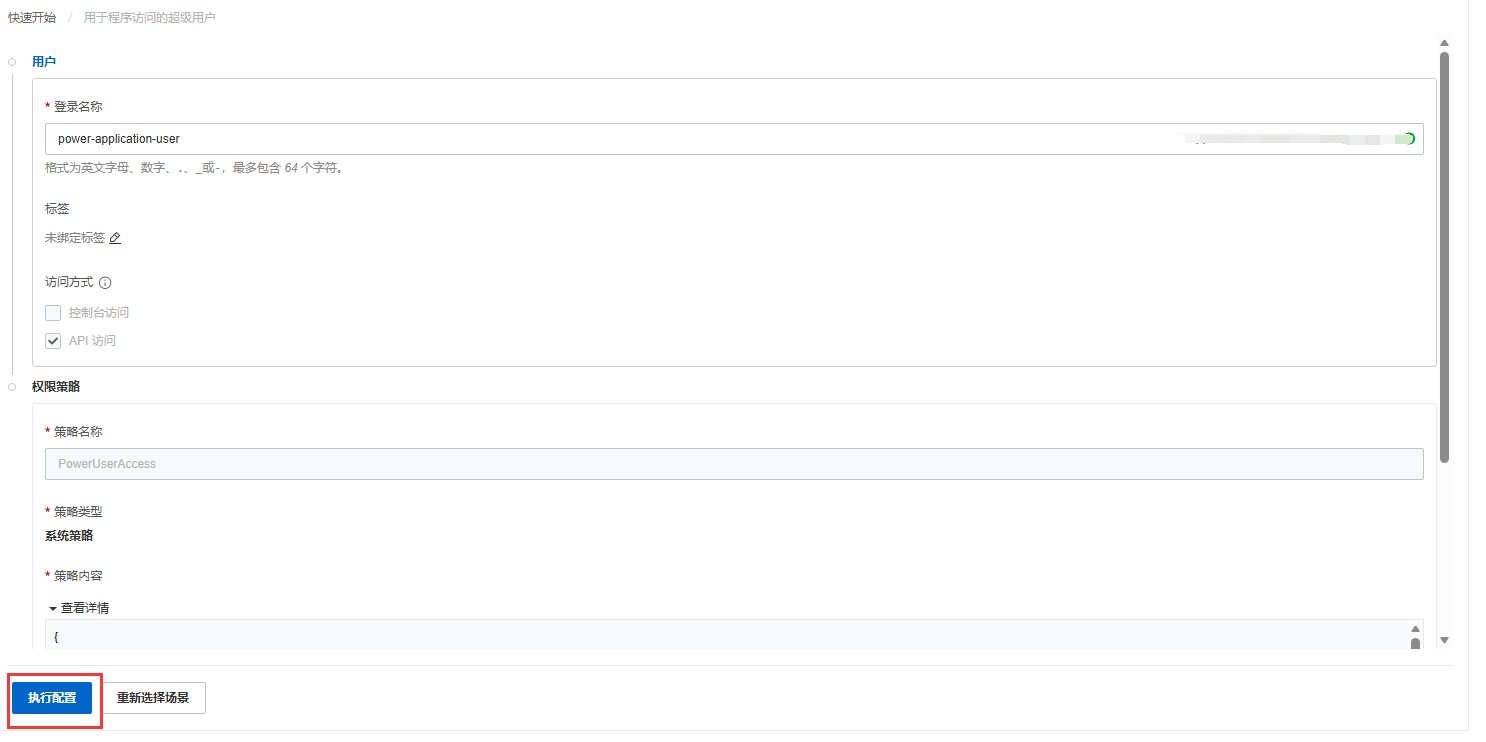
3.5 得到 AK和AKS(记得下载保存)
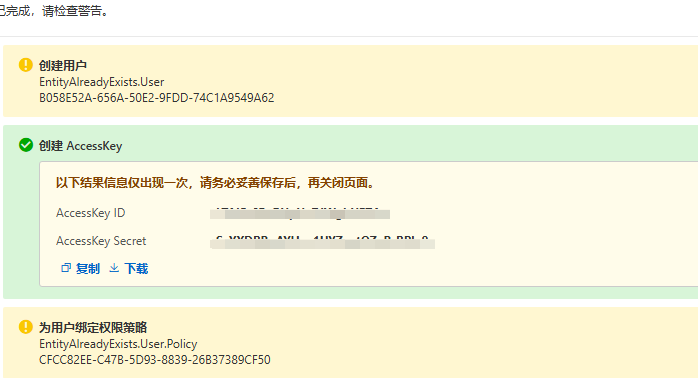
总结,得到AK和AKS
二、JAVA 实现 发送验证码
下面是官方demo,仅供参考
作者是初学者所以,把整个创建流程和使用(Controller-service)都加入了
1.在pom.xml中导入阿里云的相关依赖
<!-- 短信接口 -->
<dependency>
  <groupId>com.aliyun</groupId>
  <artifactId>dysmsapi20170525</artifactId>
  <version>4.5.1</version>
</dependency>
2.在SmsService中创建一个send接口
package com.test.service;

public interface SmsService {
    public boolean  send(String mobile,String code);
}
3.在application.yml中配置阿里云的相关信息
3.1 因为没有企业资质,这里使用 支持个人使用的,短信认证产品(就是前面买的套餐)
3.2在这里可以看到,签名名称和和模版code,因为没有企业资质,所以用测试模版
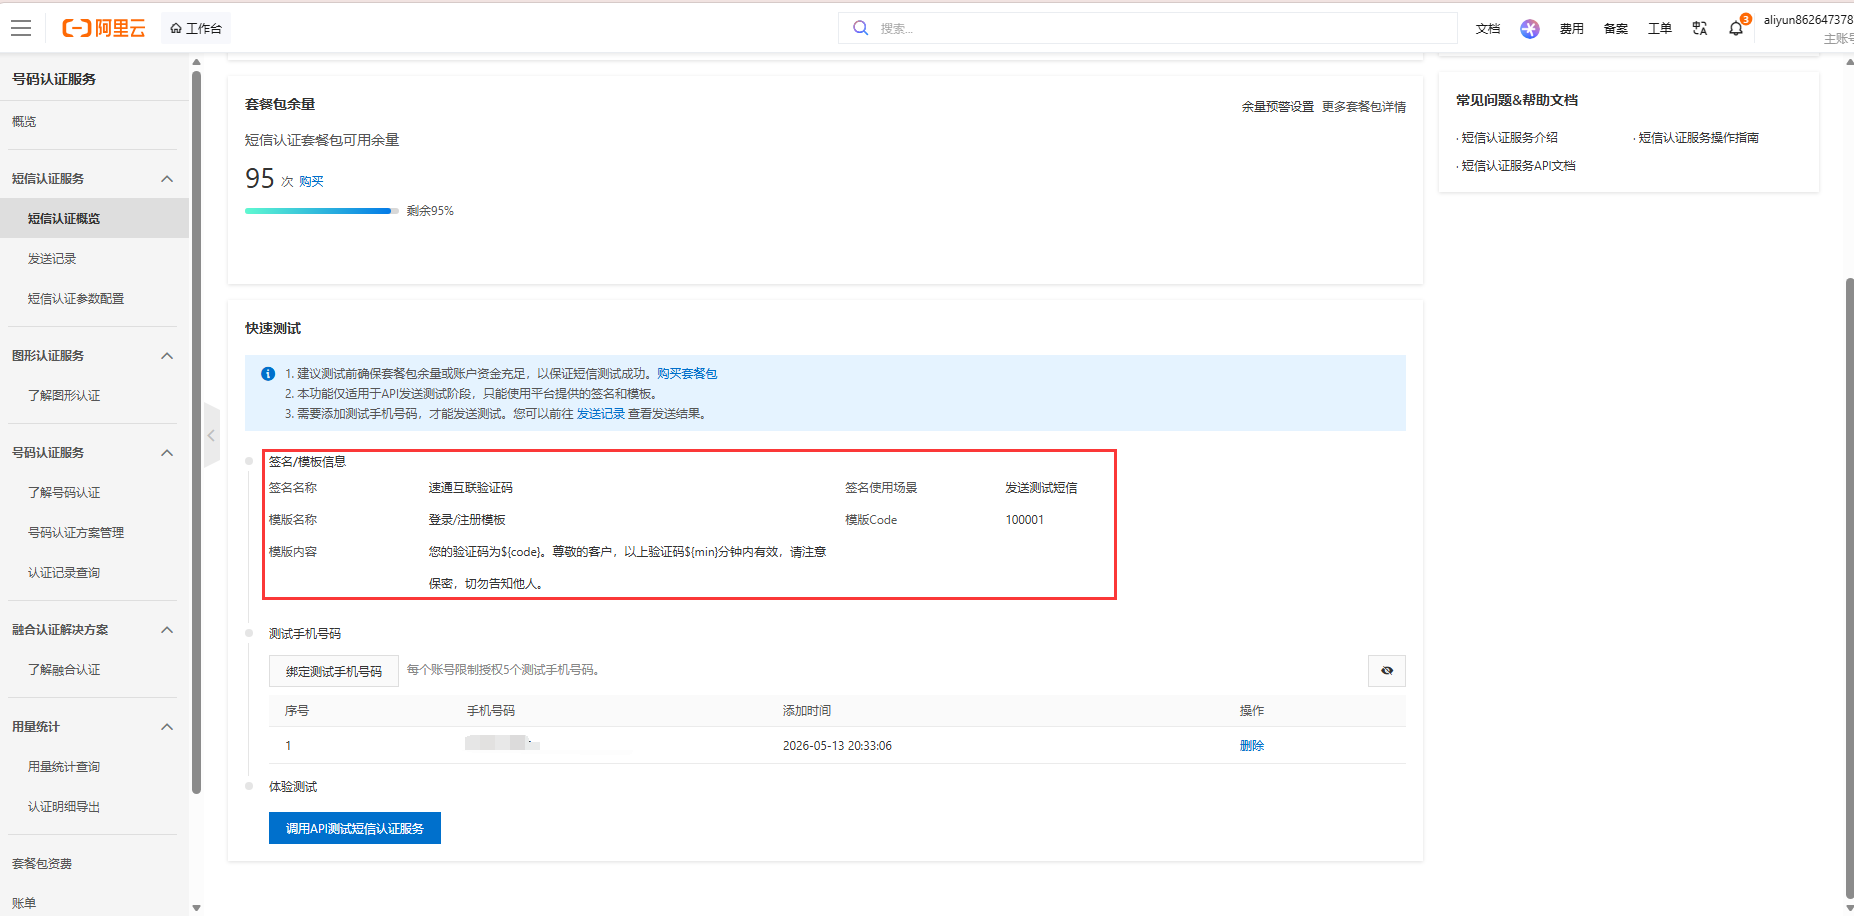
3.3将刚刚的信息(AK,AKS,签名名称,code)填入
aliyun:
  sms:
    accessKeyId: YOUR_ACCESS_KEY_ID
    accessKeySecret: YOUR_ACCESS_KEY_SECRET
    signName: 速通互联验证码
    templateCode: 100001
总结:关键是Ak,AKS,signName,templateCode的获取
4.在Impl.SmsServiceImpl中实现send接口
package com.test.service.impl;

import com.aliyun.dypnsapi20170525.Client;
import com.aliyun.dypnsapi20170525.models.SendSmsVerifyCodeRequest;
import com.aliyun.dypnsapi20170525.models.SendSmsVerifyCodeResponse;
import com.aliyun.teautil.models.RuntimeOptions;
import com.aliyun.teaopenapi.models.Config;
import com.aliyun.tea.TeaException;
import com.test.exception.ShopException;
import com.test.result.ResponseEnum;
import com.test.service.SmsService;
import org.springframework.beans.factory.annotation.Value;
import org.springframework.stereotype.Service;

@Service
public class SmsServiceImpl implements SmsService {

    // 从配置文件读取阿里云凭证和模板信息
    @Value("${aliyun.sms.accessKeyId}")
    private String accessKeyId;

    @Value("${aliyun.sms.accessKeySecret}")
    private String accessKeySecret;

    @Value("${aliyun.sms.signName}")
    private String signName;

    @Value("${aliyun.sms.templateCode}")
    private String templateCode;

    /**
     * 初始化阿里云 Client
     */
    private Client createClient() throws Exception {
        Config config = new Config()
                .setAccessKeyId(accessKeyId)
                .setAccessKeySecret(accessKeySecret)
                .setEndpoint("dypnsapi.aliyuncs.com"); // 官方 Endpoint
        return new Client(config);
    }

    /**
     * 发送验证码短信
     * @param mobile 手机号
     * @param code 验证码
     * @return true = 发送成功,false = 失败
     */
    @Override
    public boolean send(String mobile, String code) {
        try {
            Client client = createClient();
            SendSmsVerifyCodeRequest request = new SendSmsVerifyCodeRequest()
                    .setSignName(signName)
                    .setTemplateCode(templateCode)
                    .setPhoneNumber(mobile)
                    .setTemplateParam("{\"code\":\"" + code + "\",\"min\":\"5\"}")
                    .setSchemeName("https"); // 协议,必须 https

            RuntimeOptions runtime = new RuntimeOptions();

            // 调用发送方法
            SendSmsVerifyCodeResponse response = client.sendSmsVerifyCodeWithOptions(request, runtime);

            // 检查返回状态
            System.out.println("发送成功");
            return "OK".equals(response.getBody().getCode());
        } catch (TeaException e) {
            // SDK 异常处理
            e.printStackTrace(); // 打印完整堆栈
            System.err.println("阿里云短信发送异常:" + e.getMessage());
//            throw new ShopException(ResponseEnum.SMS_SEND_ERROR.getMsg());
            return false;
        } catch (Exception e) {
            // 其他异常
            System.err.println("短信发送未知异常:" + e.getMessage());

            return false;
        }
    }
}
5.在SmsServiceController中使用接口
package com.test.controller;

import com.test.exception.ShopException;
import com.test.result.ResponseEnum;
import com.test.service.SmsService;
import com.test.util.RandomUtil;
import com.test.util.RegexValidateUtil;
import com.test.util.ResultVOUtil;
import com.test.vo.ResultVO;
import org.springframework.beans.factory.annotation.Autowired;
import org.springframework.data.redis.core.RedisTemplate;
import org.springframework.data.redis.core.StringRedisTemplate;
import org.springframework.web.bind.annotation.GetMapping;
import org.springframework.web.bind.annotation.PathVariable;
import org.springframework.web.bind.annotation.RequestMapping;
import org.springframework.web.bind.annotation.RestController;

@RestController
@RequestMapping("/sms")
public class SmsController {
    @Autowired
    private SmsService smsService;
    @Autowired
    private StringRedisTemplate stringRedisTemplate;


    @GetMapping("/send/{mobile}")
    public ResultVO send(@PathVariable("mobile") String mobile){
//        手机号校验
        if(mobile == null) throw new ShopException(ResponseEnum.MOBILE_NULL.getMsg());
        boolean checkMobile = RegexValidateUtil.checkMobile(mobile);
        if(!checkMobile) throw new ShopException(ResponseEnum.MOBILE_ERROR.getMsg());

//        后端生成六位随机数作为验证码
        String code = RandomUtil.getSixBitRandom();

        //将验证码,使用阿里云服务发送
        boolean send = this.smsService.send(mobile, code);

        if(send){
            //存入Redis
//            this.redisTemplate.opsForValue().set("uushop-sms-code-"+mobile, code);
            this.stringRedisTemplate.opsForValue().set("uushop-sms-code-"+mobile, code);
//            String code11 =(String) this.redisTemplate.opsForValue().get("uushop-sms-code-"+mobile);
//            System.out.println(code11);
            return ResultVOUtil.success("短信发送成功!");
        }
        return ResultVOUtil.fail("短信发送失败!");
    }
}
整理思路
实现一个 用户点击获取验证码 → 发送短信 → 验证登录 的完整流程:
- 用户输入手机号并点击“获取验证码”
- 后端生成六位随机验证码
- 通过阿里云短信 SDK 将验证码发送到用户手机号
- 验证码同时存入 Redis,设置有效期(如 5 分钟)
- 用户提交验证码 → 后端从 Redis 校验
- 校验成功 → 登录成功
更多推荐


 5
5 0
0- 0


 已为社区贡献1条内容

所有评论(0)