
C++11 核心特性深度解析(四):可变参数模板
·
一、可变参数模板(Variadic Templates)
1.1 基本语法及原理
1.1.1 什么是可变参数模板?
C++11 支持可变参数模板,也就是说支持可变数量参数的函数模板和类模板。可变数目的参数被称为参数包(parameter pack)。
存在两种参数包:
| 参数包类型 | 表示 | 声明方式 |
|---|---|---|
| 模板参数包 | 零或多个模板参数 | template <class... Args> |
| 函数参数包 | 零或多个函数参数 | void Func(Args... args) |
1.1.2 基本语法
// 模板参数包 + 函数参数包(万能引用版本)
template <class... Args>
void Func(Args... args) {}          // 值传递

template <class... Args>
void Func(Args&... args) {}         // 左值引用

template <class... Args>
void Func(Args&&... args) {} // 万能引用(推荐)语法要点:
-
class...或typename...表示接下来的参数是零或多个类型列表 -
类型名后面跟
...表示接下来的参数是零或多个形参对象列表 -
函数参数包可以用左值引用或右值引用表示,实例化时遵循引用折叠规则
1.1.3 计算参数包个数
使用 sizeof... 运算符:
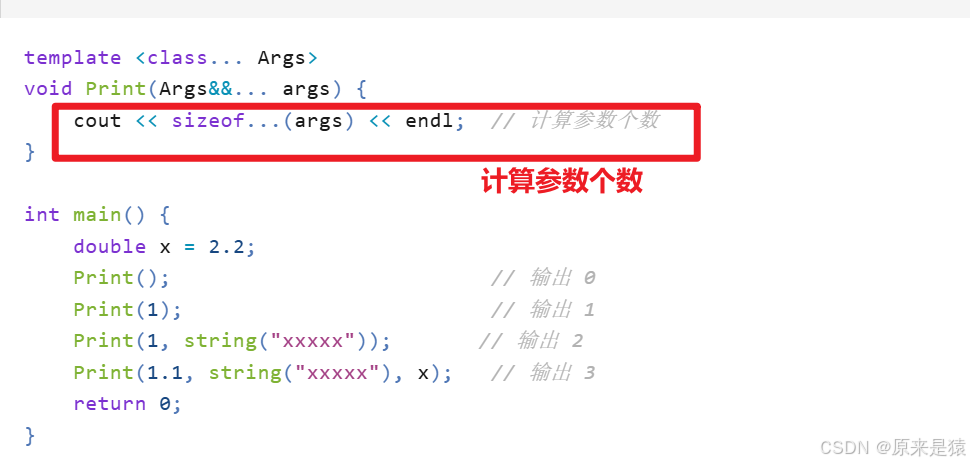
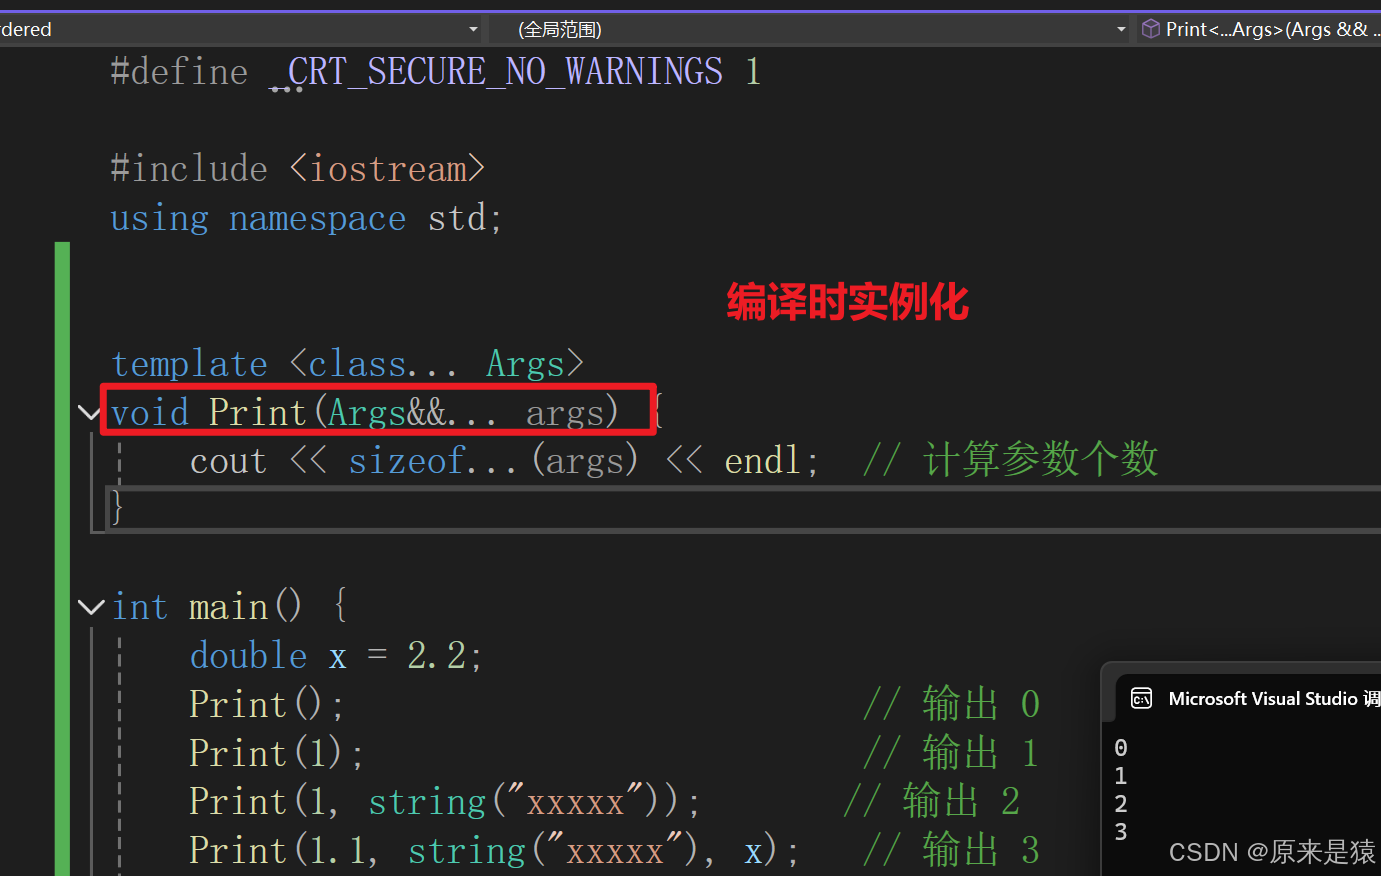
1.1.4 编译原理
可变参数模板的本质跟普通模板一样,编译时实例化对应类型和个数的多个函数:
// 编译器实际生成的函数
void Print();                                       // Print()
void Print(int&& arg1);                             // Print(1)
void Print(int&& arg1, string&& arg2);              // Print(1, string("xxxxx"))
void Print(double&& arg1, string&& arg2, double& arg3); // Print(1.1, string("xxxxx"), x)
对比:没有可变参数模板时的写法
void Print();

template <class T1>
void Print(T1&& arg1);

template <class T1, class T2>
void Print(T1&& arg1, T2&& arg2);

template <class T1, class T2, class T3>
void Print(T1&& arg1, T2&& arg2, T3&& arg3);

// ... 需要无穷多个重载!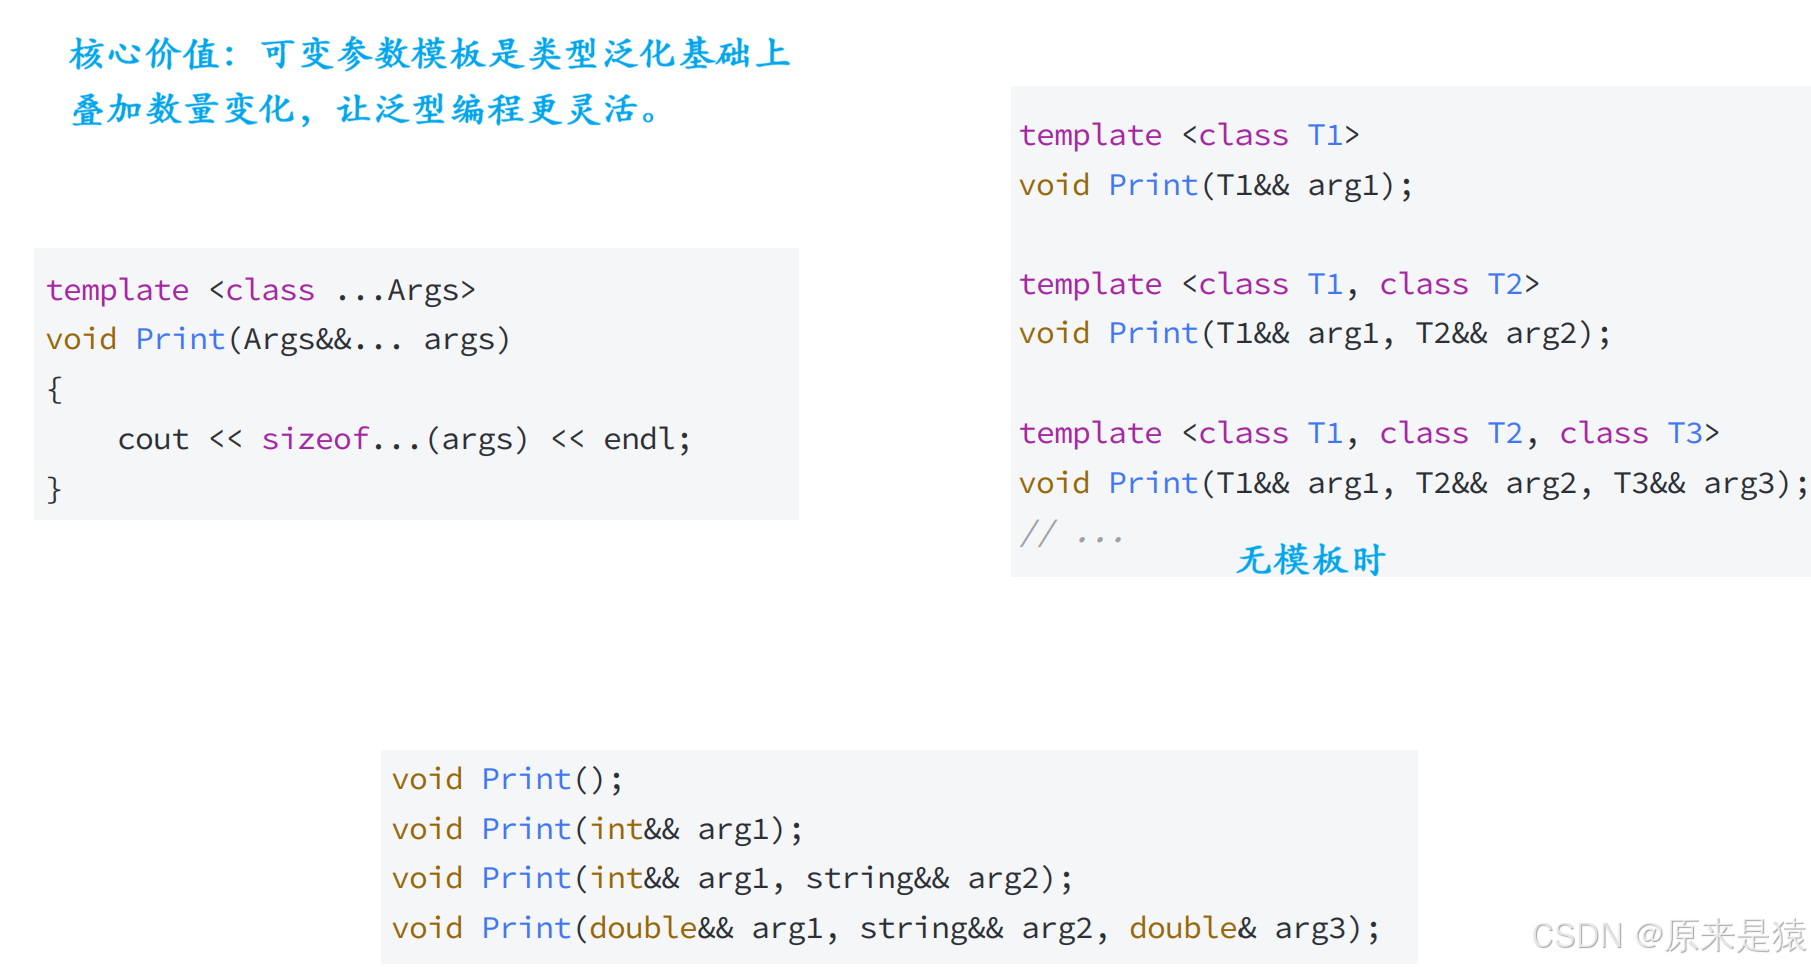
1.2 包扩展(Pack Expansion)
1.2.1 什么是包扩展?
对于一个参数包,除了计算参数个数,唯一能做的事情就是扩展它。
扩展一个包 = 将它分解为构成的元素,对每个元素应用模式,获得扩展后的列表。
通过在模式的右边放一个省略号 ... 来触发扩展操作。
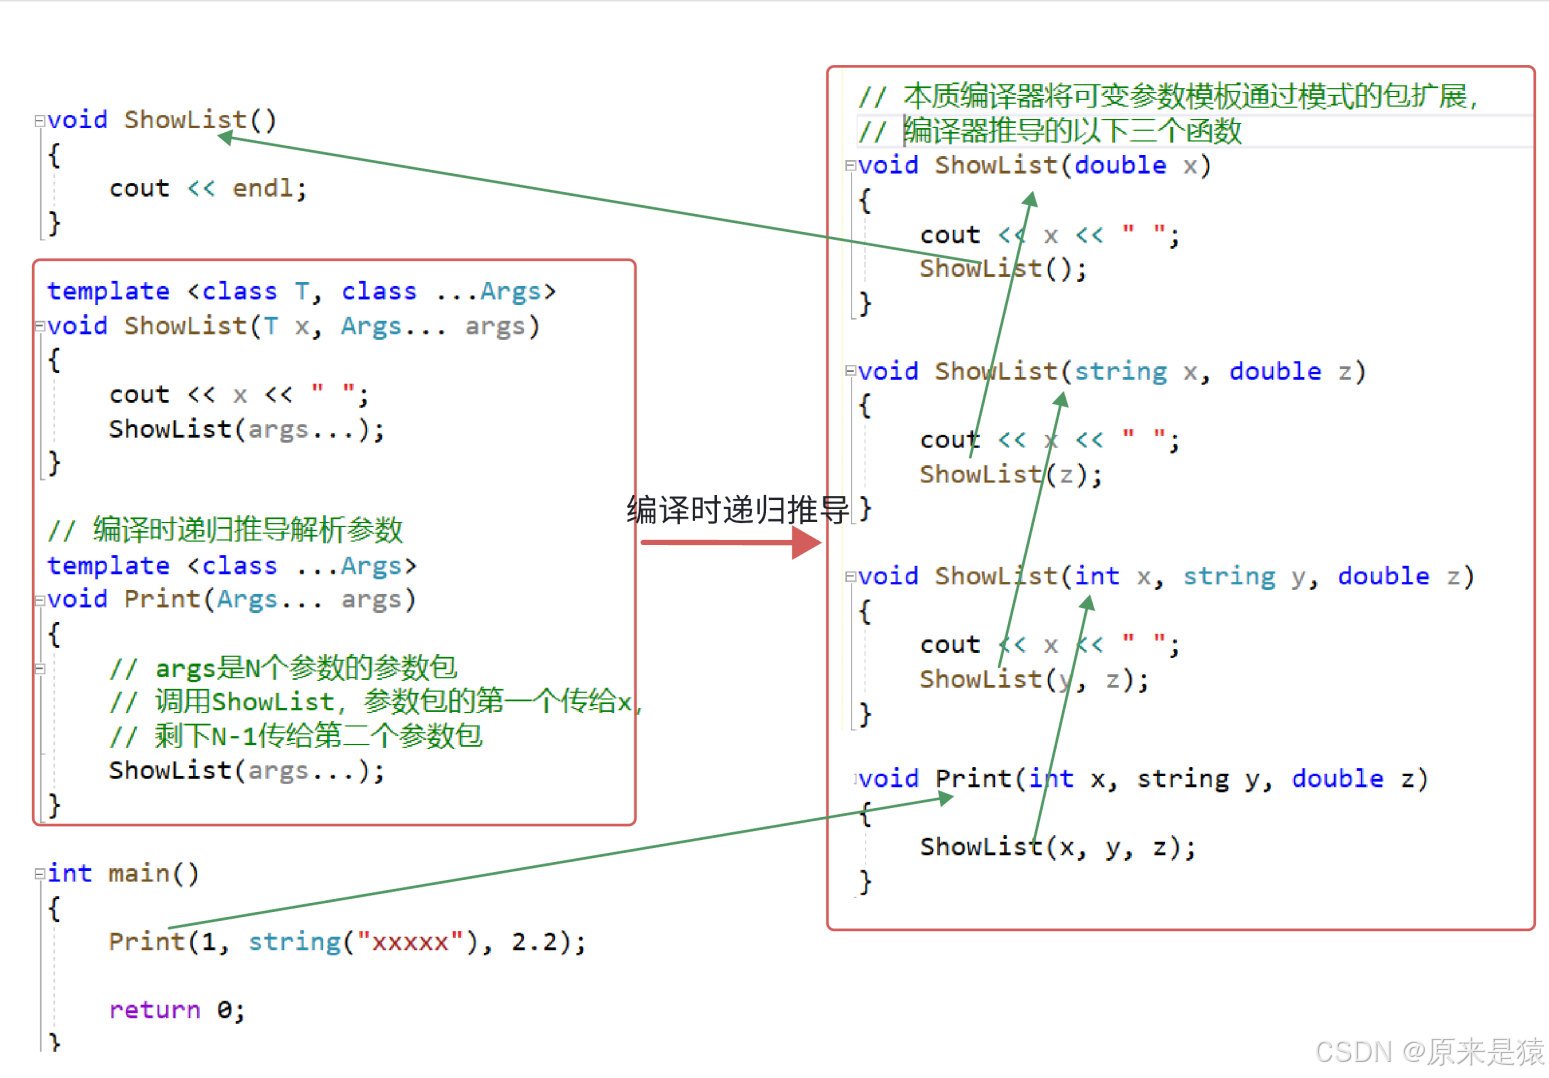
1.2.2 编译时递归推导
// 终止条件:参数包为 0 个时
void ShowList() {
cout << endl;
}
// 递归展开:每次取第一个参数,剩余继续递归
template <class T, class... Args>
void ShowList(T x, Args... args) {
cout << x << " ";
ShowList(args...); // 包扩展:args... 展开为剩余参数
}
// 入口函数
template <class... Args>
void Print(Args... args) {
ShowList(args...);
}
int main() {
Print(); // 输出空行
Print(1); // 输出 "1 "
Print(1, string("xxxxx")); // 输出 "1 xxxxx "
Print(1, string("xxxxx"), 2.2); // 输出 "1 xxxxx 2.2 "
return 0;
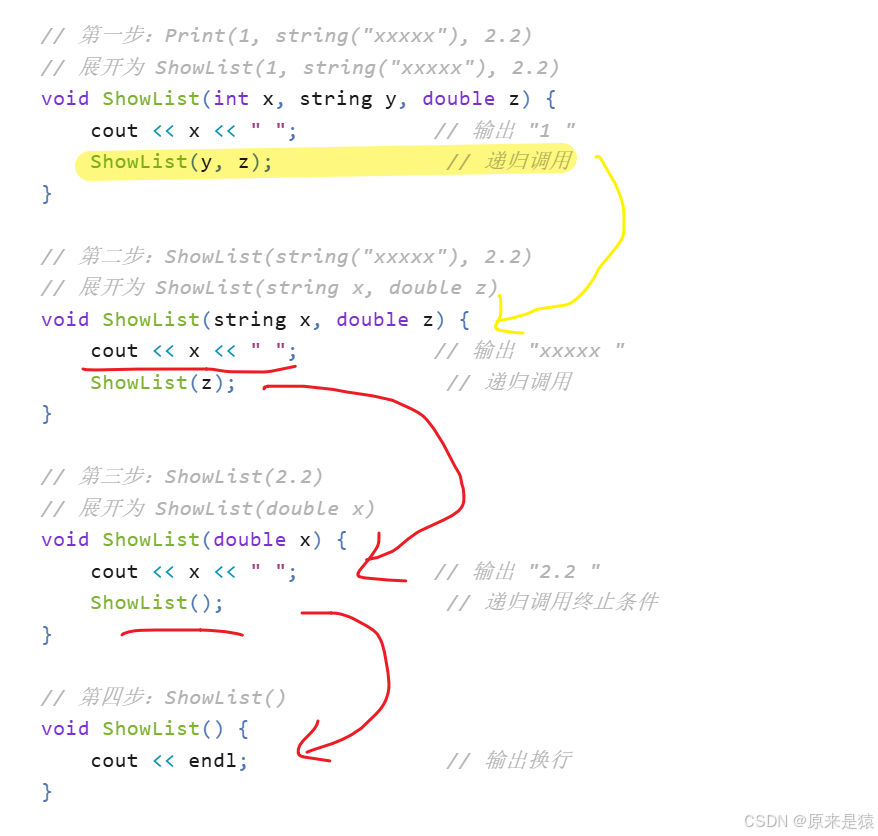
}1.2.3 编译器推导过程
以 Print(1, string("xxxxx"), 2.2) 为例,编译器递归推导:
1.2.4 更复杂的包扩展模式
直接将参数包依次展开作为实参给函数处理:
template <class T>
const T& GetArg(const T& x) {
    cout << x << " ";
    return x;
}

template <class... Args>
void Arguments(Args... args) {}

template <class... Args>
void Print(Args... args) {
    // GetArg 必须返回对象,才能组成参数包给 Arguments
    Arguments(GetArg(args)...);
}

int main() {
    Print(1, string("xxxxx"), 2.2);
    return 0;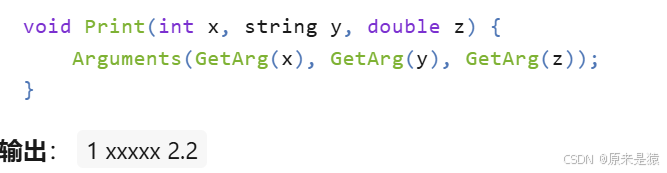
}编译器展开后的等效代码:
1.3 emplace 系列接口
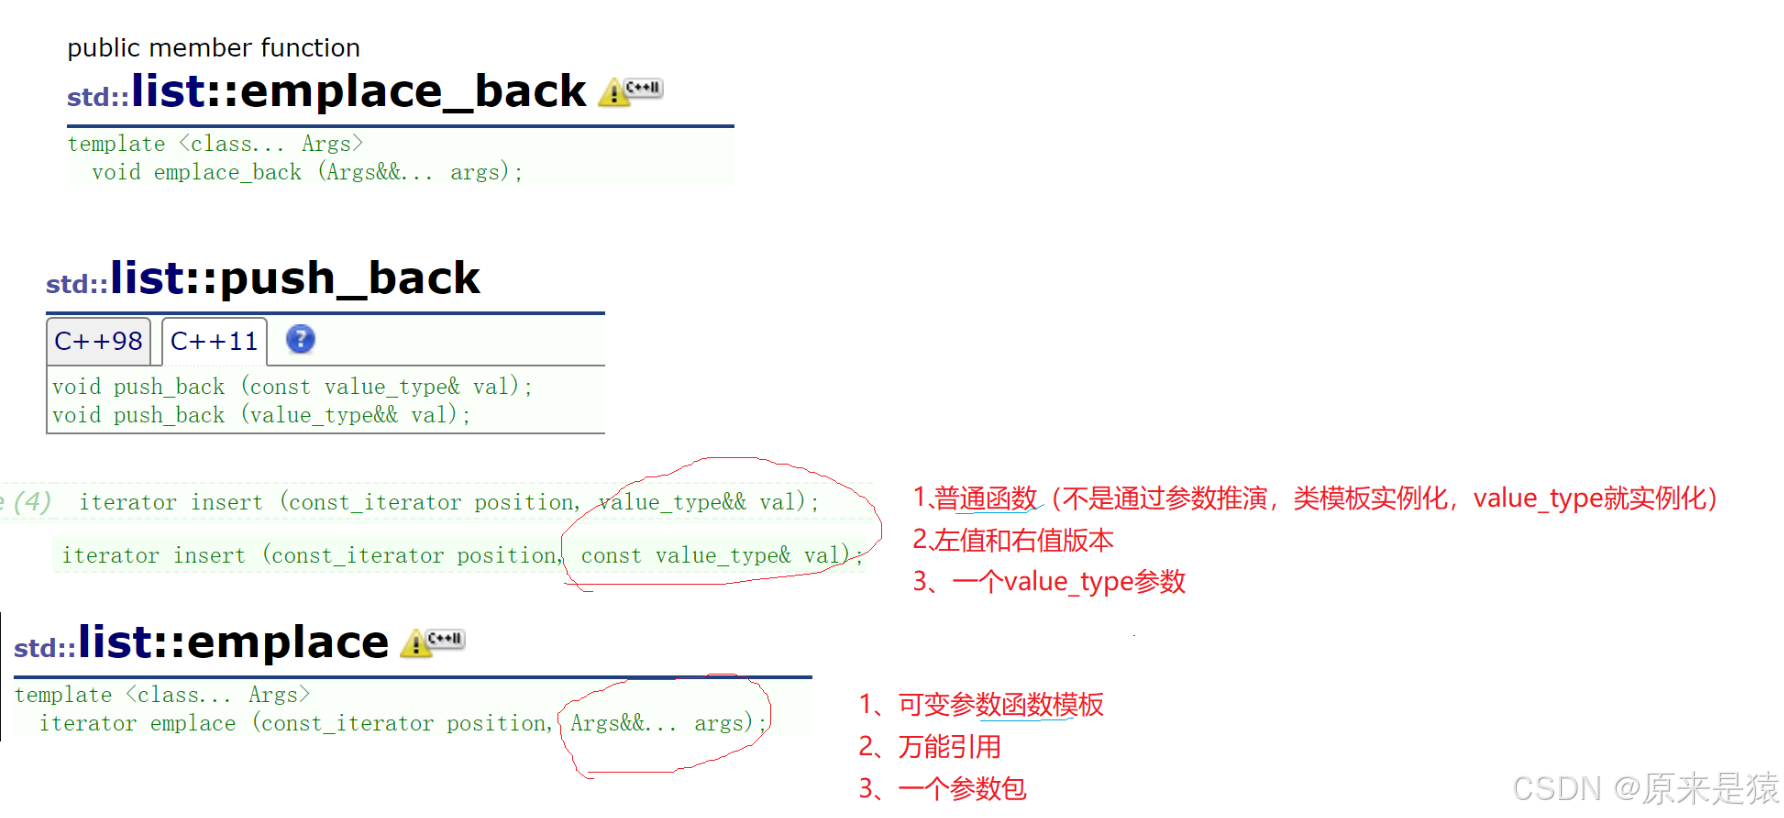
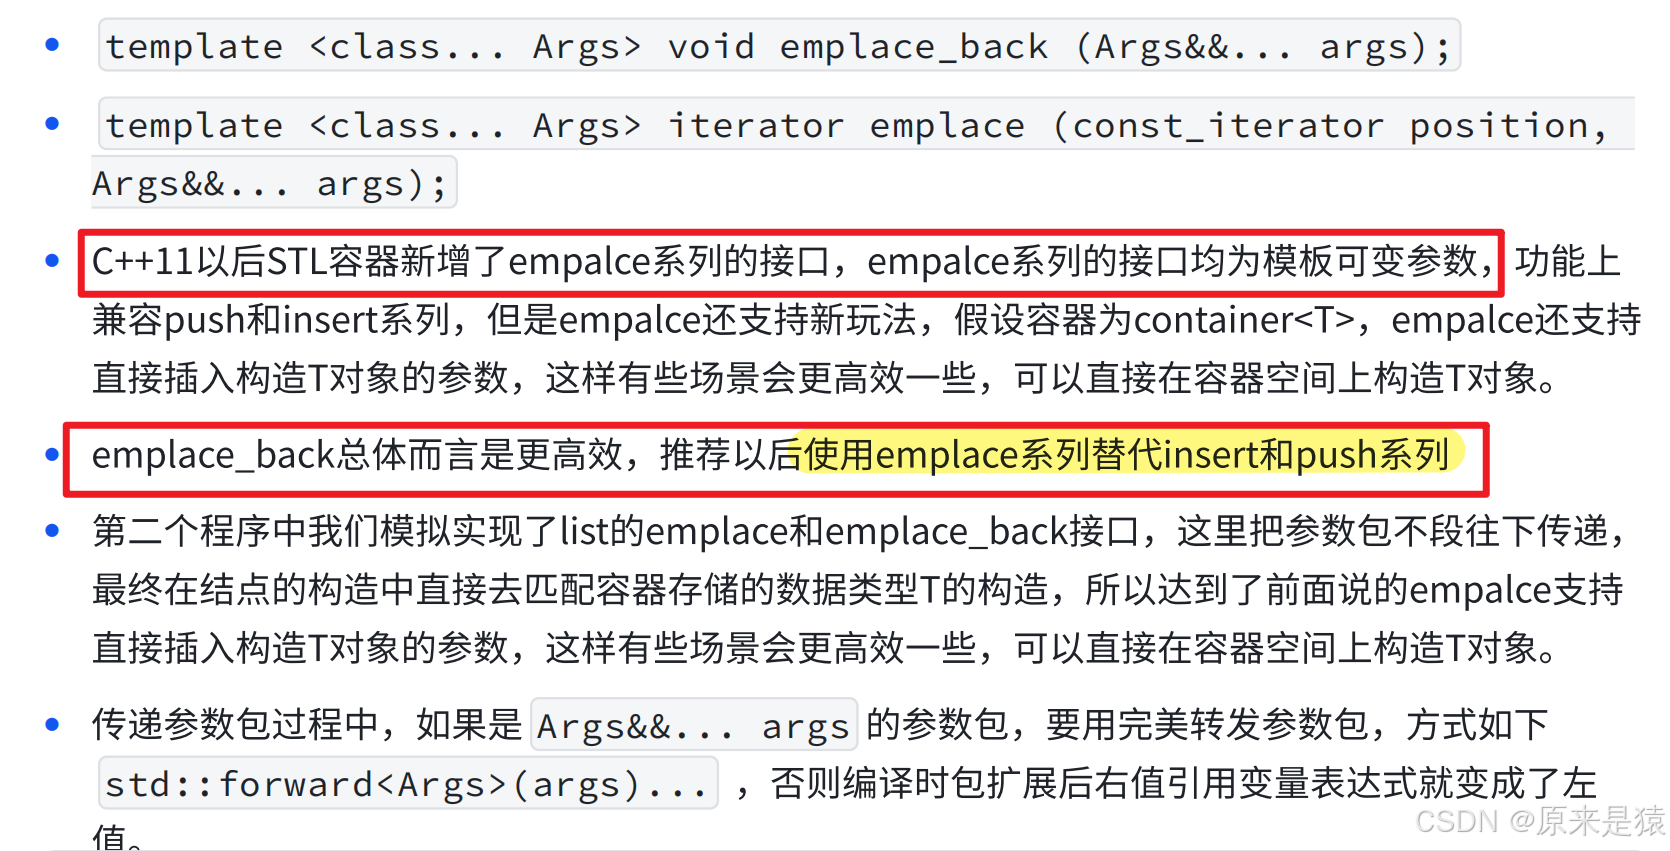
1.3.1 接口定义
// emplace_back:在尾部直接构造元素
template <class... Args>
void emplace_back(Args&&... args);

// emplace:在指定位置直接构造元素
template <class... Args>
iterator emplace(const_iterator position, Args&&... args);
1.3.2 emplace vs push_back
| 特性 | push_back |
emplace_back |
|---|---|---|
| 功能 | 插入已有对象 | 直接构造对象 |
| 参数 | 对象或右值 | 构造对象的参数包 |
| 效率 | 可能多一次拷贝/移动 | 直接在容器内存上构造 |
| 推荐度 | 兼容旧代码 | 推荐使用 |
1.3.3 使用示例
#include <list>
using namespace std;

int main() {
    list<bit::string> lt;

    // 场景1:传左值 —— 跟 push_back 一样,走拷贝构造
    bit::string s1("111111111111");
    lt.emplace_back(s1);
    cout << "*********************************" << endl;

    // 场景2:传右值 —— 跟 push_back 一样,走移动构造
    lt.emplace_back(move(s1));
    cout << "*********************************" << endl;

    // 场景3:直接传构造参数 —— push_back 做不到!
    // 直接用 string 的构造参数构造 string,不创建临时对象
    lt.emplace_back("111111111111");
    cout << "*********************************" << endl;

    // pair 场景
    list<pair<bit::string, int>> lt1;

    // push_back 风格
    pair<bit::string, int> kv("苹果", 1);
    lt1.emplace_back(kv);           // 拷贝构造
    lt1.emplace_back(move(kv));      // 移动构造
    cout << "*********************************" << endl;

    // emplace 独有:直接传 pair 的构造参数
    lt1.emplace_back("苹果", 1);      // 直接在节点内存上构造 pair
    cout << "*********************************" << endl;

    return 0;
}
1.3.4 模拟实现 list 的 emplace
ListNode 支持可变参数构造:
namespace bit {
template<class T>
struct ListNode {
    ListNode<T>* _next;
    ListNode<T>* _prev;
    T _data;

    // 移动构造版本
    ListNode(T&& data)
        : _next(nullptr), _prev(nullptr), _data(move(data)) {}

    // 可变参数构造版本 —— 核心!
    template <class... Args>
    ListNode(Args&&... args)
        : _next(nullptr), _prev(nullptr),
          _data(std::forward<Args>(args)...) {}  // 完美转发参数包
};
}
list 的 emplace_back 实现:
template<class T>
class list {
    // ...

    // emplace_back:将参数包完美转发给 insert
    template <class... Args>
    void emplace_back(Args&&... args) {
        insert(end(), std::forward<Args>(args)...);
    }

    // insert 的万能引用版本
    template <class... Args>
    iterator insert(iterator pos, Args&&... args) {
        Node* cur = pos._node;
        // 关键:用参数包直接构造节点,不创建临时对象
        Node* newnode = new Node(std::forward<Args>(args)...);
        Node* prev = cur->_prev;

        // 链接节点
        prev->_next = newnode;
        newnode->_prev = prev;
        newnode->_next = cur;
        cur->_prev = newnode;

        return iterator(newnode);
    }
};编译器生成的等效代码(以 emplace_back("苹果", 1) 为例):
// 编译器根据调用生成对应函数
void emplace_back(const char* s, int n) {
    insert(end(), std::forward<const char*>(s), std::forward<int>(n));
}

// insert 展开
iterator insert(iterator pos, const char* s, int n) {
    Node* newnode = new Node(std::forward<const char*>(s), std::forward<int>(n));
    // ... 链接逻辑
}

// Node 构造展开
ListNode(const char* s, int n)
    : _next(nullptr), _prev(nullptr),
_data(std::forward<const char*>(s), std::forward<int>(n)) {}最终效果:pair<string, int> 直接在 list 节点内存上构造,零拷贝、零移动。
1.3.5 完美转发参数包的必要性
// 错误写法:没有完美转发
template <class... Args>
void emplace_back(Args&&... args) {
    insert(end(), args...);  // 错误!args 是左值,右值引用变量表达式是左值
}

// 正确写法:完美转发
template <class... Args>
void emplace_back(Args&&... args) {
    insert(end(), std::forward<Args>(args)...);  // 保持原始值类别
}原因:Args&&... 是万能引用,实参是右值时,参数包中的变量表达式属性是左值。必须用 std::forward 保持原始属性,否则右值会变成左值,导致调用拷贝构造而非移动构造。
更多推荐

 5
5 0
0- 0


 已为社区贡献7条内容

所有评论(0)