
【IOS 自动化】IOS18 如何使用 Airtest 进行自动化测试及 go-ios 的基本使用
1、安装 go-ios2、使用 xcode 安装 WebDriverAgentRunner3、使用和命令启动 WebDriverAgentRunner4、远程连接 AirtestIDE。
一、go-ios 安装部署启动
1、Windows 系统驱动下载
2、Windows 系统驱动部署
3、配置环境变量
二、构建 wda.ipa
方案一:通过 xcode 构建
方案二:通过命令构建 wda.ipa
可能遇到的问题及解决方案
三、IOS18 启动自动化测试
四、连接到 AirtestIDE
五、封装 IOS17 + 的启动方法总结
go-ios 的基本使用
之前写过 IOS17 打包 WebDriverAgent 构建 ipa 包安装到 ios16.7 及 ios17 以上设备结合 tidevice3 进行自动化测试,但那种方式发现在不同的设备上会有失败的概率,小版本号也会有一定影响,而且操作比较繁琐,失败率较高。
于是乎在 tidevice 作者的推荐下,尝试使用 go-ios 这个开源项目进行启动 wda 程序,发现稳定性很好,ios17 以上,包括 ios18(目前最新),均可以正常启动 wda,同时 Airtest 也可以通过 ubsmax 连接 IOS17 及 IOS18 设备进行控件树识别,进行自动化测试。
代码层面,目前 Airtest 启动 wda 是采用的 tidevice,所以需要自己改动源码或者重新封装 go-ios 的方式进行启动,Airtest 官方目前也在调研 go-ios,后续应该会出相应解决 ios17、ios18 启动 wda 的方案,本文也会提供封装源码。
一、go-ios 安装部署启动
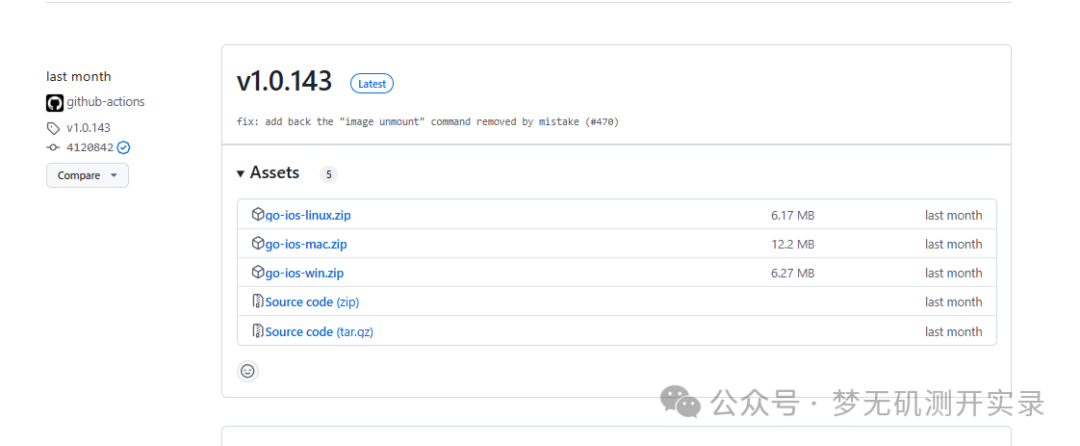
项目地址:https://github.com/danielpaulus/go-ios
releases 包下载:https://github.com/danielpaulus/go-ios/releases
这个项目也可以使用如下命令进行安装:
npm install -g go-ios
releases 包可以根据自己的系统进行下载:
1、Windows 系统驱动下载
我使用的是 windows,非 Windows 系统可以跳过这段,通过 README 教程查看,需要下载相关驱动。
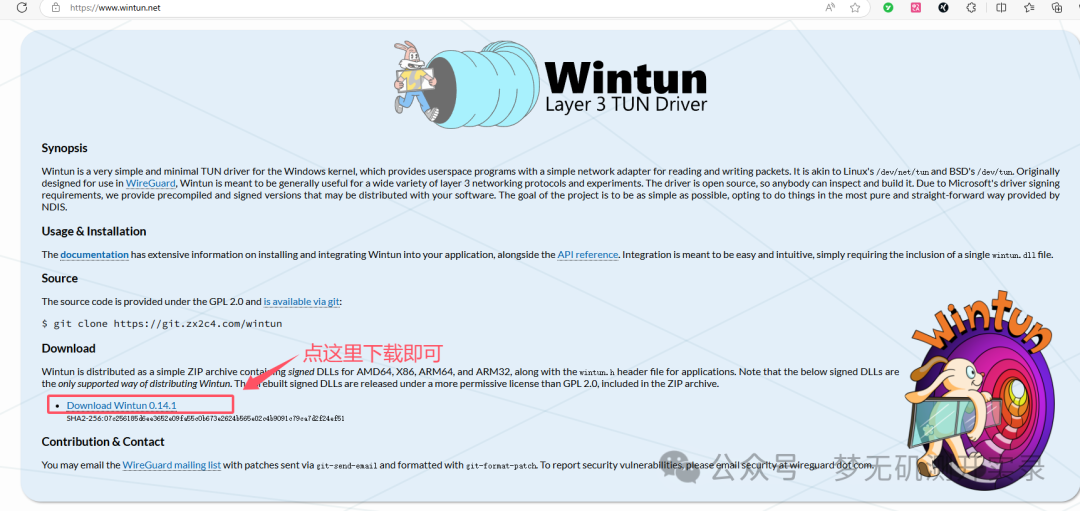
npm install -g go-ioscan be used to get going. Runios --helpafter the installation for details. For iOS 17+ devices you need to runsudo ios tunnel startfor go ios to work. This will start a tunnel daemon. To make this work on Windows, download the latest wintun.dll from herehttps://git.zx2c4.com/wintunand copy it toC:/Windows/system32
翻译:
npm install -g go-ios下载后可以进行运行。安装后运行ios --help了解详细信息。对于 iOS 17+ 设备,您需要运行sudo ios tunnel start才能使 go ios 正常工作。这将启动一个 tunnel 守护程序。要在 Windows 上执行此操作,请从此处下载最新的wintun.dll https://git.zx2c4.com/wintun并将其复制到C:/Windows/system32
驱动网址 1:https://www.wintun.net/
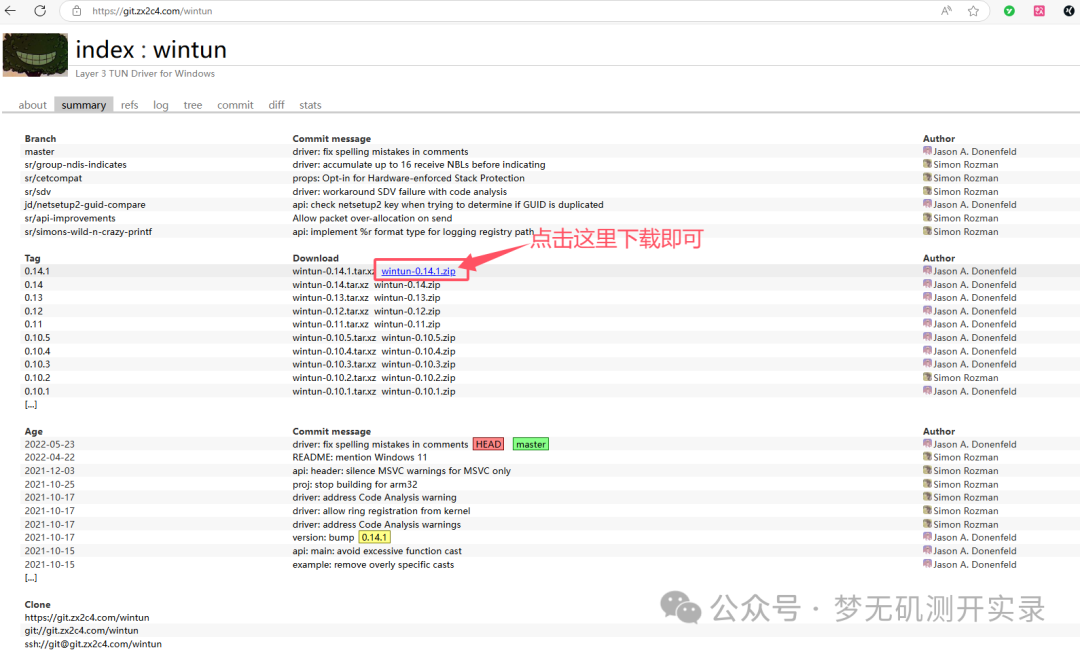
驱动网址 2:https://git.zx2c4.com/wintun
2、Windows 系统驱动部署
1、把下载好的驱动文件进行解压缩,进入 bin\amd64(现在的 windows 系统电脑一般是 amd64),把 wintun.dll 文件复制到 C:/Windows/system32 根目录下。
Ubuntu\Linux 查看系统内核
-
使用
uname -m查看架构类型。 -
使用
lscpu获取详细的 CPU 信息。 -
查看
/proc/cpuinfo文件中的详细信息。
2、注意:是把 dll 文件放过去,不是整个文件夹放过去

3、配置环境变量
1、如果是通过 npm -g 安装的就不需要进行这一步,如果是通过 release 包进行下载的,想要在全局使用 go-ios,则需要配置环境变量。
2、比如我下载后存放的路径是 D:\P_Program\go-ios-win\ios.exe
3、打开我的电脑 -> 属性 -> 系统 -> 系统信息 -> 高级系统设置 -> 环境变量
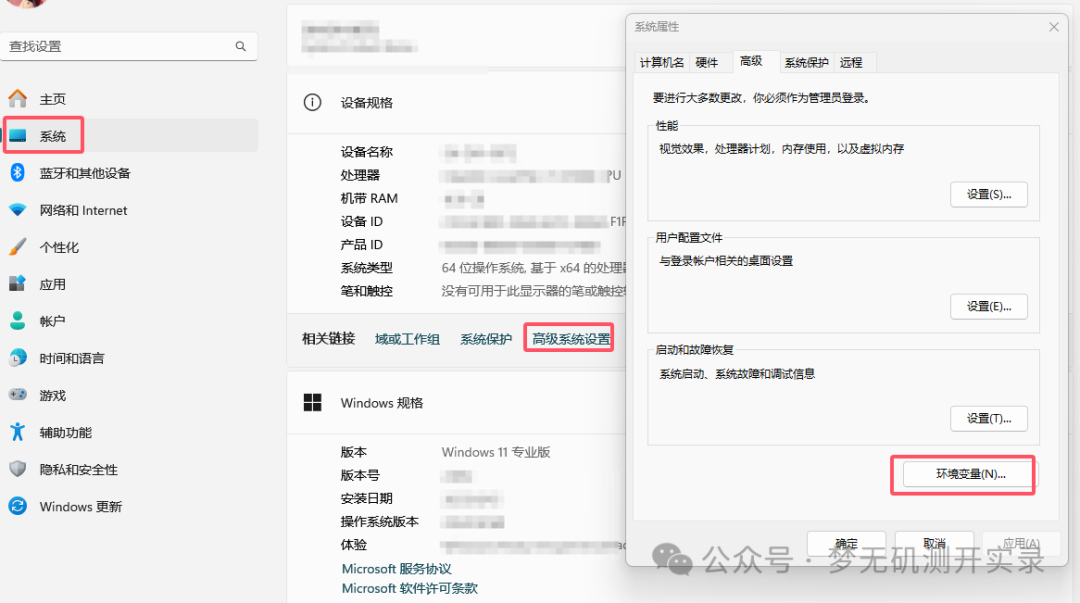
4、点开环境变量 -> 系统变量 -> 找到变量为 path 的,双击进入 -> 新建 -> 输入 D:\P_Program\go-ios-win\ios.exe -> 确认
5、win+r 输入 cmd,打开控制台,输入 ios 验证是否配置成功,出现如下内容,代表环境变量配置成功。
C:\Users>ios
Usage:
  ios activate [options]
  ios listen [options]
  .....
二、构建 wda.ipa
这个在之前的文章有写,这里简单阐述一下步骤,一个是通过 xcode 构建直接安装到设备,一个是通过命令构建 wda.ipa,再把该 ipa 安装到设备。
设备部署构建环境:
-
Mac 电脑:macOS Sonoma 14.5
-
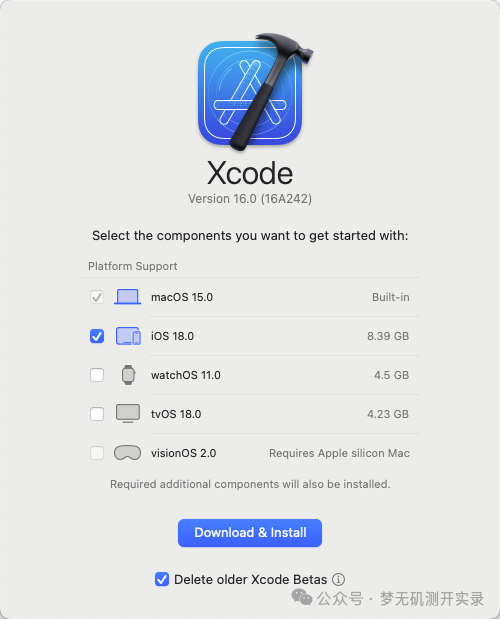
Xcode16:需要下载支持 ios18 的内容
-
Appium-WebDriverAgent:v8.9.2
方案一:通过 xcode 构建
1、进入 appium-webdriveragent 下载源码:https://github.com/appium/WebDriverAgent/releases
2、使用 xcode16 打开源码目录下的 WebDriverAgent.xcodeproj 文件,打开后,在左侧选择 WebDriverAgentRunner,然后在 Signing & Capabilities 选项卡中,确保 Automatically manage signing 选项已勾选。
3、xcode16 不再像之前的版本一样需要选 ios 小版本,这里只需要勾选 ios 大版本即可,账号使用企业开发者账户签名,个人的只有七天有效期。
-
选择正确的团队(Team),这将确保 Xcode 使用正确的签名证书和配置文件。
4、Bundle identifier 需要更改一下,不重复就可以了,我是直接在后面加点后缀。
5、连接目标 ios 设备,product --> Destination --> 选择对应设备,如果显示设备没有准备好,插拔连接线,还是这样直接重启就可以恢复连接。
6、选择对应方案,Product --> Scheme -- > WebDriverAgentRunner
7、启动构建测试:Product --> Build For --> Testing
8、测试构建:Product --> Test
以上步骤成功标志是:
-
Xcode 控制台正常输出日志
-
显示 Build Succeeded
-
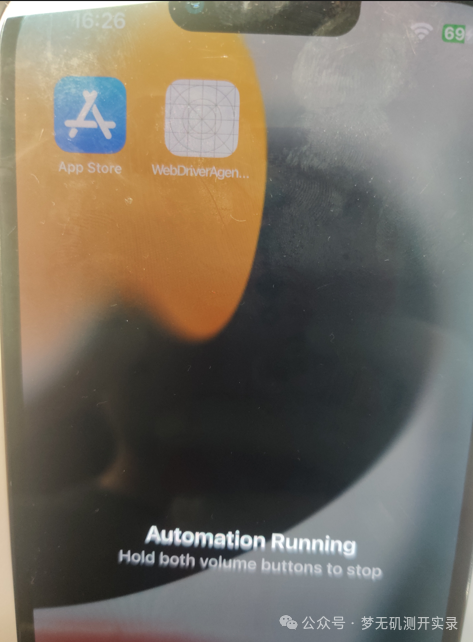
设备上安装上了 WebDriverAgentRunner-Runner
-
设备上显示 Automation Running 动态水印样式
方案二:通过命令构建 wda.ipa
# 1、xcode打开代码下的WebDriverAgent.xcodeproj项目,配置好团队唯一id等信息
$ xcodebuild build-for-testing -scheme WebDriverAgentRunner -sdk iphoneos -configuration Release -derivedDataPath /tmp/derivedDataPath
# 2、cd的目录和上条命令/tmp/derivedDataPath目录是一致的
$ cd /tmp/derivedDataPath
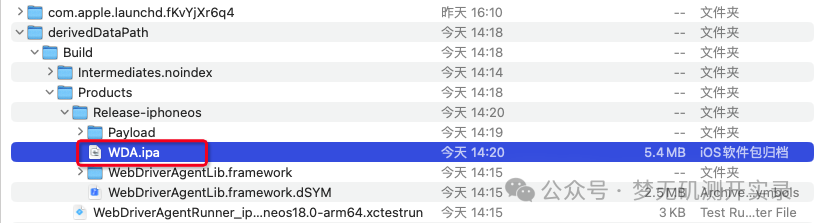
# 3、这个目录是连续的可以和上条命令一起 cd /tmp/derivedDataPath/Build/Products/Release-iphoneos
$ cd Build/Products/Release-iphoneos
# 4、在这个目录下创建一个Payload文件夹,并且把.app文件复制到Payload文件夹下
$ mkdir Payload && mv *.app Payload
# 5、用zip命令打包出来一个ipa
$ zip -r WDA.ipa Payload
# 6、把WDA.ipa安装到指定设备上
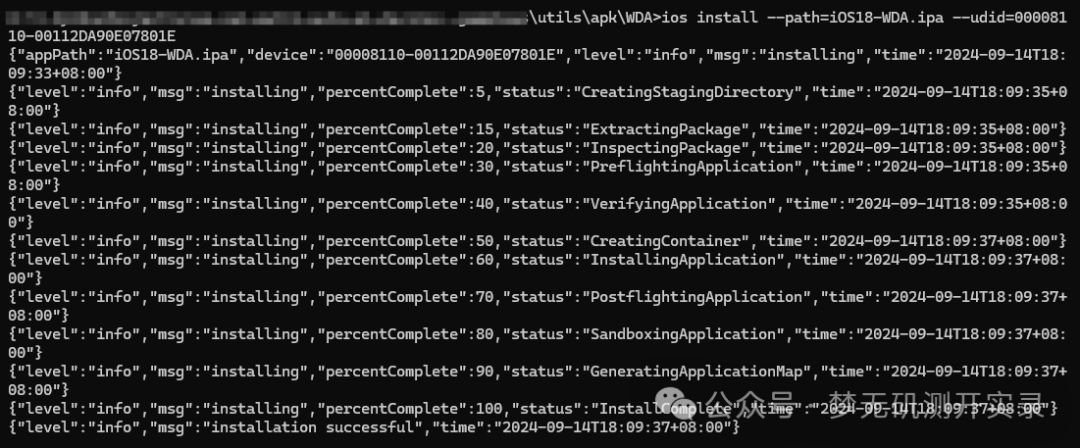
$ ios install WDA.ipa --udid=<udid>
打开访达,shift+command+g 在出现的窗口中输入 /tmp,斜杆必须写,这样可以进去对应目录吧 WDA.ipa 拖出来。
安装示列:
ios install--path=ios18-WDA.ipa --udid=00008110-00112DA90E07801E
可能遇到的问题及解决方案
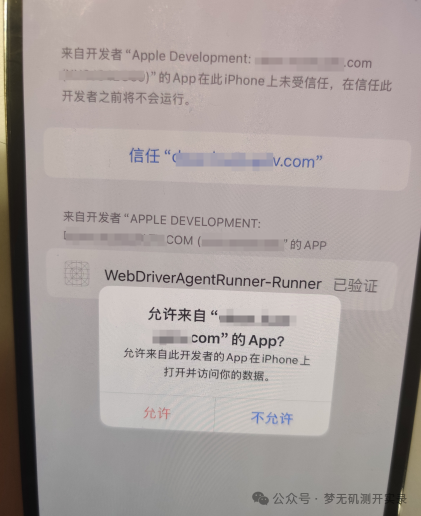
使用方案一在进行构建时,可能会出现构建失败,或者在安装 ipa 的时候会出现中断报错,这是因为我们在新的设备上没有信任该开发者账号。(ios17 之前貌似不用)
安装报错示列:
{"err":"your app is not properly signed for this device, check your codesigning and provisioningprofile. original error: 'ApplicationVerificationFailed' errorDescription:'Failed to verify code signature of /var/installd/Library/Caches/com.apple.mobile.installd.staging/temp.XyWuva/extracted/Payload/WebDriverAgentRunner-Runner.app : 0xe8008015 (A valid provisioning profile for this executable was not found.)'","level":"fatal","msg":"failed writing","time":"2024-09-14T18:46:41+08:00"}
解决方案:打开设置 -> 通用 -> VPN 与设备管理 -> 信任开发者
三、IOS18 启动自动化测试
1、ios17 以上需要通过 go-ios 启动隧道
以管理员启动终端运行如下命令,且不要关闭该界面。
iostunnel start
启动之后不要关闭,连接到 ios17 以上设备会自动帮你启动隧道。
2、设置 -> 开发者 -> 启动 UI 自动化勾上,(如果没有打开开发者:【设置】-【隐私与安全性】,拉到底部,就可在 “安全性” 一栏看到开发者模式了。)
3、指定设备启动 WebDriverAgentRunner
iosrunwda --udid=00008110-00112DA90E07801E --bundleid=com.facebook.WebDriverAgentRunnerxzz.xctrunner --testrunnerbundleid=com.facebook.WebDriverAgentRunnerxzz.xctrunner --xctestconfig=WebDriverAgentRunner.xctest

四、连接到 AirtestIDE
1、打开 AirtestIDE
2、通过远程 IOS 连接
ios:///http+usbmux://00008110-00112DA90E07801E
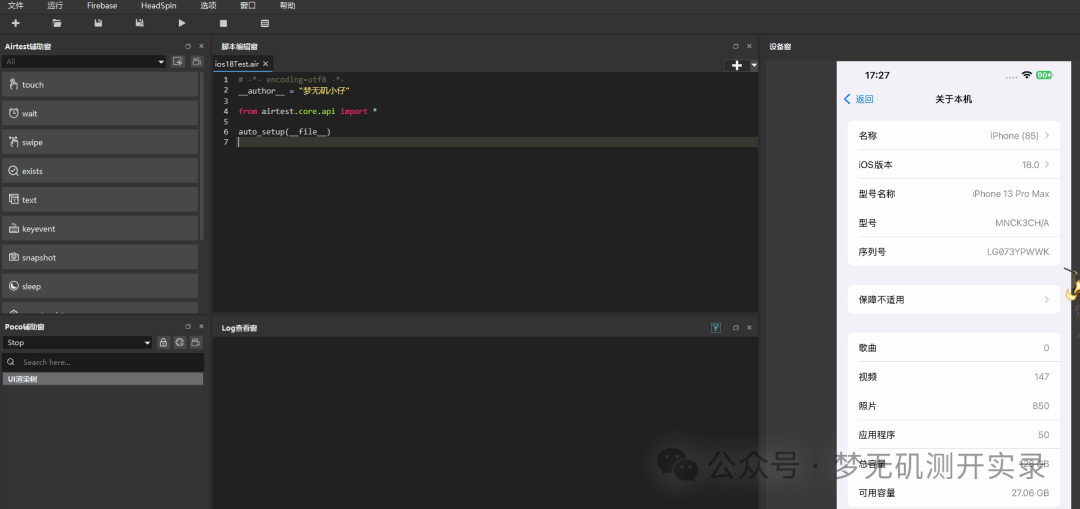
3、点击连接即可,下面是 IOS17.6.1 和 IOS18 使用 go-ios 启动 wda 后连接 AirtestIDE 的展示
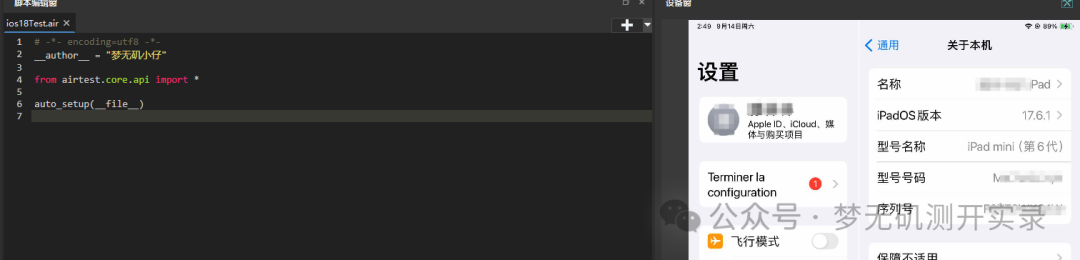
IOS18
4、均可以正常连上,后续也使用代码进行测试了,可以正常运行自动化,测试连接设备代码如下(脚本不便展示):
from airtest.core.api import *
# ios18设备的udid
devices = '00008110-00112DA90E07801E'
auto_setup(__file__, devices=[f"ios:///http+usbmux://{devices}", ])
from poco.drivers.ios import iosPoco
dev = connect_device(f"iOS:///http+usbmux://{devices}")
poco_ios = iosPoco(device=dev)
五、封装 IOS17 + 的启动方法
Airtest 中的方法 start_app () 是封装的 tidevice,但 tidevice 是不支持 ios17 和 ios18,并且作者开了新的 tidevice3,并且推荐 go-ios,所以可以直接修改源码更换,也可以重新封装,这里我为了不影响 ios17 之前的设备运行,我采用重新封装的方法。封装代码如下:
# -*- coding: utf-8 -*-
"""
@Time : 2024/9/13 17:57
@Email : Lvan826199@163.com
@公众号 : 梦无矶测开实录
@File : connect_ios17_or_higher.py
"""
__author__ = "梦无矶小仔"


import os
import subprocess
import time
from airtest.core.api import connect_device, device, sleep, auto_setup, click, text
from poco.drivers.ios import iosPoco


class IOS17HigherAutomation:
    def __init__(self, wda_package_name, uuid, wda_ipa_path, log_dir='./ios'):
        self.wda_package_name = wda_package_name
        self.uuid = uuid
        self.wda_ipa_path = wda_ipa_path
        self.log_dir = log_dir
        self.device = None
        self.poco = None
        self.width = None
        self.height = None

    def install_wda(self):
        os.system(self.wda_ipa_path)
        time.sleep(6)

    def run_wda(self):
        run_wda_command = [
            'ios', 'runwda',
            f'--bundleid={self.wda_package_name}',
            f'--testrunnerbundleid={self.wda_package_name}',
            '--xctestconfig=WebDriverAgentRunner.xctest'
        ]
        subprocess.Popen(run_wda_command)
        time.sleep(6)

    def connect_device(self):
        self.device = connect_device(f"ios:///http+usbmux://{self.uuid}")
        self.poco = iosPoco(device=self.device)
        dev = device()
        self.width, self.height = dev.get_current_resolution()
        auto_setup(logdir=self.log_dir, compress=3, devices=[f"ios:///http+usbmux://{self.uuid}"])
        sleep(6)

    def start_recording(self, fps=4, orientation=1):
        self.device.start_recording(fps=fps, orientation=orientation)

    def stop_recording(self):
        self.device.stop_recording()

    def start_app(self, app_package_name):
        # # you need to kill the app firstly, and then start the app
        # otherwith it would fail to open the app after you open the app more than 188 times
        self._kill_app(app_package_name)
        self._launch_app(app_package_name)

    def _kill_app(self, app_package_name):
        kill_app_command = ['ios', 'kill', app_package_name]
        subprocess.run(kill_app_command, check=True)

    def _launch_app(self, app_package_name):
        launch_app_command = ['ios', 'launch', app_package_name]
        subprocess.run(launch_app_command, check=True)

    def search_in_app_store(self, search_text):
        self.poco(nameMatches=".*search").click()
        self.poco(nameMatches="AppStore.searchField").click()
        text(search_text)
        click([self.width * 0.5, self.height * 0.5])

    def uninstall_wda(self):
        os.system(f'tidevice uninstall {self.wda_package_name}')


def main():
    WDA_PACKAGE_NAME = 'xxx'
    UUID = 'xxx'
    WDA_IPA_PATH = r'ios install C:\xxx\xxxx\xxxx\xxxxx\xxxxx\wda.ipa'

    ios_automation = IOS17HigherAutomation(WDA_PACKAGE_NAME, UUID, WDA_IPA_PATH)

    ios_automation.install_wda()
    ios_automation.run_wda()
    ios_automation.connect_device()
    ios_automation.start_recording()

    ios_automation.start_app("com.apple.AppStore")
    ios_automation.search_in_app_store("原神")

    ios_automation.stop_recording()
    ios_automation.uninstall_wda()


if __name__ == "__main__":
    main()
大家可以根据这个,封装符合自己业务的代码。
总结
1、安装 go-ios
2、使用 xcode 安装 WebDriverAgentRunner
3、使用 ios tunnel start 和 ios runwda --udid=00008110-00112DA90E07801E --bundleid=com.xxxx.xctrunner --testrunnerbundleid=com.xxxx.xctrunner --xctestconfig=WebDriverAgentRunner.xctest 命令启动 WebDriverAgentRunner
4、远程连接 AirtestIDE
go-ios 的基本使用
-
激活连接的 iOS 设备。
iosactivate [options]
-
监听设备的连接和断开事件
ioslisten [options]
-
列出所有连接的 iOS 设备。使用
--details参数可以获取详细信息。
ioslist[options][--details]
-
获取设备的基本信息。
display获取显示信息,lockdown获取锁定状态信息。
iosinfo[display | lockdown][options]
-
列出设备上的开发者镜像。
iosimage list [options]
-
挂载开发者镜像。需要提供镜像的路径。
iosimagemount[--path=<imagepath>][options]
-
卸载当前挂载的开发者镜像。
iosimage unmount [options]
-
自动挂载开发者镜像,基于提供的镜像存储目录。
ios image auto[--basedir=<where_dev_images_are_stored>][options]
-
获取设备的系统日志。
iossyslog [options]
-
截屏,获取设备的屏幕截图。可以指定输出文件和端口。
iosscreenshot[options][--output=<outfile>][--stream][--port=<port>]
-
通知,获取设备的通知信息。
iosinstruments notifications [options]
-
列出崩溃日志,可以使用模式匹配。
ioscrashls[<pattern>][options]
-
复制崩溃日志
ios crash cp <srcpattern><target> [options]
-
删除崩溃日志
ios crash rm <cwd><pattern> [options]
-
获取设备名称
iosdevicename [options]
-
获取或设置设备日期
iosdate [options]
-
设置时间格式,可以设置为 24 小时制、12 小时制、切换或获取当前格式。
iostimeformat (24h | 12h | toggle | get) [--force][options]
-
列出设备状态配置文件
iosdevicestate list [options]
-
启用设备状态配置文件
ios devicestate enable<profileTypeId><profileId> [options]
-
擦除设备上的所有数据。使用
--force参数强制执行。
ioserase[--force][options]
-
设置语言和区域
ioslang[--setlocale=<locale>][--setlang=<newlang>][options]
-
获取指定的 MobileGestalt 键值信息。可以选择输出为 plist 格式。
ios mobilegestalt <key>... [--plist][options]
-
列出诊断信息
iosdiagnostics list [options]
-
列出配置文件
iosprofile list [options]
-
准备设备,准备设备进行开发或测试。可以跳过某些步骤,指定证书文件和组织名称。
iosprepare[--skip-all][--skip=<option>]... [--certfile=<cert_file_path>][--orgname=<org_name>][--locale][--lang][options]
-
创建证书
ios preparecreate-cert
-
打印准备设备时跳过的步骤。
iosprepare printskip
-
从设备上移除指定的配置文件。
iosprofile remove <profileName> [options]
-
向设备添加配置文件。可以指定 p12 文件和密码。
ios profile add <profileFile> [--p12file=<orgid>][--password=<p12password>][options]
-
设置设备的 HTTP 代理。需要提供代理主机、端口、用户、密码以及 p12 文件和密码。
ios httpproxy <host><port> [<user>] [<pass>] --p12file=<orgid> --password=<p12password> [options]
-
移除设备上的 HTTP 代理设置。
ioshttpproxy remove [options]
-
与设备进行配对。需要提供 p12 文件和密码。
iospair[--p12file=<orgid>][--password=<p12password>][options]
-
列出设备上的进程。使用
--apps参数可以仅列出应用进程。
iosps[--apps][options]
-
获取设备 IP 地址
iosip [options]
-
在主机和设备之间进行端口转发。
ios forward [options] <hostPort><targetPort>
-
启动代理服务。可以选择模式和接口。
iosdproxy[--binary][--mode=<all(default)|usbmuxd|utun>][--iface=<iface>][options]
-
读取配对信息
iosreadpair [options]
-
捕获设备上的网络数据包。可以指定进程 ID 或进程名称。
iospcap[options][--pid=<processID>][--process=<processName>]
-
安装应用,需要提供应用的路径。
ios install--path=<ipaOrAppFolder> [options]
-
卸载应用,需要提供应用的包名。
iosuninstall <bundleID> [options]
-
列出应用,使用
--system参数列出系统应用,--all参数列出所有应用,--list参数列出简短信息,--filesharing参数列出支持文件共享的应用。
iosapps[--system][--all][--list][--filesharing][options]
-
启动应用,可以选择等待应用启动完成 (
--wait) 或杀死已有的应用实例 (--kill-existing)。
ios launch <bundleID> [--wait][--kill-existing][options]
-
终止应用,可以通过包名、进程 ID 或进程名称来指定应用。
ios kill (<bundleID> | --pid=<processID> | --process=<processName>) [options]
-
运行 XCTest 测试。可以指定测试包 ID、测试运行器包 ID、XCTest 配置文件、日志输出文件、要运行的测试、要跳过的测试和环境变量。
iosruntest[--bundle-id=<bundleid>][--test-runner-bundle-id=<testrunnerbundleid>][--xctest-config=<xctestconfig>][--log-output=<file>][--xctest][--test-to-run=<tests>]... [--test-to-skip=<tests>]... [--env=<e>]... [options]
-
运行 WebDriverAgent,可以指定包 ID、测试运行器包 ID、XCTest 配置文件、日志输出文件、启动参数和环境变量。
iosrunwda[--bundleid=<bundleid>][--testrunnerbundleid=<testbundleid>][--xctestconfig=<xctestconfig>][--log-output=<file>][--arg=<a>]... [--env=<e>]... [options]
-
设置辅助功能字体大小
iosax[--font=<fontSize>][options]
-
调试应用,可以选择在入口点停止。
ios debug [options][--stop-at-entry] <app_path>
-
文件同步操作,可以删除 (
rm)、列出目录树 (tree) 或创建目录 (mkdir)。
iosfsync (rm [--r] | tree | mkdir) --path=<targetPath>
-
文件同步传输,从设备拉取文件 (
pull) 或推送文件到设备 (push)。
ios fsync (pull | push) --srcPath=<srcPath> --dstPath=<dstPath>
-
重启设备
iosreboot [options]
-
显示帮助信息
ios-h | --help
-
显示版本信息
ios--version | version [options]
-
设置设备位置,需要提供纬度和经度。
iossetlocation[options][--lat=<lat>][--lon=<lon>]
-
设置设备位置(GPX 文件),需要提供 GPX 文件路径。
iossetlocationgpx[options][--gpxfilepath=<gpxfilepath>]
-
重置设备位置
iosresetlocation [options]
-
控制辅助触控,可以启用、禁用、切换或获取当前状态。
iosassistivetouch (enable | disable | toggle | get) [--force][options]
-
控制 VoiceOver,可以启用、禁用、切换或获取当前状态。
iosvoiceover (enable | disable | toggle | get) [--force][options]
-
控制缩放触控,可以启用、禁用、切换或获取当前状态。
ioszoomtouch (enable | disable | toggle | get) [--force][options]
-
获取磁盘空间信息
iosdiskspace [options]
-
检查电池状态
iosbatterycheck [options]
-
启动隧道,可以提供配对记录路径和用户空间选项。
iostunnelstart[options][--pair-record-path=<pairrecordpath>][--userspace]
-
列出隧道
iostunnel ls [options]
-
停止隧道代理
iostunnel stopagent
-
开启或获取开发者模式
iosdevmode (enable | get) [--enable-post-restart][options]
-
列出设备的 RSD(Remote Service Discovery)信息。
更多推荐
 9
9 0
0- 0


 已为社区贡献4条内容

所有评论(0)