djnago+vue+element ui前后的分离上传图片并保存
文章目录版本一、pandas是什么?二、使用步骤1.引入库2.读入数据总结版本python:3.7django:3.1.2一、pandas是什么?示例:pandas 是基于NumPy 的一种工具,该工具是为了解决数据分析任务而创建的。二、使用步骤1.引入库代码如下(示例):import numpy as npimport pandas as pdimport matplotlib.pyplot a
准备
python:3.7
django:3.1.2
一、Vue页面编写
我前端的样式是基于element ui实现的,element ui有个el-upload标签专门用来上传文件的,本例子中使用该标签上传图片。先说明一下其中参数: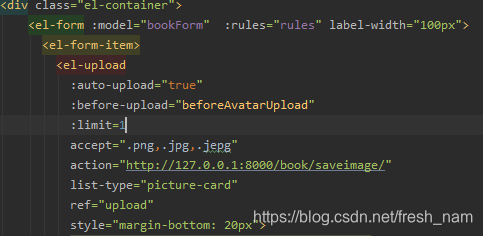
auto-upload:是否在选取文件后立即上传,我这里选择true,使得图片立刻上传。
before-upload:文件上传前的操作。
limit:上传的最大文件数。
accept:选择文件的类型,这里设置为图片后缀。
action:处理上传文件的接口。
ref:类似于绑定该标签的标识。
list-type:文件列表的类型。
我做的功能是新建书本填写信息时,对应的书本图片也要附上,下面是整个页面的代码:
CreateBook.vue
<template>
  <div>
      <div id="back">
        <el-link href="/" type="danger">返回主页</el-link>
      </div>
      <div class="el-container">
              <el-upload
                :auto-upload="true"
                :before-upload="beforeAvatarUpload"
                :limit=1
                accept=".png,.jpg,.jepg"
                action="http://127.0.0.1:8000/book/saveimage/"
                list-type="picture-card"
                ref="upload"
                style="margin-bottom: 20px">
                <i slot="default" class="el-icon-plus"></i>
                <div slot="file" slot-scope="{file}">
                  <img
                    class="el-upload-list__item-thumbnail"
                    :src="file.url" alt=""
                  >
                  <span class="el-upload-list__item-actions">
                    <span
                      class="el-upload-list__item-preview"
                      @click="handlePictureCardPreview(file)"
                    >
                      <i class="el-icon-zoom-in"></i>
                    </span>
                    <span
                      v-if="!disabled"
                      class="el-upload-list__item-delete"
                      @click="handleRemove(file)"
                    >
                      <i class="el-icon-delete"></i>
                      </span>
                  </span>
                  </div>
              </el-upload>
          <el-dialog :visible.sync="dialogVisible">
                <img width="100%" :src="dialogImageUrl" alt="">
          </el-dialog>
        </div>
  </div>
</template>

<script>
    export default {
      name: "CreateBook",
        data(){
          return{
            dialogImageUrl: '',
            dialogVisible: false,
            disabled: false,
            }
          }
      },
      methods:{
          beforeAvatarUpload(file) {
            const isJPG = file.type === 'image/jpeg';
            const isLt2M = file.size / 1024 / 1024 < 2;

            if (!isJPG) {
              this.$message.error('上传头像图片只能是 JPG 格式!');
            }
            if (!isLt2M) {
              this.$message.error('上传头像图片大小不能超过 2MB!');
            }else{
            }
            return isJPG && isLt2M;
          },
          //清除图片缓存
          handleRemove(file) {
            console.log(file)
            this.$refs.upload.clearFiles();
          },
          //展示图片预览图
          handlePictureCardPreview(file) {
            this.dialogImageUrl = file.url;
            this.dialogVisible = true;
          },
    }
</script>

<style scoped>
  #back{
    text-align: left;
    margin-bottom: 50px;
  }
</style>
二、django接口编写
1.新建项目
在cmd输入命令新建一个django项目(确保你已经下了django)
django-admin startproject Book_Django
因为前后端分离会存在跨域问题,所以先要解决跨域问题,可看博客解决django跨域问题
2.引入库
django的接口采用rest_framework风格来写,因此要引入djangorestframework
pip install djangorestframework
修改settings.py
INSTALLED_APPS = [
······
    'rest_framework',
]
3.写接口
新建一个Book应用
python manage.py startapp Book
在Book目录下添加meida文件夹,再在media文件夹下添加img,作为图片存放目录。
在Book目录的views.py编写视图:
from rest_framework.viewsets import GenericViewSet
class BookInfoViewSet(GenericViewSet):
	# 保存图片
    @action(methods=['post'], detail=False)
    def save_image(self, request):
        file = request.FILES.get('file')
        try:
            # 构造图片保存路径
            file_path = './Book/media/img/' + file.name
            # 保存图片
            with open(file_path, 'wb+') as f:
                f.write(file.read())
                f.close()
            response = {'file': file.name, 'code': 200, 'msg': "添加成功"}
        except:
            response = {'file': '', 'code': 201, 'msg': "添加失败"}
        return Response(response)
然后添加路由:
Book/urls.py
from django.urls import path
from Book.views import BookInfoViewSet

urlpatterns = [
    path('saveimage/', BookInfoViewSet.as_view({'post': 'save_image'})),
]
Book_Django/urls.py
from django.contrib import admin
from django.urls import path, include

urlpatterns = [
    path('admin/', admin.site.urls),
    path('book/', include('Book.urls')),
]
目录结构如下: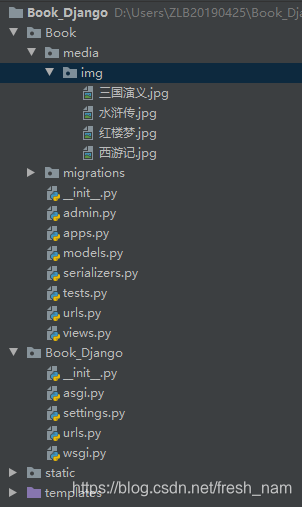
三、结果
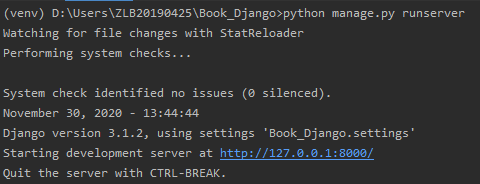
最后运行前后端
python manage.py runserver
npm run dev

选择图片
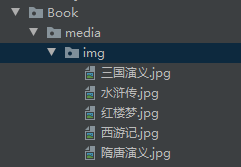
可以看到隋唐演义.jpg保存到对应目录了。
最后
有什么不懂的欢迎在评论区留言,有不妥的地方也欢迎各位指正。

前往低代码交流专区
更多推荐


 6
6 0
0- 0


 已为社区贡献5条内容

所有评论(0)