vue3+ts项目移植发富文本tinymce6踩坑
Vue3+typescript集成富文本编辑器TinyMce6
·
介绍
TinyMCE是一款易用、且功能强大的所见即所得的富文本编辑器,不详细介绍了,有兴趣可以去官网自己了解一下。
在go中form-generator生成表单用到了tinymce,就研究下废话不多讲遇到一些坑记录下。
我这用的版本是:

npm版本:8.1.2
安装
- npm下载依赖,默认安装最新版
npm install tinymce --save
npm install @tinymce/tinymce-vue --save
- 在public创建tinymce文件夹将langs/zh_CN.js放到其中
- node_modules/tinymce/skins 路径,将 skins 整个目录复制一份到 public 目录下

从node_modules里复制一份出来,因为复制出来的是tinymce的皮肤资源文件,放到public中,在项目打包时 public 文件夹的静态资源会直接复制,而不经过 webpack 处理,这样部署在线上才能保证tinymce不会缺失样式。
封装组件
将tinymce封装成公共组件
在script标签下导入必须的依赖包
import tinymce from 'tinymce/tinymce'
import Editor from '@tinymce/tinymce-vue'
import 'tinymce/themes/silver/theme'
import 'tinymce/icons/default'
import 'tinymce/models/dom'
注意:坑1

import 'tinymce/models/dom' 这里是个巨坑 一定要引入,不引入不显示富文本编辑器,当时查了好久郁闷。

坑2:出现这种GET http://localhost:8080//skins/content/default/content.css net::ERR_ABORTED 404 (Not Found)

init当中一定要定义content_css属性
//以css文件方式自定义可编辑区域的css样式,css文件需自己创建并引入
content_css: '/tinymce/skins/content/default/content.css'坑3:图片上传新版本的坑,网上查看了很多都是用success(图片地址),始终报错
// 如需ajax上传可参考https://www.tiny.cloud/docs/configure/file-image-upload/#images_upload_handler
      images_upload_handler: (blobInfo, success, failure) => {
        const img = 'data:image/jpeg;base64,' + blobInfo.base64();
        success(img);
      },
报错:Cannot read properties of undefined (reading 'then')
不知道原因,查了很多资料,也没找到解决的方法,后想到可能是版本原因,最后直接去看官网TinyMCE 6文档,果然用法不一样了,所以新版本最好先看官网新版本文档。
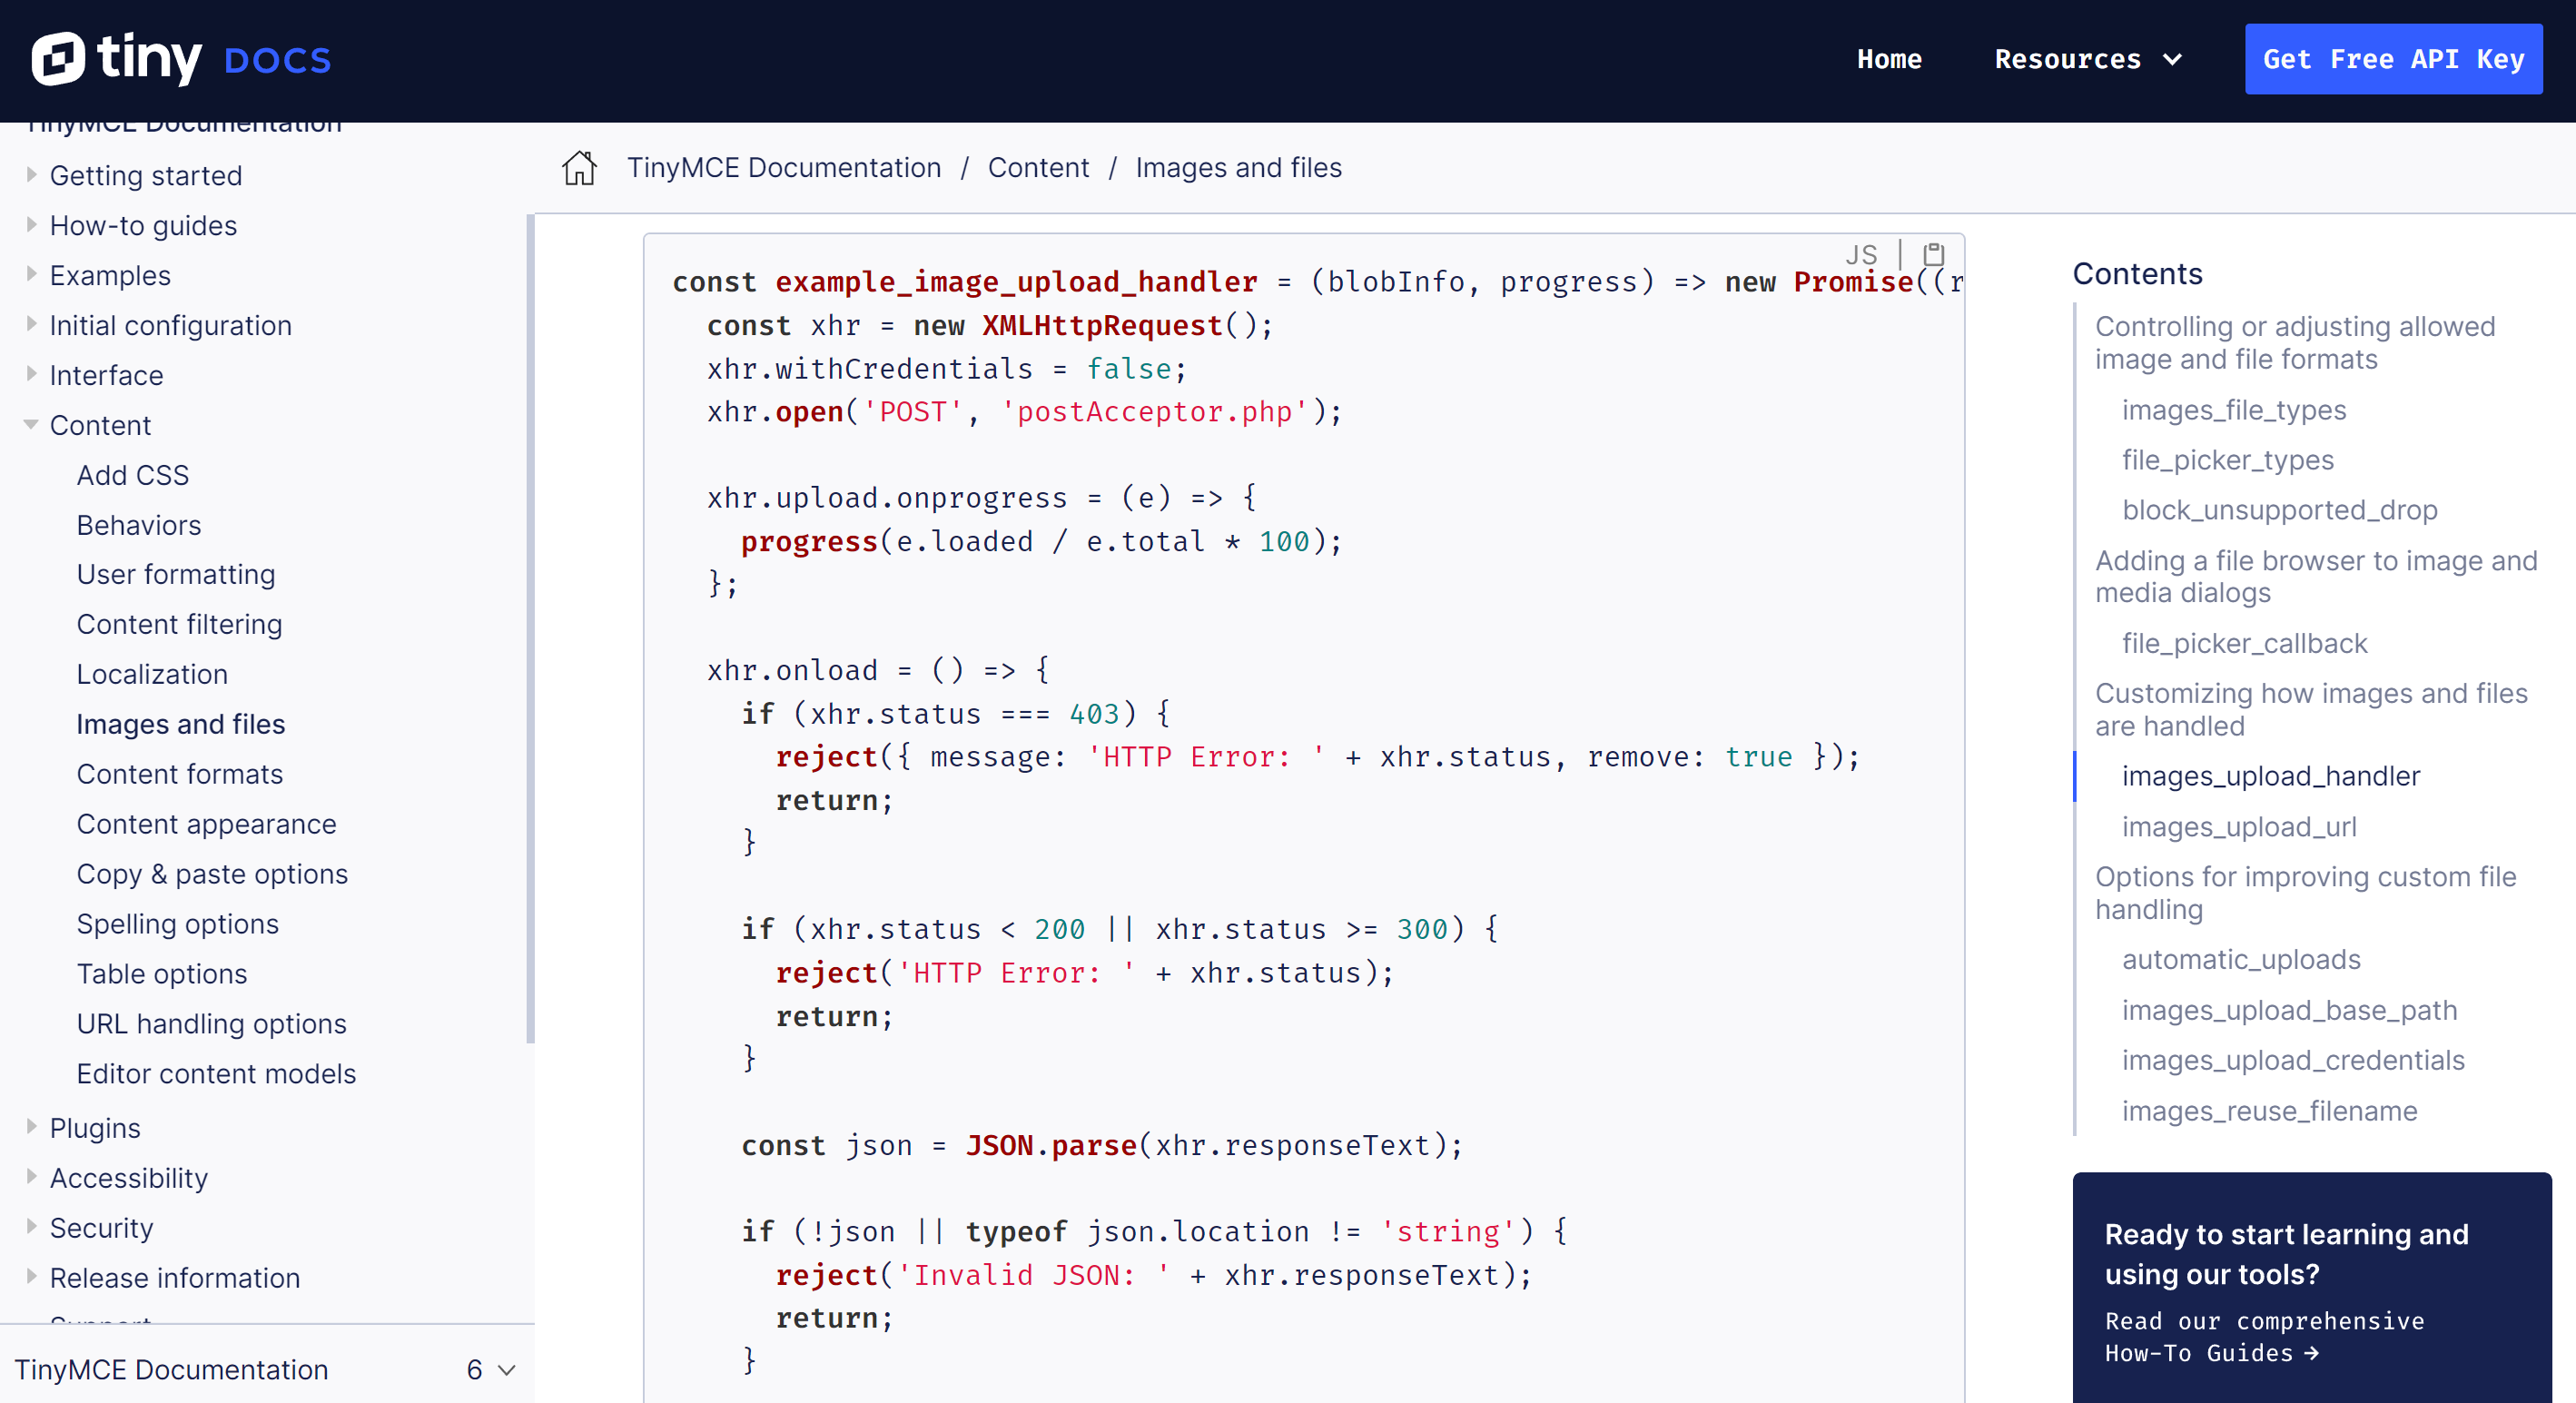
TinyMCE 6的新文档地址:TinyMCE 6.0: Release overview | TinyMCE Documentation
image_upload_handler: (blobInfo, progress) => new Promise((resolve, reject) => {
  const xhr = new XMLHttpRequest();
  xhr.withCredentials = false;
  xhr.open('POST', 'postAcceptor.php');

  xhr.upload.onprogress = (e) => {
    progress(e.loaded / e.total * 100);
  };

  xhr.onload = () => {
    if (xhr.status === 403) {
      reject({ message: 'HTTP Error: ' + xhr.status, remove: true });
      return;
    }

    if (xhr.status < 200 || xhr.status >= 300) {
      reject('HTTP Error: ' + xhr.status);
      return;
    }

    const json = JSON.parse(xhr.responseText);

    if (!json || typeof json.location != 'string') {
      reject('Invalid JSON: ' + xhr.responseText);
      return;
    }

    resolve(json.location);
  };
完整的代码:
在src/components下新建TEditor.vue,并写入以下代码
组件完整示例如下,其中tinymce有非常丰富的插件,可按自己的需要进行导入
<template>
	<editor v-model="myValue" :init="init"></editor>
</template>


<script setup lang="ts">
//JS部分
//在js中引入所需的主题和组件
import tinymce from 'tinymce/tinymce'
import 'tinymce/skins/content/default/content.css'
import Editor from '@tinymce/tinymce-vue'
import 'tinymce/themes/silver'
import 'tinymce/themes/silver/theme'
import 'tinymce/icons/default'; //引入编辑器图标icon,不引入则不显示对应图标
import 'tinymce/models/dom' // 这里是个坑 一定要引入


//在TinyMce.vue中接着引入相关插件
import "tinymce/icons/default/icons"
import "tinymce/plugins/image" // 插入上传图片插件
import "tinymce/plugins/media" // 插入视频插件
import "tinymce/plugins/table" // 插入表格插件
import "tinymce/plugins/lists" // 列表插件
import "tinymce/plugins/wordcount" // 字数统计插件
import "tinymce/plugins/code" // 源码
import "tinymce/plugins/fullscreen" //全屏

//接下来定义编辑器所需要的插件数据
import { reactive, ref } from "vue"
import { onMounted, defineEmits, watch } from "@vue/runtime-core"
import axios from 'axios'
import { updateImg } from '@/api/order/order'
const emits = defineEmits(["getContent"])
//这里我选择将数据定义在props里面,方便在不同的页面也可以配置出不同的编辑器,当然也可以直接在组件中直接定义
const props = defineProps({
  value: {
    type: String,
    default: () => {
      return ""
    },
  },
  baseUrl: {
    type: String,
    default: "",
  },
  disabled: {
    type: Boolean,
    default: false,
  },
  plugins: {
    type: [String, Array],
    default: "lists image media table wordcount fullscreen",
  },//必填
  toolbar: {
    type: [String, Array],
    default:
      "codesample bold italic underline alignleft aligncenter alignright alignjustify | undo redo |  formatselect | forecolor backcolor | bullist numlist outdent indent | lists link image media table code | removeformat | fullscreen",
  },//必填
})
//用于接收外部传递进来的富文本
const myValue = ref(props.value)
//定义一个对象 init初始化
const init = reactive({
  selector: 'textarea',
  language_url: "/tinymce/langs/zh_CN.js", // 语言包的路径,具体路径看自己的项目,文档后面附上中文js文件
  language: "zh_CN", //语言
  skin_url: "/tinymce/skins/ui/oxide", // skin路径,具体路径看自己的项目
  height: 500, //编辑器高度
  branding: false, //是否禁用“Powered by TinyMCE”
  menubar: true, //顶部菜单栏显示
  image_dimensions: false, //去除宽高属性
  plugins: props.plugins,  //这里的数据是在props里面就定义好了的
  toolbar: props.toolbar, //这里的数据是在props里面就定义好了的
// paste_convert_word_fake_lists: false, // 插入word文档需要该属性
  paste_webkit_styles: "all",
  paste_merge_formats: true,
  nonbreaking_force_tab: false,
  paste_auto_cleanup_on_paste: false,
  file_picker_types:'file image media',
  content_css: '/tinymce/skins/content/default/content.css', //以css文件方式自定义可编辑区域的css样式,css文件需自己创建并引入
  //图片上传
  images_upload_handler: (blobInfo, progress) => new Promise((resolve, reject) => {

    if(blobInfo.blob().size/1024/1024>2){
        reject({ message: '上传失败,图片大小请控制在 2M 以内', remove: true })
        return
    }else{
          const ph = import.meta.env.VITE_BASE_PATH + ":" + import.meta.env.VITE_SERVER_PORT +"/"
          let params=new FormData()
          params.append('file',blobInfo.blob())

          let config={
                headers:{
                      "Content-Type":"multipart/form-data",

                }
          }

          axios.post('xxxx',params,config).then(res=>{
                if(res.data.code==200){
                    resolve(ph+res.data.msg)  //上传成功,在成功函数里填入图片路径
                }else{
                    reject('HTTP Error: 上传失败' + res.data.code);
                    return
                }
          }).catch(()=>{
            reject('上传出错,服务器开小差了呢')
            return
          })
    }
  }),

  // 文件上传
  file_picker_callback:(callback, value, meta) => {
    // Provide file and text for the link dialog
    if (meta.filetype == 'file') {
      callback('mypage.html', { text: 'My text' });
    }

    // Provide image and alt text for the image dialog
    if (meta.filetype == 'image') {
      callback('myimage.jpg', { alt: 'My alt text' });
    }

    // Provide alternative source and posted for the media dialog
    if (meta.filetype == 'media') {
      callback('movie.mp4', { source2: 'alt.ogg', poster: 'image.jpg' });
    }
  }
})

//监听外部传递进来的的数据变化
watch(
  () => props.value,
  () => {
    myValue.value = props.value
    emits("getContent", myValue.value)
  }
)
//监听富文本中的数据变化
watch(
  () => myValue.value,
  () => {
    emits("getContent", myValue.value)
  }
)
//在onMounted中初始化编辑器
onMounted(() => {
  tinymce.init({})
})
</script>
使用封装好的tinymce公共组件
<el-row>
     <el-form-item label="编辑器" prop="field111">
        <TEditor :value="formData.field111" @getContent="getContent"></TEditor>
     </el-form-item>
</el-row>

<script setup lang="ts">
import TEditor from '@/components/TEditor.vue'

const formData = reactive({

        field111:""
})
const getContent = (v:string)=>{
    formData.field123 = v
}
</script>
最后说下新版本还是挺容易踩坑的,相关的文章也少,用的话还是要看新版本文档使用。


前往低代码交流专区
更多推荐

 13
13 0
0- 0


 已为社区贡献1条内容

所有评论(0)