el-table(vue3 总结)
vue中将 后台返回的0,1等 代码转换成 男,女等汉字。_vue2中01转化性别-CSDN博客
·
一 设置居中对齐
1.1整个表格和内容居中的方式:
header-cell-style设置头部居中;cell-style设置单元格内容居中
<el-table
    :data="tableData"
    :header-cell-style="{'text-align':'center'}"
    :cell-style="{'text-align':'center'}"
    style="width: 100%">
</el-table>1.2单个表格的内容居中:
只需要在el-table-column上加上align=‘center’
<el-table-column label="姓名" prop="realname" align="center">
  </el-table-column>
二设置头部样式(:header-cell-style)

  <el-table
        :data="userList"
        stripe
        :header-cell-style="{ background: '#F8F9FA', color: '#1D2129' }"
      >
三设置每一行的样式(row-style)


四索引
<el-table-column type="index" width="50" />
五格式化列数据
 <el-table-column
          label="订阅"
          prop="subscribeFlag"
          min-width="100px"
          :formatter="subscribeFormatter"
        />


const subscribeFormatter = (row: any, _index: any) => {
  if (row.subscribeFlag == 1) {
    return '已订阅'
  } else if (row.subscribeFlag == 0) {
    return '未订阅'
  } else {
    return ''
  }
}
vue中将 后台返回的0,1等 代码转换成 男,女等汉字。_vue2中01转化性别-CSDN博客
六多选
6.1 出现多选框

 <el-table
    ref="multipleTableRef"
    :data="tableData"
    style="width: 100%"
    @selection-change="handleSelectionChange"
  >
    <el-table-column type="selection" width="55" />
    <el-table-column property="name" label="Name" width="120" />

 </el-table>


const multipleSelection = ref<User[]>([])

const handleSelectionChange = (val: User[]) => {
  multipleSelection.value = val
}
6.2选中事件
选中触发的事件@selection-change="handleSelectionChange"
获取到一个list,每一个是选中的对象

//收集多选ID
let selectIdArr = ref([])
const customerIds = computed(() => {
  return selectIdArr.value.map(
    (item: any) => item.customerId)
})
//table复选框勾选的时候会触发的事件
const selectChange = (data: any) => {
  selectIdArr.value = data
}
6.3 跨页选中

# 【跨页批量】操作之后,需要清除选中的ID

const customerTable = ref()

 customerTable.value?.clearSelection()
八 添加loading
 <el-table
           v-loading="tableDataLoading"
           :data="tableData"
           class="ones"
            width="100%"
            element-loading-text="数据正在加载中..."
            ref="demoTable"
            style="table-layout:fixed"
            id="operateMonitorTb">
                <template slot="empty">
                <div style="margin-top: 15%;">
                    <img src="../../../img/icon.png" alt="暂无数据">
                    <br>
                    <span>暂无数据</span>
                </div>
                </template>

            <el-table-column prop="ids" label="序号" align="center"></el-table-column>
  </el-table>
九 树形数据
9.1 修改展开图标
![]()

:deep(.el-table .el-table__expand-icon) {
  margin-bottom: -3px;
  height: 16px;
  line-height: 16px;
  margin-right: 4px;
  text-align: center;
  width: 16px;
  content: url("@/assets/svg/shouqi.svg") !important;
}
9.2 修改 间距
修改层级间隔的距离
/* 间距 */
:deep(.el-table__row--level-1 .el-table__indent) {
  padding-left: 26px !important;
}
:deep(.el-table__row--level-2 .el-table__indent) {
  padding-left: 48px !important;
}
:deep(.el-table__row--level-3 .el-table__indent) {
  padding-left: 55px !important;
}
:deep(.el-tooltip) {
  &::before {
    content: "";
    display: block;
  }
}
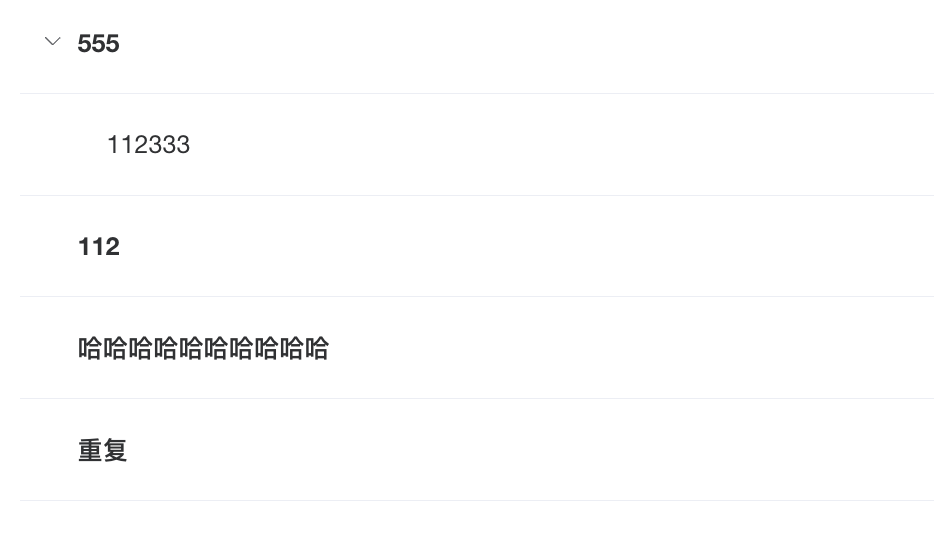
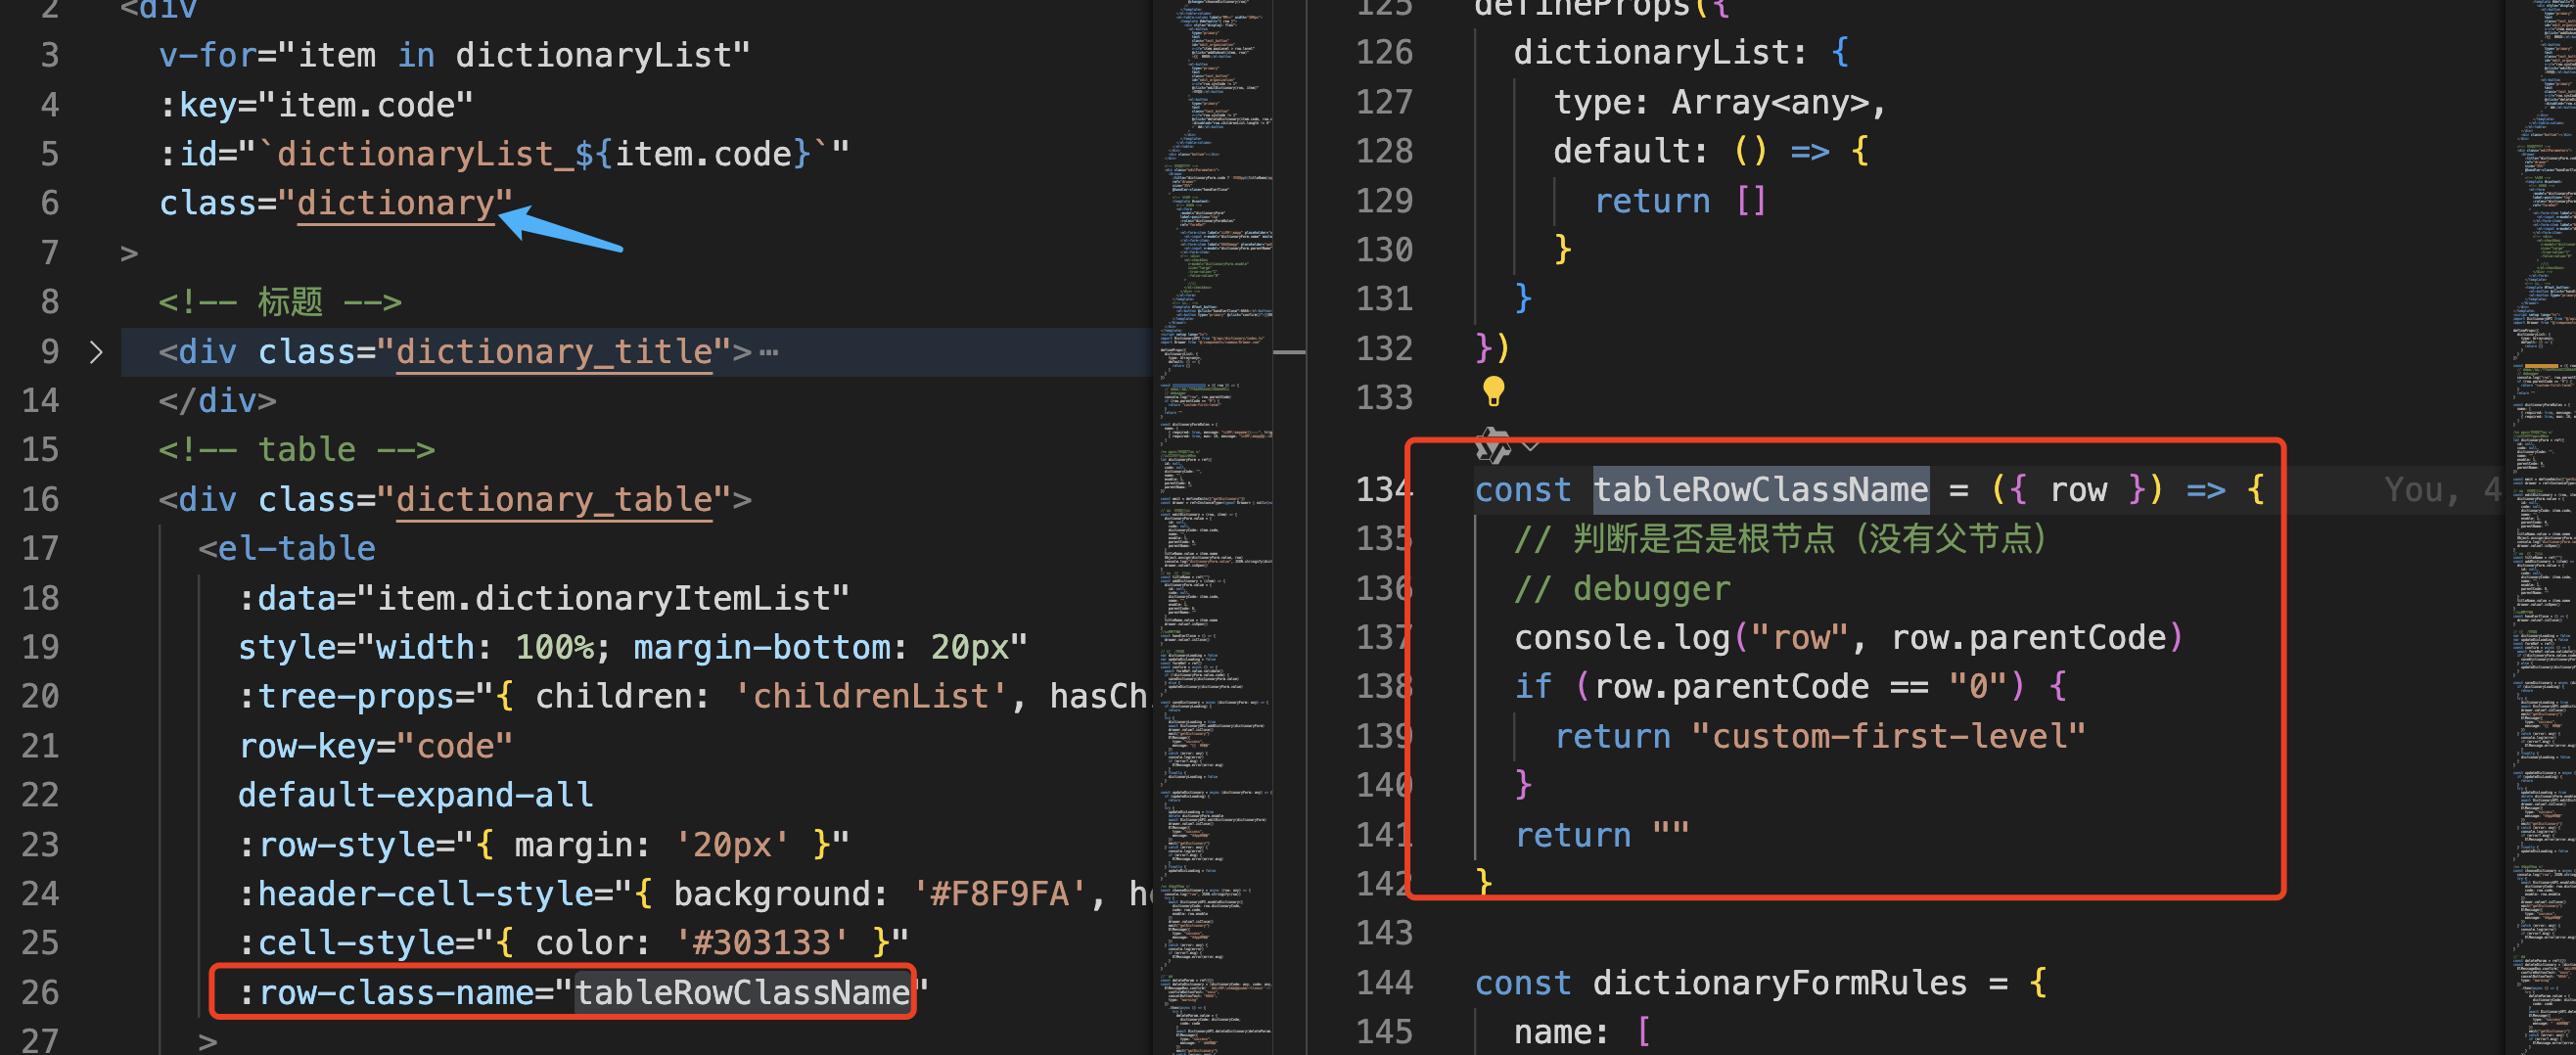
9.3 让第一层数据加深,变颜色


<div class="dictionary">
<el-table
        :data="item.dictionaryItemList"
        style="width: 100%; margin-bottom: 20px"
        :tree-props="{ children: 'childrenList', hasChildren: 'hasChildren' }"
        row-key="code"
        default-expand-all
        :row-style="{ margin: '20px' }"
        :header-cell-style="{ background: '#F8F9FA', height: '50px', color: '#1D2129' }"
        :cell-style="{ color: '#303133' }"
        :row-class-name="tableRowClassName"
      >

</el-table>
</div>

<script>
const tableRowClassName = ({ row }) => {
  // 判断是否是根节点(没有父节点)
  // debugger
  console.log("row", row.parentCode)
  if (row.parentCode == "0") {
    return "custom-first-level"
  }
  return ""
}
</script>


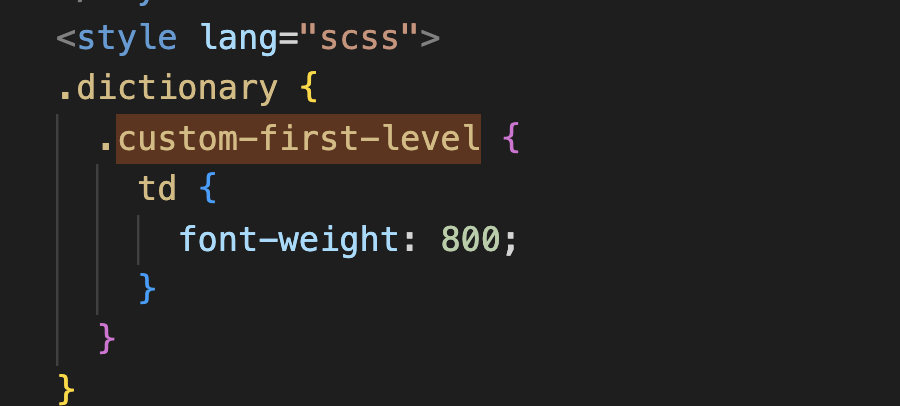
<style lang="scss">
.dictionary {
  .custom-first-level {
    td {
      font-weight: 800;
    }
  }
}
</style>
十排序
后端排序,只有一个排序条件,切换改成另一个


10.1 sort-change 清除条件
dataRef.value.clearSort();
注意:查询条件的排序条件并没有清除, 自己手动清除

更多推荐
 已为社区贡献4条内容


所有评论(0)