
Langchain-Chatchat-win10本地安装部署笔记(CPU)
Langchain-Chatchat(原Langchain-ChatGLM)基于 Langchain 与 ChatGLM 等语言模型的本地知识库问答 | Langchain-Chatchat (formerly langchain-ChatGLM), local knowledge based LLM (like ChatGLM) QA app with langchain。开源网址:https:
Langchain-Chatchat(原Langchain-ChatGLM)基于 Langchain 与 ChatGLM 等语言模型的本地知识库问答 | Langchain-Chatchat (formerly langchain-ChatGLM), local knowledge based LLM (like ChatGLM) QA app with langchain。
开源网址:https://github.com/chatchat-space/Langchain-Chatchat
因为这是自己毕设项目所需,利用虚拟机实验一下是否能成功部署。项目参考:Langchain-Chatchat-win10本地安装部署成功笔记(CPU)_file "d:\ai\virtual-digital-human\langchain-chatch-CSDN博客
其中有些是自己遇到的坑也会在这里说一下。
一、实验环境

二、安装步骤
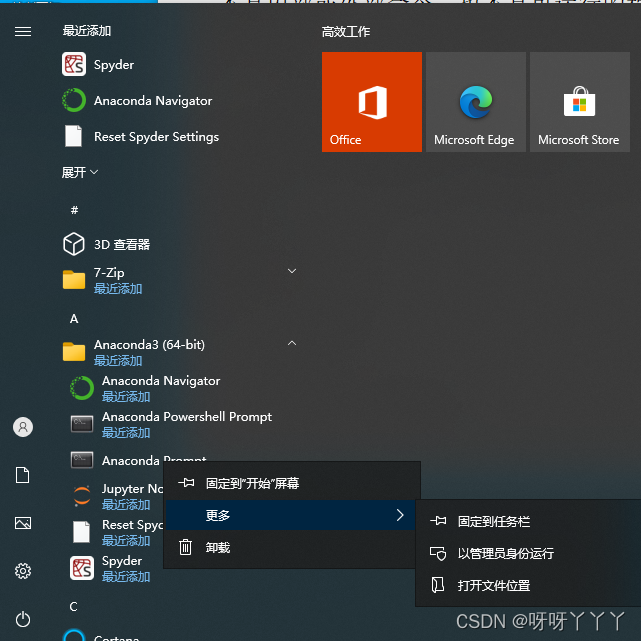
1、安装 Anaconda软件,用于管理python虚拟环境
官网地址: Anaconda | Unleash AI innovation and value,下载free版的anaconda,按导航默认安装即可。
参考文章:Anaconda安装和入门(超级简单详细的安装步骤)-CSDN博客
2、创建python运行虚拟环境
因为在 anaconda 安装中作者不建议将其加入到 PATH 中,所以该项目均在 anaconda promote 中执行(这个跟命令行终端是一样的)。(注意以管理员身份运行)

没有安装python,创建环境会自动帮你安装 python 环境。
执行命令:
conda create -n l2 python=3.10.12Collecting package metadata (current_repodata.json): done
Solving environment: unsuccessful attempt using repodata from current_repodata.json, retrying with next repodata source.
Collecting package metadata (repodata.json): done
Solving environment: done
==> WARNING: A newer version of conda exists. <==
current version: 23.7.4
latest version: 23.11.0
Please update conda by running
$ conda update -n base -c defaults conda
Or to minimize the number of packages updated during conda update use
conda install conda=23.11.0
## Package Plan ##
environment location: D:\Anaconda\anaconda\envs\l2
added / updated specs:
- python=3.10.12
The following packages will be downloaded:
package | build
---------------------------|-----------------
openssl-3.0.12 | h2bbff1b_0 7.4 MB
------------------------------------------------------------
Total: 7.4 MB
The following NEW packages will be INSTALLED:
bzip2 pkgs/main/win-64::bzip2-1.0.8-he774522_0
ca-certificates pkgs/main/win-64::ca-certificates-2023.12.12-haa95532_0
libffi pkgs/main/win-64::libffi-3.4.4-hd77b12b_0
openssl pkgs/main/win-64::openssl-3.0.12-h2bbff1b_0
pip pkgs/main/win-64::pip-23.3.1-py310haa95532_0
python pkgs/main/win-64::python-3.10.12-he1021f5_0
setuptools pkgs/main/win-64::setuptools-68.2.2-py310haa95532_0
sqlite pkgs/main/win-64::sqlite-3.41.2-h2bbff1b_0
tk pkgs/main/win-64::tk-8.6.12-h2bbff1b_0
tzdata pkgs/main/noarch::tzdata-2023d-h04d1e81_0
vc pkgs/main/win-64::vc-14.2-h21ff451_1
vs2015_runtime pkgs/main/win-64::vs2015_runtime-14.27.29016-h5e58377_2
wheel pkgs/main/win-64::wheel-0.41.2-py310haa95532_0
xz pkgs/main/win-64::xz-5.4.5-h8cc25b3_0
zlib pkgs/main/win-64::zlib-1.2.13-h8cc25b3_0
Proceed ([y]/n)? y
Downloading and Extracting Packages
Preparing transaction: done
Verifying transaction: done
Executing transaction: done
#
# To activate this environment, use
#
# $ conda activate l2
#
# To deactivate an active environment, use
#
# $ conda deactivate可以通过 conda info --envs 检查环境是否创建完成。
(base) C:\Windows\system32>conda info --envs
# conda environments:
#
base                  *  D:\Anaconda\anaconda
l2                       D:\Anaconda\anaconda\envs\l2
进入已经创建好的虚拟环境:conda activate l2
(base) C:\Windows\system32>conda activate l2

(l2) C:\Windows\system32>python
Python 3.10.12 | packaged by Anaconda, Inc. | (main, Jul  5 2023, 19:01:18) [MSC v.1916 64 bit (AMD64)] on win32
Type "help", "copyright", "credits" or "license" for more information.
>>>
python 可以正常使用。
3、安装pytorch
安装pytorch版本是比较麻烦的事情,有一个比较简单的方法:访问url: Start Locally | PyTorch,自动判断当前系统可安装的版本。如下图:

运行推荐的命令安装pytorch,用清华源:
(l2) D:\>pip3 install torch torchvision torchaudio --index-url https://download.pytorch.org/whl/cu118
Looking in indexes: https://download.pytorch.org/whl/cu118
Collecting torch
  Downloading https://download.pytorch.org/whl/cu118/torch-2.1.2%2Bcu118-cp310-cp310-win_amd64.whl (2722.7 MB)
     ---------------------------------------- 2.7/2.7 GB 714.6 kB/s eta 0:00:00
Collecting torchvision
  Downloading https://download.pytorch.org/whl/cu118/torchvision-0.16.2%2Bcu118-cp310-cp310-win_amd64.whl (4.9 MB)
     ---------------------------------------- 4.9/4.9 MB 2.7 MB/s eta 0:00:00
Collecting torchaudio
  Downloading https://download.pytorch.org/whl/cu118/torchaudio-2.1.2%2Bcu118-cp310-cp310-win_amd64.whl (3.9 MB)
     ---------------------------------------- 3.9/3.9 MB 3.9 MB/s eta 0:00:00
Collecting filelock (from torch)
  Downloading https://download.pytorch.org/whl/filelock-3.9.0-py3-none-any.whl (9.7 kB)
Collecting typing-extensions (from torch)
  Downloading https://download.pytorch.org/whl/typing_extensions-4.4.0-py3-none-any.whl (26 kB)
Collecting sympy (from torch)
  Downloading https://download.pytorch.org/whl/sympy-1.12-py3-none-any.whl (5.7 MB)
     ---------------------------------------- 5.7/5.7 MB 2.9 MB/s eta 0:00:00
Collecting networkx (from torch)
  Downloading https://download.pytorch.org/whl/networkx-3.0-py3-none-any.whl (2.0 MB)
     ---------------------------------------- 2.0/2.0 MB 2.8 MB/s eta 0:00:00
Collecting jinja2 (from torch)
  Downloading https://download.pytorch.org/whl/Jinja2-3.1.2-py3-none-any.whl (133 kB)
     ---------------------------------------- 133.1/133.1 kB 2.6 MB/s eta 0:00:00
Collecting fsspec (from torch)
  Downloading https://download.pytorch.org/whl/fsspec-2023.4.0-py3-none-any.whl (153 kB)
     ---------------------------------------- 154.0/154.0 kB 4.6 MB/s eta 0:00:00
Collecting numpy (from torchvision)
  Downloading https://download.pytorch.org/whl/numpy-1.24.1-cp310-cp310-win_amd64.whl (14.8 MB)
     ---------------------------------------- 14.8/14.8 MB 2.8 MB/s eta 0:00:00
Collecting requests (from torchvision)
  Downloading https://download.pytorch.org/whl/requests-2.28.1-py3-none-any.whl (62 kB)
     ---------------------------------------- 62.8/62.8 kB 3.3 MB/s eta 0:00:00
Collecting pillow!=8.3.*,>=5.3.0 (from torchvision)
  Downloading https://download.pytorch.org/whl/Pillow-9.3.0-cp310-cp310-win_amd64.whl (2.5 MB)
     ---------------------------------------- 2.5/2.5 MB 3.3 MB/s eta 0:00:00
Collecting MarkupSafe>=2.0 (from jinja2->torch)
  Downloading https://download.pytorch.org/whl/MarkupSafe-2.1.3-cp310-cp310-win_amd64.whl (17 kB)
Collecting charset-normalizer<3,>=2 (from requests->torchvision)
  Downloading https://download.pytorch.org/whl/charset_normalizer-2.1.1-py3-none-any.whl (39 kB)
Collecting idna<4,>=2.5 (from requests->torchvision)
  Downloading https://download.pytorch.org/whl/idna-3.4-py3-none-any.whl (61 kB)
     ---------------------------------------- 61.5/61.5 kB 827.4 kB/s eta 0:00:00
Collecting urllib3<1.27,>=1.21.1 (from requests->torchvision)
  Downloading https://download.pytorch.org/whl/urllib3-1.26.13-py2.py3-none-any.whl (140 kB)
     ---------------------------------------- 140.6/140.6 kB 835.5 kB/s eta 0:00:00
Collecting certifi>=2017.4.17 (from requests->torchvision)
  Downloading https://download.pytorch.org/whl/certifi-2022.12.7-py3-none-any.whl (155 kB)
     ---------------------------------------- 155.3/155.3 kB 281.6 kB/s eta 0:00:00
Collecting mpmath>=0.19 (from sympy->torch)
  Downloading https://download.pytorch.org/whl/mpmath-1.3.0-py3-none-any.whl (536 kB)
     ---------------------------------------- 536.2/536.2 kB 118.1 kB/s eta 0:00:00

Installing collected packages: mpmath, urllib3, typing-extensions, sympy, pillow, numpy, networkx, MarkupSafe, idna, fsspec, filelock, charset-normalizer, certifi, requests, jinja2, torch, torchvision, torchaudio

Successfully installed MarkupSafe-2.1.3 certifi-2022.12.7 charset-normalizer-2.1.1 filelock-3.9.0 fsspec-2023.4.0 idna-3.4 jinja2-3.1.2 mpmath-1.3.0 networkx-3.0 numpy-1.24.1 pillow-9.3.0 requests-2.28.1 sympy-1.12 torch-2.1.2+cu118 torchaudio-2.1.2+cu118 torchvision-0.16.2+cu118 typing-extensions-4.4.0 urllib3-1.26.13
验证是否安装成功:
(l2) D:\>python
Python 3.10.12 | packaged by Anaconda, Inc. | (main, Jul  5 2023, 19:01:18) [MSC v.1916 64 bit (AMD64)] on win32
Type "help", "copyright", "credits" or "license" for more information.
>>> import torch
>>> torch.cuda.is_available()
False
>>> x = torch.rand(5,3)
>>> print(x)
tensor([[0.1302, 0.1297, 0.4844],
        [0.4974, 0.4084, 0.9496],
        [0.9589, 0.2446, 0.8042],
        [0.4376, 0.1292, 0.4021],
        [0.8491, 0.3129, 0.0299]])
>>>
4、拉取Langchain-Chatchat源代码
有两种方式获取源代码,一种是获取最新代码,一种是获取指定版本的源代码。
# 拉取仓库
git clone https://github.com/chatchat-space/Langchain-Chatchat.git
# 指定版本获取代码
git clone -b v0.2.6 https://github.com/chatchat-space/Langchain-Chatchat.git
在拉取源代码之前先安装 git
Git 详细安装教程(详解 Git 安装过程的每一个步骤)_git安装-CSDN博客
拉取代码的时候经常会遇到这种问题
(l2) D:\l2>git clone https://github.com/chatchat-space/Langchain-Chatchat.git
Cloning into 'Langchain-Chatchat'...
fatal: unable to access 'https://github.com/chatchat-space/Langchain-Chatchat.git/': Failed to connect to github.com port 443 after 21149 ms: Couldn't connect to server
这是表示链接超时了,可以参考这篇:
解决使用git时遇到Failed to connect to github.com port 443 after 21090 ms: Couldn‘t connect to server-CSDN博客
(l2) D:\l2>git clone https://github.com/chatchat-space/Langchain-Chatchat.git
Cloning into 'Langchain-Chatchat'...
remote: Enumerating objects: 9446, done.
remote: Counting objects: 100% (752/752), done.
remote: Compressing objects: 100% (414/414), done.
remote: Total 9446 (delta 481), reused 517 (delta 323), pack-reused 8694
Receiving objects: 100% (9446/9446), 71.15 MiB | 2.87 MiB/s, done.

Resolving deltas: 100% (5746/5746), done.
5、安装依赖包
cd Langchain-Chatchat

# 安装全部依赖 用清华源
pip3 install -r requirements.txt -i https://pypi.tuna.tsinghua.edu.cn/simple/
如果你使用了科学上网工具,使用国内镜像的时候应该是要把工具关掉,不然下载速度会很慢。
Building wheel for jq (pyproject.toml) ... error
  error: subprocess-exited-with-error

  × Building wheel for jq (pyproject.toml) did not run successfully.
  │ exit code: 1
  ╰─> [5 lines of output]
      running bdist_wheel
      running build
      running build_ext
      Executing: ./configure CFLAGS=-fPIC --prefix=C:\Users\admin\AppData\Local\Temp\pip-install-aq_otija\jq_cc568b1c365642659c2a9c5a67a64cac\_deps\build\onig-install-6.9.8
      error: [WinError 2] 系统找不到指定的文件。
      [end of output]

  note: This error originates from a subprocess, and is likely not a problem with pip.
  ERROR: Failed building wheel for jq

·······

Failed to build jq
ERROR: Could not build wheels for jq, which is required to install pyproject.toml-based projects看到一个评论给出的解决办法
正确的操作方式是:使用conda安装jq,然后在requirements.txt文件中注释调jq的安装
1.conda环境中执行:conda install jq
2.修改requirements.txt文件,注释掉jq(#jq>=1.6.0 # for .json and .jsonl files. suggest conda install jq on windows)
试了一下结果没有报错,但是不清楚对后面是不是有影响。
Attempting uninstall: typing-extensions
    Found existing installation: typing_extensions 4.4.0
    Uninstalling typing_extensions-4.4.0:
      Successfully uninstalled typing_extensions-4.4.0
  Attempting uninstall: requests
    Found existing installation: requests 2.28.1
    Uninstalling requests-2.28.1:
      Successfully uninstalled requests-2.28.1
  Attempting uninstall: numpy
    Found existing installation: numpy 1.24.1
    Uninstalling numpy-1.24.1:
      Successfully uninstalled numpy-1.24.1
  Attempting uninstall: fsspec
    Found existing installation: fsspec 2023.4.0
    Uninstalling fsspec-2023.4.0:
      Successfully uninstalled fsspec-2023.4.0
Successfully installed PyJWT-2.8.0 PyMuPDF-1.23.18 PyMuPDFb-1.23.9 SQLAlchemy-2.0.19 Shapely-2.0.2 XlsxWriter-3.1.9 accelerate-0.24.1 aiofiles-23.2.1 aiohttp-3.9.1 aiosignal-1.3.1 altair-5.2.0 antlr4-python3-runtime-4.9.3 anyio-4.2.0 arxiv-2.1.0 async-timeout-4.0.3 attrs-23.2.0 backoff-2.2.1 beautifulsoup4-4.12.3 blinker-1.7.0 blis-0.7.11 brotli-1.1.0 cachetools-5.3.2 catalogue-2.0.10 cffi-1.16.0 chardet-5.2.0 click-8.1.7 cloudpathlib-0.16.0 colorama-0.4.6 coloredlogs-15.0.1 confection-0.1.4 contourpy-1.2.0 cryptography-42.0.0 cycler-0.12.1 cymem-2.0.8 dashscope-1.13.6 dataclasses-0.6 dataclasses-json-0.6.3 deprecated-1.2.14 deprecation-2.1.0 distro-1.9.0 duckduckgo-search-3.9.11 effdet-0.4.1 einops-0.7.0 emoji-2.10.0 et-xmlfile-1.1.0 exceptiongroup-1.2.0 faiss-cpu-1.7.4 fastapi-0.108.0 feedparser-6.0.10 filetype-1.2.0 flatbuffers-23.5.26 fonttools-4.47.2 frozenlist-1.4.1 fschat-0.2.34 fsspec-2023.12.2 gitdb-4.0.11 gitpython-3.1.41 greenlet-3.0.3 h11-0.14.0 h2-4.1.0 hpack-4.0.0 httpcore-1.0.2 httpx-0.25.2 huggingface-hub-0.20.3 humanfriendly-10.0 hyperframe-6.0.1 importlib-metadata-6.11.0 iniconfig-2.0.0 iopath-0.1.10 joblib-1.3.2 jsonpatch-1.33 jsonpointer-2.4 jsonschema-4.21.1 jsonschema-specifications-2023.12.1 kiwisolver-1.4.5 langchain-0.0.354 langchain-community-0.0.15 langchain-core-0.1.15 langchain-experimental-0.0.47 langcodes-3.3.0 langdetect-1.0.9 langsmith-0.0.83 layoutparser-0.3.4 llama-index-0.9.36 lxml-5.1.0 markdown-3.5.2 markdown-it-py-3.0.0 markdown2-2.4.12 markdownify-0.11.6 marshmallow-3.20.2 matplotlib-3.8.2 mdurl-0.1.2 metaphor-python-0.1.23 msg-parser-1.2.0 multidict-6.0.4 murmurhash-1.0.10 mypy-extensions-1.0.0 nest-asyncio-1.6.0 nh3-0.2.15 nltk-3.8.1 numexpr-2.8.8 numpy-1.24.4 olefile-0.47 omegaconf-2.3.0 onnx-1.15.0 onnxruntime-1.15.1 openai-1.7.2 opencv-python-4.9.0.80 openpyxl-3.1.2 packaging-23.2 pandas-2.0.3 pathlib-1.0.1 pdf2image-1.17.0 pdfminer.six-20221105 pdfplumber-0.10.3 pluggy-1.4.0 portalocker-2.8.2 preshed-3.0.9 prompt-toolkit-3.0.43 protobuf-4.25.2 psutil-5.9.8 pyarrow-15.0.0 pyclipper-1.3.0.post5 pycocotools-2.0.7 pycparser-2.21 pydantic-1.10.13 pydeck-0.8.1b0 pygments-2.17.2 pypandoc-1.12 pyparsing-3.1.1 pypdfium2-4.26.0 pyreadline3-3.4.1 pysrt-1.1.2 pytesseract-0.3.10 pytest-7.4.4 python-dateutil-2.8.2 python-decouple-3.8 python-docx-1.1.0 python-iso639-2024.1.2 python-magic-0.4.27 python-magic-bin-0.4.14 python-multipart-0.0.6 python-pptx-0.6.23 pytz-2023.3.post1 pywin32-306 pyyaml-6.0.1 rapidfuzz-3.6.1 rapidocr_onnxruntime-1.3.8 referencing-0.32.1 regex-2023.12.25 requests-2.31.0 rich-13.7.0 rpds-py-0.17.1 safetensors-0.4.2 scikit-learn-1.4.0 scipy-1.12.0 sentence_transformers-2.2.2 sentencepiece-0.1.99 sgmllib3k-1.0.0 shortuuid-1.0.11 simplejson-3.19.2 six-1.16.0 smart-open-6.4.0 smmap-5.0.1 sniffio-1.3.0 socksio-1.0.0 soupsieve-2.5 spacy-3.7.2 spacy-legacy-3.0.12 spacy-loggers-1.0.5 srsly-2.4.8 sse_starlette-1.8.2 starlette-0.32.0.post1 streamlit-1.29.0 streamlit-aggrid-0.3.4.post3 streamlit-chatbox-1.1.11 streamlit-feedback-0.1.3 streamlit-modal-0.1.0 streamlit-option-menu-0.3.12 strsimpy-0.2.1 svgwrite-1.4.3 tabulate-0.9.0 tenacity-8.2.3 thinc-8.2.2 threadpoolctl-3.2.0 tiktoken-0.5.2 timm-0.9.12 tokenizers-0.15.1 toml-0.10.2 tomli-2.0.1 toolz-0.12.1 tornado-6.4 tqdm-4.66.1 transformers-4.36.2 transformers_stream_generator-0.0.4 typer-0.9.0 typing-extensions-4.9.0 typing-inspect-0.9.0 tzdata-2023.4 tzlocal-5.2 unstructured-0.11.0 unstructured-inference-0.7.15 unstructured.pytesseract-0.3.12 uvicorn-0.27.0 validators-0.22.0 wasabi-1.1.2 watchdog-3.0.0 wavedrom-2.0.3.post3 wcwidth-0.2.13 weasel-0.3.4 websockets-12.0 wrapt-1.16.0 xformers-0.0.23.post1 xlrd-2.0.1 yarl-1.9.4 youtube-search-2.1.2 zhipuai-1.0.7 zipp-3.17.0
6、下载模型
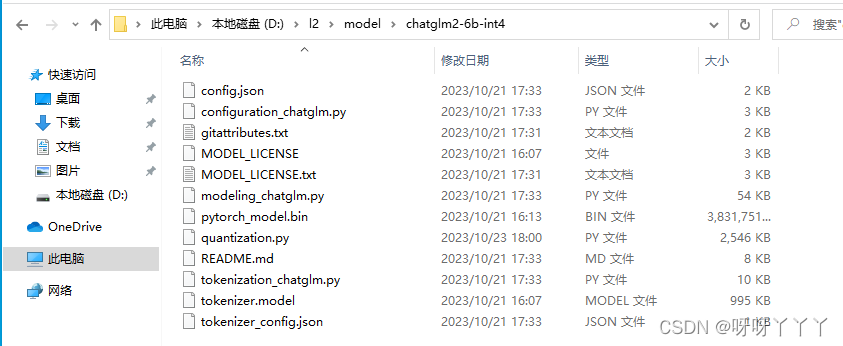
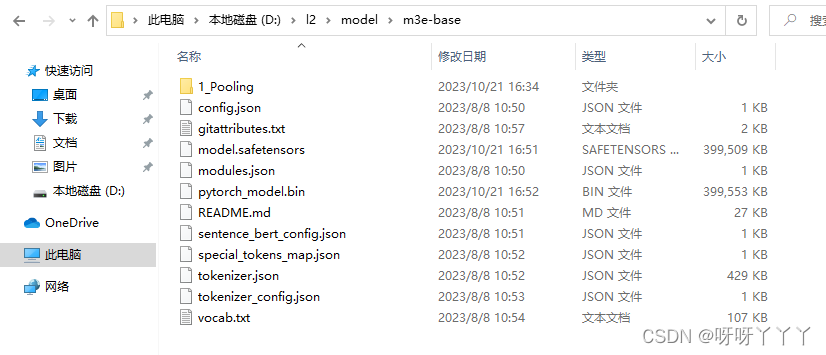
下载两个模型:M3e-base内置模型和chatglm2-6b-int4模型。
m3e-base:
https://huggingface.co/moka-ai/m3e-base
#备选
https://aistudio.baidu.com/datasetdetail/234251/0
chatglm2-6b-int4:
#配置文件
https://huggingface.co/THUDM/chatglm2-6b-int4
如果需要上 huggingface.co 获取模型可能需要科学上网工具。
进不去官网的话,可以到本文的参考文章(不是本文哦)的评论中获取作者保存在百度网盘的离线模型。
7、修改配置文件
批量修改配置文件名
批量复制configs目录下所有的配置文件,去掉example后缀:
# cd Langchain-Chatchat
# 批量复制configs目录下所有配置文件,去掉example
python copy_config_example.py
(l2) D:\l2\Langchain-Chatchat> python copy_config_example.py

(l2) D:\l2\Langchain-Chatchat>
修改model_config.py文件
修改m3e-base的模型本地路径(注意是双反斜杠"\\"):
MODEL_PATH = {
    "embed_model": {
        "ernie-tiny": "nghuyong/ernie-3.0-nano-zh",
        "ernie-base": "nghuyong/ernie-3.0-base-zh",
        "text2vec-base": "shibing624/text2vec-base-chinese",
        "text2vec": "GanymedeNil/text2vec-large-chinese",
        "text2vec-paraphrase": "shibing624/text2vec-base-chinese-paraphrase",
        "text2vec-sentence": "shibing624/text2vec-base-chinese-sentence",
        "text2vec-multilingual": "shibing624/text2vec-base-multilingual",
        "text2vec-bge-large-chinese": "shibing624/text2vec-bge-large-chinese",
        "m3e-small": "moka-ai/m3e-small",
       # "m3e-base": "moka-ai/m3e-base",
       # 修改为本地的 路径
        "m3e-base": "D:\\l2\\model\\m3e-base",
        "m3e-large": "moka-ai/m3e-large",
        "bge-small-zh": "BAAI/bge-small-zh",
        "bge-base-zh": "BAAI/bge-base-zh",
        "bge-large-zh": "BAAI/bge-large-zh",
        "bge-large-zh-noinstruct": "BAAI/bge-large-zh-noinstruct",
        "bge-base-zh-v1.5": "BAAI/bge-base-zh-v1.5",
        "bge-large-zh-v1.5": "BAAI/bge-large-zh-v1.5",
        "piccolo-base-zh": "sensenova/piccolo-base-zh",
        "piccolo-large-zh": "sensenova/piccolo-large-zh",
        "text-embedding-ada-002": "your OPENAI_API_KEY",
    },
修改chatglm2-6b-int4模型本地路径:
 "llm_model": {
        # 以下部分模型并未完全测试,仅根据fastchat和vllm模型的模型列表推定支持
        "chatglm2-6b": "THUDM/chatglm2-6b",
        "chatglm2-6b-32k": "THUDM/chatglm2-6b-32k",
        "chatglm2-6b-int4": "D:\\l2\\model\\chatglm2-6b-int4", #"THUDM/chatglm2-6b-int4",
修改LLM模型为chatglm2-6b-int4:
# 要运行的 LLM 名称,可以包括本地模型和在线模型。列表中本地模型将在启动项目时全部加载。
# 列表中第一个模型将作为 API 和 WEBUI 的默认模型。
# 在这里,我们使用目前主流的两个离线模型,其中,chatglm3-6b 为默认加载模型。
# 如果你的显存不足,可使用 Qwen-1_8B-Chat, 该模型 FP16 仅需 3.8G显存。

# chatglm3-6b输出角色标签<|user|>及自问自答的问题详见项目wiki->常见问题->Q20.
# LLM 名称 ,修改为chatglm2-6b-int4
LLM_MODELS = ["chatglm2-6b-int4", "zhipu-api", "openai-api"]  # "Qwen-1_8B-Chat",
修改LLM_DEVICE运行设备,看使用cpu、cuda(带GPU)或mps( mac本)
# 选用的 Embedding 名称
EMBEDDING_MODEL = "m3e-base" # 可以尝试最新的嵌入式sota模型:bge-large-zh-v1.5


# Embedding 模型运行设备。设为"auto"会自动检测,也可手动设定为"cuda","mps","cpu"其中之一。
EMBEDDING_DEVICE = "cpu"

# LLM 名称
LLM_MODELS = ["chatglm2-6b-int4", "zhipu-api", "openai-api"]

# LLM 运行设备。设为"auto"会自动检测,也可手动设定为"cuda","mps","cpu"其中之一。
LLM_DEVICE = "cpu"
修改server_config.py
0.2.6之前版本,需要修改0.0.0.0为127.0.0.1不然会报错
# 各服务器默认绑定host。如改为"0.0.0.0"需要修改下方所有XX_SERVER的host
DEFAULT_BIND_HOST = "127.0.0.1" if sys.platform != "win32" else "127.0.0.1"8、初始化数据库
python init_database.py --recreate-vs如果选的是 CPU 这时候 CPU 就开始跑起来了

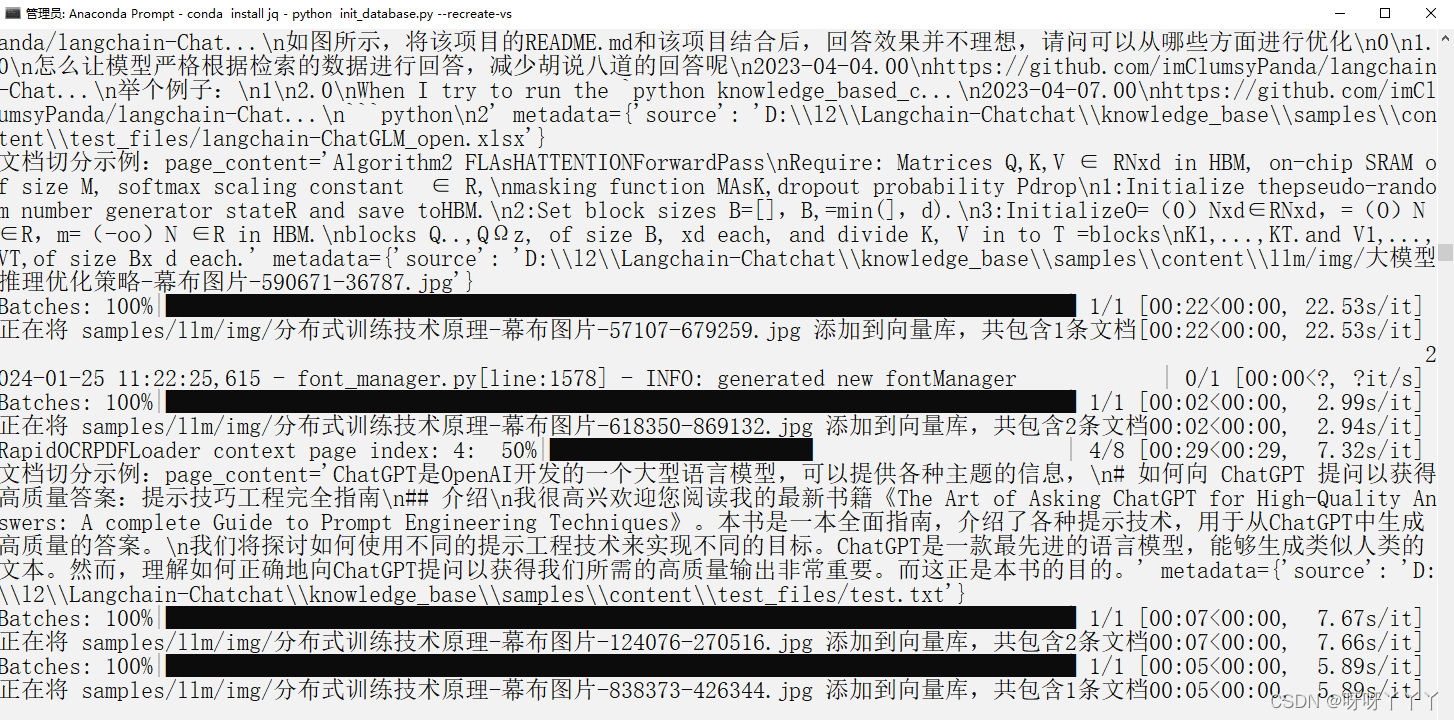
正在将 samples/llm/img/大模型推理优化策略-幕布图片-923924-83386.jpg 添加到向量库,共包含2条文档
Batches: 100%|███████████████████████████████████████████████████████████████████████████| 1/1 [00:00<00:00,  1.68it/s]
正在将 samples/llm/img/大模型推理优化策略-幕布图片-930255-616209.jpg 添加到向量库,共包含3条文档
Batches: 100%|███████████████████████████████████████████████████████████████████████████| 1/1 [00:00<00:00,  2.56it/s]
正在将 samples/test_files/langchain-ChatGLM_closed.xlsx 添加到向量库,共包含86条文档
Batches: 100%|███████████████████████████████████████████████████████████████████████████| 3/3 [00:29<00:00,  9.80s/it]
正在将 samples/test_files/langchain-ChatGLM_open.xlsx 添加到向量库,共包含126条文档
Batches: 100%|███████████████████████████████████████████████████████████████████████████| 4/4 [00:43<00:00, 10.79s/it]
正在将 samples/llm/img/大模型推理优化策略-幕布图片-590671-36787.jpg 添加到向量库,共包含4条文档
Batches: 100%|███████████████████████████████████████████████████████████████████████████| 1/1 [00:01<00:00,  1.69s/it]
正在将 samples/test_files/test.txt 添加到向量库,共包含59条文档
Batches: 100%|███████████████████████████████████████████████████████████████████████████| 2/2 [00:29<00:00, 14.87s/it]
正在将 samples/test_files/langchain.pdf 添加到向量库,共包含52条文档
Batches: 100%|███████████████████████████████████████████████████████████████████████████| 2/2 [00:18<00:00,  9.05s/it]
2024-01-25 11:26:41,131 - faiss_cache.py[line:38] - INFO: 已将向量库 ('samples', 'm3e-base') 保存到磁盘
总计用时: 0:08:19.604070
9、一键启动项目
运行:
python startup.py -a(l2) D:\l2\Langchain-Chatchat>python startup.py -a
==============================Langchain-Chatchat Configuration==============================
操作系统:Windows-10-10.0.19045-SP0.
python版本:3.10.12 | packaged by Anaconda, Inc. | (main, Jul 5 2023, 19:01:18) [MSC v.1916 64 bit (AMD64)]
项目版本:v0.2.9
langchain版本:0.0.354. fastchat版本:0.2.34
当前使用的分词器:ChineseRecursiveTextSplitter
当前启动的LLM模型:['chatglm2-6b-int4', 'zhipu-api', 'openai-api'] @ cpu
{'device': 'cpu',
'host': '127.0.0.1',
'infer_turbo': False,
'model_path': 'D:\\l2\\model\\chatglm2-6b-int4',
'model_path_exists': True,
'port': 20002}
{'api_key': '',
'device': 'cpu',
'host': '127.0.0.1',
'infer_turbo': False,
'online_api': True,
'port': 21001,
'provider': 'ChatGLMWorker',
'version': 'chatglm_turbo',
'worker_class': <class 'server.model_workers.zhipu.ChatGLMWorker'>}
{'api_base_url': 'https://api.openai.com/v1',
'api_key': '',
'device': 'cpu',
'host': '127.0.0.1',
'infer_turbo': False,
'model_name': 'gpt-3.5-turbo',
'online_api': True,
'openai_proxy': '',
'port': 20002}
当前Embbedings模型: m3e-base @ cpu
==============================Langchain-Chatchat Configuration==============================
2024-01-25 11:41:36,147 - startup.py[line:651] - INFO: 正在启动服务:
2024-01-25 11:41:36,147 - startup.py[line:652] - INFO: 如需查看 llm_api 日志,请前往 D:\l2\Langchain-Chatchat\logs
2024-01-25 11:41:48 | INFO | model_worker | Register to controller
2024-01-25 11:41:48 | ERROR | stderr | INFO: Started server process [2312]
2024-01-25 11:41:48 | ERROR | stderr | INFO: Waiting for application startup.
2024-01-25 11:41:48 | ERROR | stderr | INFO: Application startup complete.
2024-01-25 11:41:48 | ERROR | stderr | INFO: Uvicorn running on http://127.0.0.1:20000 (Press CTRL+C to quit)
2024-01-25 11:41:50 | INFO | model_worker | Loading the model ['chatglm2-6b-int4'] on worker 11740a91 ...执行到这里进程就在这个位置不动了,当使用 CTRL+C 强制结束之后是这样的:
==============================Langchain-Chatchat Configuration==============================


2024-01-25 21:25:09,762 - startup.py[line:651] - INFO: 正在启动服务:
2024-01-25 21:25:09,762 - startup.py[line:652] - INFO: 如需查看 llm_api 日志,请前往 D:\l2\Langchain-Chatchat\logs
2024-01-25 21:25:21 | INFO | model_worker | Register to controller
2024-01-25 21:25:22 | ERROR | stderr | INFO:     Started server process [7728]
2024-01-25 21:25:22 | ERROR | stderr | INFO:     Waiting for application startup.
2024-01-25 21:25:22 | ERROR | stderr | INFO:     Application startup complete.
2024-01-25 21:25:22 | ERROR | stderr | INFO:     Uvicorn running on http://127.0.0.1:20000 (Press CTRL+C to quit)
2024-01-25 21:25:25 | INFO | model_worker | Loading the model ['chatglm2-6b-int4'] on worker b5f18e81 ...
2024-01-25 21:47:02,545 - startup.py[line:856] - WARNING: Sending SIGKILL to {'zhipu-api': <Process name='api_worker - zhipu-api (5488)' pid=5488 parent=1720 started daemon>}
2024-01-25 21:47:02,576 - startup.py[line:856] - WARNING: Sending SIGKILL to {'chatglm2-6b-int4': <Process name='model_worker - chatglm2-6b-int4 (7116)' pid=7116 parent=1720 stopped exitcode=3221225477 daemon>}
2024-01-25 21:47:02 | ERROR | stderr | INFO:     Shutting down
2024-01-25 21:47:02,576 - startup.py[line:856] - WARNING: Sending SIGKILL to <Process name='controller (5596)' pid=5596 parent=1720 started daemon>
2024-01-25 21:47:02,701 - startup.py[line:856] - WARNING: Sending SIGKILL to <Process name='openai_api (7728)' pid=7728 parent=1720 started daemon>
2024-01-25 21:47:02,701 - startup.py[line:856] - WARNING: Sending SIGKILL to <Process name='API Server' parent=1720 initial daemon>
Traceback (most recent call last):
  File "D:\l2\Langchain-Chatchat\startup.py", line 764, in start_main_server
    e.wait()
  File "D:\Anaconda\anaconda\envs\l2\lib\multiprocessing\managers.py", line 1093, in wait
    return self._callmethod('wait', (timeout,))
  File "D:\Anaconda\anaconda\envs\l2\lib\multiprocessing\managers.py", line 818, in _callmethod
    kind, result = conn.recv()
  File "D:\Anaconda\anaconda\envs\l2\lib\multiprocessing\connection.py", line 250, in recv
    buf = self._recv_bytes()
  File "D:\Anaconda\anaconda\envs\l2\lib\multiprocessing\connection.py", line 305, in _recv_bytes
    waitres = _winapi.WaitForMultipleObjects(
  File "D:\l2\Langchain-Chatchat\startup.py", line 609, in f
    raise KeyboardInterrupt(f"{signalname} received")
KeyboardInterrupt: SIGINT received

During handling of the above exception, another exception occurred:

Traceback (most recent call last):
  File "D:\l2\Langchain-Chatchat\startup.py", line 883, in <module>
    loop.run_until_complete(start_main_server())
  File "D:\Anaconda\anaconda\envs\l2\lib\asyncio\base_events.py", line 649, in run_until_complete
    return future.result()
  File "D:\l2\Langchain-Chatchat\startup.py", line 864, in start_main_server
    p.kill()
  File "D:\Anaconda\anaconda\envs\l2\lib\multiprocessing\process.py", line 140, in kill
    self._popen.kill()
AttributeError: 'NoneType' object has no attribute 'kill'
后续找不到解决的办法,就换到了另一台配置更好的服务器上运行,能够成功运行。

旨在为数千万中国开发者提供一个无缝且高效的云端环境,以支持学习、使用和贡献开源项目。
更多推荐


 29
29 0
0- 0


 已为社区贡献1条内容

所有评论(0)