Sentinel1.8.6 Gateway网关流控+动态Nacos数据源双向持久化
大家也知道,SpringCloud架构的微服务项目—可以说网关是必不可少的,其中SpringCloud gateway最受欢迎,无缝集成,所有请求都会先进入Gateway,由Gateway进行路由转发。你想想,sentinel默认配置的流控规则都是存储在dashboard服务内存中的,项目一重启,那么你之前配置的流控规则都没了!注意,重点就是在Publisher(Nacos发布者)和Provide
最近在研究微服务限流功能,脑子第一想法就是用阿里的组件—sentinel,先不管线上访问量大不大,主要我就想用阿里的组件框架,哈哈!!!
好了闲话我们不说,直接进入正题。
大家也知道,SpringCloud架构的微服务项目—可以说网关是必不可少的,其中SpringCloud gateway最受欢迎,无缝集成,所有请求都会先进入Gateway,由Gateway进行路由转发。所以我们的目标,就是在Gateway进行流控。
为什么要流控规则持久化?
你想想,sentinel默认配置的流控规则都是存储在dashboard服务内存中的,项目一重启,那么你之前配置的流控规则都没了!!!这里主要讲解Nacos双向持久化,既可以读,又可以写。sentinel还支持Apollo、Zookeeper。
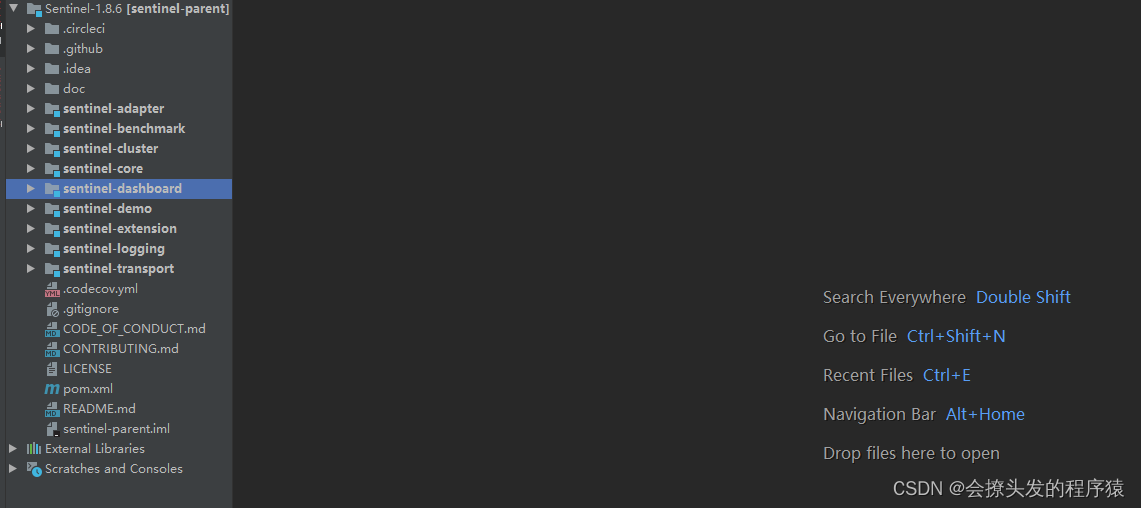
1、先把源码下载下来再说:
地址:https://github.com/alibaba/Sentinel/releases
这边下载是1.8.6版本。

2、动态数据源是需要修改源码的:
① 修改pom.xml文件依赖,注释scope。

② 修改代码,复制代码到main文件夹下com.alibaba.csp.sentinel.dashboard.rule


注意,重点就是在Publisher(Nacos发布者)和Provider(Nacos发布者)这两个类,需要重写,Sentinel是支持网关流控控台的,所以我们需要重写。
新建gateway文件夹:

注意,网关流控是有限制的,可以看看官网:
从 1.6.0 版本开始,Sentinel 提供了 Spring Cloud Gateway 的适配模块,可以提供两种资源维度的限流:
- route 维度:即在 Spring 配置文件中配置的路由条目,资源名为对应的 routeId
- 自定义 API 维度:用户可以利用 Sentinel 提供的 API 来自定义一些 API 分组
③实现DynamicRulePublisher和DynamicRuleProvider接口’
GatewayApiNacosProvider:
@Component("gatewayApiNacosProvider")
public class GatewayApiNacosProvider implements DynamicRuleProvider<List<ApiDefinitionEntity>> {

    @Autowired
    private ConfigService configService;
    @Autowired
    private Converter<String, List<ApiDefinitionEntity>> converter;

    @Override
    public List<ApiDefinitionEntity> getRules(String appName) throws Exception {
        String rules = configService.getConfig(appName+ NacosConfigUtil.GATEWAY_API_DATA_ID_POSTFIX, NacosConfigUtil.GROUP_ID, 3000);
        if (StringUtil.isEmpty(rules)) {
            return new ArrayList<>();
        }
        return converter.convert(rules);
    }
}
GatewayApiNacosPublisher:
@Component("gatewayApiNacosPublisher")
public class GatewayApiNacosPublisher implements DynamicRulePublisher<List<ApiDefinitionEntity>> {

    @Autowired
    private ConfigService configService;
    @Autowired
    private Converter<List<ApiDefinitionEntity>, String> converter;

    @Override
    public void publish(String app, List<ApiDefinitionEntity> rules) throws Exception {
        AssertUtil.notEmpty(app, "app name cannot be empty");
        if (rules == null) {
            return;
        }
        configService.publishConfig(app+ NacosConfigUtil.GATEWAY_API_DATA_ID_POSTFIX,
                NacosConfigUtil.GROUP_ID,converter.convert(rules));
    }
}
GatewayFlowRuleNacosProvider:
@Component("gatewayFlowRuleNacosProvider")
public class GatewayFlowRuleNacosProvider implements DynamicRuleProvider<List<GatewayFlowRuleEntity>> {

    @Autowired
    private ConfigService configService;
    /**
     *规则对象的转换器,获取到的数据根据使用的数据类型的不同,需要用不同的转换器转化后使用
     */
    @Autowired
    private Converter<String, List<GatewayFlowRuleEntity>> converter;

    @Override
    public List<GatewayFlowRuleEntity> getRules(String appName) throws Exception {
        String rules = configService.getConfig(appName + NacosConfigUtil.GATEWAY_FLOW_DATA_ID_POSTFIX,
                NacosConfigUtil.GROUP_ID, 3000);
        if (StringUtil.isEmpty(rules)) {
            return new ArrayList<>();
        }
        return converter.convert(rules);
    }
}
GatewayFlowRuleNacosPublisher:
@Component("gatewayFlowRuleNacosPublisher")
public class GatewayFlowRuleNacosPublisher implements DynamicRulePublisher<List<GatewayFlowRuleEntity>> {

    @Autowired
    private ConfigService configService;
    /**
     * 数据通信的转换器。
     * 在config包下的NacosConfig类中声明的Spring Bean对象。
     * 负责将实体对象转换为json格式的字符串
     */
    @Autowired
    private Converter<List<GatewayFlowRuleEntity>, String> converter;

    @Override
    public void publish(String app, List<GatewayFlowRuleEntity> rules) throws Exception {
        AssertUtil.notEmpty(app, "app name cannot be empty");
        if (rules == null) {
            return;
        }
        /**
         *  将规则发布到动态数据源作持久化,第一个参数是app+后缀(nacos的文件名称),app就是服务的名称,后缀可自行命名;
         *  第二个参数是nacos分组id,这个用默认提供的sentinel预留项即可;最后一个参数是数据转换
         *  器,要将对象转换成统一的格式后,网络传输到nacos。
         */
        configService.publishConfig(app + NacosConfigUtil.GATEWAY_FLOW_DATA_ID_POSTFIX,
                NacosConfigUtil.GROUP_ID, converter.convert(rules));
    }
}
可能很多同学不知道为什么要实现这两个接口,我们可以看源码注释
public interface DynamicRulePublisher<T> {

    /**
     * Publish rules to remote rule configuration center for given application name.
     * 意思就是说:将给定应用程序名称的规则发布到远程规则配置中心,也就是把你的规则写入到数据源
     *
     * @param app app name
     * @param rules list of rules to push
     * @throws Exception if some error occurs
     */
    void publish(String app, T rules) throws Exception;
}
public interface DynamicRuleProvider<T> {
	/**
	* 没有注释,但是点击实现那你就会知道,用来读取数据源配置的
	*/
    T getRules(String appName) throws Exception;
}
我们看到,接口是实现了,数据源的配置呢?同学们也看到了注入了一个ConfigService,进入com.alibaba.csp.sentinel.dashboard.rule.nacos目录下,有一个类:NacosConfig配置类,这里就是用来配置Nacos数据源的。还有一个NacosConfigUtil放常量类的。
④请看配置:
@Configuration
public class NacosConfig {
	//这里我是写了一个类读取nacos配置的
    @Resource
    private NacosConfigProperties nacosConfigProperties;
	//普通服务限流
    @Bean
    public Converter<List<FlowRuleEntity>, String> flowRuleEntityEncoder() {
        return JSON::toJSONString;
    }
	//普通服务限流
    @Bean
    public Converter<String, List<FlowRuleEntity>> flowRuleEntityDecoder() {
        return s -> JSON.parseArray(s, FlowRuleEntity.class);
    }

    @Bean
    public ConfigService nacosConfigService() throws Exception {
        //return ConfigFactory.createConfigService("localhost");  注释这行代码,读取你所配置nacos参数
        Properties properties = new Properties();
        properties.put(PropertyKeyConst.SERVER_ADDR,nacosConfigProperties.getServerAddr());
        properties.put(PropertyKeyConst.USERNAME,nacosConfigProperties.getUsername());
        properties.put(PropertyKeyConst.PASSWORD,nacosConfigProperties.getPassword());
        properties.put(PropertyKeyConst.NAMESPACE,nacosConfigProperties.getNamespace());
        return ConfigFactory.createConfigService(properties);
    }

    /**  需要初始化网关流控规则数据源  **/
    @Bean
    public Converter<List<GatewayFlowRuleEntity>, String> gatewayFlowRuleEntityEncoder() {
        return JSON::toJSONString;
    }

    @Bean
    public Converter<String, List<GatewayFlowRuleEntity>> gatewayFlowRuleEntityDecoder() {
        return s -> JSON.parseArray(s, GatewayFlowRuleEntity.class);
    }

    @Bean
    public Converter<List<ApiDefinitionEntity>, String> gatewayApiEntityEncoder() {
        return JSON::toJSONString;
    }

    @Bean
    public Converter<String, List<ApiDefinitionEntity>> gatewayApiEntityDecoder() {
        return s -> JSON.parseArray(s, ApiDefinitionEntity.class);
    }
}
贴出NacosConfigProperties类代码
@Configuration
@ConfigurationProperties(prefix = "sentinel.nacos")
public class NacosConfigProperties {
    //nacos服务地址
    @Value("${sentinel.nacos.serverAddr}")
    private String serverAddr;
    //nacos登录名
    @Value("${sentinel.nacos.username}")
    private String username;
    //nacos登录密码
    @Value("${sentinel.nacos.password}")
    private String password;
    //nacos命名空间
    @Value("${sentinel.nacos.namespace}")
    private String namespace;
}
对应配置:resources文件下的properties文件
#Nacos数据源配置
sentinel.nacos.serverAddr=xxx
sentinel.nacos.username=xxx
sentinel.nacos.password=xxx
sentinel.nacos.namespace=xxx
3、ok,Nacos数据源配置改造已经完成,接下来就是修改Controller代码,
进入com.alibaba.csp.sentinel.dashboard.controller.gateway目录:

GatewayApiController类
注入对象:
@RestController
@RequestMapping(value = "/gateway/api")
public class GatewayApiController {

    private final Logger logger = LoggerFactory.getLogger(GatewayApiController.class);

    @Autowired
    private InMemApiDefinitionStore repository;
	//实现的DynamicRuleProvider类
    @Autowired
    @Qualifier("gatewayApiNacosProvider")
    private DynamicRuleProvider<List<ApiDefinitionEntity>> apiProvider;
    //实现的DynamicRulePublisher类
    @Autowired
    @Qualifier("gatewayApiNacosPublisher")
    private DynamicRulePublisher<List<ApiDefinitionEntity>> apiPublisher;
}
改造代码:publishApis方法,由pushlisher推送至配置中心
    private void publishApis(String app, String ip, Integer port) throws Exception {
        List<ApiDefinitionEntity> apis = repository.findAllByMachine(MachineInfo.of(app, ip, port));
        apiPublisher.publish(app, apis);
    }
注意,调用这个方法的,需要进行修改下:
		//注释原先代码,修改、删除、添加
        //if (!publishApis(oldEntity.getApp(), oldEntity.getIp(), oldEntity.getPort())) {
        //    logger.warn("publish gateway apis fail after delete");
        //}

        try {
            publishApis(oldEntity.getApp(), oldEntity.getIp(), oldEntity.getPort());
        } catch (Exception e) {
            e.printStackTrace();
            logger.warn("publish gateway apis fail after delete");
        }

		//查询代码修改,@GetMapping("/list.json")
		try {
			//使用Provider实现类获取规则配置
            List<ApiDefinitionEntity> apis = apiProvider.getRules(app);
            repository.saveAll(apis);
            return Result.ofSuccess(apis);
        } catch (Throwable throwable) {
            logger.error("queryApis error:", throwable);
            return Result.ofThrowable(-1, throwable);
        }
至此,Sentinel控制台改造完成。
Gateway集成Sentinel:
引入依赖:
		<!--sentinel-->
        <dependency>
            <groupId>com.alibaba.cloud</groupId>
            <artifactId>spring-cloud-starter-alibaba-sentinel</artifactId>
            <version>2.2.3.RELEASE</version>
        </dependency>
        <!-- https://mvnrepository.com/artifact/com.alibaba.cloud/spring-cloud-alibaba-sentinel-gateway entinel gateway依赖包-->
        <dependency>
            <groupId>com.alibaba.cloud</groupId>
            <artifactId>spring-cloud-alibaba-sentinel-gateway</artifactId>
            <version>2.2.3.RELEASE</version>
        </dependency>
        <!-- https://mvnrepository.com/artifact/org.springframework.cloud/spring-cloud-starter-gateway sentilen用 nacos做持久化-->
        <dependency>
            <groupId>com.alibaba.csp</groupId>
            <artifactId>sentinel-datasource-nacos</artifactId>
            <version>1.8.2</version>
        </dependency>
        <!--sentinel end-->
创建GatewayConfiguration配置类,这里我们不自定义默认API分组规则配置,我们直接与Nacos交互。
@Configuration
public class GatewayConfiguration {

    private final List<ViewResolver> viewResolvers;
    private final ServerCodecConfigurer serverCodecConfigurer;

    public GatewayConfiguration(ObjectProvider<List<ViewResolver>> viewResolversProvider,
                                ServerCodecConfigurer serverCodecConfigurer) {
        this.viewResolvers = viewResolversProvider.getIfAvailable(Collections::emptyList);
        this.serverCodecConfigurer = serverCodecConfigurer;
    }

    @Bean
    @Order(Ordered.HIGHEST_PRECEDENCE)
    public SentinelGatewayBlockExceptionHandler sentinelGatewayBlockExceptionHandler() {
        // Register the block exception handler for Spring Cloud Gateway.
        return new SentinelGatewayBlockExceptionHandler(viewResolvers, serverCodecConfigurer);
    }

    @Bean
    @Order(Ordered.HIGHEST_PRECEDENCE)
    public GlobalFilter sentinelGatewayFilter() {
        return new SentinelGatewayFilter();
    }
}
修改yaml文件,在spring.cloud下配置
	sentinel:
      # 支持链路限流
      web-context-unify: false
      ## 关闭官方默认收敛所有context
      filter:
        enabled: true
      # 取消控制台懒加载
      eager: true
      scg: #配置限流之后,响应内容
        fallback:
          mode: response
          response-status: 200
          response-body: "{\"resultCode\": 5005,\"description\": \"The system is currently experiencing network congestion. Please try again later!\"}"  #限流响应内容
          content-type: "application/json"
      #控制台地址
      transport:
        dashboard: ip:port  #控制台路径
      datasource:
        # 名称随意
        gw-flow:
          nacos:
            server-addr: ${spring.cloud.nacos.config.server-addr}  #nacos地址
            dataId: ${spring.application.name}-gw-flow # 在修改的sentinel 源码中定义的规则名
            namespace: xxxxx   #nacos 命名空间
            groupId: SENTINEL
            rule-type: gw-flow  #枚举类型
        gw-api-group:
          nacos:
            server-addr: ${spring.cloud.nacos.config.server-addr} #nacos地址
            dataId: ${spring.application.name}-gw-api # 在修改的sentinel 源码中定义的规则名
            namespace: xxxxx  #nacos 命名空间
            groupId: SENTINEL
            rule-type: gw-api-group #枚举类型
dataId:就是文件名,后缀就是在控制台实现数据源的后缀名,一一对应即可
rule-typey一定要使用网关type,否则不生效

至此,网关Gateway改造已经完毕,接下来进行测试:
启动控制台:

自定义分组:

点击新增我们看nacos是什么样的:

查看 GATEWAY-gw-api文件:

直接定义流控规则,我们看效果:

具体操作我就不说了,控制台起来,自己摸索一番就行了,也非常好理解~
我还是会撩头发的程序猿~
更多推荐
 已为社区贡献1条内容


所有评论(0)