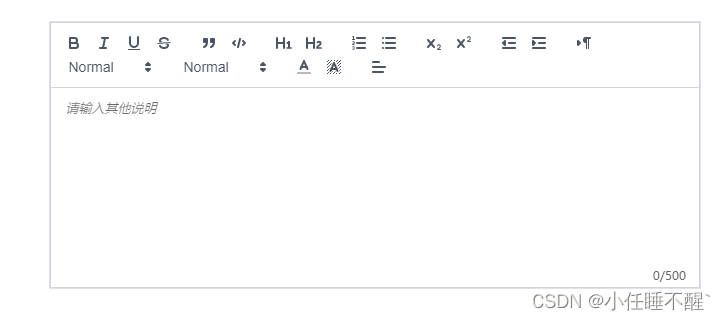
vue3使用vueup/vue-quill富文本、并限制输入字数
v-model:content(一定加content)3、填写下一个富文本上一个未清空时:myQuillEditor.value.setHTML('')强制清空一下4、编辑进入的时候:强制设置一下内容;并且延迟设置一下字数。
·
vue3中使用富文本实在是踩了太多坑了,大概记录一下笨方法处理,有好的方法多交流
目录
文档地址:Events | VueQuill
一、效果展示

二、npm
npm install @vueup/vue-quill@alpha --save三、main.js引入
import { QuillEditor } from '@vueup/vue-quill'
import '@vueup/vue-quill/dist/vue-quill.snow.css';
app.component('QuillEditor',QuillEditor)
四、页面使用
<quill-editor
 v-model:content="htmlValue"
 ref="myQuillEditor"
 contentType="html"
 :options="editorOption"
 @update:content="onEditorChange($event)">
</quill-editor>
<div class="editor_length">{{ TiLength }}/500</div>
const htmlValue=ref("")
const TiLength =ref(0)
const myQuillEditor=ref(null)
const editorOption=reactive({
theme: "snow", // 主题
// debug: 'info',
placeholder: "请输入其他说明",
modules: {
toolbar: {
container: [
["bold", "italic", "underline", "strike"],
["blockquote", "code-block"],
[{ header: 1 }, { header: 2 }],
[{ list: "ordered" }, { list: "bullet" }],
[{ script: "sub" }, { script: "super" }],
[{ indent: "-1" }, { indent: "+1" }],
[{ direction: "rtl" }],
[{ size: ["small", false, "large", "huge"] }],
[{ header: [1, 2, 3, 4, 5, 6, false] }],
[{ color: [] }, { background: [] }],
// [{ font: [] }],
[{ align: [] }]
// ["clean", "link", "image"]
// ['addBtn']
] // 自定义工具栏选项
}
}
})
const onEditorChange=(e)=>{
// console.log(myQuillEditor.value.getText().length);
// console.log(TiLength.value);
TiLength.value =myQuillEditor.value.getText().length-1
if(TiLength.value>500){
myQuillEditor.value.setText(myQuillEditor.value.getText().slice(0,500))
return
}
}
return{
htmlValue,editorOption,onEditorChange,TiLength,myQuillEditor }五、总结问题(简单记录一下笨方法处理的)
1、双向绑定:v-model:content(一定加content)
2、change事件:@update:content
3、填写下一个富文本上一个未清空时: myQuillEditor.value.setHTML('')强制清空一下
4、编辑进入的时候:强制设置一下内容;并且延迟设置一下字数
nextTick(()=>{TiLength.value =myQuillEditor.value.getText().length-1 })
更多推荐
 已为社区贡献3条内容


所有评论(0)