新建vue项目如何配置路由实现后台管理系统框架(登录窗、主界面、子界面)
要实现一个后台管理系统,大体会涉及到两种类型的页面,一种是独立页面,一种是嵌套页面,独立页面:以登录页面为例,这种页面是独立的,没有区域嵌套,嵌套页面:以首页,用户管理页面为例,像左侧边栏,顶部的欢迎栏是固定的,里面的内容来自子页面,所以独立页面要与嵌套的主界面要是同一级,被嵌套的子页面放到嵌套主界面面的子级,在路由配置上要使用子路由。
要实现一个后台管理系统,大体会涉及到两种类型的页面,一种是独立页面,一种是嵌套页面
独立页面:以登录页面为例,这种页面是独立的,没有区域嵌套
嵌套页面:以首页,用户管理页面为例,像左侧边栏,顶部的欢迎栏是固定的,里面的内容来自子页面
所以独立页面要与嵌套的主界面要是同一级,被嵌套的子页面放到嵌套主界面面的子级,在路由配置上要使用子路由。
配置如下:
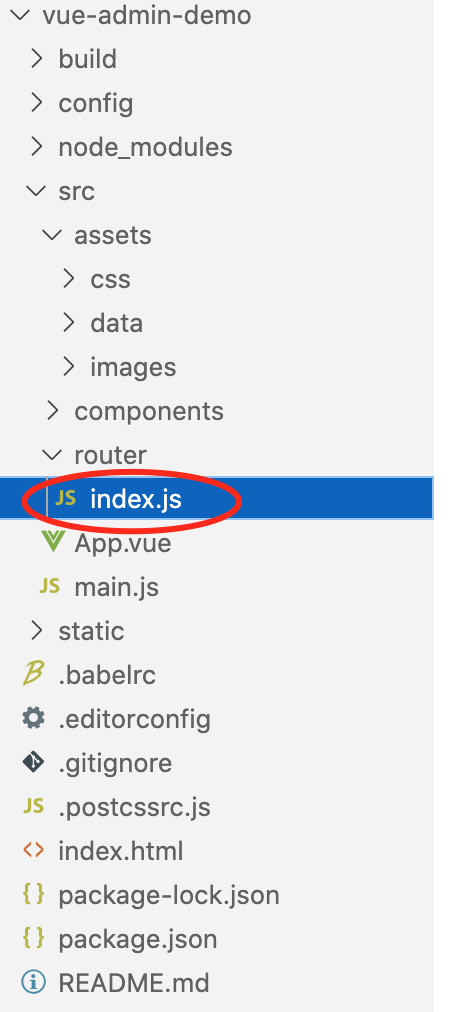
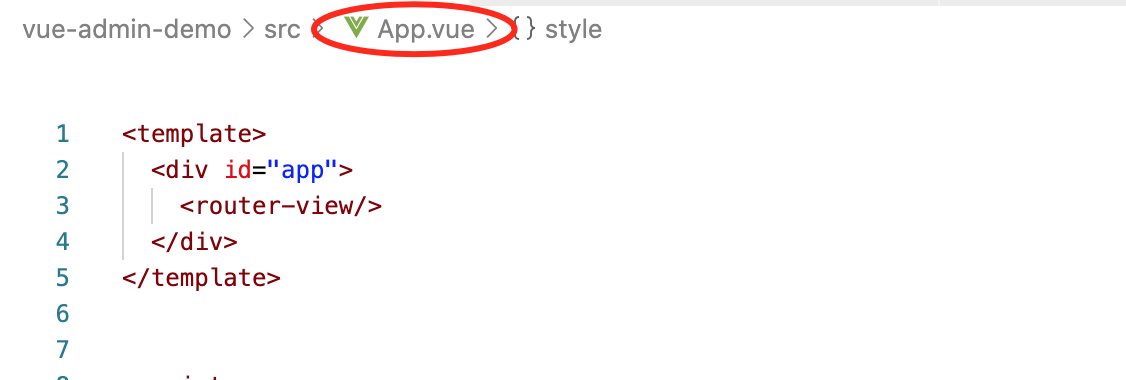
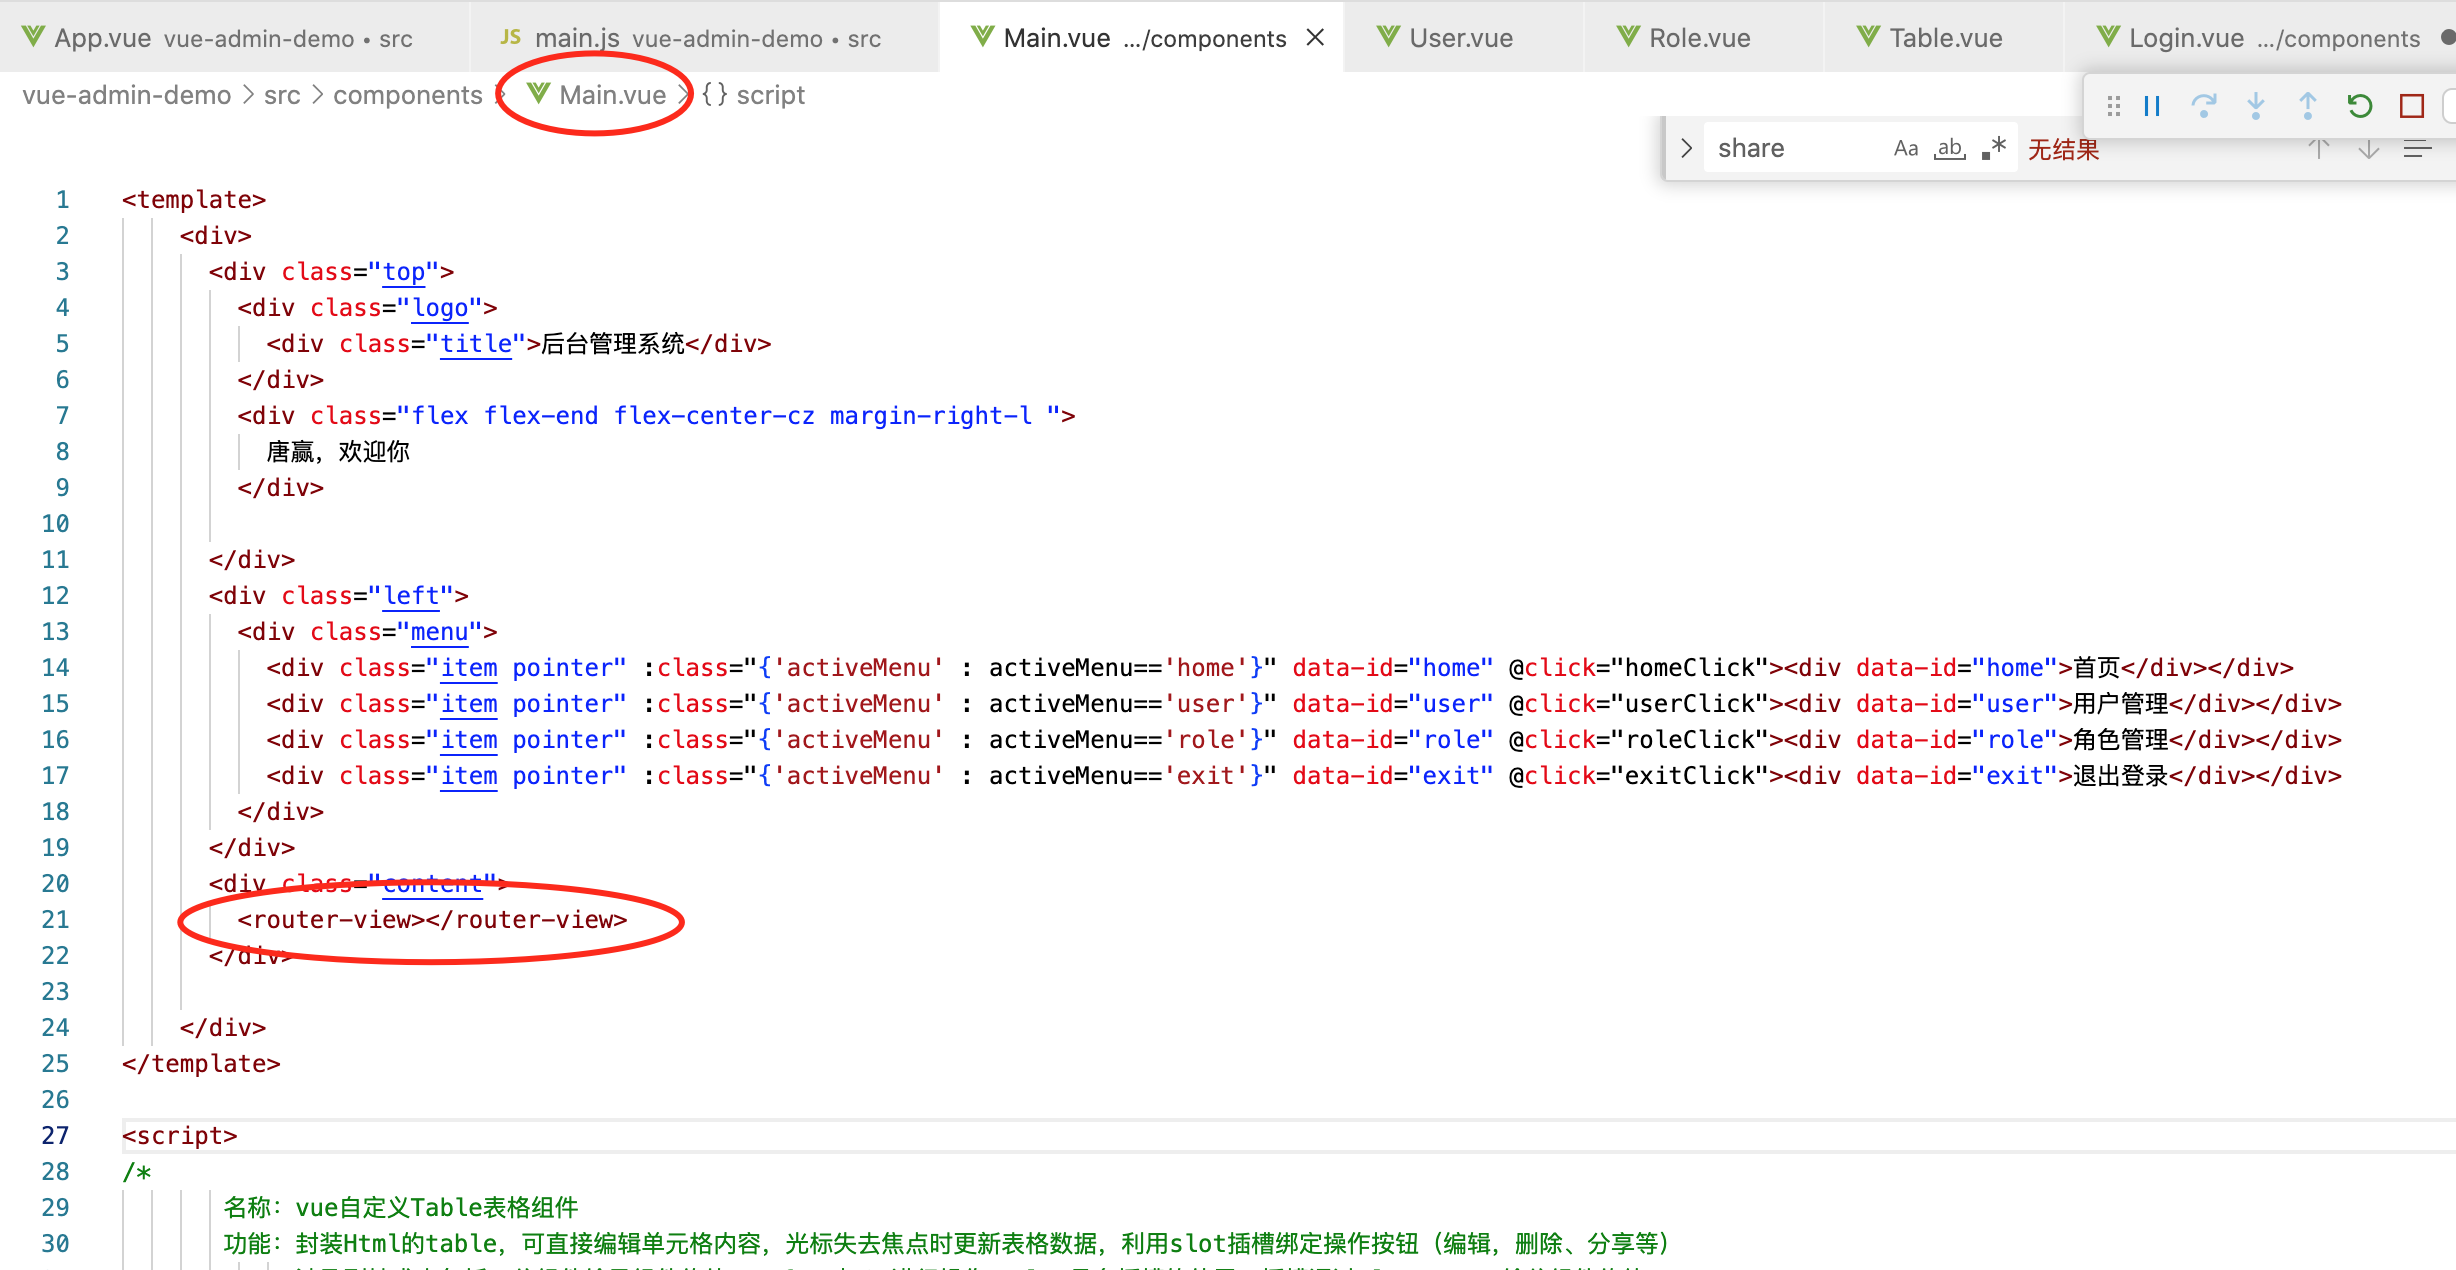
App.vue 只放一个<router-view>,这个router-view用于跳转登录页(Login.vue)和主界面(Main.vue)这两个一级路由
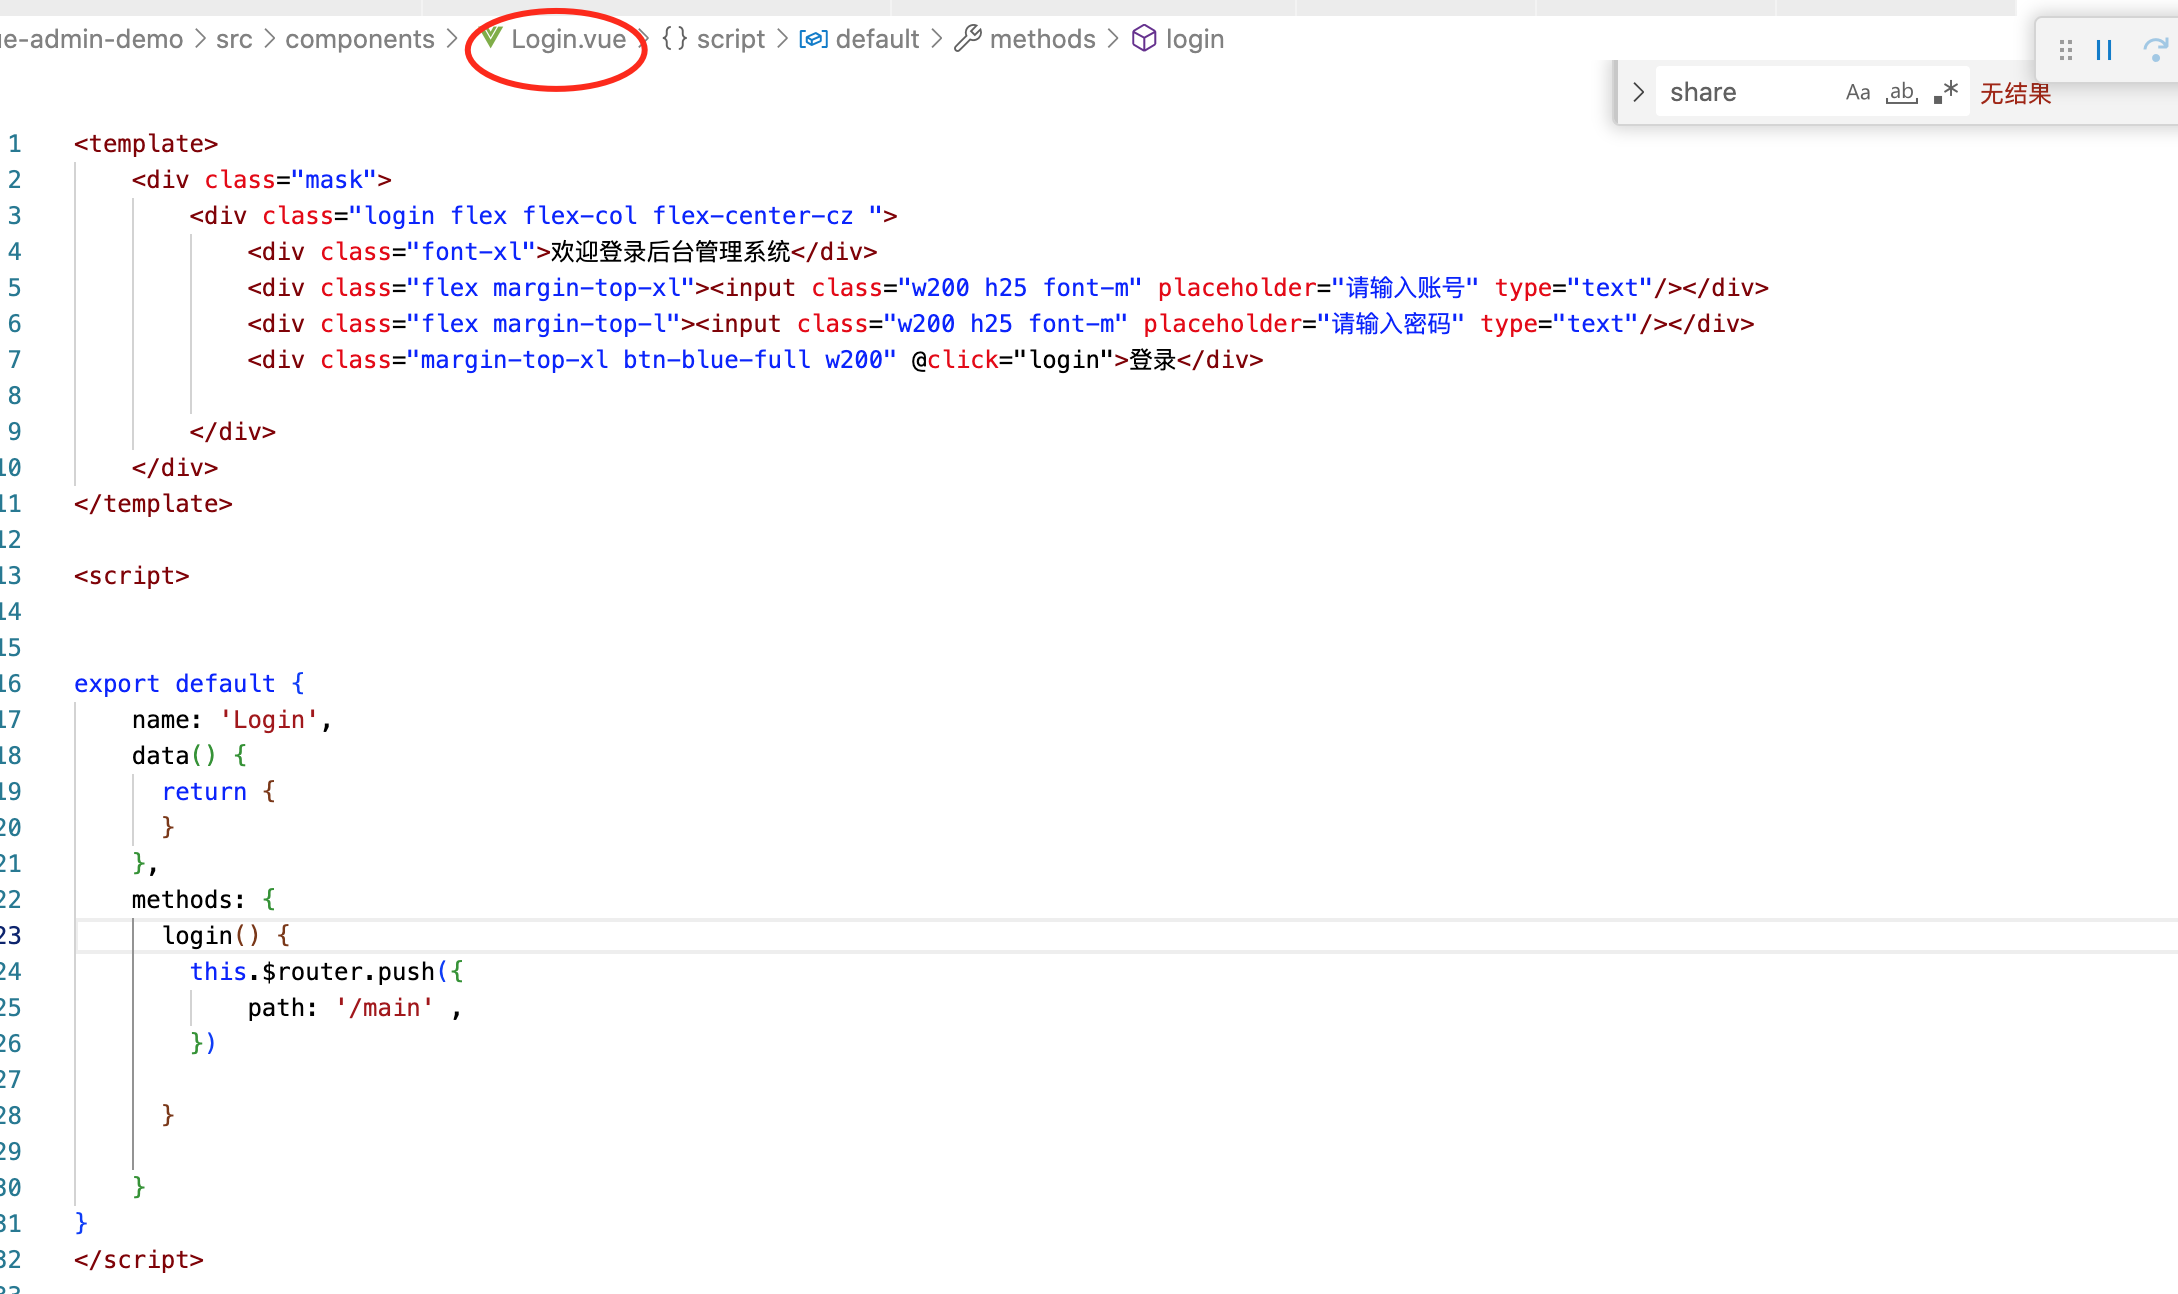
登录页面,为独立页面,不设置<router-view>
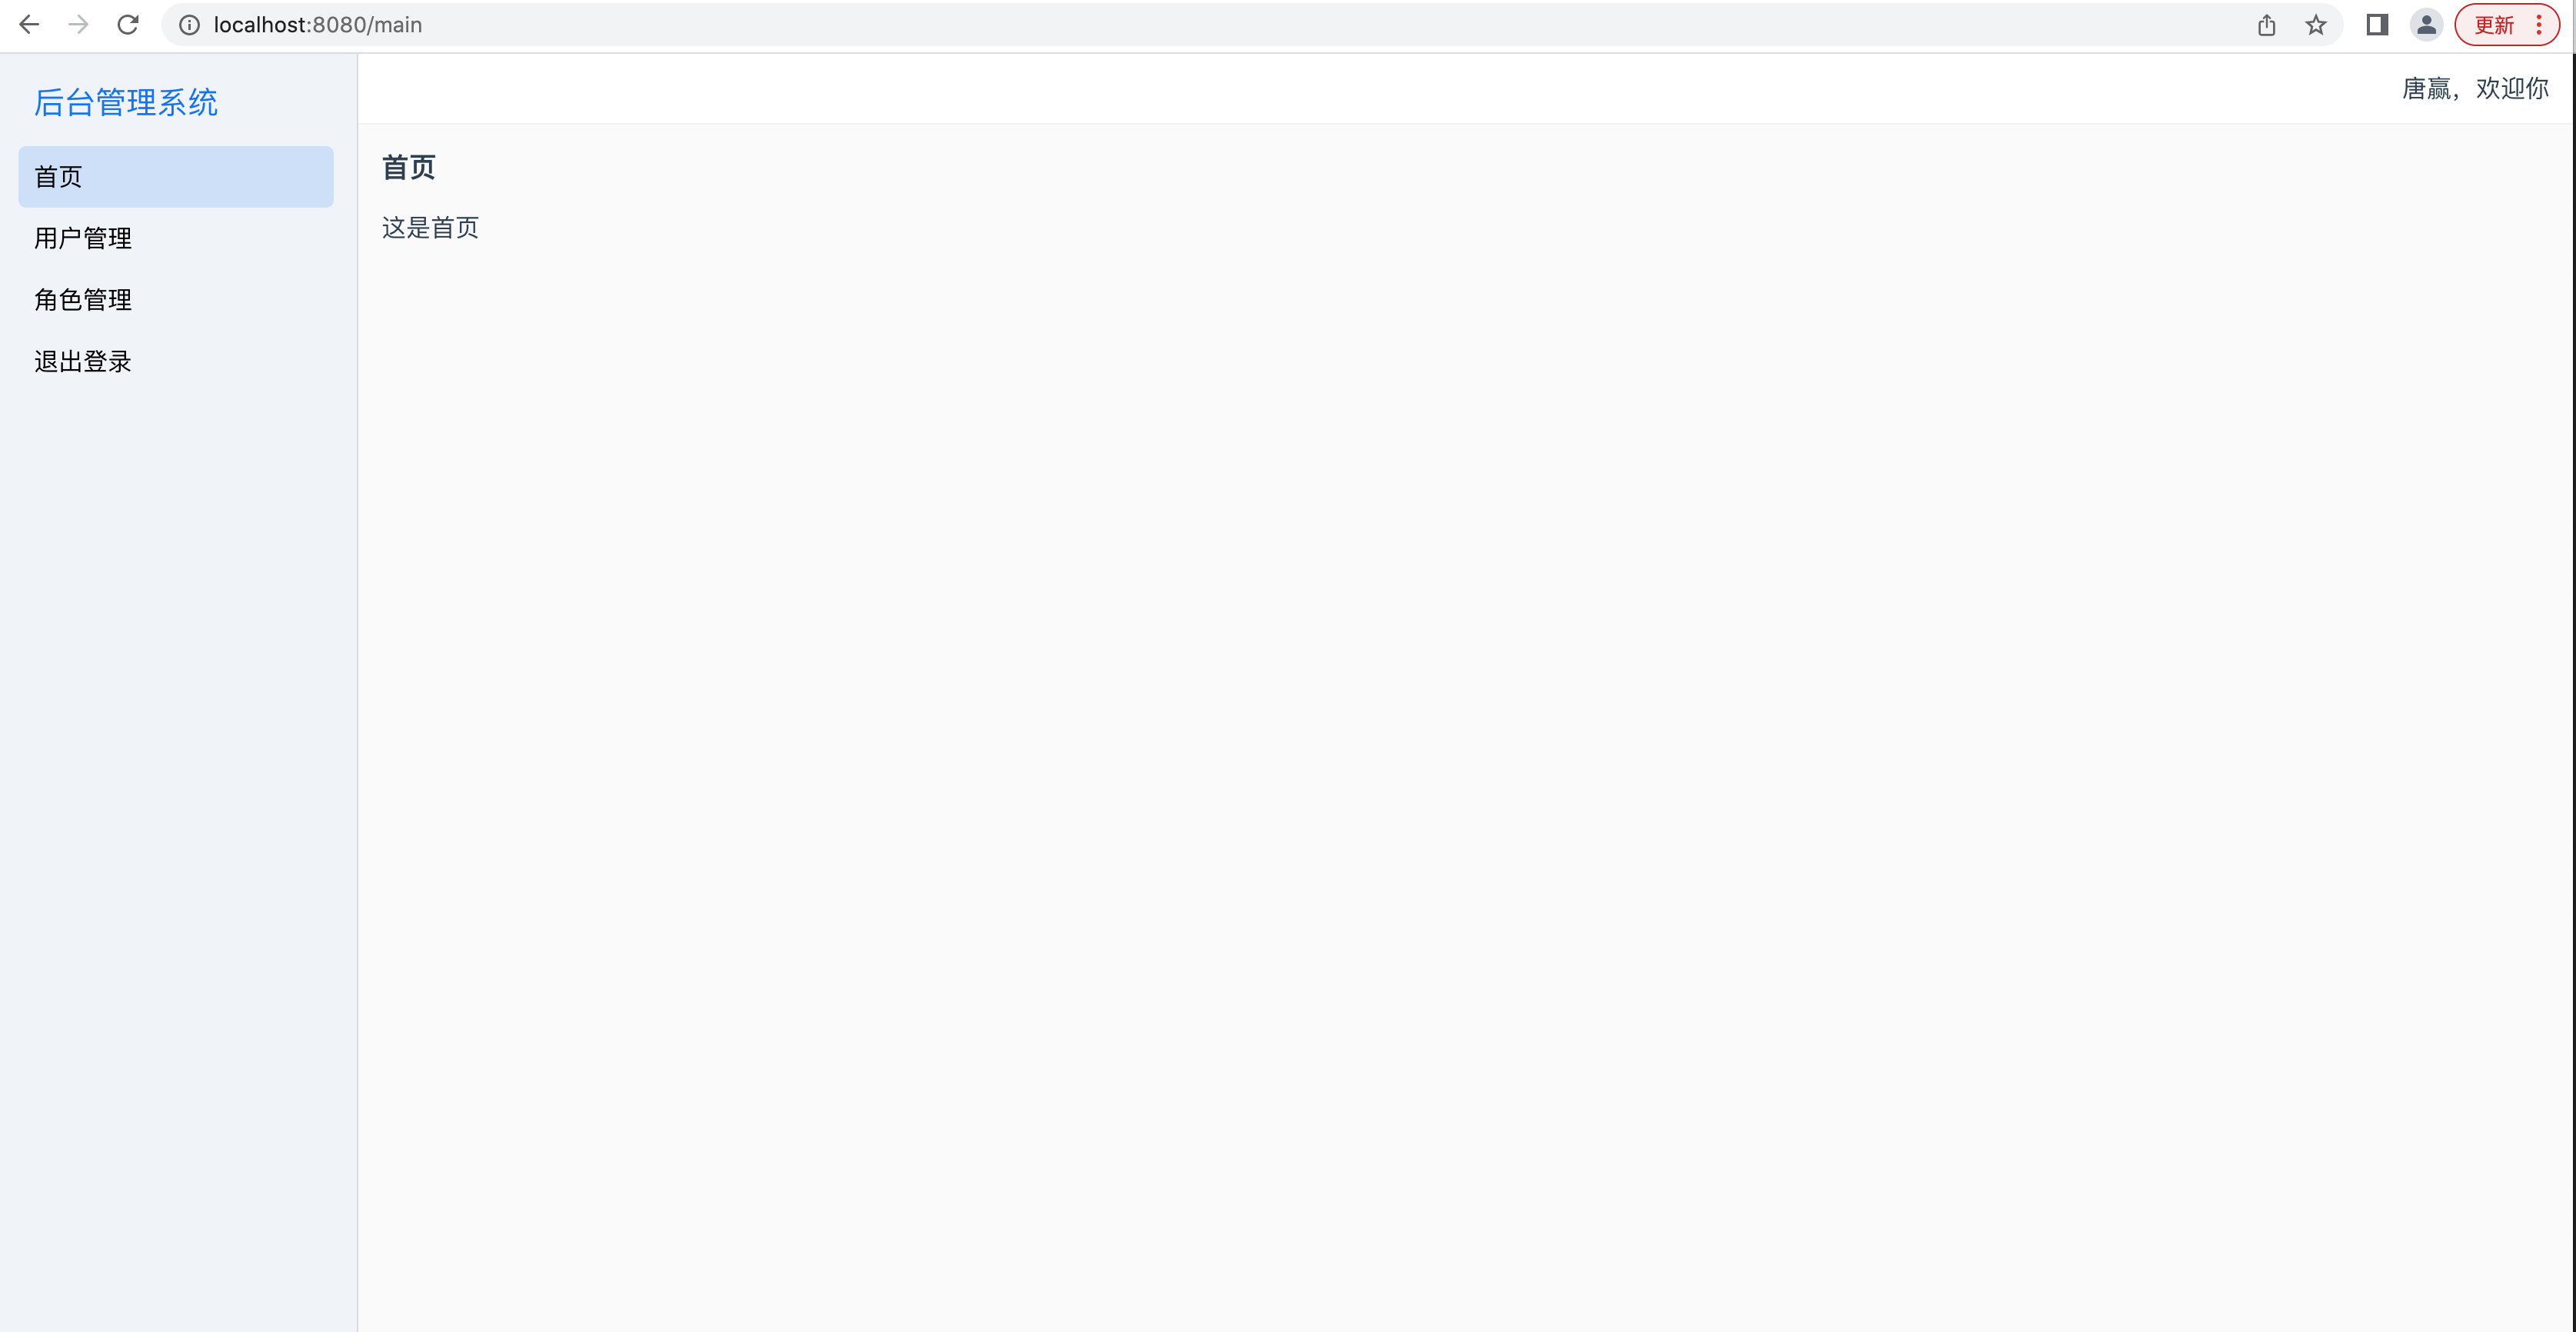
主界面设置了<router-view>,为的是显示子面面的内容
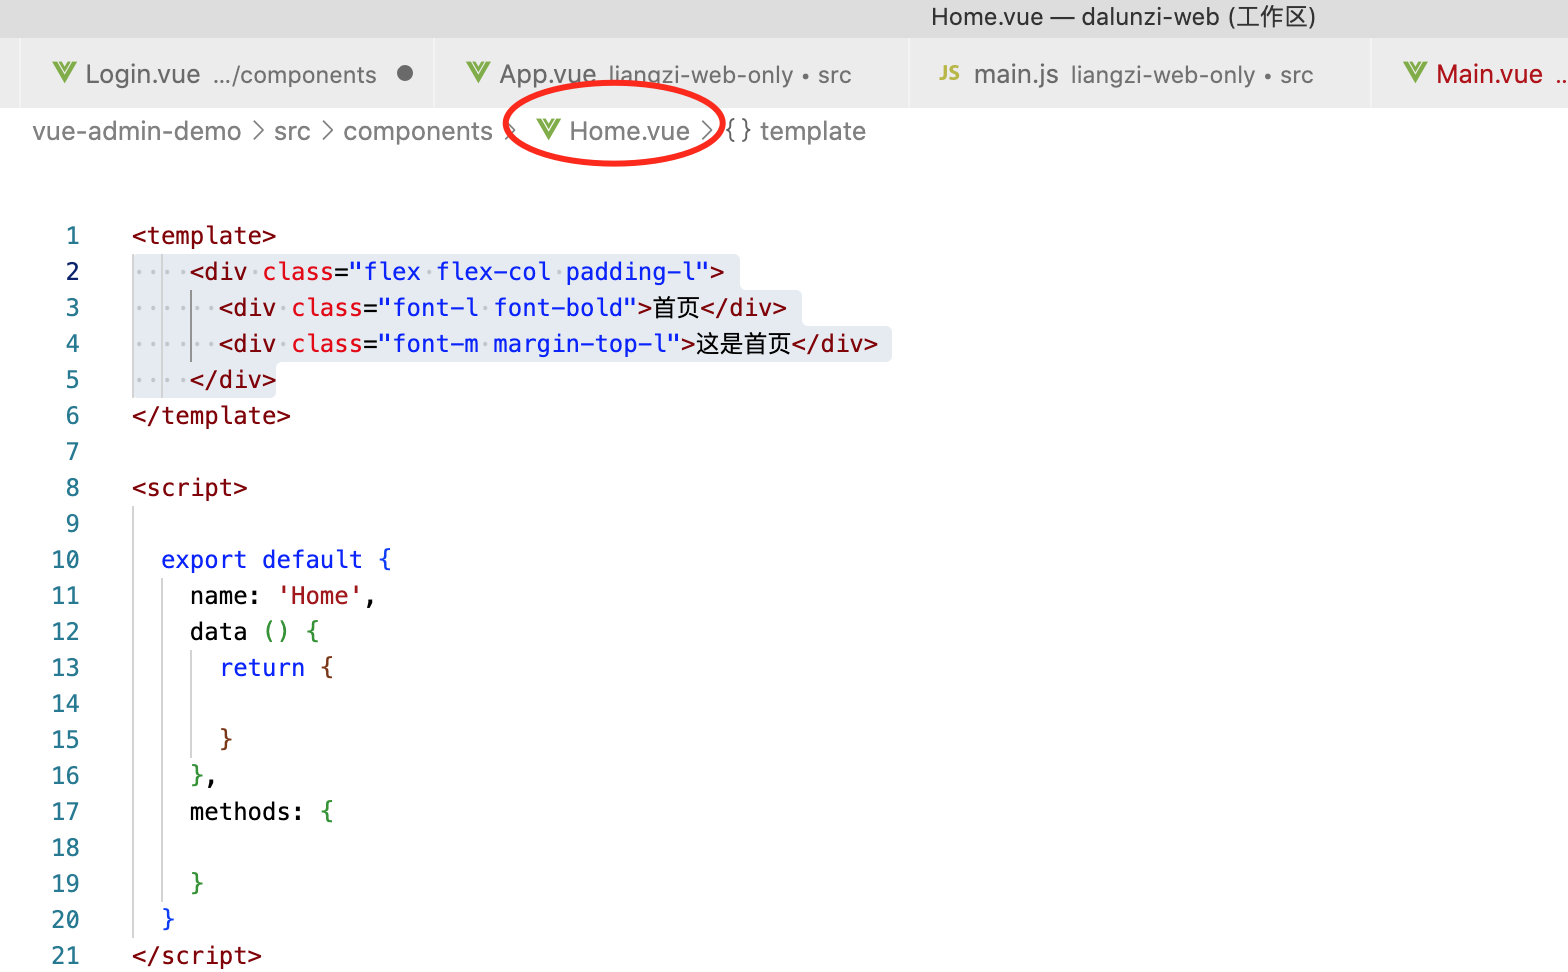
子页面内容,只处理子页面自身信息
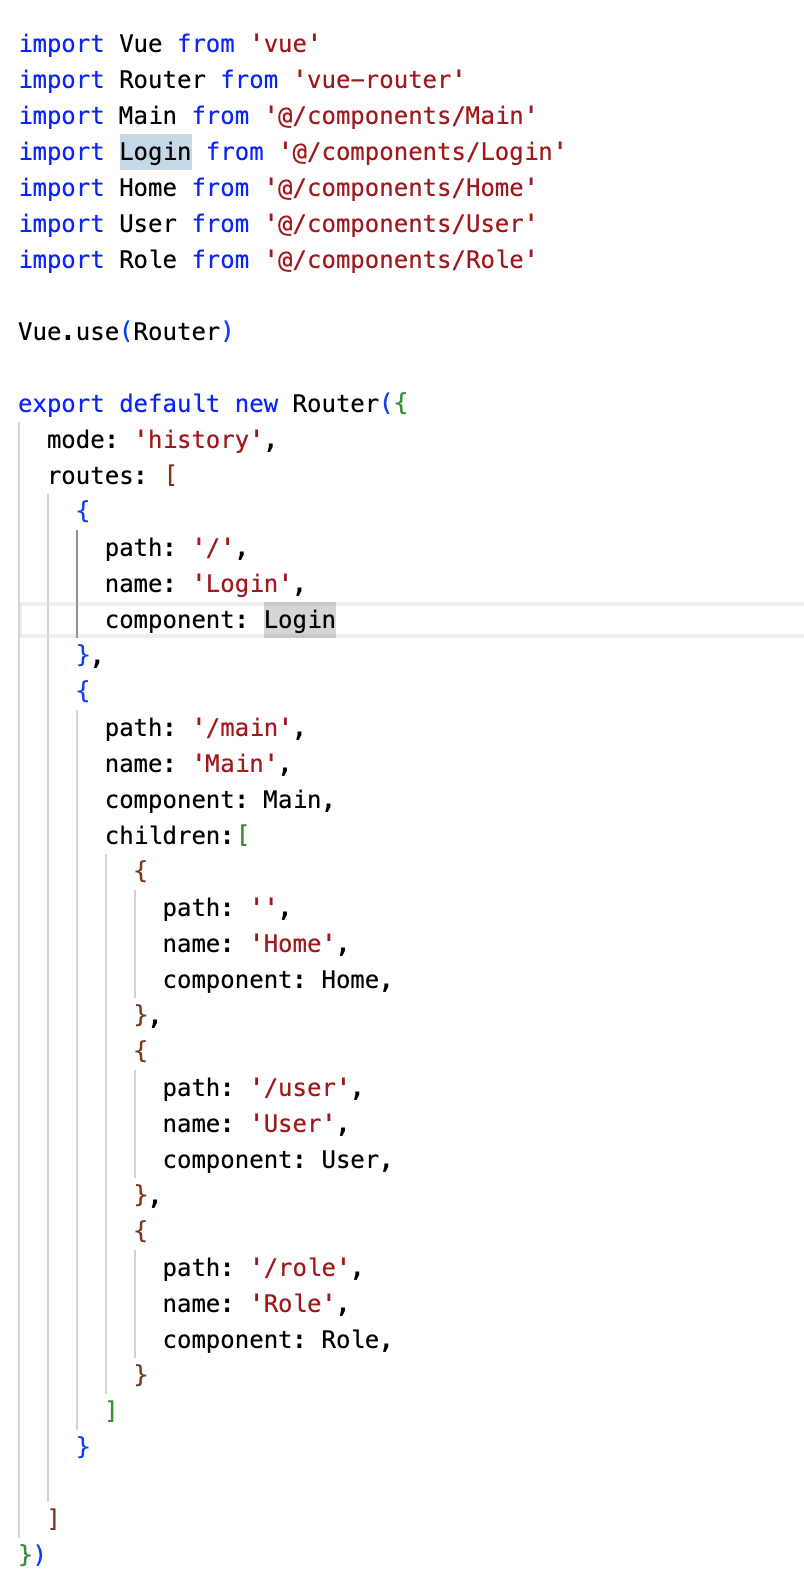
router/index.js代码, 路由配置,包含主路由和子路由,子路由的path=''时,表示默认路由,跳到该主路由时,会自动弹到该子路由,比如this.$router.push({path:’/main’})时,会自动跳到首页
import Vue from 'vue'
import Router from 'vue-router'
import Main from '@/components/Main'
import Login from '@/components/Login'
import Home from '@/components/Home'
import User from '@/components/User'
import Role from '@/components/Role'

Vue.use(Router)

export default new Router({
  mode: 'history',
  routes: [
    {
      path: '/',
      name: 'Login',
      component: Login
    },
    {
      path: '/main',
      name: 'Main',
      component: Main,
      children:[
        {
          path: '',
          name: 'Home',
          component: Home,
        },
        {
          path: '/user',
          name: 'User',
          component: User,
        },
        {
          path: '/role',
          name: 'Role',
          component: Role,
        }
      ]
    }

  ]
})
App.vue代码,只放<router-view/>
<template>
  <div id="app">
    <router-view/>
  </div>
</template>


<script>
/*
       名称:vue后台管理框架
       功能:通过配置路由及子路由,实现后台管理框架,包括登录页,主页面,子页面
       作者:唐赢
       时间:2023-3-7
*/
export default {
  name: 'App',
  data() {
    return {
    }
  },
  methods:  {
  }
}
</script>

<style>
  html,body{
    margin:0;
    padding:0;
    border:0px;
    background-color: #fafafa;
  }

  #app {
    font-family: 'Avenir', Helvetica, Arial, sans-serif;
    -webkit-font-smoothing: antialiased;
    -moz-osx-font-smoothing: grayscale;
    color: #2c3e50;
  }


</style>
Main.vue代码,除了放左侧和顶部区域,还放了一个<router-view>,用于显示子页面
<template>
    <div>
      <div class="top">
        <div class="logo">
          <div class="title">后台管理系统</div>
        </div>
        <div class="flex flex-end flex-center-cz margin-right-l ">
          唐赢,欢迎你
        </div>

      </div>
      <div class="left">
        <div class="menu">
          <div class="item pointer" :class="{'activeMenu' : activeMenu=='home'}" data-id="home" @click="homeClick"><div data-id="home">首页</div></div>
          <div class="item pointer" :class="{'activeMenu' : activeMenu=='user'}" data-id="user" @click="userClick"><div data-id="user">用户管理</div></div>
          <div class="item pointer" :class="{'activeMenu' : activeMenu=='role'}" data-id="role" @click="roleClick"><div data-id="role">角色管理</div></div>
          <div class="item pointer" :class="{'activeMenu' : activeMenu=='exit'}" data-id="exit" @click="exitClick"><div data-id="exit">退出登录</div></div>
        </div>
      </div>
      <div class="content">
        <router-view></router-view>
      </div>

    </div>
</template>

<script>
/*
       名称:vue自定义Table表格组件
       功能:封装Html的table,可直接编辑单元格内容,光标失去焦点时更新表格数据,利用slot插槽绑定操作按钮(编辑,删除、分享等)
            涉及到技术点包括:父组件给子组件传值、refs 对DOM进行操作,slot具名插槽的使用,插槽通过slot-scope给父组件传值
       作者:唐赢
       时间:2023-1-14
*/

  export default {
    name: 'Main',
    data () {
      return {
        activeMenu:'home'


      }
    },
    methods: {
      homeClick() {
        this.activeMenu = "home";
        this.$router.push({path:'/main'})
      },
      userClick() {
        this.activeMenu = "user";
        this.$router.push({path:'/user'})
      },
      roleClick() {
        this.activeMenu = "role";
        this.$router.push({path:'/role'})
      },
      exitClick() {
        this.activeMenu = "exit";
        this.$router.push({path:'/'})
      }

    }
  }
</script>

  <!-- Add "scoped" attribute to limit CSS to this component only -->
  <style scoped>
    .top {
      position: absolute;
      display: flex;
      justify-content: space-between;
      top: 0;
      left: 0;
      right: 0;
      height: 45px;
      background-color: #fff;
      box-shadow: 0 1px 0 0 rgb(0 0 0 / 3%);
      z-index: 100;
    }
    .title {
      margin-top:10px;
      margin-left: 25px;

    }
    .left{
      position: absolute;
      top: 45px;
      width: 235px;
      background-color: #f0f3f8;
      z-index: 101;
      bottom: 0;
      left:0;
      border-right: 1px solid;
      border-color: rgba(0, 0, 0, .1);
    }
    .menu{
      color: #000;
      padding: 15px;
      display: flex;
      flex-direction: column;
    }
    .item {
      padding-left: 10px;
      display: flex;
      flex-direction: row;
      align-items: center;
      height: 40px;
      border-radius: 5px;

    }
    .item:hover {
      background-color: #ccdff8;
      border-top: 1px solid #f0f3f8;
      border-bottom: 1px solid #f0f3f8;
      height: 38px;
    }

    .activeMenu {
      background-color: #ccdff8;
    }

    .content {
      position: fixed;
      left: 236px;
      top: 46px;
      right: 0px;
      bottom: 0px;
      z-index: 888;
      overflow: auto;
    }

    .logo {
      color: #0070f9;
      width: 235px;
      font-size: 20px;
      line-height: 45px;
      background-color: #f0f3f8;
      position: left;
      vertical-align: top;
      white-space: nowrap;
      display: inline-block;
      border-right: 1px solid;
      border-color: rgba(0, 0, 0, .1);
    }


  </style>
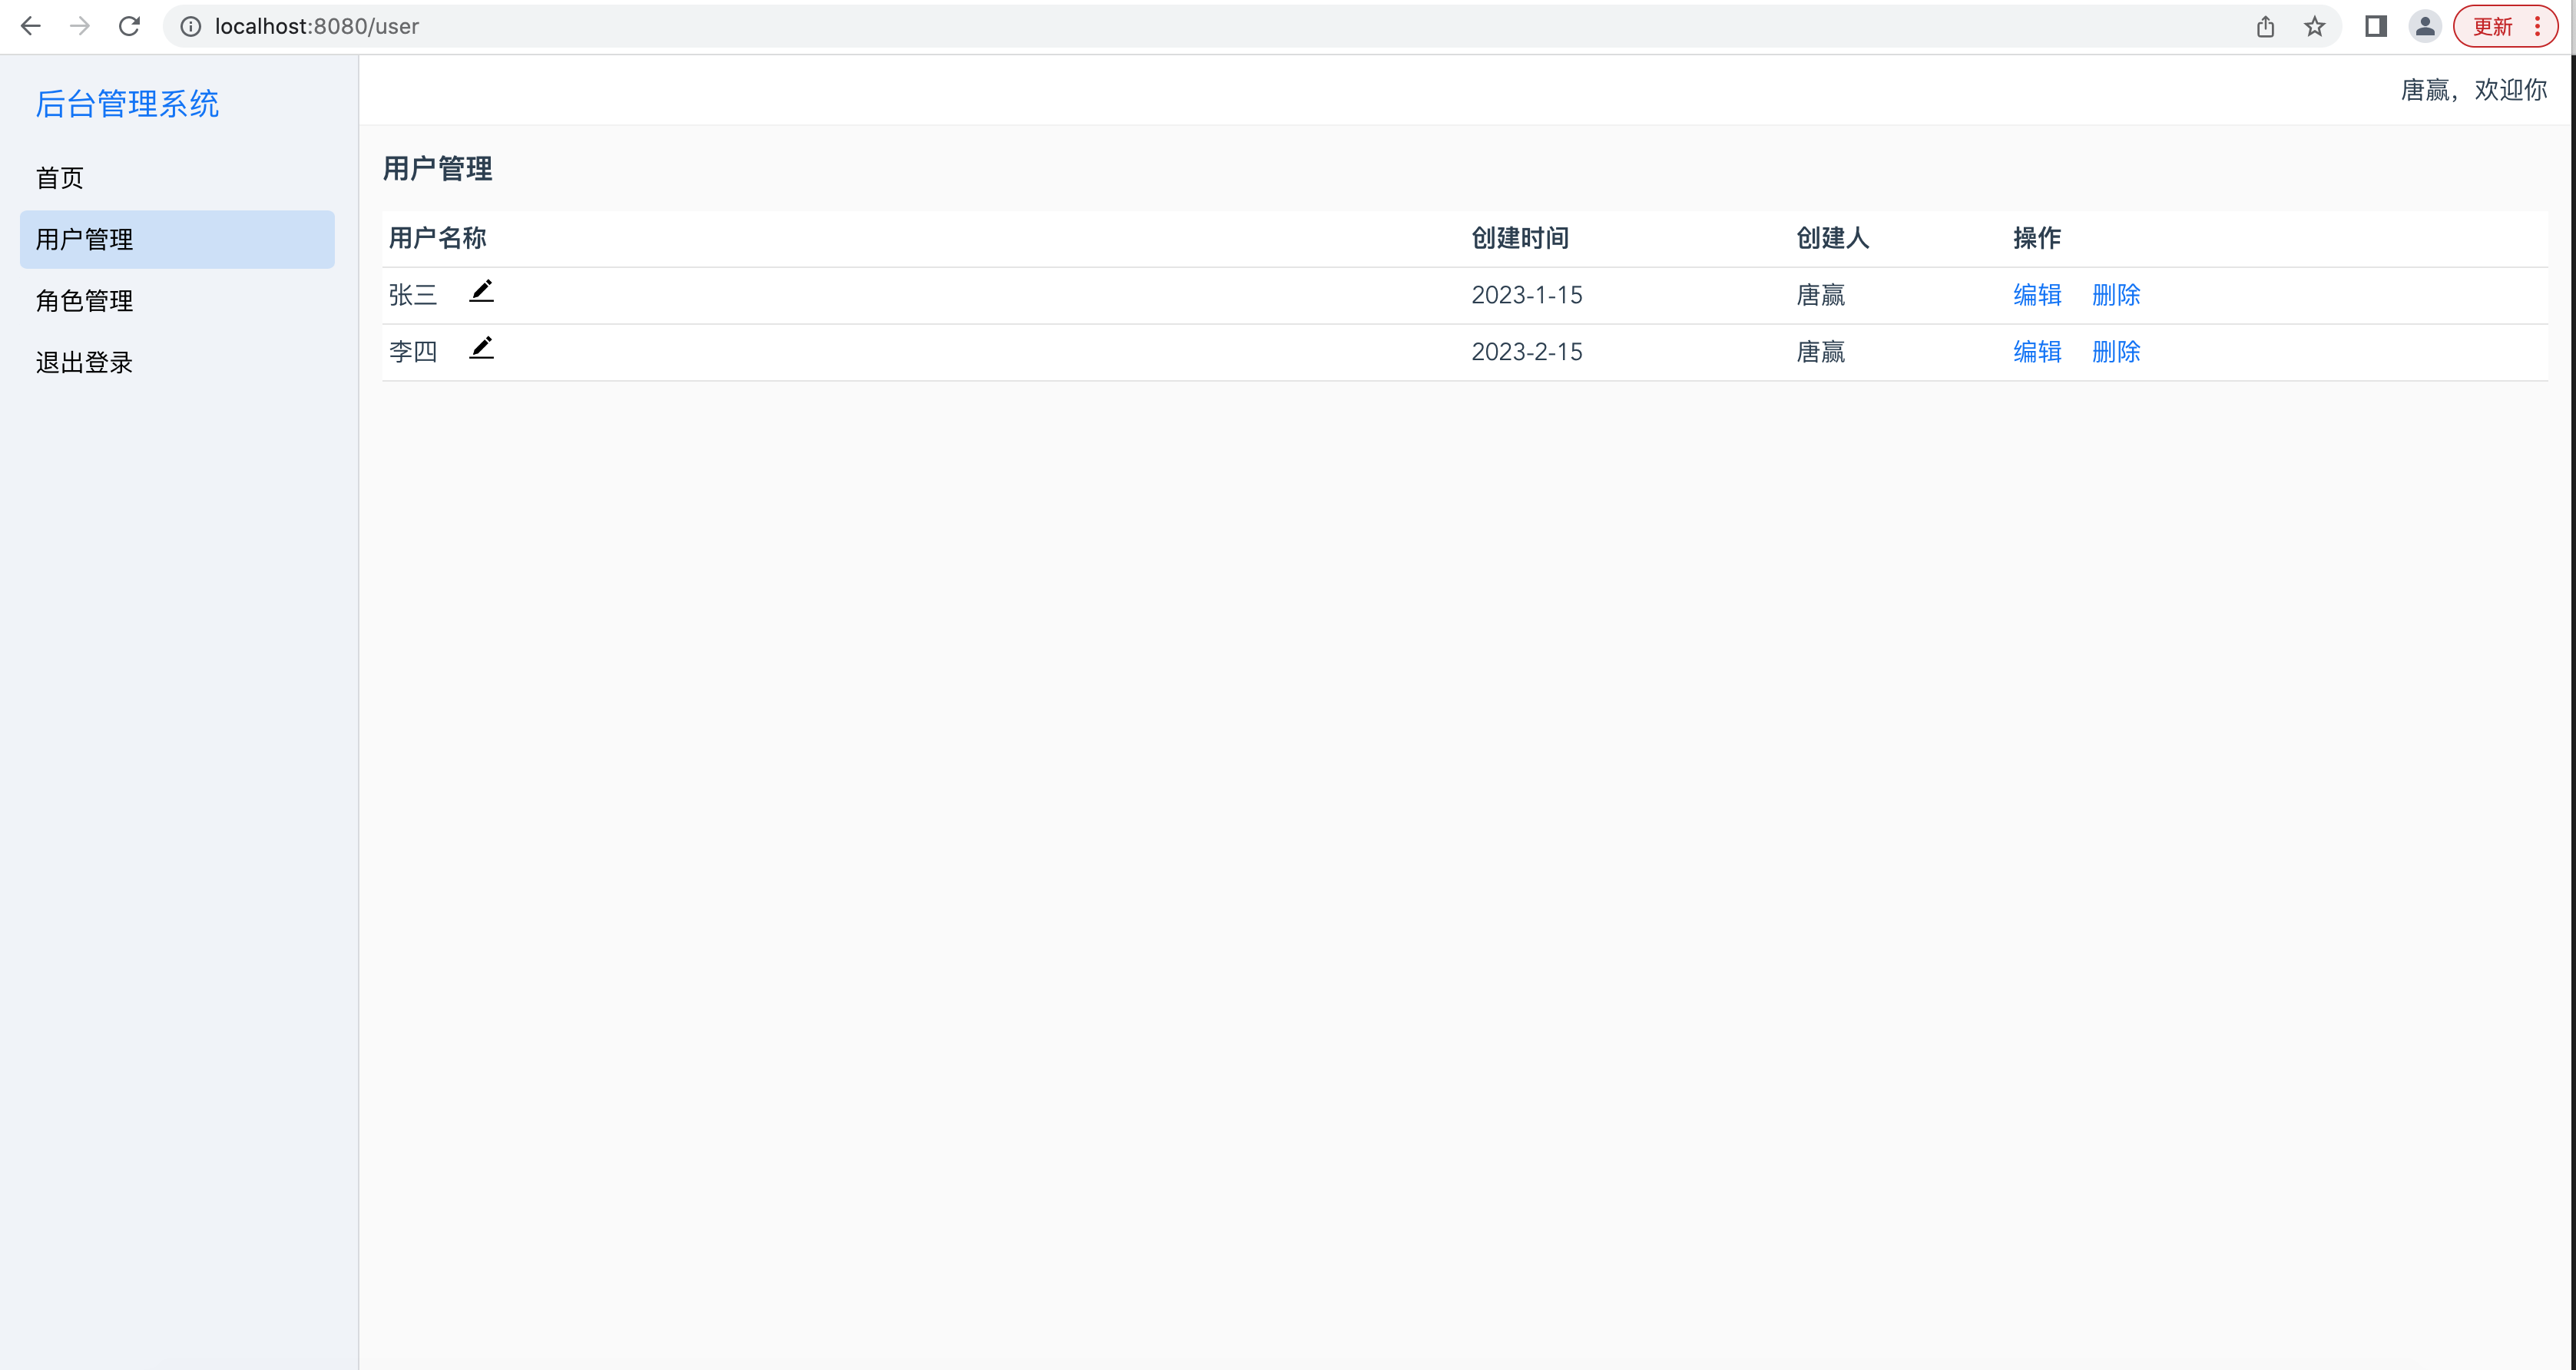
User.vue代码,子面面代码,显示时除显示自身外,还会显示主界面的菜单栏和头部
<template>

    <div class="flex flex-col padding-l">
        <div class="font-l font-bold">用户管理</div>
        <div class="margin-top-l">
            <my-table :fields="fields" :data="tableData" :opFields="opFields">
            <template slot="opField1" slot-scope="val">
                <span class="pointer color-blue" :data-id="val.recordId">编辑</span>
                <span class="margin-left-l color-blue pointer">删除</span>
            </template>
        </my-table>
        </div>

    </div>
</template>

<script>

  import MyTable from '@/components/Table' //引入我们写好的递归组件
  export default {
    name: 'Main',
    components: {
      MyTable
    },
    data () {
      return {

        tableData: [
            {
              "id":1,
              "name": "张三",
              "createUser":"唐赢",
              "createTime":"2023-1-15"
            },
            {
              "id":2,
              "name": "李四",
              "createUser":"唐赢",
              "createTime":"2023-2-15",
            }
          ],
          fields: [
            {title:'用户名称',fieldName:'name',width:'',canEdit: true},
            {title:'创建时间',fieldName:'createTime',width:'15%',canEdit: false},
            {title:'创建人',fieldName:'createUser',width:'10%',canEdit: false}
          ],
          opFields : [
            {name:'opField1', title:"操作", width:'25%'}
          ]

      }
    },
    methods: {


    }
  }
</script>

  <!-- Add "scoped" attribute to limit CSS to this component only -->
  <style scoped>

  .table {
    background-color: #fff;
    width: 1080px;
    min-height: 800px;
    box-shadow: 0px 3px 6px rgba(0, 0, 0, .1);
    margin-bottom: 10px;
  }

  </style>
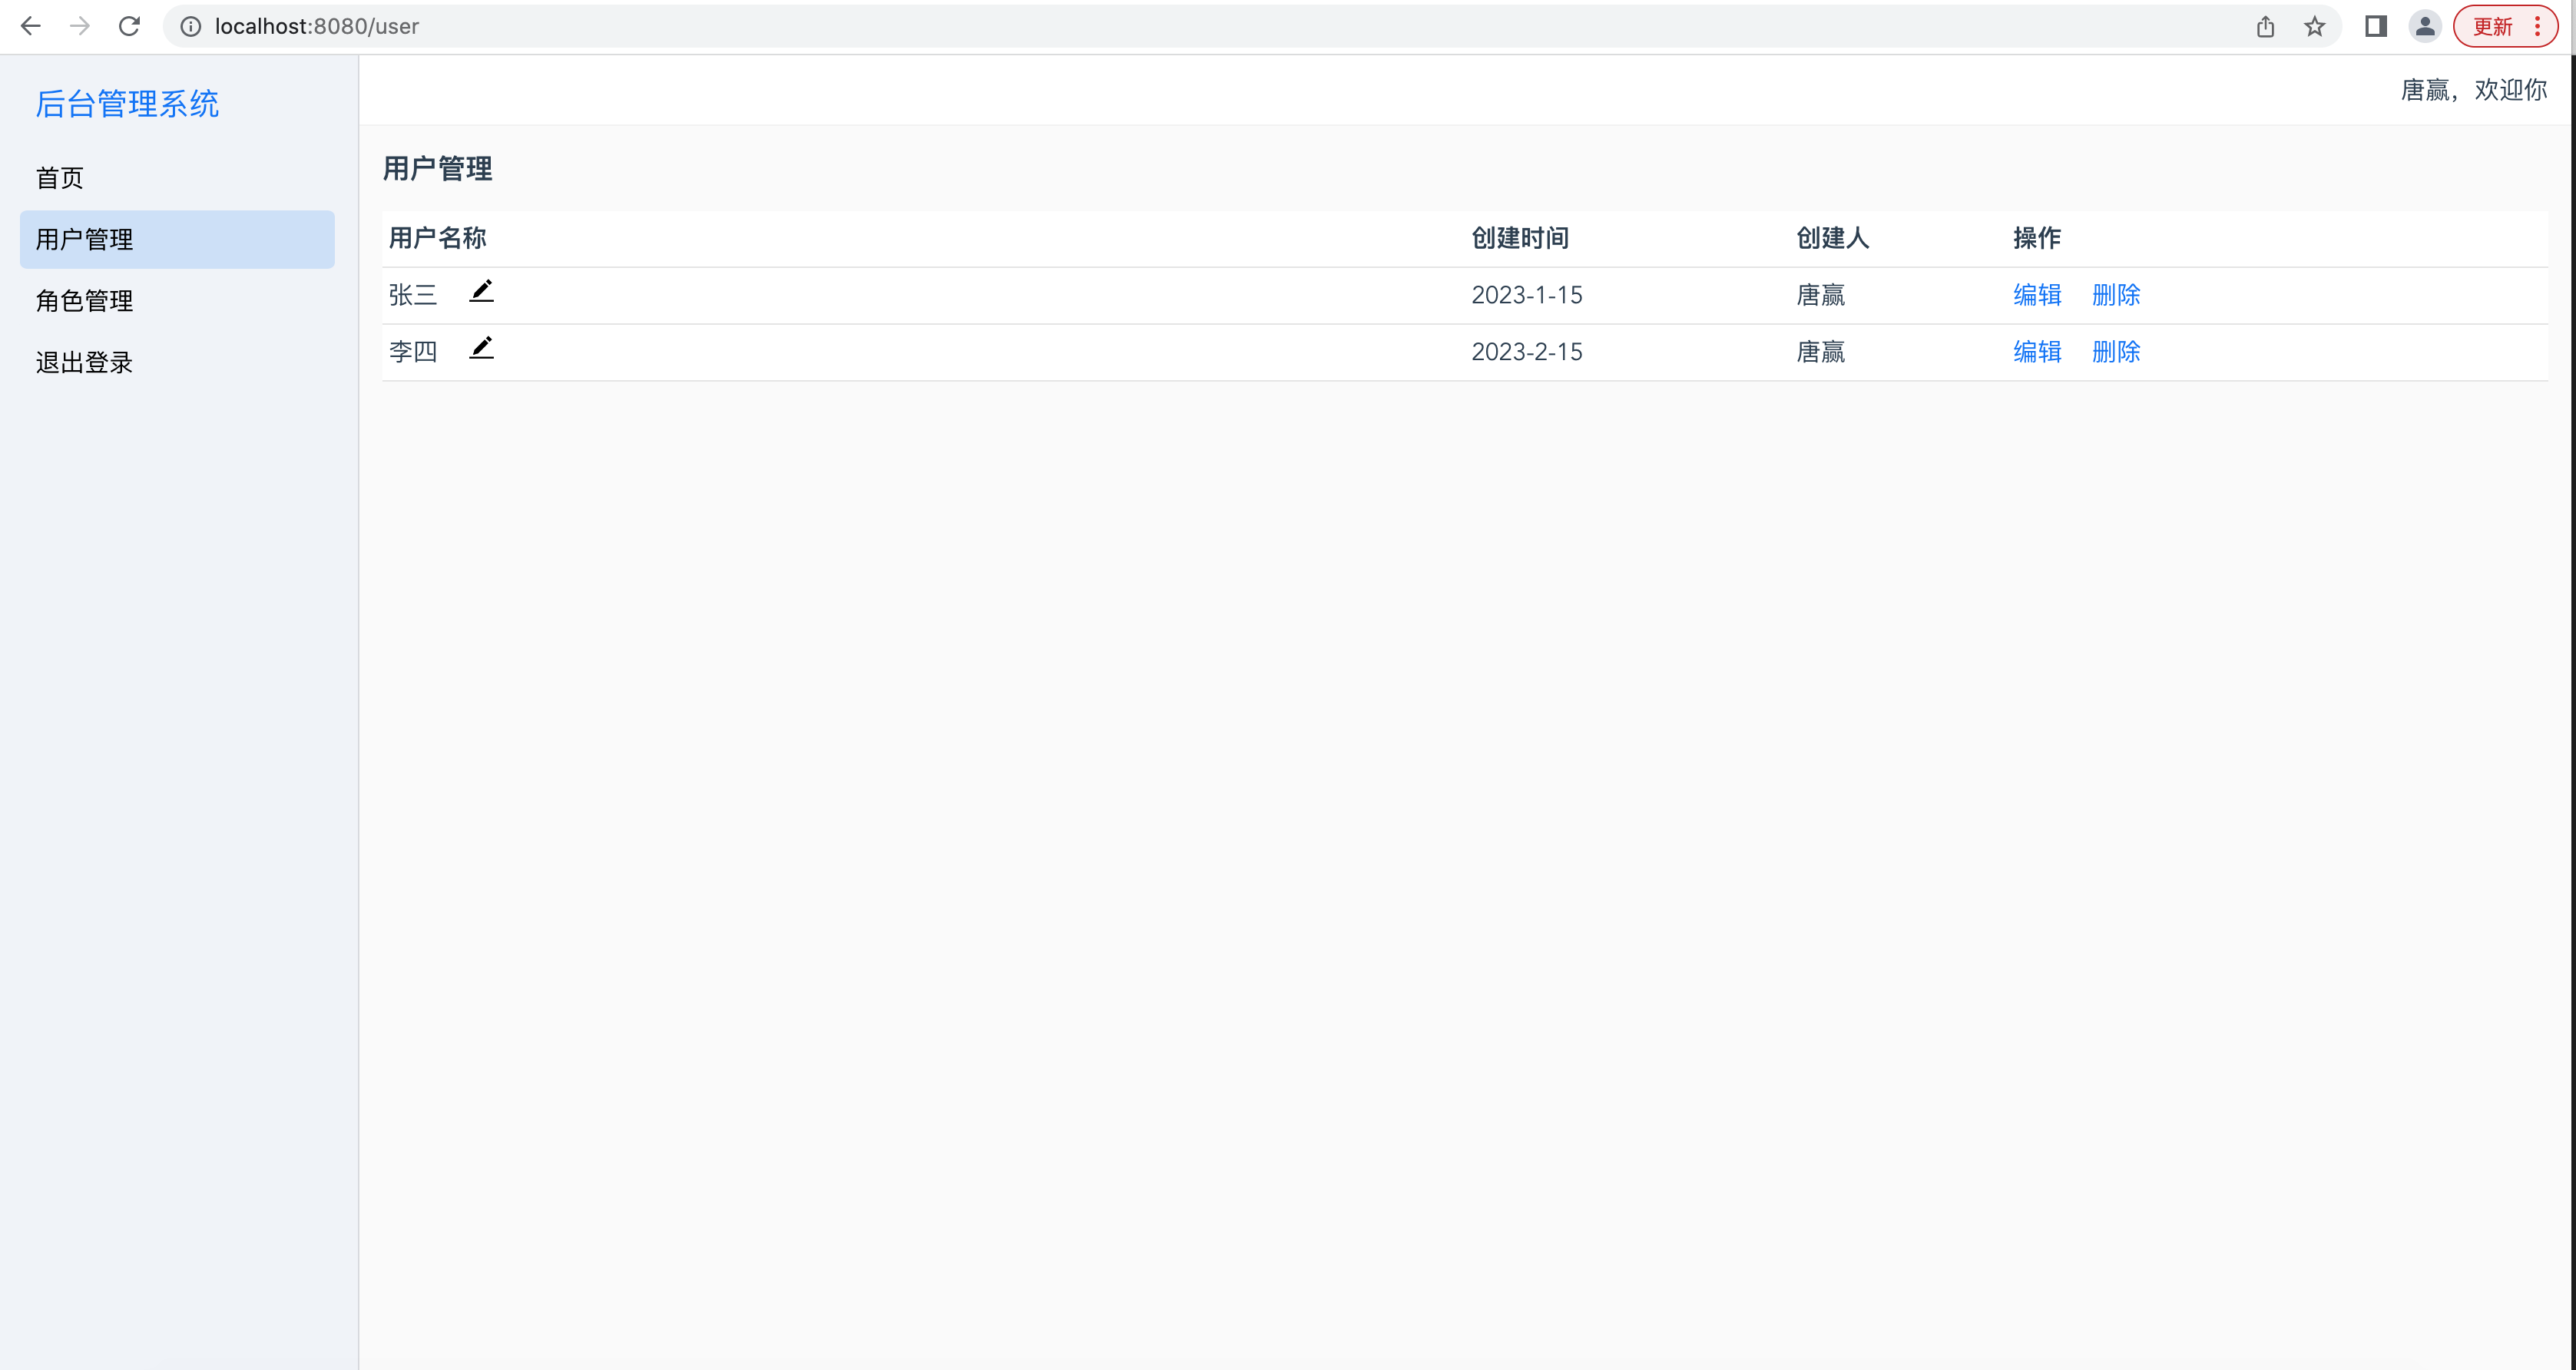
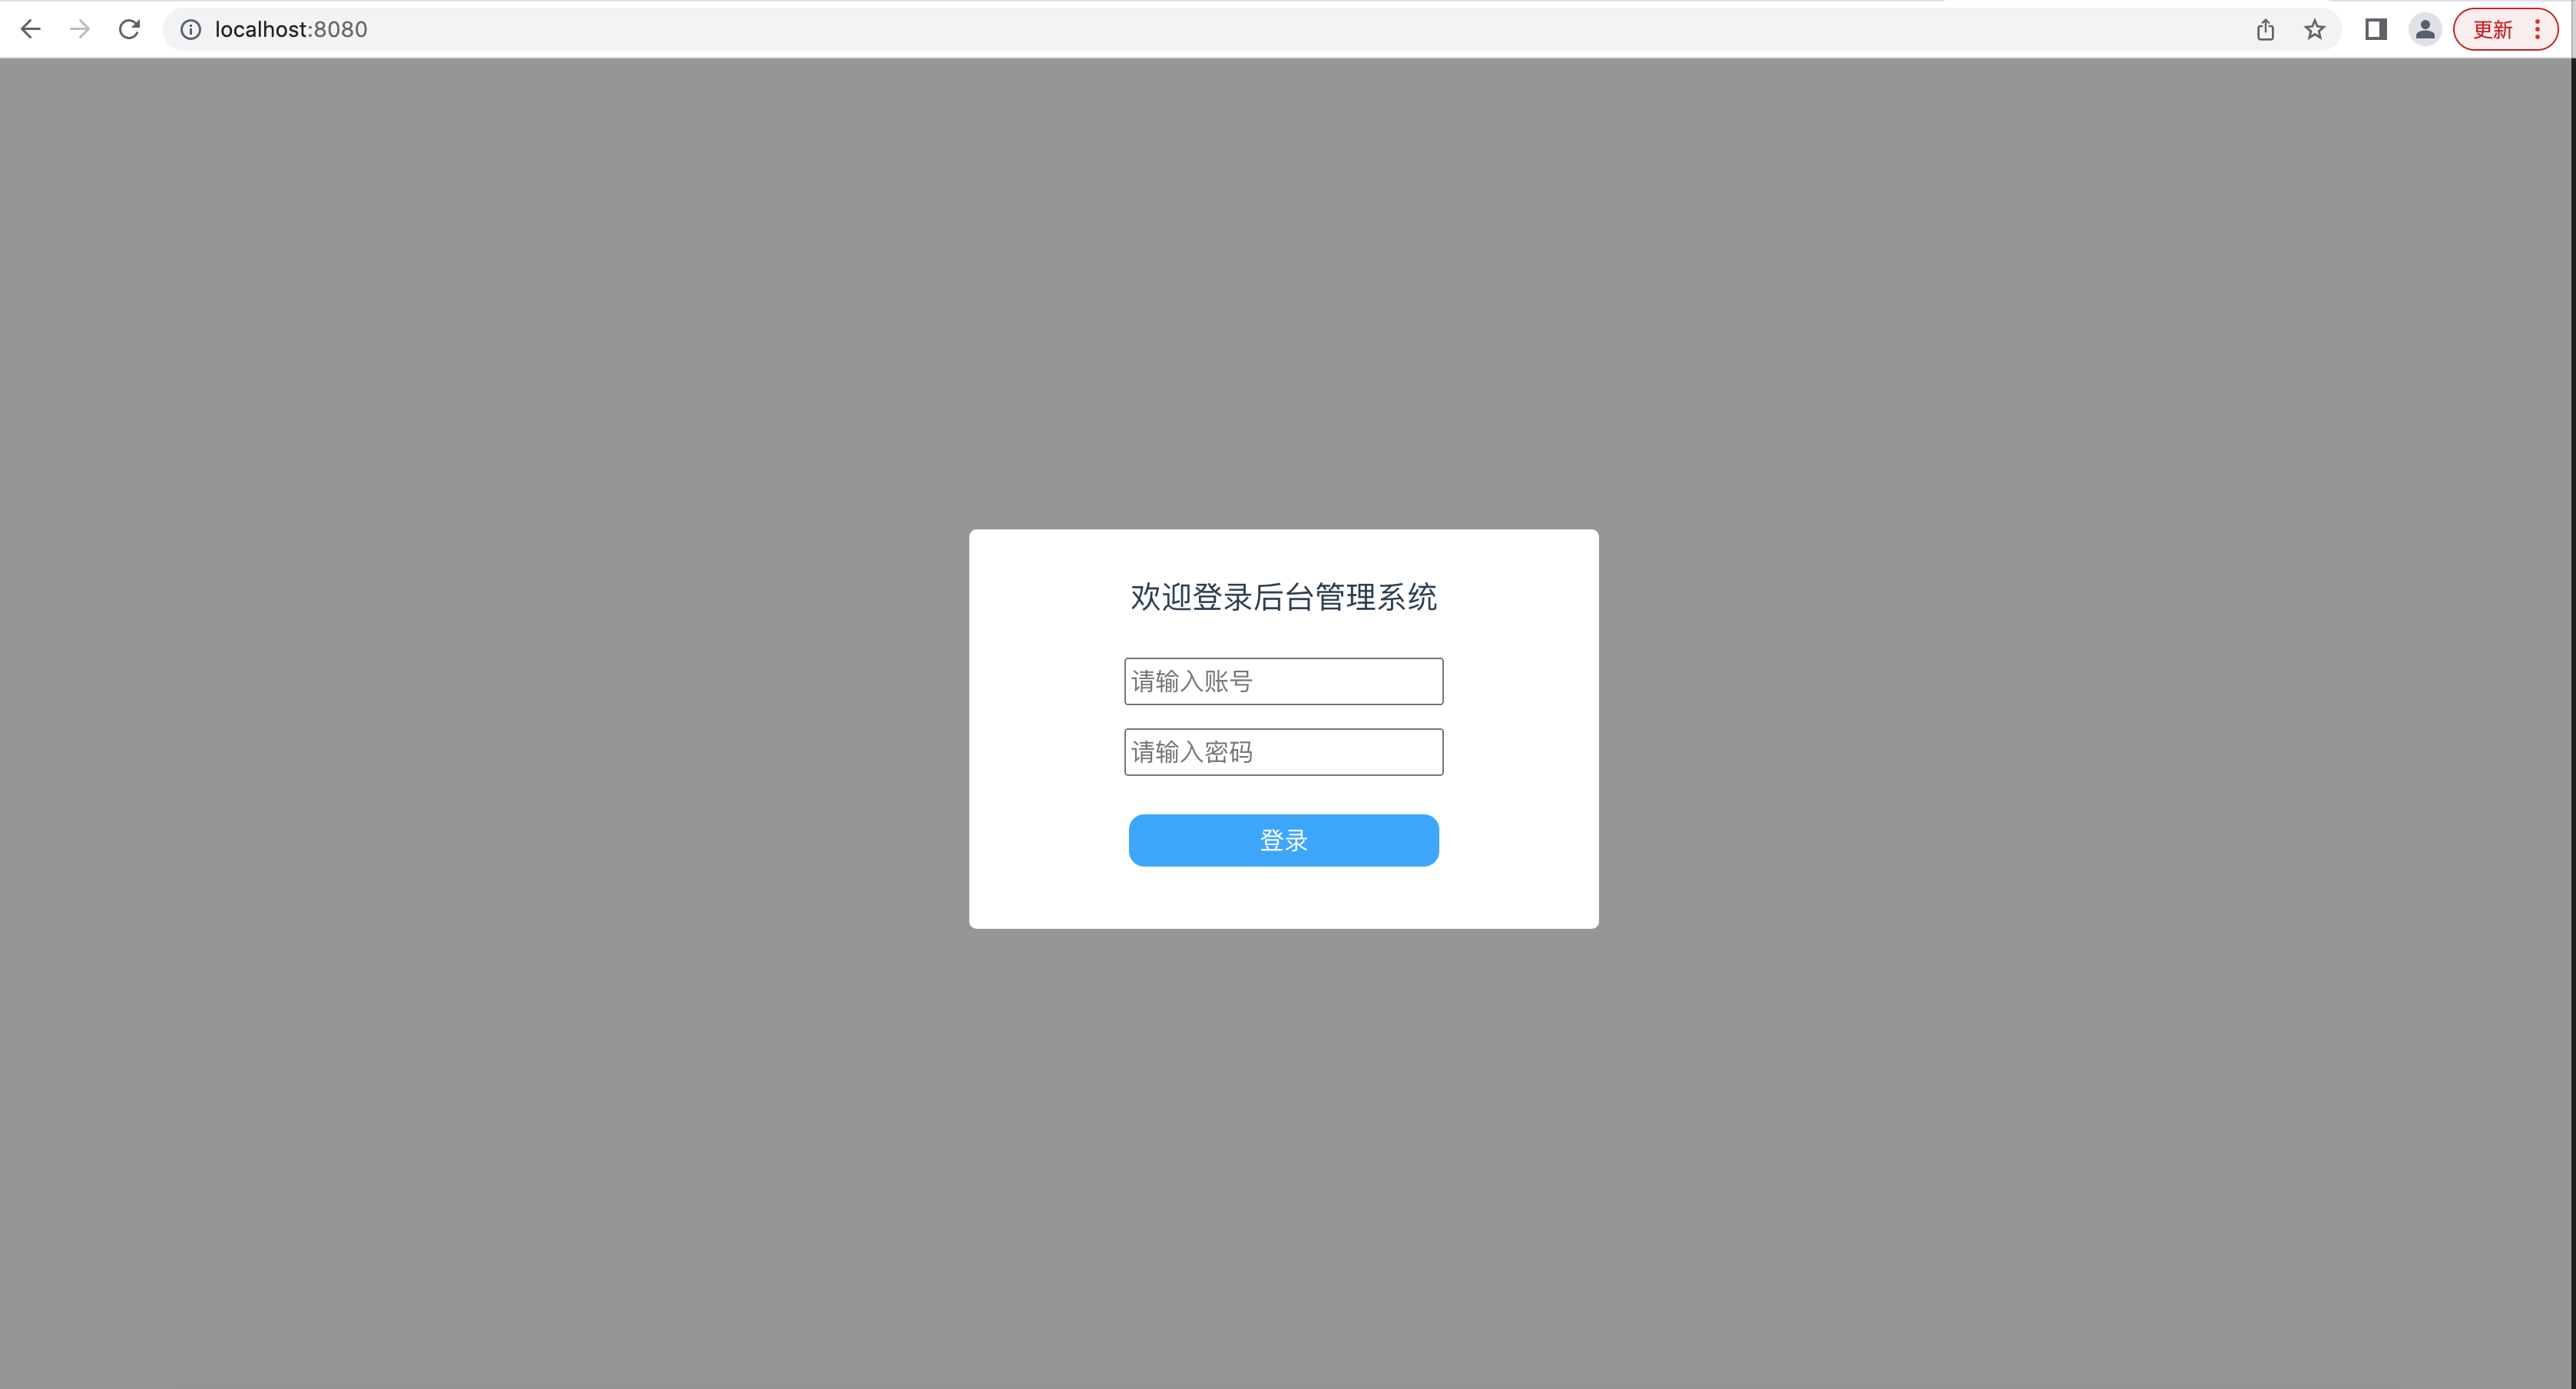
最终效果图如下:
登录窗
首页
用户管理页
更多推荐
 已为社区贡献5条内容


所有评论(0)