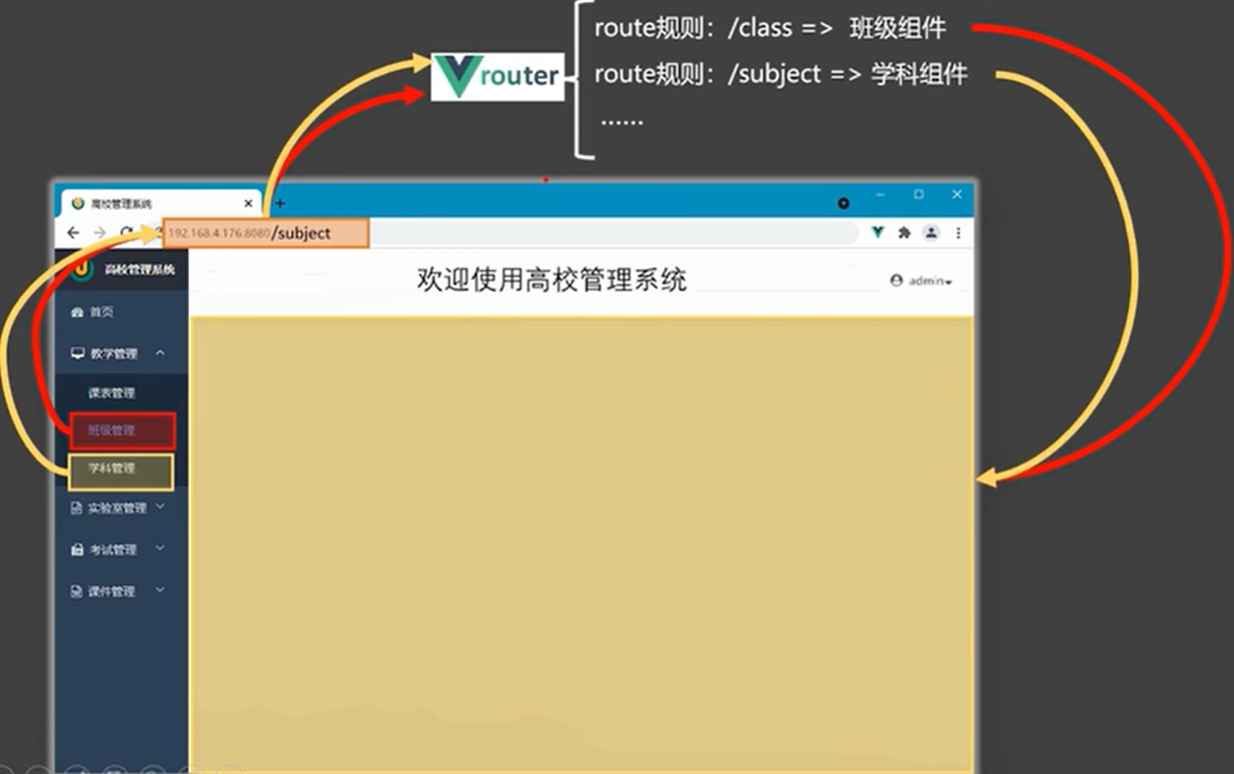
vue路由配置步骤
vue路由配置步骤
·
vue路由配置及前置路由守卫和后置路由守卫
1.创建/src/router/index.js文件,该文件专门用于创建整个应用的路由器
2.下载安装vue-router:
npm install --save vue-router@3
3.使用插件vue-router
4.配置路由规则
5.创建并暴露 路由器
// 该文件专门用于创建整个应用的路由器
import Vue from 'vue'
import VueRouter from 'vue-router'
import Home from '../views/Home.vue'
// 1.下载vue-router: npm i -S vue-router@3
// 2.使用插件vue-router
Vue.use(VueRouter)

// 3.配置路由规则
const routes = [
  {
    path: '/',
    // 路由重定向 默认显示当前路由页面
    redirect: '/about',
    // 后置路由守卫,需要每个都配置  meta
    meta: { title: '首页' }
  },
  {
    name: 'shouye',
    // 路径
    path: '/home',
    // 组件
    component: Home,
    redirect: '/home/news',
    meta: { title: '首页' },
    children: [
      // 二级路由不要加 /
      {
        name: 'xinwen',
        path: 'news',
        component: () => import('../views/News.vue'),
        meta: { title: '新闻' }
      },
      {
        name: 'xinxi',
        path: 'message',
        component: () => import('../views/Message.vue'),
        // 前置路由守卫 用于标识是否需要权限验证  meta 配置项 不能变  isAuth 可以自己设置  isAuth: true 没有权限访问
        meta: { isAuth: true, title: '信息' },
        // 三级嵌套路由
        children: [
          {
            name: 'xiangqing', // 给路由取别名,最好是唯一的
            // query
            // path:'detail',
            // params
            path: 'detail/:id/:title', // /: 使用占位符声明接收params参数
            component: () => import('../views/Detail.vue'),
            meta: { title: '详情' }

            // props配置
            // 第一种写法:props值为对象  该对象中所有的key-value的组合最终都会通过props传给Detail组件
            // props:{id:111,title:'lala'}

            // 第二种写法:props值为布尔值,布尔值为true  则把路由收到的所有params参数通过props传给Detail组件
            // props:true,  // 仅用于params参数

            // 第三种写法:props值为函数,该函数返回的对象中每一组key-value都会通过props传给Detail组件
            /*  props(route) {
              // 适用于query参数和params参数
              return {
                id: router.params.id,
                title: TouchEvent.params.title
              }
            } */
            // 利用结构赋值,简化第三种方法
            /*  props({params:{id,title}}){
              return{
                id,
                title
              }
            } */
          }
        ]
      }
    ]
  },
  {
    path: '/about',
    component: () => import('../views/About.vue')
  }
]

// 4.创建并暴露 路由器
const router = new VueRouter({
  routes,
  // mode:'hash'  // 有#
})

// 前置路由守卫
router.beforeEach((to, from, next) => {
  // 2.若数据太多,可以用数组验证
  // const arr=['xinwen','xinxi','xuesheng','zuoye']
  // if(arr.indexOf(to.name))
  // 3.通过  meta 标识
  if (to.meta.isAuth) {
    // 1.可以用name进行验证
    // if (to.name === 'xinwen' || to.name === 'xinxi') {
    // 需要进行权限验证
    // console.log('需要进行权限验证')
    if (localStorage.getItem('username') === 'admin') {
      next()
    } else {
      alert('您没有权限请登录')
    }
  } else {
    // 无需权限验证  如:登录页面,注册页面  404页面
    next()
  }
})

// 后置路由守卫  to,from
router.afterEach((to) => {
  document.title = to.meta.title || '北京昌平'
})

export default router
6.在main.js中引入路由器并注册
import Vue from 'vue'
import App from './App.vue'
// 导入bootstrap的css
import 'bootstrap/dist/css/bootstrap.min.css'
// 5.导入路由器
import router from './router/index.js'
Vue.config.productionTip = false
new Vue({
  // 注册路由器  Vue.prototype.$router=router
  router,
  render: h => h(App),
}).$mount('#app')
7.使用router-link标签 用于路由切换
<router-link class="list-group-item" active-class="active" to="/about">About</router-link>
8.使用router-view标签 占位符 用于展示路由组件的内容
<router-view></router-view>
更多推荐
 已为社区贡献2条内容


所有评论(0)