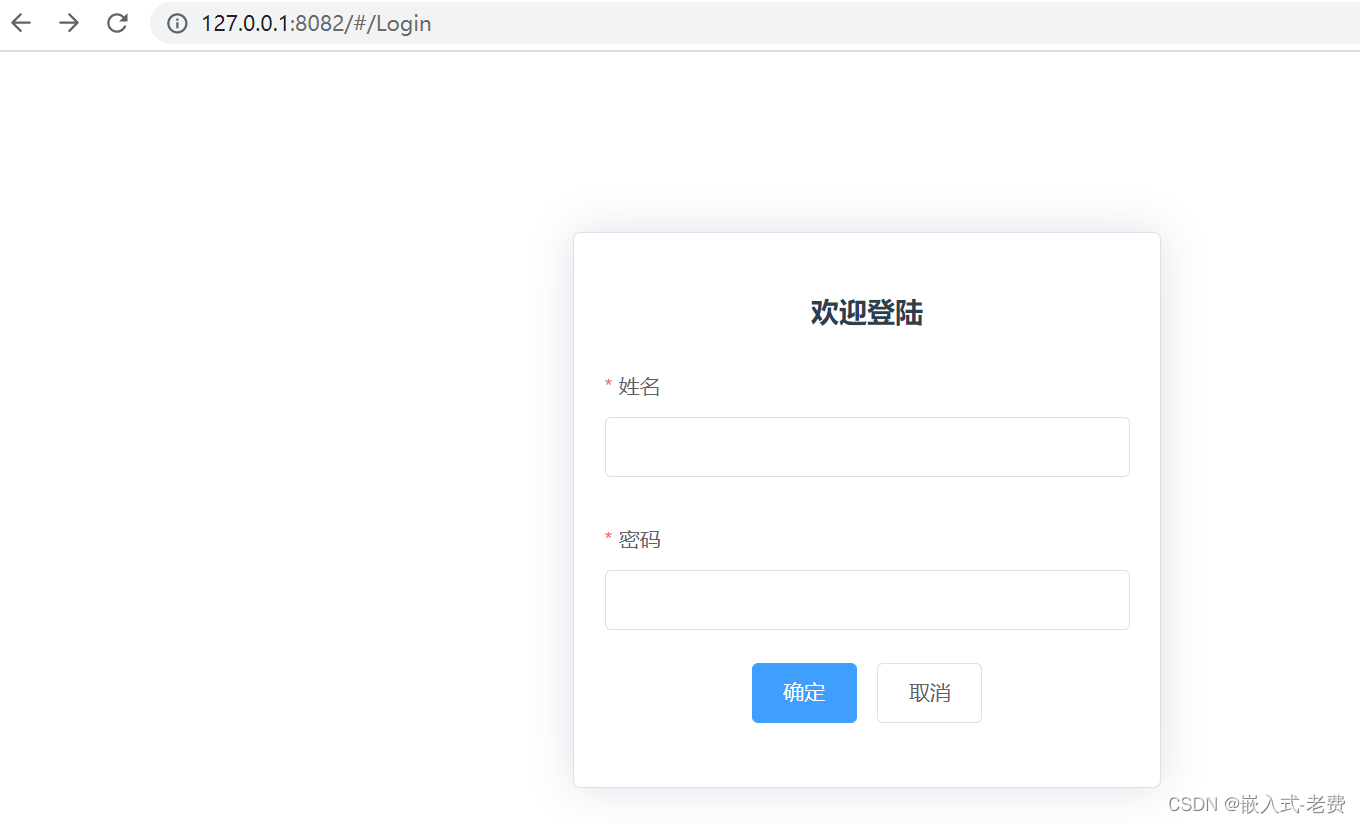
element ui框架(登录窗口)
【 声明:版权所有,欢迎转载,请勿用于商业用途。 联系信箱:feixiaoxing @163.com】前面说到了路由,有了这个功能,其实后面的工作就比较好开展了。一般来说,很多网页项目都是这样的,首先进入的是登录窗口,在输入用户名和密码之后,就可以进入主页面了。所以,登陆页面本身也是非常重要的一个环节。
【 声明:版权所有,欢迎转载,请勿用于商业用途。 联系信箱:feixiaoxing @163.com】
前面说到了路由,有了这个功能,其实后面的工作就比较好开展了。一般来说,很多网页项目都是这样的,首先进入的是登录窗口,在输入用户名和密码之后,就可以进入主页面了。所以,登陆页面本身也是非常重要的一个环节。
窗口编写的过程中涉及到node-sass、sass-loader的安装,这是因为涉及到css的编写,这部分需要注意下。
1、创建登录工程,注意选中router功能
vue init ./webpack login2、安装element ui
cd login
npm install element-ui -S
3、安装其他node_modules,并执行
npm install
npm run dev
4、将element ui添加到项目中
// The Vue build version to load with the `import` command
// (runtime-only or standalone) has been set in webpack.base.conf with an alias.
import Vue from 'vue'
import App from './App'
import router from './router'
import ElementUI from 'element-ui';
import 'element-ui/lib/theme-chalk/index.css';

Vue.use(ElementUI);
Vue.config.productionTip = false

/* eslint-disable no-new */
new Vue({
  el: '#app',
  router,
  components: { App },
  template: '<App/>',
  render:h=>h(App)
})
5、删除原来HelloWorld相关的功能
5.1 删除App.vue中图片的内容、删除样式
<template>
  <div id="app">

    <router-view/>
  </div>
</template>

<script>
export default {
  name: 'App'
}
</script>

<style>
</style>
5.2 删除HelloWorld.vue中显示的内容,仅保留一个基本框架
<template>
</template>

<script>
export default {
  name: 'HelloWorld'
}
</script>

<!-- Add "scoped" attribute to limit CSS to this component only -->
<style scoped>
</style>
6、创建view目录
6.1 添加Login.vue
<template>
	<div>Login</div>

</template>

<script>

export default {
	name: "Login"
}

</script>

<style scoped>
</style>
6.2 添加Main.vue,其实和Login.vue差不多
<template>
	<div>Main</div>

</template>

<script>

export default {
	name: "Main"
}

</script>

<style scoped>
</style>
6.3 修改router/index.js,将Login和Main插入到路由表中
import Vue from 'vue'
import Router from 'vue-router'
import HelloWorld from '@/components/HelloWorld'
import Login from '@/view/Login'
import Main from '@/view/Main'

Vue.use(Router)

export default new Router({
  routes: [
    {
      path: '/',
      name: 'HelloWorld',
      component: HelloWorld
    },
	{
      path: '/Login',
      name: 'Login',
      component: Login
    },
	{
      path: '/Main',
      name: 'Main',
      component: Main
    }
  ]
})
6.4 输入127.0.0.1:8082/#/Login和127.0.0.1:8082/#/Main来进行验证。
7、准备利用element ui组件来修饰Login.vue
7.1 因为编写的过程中涉及到style的编写,所以需要安装node-sass、sass-loader
npm install node-sass@4.13.1  --registry=http://registry.npm.taobao.org
npm install sass-loader@7.3.1  --registry=http://registry.npm.taobao.org
7.2 修改Login.vue
<template>
	<div>
		<el-form ref="form" :model="form"  :rules="rules" class="login-box">
			<h3 class="login-title">欢迎登陆</h3>
			<el-form-item label="姓名" prop="name">
				<el-input v-model="form.name"></el-input>
			</el-form-item>
			<el-form-item label="密码" prop="password">
				<el-input v-model="form.password"></el-input>
			</el-form-item>
			<el-form-item>
				<el-button type="primary" @click="submitForm('form')">确定</el-button>
				<el-button>取消</el-button>
			</el-form-item>
		</el-form>
	</div>
</template>

<script>

export default {
	name: "Login",
	data() {
		return {
			form:{
				name:'',
				password:''
			},
			rules:{
				name: [
					{ required: true, message: '请输入姓名', trigger: 'blur' },
				],
				password: [
					{ required: true, message: '请选择密码', trigger: 'change' }
				]
			}
		}
	},
	methods:{
		submitForm(formName) {
			//alert('submit!');

			this.$refs[formName].validate((valid) => {
				if (valid) {
					this.$router.push("/Main");
				} else {
					this.$message.error('请输入正确用户名或密码!');
					return false;
				}
			});
		}
	}
}

</script>

<style lang="scss"	scoped>
	.login-box{
		width: 350px;
		margin:120px auto;
		border:1px solid #DCDFE6;
		padding:20px;
		border-radius:5px;
		box-shadow:0 0 30px #DCDFE6;
	}
	.login-title{
		text-align: center;
	}
</style>
8、测试网页
有了上面这些操作,在npm run dev运行后,就可以看到不错的登录框效果了,

更多推荐
 已为社区贡献1条内容


所有评论(0)