【uni-app从入门到实战】项目创建、基本配置、首页
【uni-app从入门到实战】
头部
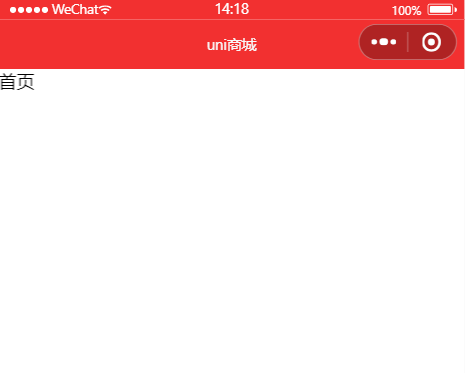
从今天起我们来完成一个商城的项目,首先创建 uni-app 项目 uni_shop,把 pages/index/index.vue 中多余的代码删去,然后修改 pages.json
{
	"pages": [ //pages数组中第一项表示应用启动页,参考:https://uniapp.dcloud.io/collocation/pages
		{
			"path": "pages/index/index"
		}
	],
	"globalStyle": {
		"navigationBarTextStyle": "white",
		"navigationBarTitleText": "uni商城",
		"navigationBarBackgroundColor": "#F23030",
		"backgroundColor": "#F8F8F8"
	},
	"uniIdRouter": {}
}
这样头部就改好了:
底部
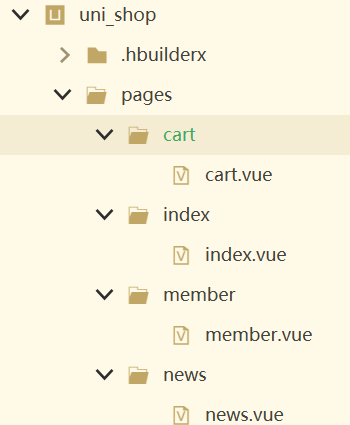
新建 cart.vue、member.vue、news.vue,记得勾选在 pages.json 中注册
然后在 pages.json 中增加 tabBar 选项,设置底部 tab 的列表,并通过 color 和 selectedColor 设置 tab 上的文字默认颜色和选中颜色
{
	"pages": [ //pages数组中第一项表示应用启动页,参考:https://uniapp.dcloud.io/collocation/pages
		{
			"path": "pages/index/index"
		}
		,{
            "path" : "pages/news/news",
            "style" : {}
        }
	    ,{
            "path" : "pages/cart/cart",
            "style" : {}
        }
        ,{
            "path" : "pages/member/member",
            "style" : {}
        }

    ],
	"globalStyle": {
		"navigationBarTextStyle": "white",
		"navigationBarTitleText": "uni商城",
		"navigationBarBackgroundColor": "#F23030",
		"backgroundColor": "#F8F8F8"
	},
	"uniIdRouter": {},
	"tabBar": {
		"color": "#2c2c2c",//未选中时文字颜色
		"selectedColor": "#F23030",//选中时文字颜色
		"list": [
			{
				"text": "首页",
				"pagePath": "pages/index/index",
				"iconPath": "static/index.png",
				"selectedIconPath": "static/index_active.png"
			},
			{
				"text": "资讯",
				"pagePath": "pages/news/news",
				"iconPath": "static/news.png",
				"selectedIconPath": "static/news_active.png"
			},
			{
				"text": "购物车",
				"pagePath": "pages/cart/cart",
				"iconPath": "static/cart.png",
				"selectedIconPath": "static/cart_active.png"
			},
			{
				"text": "会员",
				"pagePath": "pages/member/member",
				"iconPath": "static/member.png",
				"selectedIconPath": "static/member_active.png"
			}
		]
	}
}
这样底部就做好了:
获取轮播图数据
轮播图我们需要从接口获取,我们用到的接口全部来自:👉点击查看接口地址
首先获取轮播图数据并打印,修改 index.vue
export default {
		......
		onLoad() {
			this.getSwipers()
		},
		methods: {
			getSwipers(){
				uni.request({
					url:'https://api-hmugo-web.itheima.net/api/public/v1/home/swiperdata',
					success:res=> {
						console.log(res)
					}
				})
			}
		}
	}
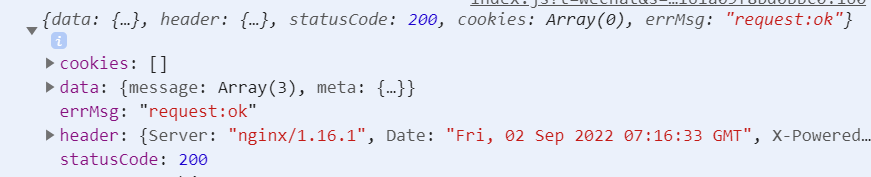
打印返回数据:
也可以用另一种写法:
methods: {
	async getSwipers(){
		const res = await uni.request({
			url:'https://api-hmugo-web.itheima.net/api/public/v1/home/swiperdata'
		})
		console.log(res)
	}
}
打印结果如下:
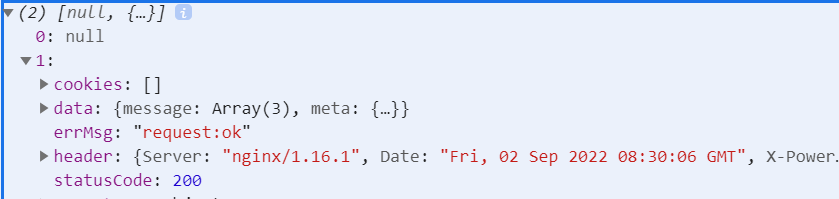
第二种写法了解下即可,我们还是采用第一种方法。我们把获取的轮播图数据保存下,在 data 中定义 swipers 数组,在发送请求返回结果时,statusCode 为 200 时表示成功,并给 swipers 赋值;在不为 200 时弹出提示框提示。
export default {
		data() {
			return {
				swipers:[]
			}
		},
		onLoad() {
			this.getSwipers()
		},
		methods: {
			getSwipers(){
				uni.request({
					url:'https://api-hmugo-web.itheima.net/api/public/v1/home/swiperdata',
					success:res=> {
						if(res.statusCode !== 200){
							return uni.showToast({
								title:'获取数据失败',
								icon:'error'
							})
						}
						//console.log(res)
						this.swipers = res.data.message
					}
				})
			}
		}
	}
发送请求封装
新建 util 目录,然后在其中新建 api.js
const BASE_URL = 'https://api-hmugo-web.itheima.net'
export const myRequest = (options)=>{
	return new Promise((resolve,reject)=>{
		uni.request({
			url:BASE_URL+options.url,
			data:options.data,
			success: (res) => {
				if(res.statusCode !== 200){
					return uni.showToast({
						title:'获取数据失败',
						icon:'error'
					})
				}
				resolve(res)
			},
			fail: (err) => {
				uni.showToast({
					title:'请求接口失败',
					icon:'error'
				})
				reject(err)
			}
		})
	})
}
然后在 main.js 中将 myRequest 挂载的全局页面
import { myRequest } from 'util/api.js'

Vue.prototype.$myRequest = myRequest
我们现在可以修改 index.vue 中获取轮播图的方法了:
async getSwipers(){
	const res = await this.$myRequest({
		url:'/api/public/v1/home/swiperdata'
	})
	this.swipers = res.data.message
}
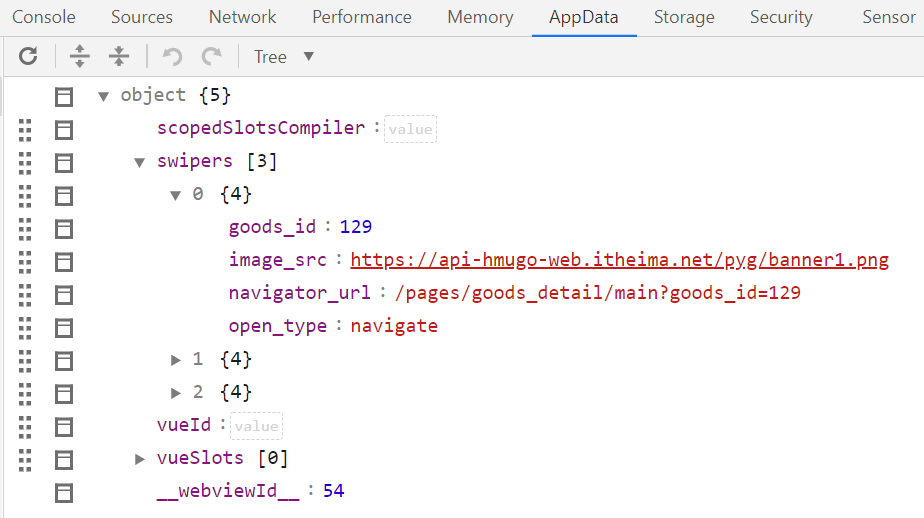
重新运行程序,我们在小程序中的 AppData 可以看到 swiper 已经被赋值了
轮播图展示
修改 index.vue,根据上边的文档 放入 swiper 组件,同时循环遍历我们已经拿到的轮播图数据:swipers 来填充组件 swiper-item
其中组件 swiper 的属性 indicator-dots 为 是否显示面板指示点;属性 circular 为是否采用衔接滑动,即播放到末尾后重新回到开头
<template>
	<view class="content">
		<swiper indicator-dots circular>
			<swiper-item v-for="(item,index) in swipers" :key="index">
				<image :src="item.image_src"></image>
			</swiper-item>
		</swiper>
	</view>
</template>

<script>
......
</script>

<style lang="scss">
	.content{
		swiper{
			width: 750rpx;
			height: 380rpx;
			image{
				width: 100%;
				height: 100%;
			}
		}
	}
</style>
运行程序,效果如下:

导航的基本结构
首先准备好字体图标:关于字体图标的使用
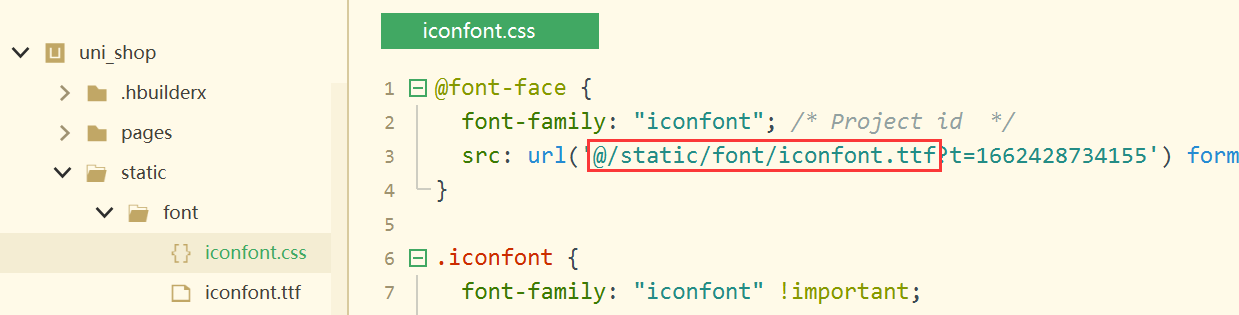
在 static 文件夹下创建 font 目录,放入下载的 iconfont.css 和 iconfont.ttf
修改 iconfont.css 中 iconfont.ttf 的路径
App.vue 中引入
<style>
	/*每个页面公共css */
	@import url(static/font/iconfont.css);
</style>
然后修改 index.vue
<template>
	<view class="content">
		<!--轮播图-->
		......
		<!--导航-->
		<view class='nav'>
			<view class='nav_item'>
				<view class="iconfont icon-shangpin"></view>
				<text>uni超市</text>
			</view>
			<view class='nav_item'>
				<view class="iconfont icon-xinxi"></view>
				<text>联系我们</text>
			</view>
			<view class='nav_item'>
				<view class="iconfont icon-tuku"></view>
				<text>社区图片</text>
			</view>
			<view class='nav_item'>
				<view class="iconfont icon-diannao"></view>
				<text>学习视频</text>
			</view>
		</view>
	</view>
</template>

<script>
	......
</script>

<style lang="scss">
	.content{
		......

		.nav{
			display: flex;
			.nav_item{
				width: 25%;
				text-align: center;
				view{
					width: 120rpx;
					height: 120rpx;
					border-radius: 60rpx;
					background: #f23030;
					margin: 10rpx auto;
					line-height: 120rpx;
					color: #fff;
					font-size: 50rpx;
				}
				text{
					font-size: 30rpx;
				}
			}
		}
	}
</style>
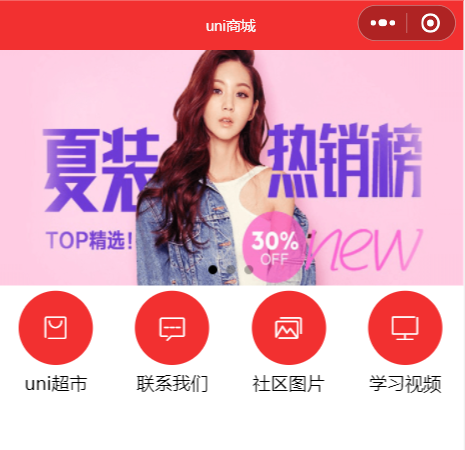
最终效果图:
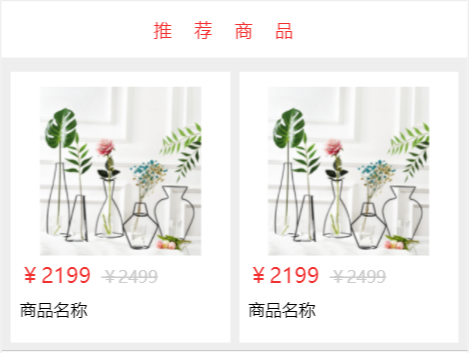
推荐商品
对于常用的样式,可以在根目录下的 uni.scss 定义颜色变量
$shop-color : #f23030;
<template>
	<view class="content">
		......
		<!--推荐商品-->
		<view class="hot_goods">
			<view class="title">推荐商品</view>
			<view class="goods_list">
				<view class="goods_item">
					<image src="../../static/goods.png"></image>
					<view class="price">
						<text>¥2199</text>
						<text>¥2499</text>
					</view>
					<view class="name">
						<text>商品名称</text>
					</view>
				</view>

				<view class="goods_item">
					<image src="../../static/goods.png"></image>
					<view class="price">
						<text>¥2199</text>
						<text>¥2499</text>
					</view>
					<view class="name">
						<text>商品名称</text>
					</view>
				</view>

			</view>
		</view>
	</view>
</template>

<script>
......
</script>

<style lang="scss">
	.content{
		......
		.hot_goods{
			background: #eee;
			overflow: hidden;
			margin-top: 10rpx;
			.title{
				height: 50px;
				line-height: 50px;
				color: $shop-color;
				background: #fff;
				text-align: center;
				letter-spacing: 20px;
				margin: 7rpx 0;
			}

			.goods_list{
				padding: 0 15rpx;
				display: flex;
				flex-wrap: wrap;
				justify-content: space-between;
				.goods_item{
					background: #fff;
					width: 355rpx;
					margin: 10px 0;
					padding: 15rpx;
					box-sizing: border-box;
					image{
						width: 80%;
						height: 150px;
						display: block;
						margin: 5px auto;
					}
					.price{
						color: $shop-color;
						font-size: 36rpx;
						text:nth-child(2){
							color: #ccc;
							font-size: 28rpx;
							margin-left: 17rpx;
							text-decoration: line-through;
						}
					}
					.name{
						font-size: 28rpx;
						line-height: 50rpx;
						padding-bottom: 15rpx;
						padding-top: 10rpx;
					}
				}
			}
		}
	}
</style>
然后可以通过接口获取数据,然后展示
<template>
	<view class="content">
		<!--轮播图-->
		......
		<!--导航-->
		......
		<!--推荐商品-->
		<view class="hot_goods">
			<view class="title">推荐商品</view>
			<view class="goods_list">
				<view class="goods_item" v-for="item in goods">
					<image :src="item.goods_big_logo"></image>
					<view class="price">
						<text>{{item.goods_price}}</text>
						<text>¥2499</text>
					</view>
					<view class="name">
						<text>{{item.goods_name}}</text>
					</view>
				</view>
			</view>
		</view>
	</view>
</template>

<script>
	export default {
		data() {
			return {
				......
				goods:[]
			}
		},
		onLoad() {
			......
			this.getHotGoods()
		},
		methods: {
			......
			//获取推荐商品
			async getHotGoods(){
				const res = await this.$myRequest({
					url:'/api/public/v1/goods/search'
				})
				this.goods = res.data.message.goods
			}
		}
	}
</script>
......


为开发者提供学习成长、分享交流、生态实践、资源工具等服务,帮助开发者快速成长。
更多推荐


 1
1 0
0- 0


 已为社区贡献15条内容

所有评论(0)